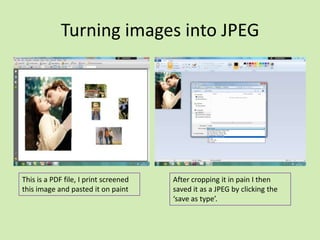
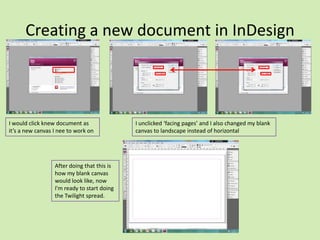
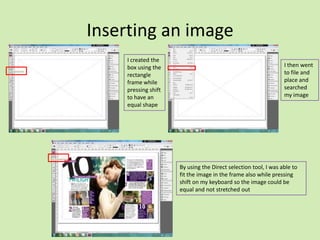
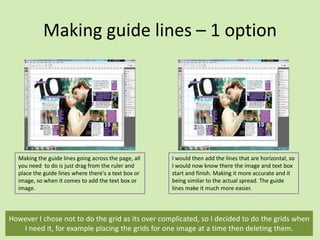
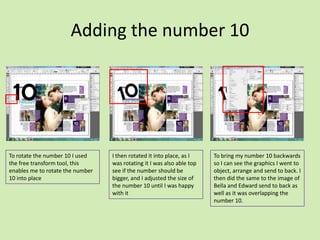
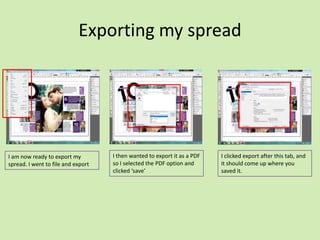
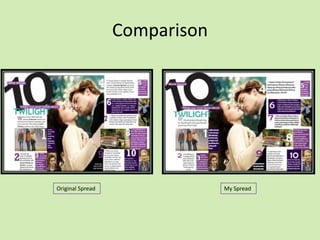
InDesign Software Evidence
Pamela Younes
Turning images into JPEG

This is a PDF file, I print screened
this image and pasted it on paint

After cropping it in pain I then
saved it as a JPEG by clicking the
‘save as type’.
Creating a new document in InDesign

I would click knew document as
it’s a new canvas I nee to work on

After doing that this is
how my blank canvas
would look like, now
I'm ready to start doing
the Twilight spread.

I unclicked ‘facing pages’ and I also changed my blank
canvas to landscape instead of horizontal
Inserting an image
I created the
box using the
rectangle
frame while
pressing shift
to have an
equal shape

I then went
to file and
place and
searched
my image

By using the Direct selection tool, I was able to
fit the image in the frame also while pressing
shift on my keyboard so the image could be
equal and not stretched out
Making guide lines – 1 option

Making the guide lines going across the page, all
you need to do is just drag from the ruler and
place the guide lines where there's a text box or
image, so when it comes to add the text box or
image.

I would then add the lines that are horizontal, so
I would now know there the image and text box
start and finish. Making it more accurate and it
being similar to the actual spread. The guide
lines make it much more easier.

However I chose not to do the grid as its over complicated, so I decided to do the grids when
I need it, for example placing the grids for one image at a time then deleting them.
Placing the image

I wanted to lock the original spread, so
when I add the images or the graphs the
Twilight actual spread would not move

I clicked the rectangle frame tool, and I
put it over the first image that is in the
back layer to insert the same image.

I added a second
page of the
twilight so I can
add the grid to it,
as the fist page I
am unable to add
the grid because
the main image is
in front of the
images and I'm
unable to see them

To insert an image I went to file -> place
and searched for my image

I then added the n
scrolled between my
two pages and
mirrored the guide
lines that I inserted on
page 2 so now I am
able to see where the
rest of the images are
places
Placing the graphics

The original spread was still as my
background as I was able to trace
the textbox I was drawing on top
of the original spread. I used text
box tool to do this.

I then used the eyedropper tool to
get the colour from the original
spread.
Adding the text to the graphics

I started adding the text, and when on character
to look for a similar font, the best one I found
was ‘Berlin Sans FB’. I then removed the
background to see what I have on my spread so
far. I went on character and chose the size font
and there type of font in the character section of
InDesign
Adding the numbers

I created new textboxes next to
the text. I used the eyedropper
tool to get the same colour

I then trued to search for a similar
font and text size to the original
spread, I then used the
eyedropper tool to get the same
font and text size
Adding the number 10

To rotate the number 10 I used
the free transform tool, this
enables me to rotate the number
10 into place

I then rotated it into place, as I
was rotating it I was also able top
see if the number should be
bigger, and I adjusted the size of
the number 10 until I was happy
with it

To bring my number 10 backwards
so I can see the graphics I went to
object, arrange and send to back. I
then did the same to the image of
Bella and Edward send to back as
well as it was overlapping the
number 10.
Exporting my spread

I am now ready to export my
spread. I went to file and export

I then wanted to export it as a PDF
so I selected the PDF option and
clicked ‘save’

I clicked export after this tab, and
it should come up where you
saved it.
Comparison

Original Spread

My Spread

In design software evidence:

  • 1.
  • 2.
    Turning images intoJPEG This is a PDF file, I print screened this image and pasted it on paint After cropping it in pain I then saved it as a JPEG by clicking the ‘save as type’.
  • 3.
    Creating a newdocument in InDesign I would click knew document as it’s a new canvas I nee to work on After doing that this is how my blank canvas would look like, now I'm ready to start doing the Twilight spread. I unclicked ‘facing pages’ and I also changed my blank canvas to landscape instead of horizontal
  • 4.
    Inserting an image Icreated the box using the rectangle frame while pressing shift to have an equal shape I then went to file and place and searched my image By using the Direct selection tool, I was able to fit the image in the frame also while pressing shift on my keyboard so the image could be equal and not stretched out
  • 5.
    Making guide lines– 1 option Making the guide lines going across the page, all you need to do is just drag from the ruler and place the guide lines where there's a text box or image, so when it comes to add the text box or image. I would then add the lines that are horizontal, so I would now know there the image and text box start and finish. Making it more accurate and it being similar to the actual spread. The guide lines make it much more easier. However I chose not to do the grid as its over complicated, so I decided to do the grids when I need it, for example placing the grids for one image at a time then deleting them.
  • 6.
    Placing the image Iwanted to lock the original spread, so when I add the images or the graphs the Twilight actual spread would not move I clicked the rectangle frame tool, and I put it over the first image that is in the back layer to insert the same image. I added a second page of the twilight so I can add the grid to it, as the fist page I am unable to add the grid because the main image is in front of the images and I'm unable to see them To insert an image I went to file -> place and searched for my image I then added the n scrolled between my two pages and mirrored the guide lines that I inserted on page 2 so now I am able to see where the rest of the images are places
  • 7.
    Placing the graphics Theoriginal spread was still as my background as I was able to trace the textbox I was drawing on top of the original spread. I used text box tool to do this. I then used the eyedropper tool to get the colour from the original spread.
  • 8.
    Adding the textto the graphics I started adding the text, and when on character to look for a similar font, the best one I found was ‘Berlin Sans FB’. I then removed the background to see what I have on my spread so far. I went on character and chose the size font and there type of font in the character section of InDesign
  • 9.
    Adding the numbers Icreated new textboxes next to the text. I used the eyedropper tool to get the same colour I then trued to search for a similar font and text size to the original spread, I then used the eyedropper tool to get the same font and text size
  • 10.
    Adding the number10 To rotate the number 10 I used the free transform tool, this enables me to rotate the number 10 into place I then rotated it into place, as I was rotating it I was also able top see if the number should be bigger, and I adjusted the size of the number 10 until I was happy with it To bring my number 10 backwards so I can see the graphics I went to object, arrange and send to back. I then did the same to the image of Bella and Edward send to back as well as it was overlapping the number 10.
  • 11.
    Exporting my spread Iam now ready to export my spread. I went to file and export I then wanted to export it as a PDF so I selected the PDF option and clicked ‘save’ I clicked export after this tab, and it should come up where you saved it.
  • 12.