Download to read offline

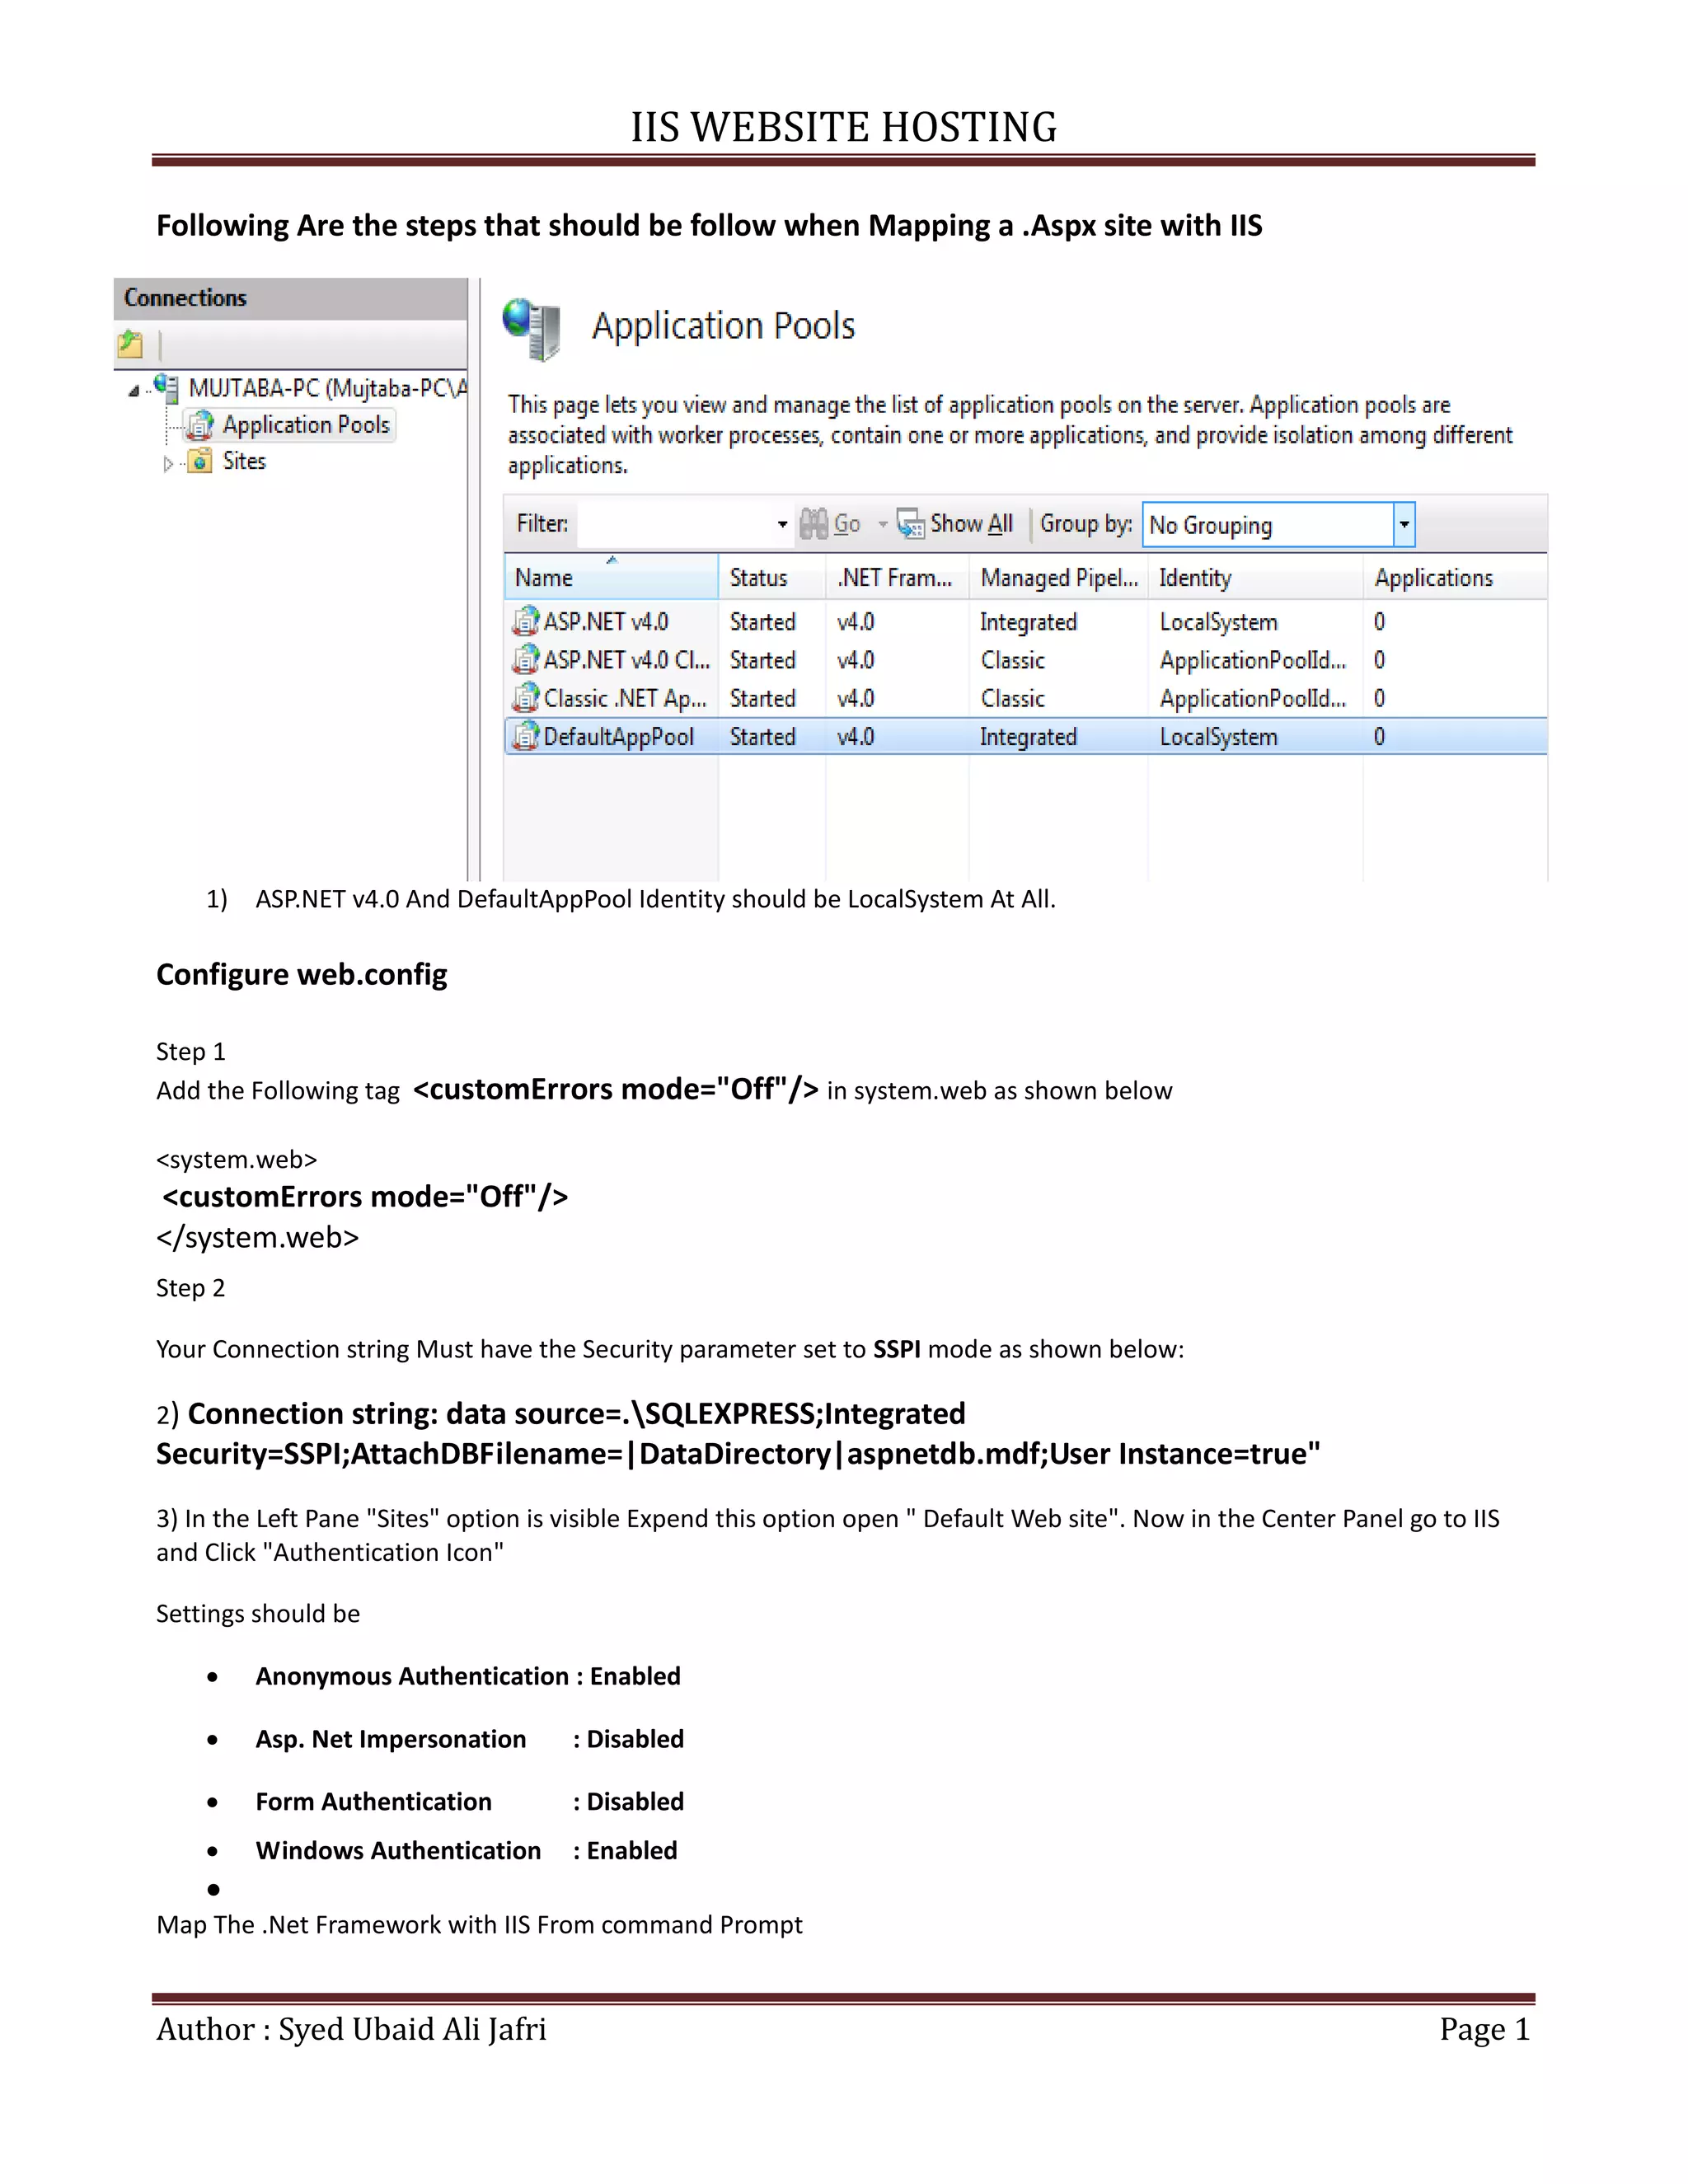

The document provides steps for mapping an .aspx site with IIS, including: 1) Configuring ASP.NET and the default app pool identity as LocalSystem. 2) Configuring the web.config file and connection string for authentication. 3) Enabling the appropriate authentication settings in IIS like Anonymous, Windows, and disabling others.