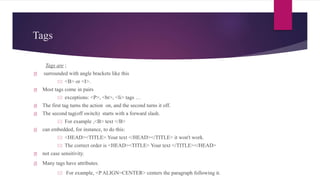
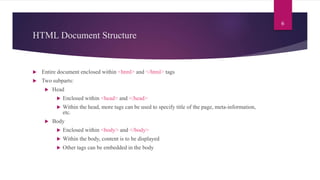
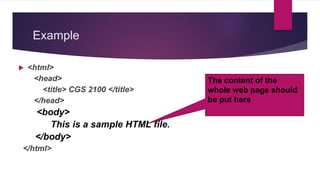
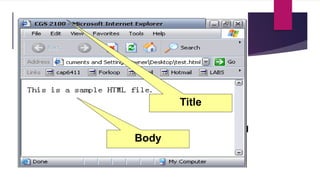
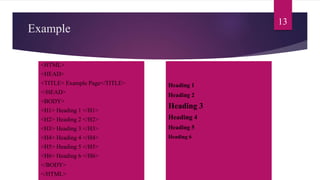
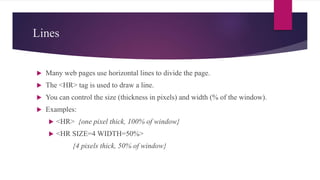
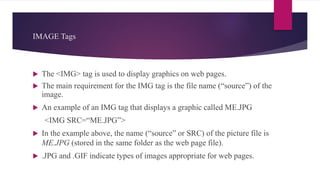
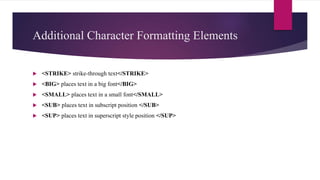
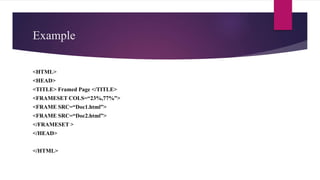
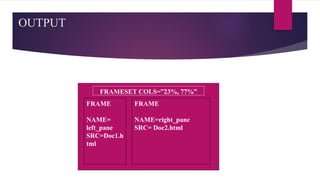
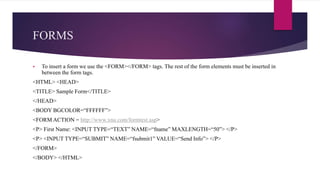
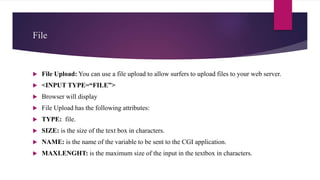
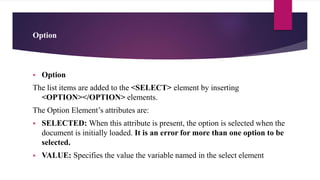
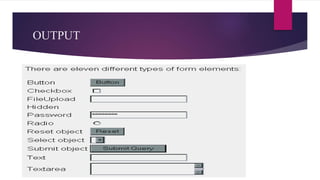
HTML Tags
D.NITHYA
ASST. PROFESSOR
DEPARTMENT OF CSE
AVINASHILINGAM INSTITUTE,
COIMBATORE
Contents
 Web Pages
 Introduction to HTML
 HTML tags
 Advantages and Disadvantages
 Frames and Forms
Web Pages
 web page is a document available on world wide web. Web Pages are stored on web server and can be
viewed using a web browser.
 A web page can contain huge information including text, graphics, audio, video and hyper links. These
hyper links are the link to other web pages.
 Static Web page
 User can only read the information but can’t do any modification or interact with the information.
 Static web pages are created using only HTML.
 Dynamic Web page
 It shows different information at different point of time.
HTML: HyperText Markup Language
 HTML documents are simply text documents with a specific form
 Documents comprised of content and markup tags
 Content: actual information being conveyed
 The markup tags tell the Web browser how to display the page
 An HTML file must have an htm or html file extension
 An HTML file can be created using a simple text editor
4
Tags
Tags are ;
 surrounded with angle brackets like this
 <B> or <I>.
 Most tags come in pairs
 exceptions: <P>, <br>, <li> tags …
 The first tag turns the action on, and the second turns it off.
 The second tag(off switch) starts with a forward slash.
 For example ,<B> text </B>
 can embedded, for instance, to do this:
 <HEAD><TITLE> Your text </HEAD></TITLE> it won't work.
 The correct order is <HEAD><TITLE> Your text </TITLE></HEAD>
 not case sensitivity.
 Many tags have attributes.
 For example, <P ALIGN=CENTER> centers the paragraph following it.
HTML Document Structure
 Entire document enclosed within <html> and </html> tags
 Two subparts:
 Head
 Enclosed within <head> and </head>
 Within the head, more tags can be used to specify title of the page, meta-information,
etc.
 Body
 Enclosed within <body> and </body>
 Within the body, content is to be displayed
 Other tags can be embedded in the body
6
Example
 <html>
<head>
<title> CGS 2100 </title>
</head>
<body>
This is a sample HTML file.
</body>
</html>
The content of the
whole web page should
be put here
Title
Body
Advantages and Disadvantages
 Advantages
 HTML is easy to code.
 HTML also allows the use of templates, which makes designing a webpage easy.
 Very useful for beginners in web designing field.
 Disadvantages
 Errors can be costly.
 The time it takes to choose the color scheme of a page and to create lists, tables and forms.
 It can create only static and plain pages so if we need dynamic pages then HTML is not useful.
 Need to write lot of code for making simple webpage.
Text-Related Tags
 Text is most often displayed in paragraphs, using block form
(no indentation, blank line between paragraphs).
 The paragraph tags <P> and </P> are used before and after a
paragraph.
 <BR> (“line break”) is like pressing Return/Enter. The text
that follows is displayed on the next line.
 The <FONT> </FONT> tag pair can be used to change other
aspects of text (e.g., color).
Text-Related Tags
 Text is sometimes displayed in BOLD or ITALICS.
 The tag pair <B> and </B> make the text between display in bold.
 The tag pair <I> and </I> make the text between display in italics.
 Examples:
 <B>This is bold text.</B> This is bold text.
 <I>Here is italics.</I> Here is italics.
 <B><I>Both!</I></B> Both!
Text-Related Tags
 The “header” tags are used for this purpose.
 The largest “header” tag is <H1> </H1> (larger numbers
make smaller headers).
 An example: <H1>MY PAGE</H1> displays MY PAGE
 <H6>MY PAGE</H6> displays MY PAGE
<HTML>
<HEAD>
<TITLE> Example Page</TITLE>
</HEAD>
<BODY>
<H1> Heading 1 </H1>
<H2> Heading 2 </H2>
<H3> Heading 3 </H3>
<H4> Heading 4 </H4>
<H5> Heading 5 </H5>
<H6> Heading 6 </H6>
</BODY>
</HTML>
Heading 1
Heading 2
Heading 3
Heading 4
Heading 5
Heading 6
13
Example
Lines
 Many web pages use horizontal lines to divide the page.
 The <HR> tag is used to draw a line.
 You can control the size (thickness in pixels) and width (% of the window).
 Examples:
 <HR> {one pixel thick, 100% of window}
 <HR SIZE=4 WIDTH=50%>
{4 pixels thick, 50% of window}
Horizontal Rule, <HR> Example
<HTML>
<HEAD>
<TITLE> Example Page</TITLE>
</HEAD>
<BODY>
<H1> Heading 1 </H1>
<P>Paragraph 1, <BR>
Line 2 <BR>
<HR>Line 3 <BR>
</P>
</BODY>
</HTML>
Heading 1
Paragraph 1,….
Line 2
_________________________
__
Line 3
15
IMAGE Tags
 The <IMG> tag is used to display graphics on web pages.
 The main requirement for the IMG tag is the file name (“source”) of the
image.
 An example of an IMG tag that displays a graphic called ME.JPG
<IMG SRC=“ME.JPG”>
 In the example above, the name (“source” or SRC) of the picture file is
ME.JPG (stored in the same folder as the web page file).
 .JPG and .GIF indicate types of images appropriate for web pages.
Additional Character Formatting Elements
 <STRIKE> strike-through text</STRIKE>
 <BIG> places text in a big font</BIG>
 <SMALL> places text in a small font</SMALL>
 <SUB> places text in subscript position </SUB>
 <SUP> places text in superscript style position </SUP>
<marquee> tag
 <marquee> tag is used for scrolling piece of text or image displayed either horizontally
across orvertically down your web site page depending on the settings.
Example
<body> <marquee>This is basic example of marquee</marquee>
<marquee direction = "up">The direction of text will be from bottom to top.</marquee>
</body>
Lists
 HTML supplies several list elements. Most list elements are composed of one or
more <LI> (List Item) elements.
 Lists can be “unordered” (using bullets like this list) or “ordered” (with numbers
or letters).
 <UL> </UL> indicates an unordered (bulleted) list.
 <OL> </OL> indicates an ordered list.
 <DL> </DL> Definition list
 <LI> </LI> is used for each list item.
List Examples
These tags…
 <UL>
 <LI>Dogs</LI>
 <LI>Cats</LI>
 <LI>Lizards</LI>
 </UL>
Produce this list…
• Dogs
• Cats
• Lizards
List Examples
These tags…
 <OL>
 <LI>Dogs</LI>
 <LI>Cats</LI>
 <LI>Lizards</LI>
 </OL>
Produce this list…
1. Dogs
2. Cats
3. Lizards
List Examples
These tags…
 <OL TYPE=“A”>
 <LI>Dogs</LI>
 <LI>Cats</LI>
 <LI>Lizards</LI>
 </OL>
Produce this list…
A. Dogs
B. Cats
C. Lizards
List Examples
 DL: Definition List. This kind of list is different from the others. Each item in a DL consists of one or more
Definition Terms (DT elements), followed by one or more Definition Description (DD elements).
<DL>
<DT> HTML </DT>
<DD> Hyper Text Markup Language </DD>
<DT> DOG </DT>
<DD> A human’s best friend!</DD>
</DL>
HTML
Hyper Text Markup Language
DOG
A human’s best friend!
A Word about Links
 The tags used to produce links are the <A> and </A>. The <A> tells where the link should start and
the </A> indicates where the link ends.
 All links use the tag that begins <A HREF=
 The A stands for “anchor”
 The HREF part will be the name of a web page or a web address.
 Example:
 <A HREF=“HOME.HTM”>Go Back</A>
Tables
<TABLE></TABLE> element has four sub-elements:
1. Table Row<TR></TR>.
2. Table Header <TH></TH>.
3. Table Data <TD></TD>.
4. Caption <CAPTION></CAPTION>.
The table row elements usually contain table header elements or table
data elements.
General Table Syntax
<table>
<tr>
<td> First Cell </td>
<td> Second Cell </td>
</tr>
<tr>
<td> Third Cell </td>
<td> Fourth Cell </td>
</tr>
</table>
two rows
Creating a Table Caption
 HTML allows you to specify a caption for a table.
 The syntax for creating a caption is: <caption align=“alignment”>caption text</caption>
 alignment indicates the caption placement
 a value of “bottom” centers the caption below the table
 a value of “top” or “center” centers the caption above the table
 a value of “left” or “right” place the caption above the table to the left or right
 A table border can be added using the border attribute to the <table> tag.
 The syntax for creating a table border is: <table border=“value”>
 value is the width of the border in pixels
 The size attribute is optional; if you don’t specify a size, the browser creates a table border 1 pixel wide.
Tables with Different Borders Values
 This figure shows the effect on a table’s border when the border size is varied.
Cell Spacing & Cell Padding
 Cell spacing refers to the space between the cells
 The syntax for specifying the cell space is:
<table cellspacing=“value”>
 value is the width of the interior borders in pixels
 the default cell spacing is 2 pixels
 Cell padding refers to the space within the cells.
 The syntax for this attribute is:
<table cellpadding=“value”>
 value is the distance from the table text to the cell border, as measured in pixels
 the default cell padding value is 1 pixel
Tables with Different Cell Spacing Values
different cell spacing values
different cell padding values
HTML Frames
 HTML frames are a means of having several browser windows open within a single larger window
 Each HTML document is called a frame
 Disadvantages:
 Must keep track of more HTML documents
 Difficult to print the entire page
 Example of using frame
 http://www.csupomona.edu/~ftang/www/courses/CS299-S09/examples/frame.html
 http://www.w3schools.com/html/html_frames.asp
31
Attributes
 A <FRAMESET> element is placed in the html document before the <BODY> element.
The <FRAMESET> describes the amount of screen real estate given to each windowpane
by dividing the screen into ROWS or COLS.
 The <FRAMESET> will then contain <FRAME> elements, one per division of the
browser window.
 Note: Because there is no BODY container, FRAMESET pages can't have background
images and background colors associated with them
Example
<HTML>
<HEAD>
<TITLE> Framed Page </TITLE>
<FRAMESET COLS=“23%,77%”>
<FRAME SRC=“Doc1.html”>
<FRAME SRC=“Doc2.html”>
</FRAMESET >
</HEAD>
</HTML>
OUTPUT
34
FRAMESET COLS=”23%, 77%”
FRAME
NAME=right_pane
SRC= Doc2.html
FRAME
NAME=
left_pane
SRC=Doc1.h
tml
FORMS
 To insert a form we use the <FORM></FORM> tags. The rest of the form elements must be inserted in
between the form tags.
<HTML> <HEAD>
<TITLE> Sample Form</TITLE>
</HEAD>
<BODY BGCOLOR=“FFFFFF”>
<FORM ACTION = http://www.xnu.com/formtest.asp>
<P> First Name: <INPUT TYPE=“TEXT” NAME=“fname” MAXLENGTH=“50”> </P>
<P> <INPUT TYPE=“SUBMIT” NAME=“fsubmit1” VALUE=“Send Info”> </P>
</FORM>
</BODY> </HTML>
Attributes
 ACTION: is the URL of the CGI (Common Gateway Interface) program that is going to accept the data
from the form, process it, and send a response back to the browser.
 METHOD: GET (default) or POST specifies which HTTP method will be used to send the form’s
contents to the web server. The CGI application should be written to accept the data from either method.
 NAME: is a form name used by VBScript or JavaScripts.
 TARGET: is the target frame where the response page will show up.
Elements
 Form elements have properties: Text boxes, Password boxes,
Checkboxes, Option(Radio) buttons, Submit, Reset, File,
Hidden and Image.
 The properties are specified in the TYPE Attribute of the HTML
element <INPUT></INPUT>.
OUTPUT
Sami Ali
Al al-Bayt University
Text Box
 Text boxes: Used to provide input fields for text, phone numbers, dates, etc.
<INPUT TYPE= " TEXT " >
Browser will display
Textboxes use the following attributes:
 TYPE: text.
 SIZE: determines the size of the textbox in characters. Default=20 characters.
 MAXLENGHT : determines the maximum number of characters that the field will accept.
 NAME: is the name of the variable to be sent to the CGI application.
 VALUE: will display its contents as the default value.
Password
 Password: Used to allow entry of passwords.
<INPUT TYPE= " PASSWORD " >
Browser will display
Text typed in a password box is starred out in the browser display.
Password boxes use the following attributes:
 TYPE: password.
 SIZE: determines the size of the textbox in characters.
 MAXLENGHT: determines the maximum size of the password in characters.
 NAME: is the name of the variable to be sent to the CGI application.
 VALUE: is usually blank.
Check Box
 Check Box: Check boxes allow the users to select more than one option.
<INPUT TYPE=“CHECKBOX”>
Browser will display
Checkboxes have the following attributes:
 TYPE: checkbox.
 CHECKED: is blank or CHECKED as the initial status.
 NAME: is the name of the variable to be sent to the CGI application.
 VALUE: is usually set to a value.
Radio Button
 Radio Button: Radio buttons allow the users to select only one option.
<INPUT TYPE=“RADIO”>
Browser will display
Radio buttons have the following attributes:
 TYPE: radio.
 CHECKED: is blank or CHECKED as the initial status. Only one radio button can be
checked
 NAME: is the name of the variable to be sent to the CGI application.
 VALUE: usually has a set value.
Submit Button
 Submit:Every set of Form tags requires a Submit button. This is the element causes the browser
to send the names and values of the other elements to the CGI Application specified by the ACTION
attribute of the FORM element.
<INPUT TYPE=“SUBMIT”>
The browser will display
Submit has the following attributes:
 TYPE: submit.
 NAME: value used by the CGI script for processing.
 VALUE: determines the text label on the button, usually Submit Query.
Reset Button
 Reset: It is a good idea to include one of these for each form where
users are entering data. It allows the surfer to clear all the input in
the form.
<INPUT TYPE=“RESET”>
 Browser will display
 Reset buttons have the following attributes:
 TYPE: reset.
 VALUE: determines the text label on the button, usually Reset.
File
 File Upload: You can use a file upload to allow surfers to upload files to your web server.
 <INPUT TYPE=“FILE”>
 Browser will display
 File Upload has the following attributes:
 TYPE: file.
 SIZE: is the size of the text box in characters.
 NAME: is the name of the variable to be sent to the CGI application.
 MAXLENGHT: is the maximum size of the input in the textbox in characters.
Textarea
 <TEXTAREA></TEXTAREA>: is an element that allows for free form text entry.
Browser will display
Textarea has the following attributes:
 NAME: is the name of the variable to be sent to the CGI application.
 ROWS: the number of rows to the textbox.
 COLS: the number of columns to the textbox.
Option
 Option
The list items are added to the <SELECT> element by inserting
<OPTION></OPTION> elements.
The Option Element’s attributes are:
 SELECTED: When this attribute is present, the option is selected when the
document is initially loaded. It is an error for more than one option to be
selected.
 VALUE: Specifies the value the variable named in the select element
OUTPUT
End

Html

  • 1.
    HTML Tags D.NITHYA ASST. PROFESSOR DEPARTMENTOF CSE AVINASHILINGAM INSTITUTE, COIMBATORE
  • 2.
    Contents  Web Pages Introduction to HTML  HTML tags  Advantages and Disadvantages  Frames and Forms
  • 3.
    Web Pages  webpage is a document available on world wide web. Web Pages are stored on web server and can be viewed using a web browser.  A web page can contain huge information including text, graphics, audio, video and hyper links. These hyper links are the link to other web pages.  Static Web page  User can only read the information but can’t do any modification or interact with the information.  Static web pages are created using only HTML.  Dynamic Web page  It shows different information at different point of time.
  • 4.
    HTML: HyperText MarkupLanguage  HTML documents are simply text documents with a specific form  Documents comprised of content and markup tags  Content: actual information being conveyed  The markup tags tell the Web browser how to display the page  An HTML file must have an htm or html file extension  An HTML file can be created using a simple text editor 4
  • 5.
    Tags Tags are ; surrounded with angle brackets like this  <B> or <I>.  Most tags come in pairs  exceptions: <P>, <br>, <li> tags …  The first tag turns the action on, and the second turns it off.  The second tag(off switch) starts with a forward slash.  For example ,<B> text </B>  can embedded, for instance, to do this:  <HEAD><TITLE> Your text </HEAD></TITLE> it won't work.  The correct order is <HEAD><TITLE> Your text </TITLE></HEAD>  not case sensitivity.  Many tags have attributes.  For example, <P ALIGN=CENTER> centers the paragraph following it.
  • 6.
    HTML Document Structure Entire document enclosed within <html> and </html> tags  Two subparts:  Head  Enclosed within <head> and </head>  Within the head, more tags can be used to specify title of the page, meta-information, etc.  Body  Enclosed within <body> and </body>  Within the body, content is to be displayed  Other tags can be embedded in the body 6
  • 7.
    Example  <html> <head> <title> CGS2100 </title> </head> <body> This is a sample HTML file. </body> </html> The content of the whole web page should be put here
  • 8.
  • 9.
    Advantages and Disadvantages Advantages  HTML is easy to code.  HTML also allows the use of templates, which makes designing a webpage easy.  Very useful for beginners in web designing field.  Disadvantages  Errors can be costly.  The time it takes to choose the color scheme of a page and to create lists, tables and forms.  It can create only static and plain pages so if we need dynamic pages then HTML is not useful.  Need to write lot of code for making simple webpage.
  • 10.
    Text-Related Tags  Textis most often displayed in paragraphs, using block form (no indentation, blank line between paragraphs).  The paragraph tags <P> and </P> are used before and after a paragraph.  <BR> (“line break”) is like pressing Return/Enter. The text that follows is displayed on the next line.  The <FONT> </FONT> tag pair can be used to change other aspects of text (e.g., color).
  • 11.
    Text-Related Tags  Textis sometimes displayed in BOLD or ITALICS.  The tag pair <B> and </B> make the text between display in bold.  The tag pair <I> and </I> make the text between display in italics.  Examples:  <B>This is bold text.</B> This is bold text.  <I>Here is italics.</I> Here is italics.  <B><I>Both!</I></B> Both!
  • 12.
    Text-Related Tags  The“header” tags are used for this purpose.  The largest “header” tag is <H1> </H1> (larger numbers make smaller headers).  An example: <H1>MY PAGE</H1> displays MY PAGE  <H6>MY PAGE</H6> displays MY PAGE
  • 13.
    <HTML> <HEAD> <TITLE> Example Page</TITLE> </HEAD> <BODY> <H1>Heading 1 </H1> <H2> Heading 2 </H2> <H3> Heading 3 </H3> <H4> Heading 4 </H4> <H5> Heading 5 </H5> <H6> Heading 6 </H6> </BODY> </HTML> Heading 1 Heading 2 Heading 3 Heading 4 Heading 5 Heading 6 13 Example
  • 14.
    Lines  Many webpages use horizontal lines to divide the page.  The <HR> tag is used to draw a line.  You can control the size (thickness in pixels) and width (% of the window).  Examples:  <HR> {one pixel thick, 100% of window}  <HR SIZE=4 WIDTH=50%> {4 pixels thick, 50% of window}
  • 15.
    Horizontal Rule, <HR>Example <HTML> <HEAD> <TITLE> Example Page</TITLE> </HEAD> <BODY> <H1> Heading 1 </H1> <P>Paragraph 1, <BR> Line 2 <BR> <HR>Line 3 <BR> </P> </BODY> </HTML> Heading 1 Paragraph 1,…. Line 2 _________________________ __ Line 3 15
  • 16.
    IMAGE Tags  The<IMG> tag is used to display graphics on web pages.  The main requirement for the IMG tag is the file name (“source”) of the image.  An example of an IMG tag that displays a graphic called ME.JPG <IMG SRC=“ME.JPG”>  In the example above, the name (“source” or SRC) of the picture file is ME.JPG (stored in the same folder as the web page file).  .JPG and .GIF indicate types of images appropriate for web pages.
  • 17.
    Additional Character FormattingElements  <STRIKE> strike-through text</STRIKE>  <BIG> places text in a big font</BIG>  <SMALL> places text in a small font</SMALL>  <SUB> places text in subscript position </SUB>  <SUP> places text in superscript style position </SUP>
  • 18.
    <marquee> tag  <marquee>tag is used for scrolling piece of text or image displayed either horizontally across orvertically down your web site page depending on the settings. Example <body> <marquee>This is basic example of marquee</marquee> <marquee direction = "up">The direction of text will be from bottom to top.</marquee> </body>
  • 19.
    Lists  HTML suppliesseveral list elements. Most list elements are composed of one or more <LI> (List Item) elements.  Lists can be “unordered” (using bullets like this list) or “ordered” (with numbers or letters).  <UL> </UL> indicates an unordered (bulleted) list.  <OL> </OL> indicates an ordered list.  <DL> </DL> Definition list  <LI> </LI> is used for each list item.
  • 20.
    List Examples These tags… <UL>  <LI>Dogs</LI>  <LI>Cats</LI>  <LI>Lizards</LI>  </UL> Produce this list… • Dogs • Cats • Lizards
  • 21.
    List Examples These tags… <OL>  <LI>Dogs</LI>  <LI>Cats</LI>  <LI>Lizards</LI>  </OL> Produce this list… 1. Dogs 2. Cats 3. Lizards
  • 22.
    List Examples These tags… <OL TYPE=“A”>  <LI>Dogs</LI>  <LI>Cats</LI>  <LI>Lizards</LI>  </OL> Produce this list… A. Dogs B. Cats C. Lizards
  • 23.
    List Examples  DL:Definition List. This kind of list is different from the others. Each item in a DL consists of one or more Definition Terms (DT elements), followed by one or more Definition Description (DD elements). <DL> <DT> HTML </DT> <DD> Hyper Text Markup Language </DD> <DT> DOG </DT> <DD> A human’s best friend!</DD> </DL> HTML Hyper Text Markup Language DOG A human’s best friend!
  • 24.
    A Word aboutLinks  The tags used to produce links are the <A> and </A>. The <A> tells where the link should start and the </A> indicates where the link ends.  All links use the tag that begins <A HREF=  The A stands for “anchor”  The HREF part will be the name of a web page or a web address.  Example:  <A HREF=“HOME.HTM”>Go Back</A>
  • 25.
    Tables <TABLE></TABLE> element hasfour sub-elements: 1. Table Row<TR></TR>. 2. Table Header <TH></TH>. 3. Table Data <TD></TD>. 4. Caption <CAPTION></CAPTION>. The table row elements usually contain table header elements or table data elements.
  • 26.
    General Table Syntax <table> <tr> <td>First Cell </td> <td> Second Cell </td> </tr> <tr> <td> Third Cell </td> <td> Fourth Cell </td> </tr> </table> two rows
  • 27.
    Creating a TableCaption  HTML allows you to specify a caption for a table.  The syntax for creating a caption is: <caption align=“alignment”>caption text</caption>  alignment indicates the caption placement  a value of “bottom” centers the caption below the table  a value of “top” or “center” centers the caption above the table  a value of “left” or “right” place the caption above the table to the left or right  A table border can be added using the border attribute to the <table> tag.  The syntax for creating a table border is: <table border=“value”>  value is the width of the border in pixels  The size attribute is optional; if you don’t specify a size, the browser creates a table border 1 pixel wide.
  • 28.
    Tables with DifferentBorders Values  This figure shows the effect on a table’s border when the border size is varied.
  • 29.
    Cell Spacing &Cell Padding  Cell spacing refers to the space between the cells  The syntax for specifying the cell space is: <table cellspacing=“value”>  value is the width of the interior borders in pixels  the default cell spacing is 2 pixels  Cell padding refers to the space within the cells.  The syntax for this attribute is: <table cellpadding=“value”>  value is the distance from the table text to the cell border, as measured in pixels  the default cell padding value is 1 pixel
  • 30.
    Tables with DifferentCell Spacing Values different cell spacing values different cell padding values
  • 31.
    HTML Frames  HTMLframes are a means of having several browser windows open within a single larger window  Each HTML document is called a frame  Disadvantages:  Must keep track of more HTML documents  Difficult to print the entire page  Example of using frame  http://www.csupomona.edu/~ftang/www/courses/CS299-S09/examples/frame.html  http://www.w3schools.com/html/html_frames.asp 31
  • 32.
    Attributes  A <FRAMESET>element is placed in the html document before the <BODY> element. The <FRAMESET> describes the amount of screen real estate given to each windowpane by dividing the screen into ROWS or COLS.  The <FRAMESET> will then contain <FRAME> elements, one per division of the browser window.  Note: Because there is no BODY container, FRAMESET pages can't have background images and background colors associated with them
  • 33.
    Example <HTML> <HEAD> <TITLE> Framed Page</TITLE> <FRAMESET COLS=“23%,77%”> <FRAME SRC=“Doc1.html”> <FRAME SRC=“Doc2.html”> </FRAMESET > </HEAD> </HTML>
  • 34.
    OUTPUT 34 FRAMESET COLS=”23%, 77%” FRAME NAME=right_pane SRC=Doc2.html FRAME NAME= left_pane SRC=Doc1.h tml
  • 35.
    FORMS  To inserta form we use the <FORM></FORM> tags. The rest of the form elements must be inserted in between the form tags. <HTML> <HEAD> <TITLE> Sample Form</TITLE> </HEAD> <BODY BGCOLOR=“FFFFFF”> <FORM ACTION = http://www.xnu.com/formtest.asp> <P> First Name: <INPUT TYPE=“TEXT” NAME=“fname” MAXLENGTH=“50”> </P> <P> <INPUT TYPE=“SUBMIT” NAME=“fsubmit1” VALUE=“Send Info”> </P> </FORM> </BODY> </HTML>
  • 36.
    Attributes  ACTION: isthe URL of the CGI (Common Gateway Interface) program that is going to accept the data from the form, process it, and send a response back to the browser.  METHOD: GET (default) or POST specifies which HTTP method will be used to send the form’s contents to the web server. The CGI application should be written to accept the data from either method.  NAME: is a form name used by VBScript or JavaScripts.  TARGET: is the target frame where the response page will show up.
  • 37.
    Elements  Form elementshave properties: Text boxes, Password boxes, Checkboxes, Option(Radio) buttons, Submit, Reset, File, Hidden and Image.  The properties are specified in the TYPE Attribute of the HTML element <INPUT></INPUT>.
  • 38.
  • 39.
    Text Box  Textboxes: Used to provide input fields for text, phone numbers, dates, etc. <INPUT TYPE= " TEXT " > Browser will display Textboxes use the following attributes:  TYPE: text.  SIZE: determines the size of the textbox in characters. Default=20 characters.  MAXLENGHT : determines the maximum number of characters that the field will accept.  NAME: is the name of the variable to be sent to the CGI application.  VALUE: will display its contents as the default value.
  • 40.
    Password  Password: Usedto allow entry of passwords. <INPUT TYPE= " PASSWORD " > Browser will display Text typed in a password box is starred out in the browser display. Password boxes use the following attributes:  TYPE: password.  SIZE: determines the size of the textbox in characters.  MAXLENGHT: determines the maximum size of the password in characters.  NAME: is the name of the variable to be sent to the CGI application.  VALUE: is usually blank.
  • 41.
    Check Box  CheckBox: Check boxes allow the users to select more than one option. <INPUT TYPE=“CHECKBOX”> Browser will display Checkboxes have the following attributes:  TYPE: checkbox.  CHECKED: is blank or CHECKED as the initial status.  NAME: is the name of the variable to be sent to the CGI application.  VALUE: is usually set to a value.
  • 42.
    Radio Button  RadioButton: Radio buttons allow the users to select only one option. <INPUT TYPE=“RADIO”> Browser will display Radio buttons have the following attributes:  TYPE: radio.  CHECKED: is blank or CHECKED as the initial status. Only one radio button can be checked  NAME: is the name of the variable to be sent to the CGI application.  VALUE: usually has a set value.
  • 43.
    Submit Button  Submit:Everyset of Form tags requires a Submit button. This is the element causes the browser to send the names and values of the other elements to the CGI Application specified by the ACTION attribute of the FORM element. <INPUT TYPE=“SUBMIT”> The browser will display Submit has the following attributes:  TYPE: submit.  NAME: value used by the CGI script for processing.  VALUE: determines the text label on the button, usually Submit Query.
  • 44.
    Reset Button  Reset:It is a good idea to include one of these for each form where users are entering data. It allows the surfer to clear all the input in the form. <INPUT TYPE=“RESET”>  Browser will display  Reset buttons have the following attributes:  TYPE: reset.  VALUE: determines the text label on the button, usually Reset.
  • 45.
    File  File Upload:You can use a file upload to allow surfers to upload files to your web server.  <INPUT TYPE=“FILE”>  Browser will display  File Upload has the following attributes:  TYPE: file.  SIZE: is the size of the text box in characters.  NAME: is the name of the variable to be sent to the CGI application.  MAXLENGHT: is the maximum size of the input in the textbox in characters.
  • 46.
    Textarea  <TEXTAREA></TEXTAREA>: isan element that allows for free form text entry. Browser will display Textarea has the following attributes:  NAME: is the name of the variable to be sent to the CGI application.  ROWS: the number of rows to the textbox.  COLS: the number of columns to the textbox.
  • 47.
    Option  Option The listitems are added to the <SELECT> element by inserting <OPTION></OPTION> elements. The Option Element’s attributes are:  SELECTED: When this attribute is present, the option is selected when the document is initially loaded. It is an error for more than one option to be selected.  VALUE: Specifies the value the variable named in the select element
  • 48.
  • 49.