
Recommended
More Related Content
What's hot
What's hot (16)
Viewers also liked
Viewers also liked (17)
Similar to Hot to storyboard
Similar to Hot to storyboard (20)
More from ShahEman
More from ShahEman (20)
Recently uploaded
Recently uploaded (20)
Hot to storyboard
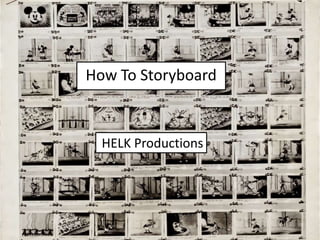
- 1. How To Storyboard HELK Productions
- 2. Purpose of a Storyboard Storyboards are a series of illustrations/drawings, which are displayed in a sequence. This helps film makers, visualize their film and may help them, when it comes to the filming as they can understand what shot they can use for each section of the narrative. This makes it quicker and easier for the team to film as they know exactly what they have to film and when and everything is explained in detail, so they have something to fall back on and to rely on. This also helps team cooperation, as all of the media production team are visualizing the same thing, instead of having a different image in their head and wanting to film it a different way. A storyboard is essentially a large comic of the film or some section of the film produced beforehand to help the directors and cinematographers visualize the scenes and find potential problems before they occur. Often storyboards include arrows or instructions that indicate movement. The storyboarding process, in the form it is known today, was developed at the Walt Disney studio during the early 1930s, after several years of similar processes being in use at Disney and other animation studios. Storyboarding became popular in live-action film production during the early 1940s. Storyboards are used to brainstorm and capture all the ideas before taking action. The process of visual thinking and planning allows a group of people to brainstorm together, placing their ideas on storyboards, then arranging the storyboards on the storyboard sheet. This may make an idea more complex and effective, which benefits the effectiveness of one shot.
- 3. Storyboard Sheet Before making our storyboards, we will begin by evaluating our screenplay and picturing it in terms of separate shots we can use for a certain parts of a narrative, which may look most effective. This is our final story board sheet. The importance of a storyboard is to see how all the shots fit together to tell your story, before you go out and shoot the video. This is like having a visual script. We looked into some conventions of a storyboard and the things we found and included in our storyboard was an image of how we pictured the shot to look like (this would be hand drawn) We also found that most storyboards have a record of the duration of each shot. A storyboard would also explain the camera instructions, as to whether is stays still, pans in/out, moves on a track such as a dolly or moves angle by using a jib. A storyboard may also explain the type of shot used, to make the production team clear, in case the picture doesn’t explain. A variety of shots are used in storyboarding, which makes the film different and may maintain the audiences attention. Lastly, there should be an explanation of what sound should be used in each shot. For example, in our film the most sound that will be used is dialogue, which is diegetic. Therefore, we would write in the sound box, dialogue (diegetic) If we were to have a soundtrack at the end of the film which the characters wouldn’t hear but the audience was, we would write in the sound box, soundtrack music(non diegetic) This is our completed story board, which we made. On the left hand side, we have information about the type of for each shot. We also have a duration time, when it comes to filming and editing. This helps us calculate the length of our film as it is important to keep it a short film. We then have a box for the image of the shot, which we can draw in. we have a box to represent the transitions we would like to use e.g. fade in and out. On the right, we have made a box next to each shot to explain the camera instructions and what type of sound is used in each shot. Lastly, at the top, we have a box to number our storyboard sheets, and an assignment name which would be the title of the film. When finished the storyboards, we will scan them into Photoshop, to add colour. We personalized our storyboards by putting the name of the company at the bottom. We could have chosen to colour the storyboards in by hand but felt it was more professional to use Photoshop to colour them in as we can show more skills that way. we like the design of our storyboards, as they are simple, but look organized and neat.
- 4. Drawing People As nobody in our media group is confident in drawing and art, it was difficult for us to storyboard and make t look of a professional standard. Our main problem was attempting to draw people and getting full length body shots into one shot. We then looked online to find the best way to draw people, and found this method. The idea is to draw like you would to draw stick men, to outline the shape of their body like they are doing a specific action (like sitting down which is shown in the image below) and then go over/around It by drawing circles, to make them look like sausage people. The circles should be in proportion to a person. For example the biggest circle would be the torso/waist which is one circle, a smaller circle for the head, two long circles for the upper and lower arm, a circle for each hand, again two circles for the upper and lower leg and two circles for the feet (all of which shown on the picture to the side) This was a very simplistic way of drawing. However, we believe that it looks professional and keeps each body in proportion. When applying drawing of a character onto the storyboards, the head should be placed one third of the way down the box. This is to allow lead room at the top of the characters head to follow conventions of a film, when filming. When it comes to colouring in the people on Photoshop, we can remove where the circles overlap to make them look like well proportioned people. Which is explain more on the next slide, which shows the finishing product. Also as we found it difficult to draw faces, we would put a cross in the face to change the angle of where they are looking.
- 5. The Finished Product This is a completed page to our storyboard. These are all numbered and in order, they have camera instructions that explain what shot they are and what sound is used as well as a drawing, using the method mentioned above to draw proportioned people. There are also arrows drawn on to explain what is happening in the shot. An arrow with a black head shows it is the actions of the cast and an arrow with a white head shows the movement is placed there to explain the direction of the movement of the camera. The camera instructions are right to the point and explains everything that is happening in that shot, such as where the camera is placed to achieve a type of shot and when the actions of characters occur, according to the script. We thought it would be a good idea to number the script so we didn’t have to waste space in the sound box, writing the whole line down and instead writing the number of the lines being read in each shot . These have been coloured in on Photoshop, so the colouring in looks more professional.