Download to read offline
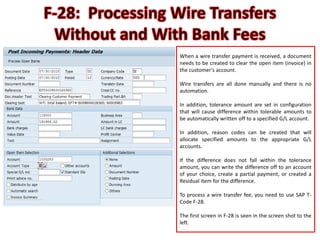
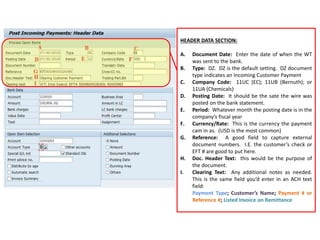
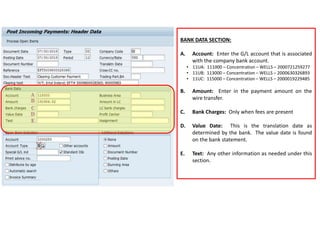
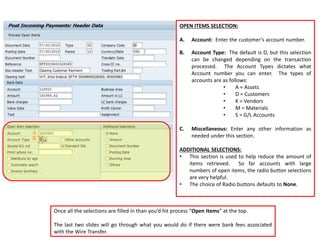
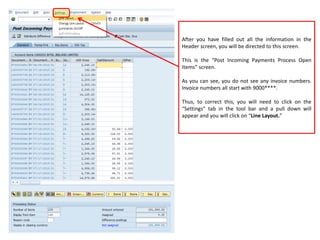
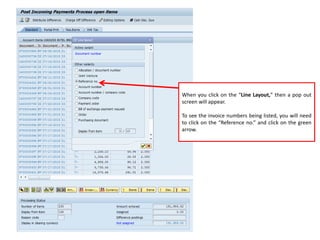
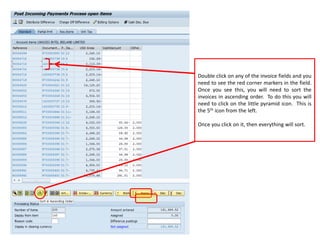
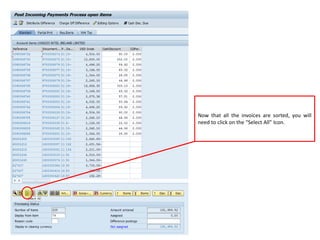
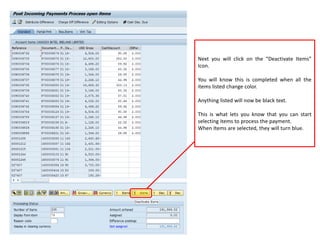
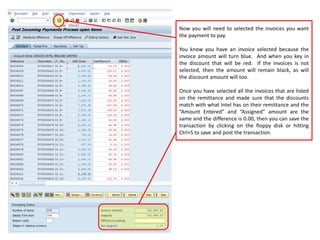
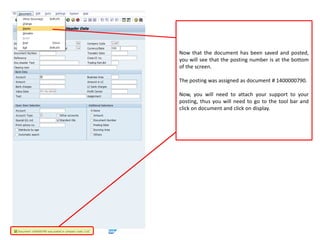
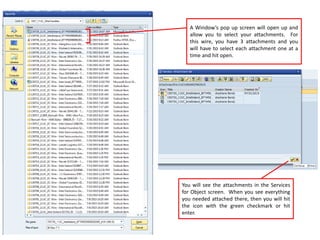
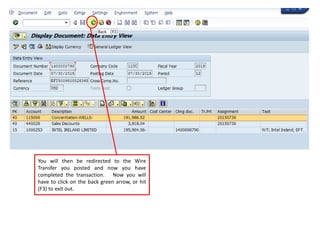
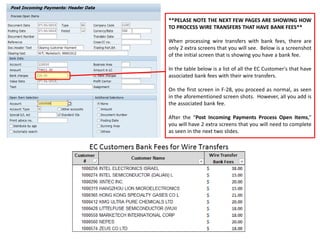
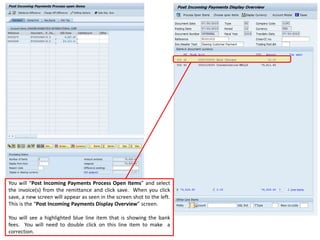

This document provides instructions for processing wire transfer payments in SAP. It describes the steps to create a payment document, clear open invoices, and process bank fees. Key steps include using transaction code F-28, filling out header and bank data, selecting open items to pay, and attaching supporting documents. For payments with bank fees, additional screens are used to correct the general ledger account and allocate fees to the proper cost center.


![[Webinar] Strategic Link Building](https://cdn.slidesharecdn.com/ss_thumbnails/strategic-web-linkingfinal-151012204951-lva1-app6891-thumbnail.jpg?width=640&height=640&fit=bounds)


