Downloaded 3,926 times
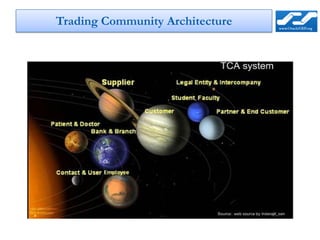
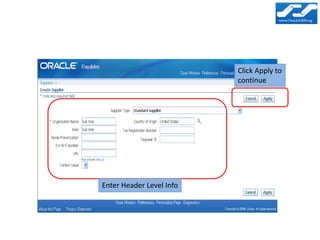
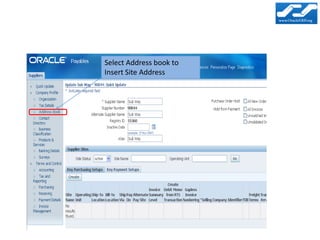
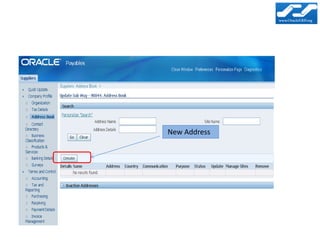
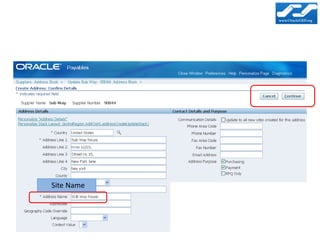
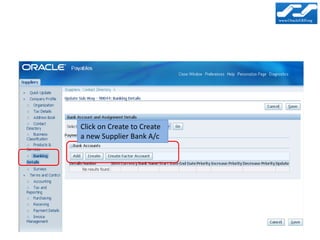


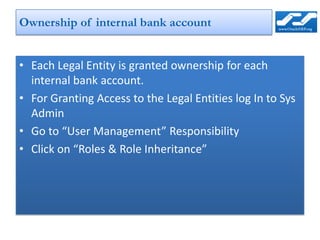

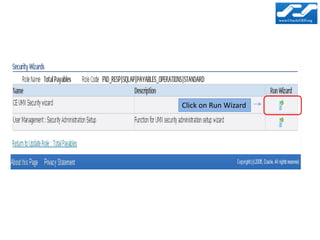
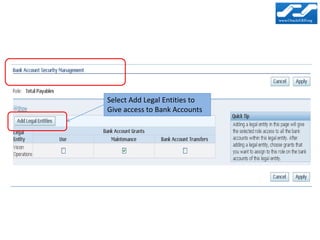

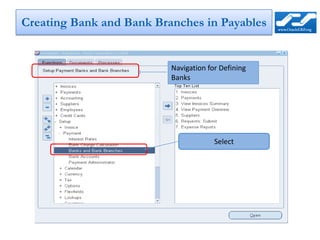
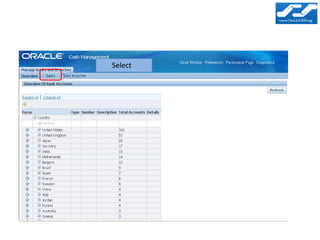
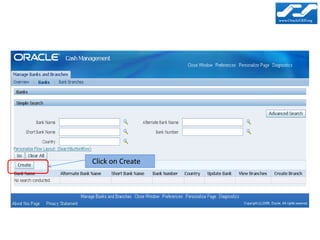
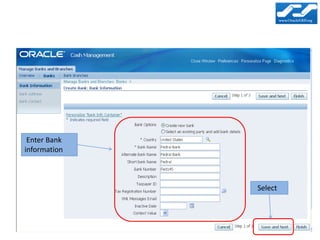

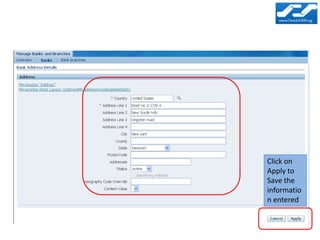
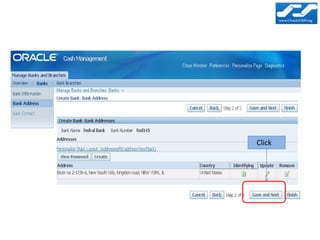
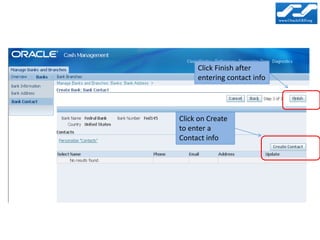
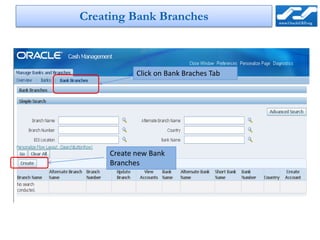

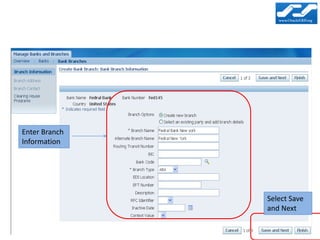
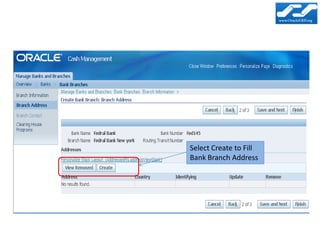
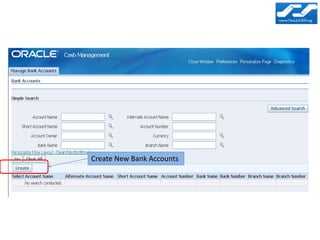
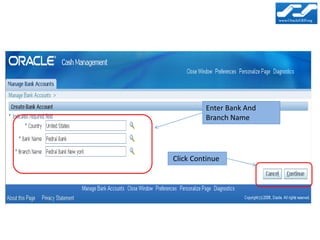
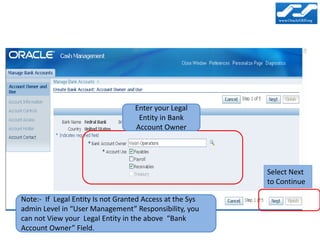
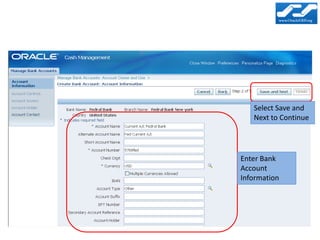
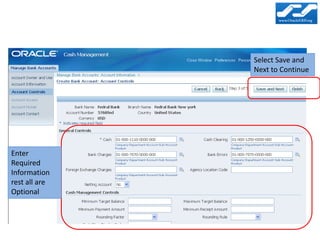
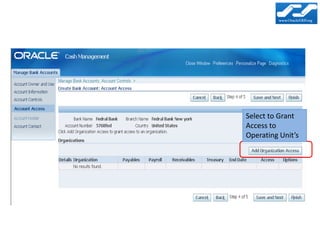
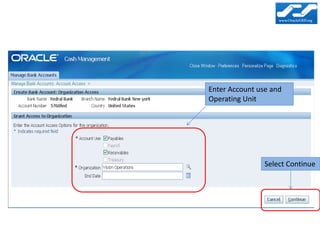
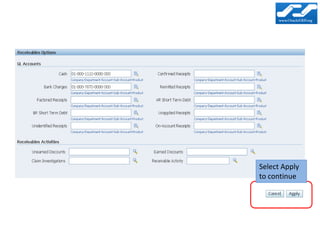
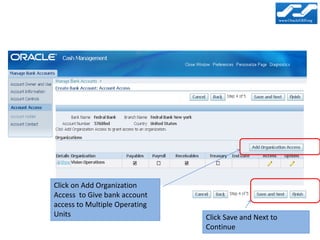
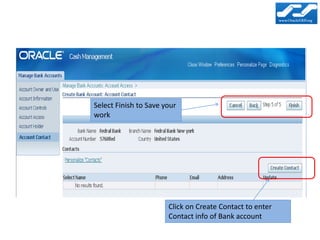
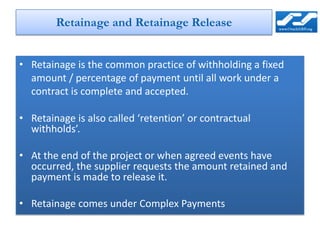
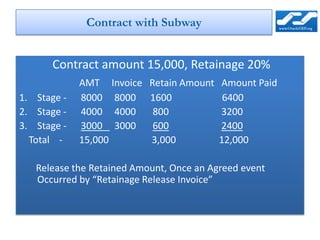

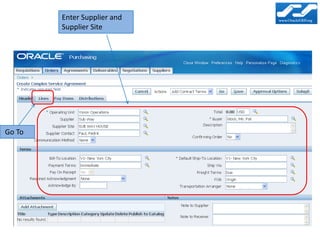
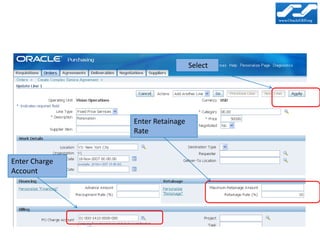
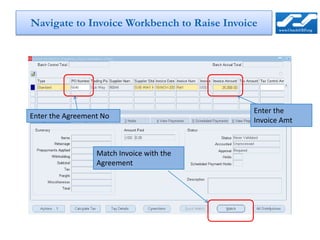
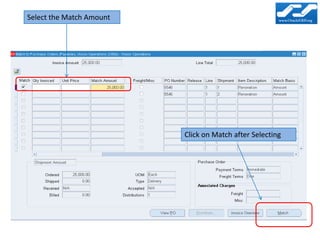
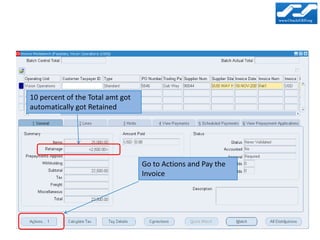
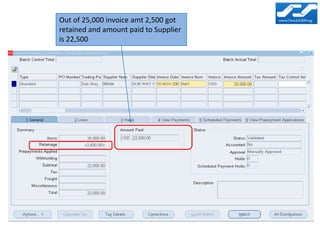
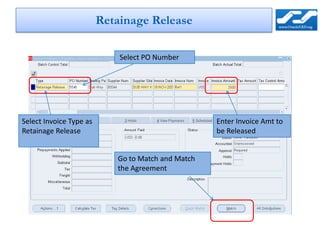
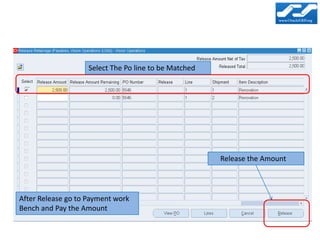

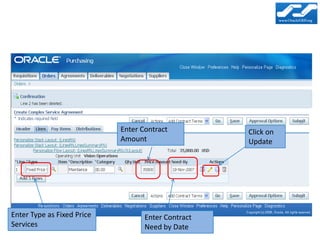
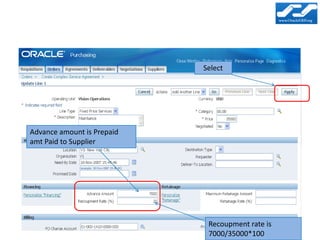
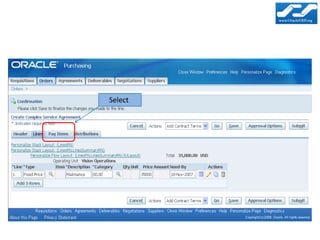
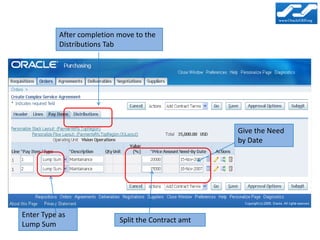
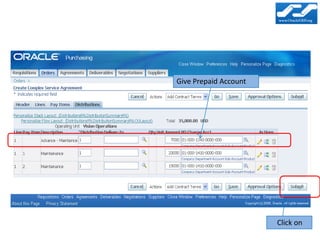
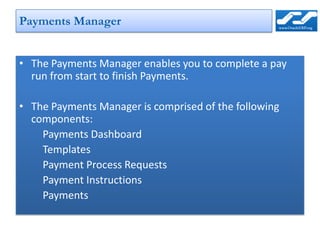

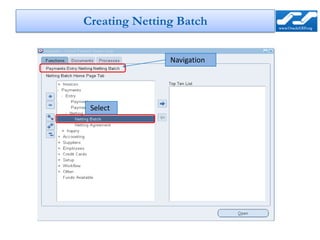

This document provides an overview and instructions for key features in Oracle Payables Release 12, including: 1. Suppliers are now defined as Trading Community Architecture (TCA) parties with supplier sites as TCA party sites, allowing a single supplier address and contact to be leveraged across organizations. 2. Banks and bank accounts can now be defined and managed centrally across multiple Oracle modules. A single legal entity owns each bank account and organizations are granted usage rights. 3. Retainage allows a percentage of payments to suppliers to be withheld until project completion, then later released via a retainage release invoice. 4. Payments Manager provides a centralized workflow for creating payment templates, requests,


