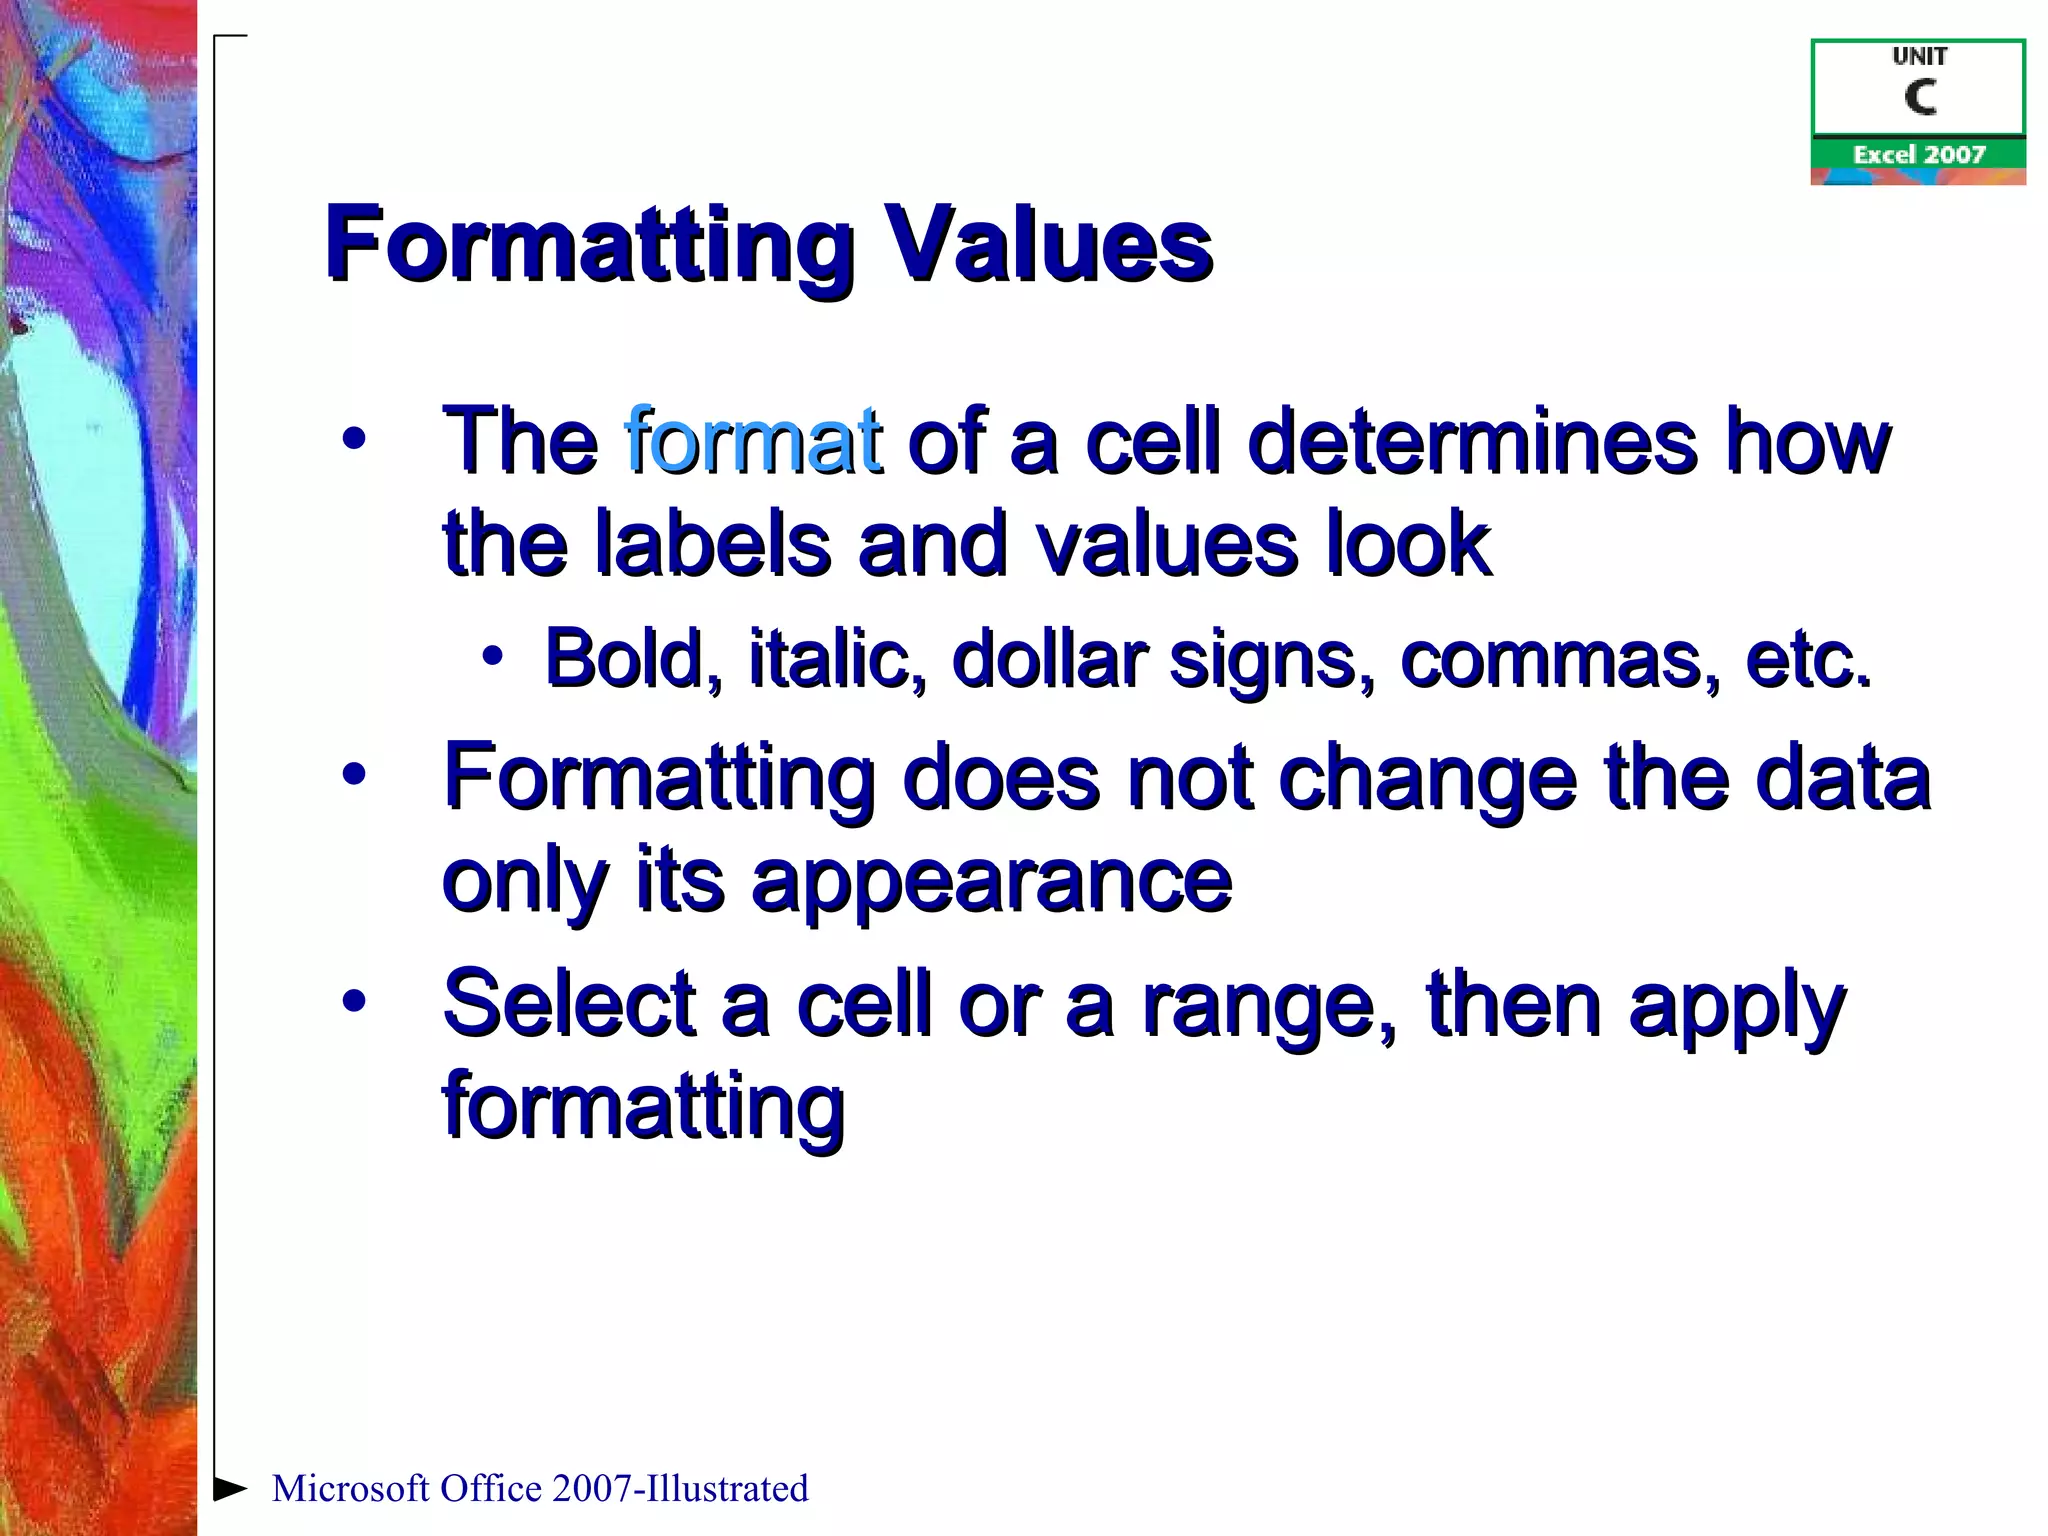
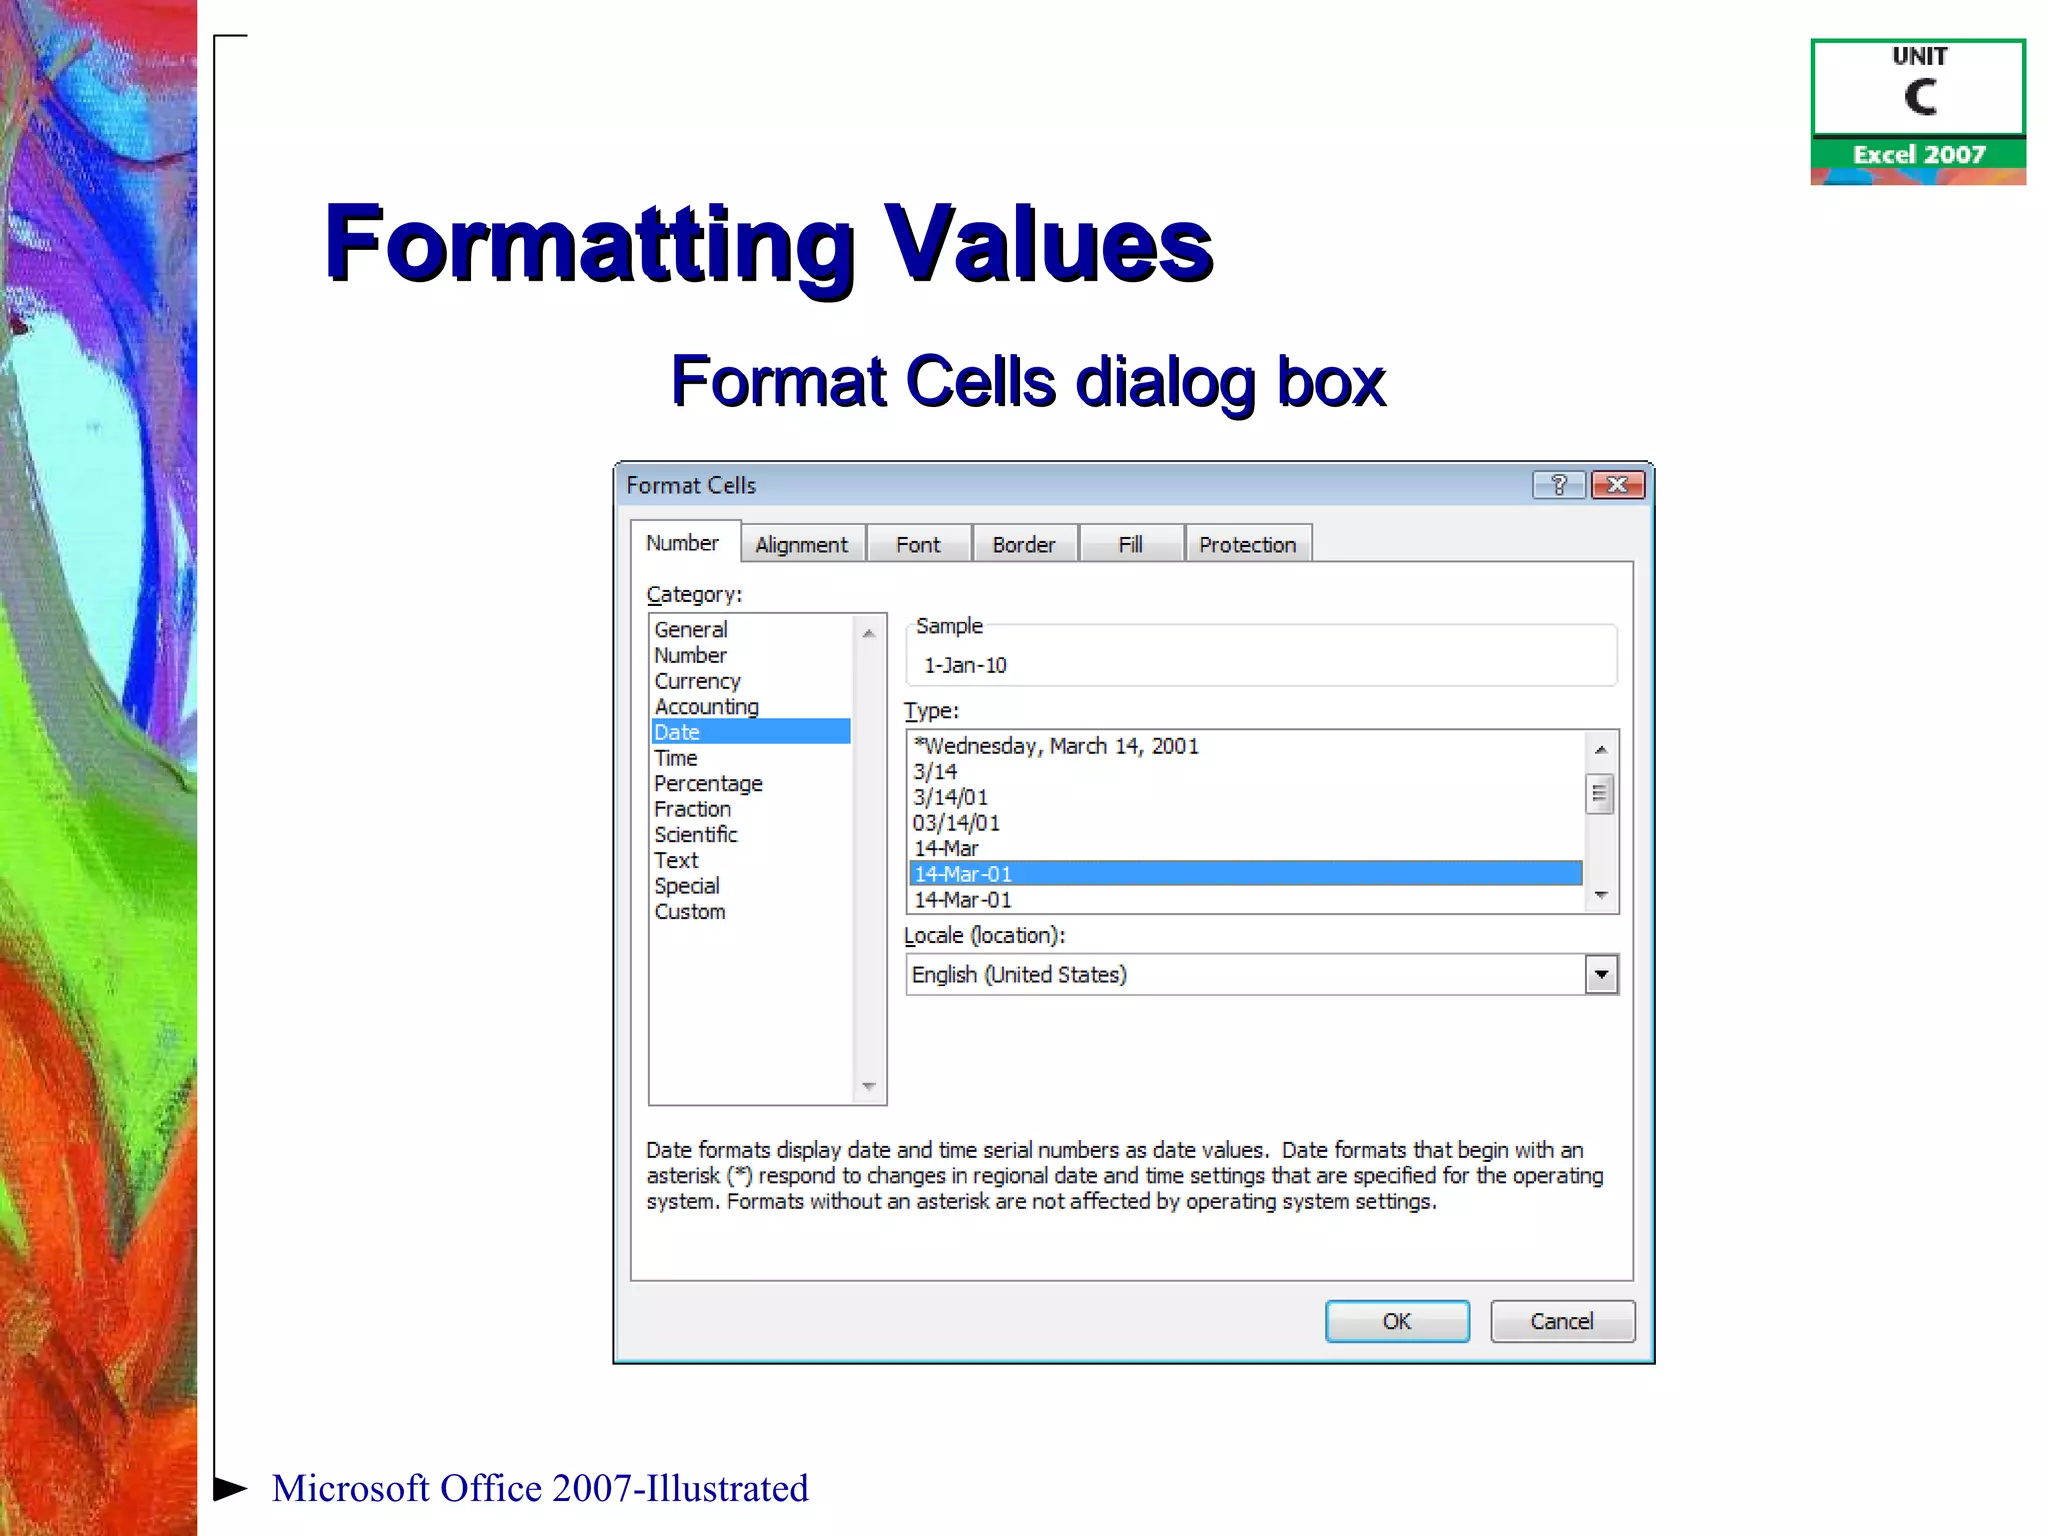
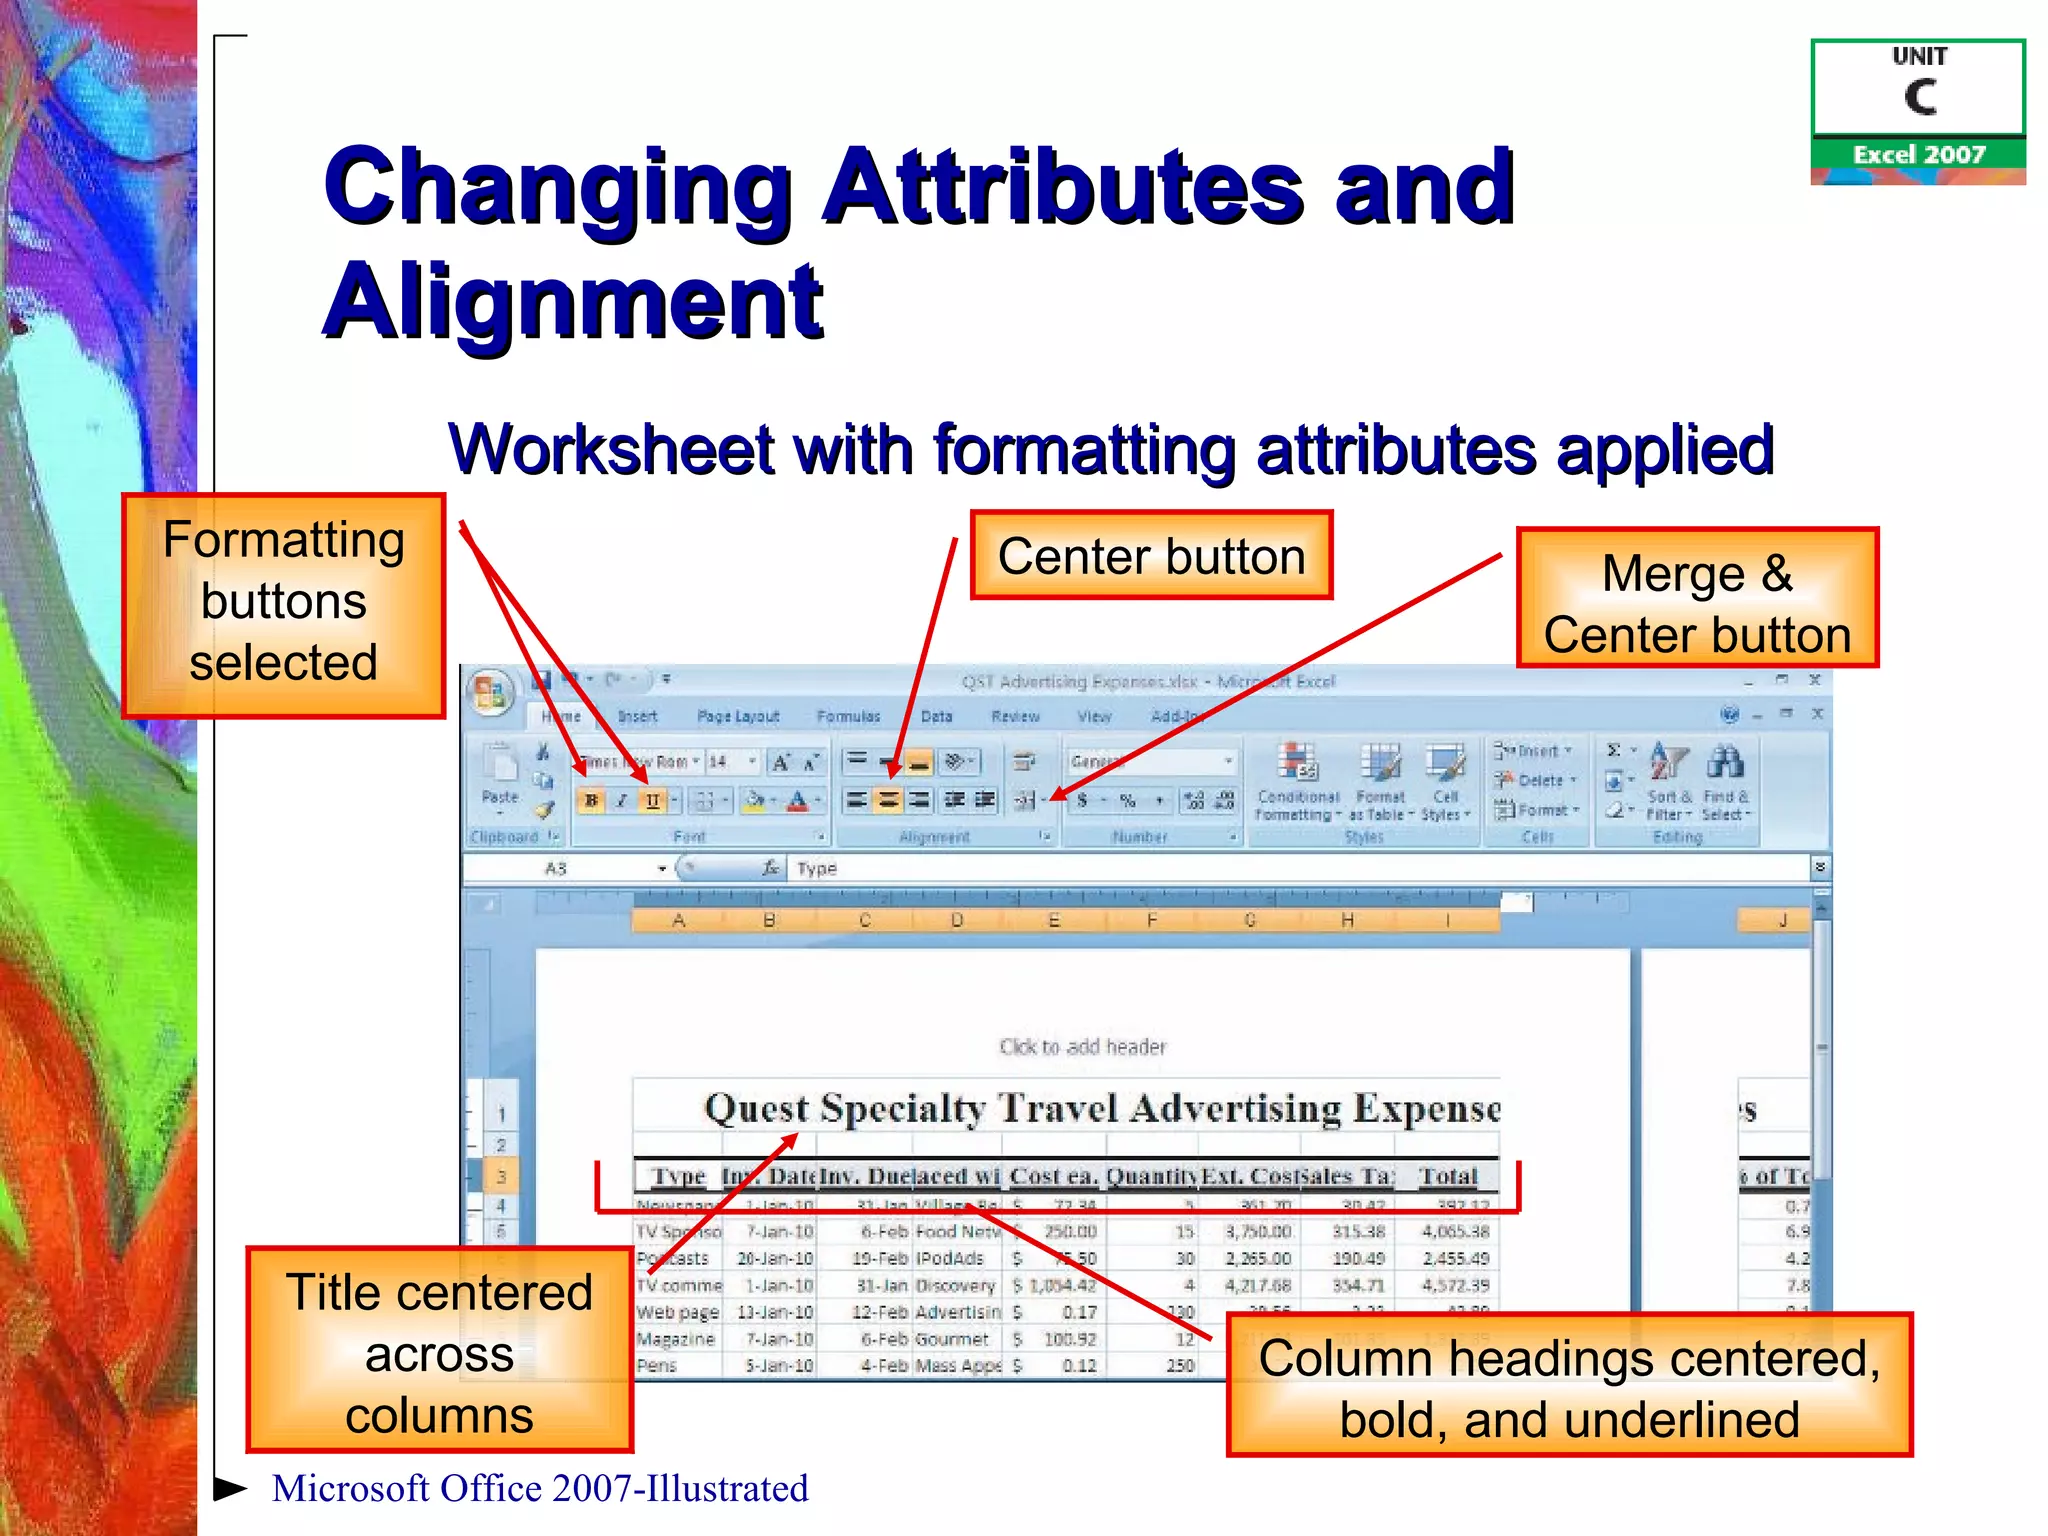
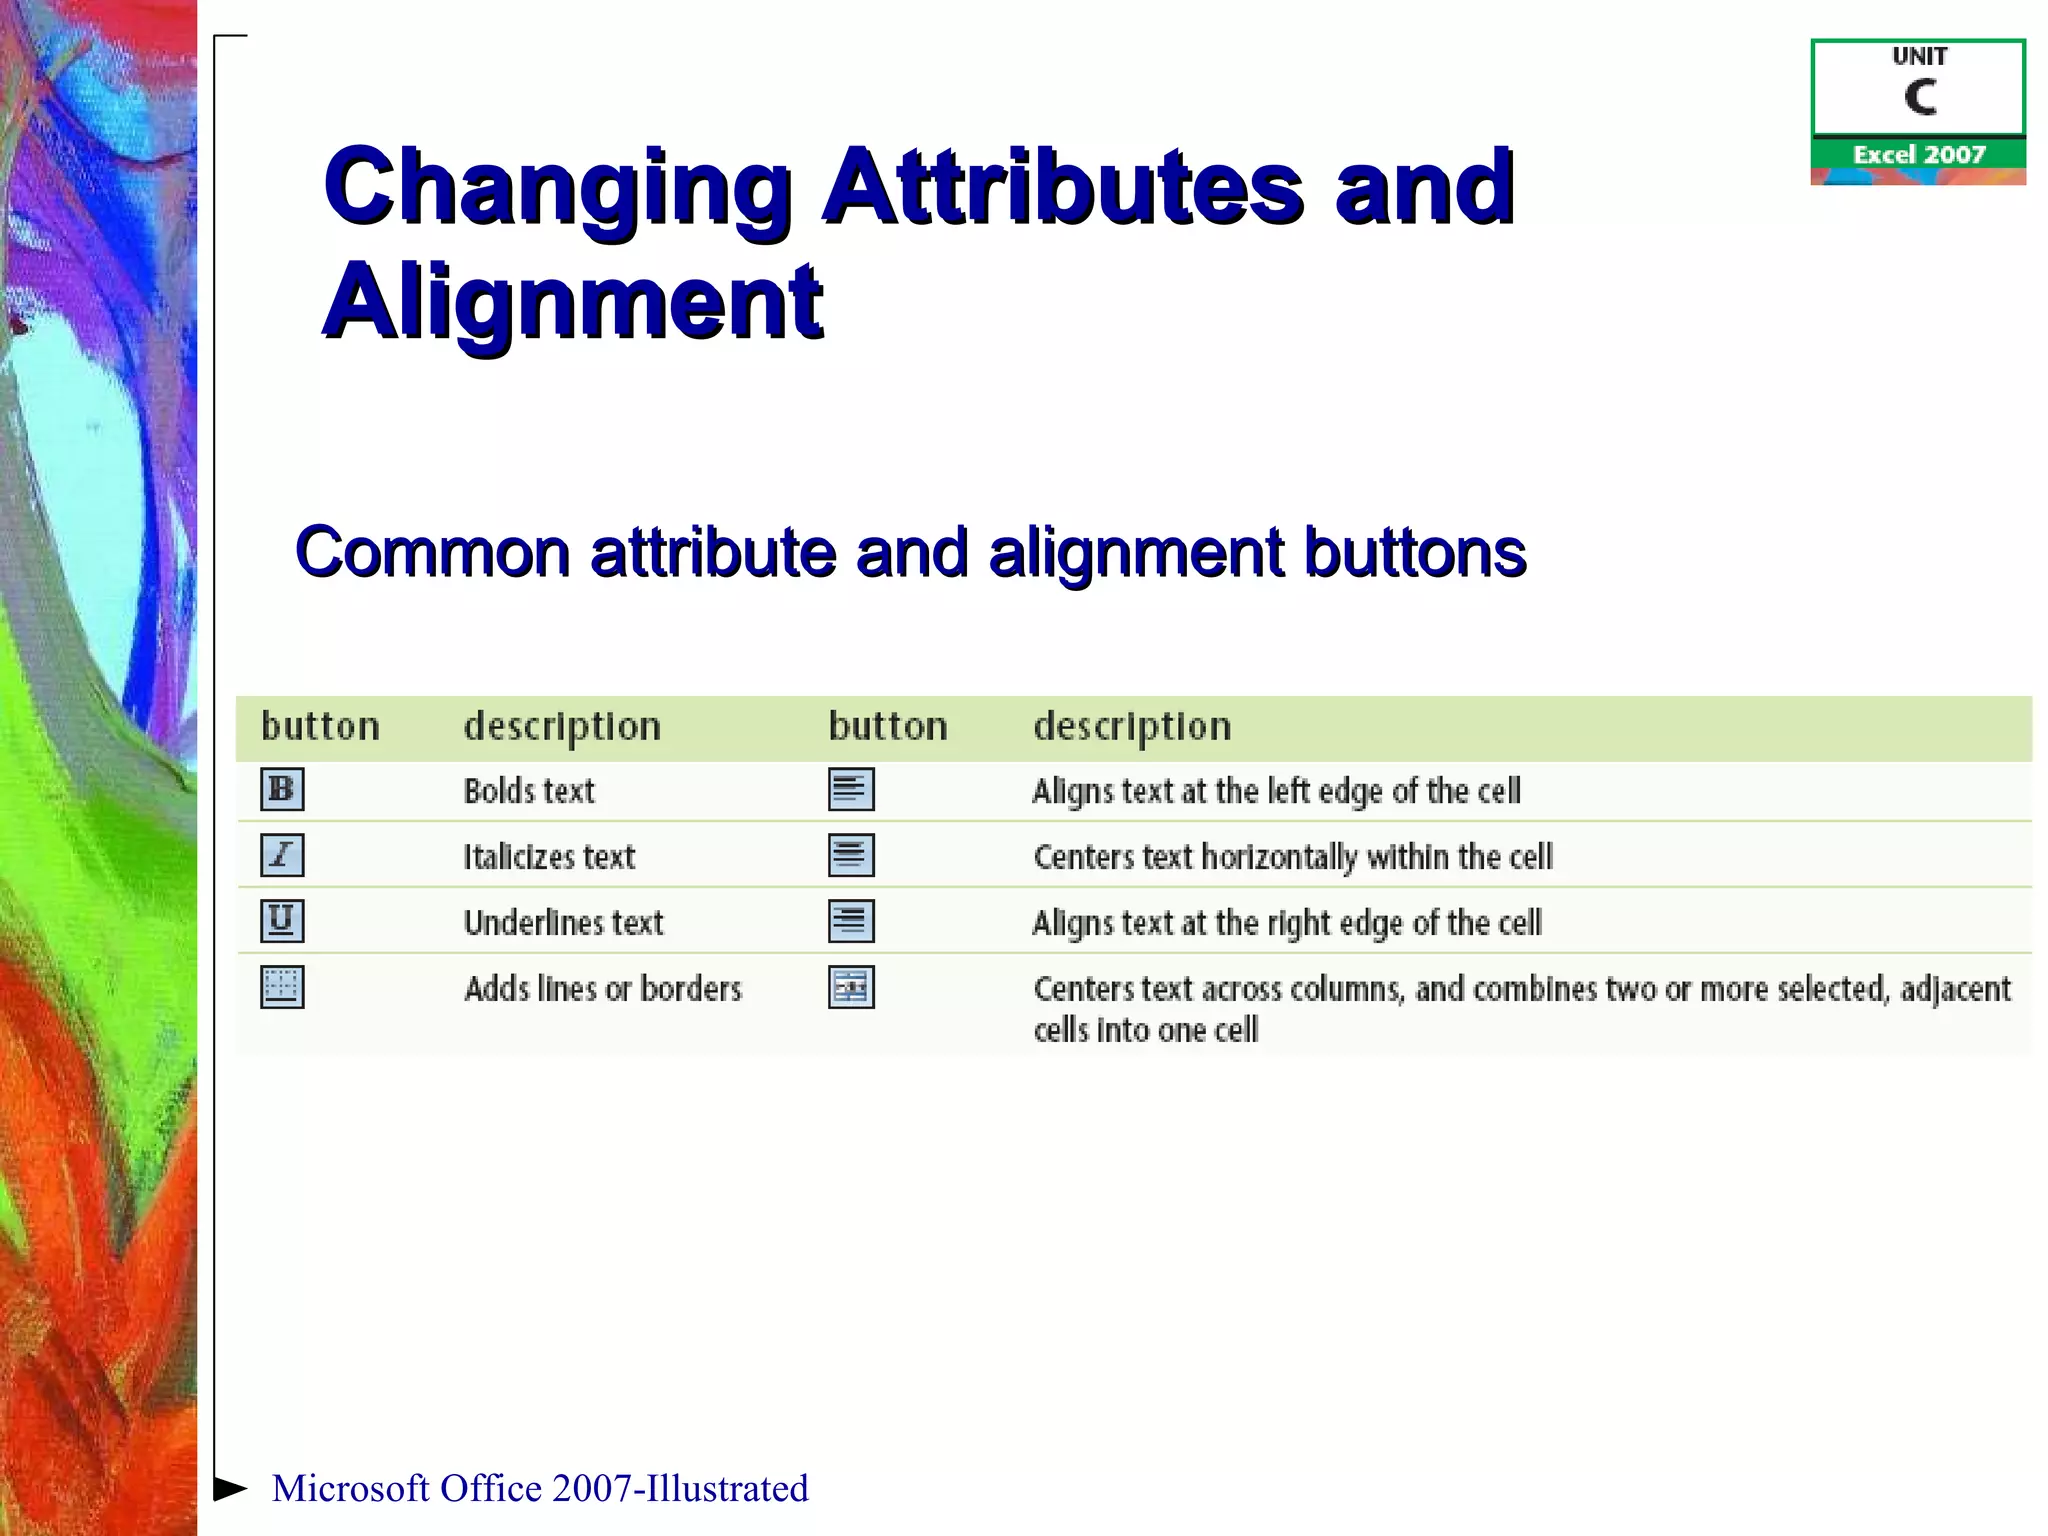
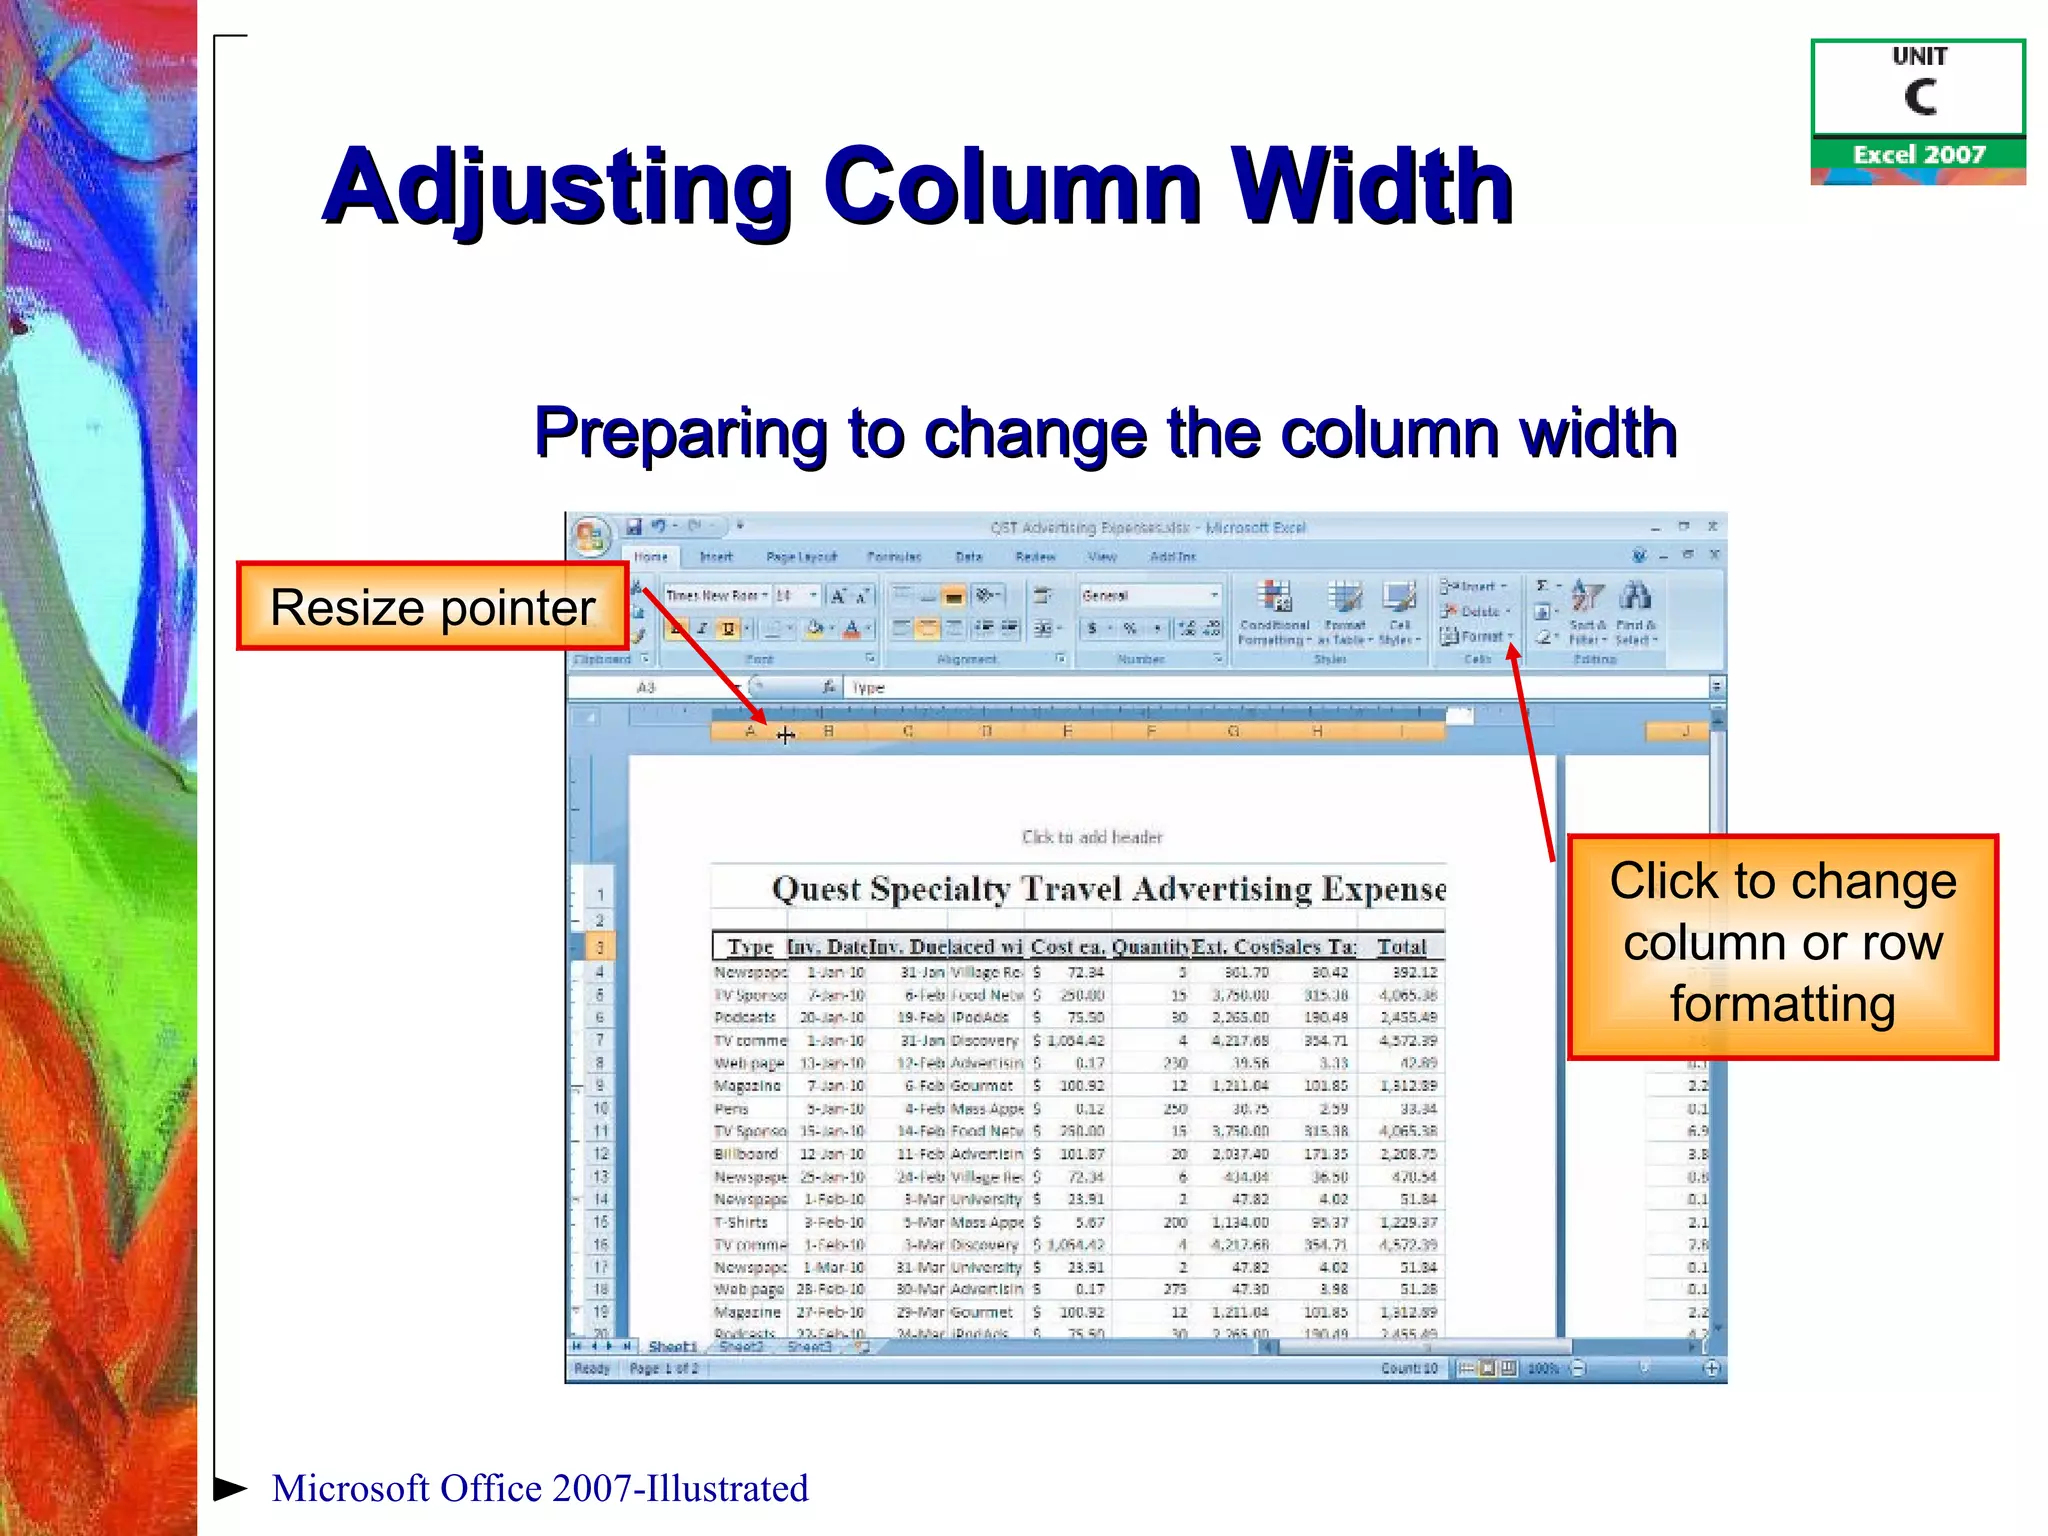
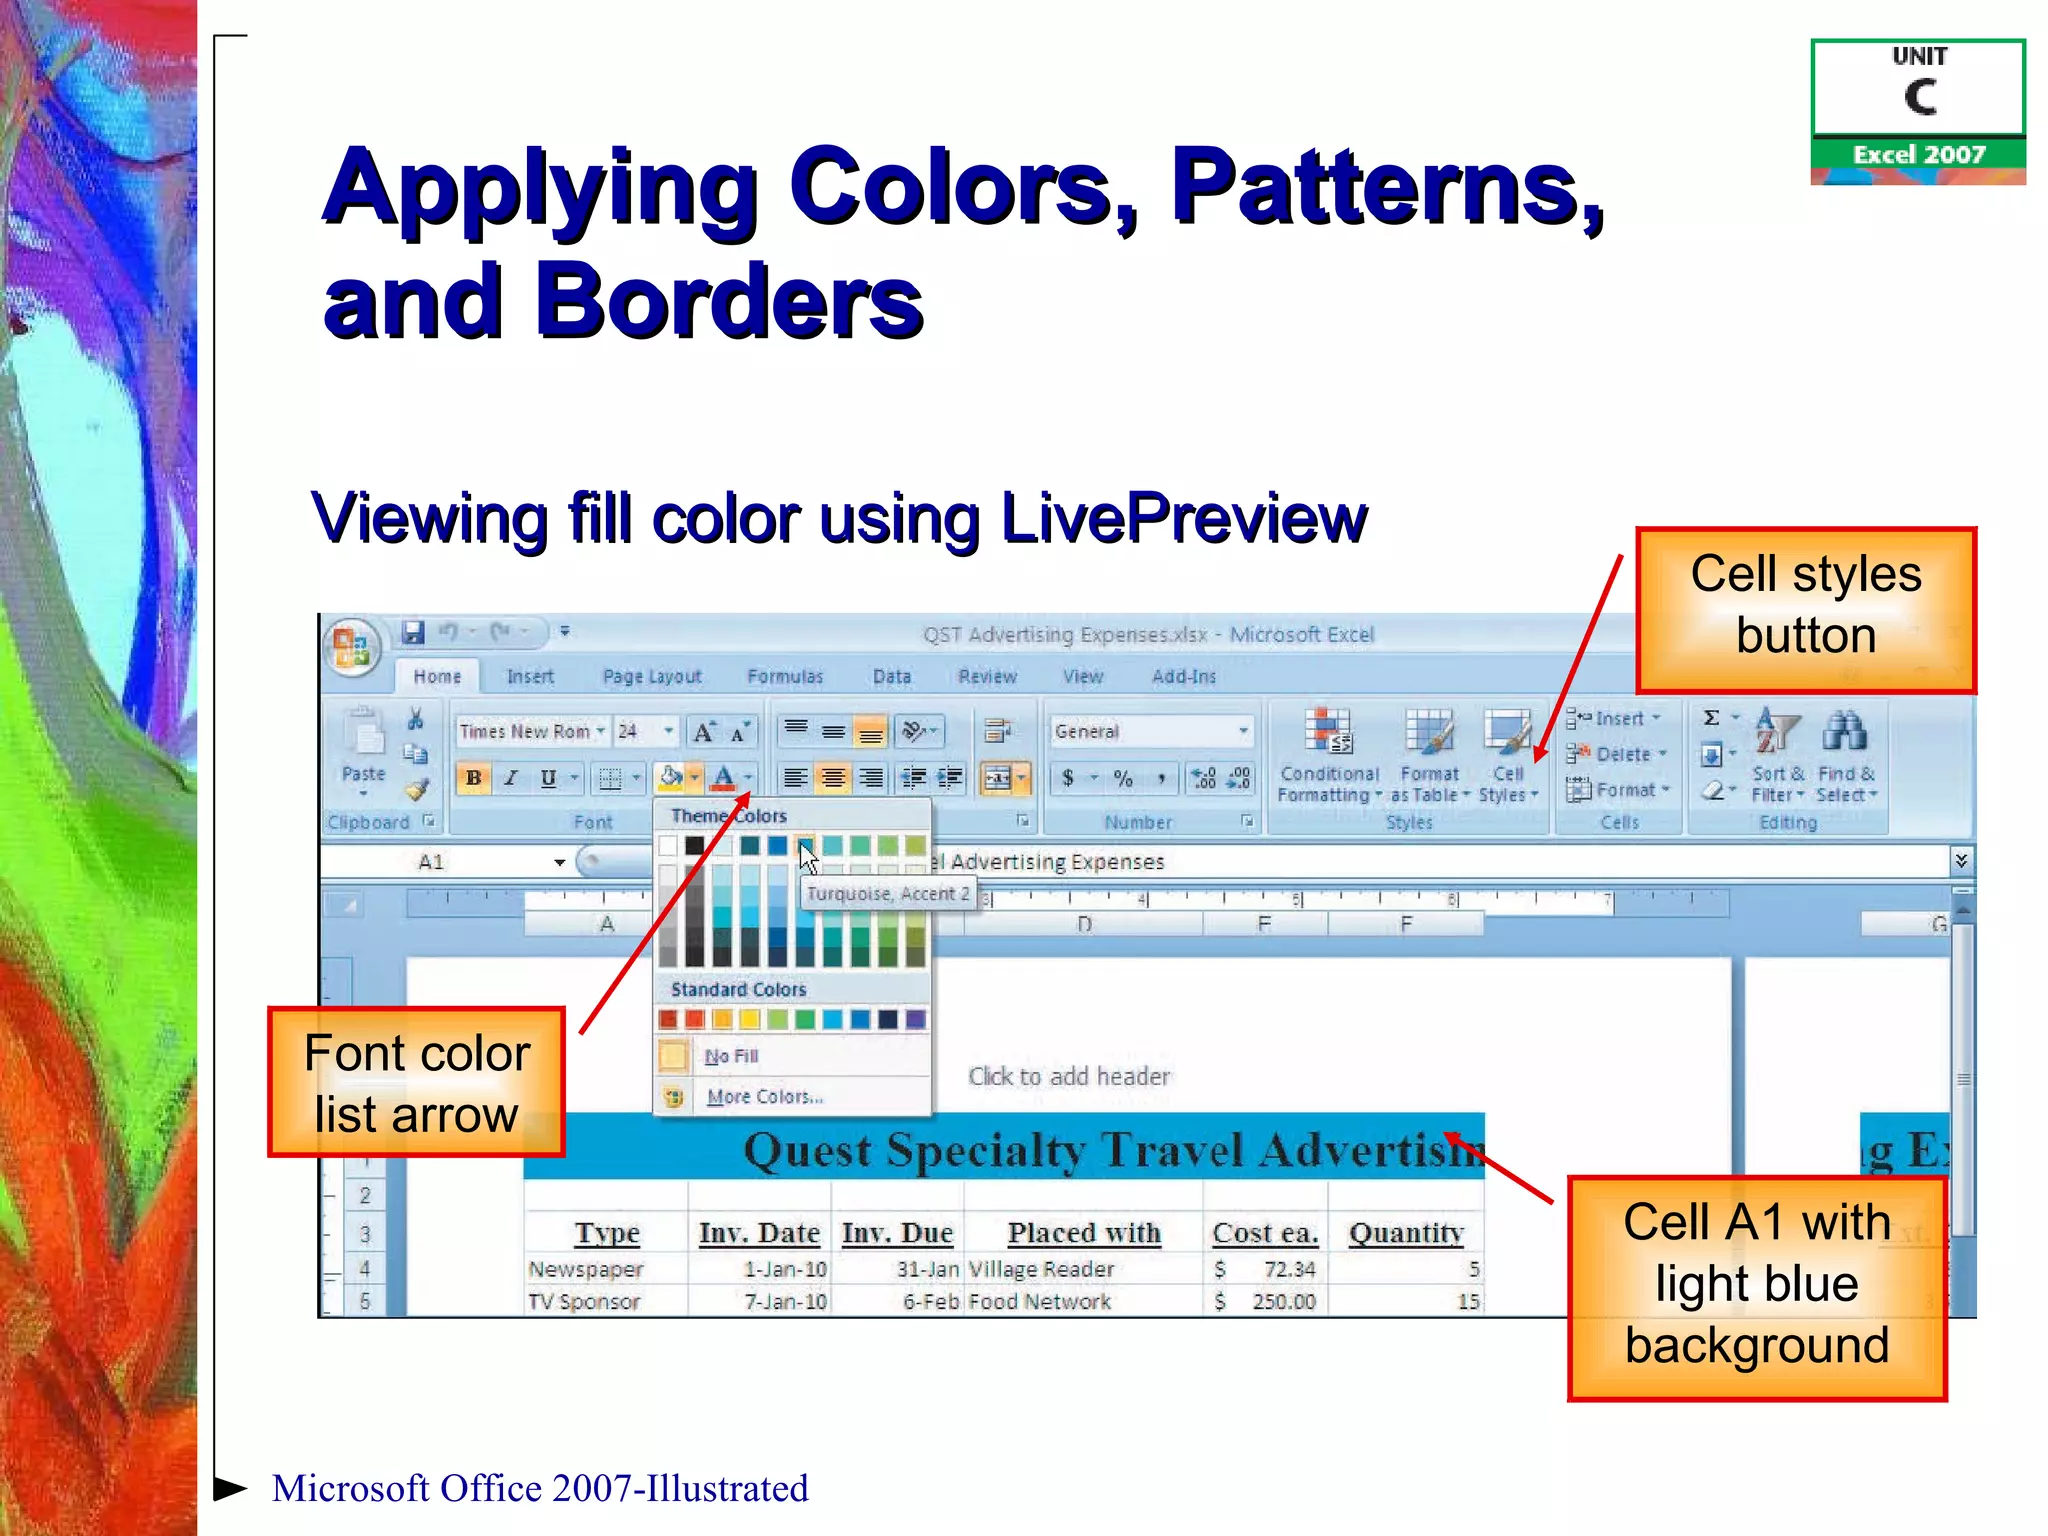
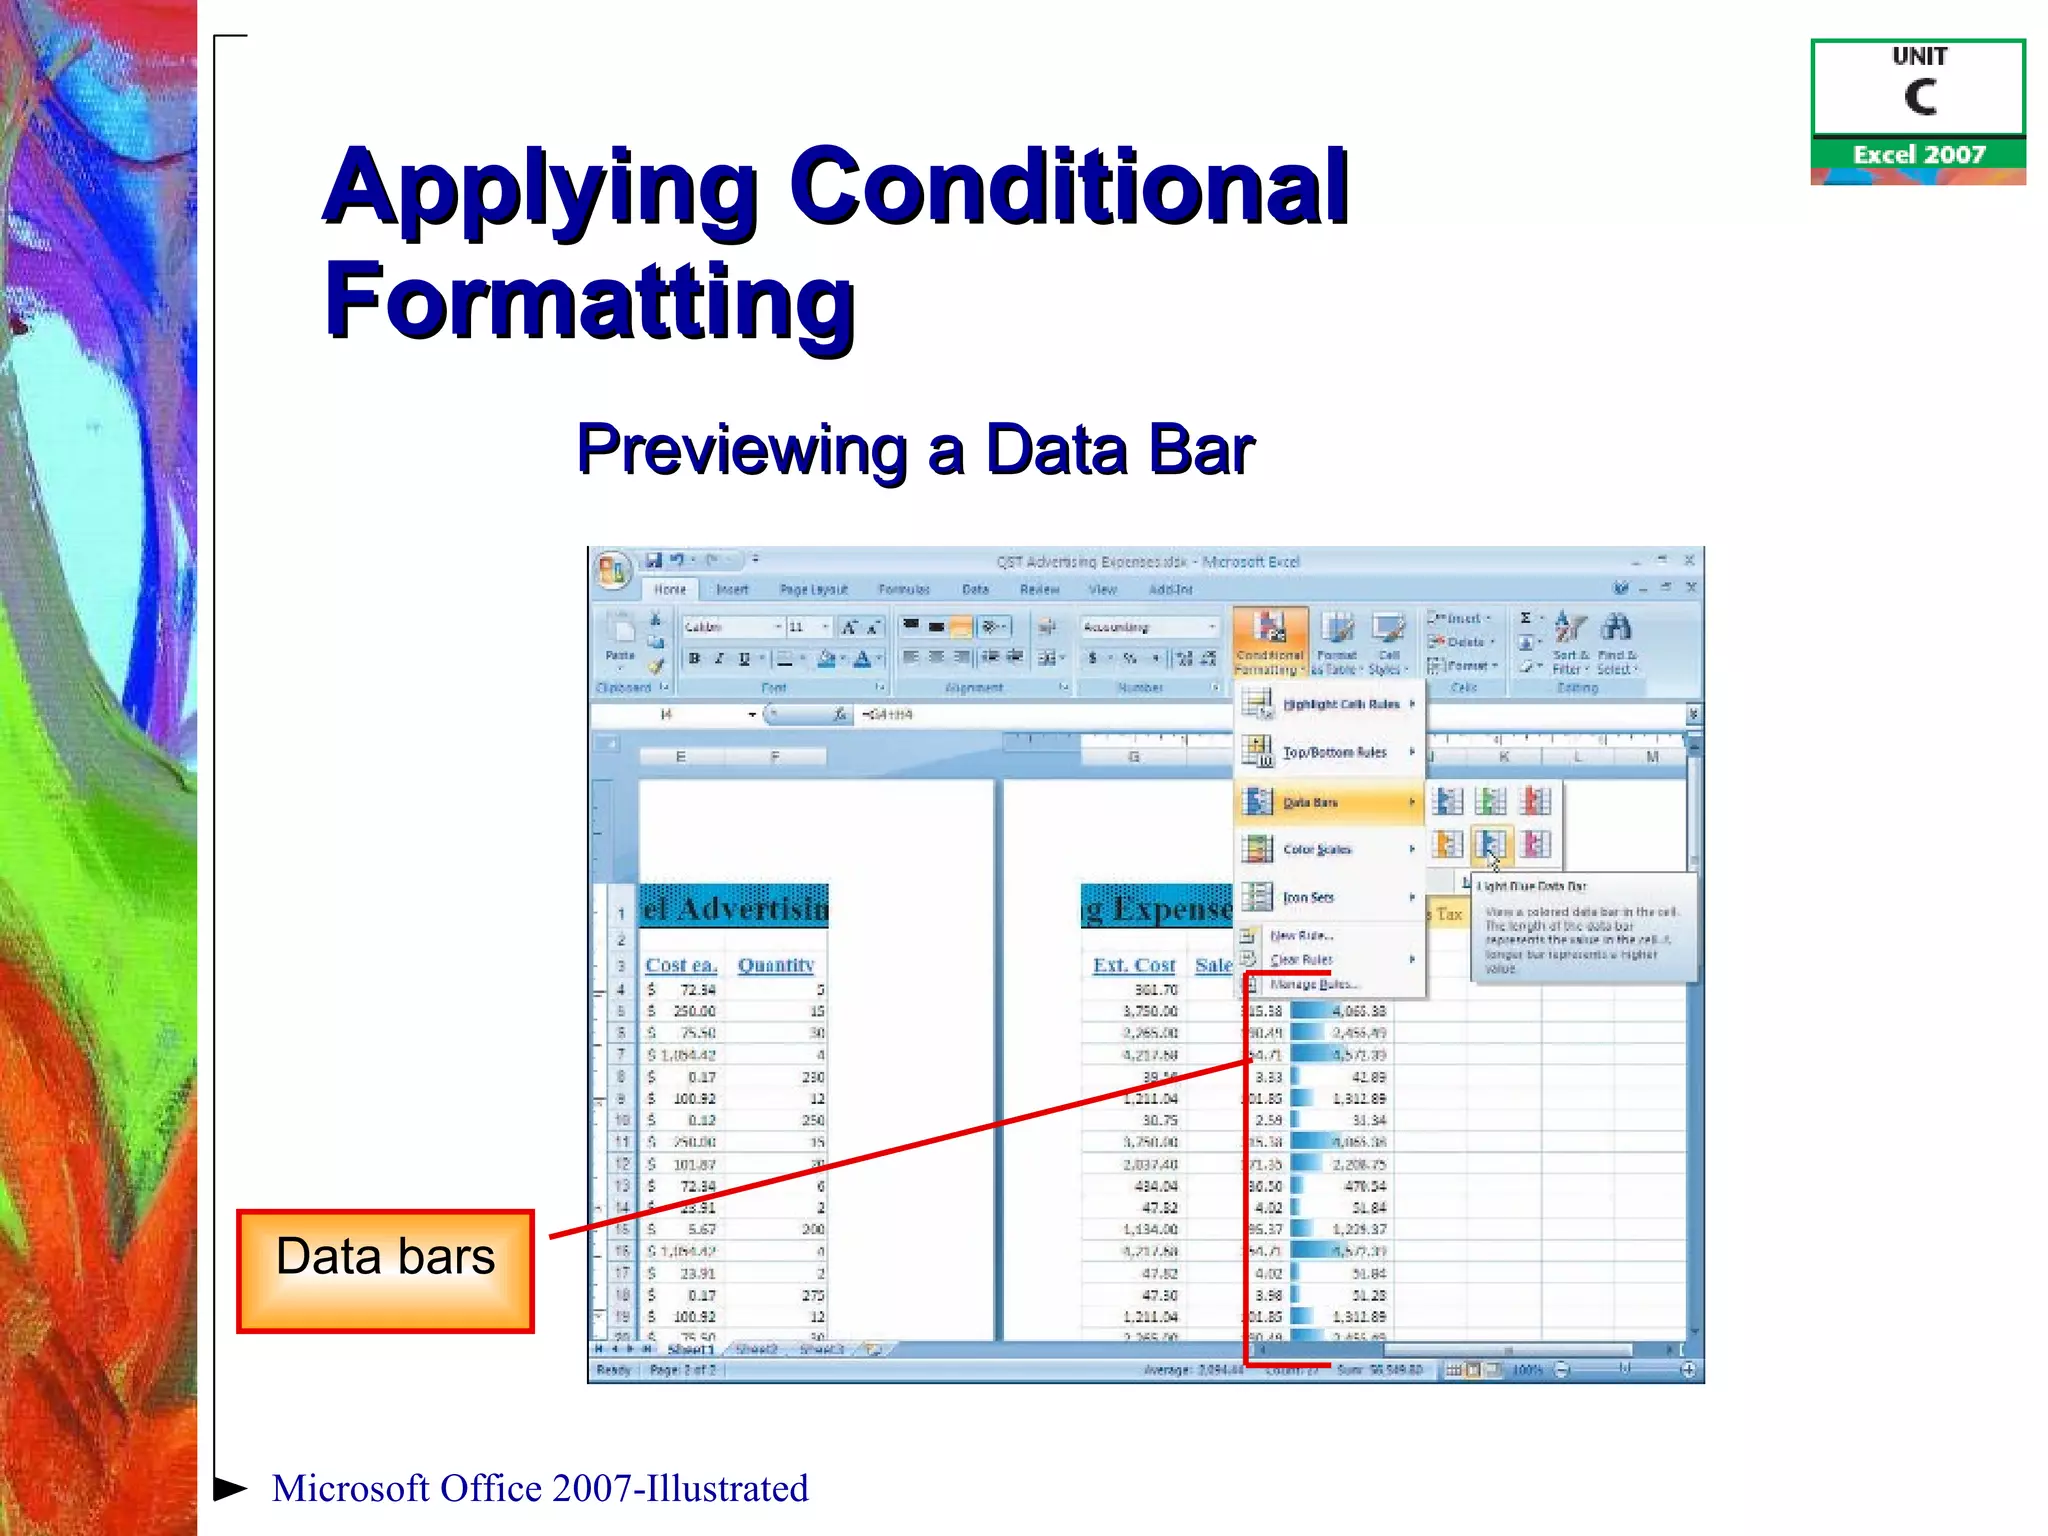
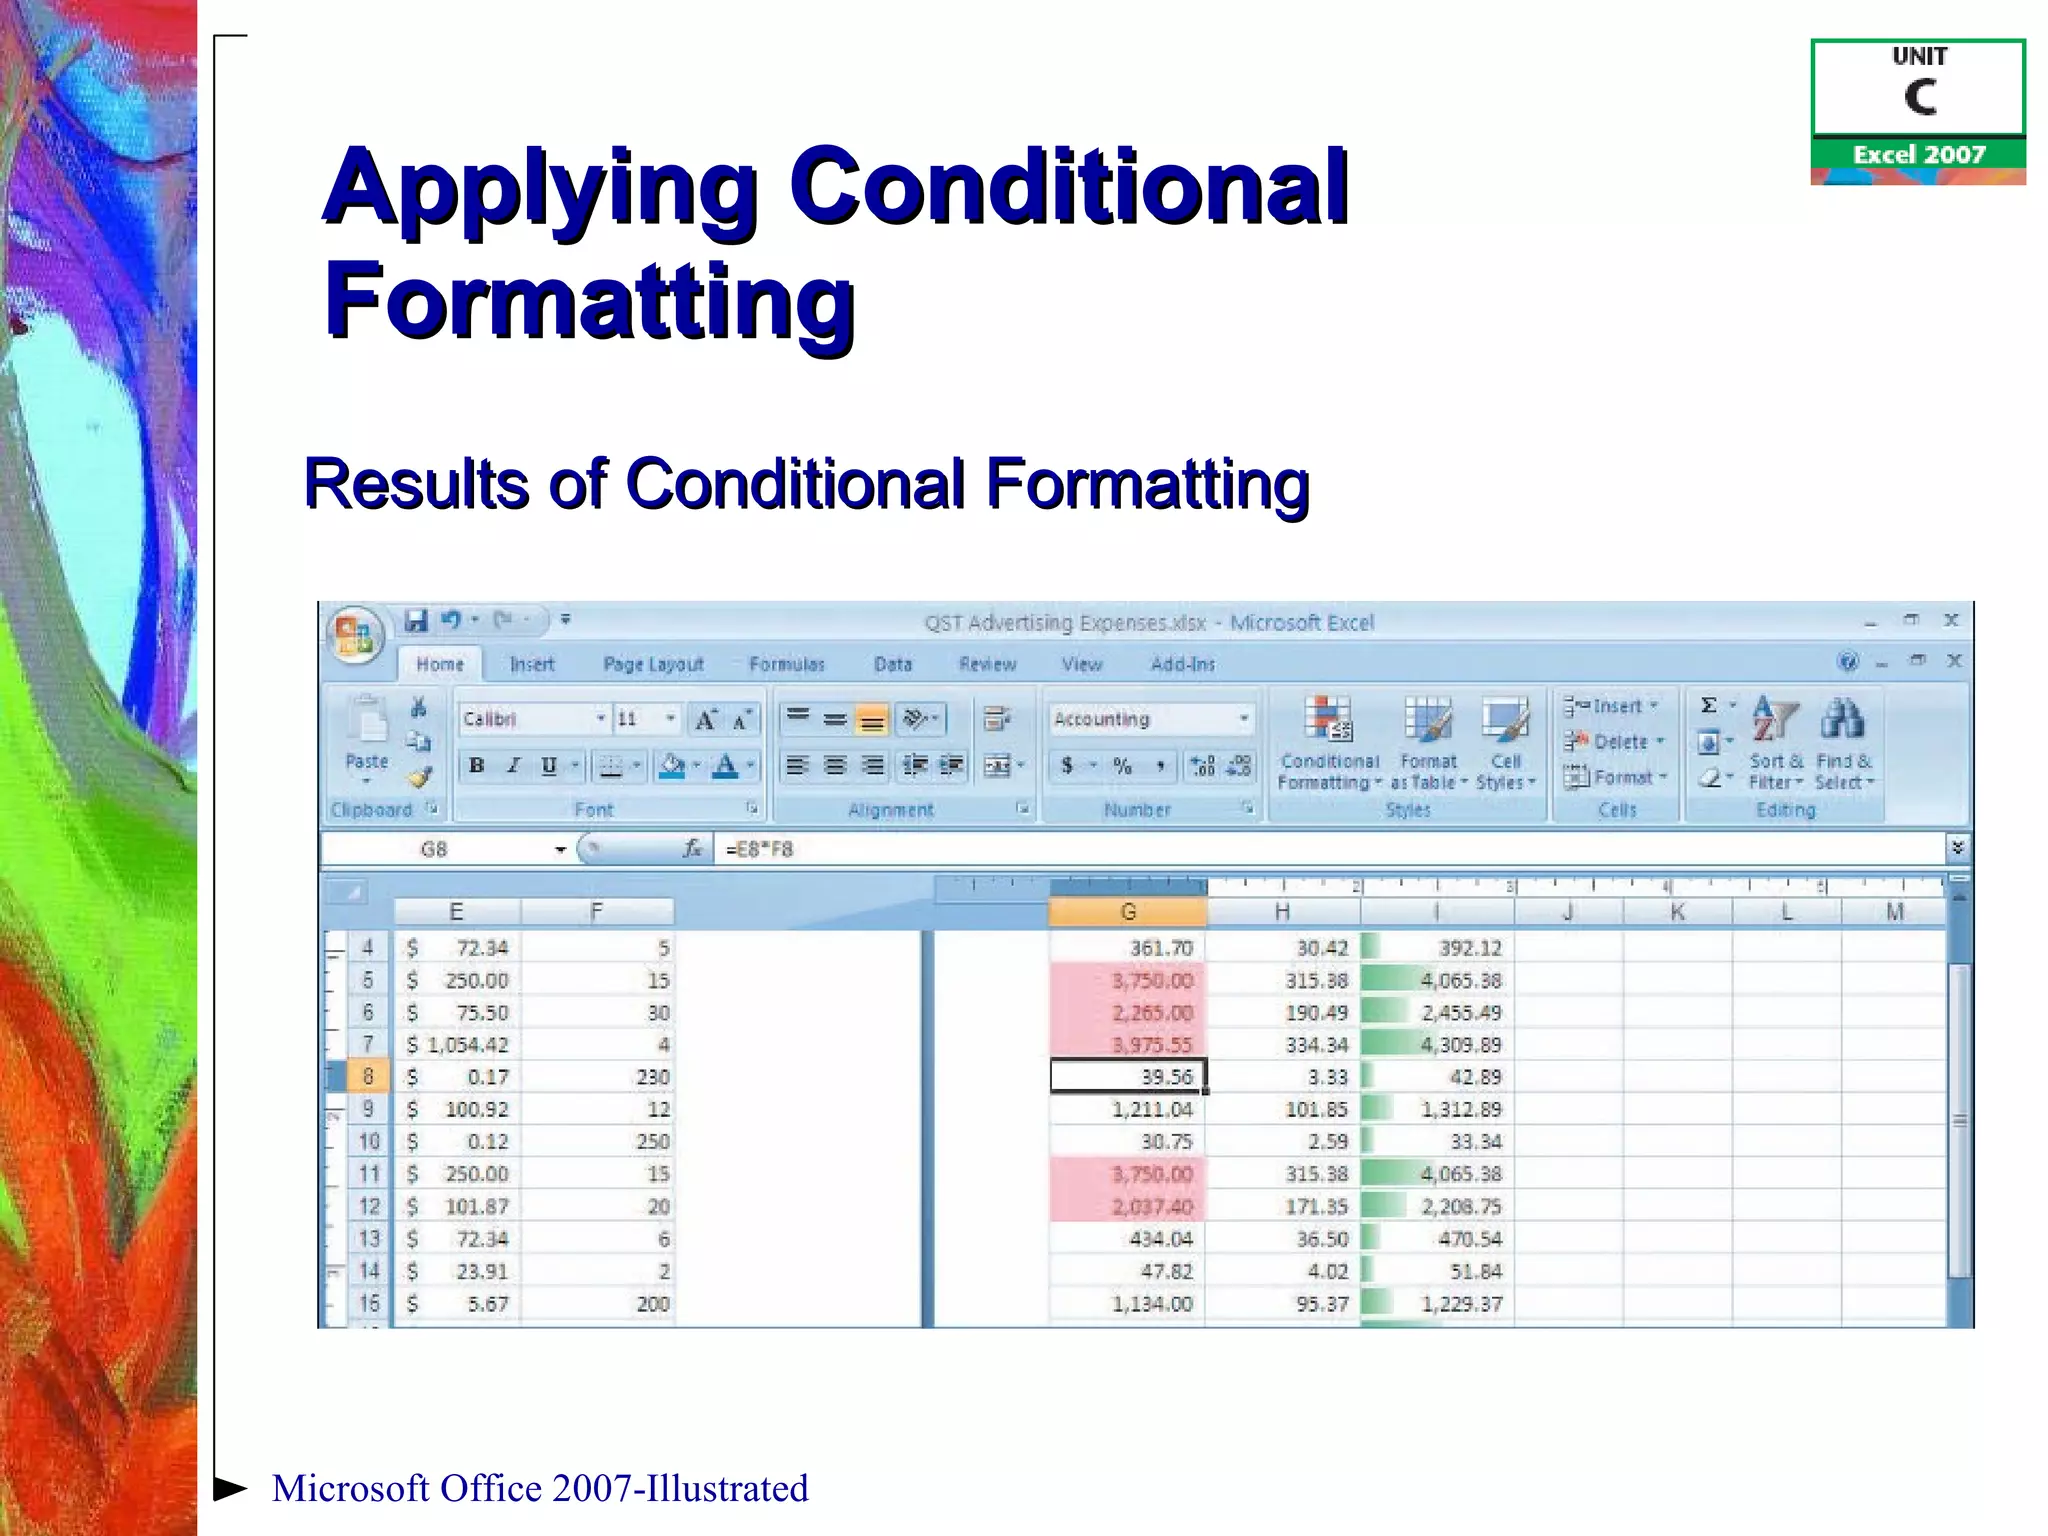
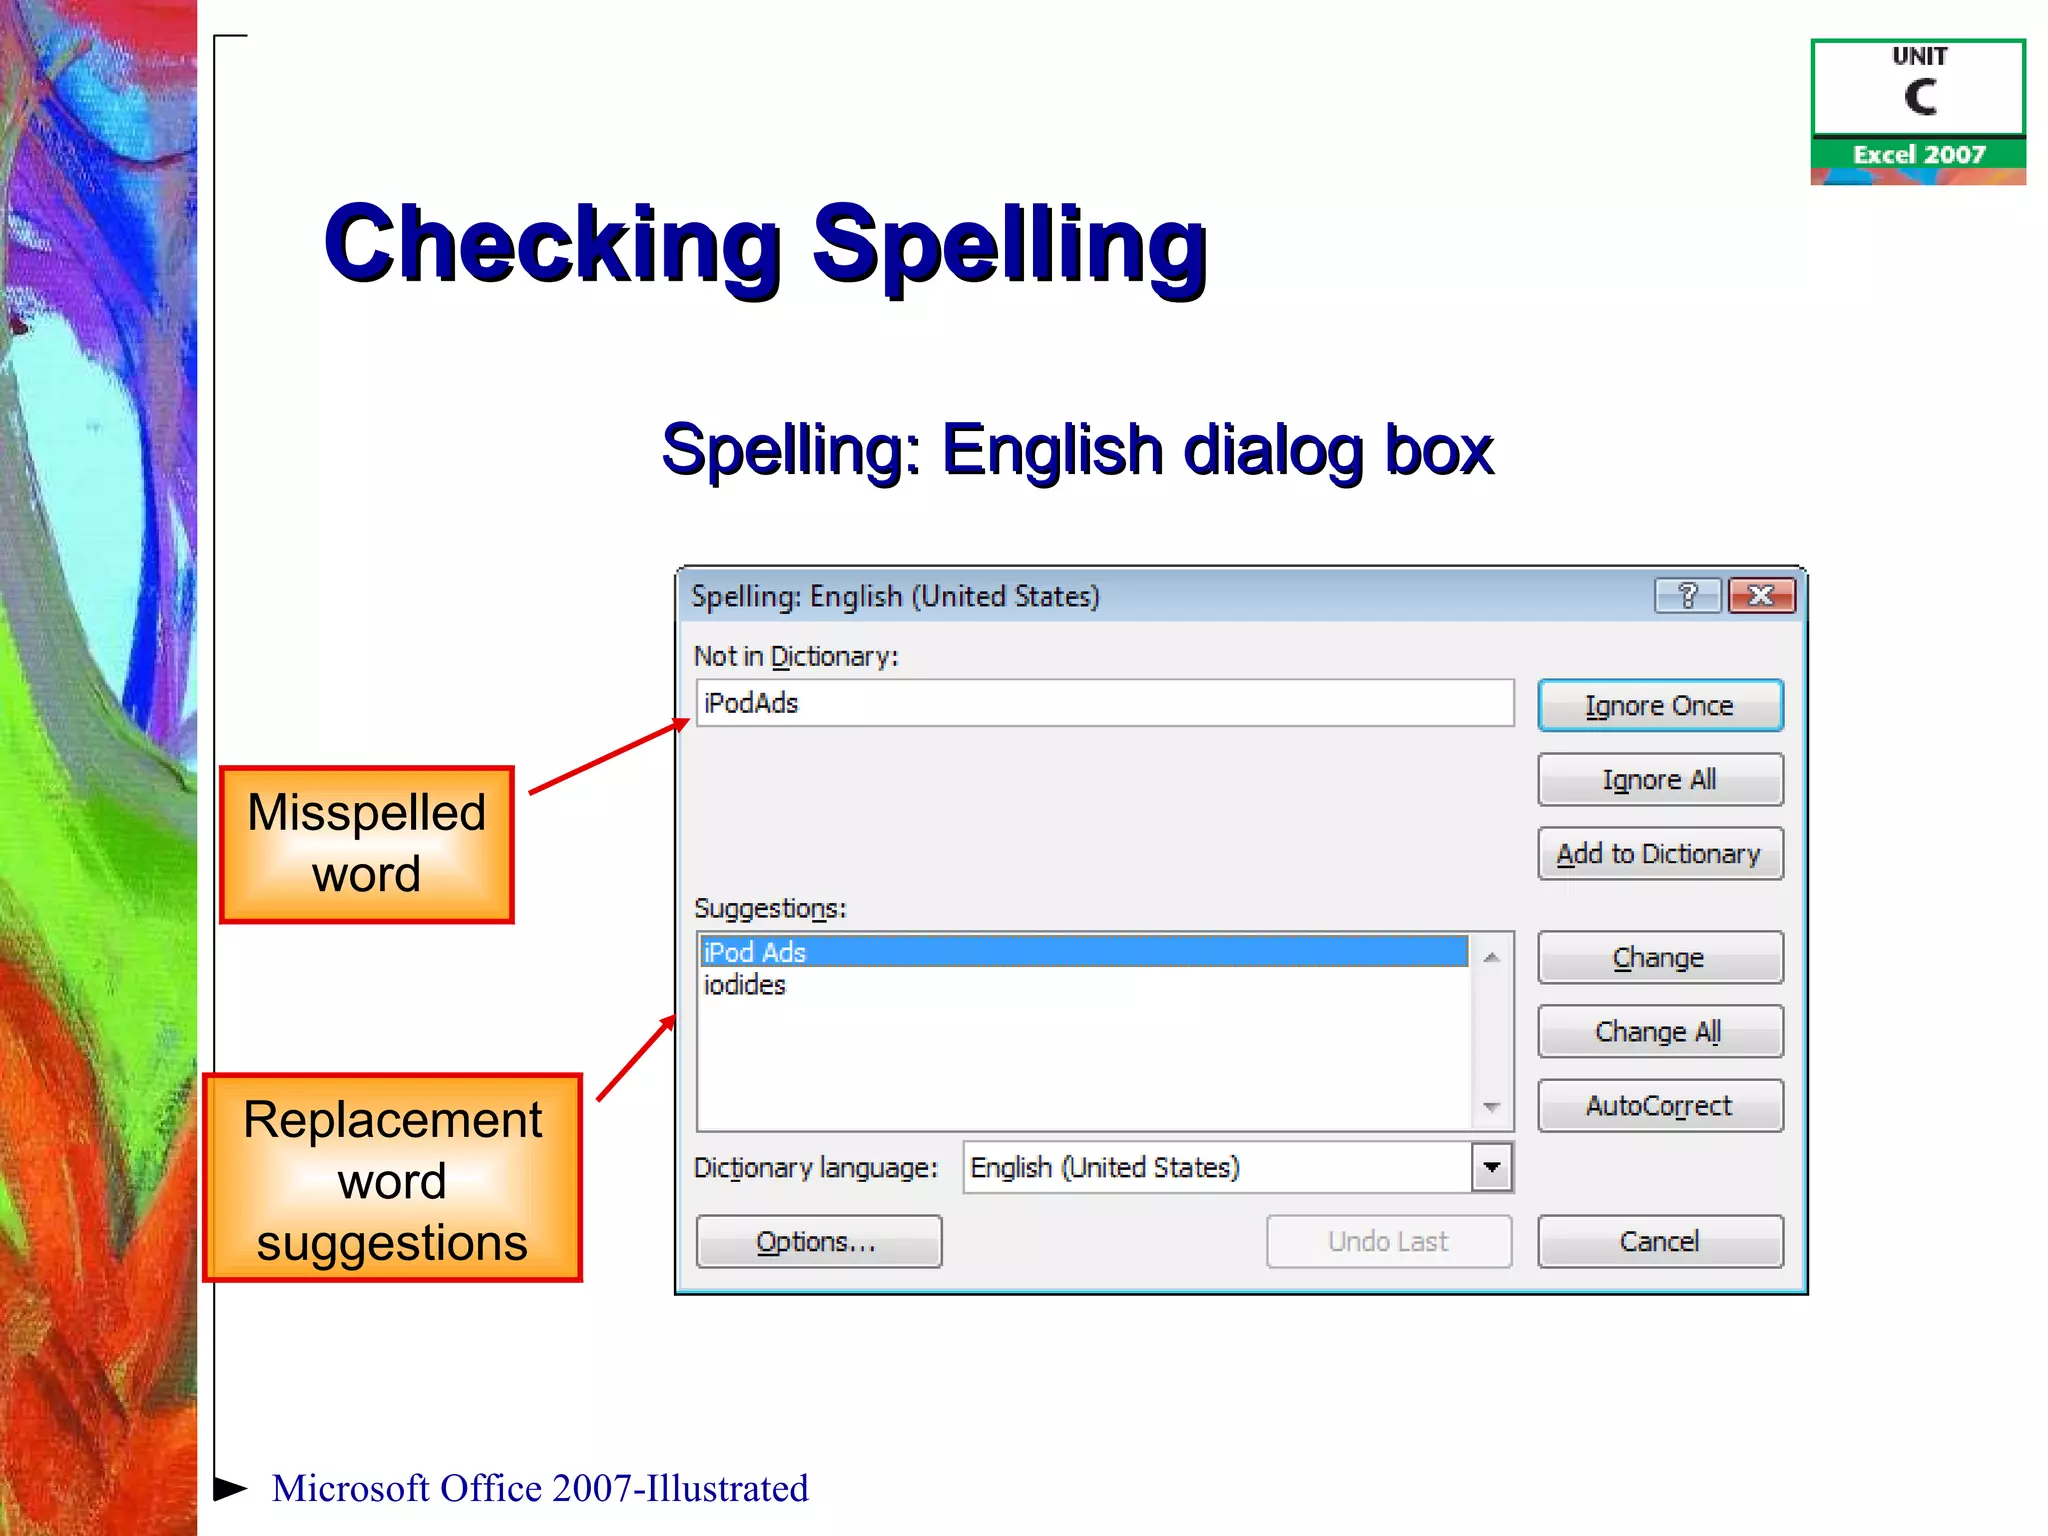
This document provides an overview of formatting and editing features in Microsoft Excel, including how to format values, change fonts and formatting, adjust columns and rows, apply colors and borders, use conditional formatting, name and move sheets, and check spelling. The objectives are covered in multiple sections with descriptions and screenshots illustrating each task.

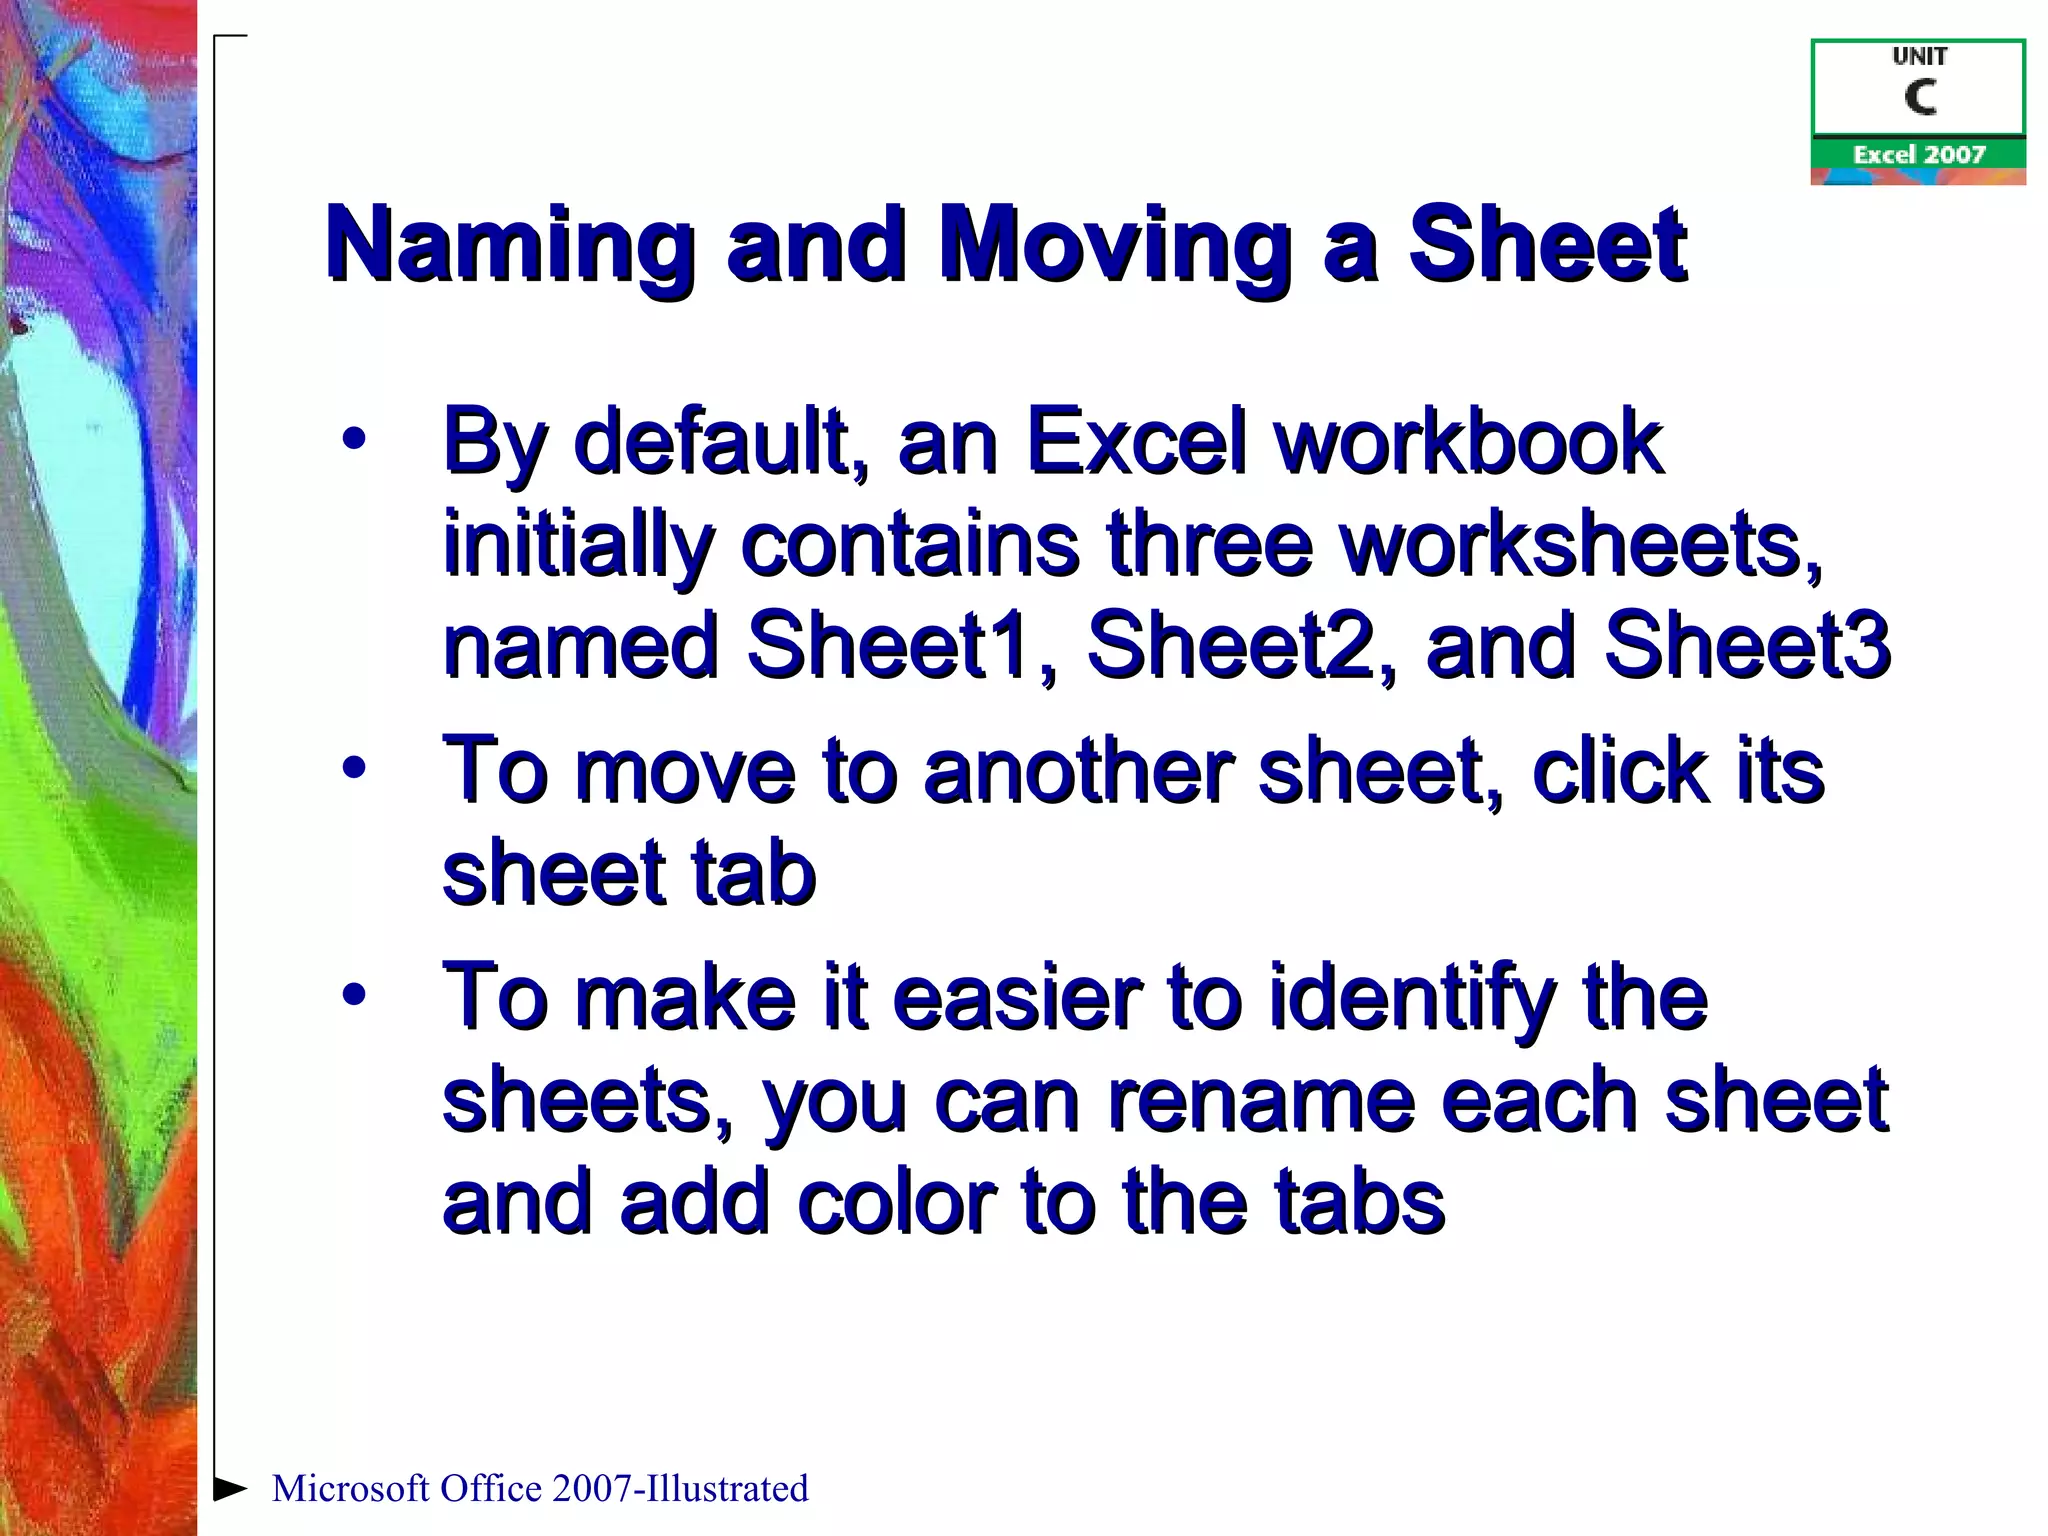
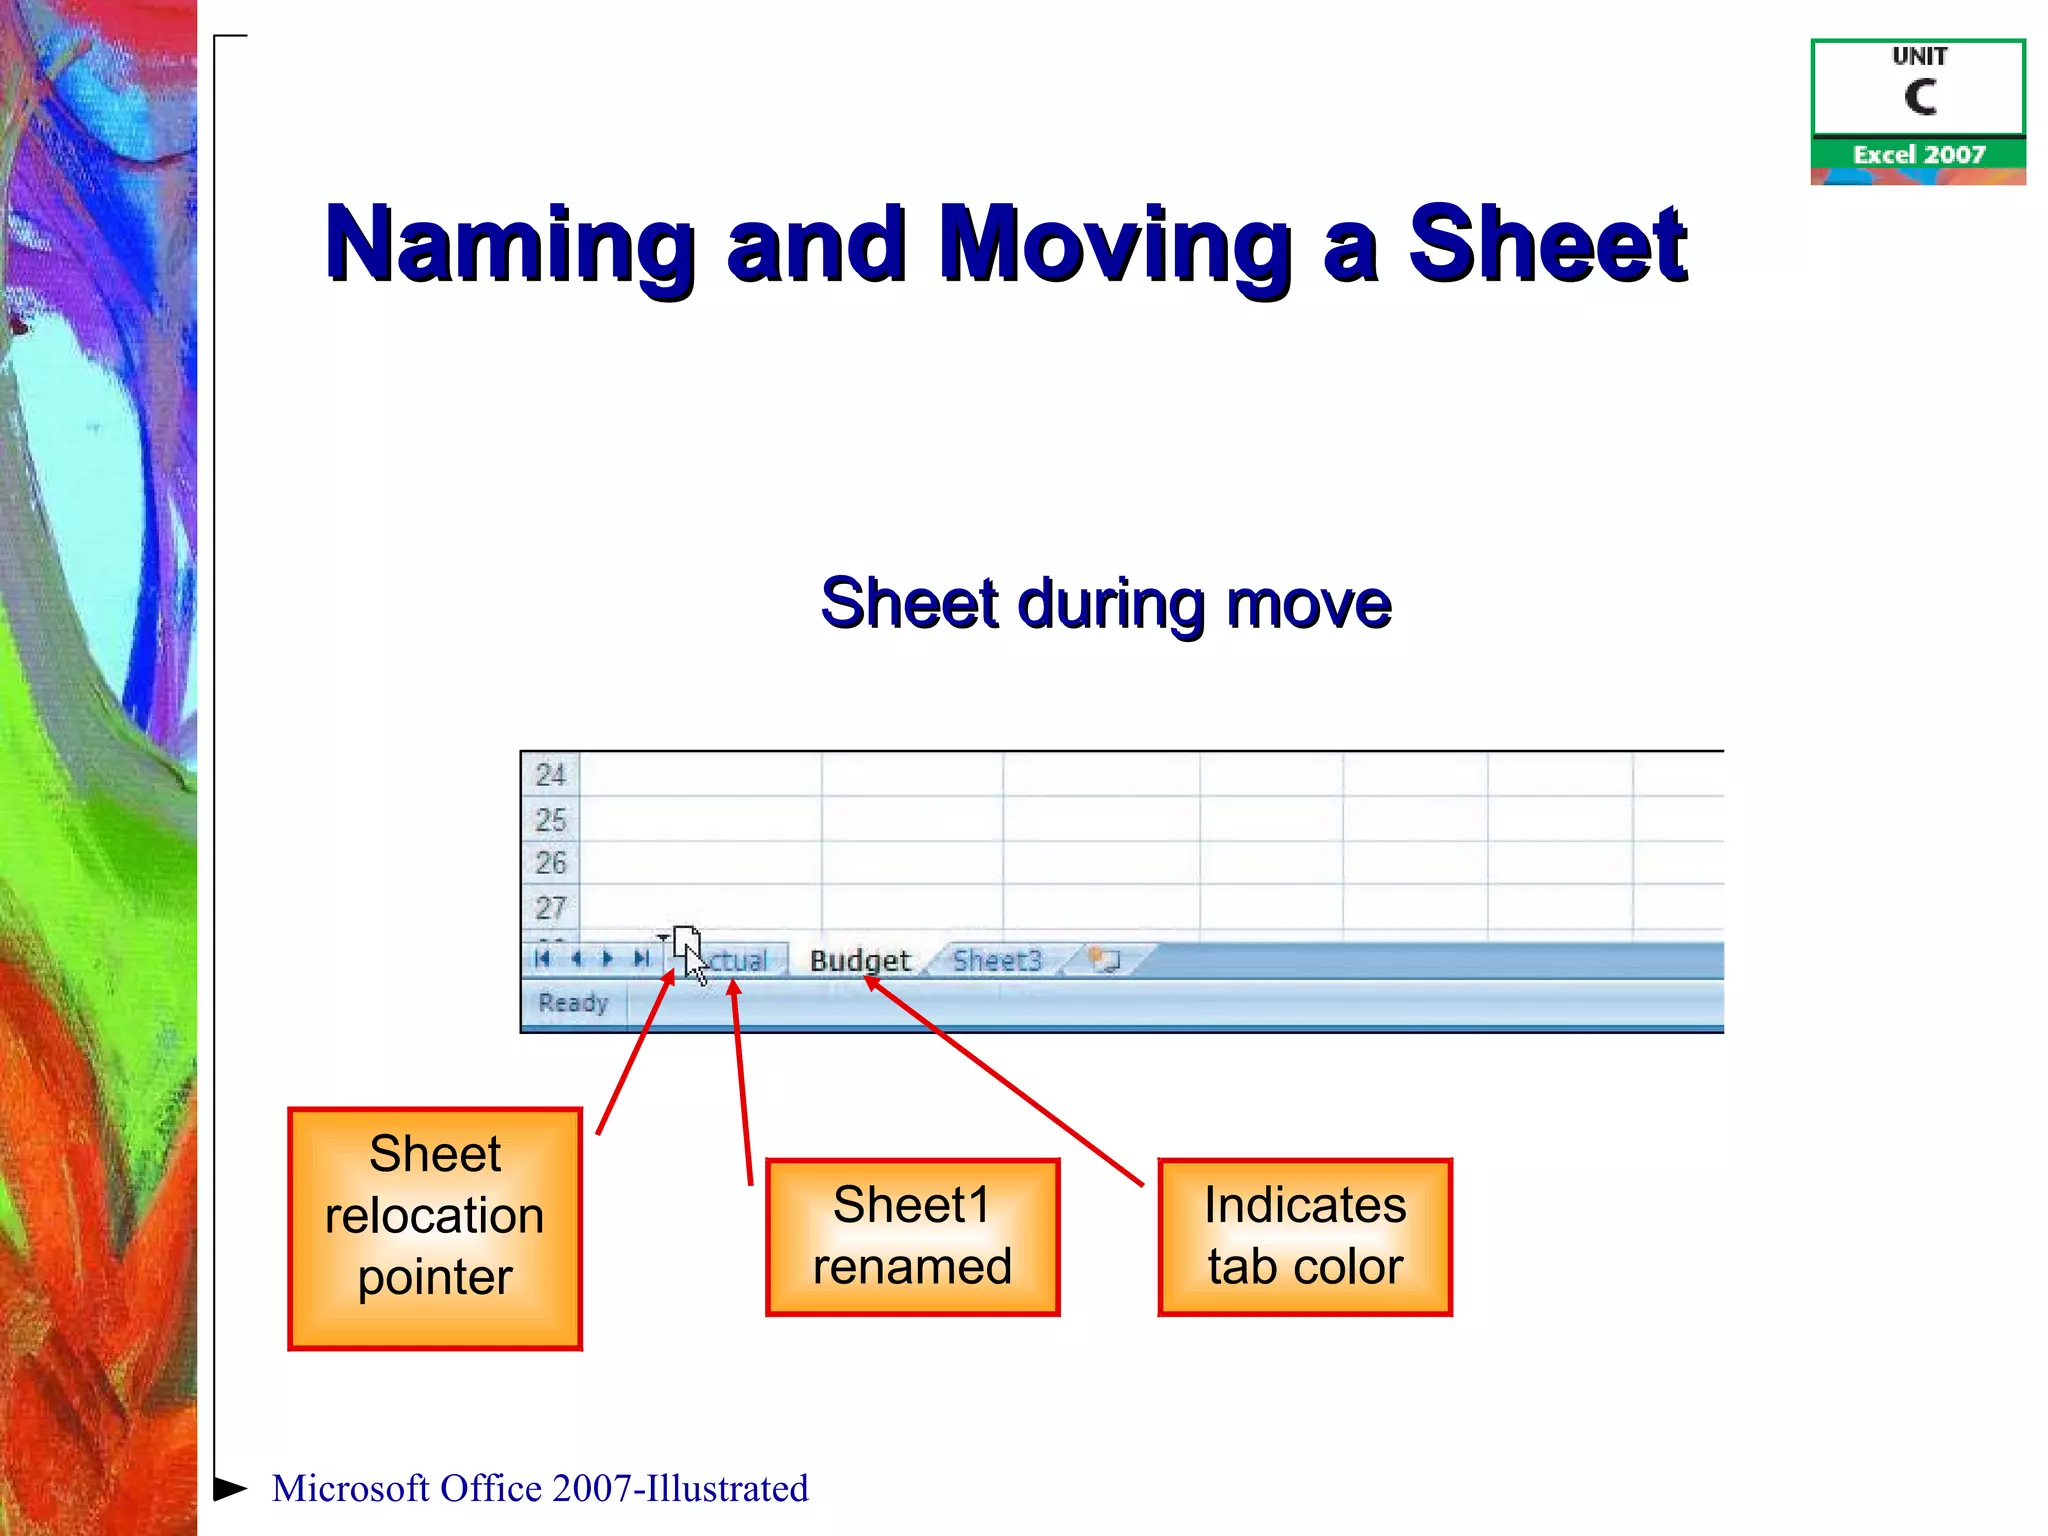
![Naming and Moving a Sheet To rename a sheet, double-click its sheet tab, type the new name, and then press [Enter] To add color to a sheet tab, right-click the sheet tab, point to Tab Color, and then choose a color You can change the order of sheets by dragging the sheet tabs Microsoft Office 2007-Illustrated](https://image.slidesharecdn.com/excel2007unitc-090910001624-phpapp02/75/Excel-2007-Unit-C-29-2048.jpg)


![Vibe Coding vs. Spec-Driven Development [Free Meetup]](https://cdn.slidesharecdn.com/ss_thumbnails/vibecodingvsspecdrivendevelopment-251209105622-43f455e7-thumbnail.jpg?width=640&height=640&fit=bounds)


