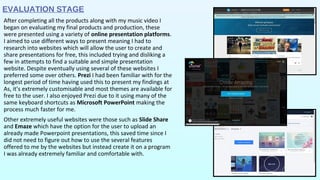
Question 4. How did you use
media technologies in the
construction and research,
planning and evaluation
stages? 
RESEARCH STAGE
During the research stage I relied heavily on laptops and computers as
the internet was required to find much of the information concerning
various artists, genres and their audiences. To find out new
information about artists I was less familiar with I used the Google
search engine, Google images was also extremely helpful when
researching examples of digipaks and promotional posters. Google
images allows the user to refine their search through selecting specific
colours, sizes, formats etc. of the images you want to view, this very
beneficial to me after deciding the colour and theme of my digipak and
poster as I could easily filter out irrelevant images and find inspiration
faster.
My IPhone was also helpful to some extent during this stage as it could
also be used for some quick, last minute research if a computer or
laptop were not available or near by.
The research on artists also extended to their music video’s and so
YouTube was an extremely helpful platform in finding this information
out. After using Google to research artists similar to our own, we would
use YouTube to find and analyse some of the artists music videos, from
this I saw many indie artists adopted their own style and made that
clearly show in their music videos through the use of props and effects
post production. We saw patterns across most indie videos and the
types of shots and locations favoured, this inspired us when planning
our own production.
RESEARCH AND PLANNING - AUDIENCE
FEEDBACK
During the research stage I could not rely solely on using secondary
research I obtained from Google, I wanted to ask people myself for
their opinions on the Indie/Indie-pop genre and also the products I had
created. To ask basic questions about Music Videos and people’s
preferences I used a free, online survey website, Survey Monkey, I
sent this around to a few classmates for their feedback but as it was
public it was completed by a few other people helping me in obtaining
a wide range of results. Another useful feature of this survey website is
the fact that it sorts results into pie charts, bar charts and simple tables
making all the data and information collected easy to view and
compare side by side.
After creating my digipak using Photoshop I decided to ask for
feedback from a few friends, I was able to do this quickly and easily
using social media platforms such as Facebook. I could send the image
on the chat from either my computer or my IPhone as Facebook has a
messenger app, this also allowed me to easily screenshot and crop the
messages sent. Using a platform such as Facebook also meant I could
easily communicate with anyone at anytime as long as they were also
online to receive the message. I did the same for the promotional
poster I created on Photoshop and was able to create a final product I
was satisfied with through receiving the feedback.
CONSTRUCTION – DIGIPAK AND POSTER
After sketching out ideas of my digipak I created my first draft
using the photo manipulation software's Photoshop and Gimp.
I initially started the digipak on in Photoshop using the IMac at
school, however as I did not have this software installed at
home I decided to complete the design on a similar yet free
software called Gimp which I had previously installed and
regularly used on my home computer. Gimp contains most of
the features which come with Photoshop and I was able to
easily able to warp, blur, add effects, add text etc…to my
digipak design. After completing my digipak I simply exported
the image in jpg format so it could be uploaded to my Weebly
blog. When creating the final version of my digipak I found the
process to be much quicker as I could simply choose which
layers to erase and which to keep according to the audience
feedback I had received.
I followed the a similar process for both the first and final drafts
of my promotional poster. Through using Gimp I was able to
select the colour’s I had used to create my album cover and
replicate the style for my poster to maintain the colour theme
and to clearly show the link between the two products.
CONSTRUCTION – MUSIC VIDEO
During the construction stage we used the Cannon 100D dslr to
film the entire video, this camera had a manual focus feature we
found this extremely useful as our music video contained many
close up and extreme close up shots which would have been
difficult to accomplish without the manual focus feature, it also
gave the the video a more professional look overall.
After filming we uploaded and stored all our footage on an IMac,
this was helpful as the all IMac’s contain Final Cut Pro, the video
editing software which my partner and I used to place together
and edit the footage. As we had previously used this software for
our As production in year 12 me and my partner were very
familiar with its many features and could therefore make use of
some features we had previously ignored which helped improve
the quality and appearance of our final product greatly such as
colour correction, video and audio effects, increasing and
decreasing the speed, overlapping shots etc…Final Cut Pro also
automatically saves the project you’re working on, meaning
forgetting to save and loosing our work was not an issue we could
have faced.
EVALUATION STAGE
After completing all the products along with my music video I
began on evaluating my final products and production, these
were presented using a variety of online presentation platforms.
I aimed to use different ways to present meaning I had to
research into websites which will allow the user to create and
share presentations for free, this included trying and disliking a
few in attempts to find a suitable and simple presentation
website. Despite eventually using several of these websites I
preferred some over others. Prezi I had been familiar with for the
longest period of time having used this to present my findings at
As, it’s extremely customisable and most themes are available for
free to the user. I also enjoyed Prezi due to it using many of the
same keyboard shortcuts as Microsoft PowerPoint making the
process much faster for me.
Other extremely useful websites were those such as Slide Share
and Emaze which have the option for the user to upload an
already made Powerpoint presentations, this saved time since I
did not need to figure out how to use the several features
offered to me by the websites but instead create it on a program
I was already extremely familiar and comfortable with.
WEEBLY – RESEARCH AND
PLANNING
I used Weebly to upload all my research, planning,
final product and evaluation. This was a very good
website for this purpose as it allows users to embed
codes, upload YouTube videos, insert images and
more, there are also various themes and layouts to
choose from so I was able to bring across my own
personality through customising the blog. The blog is
also free to use so suitable for a student like me.
Anyone is able to access the blog, needing only the
link, this was extremely useful as me and my partner
could easily view each others blogs and share the
information we had collected on there.
The blog behaved as a diary for the progress I was
making throughout my research and planning, through
its simple layout I was able to see the sections I had
already completed and what may need to be
expanded.

Evaluation Question 4

  • 1.
    Question 4. Howdid you use media technologies in the construction and research, planning and evaluation stages? 
  • 2.
    RESEARCH STAGE During the researchstage I relied heavily on laptops and computers as the internet was required to find much of the information concerning various artists, genres and their audiences. To find out new information about artists I was less familiar with I used the Google search engine, Google images was also extremely helpful when researching examples of digipaks and promotional posters. Google images allows the user to refine their search through selecting specific colours, sizes, formats etc. of the images you want to view, this very beneficial to me after deciding the colour and theme of my digipak and poster as I could easily filter out irrelevant images and find inspiration faster. My IPhone was also helpful to some extent during this stage as it could also be used for some quick, last minute research if a computer or laptop were not available or near by. The research on artists also extended to their music video’s and so YouTube was an extremely helpful platform in finding this information out. After using Google to research artists similar to our own, we would use YouTube to find and analyse some of the artists music videos, from this I saw many indie artists adopted their own style and made that clearly show in their music videos through the use of props and effects post production. We saw patterns across most indie videos and the types of shots and locations favoured, this inspired us when planning our own production.
  • 3.
    RESEARCH AND PLANNING- AUDIENCE FEEDBACK During the research stage I could not rely solely on using secondary research I obtained from Google, I wanted to ask people myself for their opinions on the Indie/Indie-pop genre and also the products I had created. To ask basic questions about Music Videos and people’s preferences I used a free, online survey website, Survey Monkey, I sent this around to a few classmates for their feedback but as it was public it was completed by a few other people helping me in obtaining a wide range of results. Another useful feature of this survey website is the fact that it sorts results into pie charts, bar charts and simple tables making all the data and information collected easy to view and compare side by side. After creating my digipak using Photoshop I decided to ask for feedback from a few friends, I was able to do this quickly and easily using social media platforms such as Facebook. I could send the image on the chat from either my computer or my IPhone as Facebook has a messenger app, this also allowed me to easily screenshot and crop the messages sent. Using a platform such as Facebook also meant I could easily communicate with anyone at anytime as long as they were also online to receive the message. I did the same for the promotional poster I created on Photoshop and was able to create a final product I was satisfied with through receiving the feedback.
  • 4.
    CONSTRUCTION – DIGIPAKAND POSTER After sketching out ideas of my digipak I created my first draft using the photo manipulation software's Photoshop and Gimp. I initially started the digipak on in Photoshop using the IMac at school, however as I did not have this software installed at home I decided to complete the design on a similar yet free software called Gimp which I had previously installed and regularly used on my home computer. Gimp contains most of the features which come with Photoshop and I was able to easily able to warp, blur, add effects, add text etc…to my digipak design. After completing my digipak I simply exported the image in jpg format so it could be uploaded to my Weebly blog. When creating the final version of my digipak I found the process to be much quicker as I could simply choose which layers to erase and which to keep according to the audience feedback I had received. I followed the a similar process for both the first and final drafts of my promotional poster. Through using Gimp I was able to select the colour’s I had used to create my album cover and replicate the style for my poster to maintain the colour theme and to clearly show the link between the two products.
  • 5.
    CONSTRUCTION – MUSICVIDEO During the construction stage we used the Cannon 100D dslr to film the entire video, this camera had a manual focus feature we found this extremely useful as our music video contained many close up and extreme close up shots which would have been difficult to accomplish without the manual focus feature, it also gave the the video a more professional look overall. After filming we uploaded and stored all our footage on an IMac, this was helpful as the all IMac’s contain Final Cut Pro, the video editing software which my partner and I used to place together and edit the footage. As we had previously used this software for our As production in year 12 me and my partner were very familiar with its many features and could therefore make use of some features we had previously ignored which helped improve the quality and appearance of our final product greatly such as colour correction, video and audio effects, increasing and decreasing the speed, overlapping shots etc…Final Cut Pro also automatically saves the project you’re working on, meaning forgetting to save and loosing our work was not an issue we could have faced.
  • 6.
    EVALUATION STAGE After completingall the products along with my music video I began on evaluating my final products and production, these were presented using a variety of online presentation platforms. I aimed to use different ways to present meaning I had to research into websites which will allow the user to create and share presentations for free, this included trying and disliking a few in attempts to find a suitable and simple presentation website. Despite eventually using several of these websites I preferred some over others. Prezi I had been familiar with for the longest period of time having used this to present my findings at As, it’s extremely customisable and most themes are available for free to the user. I also enjoyed Prezi due to it using many of the same keyboard shortcuts as Microsoft PowerPoint making the process much faster for me. Other extremely useful websites were those such as Slide Share and Emaze which have the option for the user to upload an already made Powerpoint presentations, this saved time since I did not need to figure out how to use the several features offered to me by the websites but instead create it on a program I was already extremely familiar and comfortable with.
  • 7.
    WEEBLY – RESEARCHAND PLANNING I used Weebly to upload all my research, planning, final product and evaluation. This was a very good website for this purpose as it allows users to embed codes, upload YouTube videos, insert images and more, there are also various themes and layouts to choose from so I was able to bring across my own personality through customising the blog. The blog is also free to use so suitable for a student like me. Anyone is able to access the blog, needing only the link, this was extremely useful as me and my partner could easily view each others blogs and share the information we had collected on there. The blog behaved as a diary for the progress I was making throughout my research and planning, through its simple layout I was able to see the sections I had already completed and what may need to be expanded.