Here are the key points about authentication modes:
- NetWorker Module for SQL Server works with both Windows authentication mode and mixed mode (Windows authentication and SQL authentication) in SQL Server.
- In Windows authentication mode, the Windows logon account used by the module must be granted the SQL Server sysadmin role.
- In mixed mode, the module can connect using either a Windows account or SQL login credentials that have sysadmin privileges.
- The module processes need sysadmin privileges to issue T-SQL BACKUP commands and open a shared memory handle for backups.
So in summary, the authentication mode doesn't impact functionality, but the account(s) used by the module need to have SQL Server sysadmin role

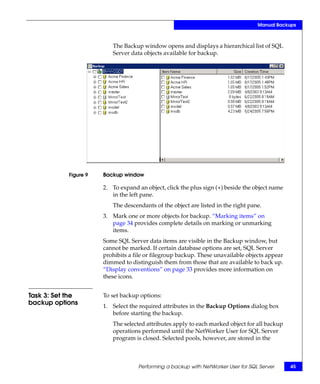
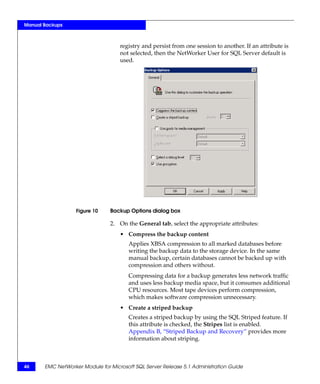
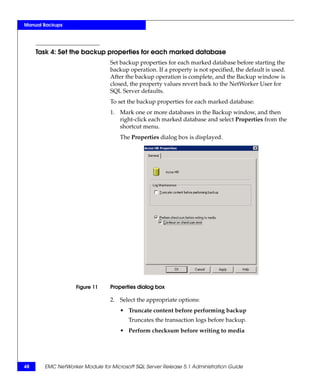
![Preface
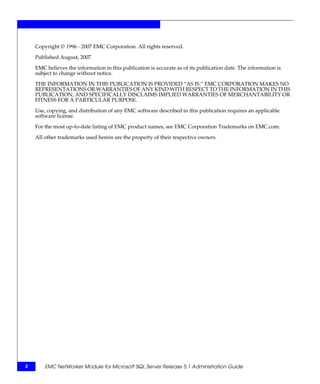
Typographical conventions
EMC uses the following type style conventions in this document:
Normal Used in running (nonprocedural) text for:
• Names of interface elements (such as names of windows,
dialog boxes, buttons, fields, and menus)
• Names of resources, attributes, pools, Boolean expressions,
buttons, DQL statements, keywords, clauses, environment
variables, filenames, functions, utilities
• URLs, pathnames, filenames, directory names, computer
names, links, groups, service keys, file systems, notifications
Bold: Used in running (nonprocedural) text for:
• Names of commands, daemons, options, programs,
processes, services, applications, utilities, kernels,
notifications, system call, man pages
Used in procedures for:
• Names of interface elements (such as names of windows,
dialog boxes, buttons, fields, and menus)
• What user specifically selects, clicks, presses, or types
Italic: Used in all text (including procedures) for:
• Full titles of publications referenced in text
• Emphasis (for example a new term)
• Variables
Courier: Used for:
• System output, such as an error message or script
• URLs, complete paths, filenames, prompts, and syntax when
shown outside of running text
Courier bold: Used for:
• Specific user input (such as commands)
Courier italic: Used in procedures for:
• Variables on command line
• User input variables
<> Angle brackets enclose parameter or variable values supplied by
the user
[] Square brackets enclose optional values
| Vertical bar indicates alternate selections - the bar means “or”
{} Braces indicate content that you must specify (that is, x or y or z)
... Ellipses indicate nonessential information omitted from the
example
EMC NetWorker Module for Microsoft SQL Server Release 5.1 Administration Guide 11](https://image.slidesharecdn.com/emc-networker-module-for-microsoft-sql-server-release-51912/85/EMC-NetWorker-Module-for-Microsoft-SQL-Server-Release-5-1-9-320.jpg)


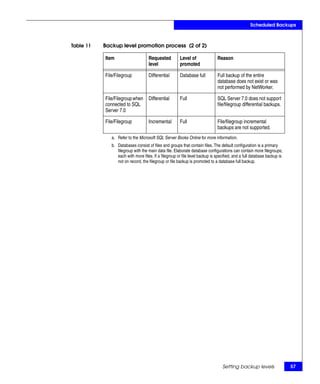
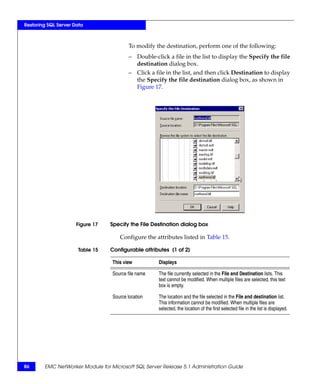
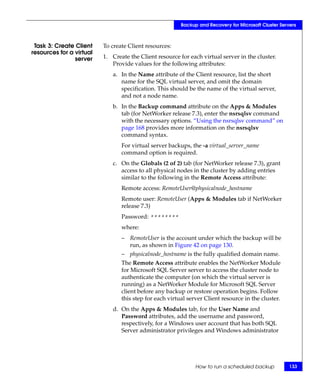
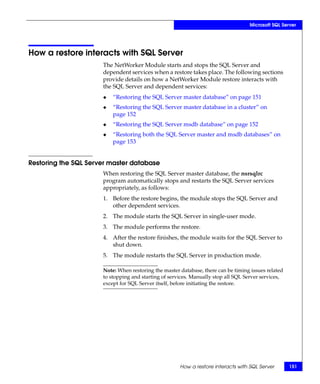
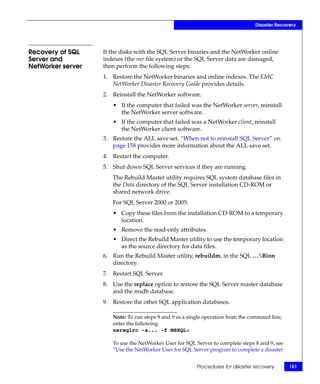
![Scheduled Backups
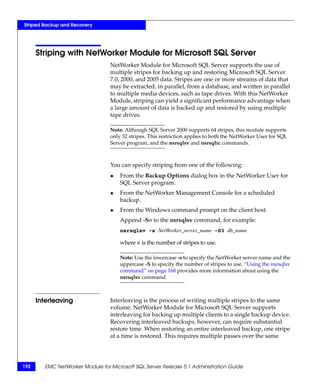
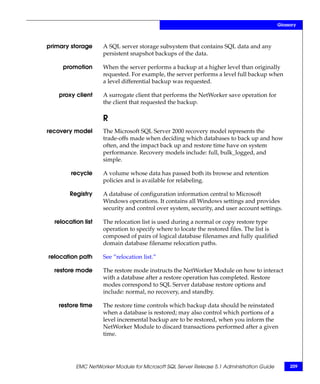
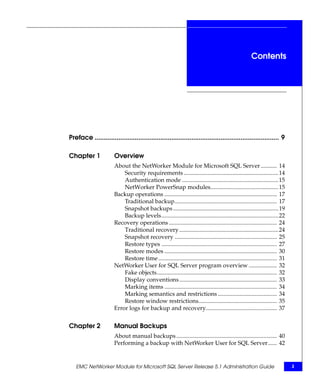
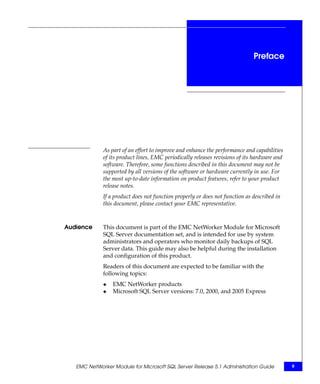
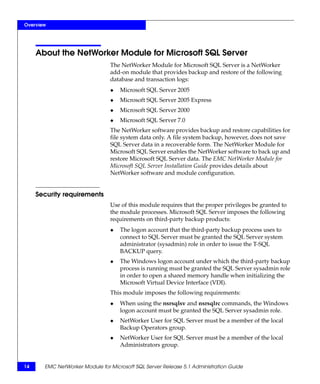
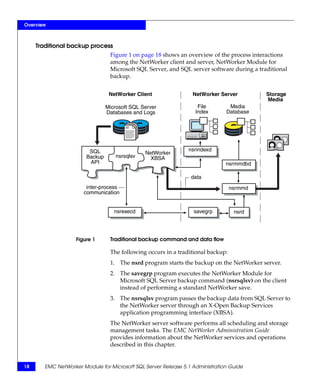
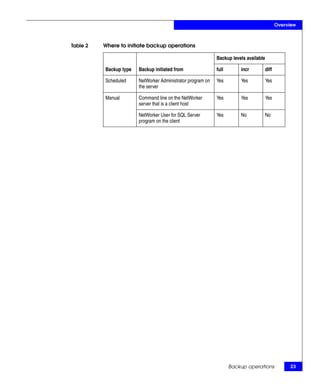
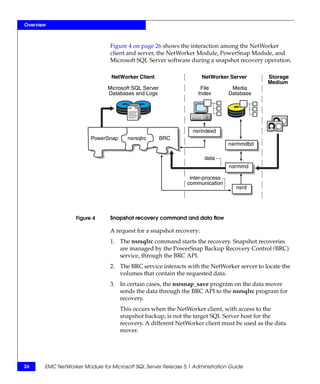
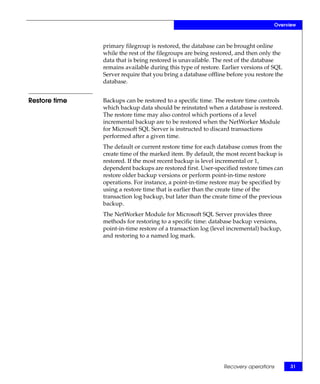
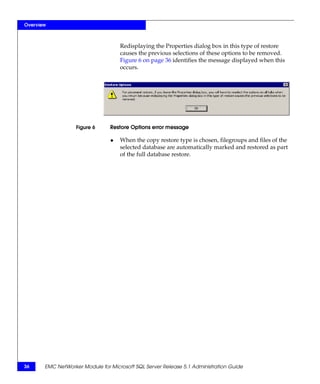
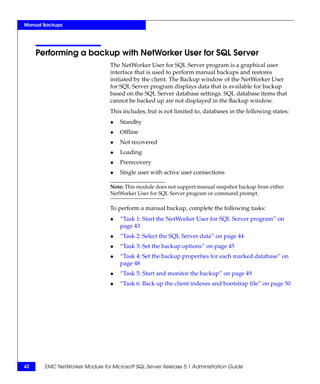
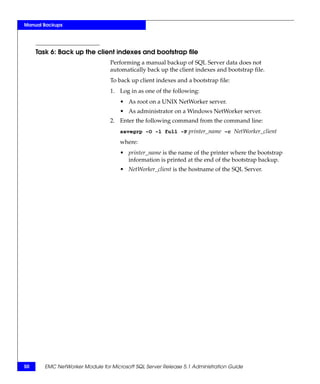
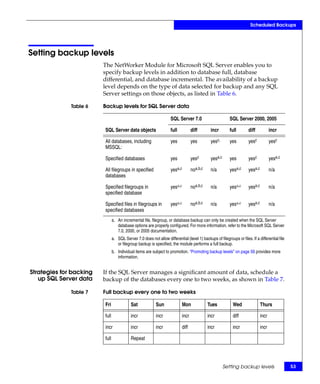
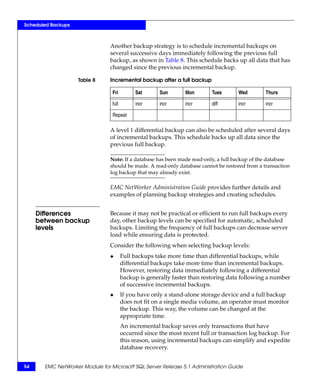
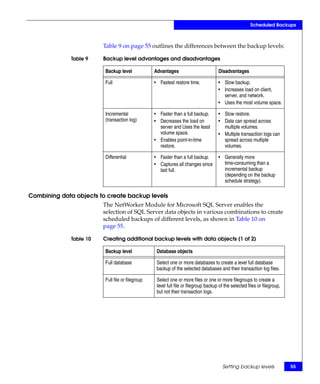
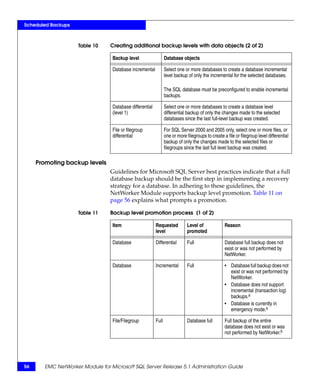
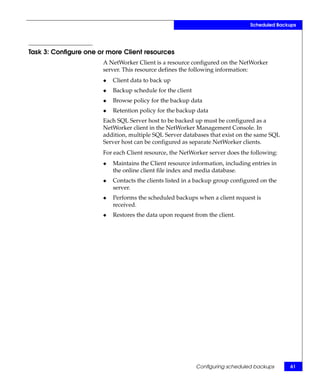
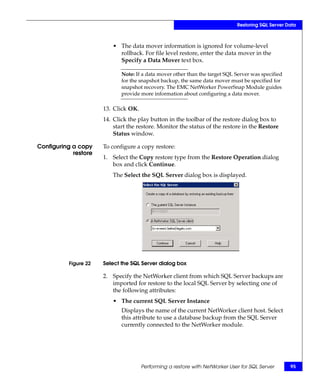
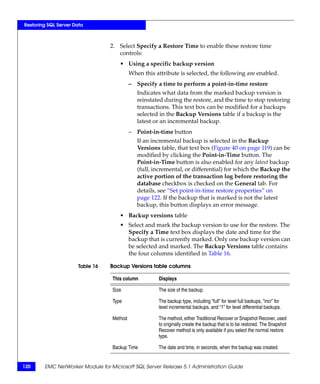
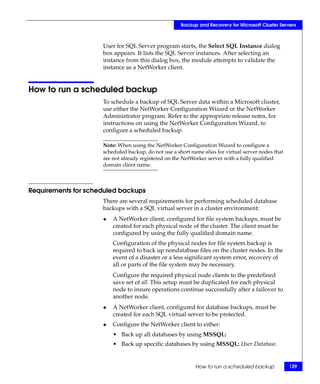
Table 13 on page 62 describes the settings used when creating a
NetWorker client for a SQL Server host.
Table 13 Client resource attribute settings (1 of 2)
Attribute NetWorker Module Requirements
Name Enter the SQL Server’s hostname. If you create multiple Client resources
for the same SQL Server, use the same name for each.
Comment If using multiple Client resources for the same SQL Server host, enter a
comment to identify the purpose of each.
Save Set Specify any valid save set names, for example:
MSSQL:
or
MSSQL:dbName1 [MSSQL:dbName2 MSSQL:dbName3 ...]
For example, entering only MSSQL: always yields a backup of all
databases on the SQL Server host.
A snapshot backup fails if more than one database, or MSSQL: is
specified for the Save Set attribute. For snapshot backups, list only one
database for the Save Set attribute.
Group Select a backup group. “Task 2: Configure one or more group resources”
on page 60 provides more information.
Schedule Select a backup schedule. “Task 4: Configure a schedule and set backup
levels” on page 63 provides more information.
Browse Policy Select a browse policy to specify how long the NetWorker server retains
client file index entries.
Retention Policy Select a retention policy to specify how long the NetWorker server
retains media entries for the client’s backups.
Storage Node If the NetWorker server has one or more remote storage nodes that are
to be used for backing up the SQL Server’s data, enter the name of each
storage node in the order they are to be used. The default storage node,
nsrserverhost, represents the NetWorker server.
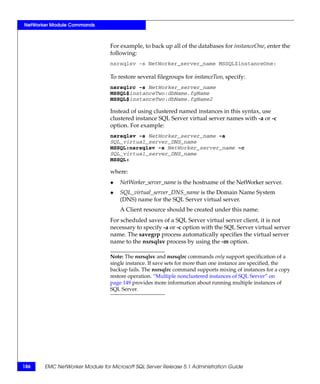
Backup Enter the nsrsqlsv command and any necessary command options.
Command “Using the nsrsqlsv command” on page 168 provides information about
nsrsqlsv options.
For virtual server backups, the -a virtual_server_name command option
is required.
62 EMC NetWorker Module for Microsoft SQL Server Release 5.1 Administration Guide](https://image.slidesharecdn.com/emc-networker-module-for-microsoft-sql-server-release-51912/85/EMC-NetWorker-Module-for-Microsoft-SQL-Server-Release-5-1-60-320.jpg)
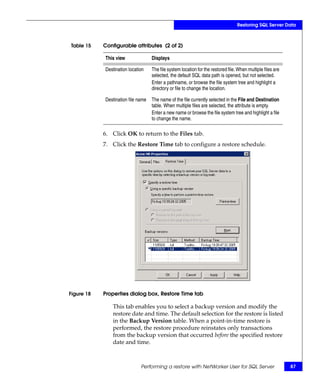
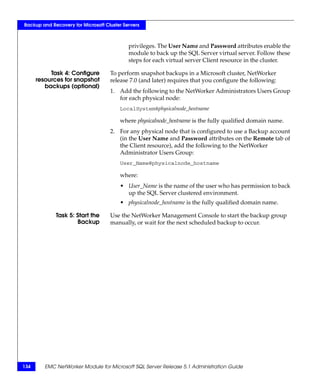
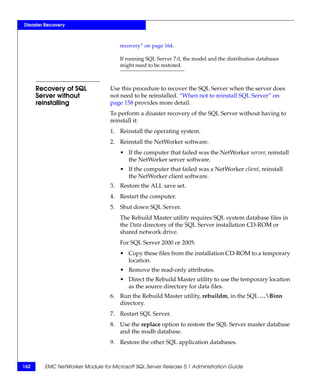
![Scheduled Backups
The EMC NetWorker Administration Guide provides instructions on
configuring Notification resources.
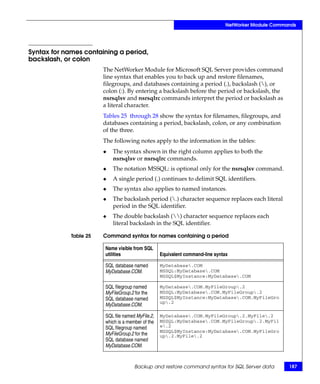
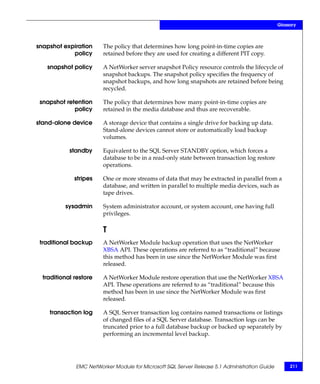
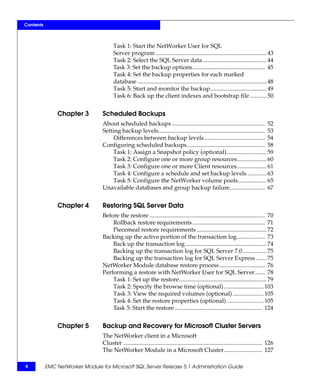
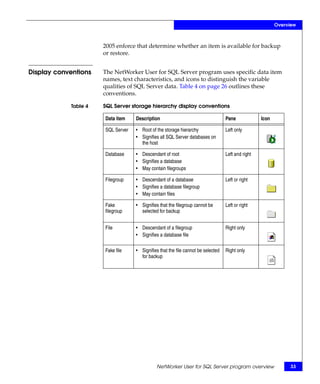
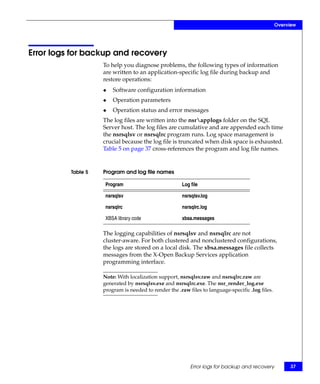
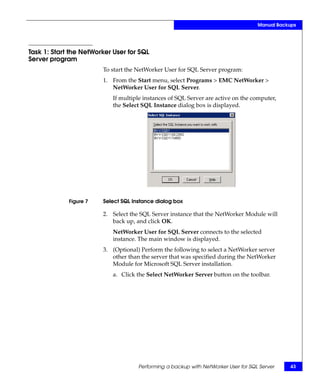
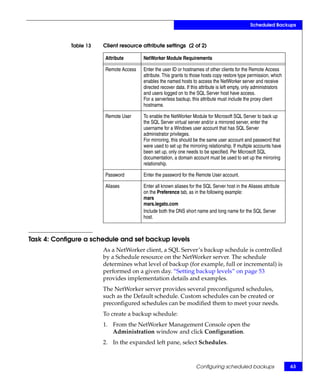
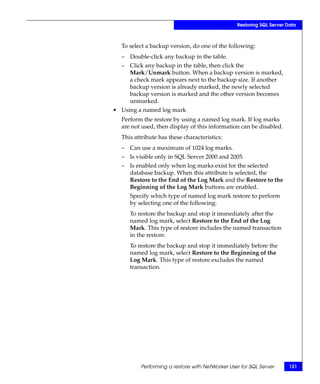
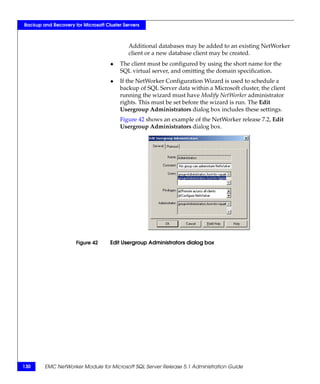
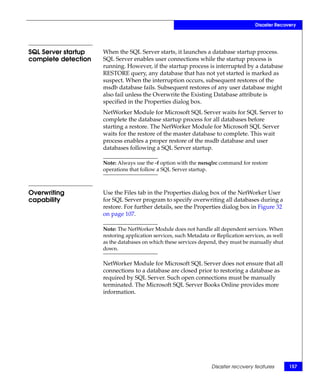
You can override the scheduled backup start time and start the group
manually. This is equivalent to selecting Start Now in the Autostart
attribute of the Group resource.
Note: When a group backup is started manually, the NetWorker server runs
the backup at the level of the next scheduled backup, such as full, level [1 – 9],
incremental, or consolidated.
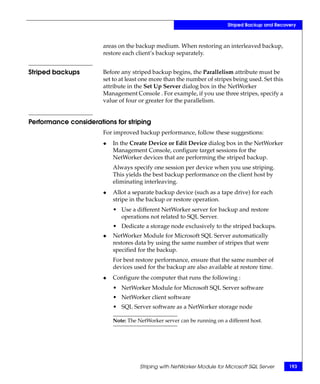
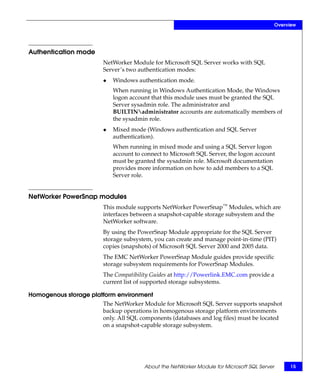
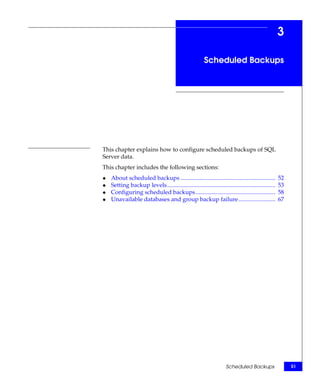
To manually start a group backup:
1. Open the NetWorker Management Console. From the
Administration window, click Monitoring.
2. Click the Groups tab.
3. Right-click the group to start, then select Start.
4. Click Yes to confirm the start.
The NetWorker server immediately backs up the clients in the group,
overriding the scheduled backup start time. The group icon changes
to the clock icon until the backup has completed or is interrupted.
The EMC NetWorker Administration Guide provides more details.
66 EMC NetWorker Module for Microsoft SQL Server Release 5.1 Administration Guide](https://image.slidesharecdn.com/emc-networker-module-for-microsoft-sql-server-release-51912/85/EMC-NetWorker-Module-for-Microsoft-SQL-Server-Release-5-1-64-320.jpg)

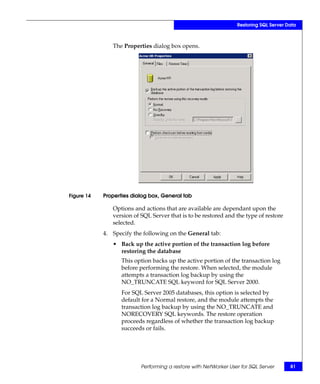
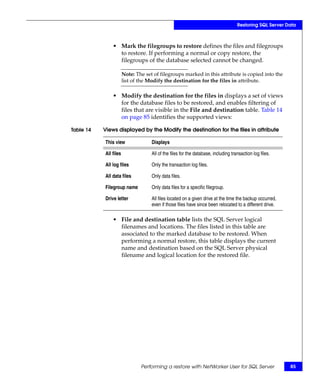
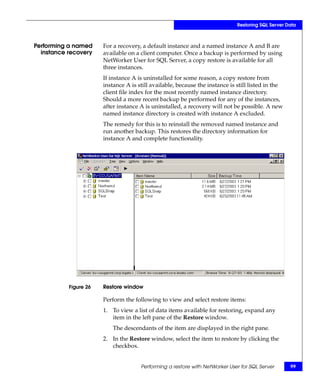
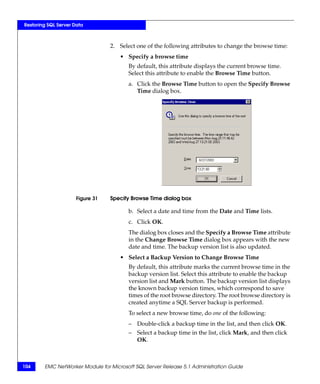
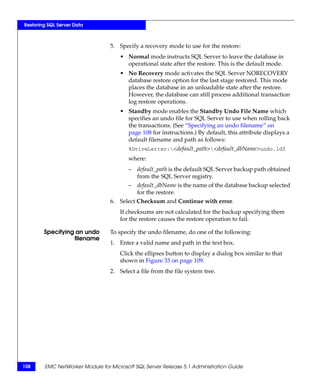
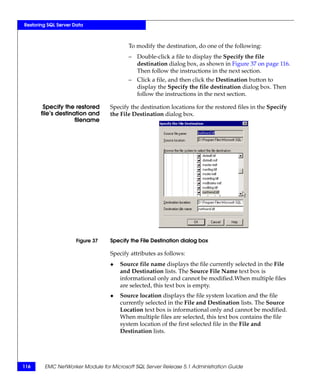
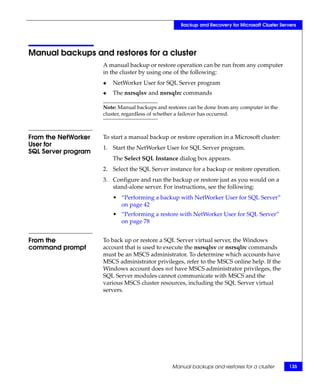
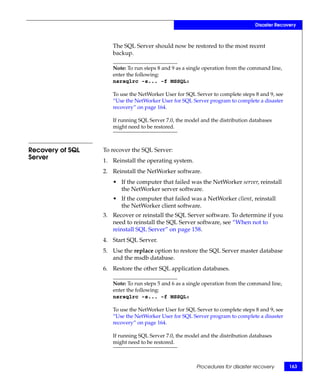
![Restoring SQL Server Data
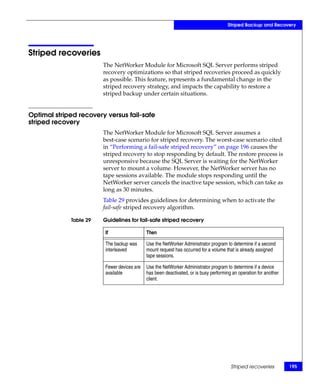
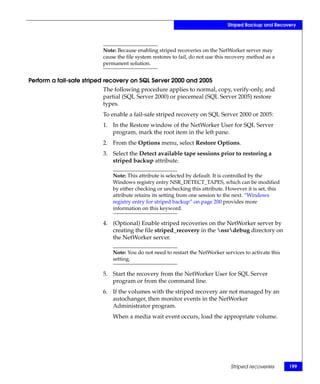
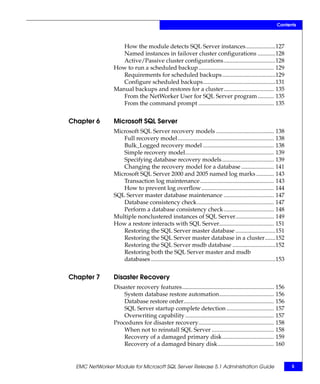
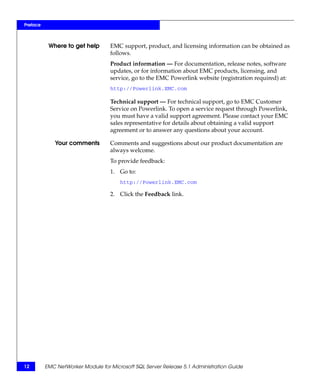
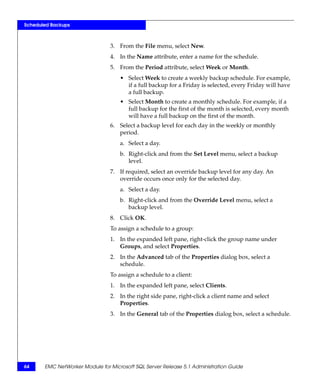
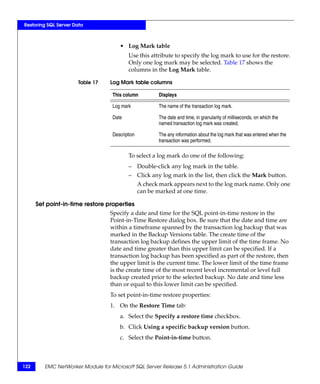
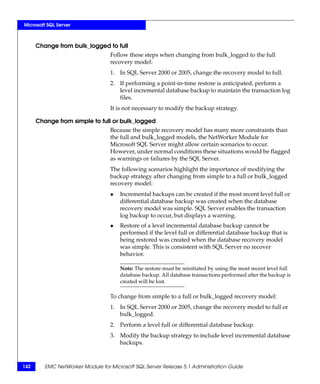
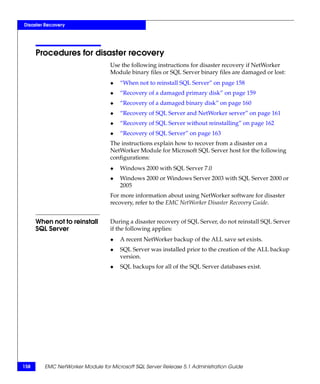
Back up the transaction log
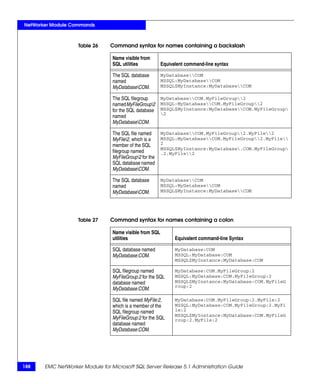
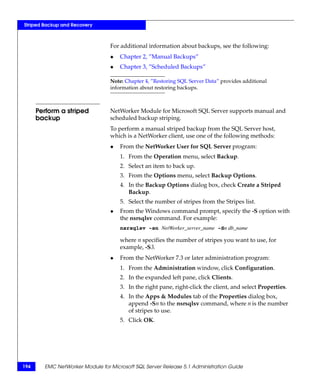
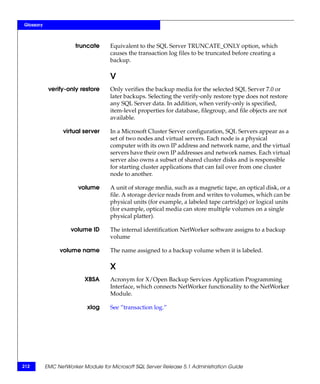
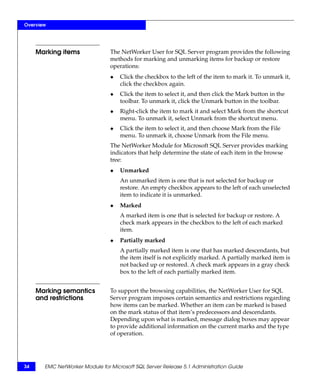
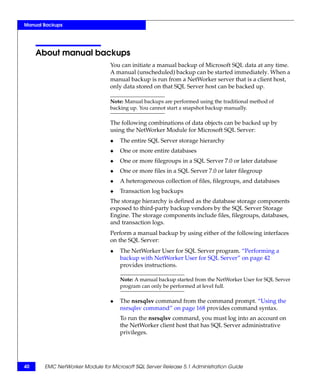
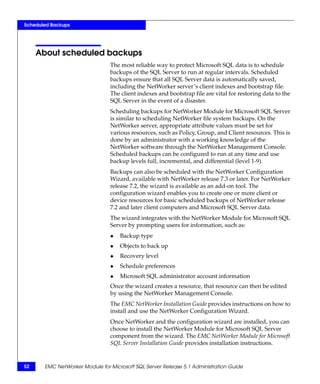
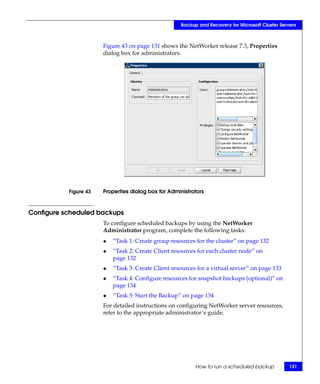
To use the command line to restore the file or filegroup, the
transaction log backup must be explicitly performed by using the
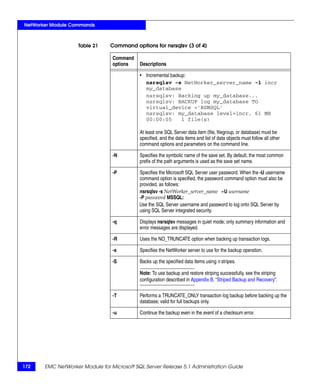
nsrsqlsv command as follows:
nsrsqlsv [-s NetWorker_server_name] -l incr -R -H dbName
where:
◆ NetWorker_server_name is the hostname of the NetWorker
server.
◆ dbName is the name of the database that receives the transaction
log backup.
◆ The -R flag is required so the transaction log is not truncated after
the backup completes.
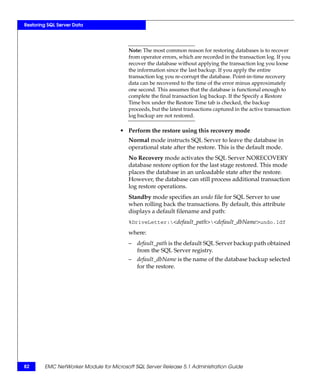
◆ The -H option uses the NORECOVERY option when backing up
transaction logs. It leaves the database in Restoring state.
• Do not use the -H option with versions previous to SQL Server
2005.
• Use the -H option:
– To back up the transaction log prior to database restore or
primary filegroup restore on SQL Server 2005 Enterprise
Edition.
– To back up the transaction log prior to database restore or
filegroup or file restore on non-Enterprise editions of SQL
Server 2005.
Note: If you use third-party vendor software to back up SQL Server data,
after completing the backup, you must perform a full database backup with
the NetWorker Module for Microsoft SQL Server. This prevents a broken
transaction log chain, which can cause the restore operation to fail.
74 EMC NetWorker Module for Microsoft SQL Server Release 5.1 Administration Guide](https://image.slidesharecdn.com/emc-networker-module-for-microsoft-sql-server-release-51912/85/EMC-NetWorker-Module-for-Microsoft-SQL-Server-Release-5-1-72-320.jpg)
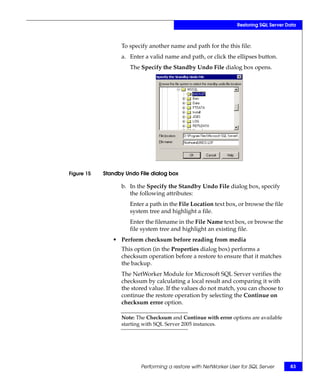
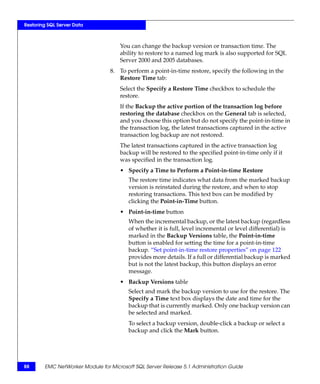

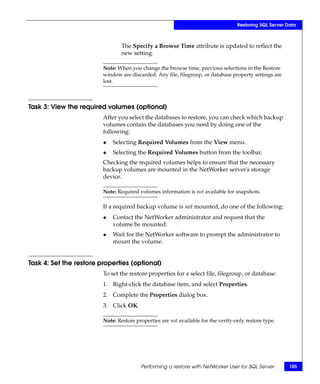
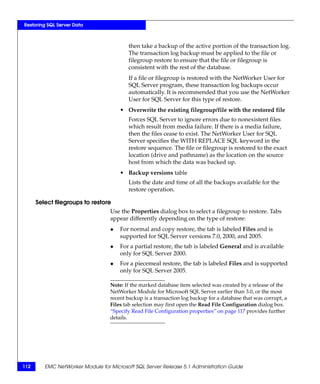
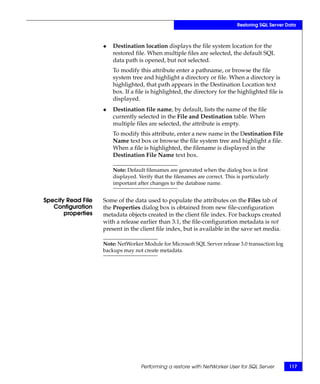
![Restoring SQL Server Data
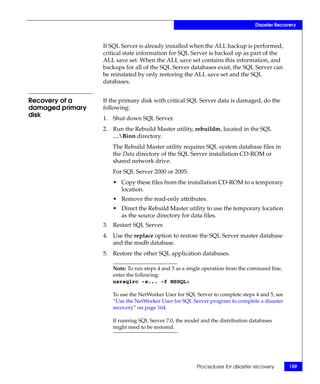
• A [different] NetWorker SQL Server client
By default, this attribute is disabled and the text box displays
the name of a NetWorker client host. Select this attribute to
select a different SQL Server host from which to obtain the
existing database backup.
Note: In order to select other client machines as the source of a copy
restore, the destination machine and an appropriate user account or
group must be specified in the list of NetWorker administrators on
the NetWorker server. The release notes provide information about
setting up a mid-level user account that does not grant full
administrator privileges.
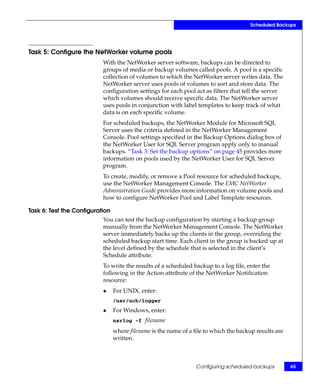
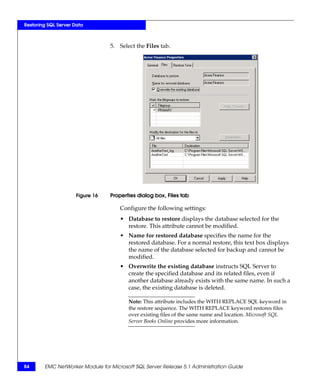
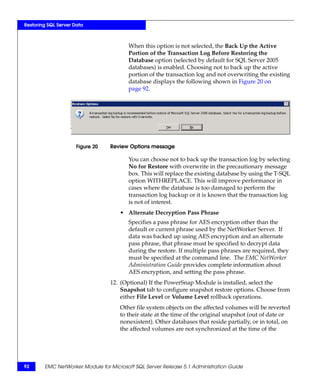
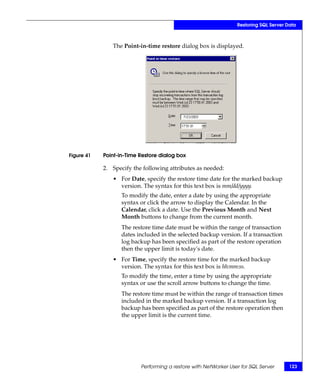
A new dialog box is displayed if the following applies to the
selected NetWorker client:
– A backup exists.
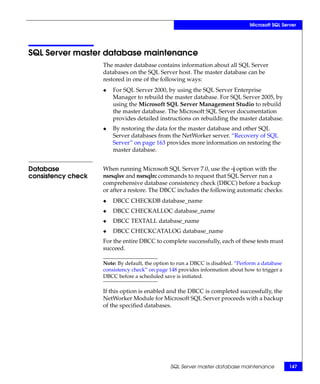
– A named instance directory in the index.
This dialog box enables the selection of the source from
default and named instances.
3. Select either the SQL Server default instance or an SQL Server
named instance, and click Continue. After choosing a SQL
instance, all database backups are listed.
Note: A CopyOf prefix is prepended to database (and database file)
names only if a database by the same name already exists on the target
system. This may not be the case for copy restore between systems or
between instances of SQL Server (or if the original database has been
removed). In these cases the default database and filenames will be the
same as the original names.
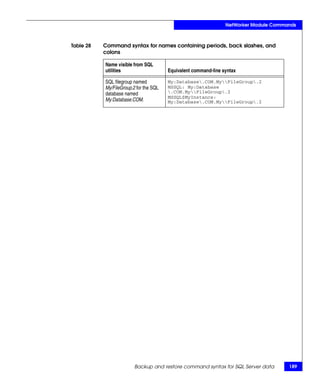
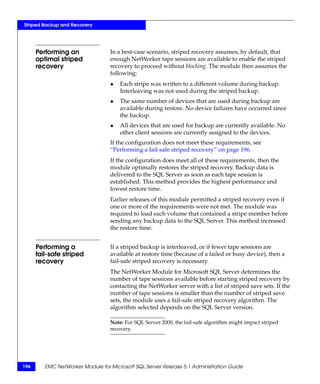
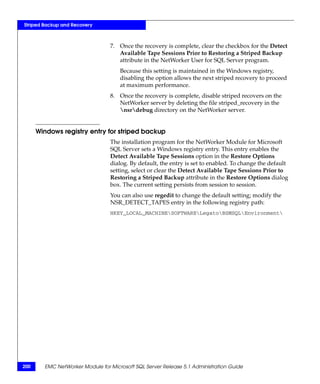
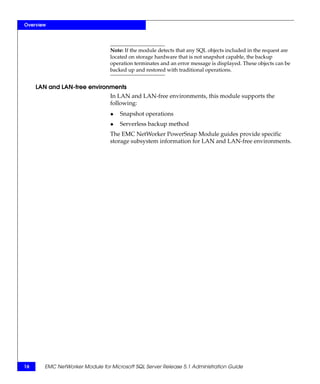
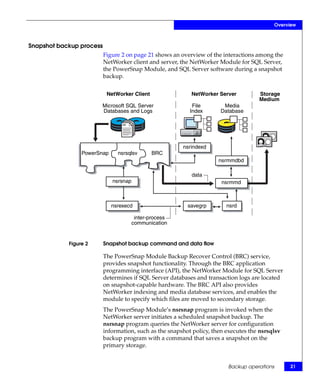
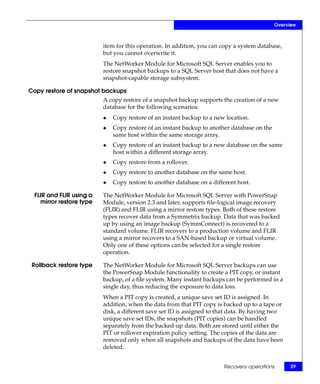
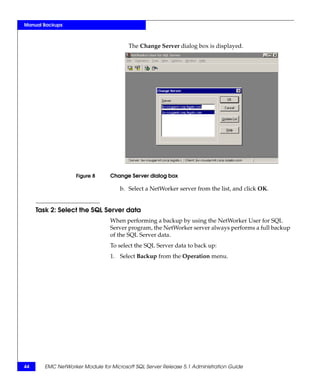
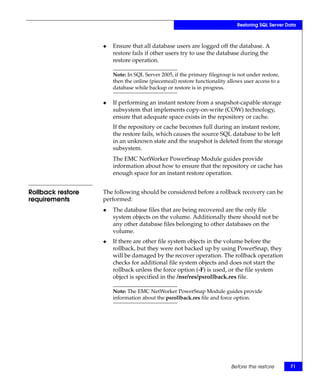
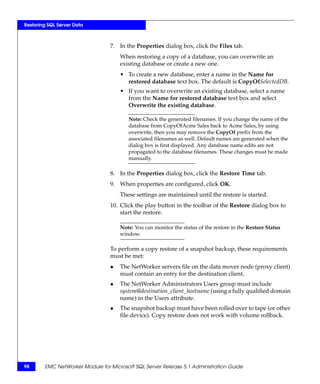
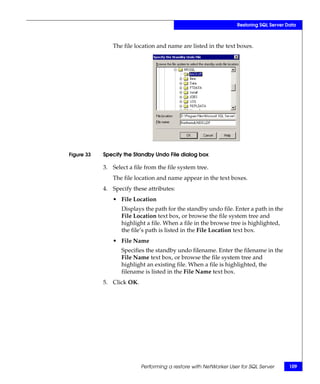
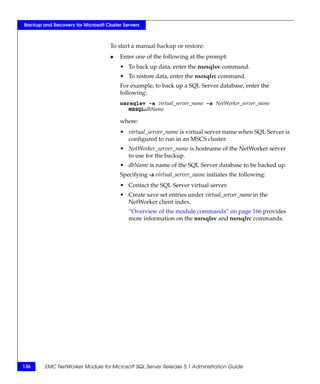
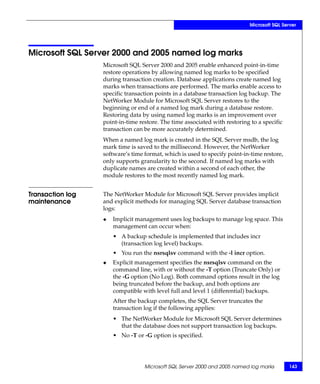
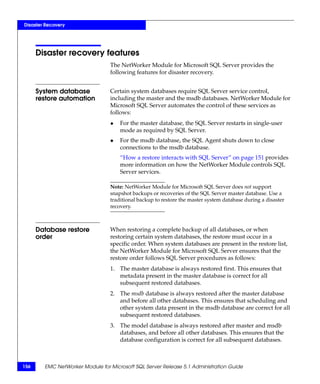
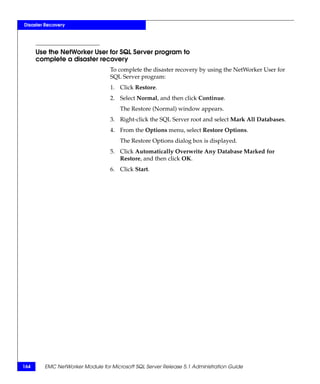
If backups for the SQL default or other named instance were not
performed, or are no longer available, the message shown in
Figure 23 is displayed.
Figure 23 NetWorker User for SQL Server message
96 EMC NetWorker Module for Microsoft SQL Server Release 5.1 Administration Guide](https://image.slidesharecdn.com/emc-networker-module-for-microsoft-sql-server-release-51912/85/EMC-NetWorker-Module-for-Microsoft-SQL-Server-Release-5-1-94-320.jpg)

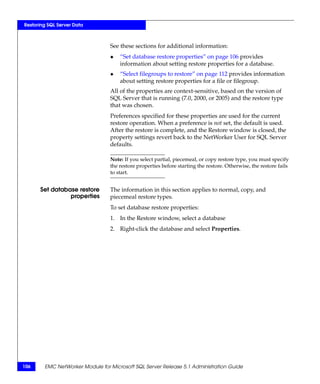
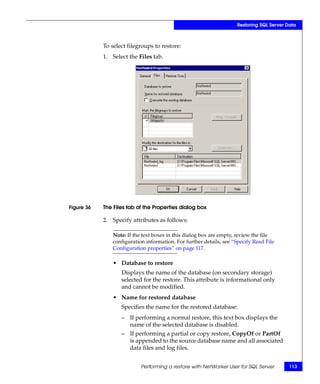


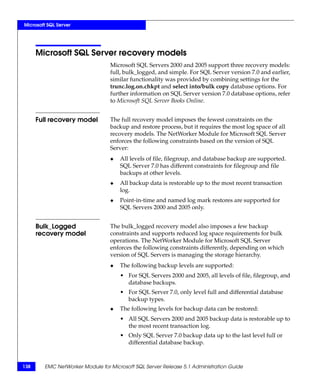
![Microsoft SQL Server
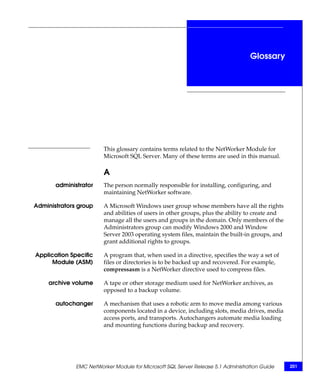
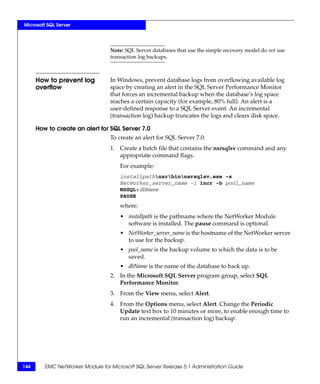
Multiple nonclustered instances of SQL Server
Microsoft SQL Server 2000 and 2005 enable you to run multiple
copies of SQL Server on a single computer. This feature is called
multiple instance.
The first installation of SQL Server on a computer is called the default
instance. The name of the default instance is the network name for the
local computer. The NetWorker Module for Microsoft SQL Server
supports backup and recovery of SQL Server 7.0, and SQL Server
2000 or 2005 default instances.
Additional installations of SQL Server on a computer are called
named instances. The NetWorker Module for Microsoft SQL Server
supports recovery from the default instance or named instances of
SQL Server 2000 and 2005, using a copy restore, to any instance of
SQL Server. This includes recovery operations when the destination
server is different from the source.
Note: SQL Server 7.0 has no named instance support. Therefore, copy restore
for SQL Server 7.0 applies only to/from the default instance.
Each named instance has a unique instance name in the form:
computerNameinstanceName
where:
◆ computerName is the network name of the computer.
◆ instanceName is the logical name of the named instance.
Note: When naming a SQL database or an instance, select names that are
unique. Poor database name choices, for example, include the name SQL
Server uses to identify itself (MSSQL:) and names of installed SQL instances
you have installed.
The syntax for specifying a nonclustered instance of SQL Server at a
command prompt is as follows:
MSSQL$instanceName:[dbName ...][.fgName ...][.fileName ...]
An entry of MSSQL: for the Save Set attribute in the Client resource
yields a backup of all databases on the SQL Server host. For detailed
guidelines on specifying the save sets for an instance, see “Backup
and restore command syntax for SQL Server data” on page 184.
Multiple nonclustered instances of SQL Server 149](https://image.slidesharecdn.com/emc-networker-module-for-microsoft-sql-server-release-51912/85/EMC-NetWorker-Module-for-Microsoft-SQL-Server-Release-5-1-147-320.jpg)


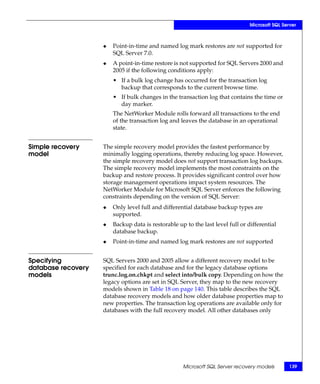
![NetWorker Module Commands
◆ Brackets ([ ]) are used to denote the optional portions of a
command (for example, command options and corresponding
arguments, if any). When initiating an actual backup or restore
operation, do not include brackets.
◆ Data items must follow:
• All other command options.
• Parameters on the command line.
An application log is generated for both nsrsqlsv.exe and
nsrsqlrc.exe programs. The logs are written into the nsrapplogs
folder on the SQL Server host. The logs are cumulative and are
appended each time the nsrsqlsv.exe or nsrsqlrc.exe program runs.
The log space management is rudimentary. The log is truncated
when disk space is exhausted. “Error logs for backup and recovery”
on page 37 provides more information about application logs.
Overview of the module commands 167](https://image.slidesharecdn.com/emc-networker-module-for-microsoft-sql-server-release-51912/85/EMC-NetWorker-Module-for-Microsoft-SQL-Server-Release-5-1-165-320.jpg)
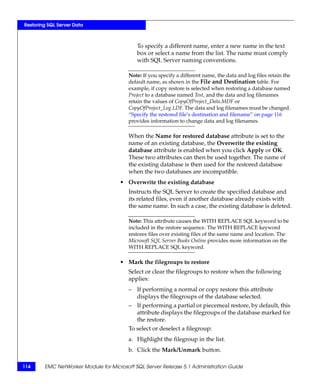
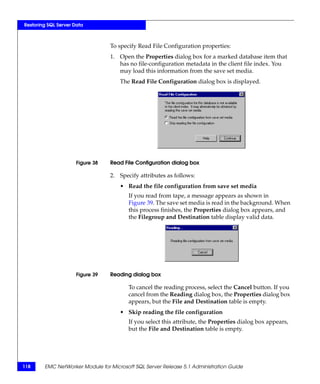
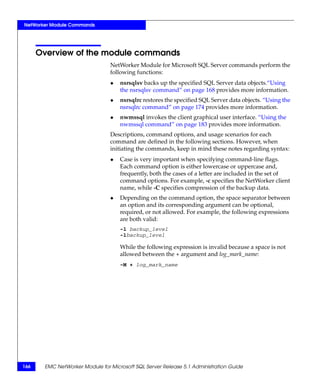
![NetWorker Module Commands
Using NetWorker 7.3 and later
To modify the Backup Command attribute:
1. From the Administration window, click Configuration.
2. In the expanded left pane, click Clients.
3. In the right-side pane, right-click the client you want, and select
Properties.
4. In the Apps & Modules tab of the Properties dialog box, enter
nsrsqlsv and any needed command options in the Backup
Command field.
5. Click OK.
Note: The -b and -l command options are valid only for manual backups
initiated from a Windows command prompt on a client host. Do not use
either of these options when initiating a scheduled save in the NetWorker
Administrator program.
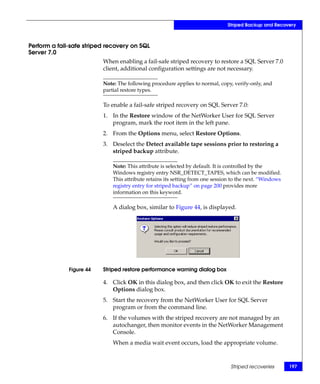
Command syntax The nsrsqlsv command syntax is:
for nsrsqlsv nsrsqlsv [-CGjqRTvkuHZ] [-a virtual_server_name]
[-b pool_name][-c client_name] [-f aes][-g group ]
[-h dbName] [-I input_file] [-l backup_level]
[-N name] [-s NetWorker_server_name]
[-S stripes_count][[-U username] [-P password]
[MSSQL:dbName dbName.fgName dbName.fgName.filename
...]
Using the nsrsqlsv command 169](https://image.slidesharecdn.com/emc-networker-module-for-microsoft-sql-server-release-51912/85/EMC-NetWorker-Module-for-Microsoft-SQL-Server-Release-5-1-167-320.jpg)


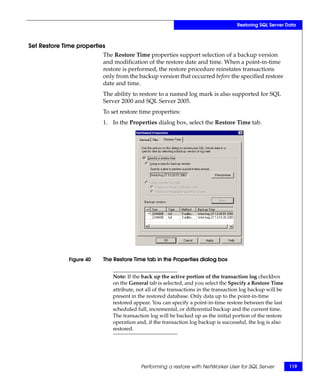
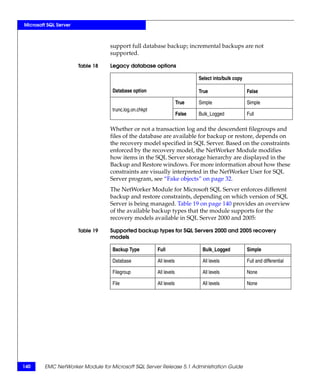
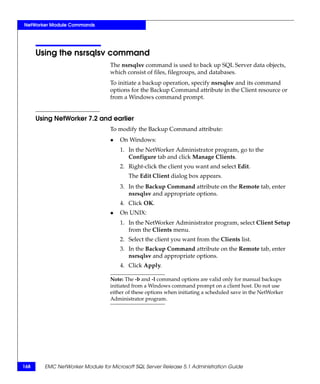
![NetWorker Module Commands
Using the nsrsqlrc command
The nsrsqlrc command restores specified SQL Server data (files,
filegroups, and databases) from the NetWorker system. To initiate a
restore operation, specify nsrsqlrc and any of its command options at
a Windows command prompt.
Command syntax The nsrsqlrc command syntax is as follows:
for nsrsqlrc nsrsqlrc [-fjqVku] [-a virtual_server_name]
[-c client_name]{[-d MSSQL:destination_dbName]
[-e pass_phrase]
[-C file=path,file2=path2,...]}[-M [+|-]log_mark_name]
[-R fgName1,fgName2,...] [-t date]
[-s NetWorker_server_name]
[-S normal|standby:undo_file|norecover][[-U username]
[-P password]] [-z]
[MSSQL: dbName dbName.fgName dbName.fgName.filename ...]
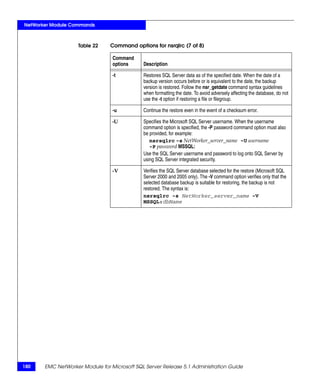
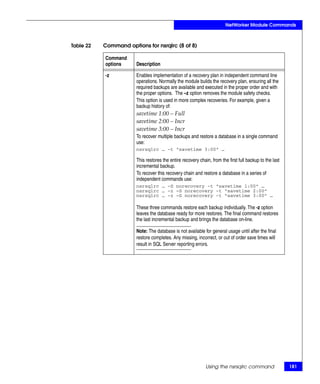
Command options The command options are as follows:
for nsrsqlrc
Table 22 Command options for nsrqlrc (1 of 8)
Command
options Description
-a Specifies the virtual server name when SQL Server is configured to run as a
clustered service in an MSCS cluster. Chapter 5, ”Backup and Recovery for
Microsoft Cluster Servers” provides more information.
-c Specifies the NetWorker client name from which the SQL Server data is to
be restored.
174 EMC NetWorker Module for Microsoft SQL Server Release 5.1 Administration Guide](https://image.slidesharecdn.com/emc-networker-module-for-microsoft-sql-server-release-51912/85/EMC-NetWorker-Module-for-Microsoft-SQL-Server-Release-5-1-172-320.jpg)
![NetWorker Module Commands
Table 22 Command options for nsrqlrc (2 of 8)
Command
options Description
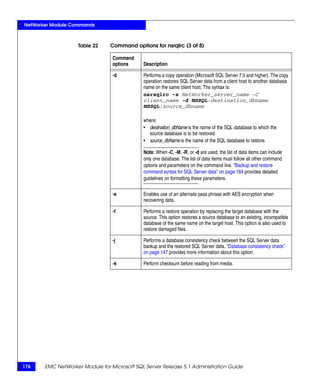
-C Copies the database being restored to either the same SQL Server or a
different SQL Server. It can be used for normal, copy, and partial restores.
Use the relocation list to specify new locations for restored database files.
The relocation list is composed of pairs of logical database filenames and
fully qualified domain database filename relocation paths. Specify the
relocation list only when restoring a database. Each filename and relocation
path is joined by the equal sign (=), and pairs are delimited in the list by
commas.
The syntax is:
["][’] file[’]=[’]path[’],[’] file2[’]=[’]path2[’],...["]
For example, to copy a database named Project from a client host named
ClientHost1 to a different location on ClientHost1, specify the relocation list
for the database files, but do not include the client host name command
option:
nsrsqlrc -s NetWorker_server_name
-d MSSQL:CopyOfProject
-C Project_Data=C:RelocationPathProject_Data.mdF,
Project_Data2=C:RelocationPathProject_Data2.ndF,...,
Project_Log=C:RelocationPathProject_Log.ldF MSSQL:Project
The relocation list may be enclosed by double quotes to allow for spaces in
the relocation elements and pathnames. A logical filename or relocation
path may be enclosed by single quotes to also allow for spaces. If a
filename or path contains a single quote, precede the single quote with
another single quote to prevent the NetWorker Module for Microsoft SQL
Server from parsing the single quote as a delimiter, for example:
nsrsqlrc -s NetWorker_server_name
-d MSSQL:CopyOfProject
-C"’File’=C:Relocate DirPath,
=’C:Relocate DirPath’,...,
’=C:Relocate DirPath’’" MSSQL:Project
When no relocation list is specified, the module reads the source database
filenames and location from the client index metadata or the backup. This
information is used to generate a default list by relocating all files to the
default SQL data path for the target SQL Server. The filenames are
guaranteed to be unique, but sufficient disk space is not ensured.
Using the nsrsqlrc command 175](https://image.slidesharecdn.com/emc-networker-module-for-microsoft-sql-server-release-51912/85/EMC-NetWorker-Module-for-Microsoft-SQL-Server-Release-5-1-173-320.jpg)
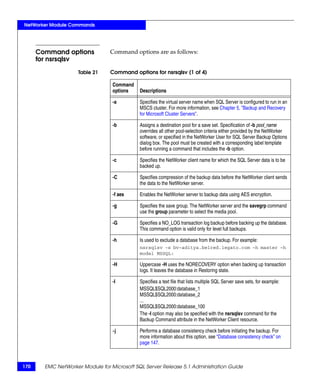
![NetWorker Module Commands
Table 22 Command options for nsrqlrc (5 of 8)
Command
options Description
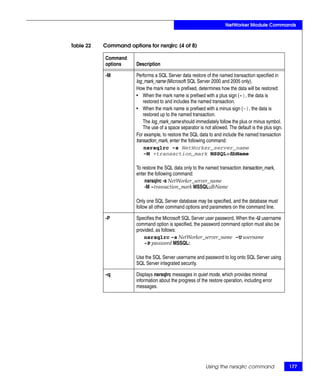
-R Performs a partial database restore (when using Microsoft SQL Server
2000) or a piecemeal restore (when using SQL Server 2005) of the
specified filegroups. This command option is not available with other
versions of SQL Server. The partial database restore operation restores
specific filegroups from a single full SQL Server database backup. Supply
the filegroups to the -R command option in a list, with items separated by
commas. The -C parameter may be used, and should specify all files for the
database. The -d parameter is also required:
nsrsqlrc -s NetWorker_server_name
-R
["][’]fgName[’],[’]fgName2[’],[’]...[’]["]
-C
Project_Data=C:RelocationPathProject_Data.
mdF,
Project_Data2=C:RelocationPathProject_Data
2.ndF,...,
Project_Log=C:RelocationPathProject_Log.ld
F MSSQL:Project
-d MSSQL:PartOfProject MSSQL:Project
where:
• Project is the name of the SQL database to restore.
• PartOfProject is the name of the SQL database to which the source
database is to be restored
• fgName,... are the names of the filegroups to restore.
To allow spaces:
• Between the filegroup names for the -R option, enclose the list of
filegroup names within double quotes.
• Within filegroup names, enclose each filegroup name within single
quotes.
Note: If a filegroup name contains a single quote, precede the single quote
with another single quote to prevent the NetWorker software from parsing
the single quote as a delimiter.
For example, to accomodate for the space in Filegroup A, the space after
the first comma, and the single quote in Filegroup A’, use the following
syntax:
-R "’Filegroup A’, ’Filegroup A’’’"
When an empty relocation list is supplied, use the following syntax:
-R ""
178 EMC NetWorker Module for Microsoft SQL Server Release 5.1 Administration Guide](https://image.slidesharecdn.com/emc-networker-module-for-microsoft-sql-server-release-51912/85/EMC-NetWorker-Module-for-Microsoft-SQL-Server-Release-5-1-176-320.jpg)

![NetWorker Module Commands
Using the nwmssql command
The nwmssql command invokes the NetWorker User for SQL Server
program, the client graphical user interface.
To run the NetWorker User for SQL Server program from the
Windows Start menu, select
Programs>EMC NetWorker>NetWorker User for SQL Server.
Note: The EMC NetWorker group referred to as NetWorker Group in
NetWorker releases earlier than 7.0.
To create a desktop shortcut, go to the <install_path>nsrbin
directory and drag the nwmssql.exe file to your desktop while
pressing the [Ctrl] key.
Command options The nwmssql command options are as follows:
for nwmssql nwmssql [-t] -s NetWorker_server_name
Table 23 Command options for nwmssql
Command
options for
nwmssql Description
-s Specifies the NetWorker server to use.
-t Diagnoses the current backup or restore command issued by the module.
The NetWorker User for SQL Server program displays the full backup or
restore command in the operation status window, but does not execute
the backup or restore operation.
“NetWorker User for SQL Server program overview” on page 32
provides more information on the NetWorker User for SQL Server
program.
Using the nwmssql command 183](https://image.slidesharecdn.com/emc-networker-module-for-microsoft-sql-server-release-51912/85/EMC-NetWorker-Module-for-Microsoft-SQL-Server-Release-5-1-181-320.jpg)
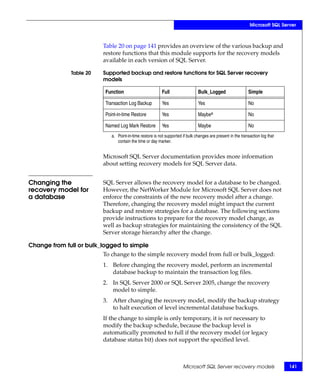
![NetWorker Module Commands
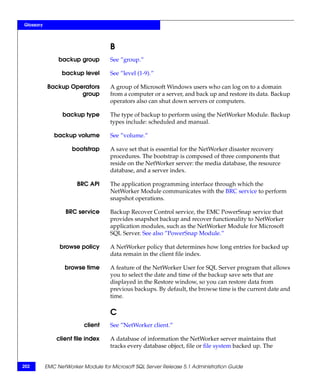
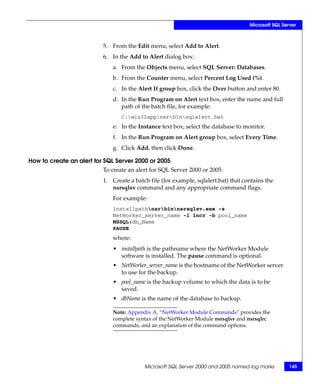
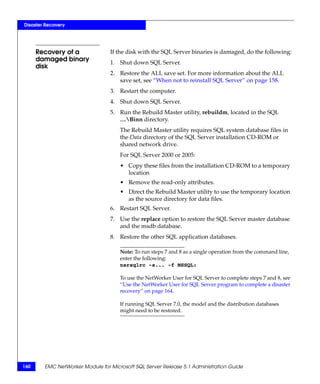
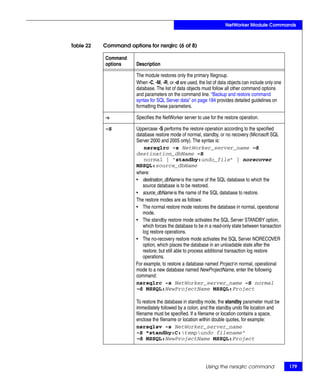
Backup and restore command syntax for SQL Server data
With the standard NetWorker backup and restore commands
(nsrsqlsv and nsrsqlrc), use the additional command syntax shown
in Table 24 on page 184 to back up or restore SQL Server data.
Enter the NetWorker commands with the SQL Server data syntax for
either scheduled or manual backups as follows:
◆ Scheduled backup
In the NetWorker Administrator program, enter the command in
the Backup Command attribute of the Create Client or Edit
Client dialog box.
◆ Manual backup
Enter the command at the Windows command prompt on the
NetWorker server.
At least one SQL Server data item (file, filegroup, or database)
must be specified for a manual backup or restore.
You can specify more than one data object and combine different
types of data. SQL data objects must be specified by using the syntax
shown in Table 24 on page 184.
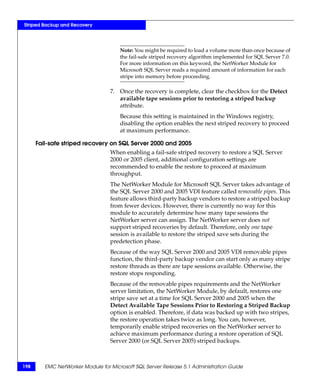
Table 24 Command syntax for SQL Server data (1 of 2)
SQL Server data Syntax for SQL Server data objects
All databases in the MSSQL:
SQL Server storage Entering only MSSQL: always yields a backup of all databases on
hierarchy (optional) the SQL Server host.
A snapshot backup fails if more than one database, or MSSQL: is
specified for the Save Set attribute. For snapshot backups, list only
one database for the Save Set attribute.
Specified databases MSSQL:dbName
or
[MSSQL:dbName MSSQL:dbName2 ...]
All filegroups in MSSQL:dbName.
specified databases or
[MSSQL:dbName. MSSQL:dbName2 ...]
184 EMC NetWorker Module for Microsoft SQL Server Release 5.1 Administration Guide](https://image.slidesharecdn.com/emc-networker-module-for-microsoft-sql-server-release-51912/85/EMC-NetWorker-Module-for-Microsoft-SQL-Server-Release-5-1-182-320.jpg)
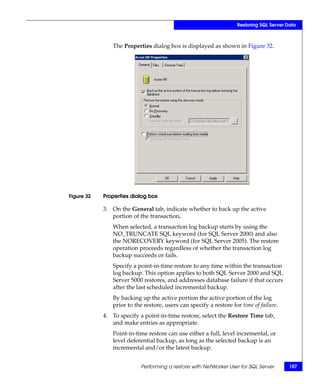
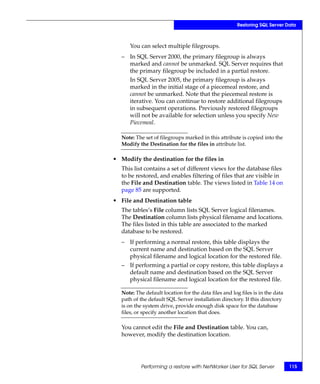
![NetWorker Module Commands
Table 24 Command syntax for SQL Server data (2 of 2)
SQL Server data Syntax for SQL Server data objects
Specified filegroups in MSSQL:dbName.fgName
specified database or
[MSSQL:dbName.fgName
MSSQL:dbName.fgName2
MSSQL:dbName2.fgName
MSSQL:dbName2.fgName2 ...]
Specified files in MSSQL:dbName.fgName.filename
specified filegroups in or
specified databases [MSSQL:dbName.fgName.filename
MSSQL:dbName.fgName2.filename
MSSQL:dbName2.fgName.filename
MSSQL:dbName2.fgName2.filename ...]
Specifying MSSQL before each data object name is optional and does
not affect the expression or the resulting operation. However, when
MSSQL is specified, it must be followed by a colon (:).
For example, the following two commands are equivalent:
nsrsqlsv -s NetWorker_server_name dbName.fgName
nsrsqlsv -s NetWorker_server_name MSSQL:dbName.fgName
In a nonclustered, named instance configuration, MSSQL$ is
required, followed by the instance name and a colon. For example:
nsrsqlsv -s NetWorker_server_name
MSSQL$instanceName:dbName.fgName
Syntax for a named instance configuration for
SQL 2000 and 2005
When the configuration contains nonclustered named instances of
SQL Server, the name of the instance should be specified before the
data, as follows:
MSSQL$instanceName:[dbName ...] [.fgName ...] [.fileName
...]
Backup and restore command syntax for SQL Server data 185](https://image.slidesharecdn.com/emc-networker-module-for-microsoft-sql-server-release-51912/85/EMC-NetWorker-Module-for-Microsoft-SQL-Server-Release-5-1-183-320.jpg)