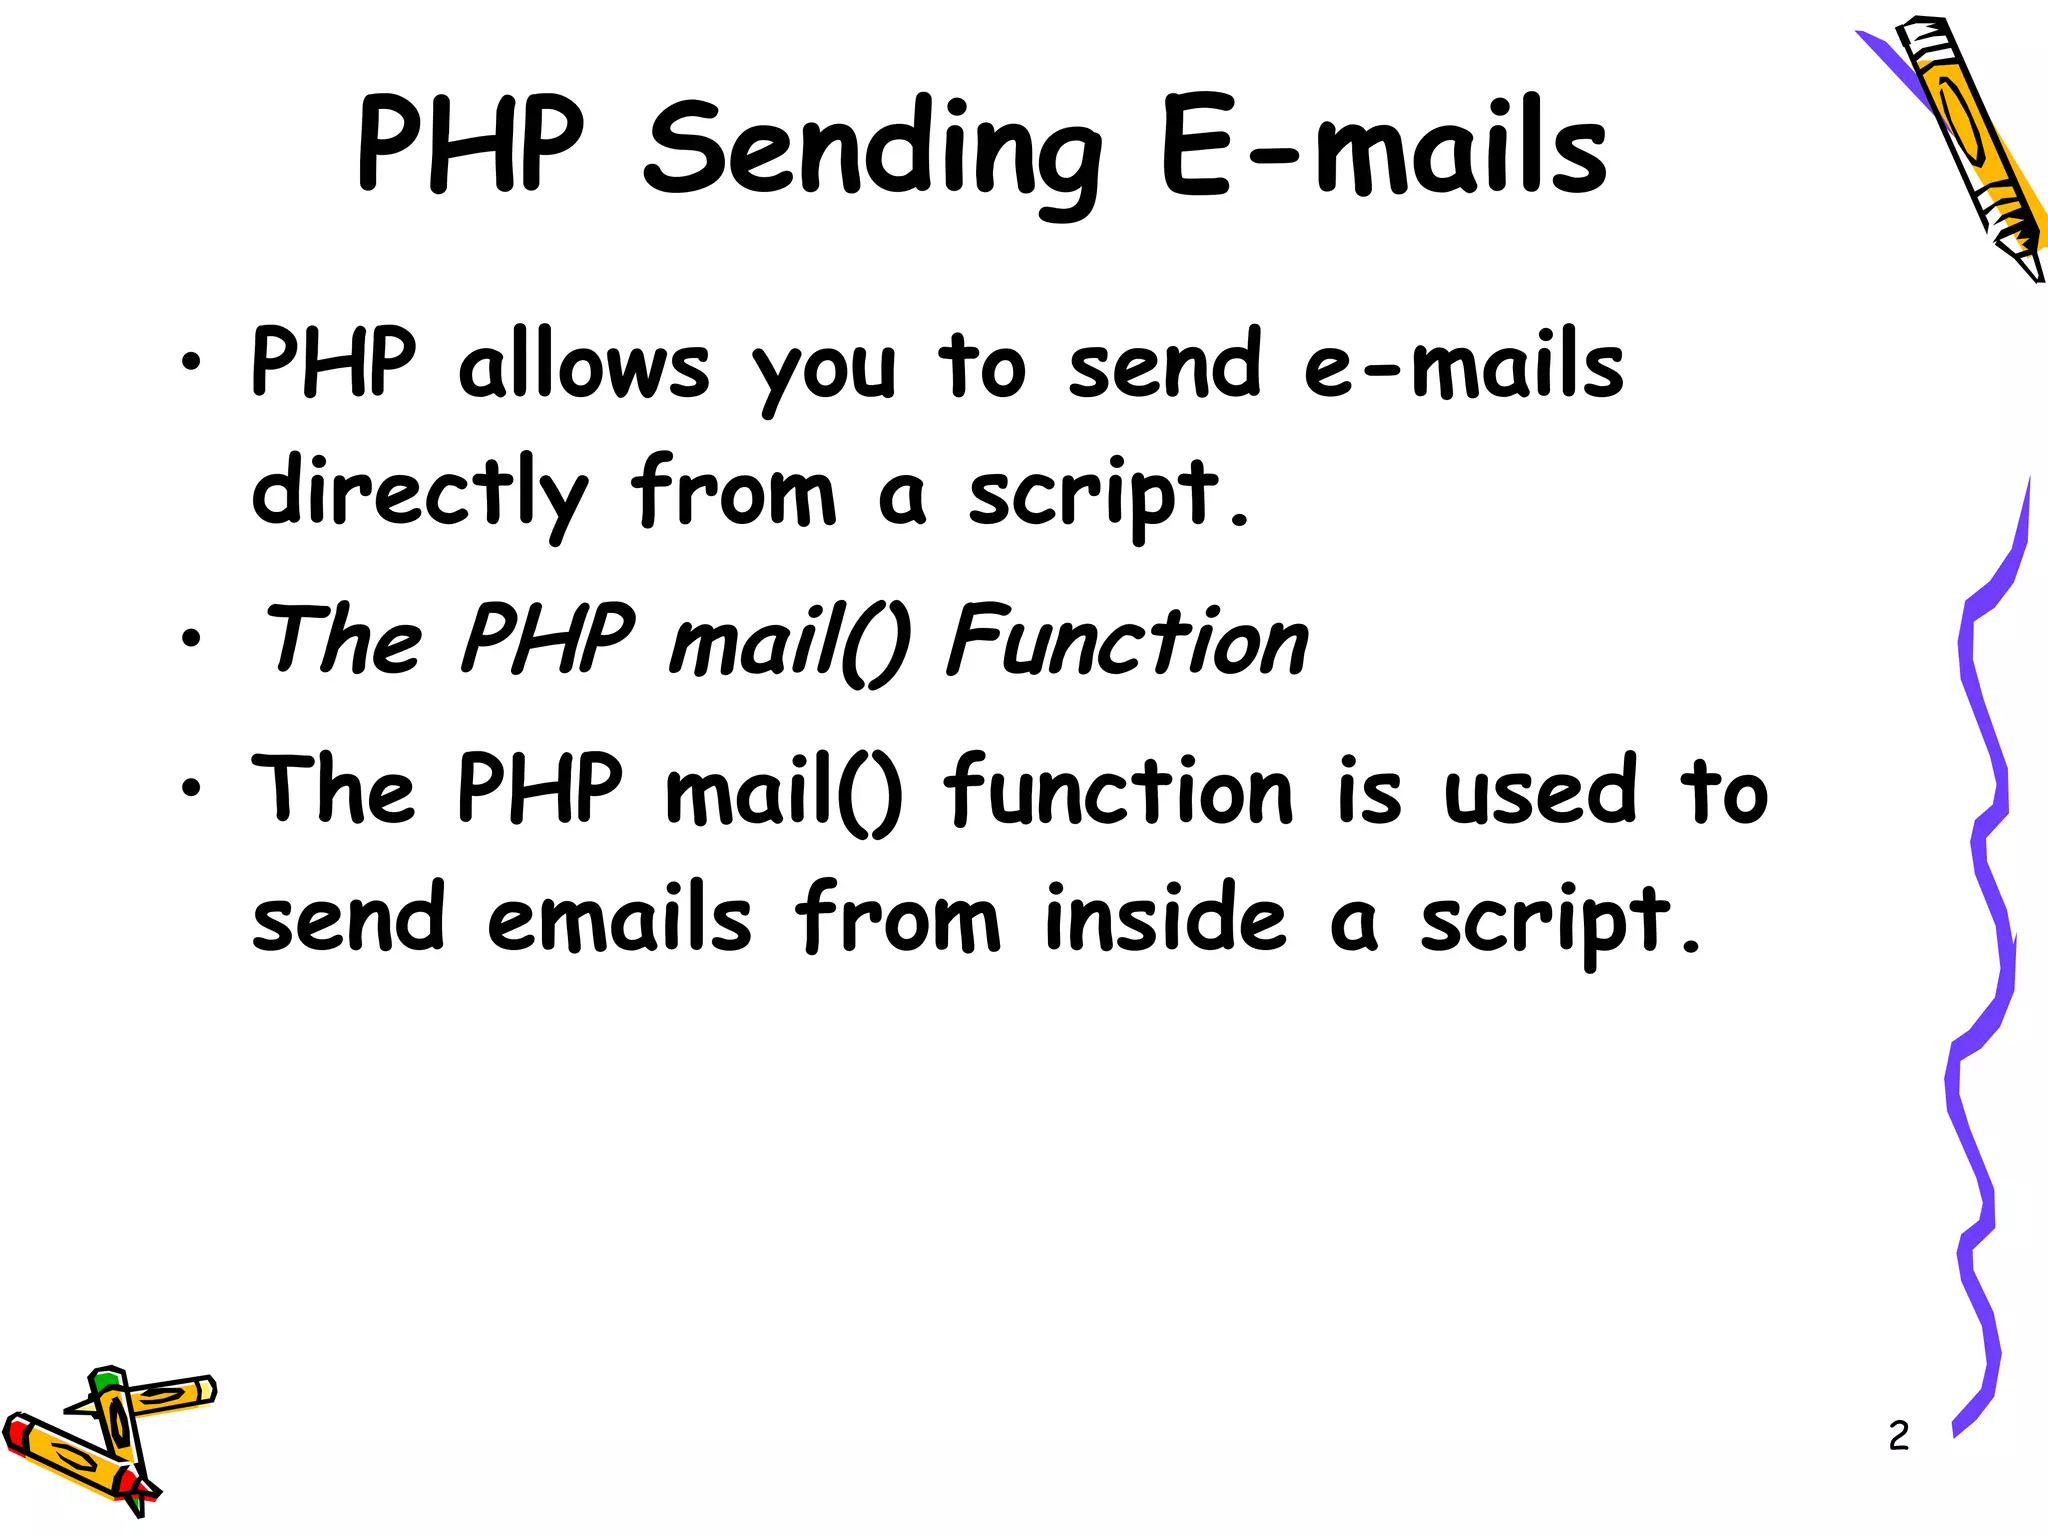
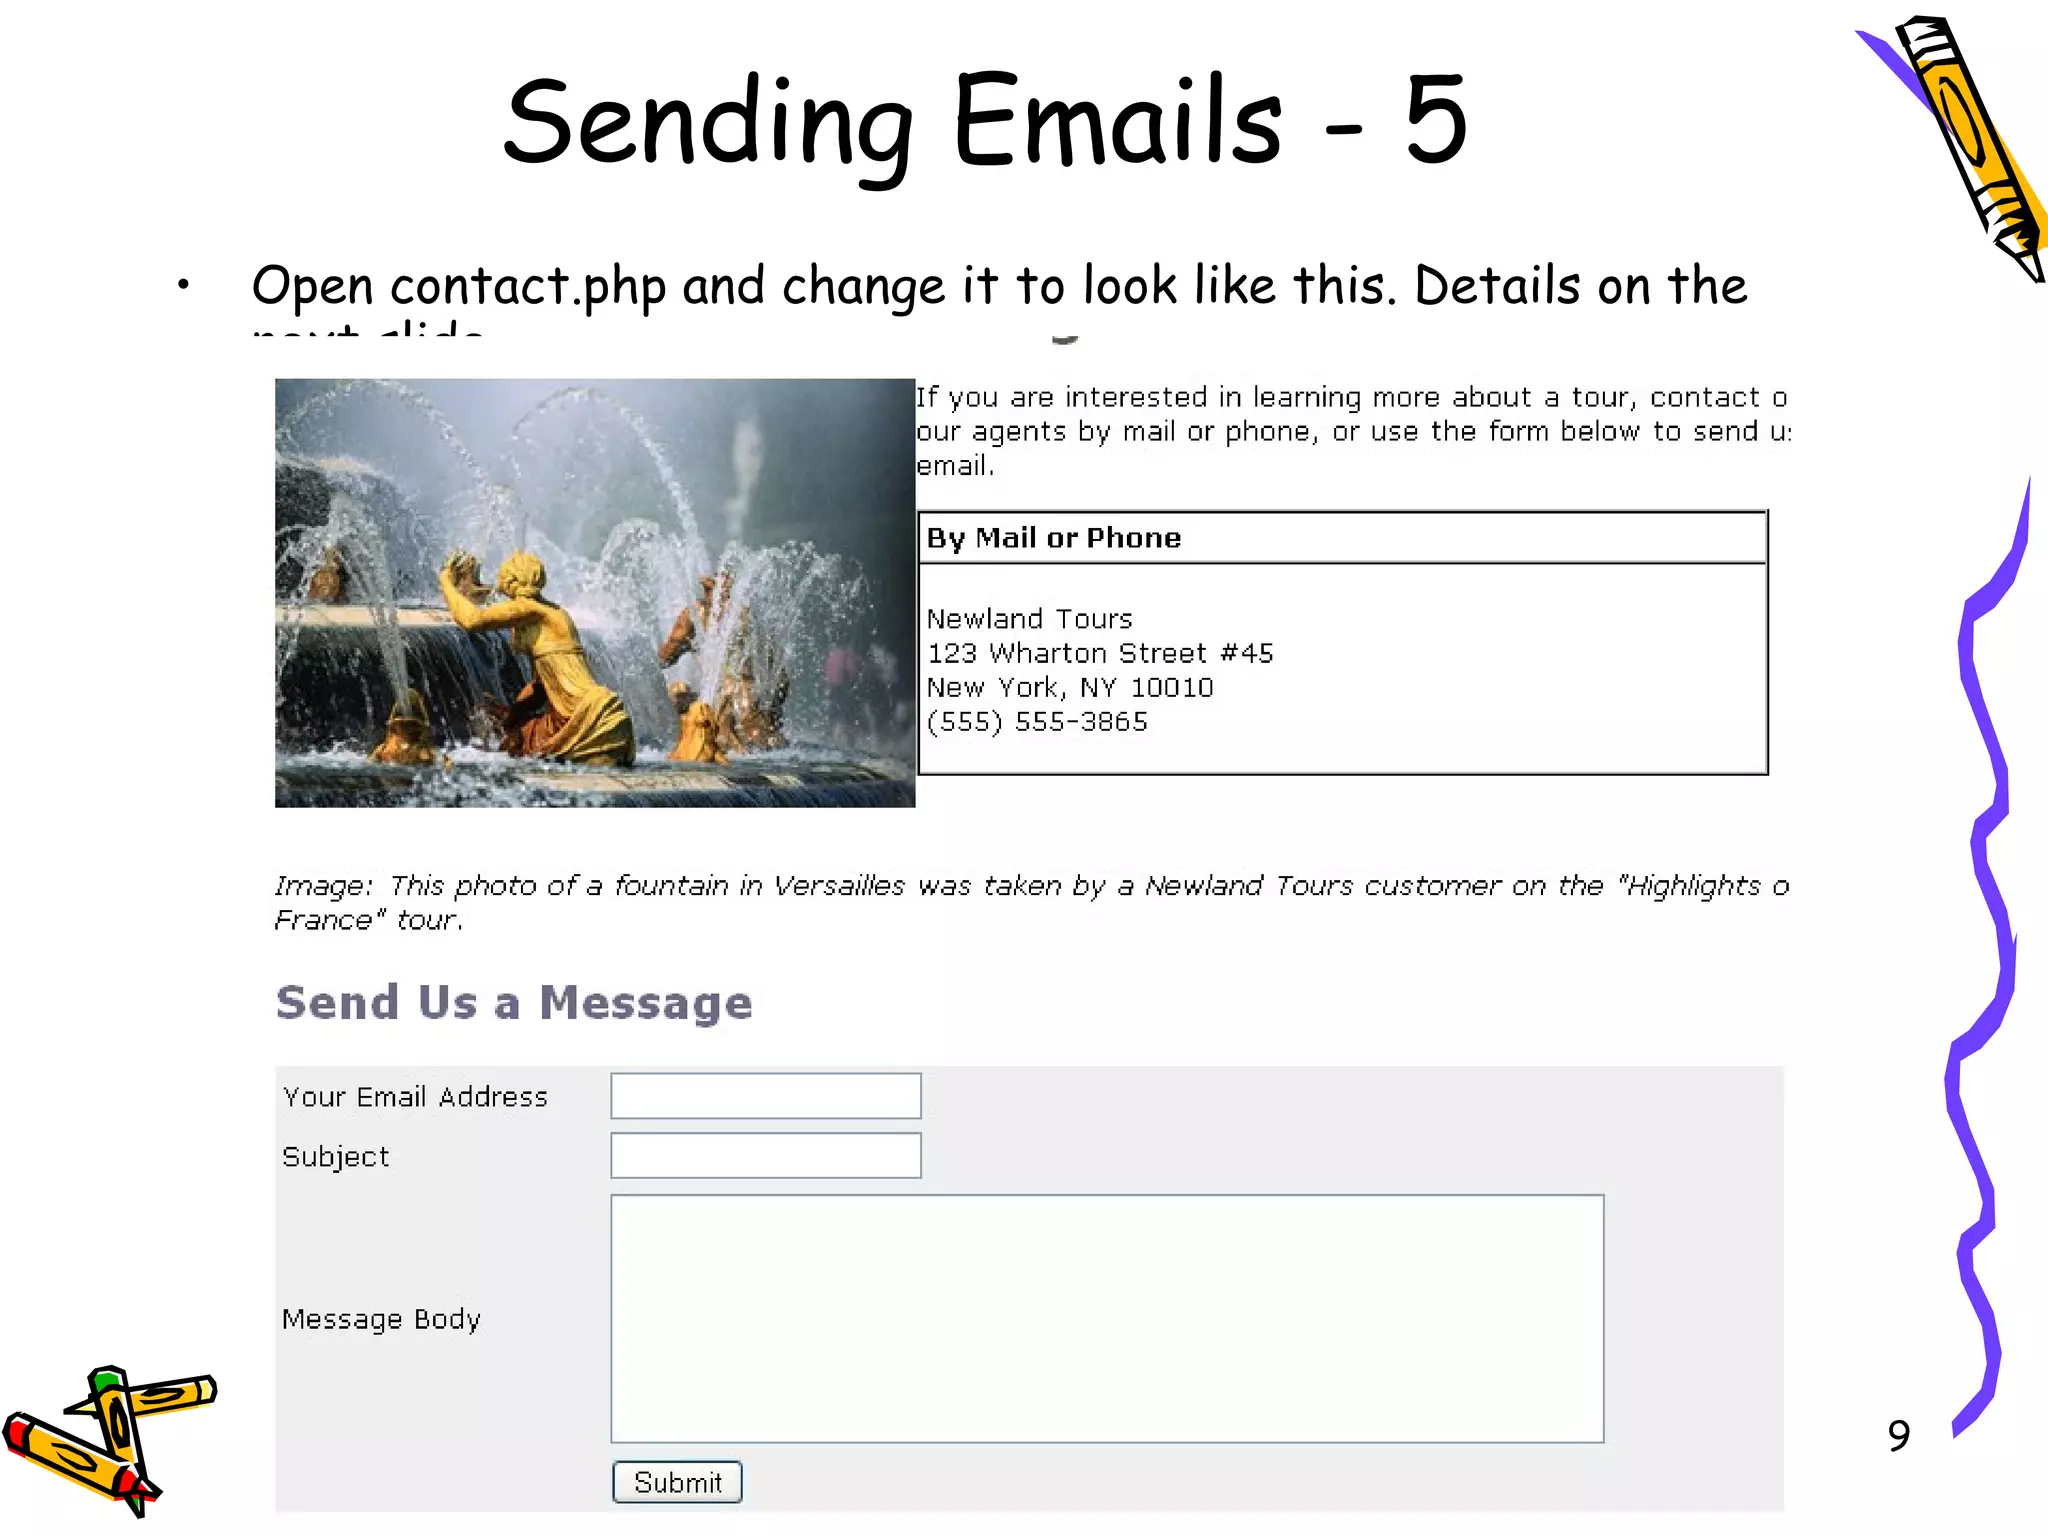
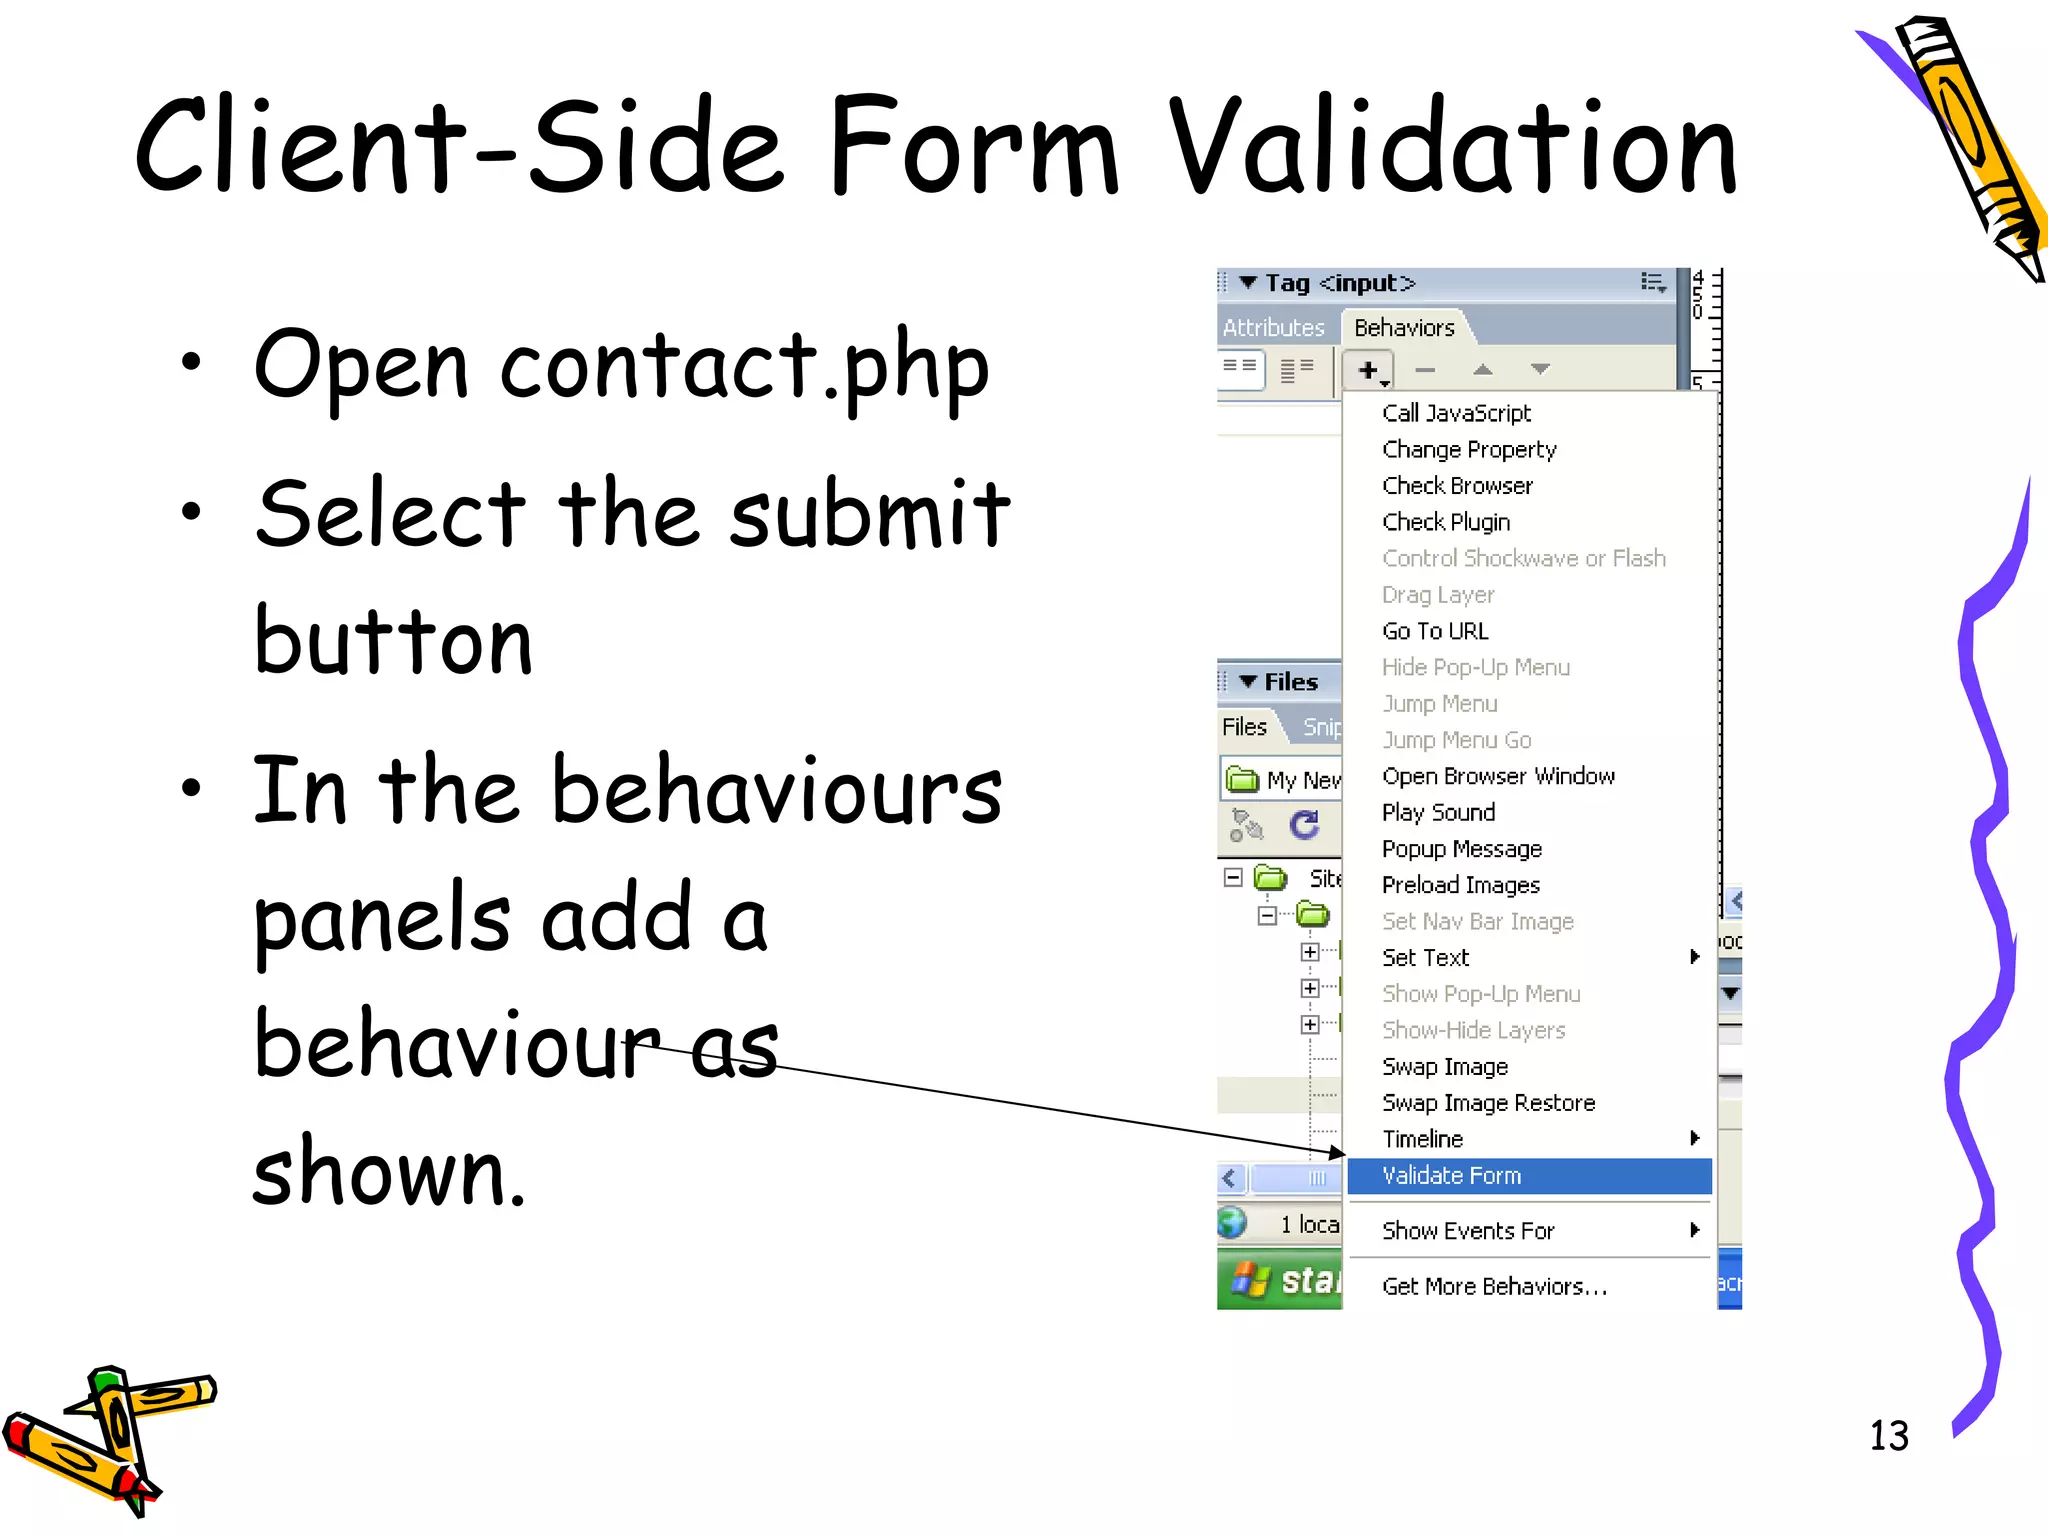
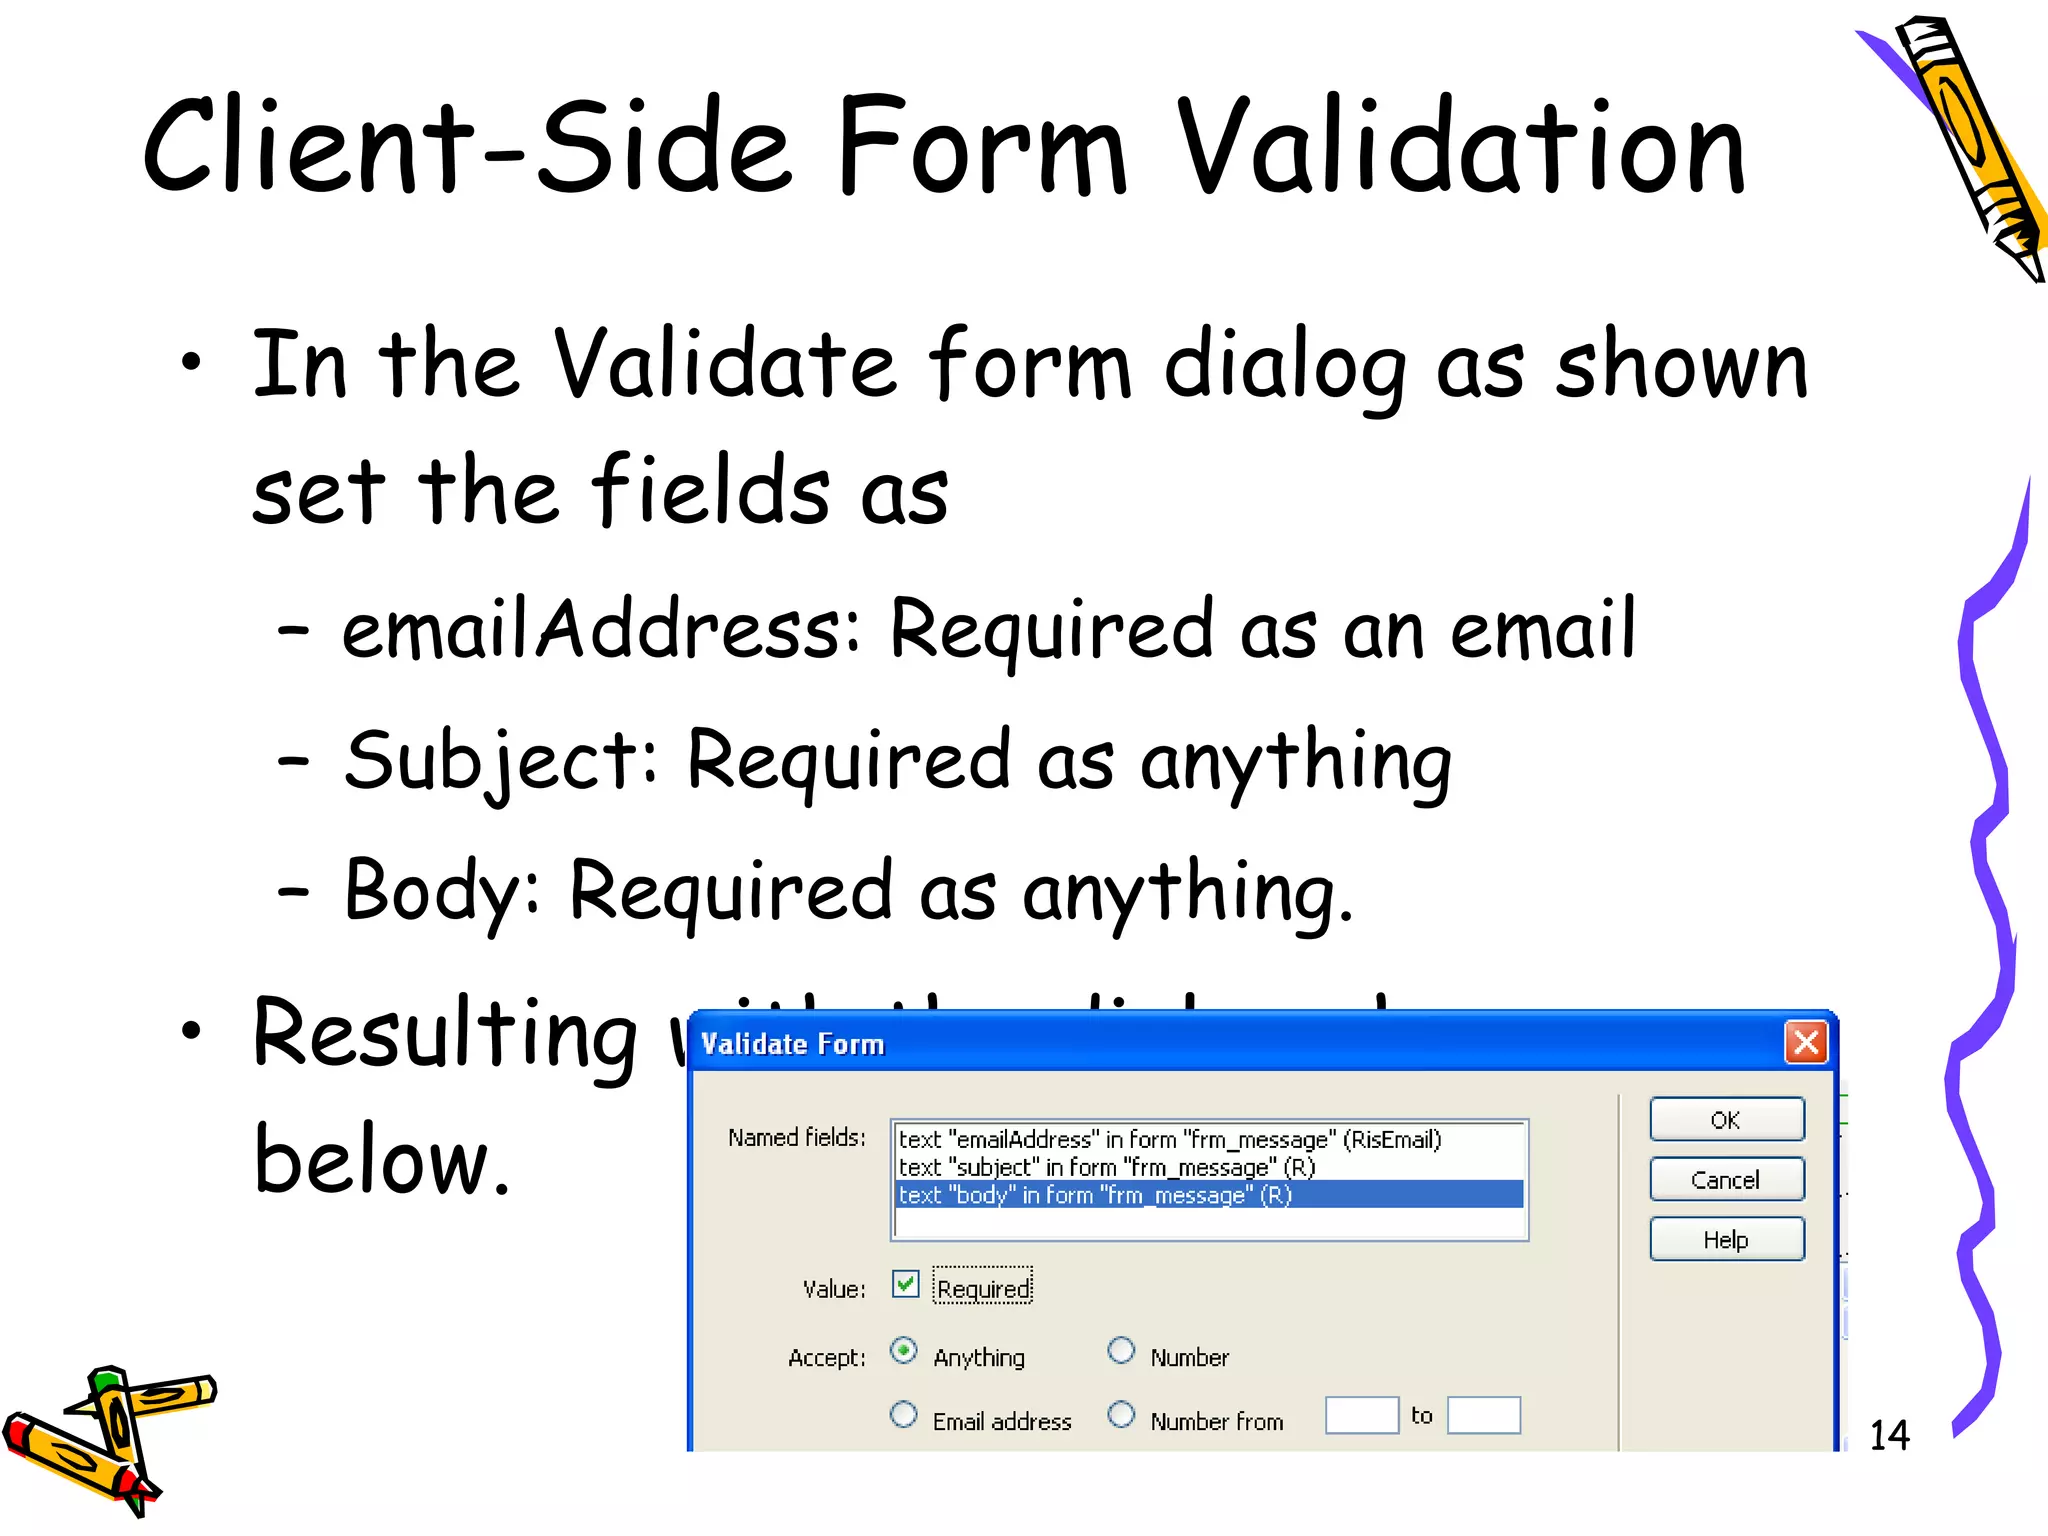
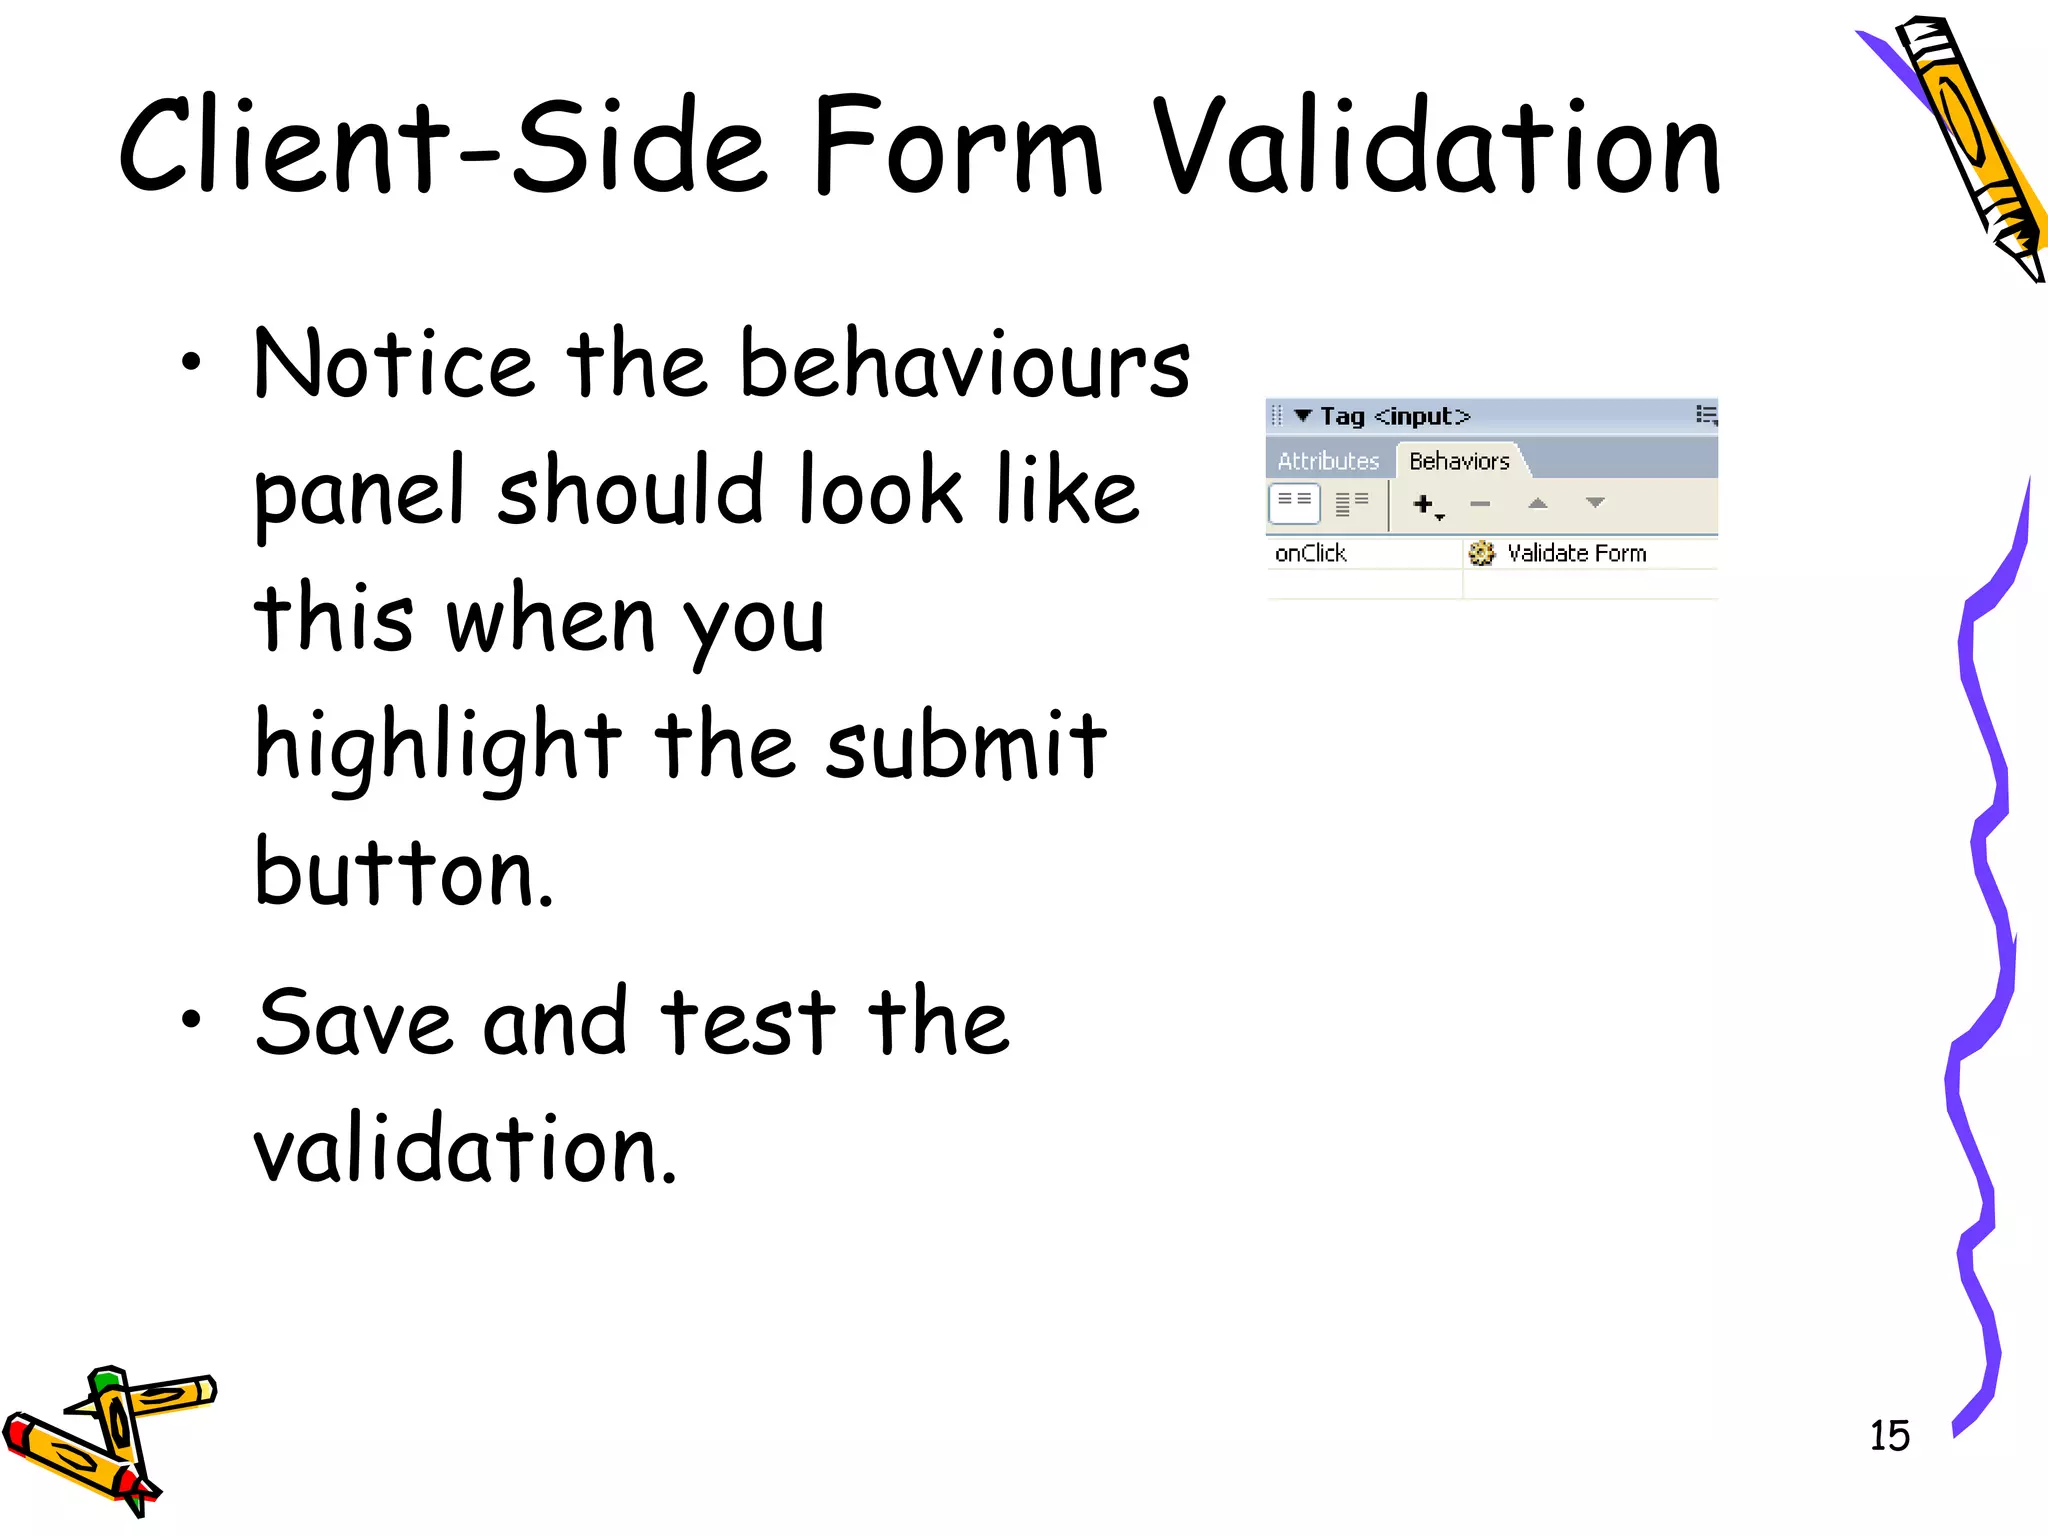
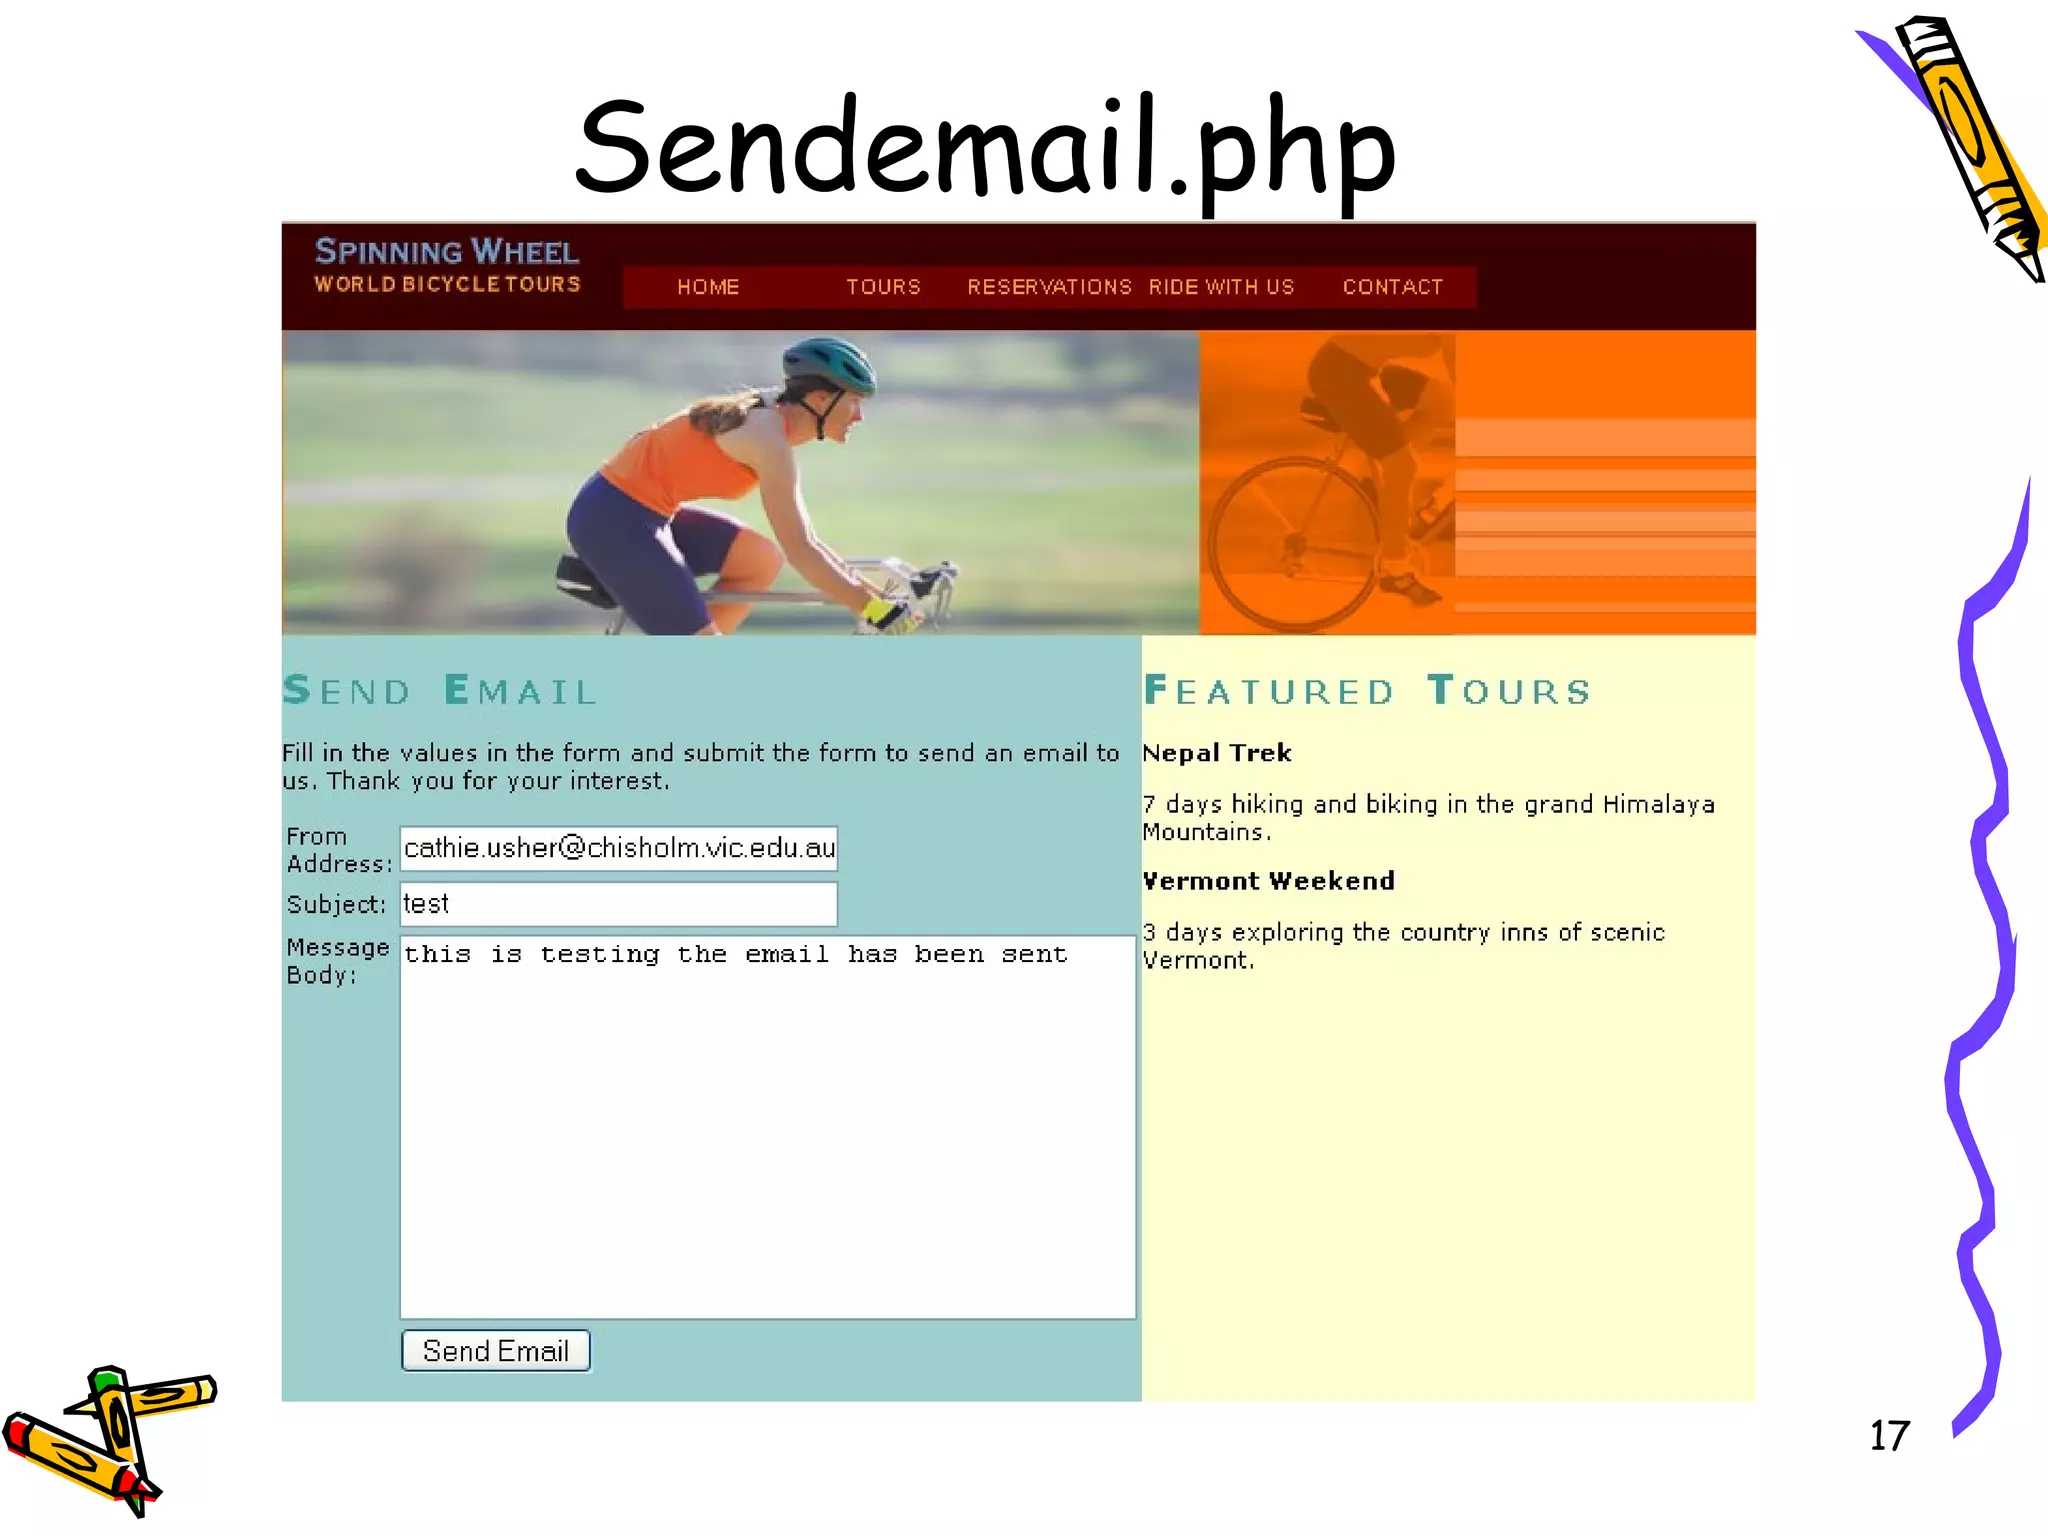
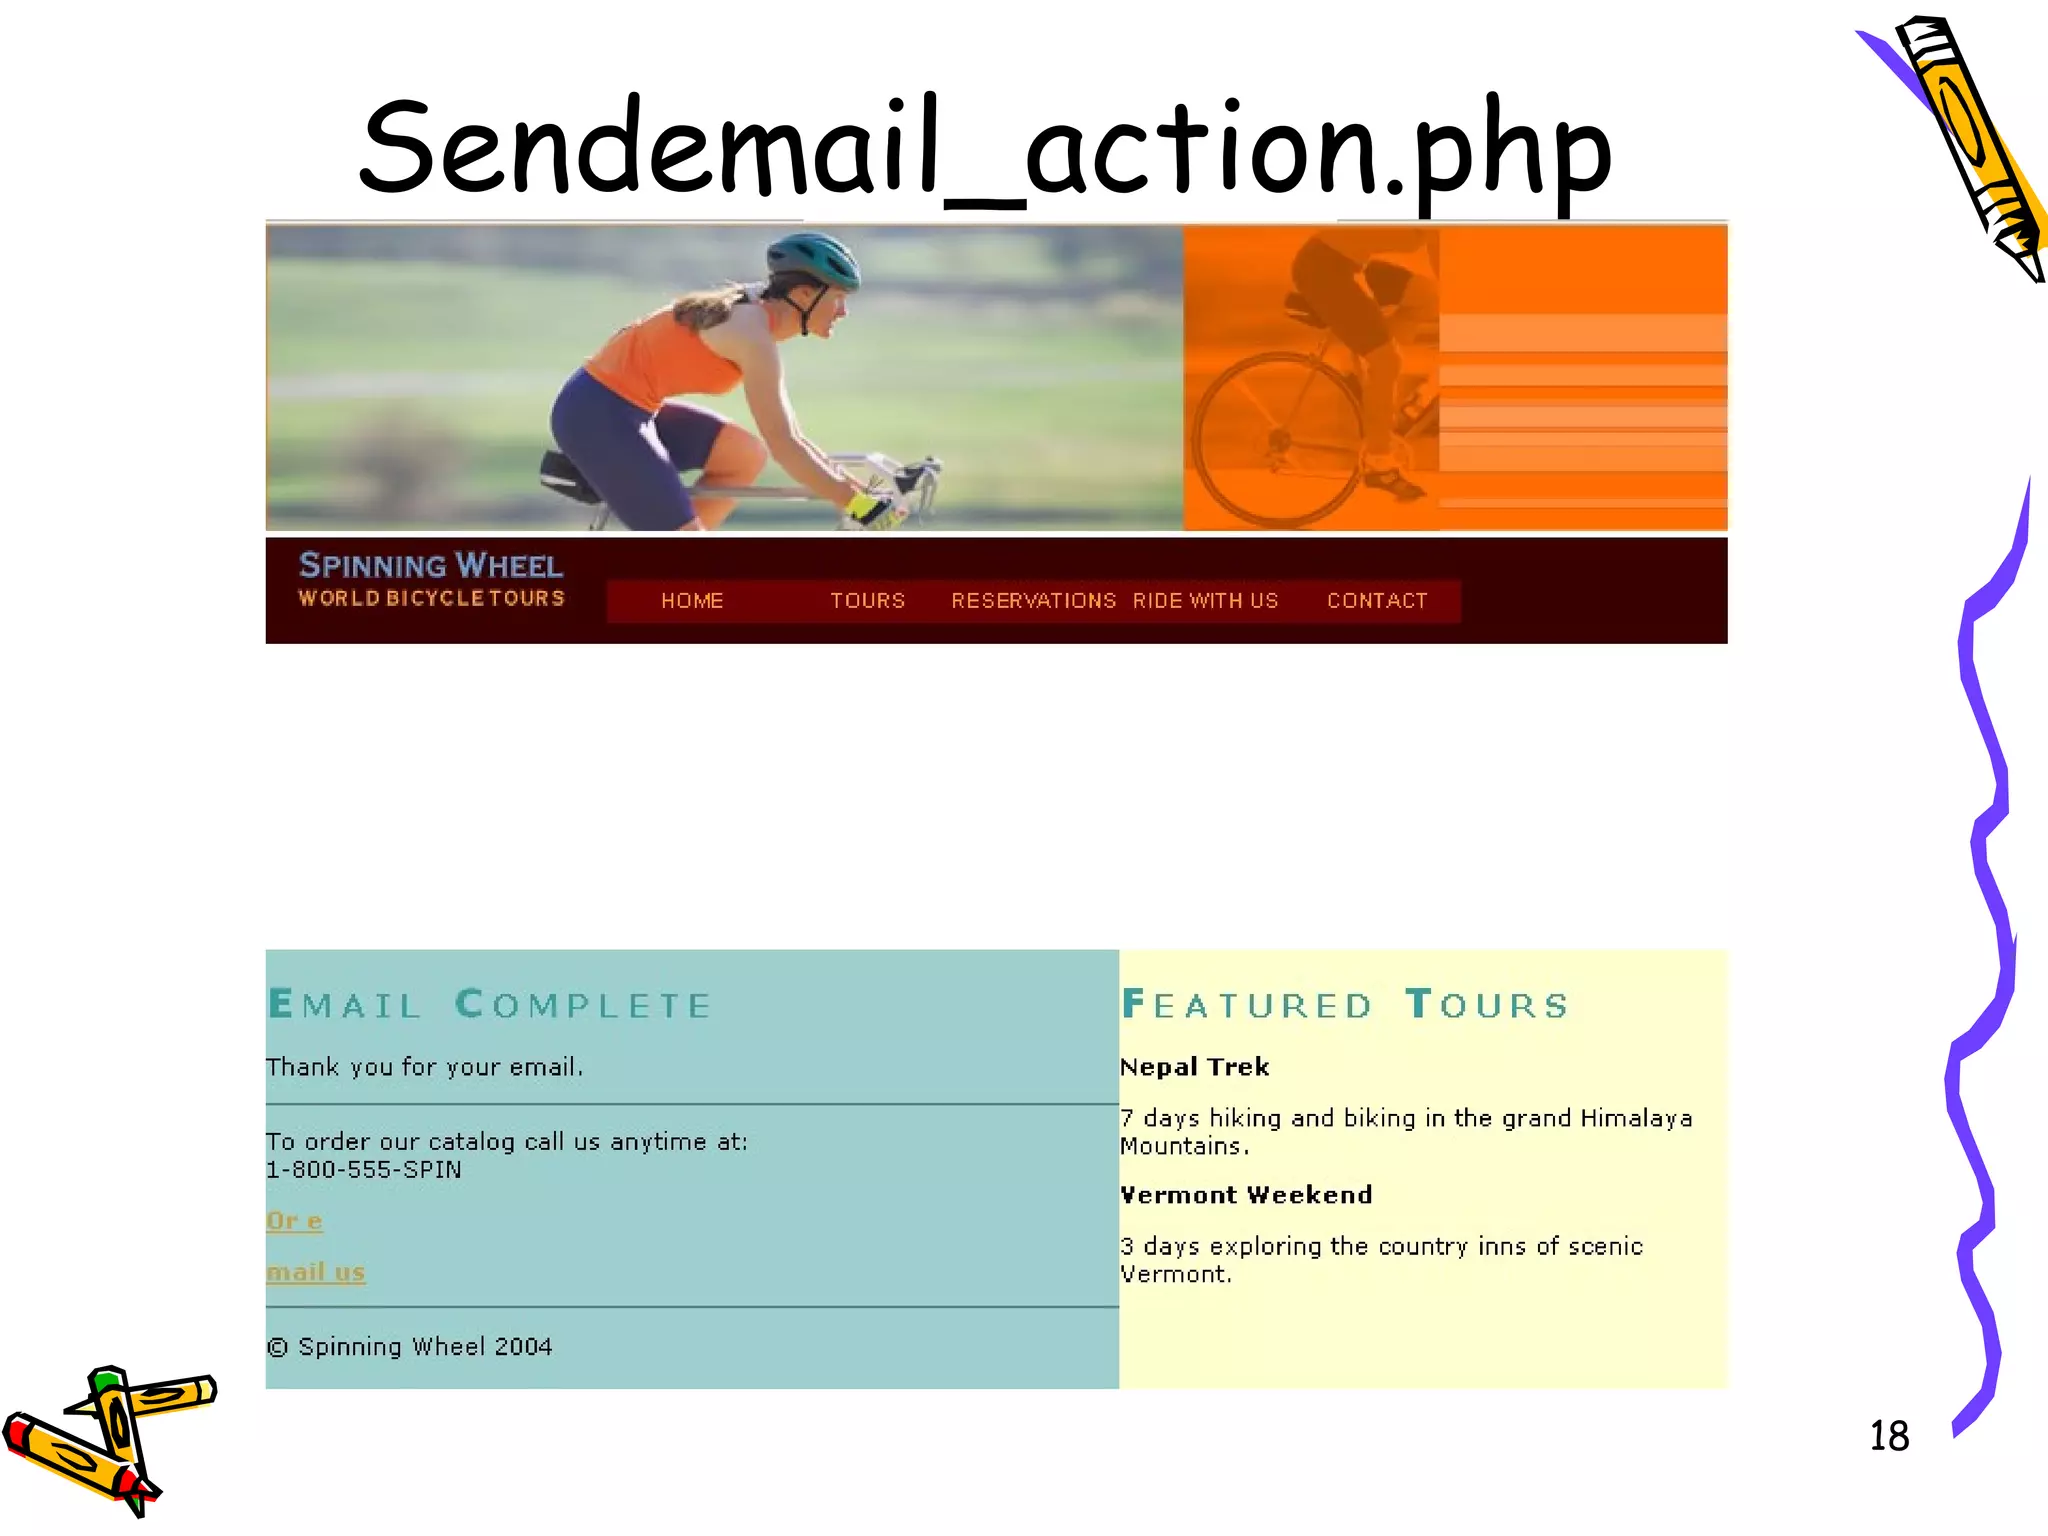
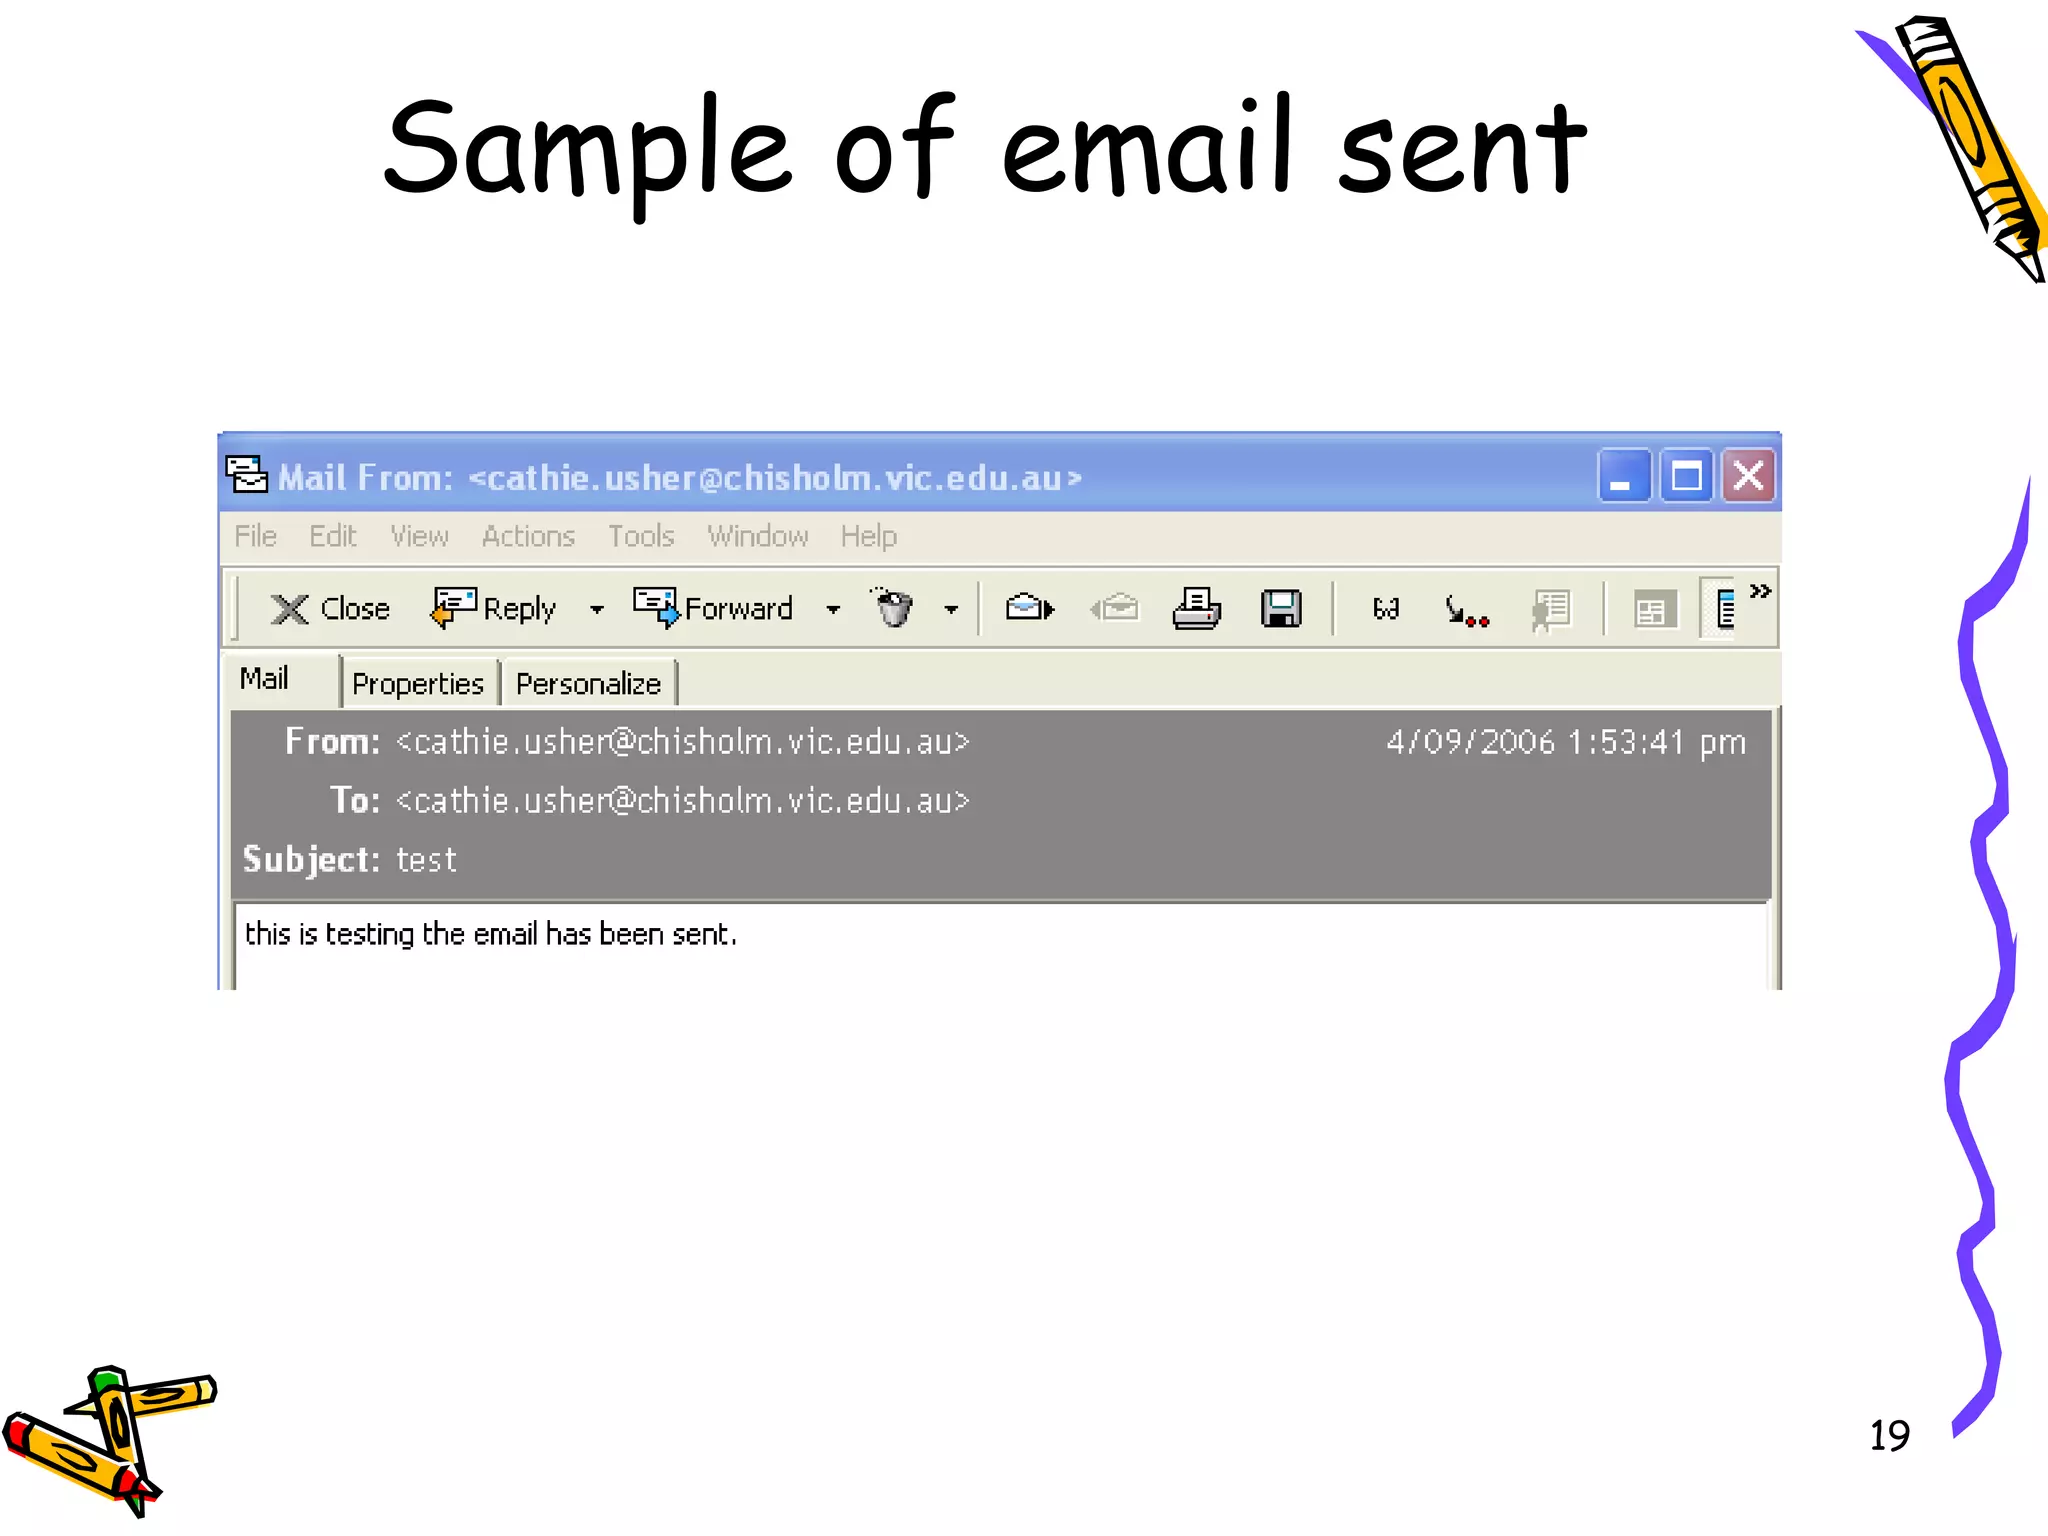
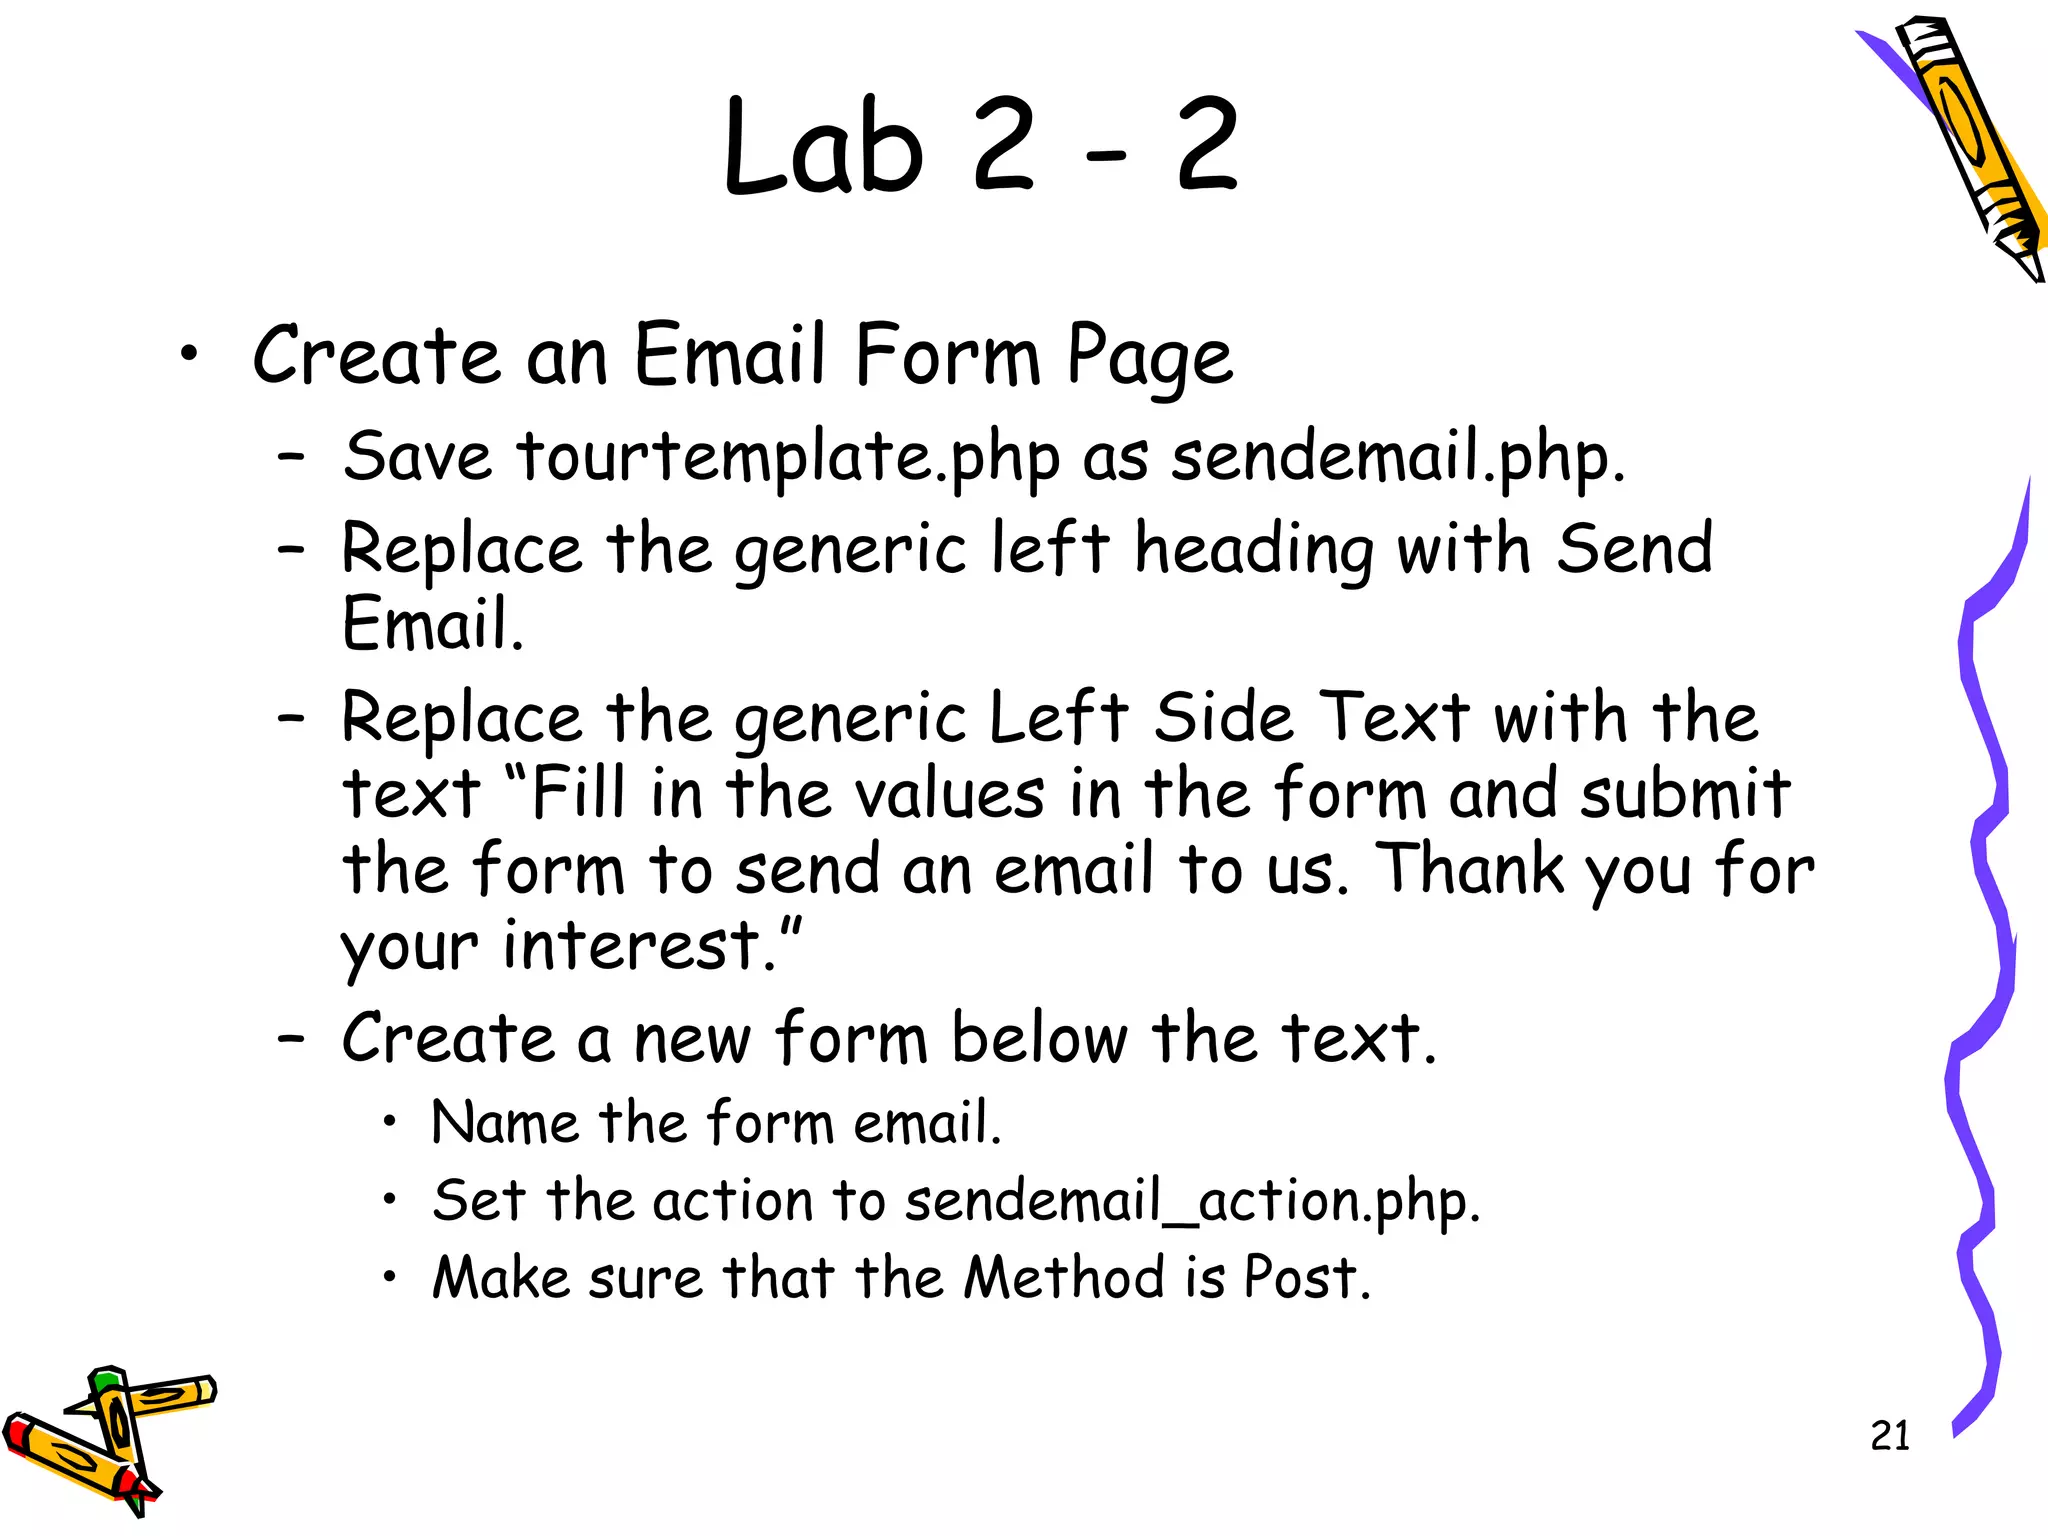
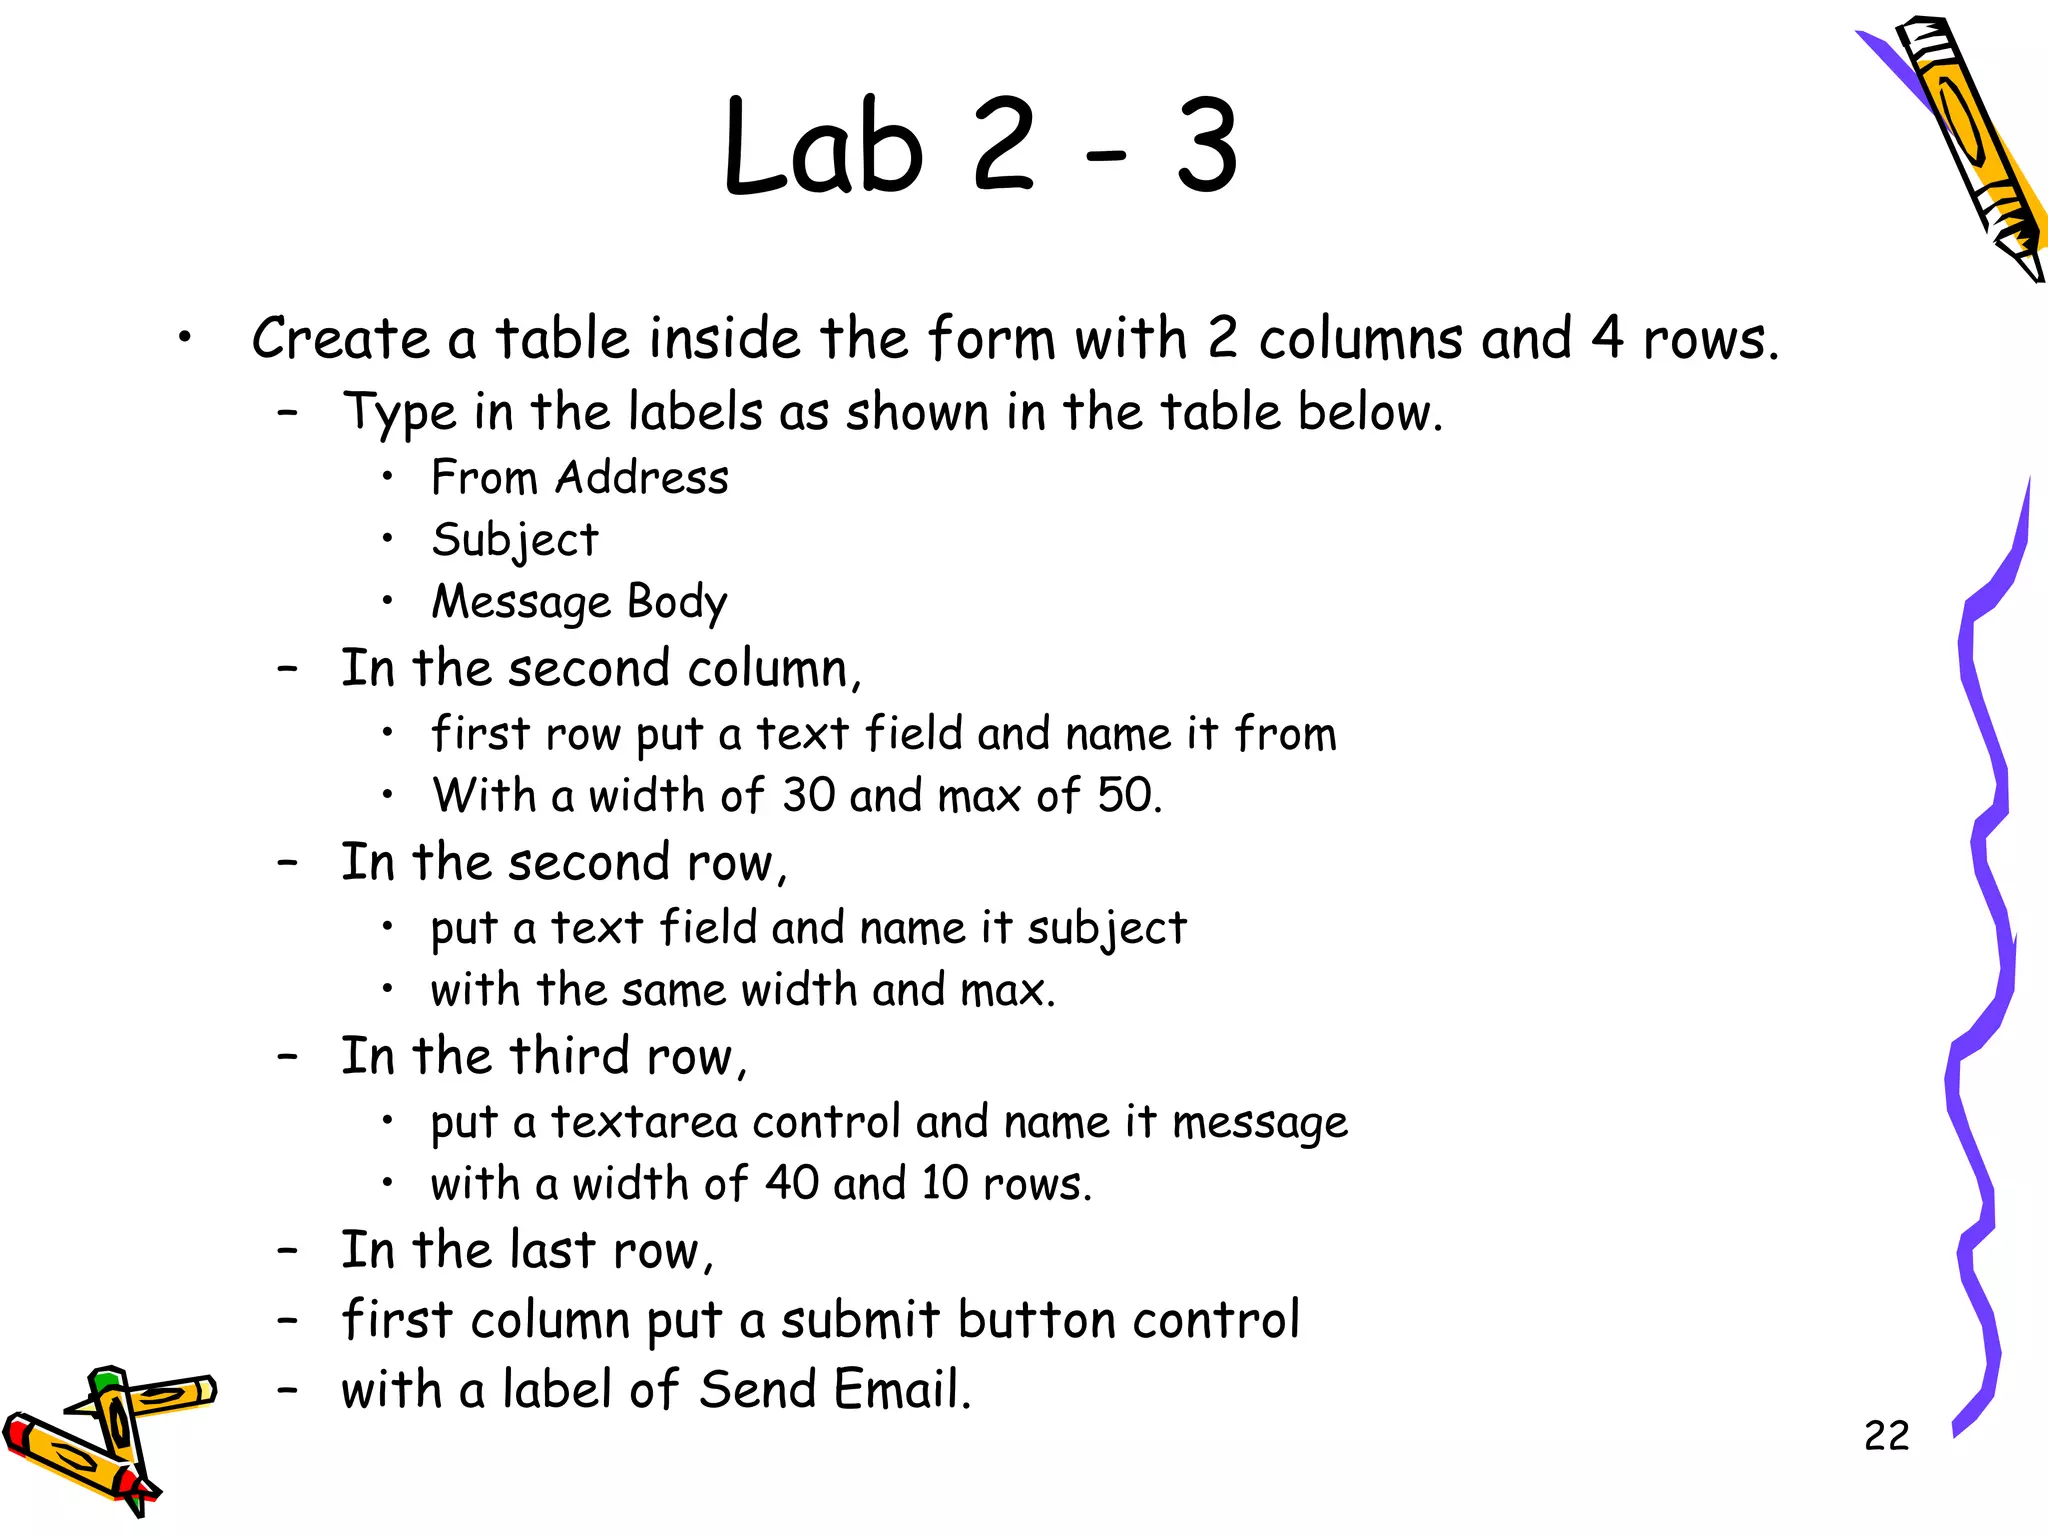
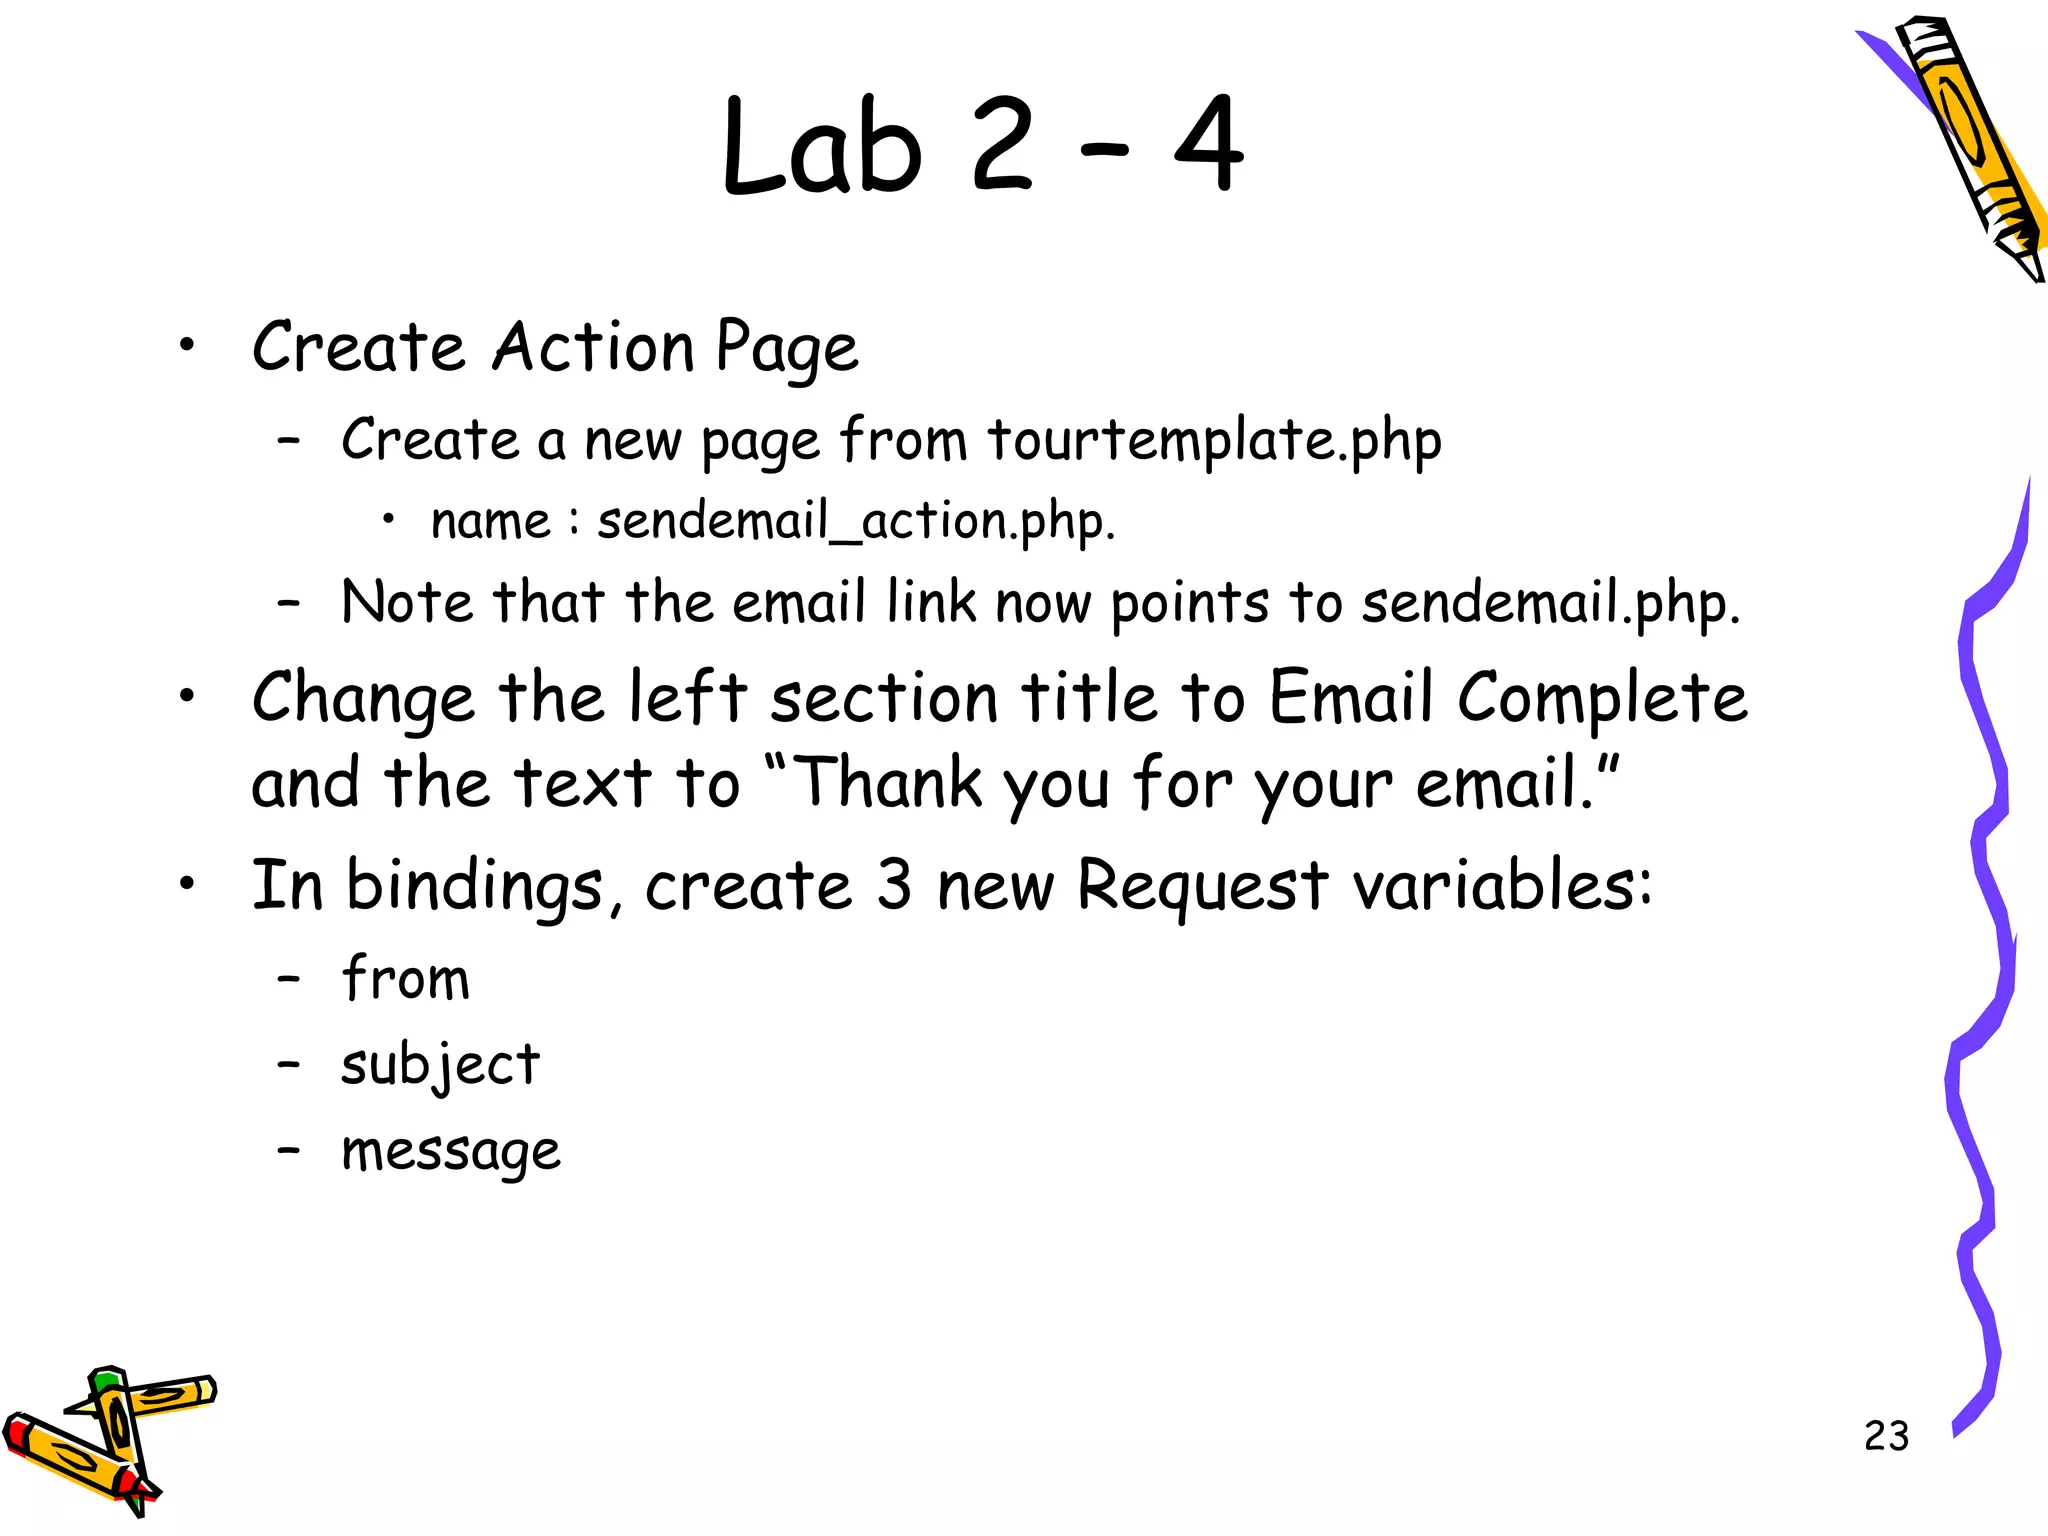
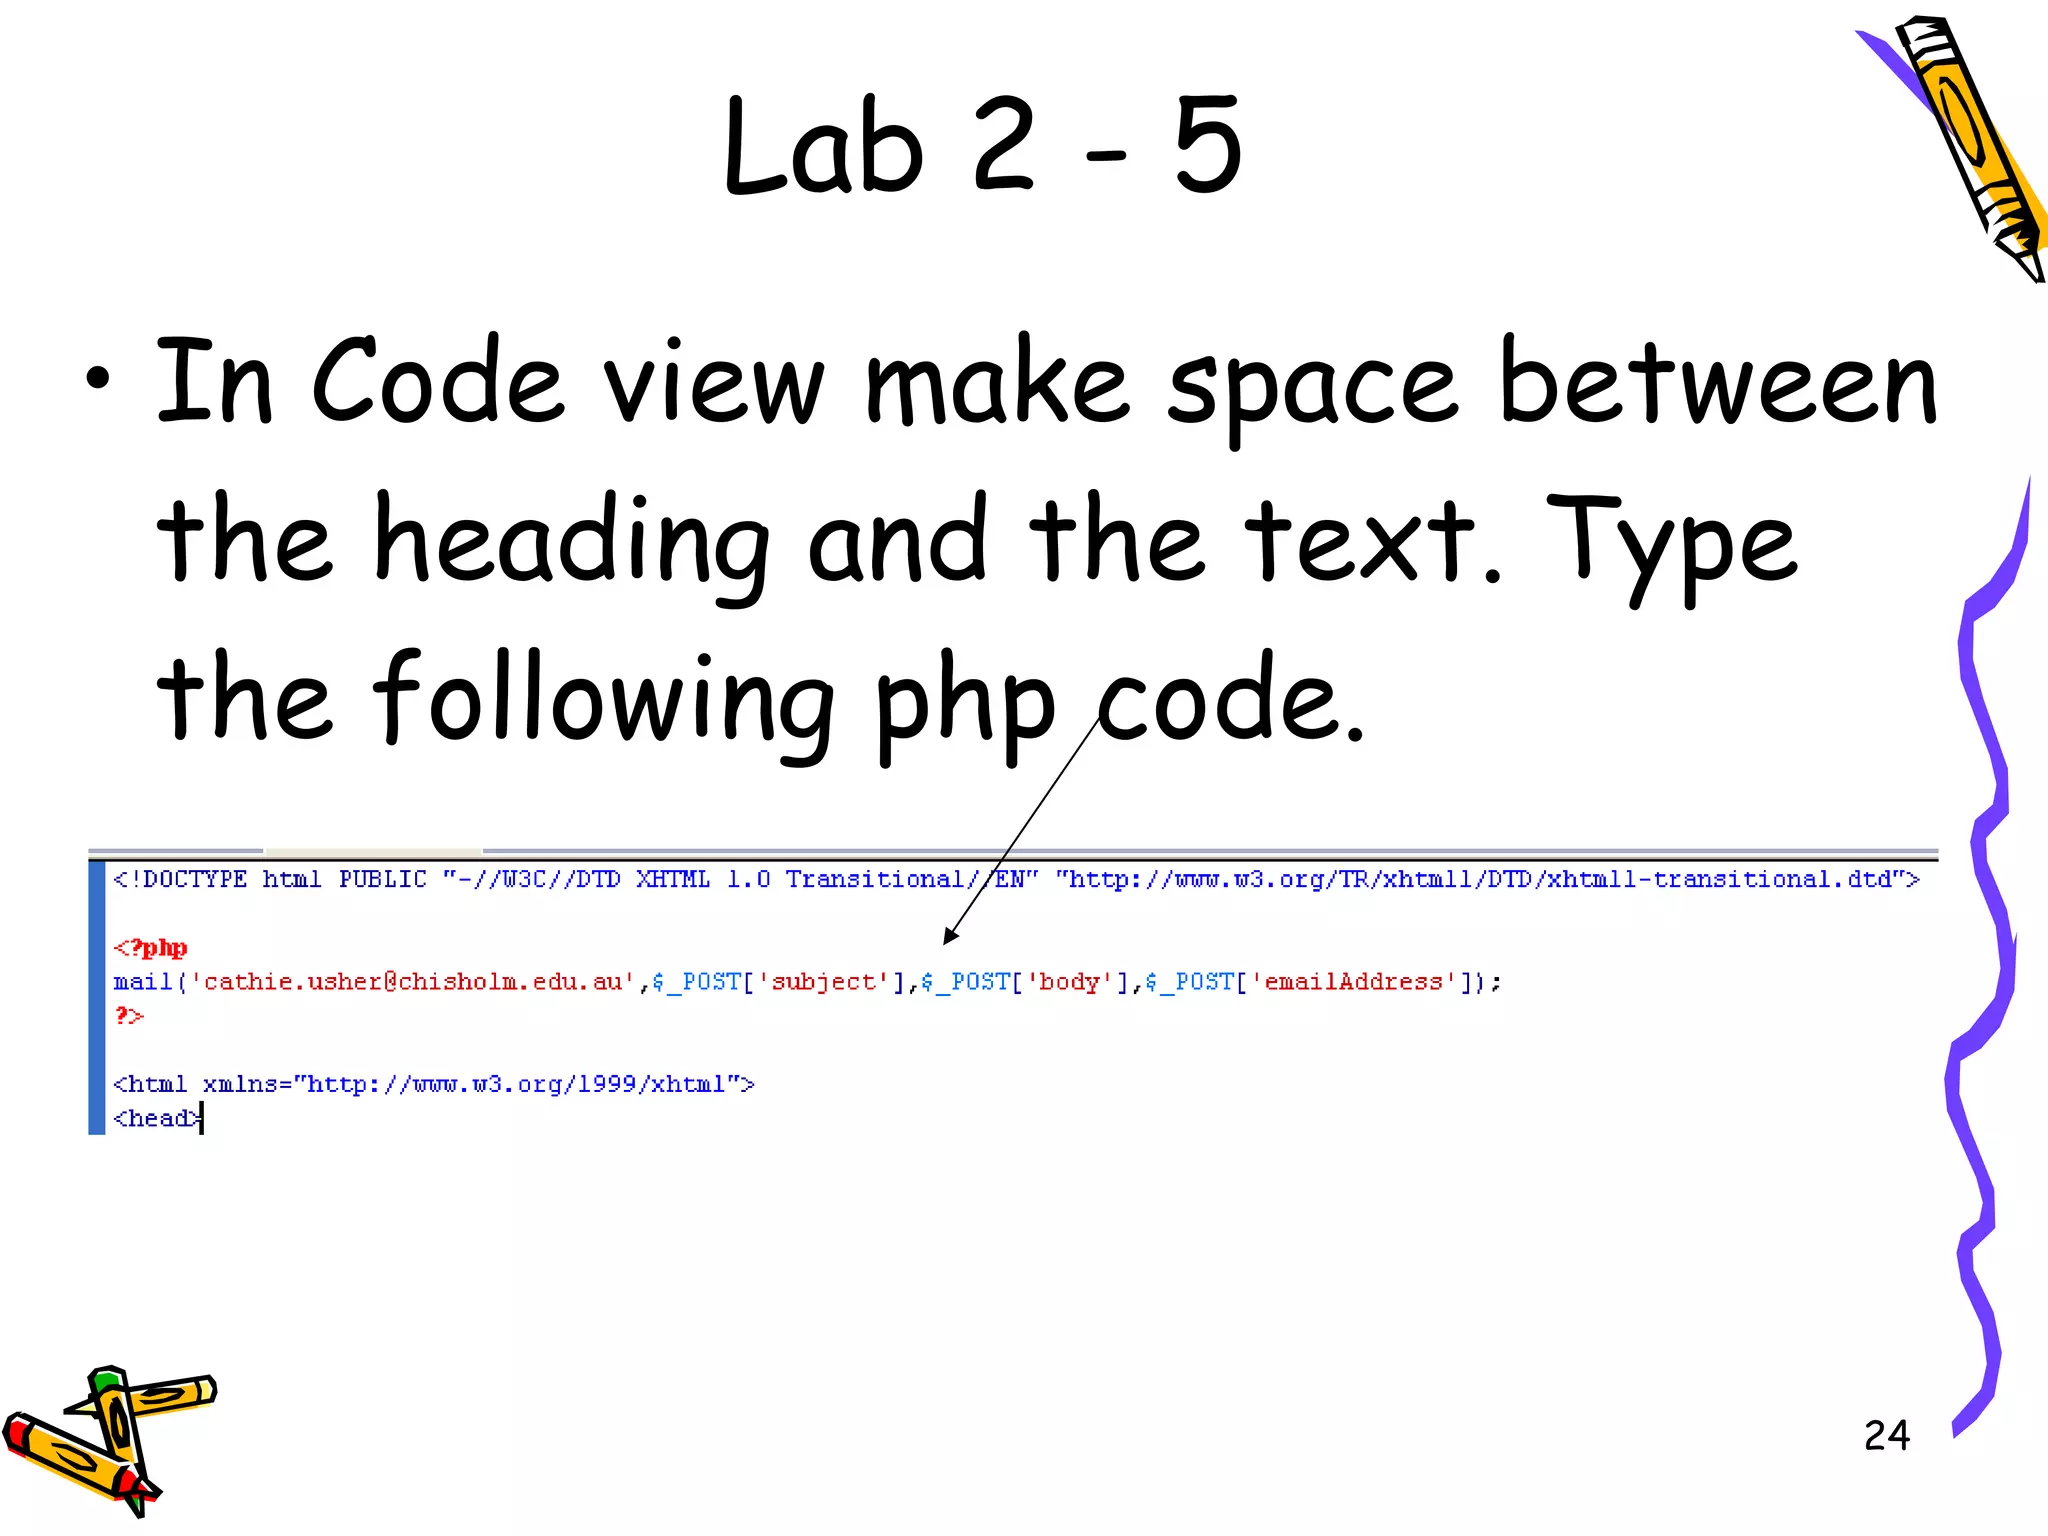
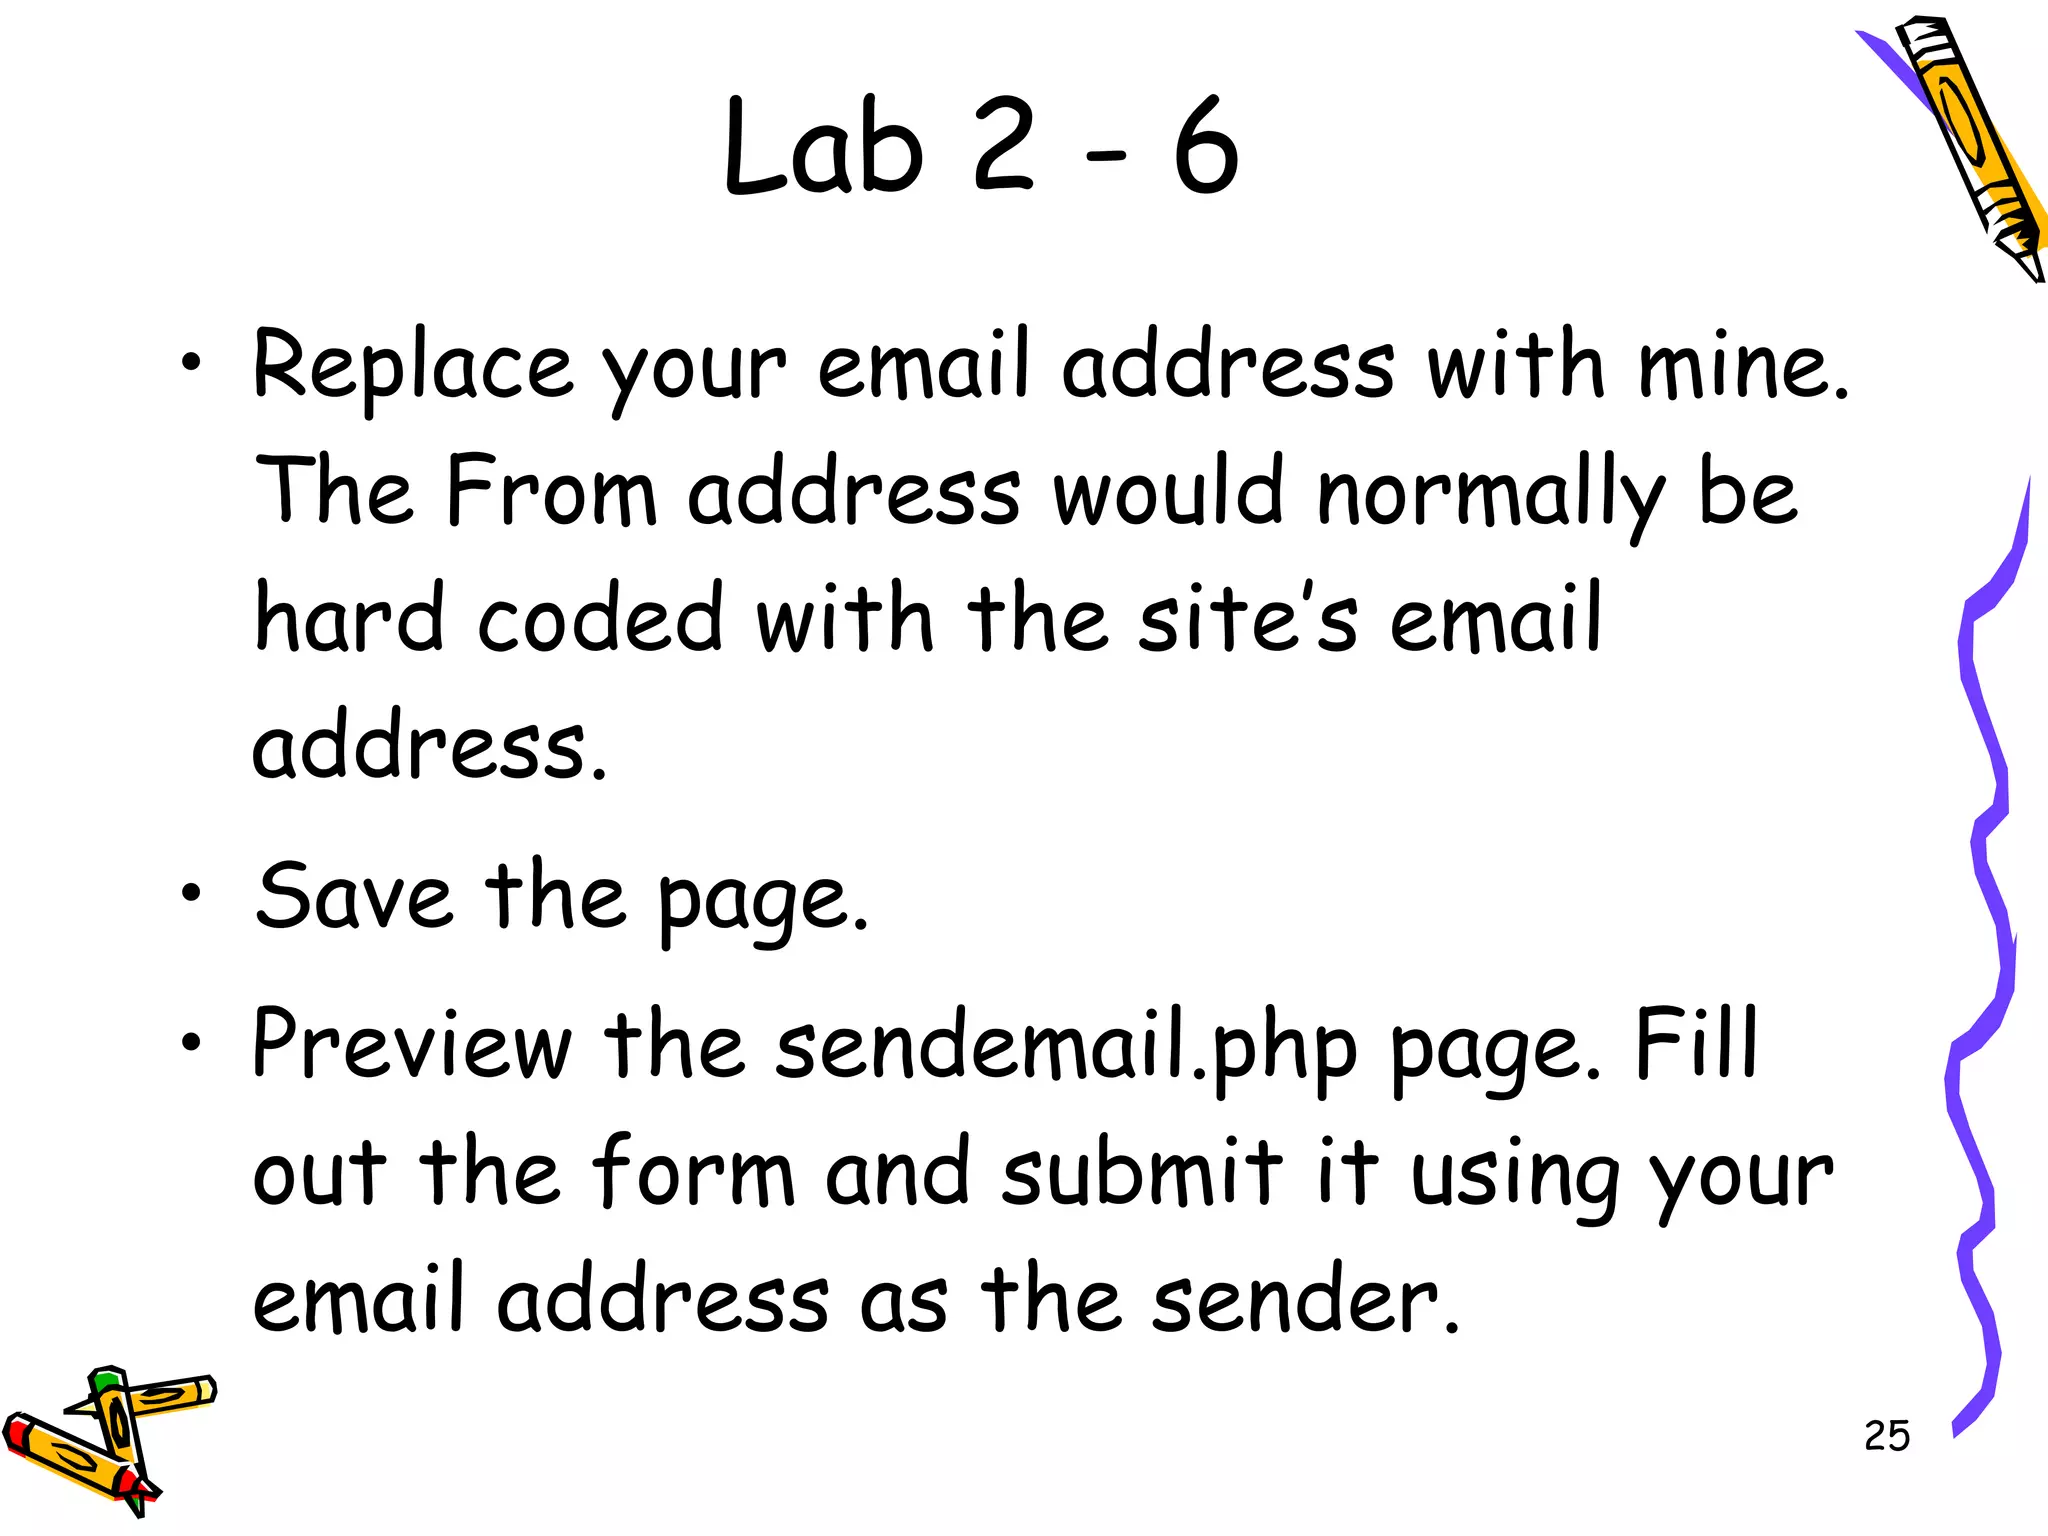
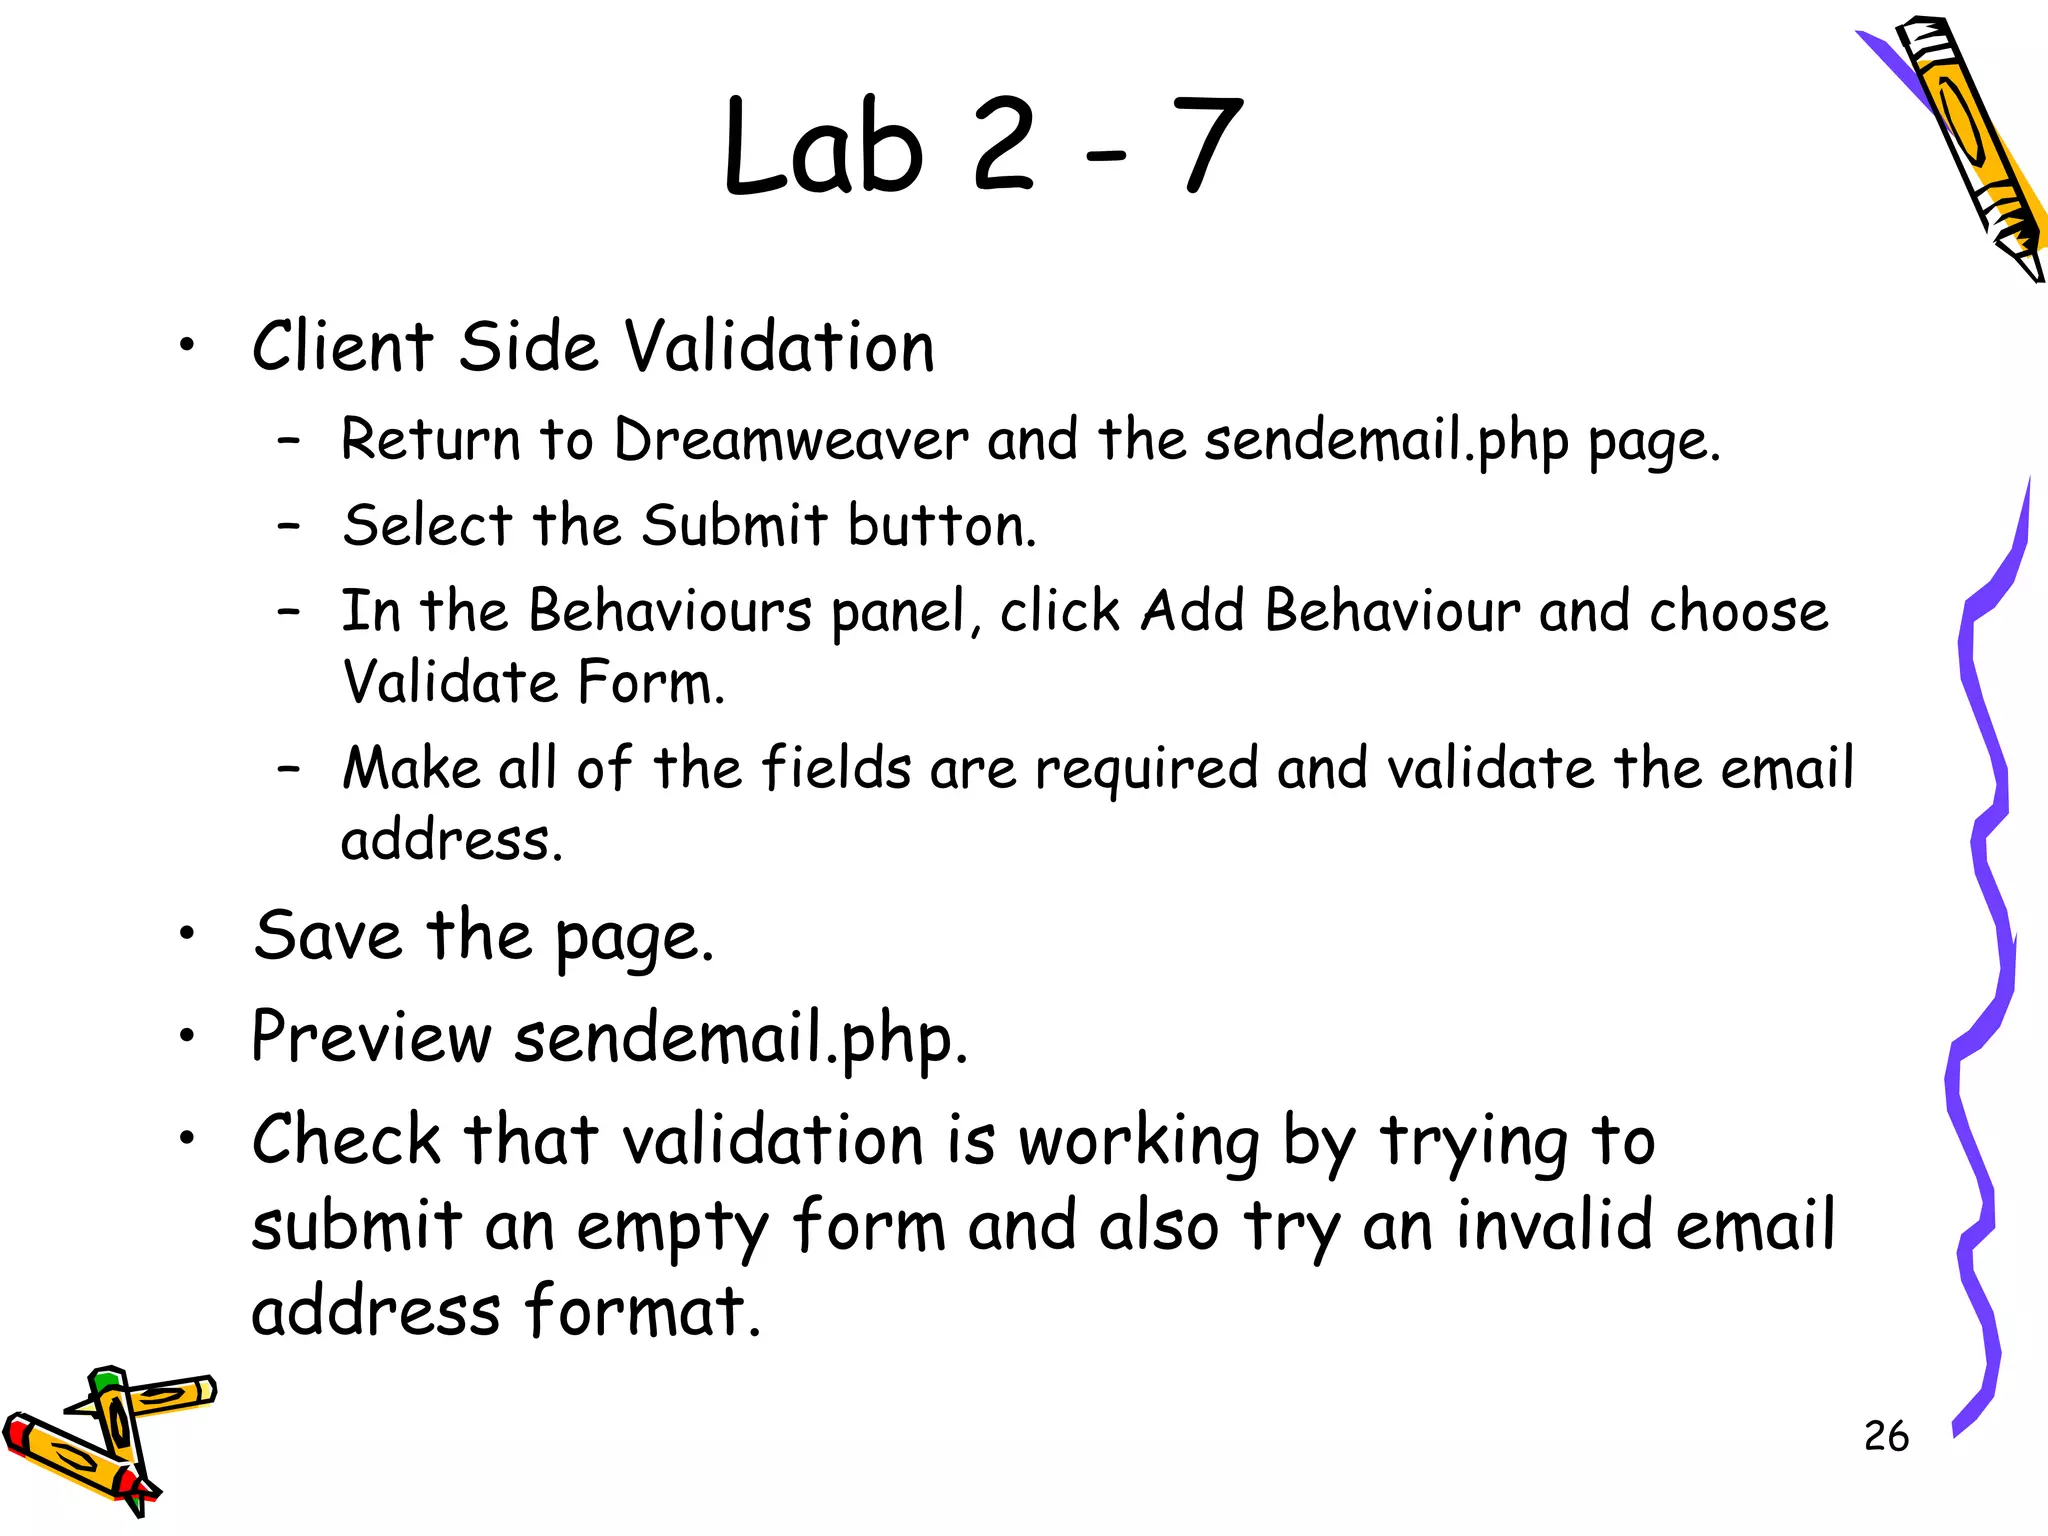
This document discusses sending email forms and validation in PHP. It provides instructions on setting up a basic contact form with client-side validation to send email from a PHP script. The steps include:
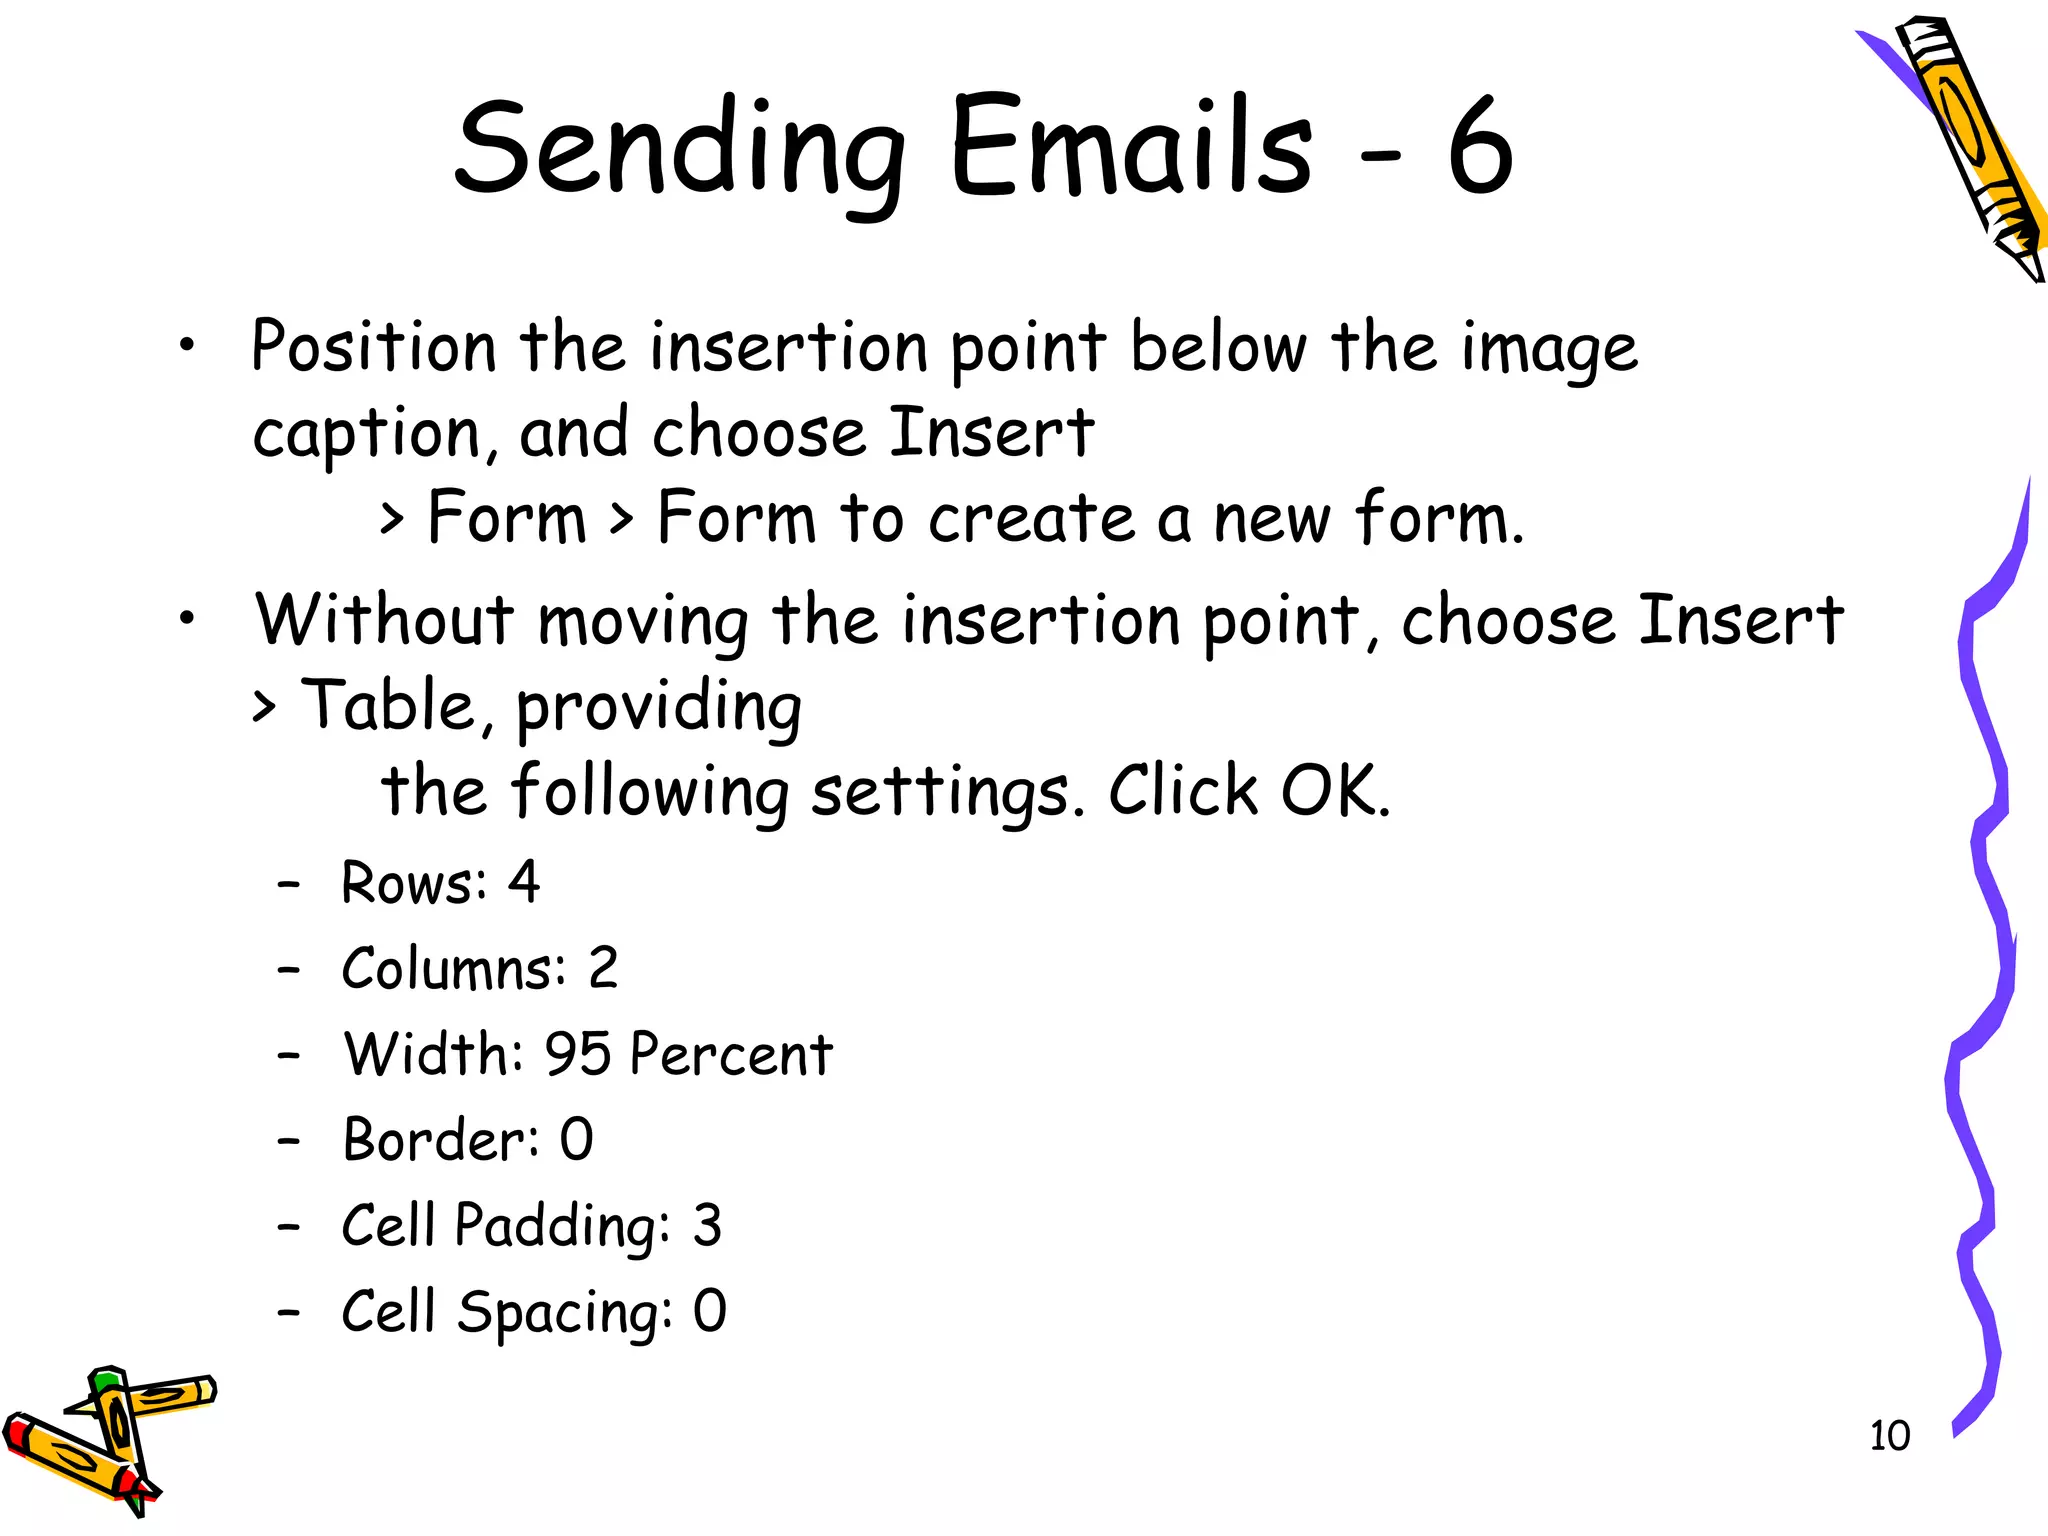
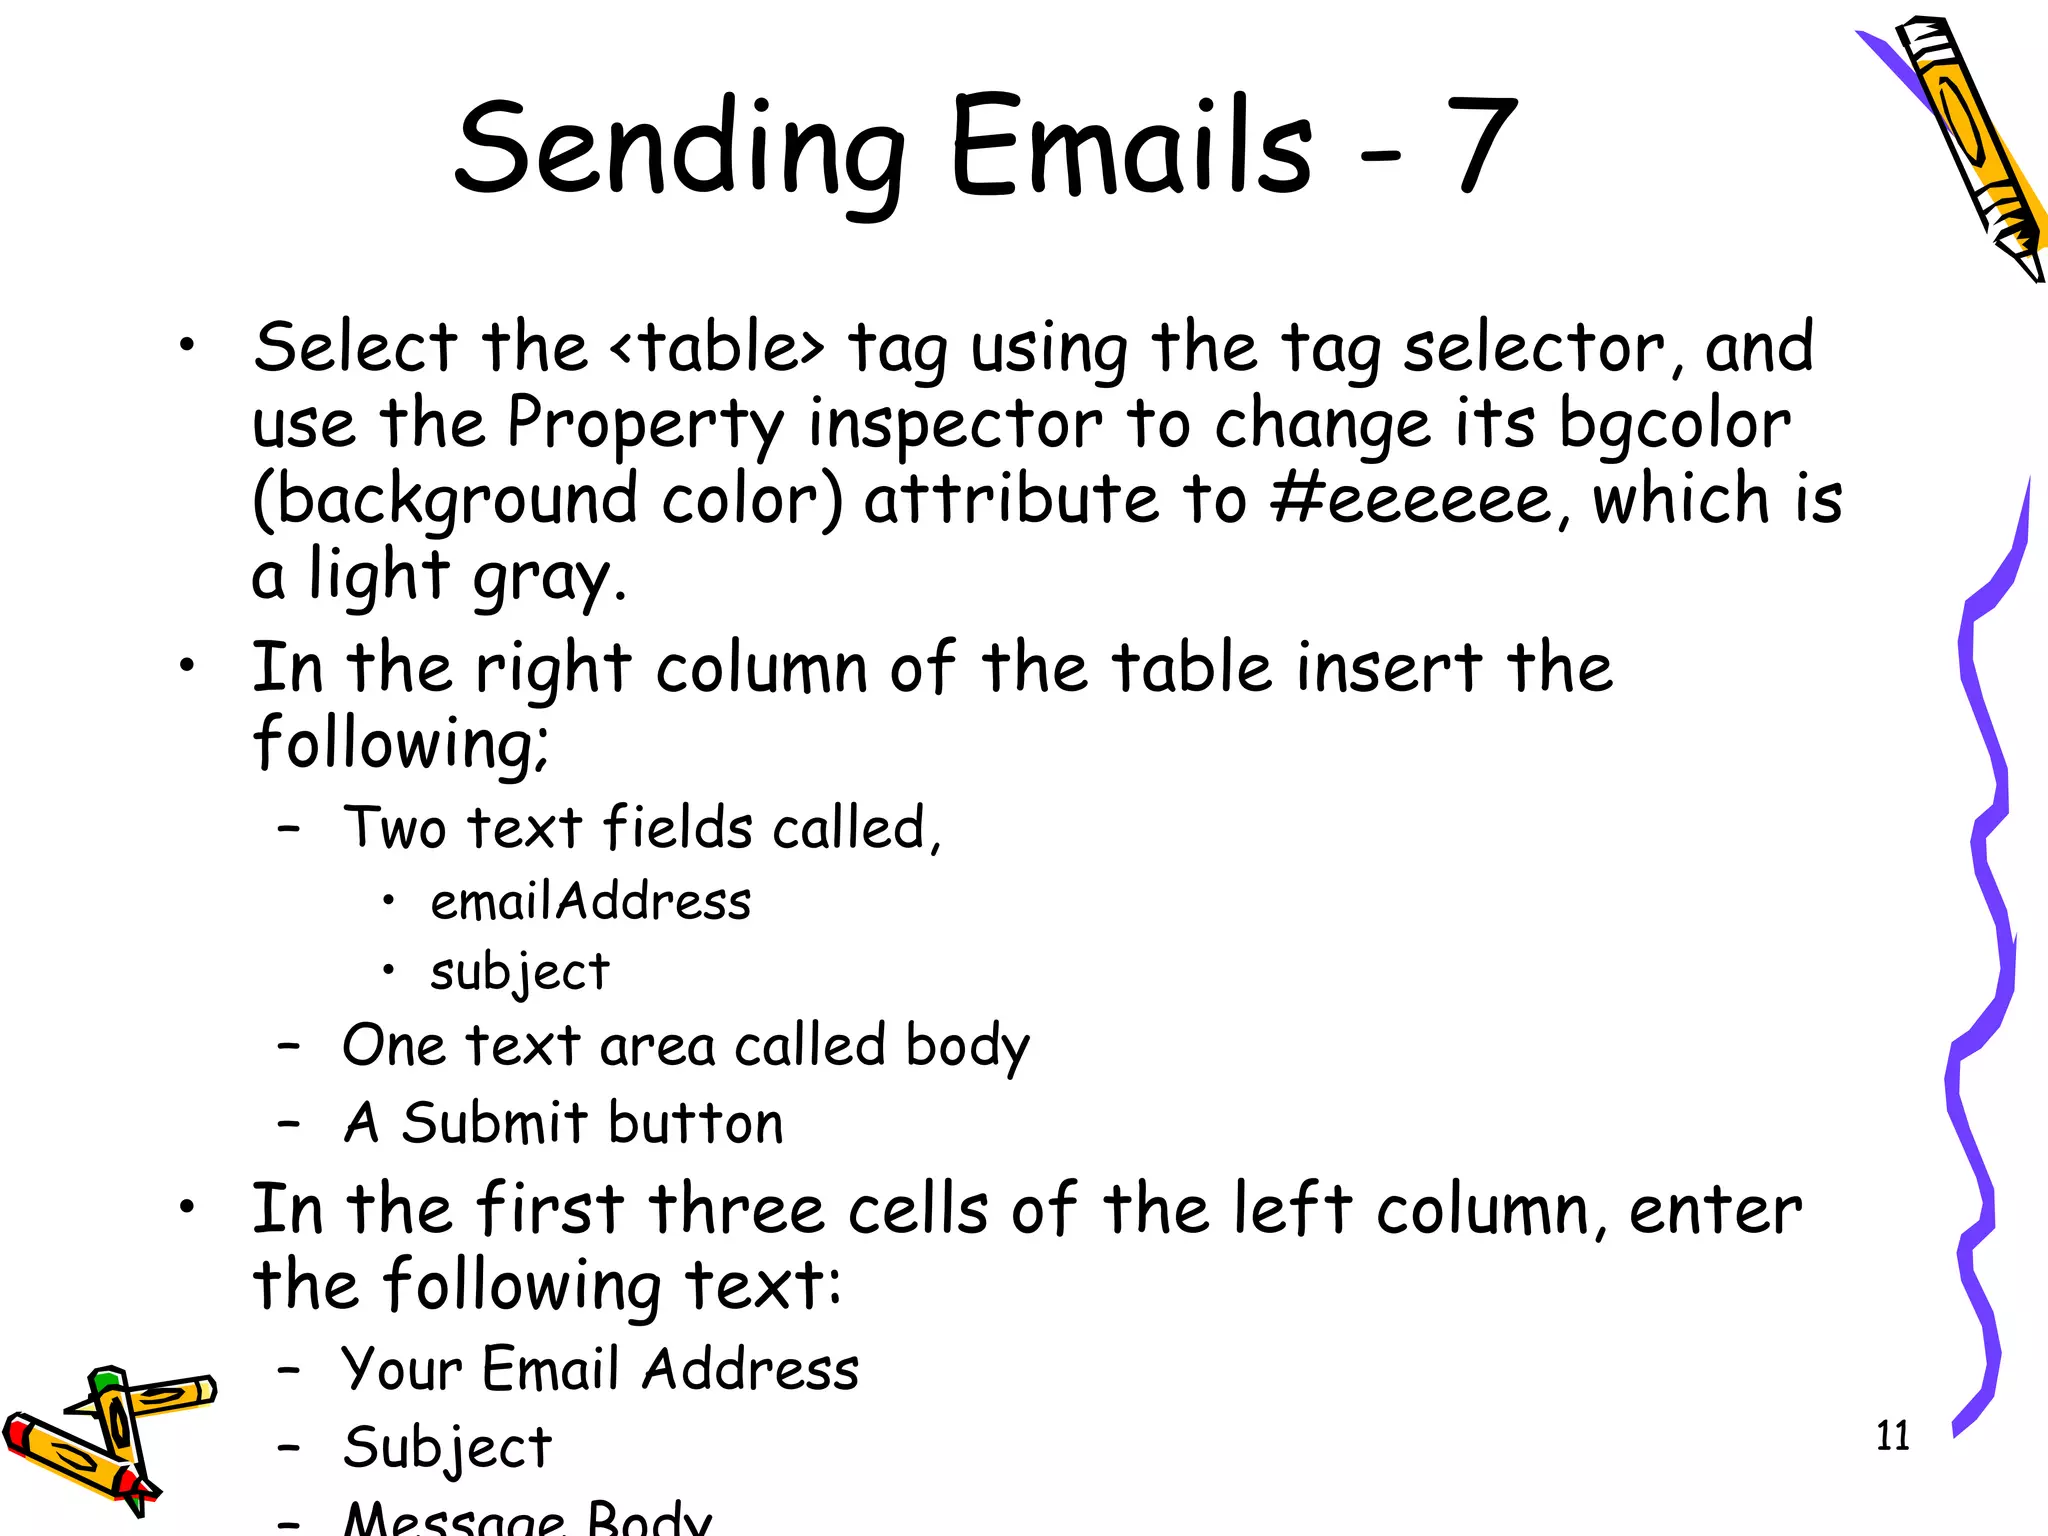
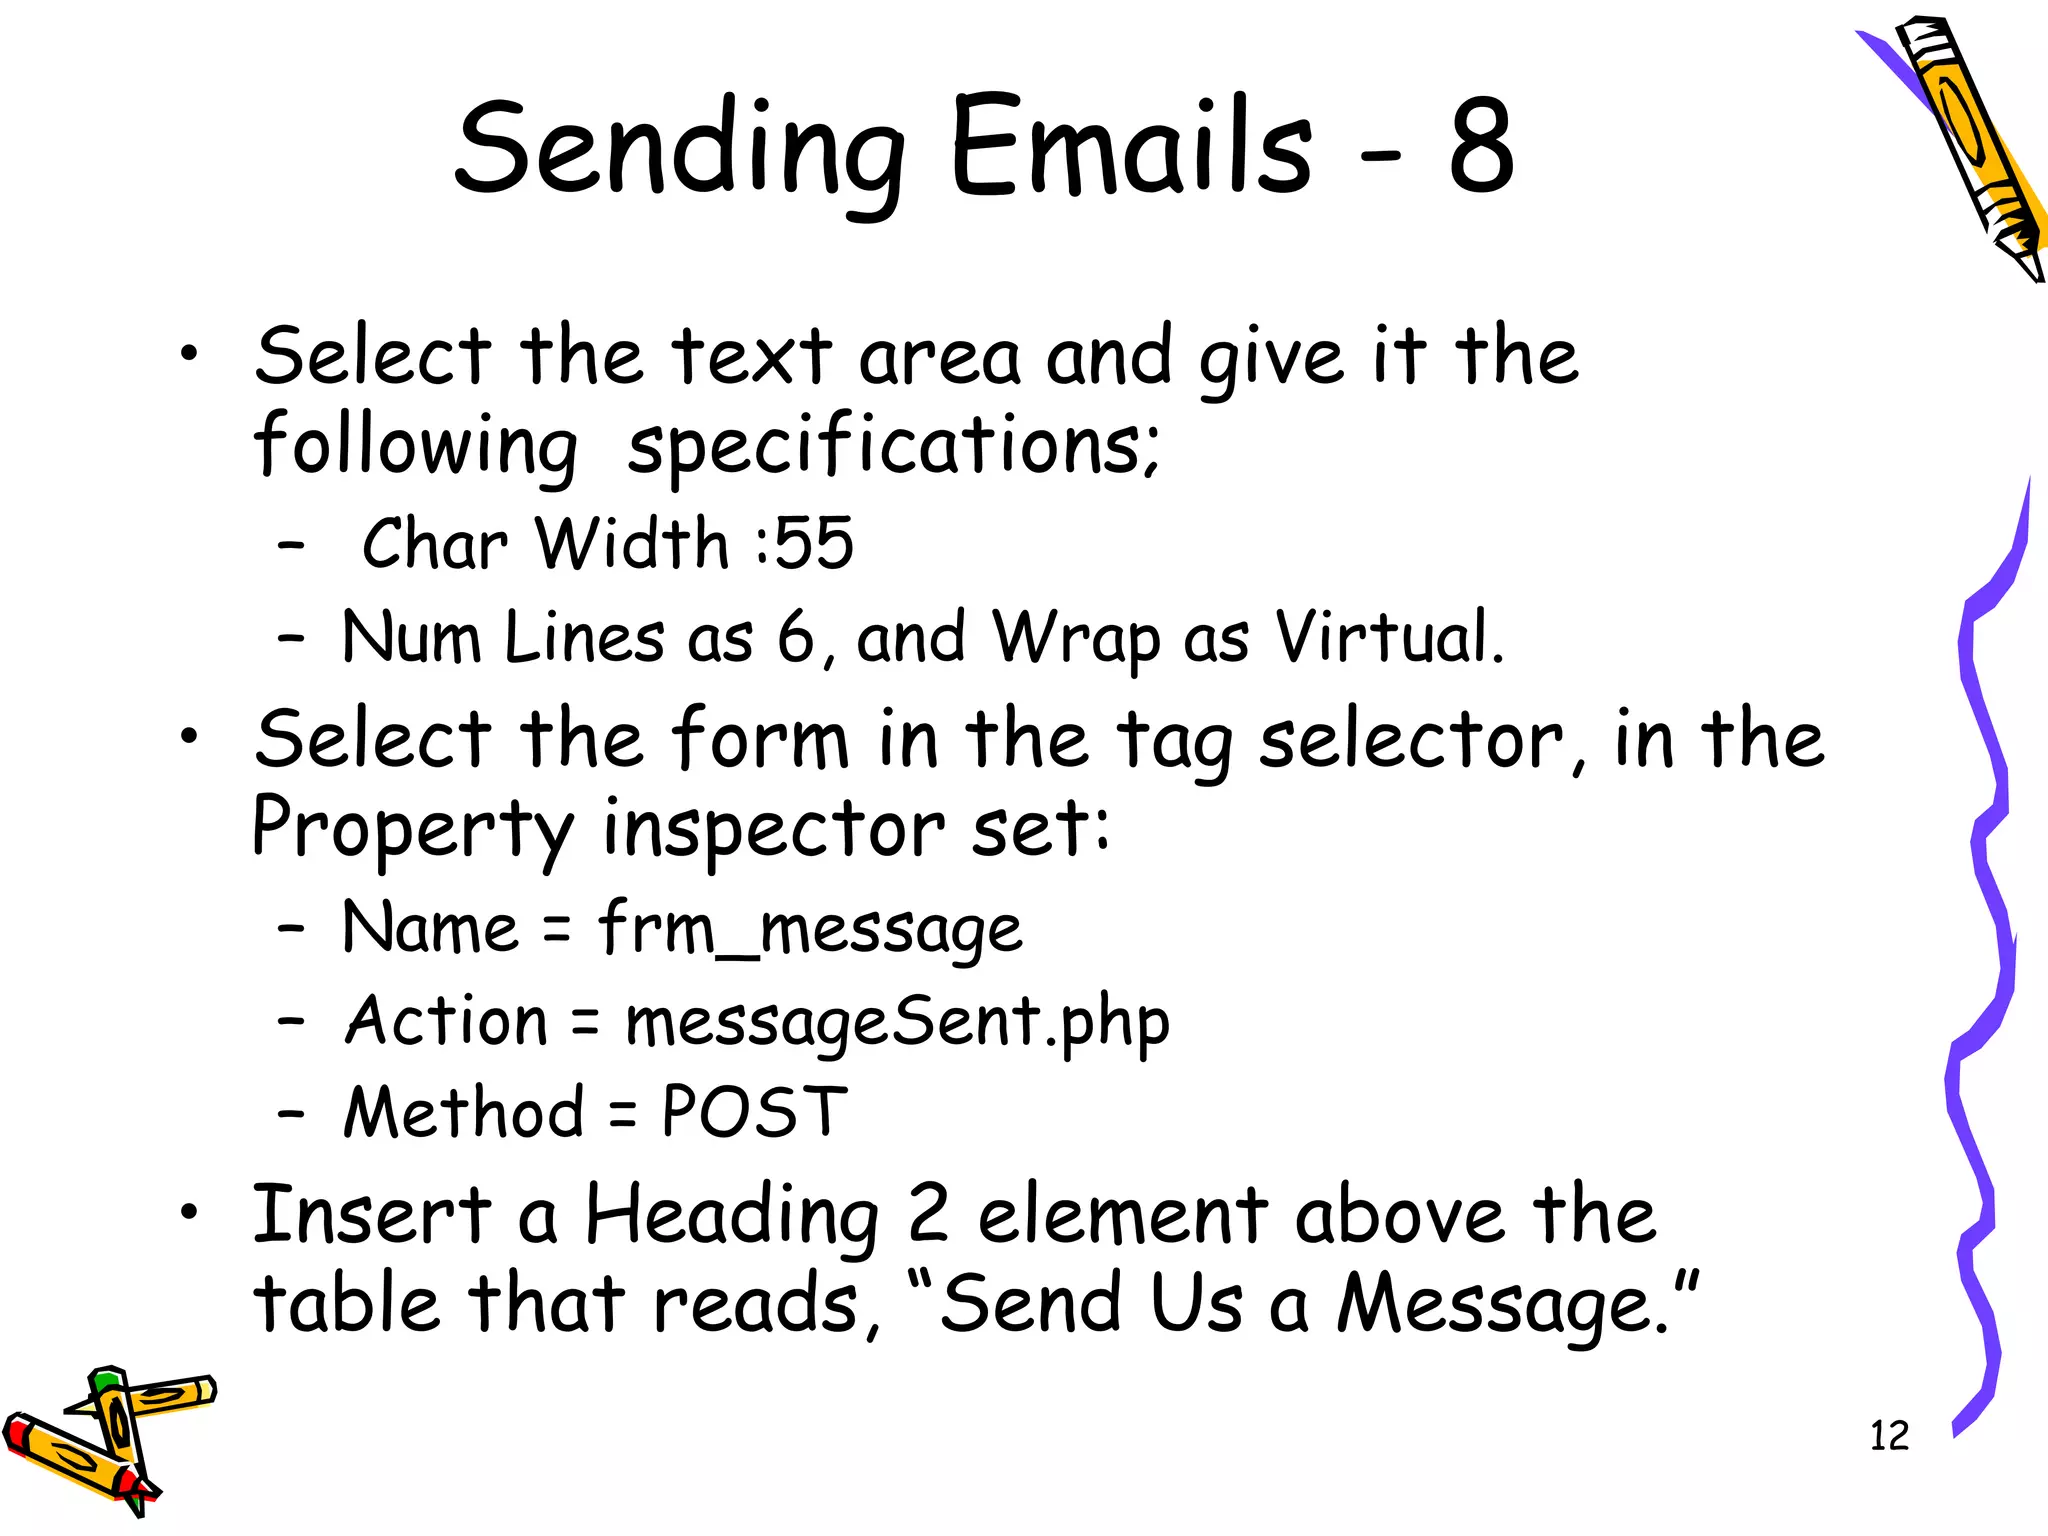
1) Creating a contact form page with fields for email, subject, and message.
2) Adding client-side validation to require values and validate email format.
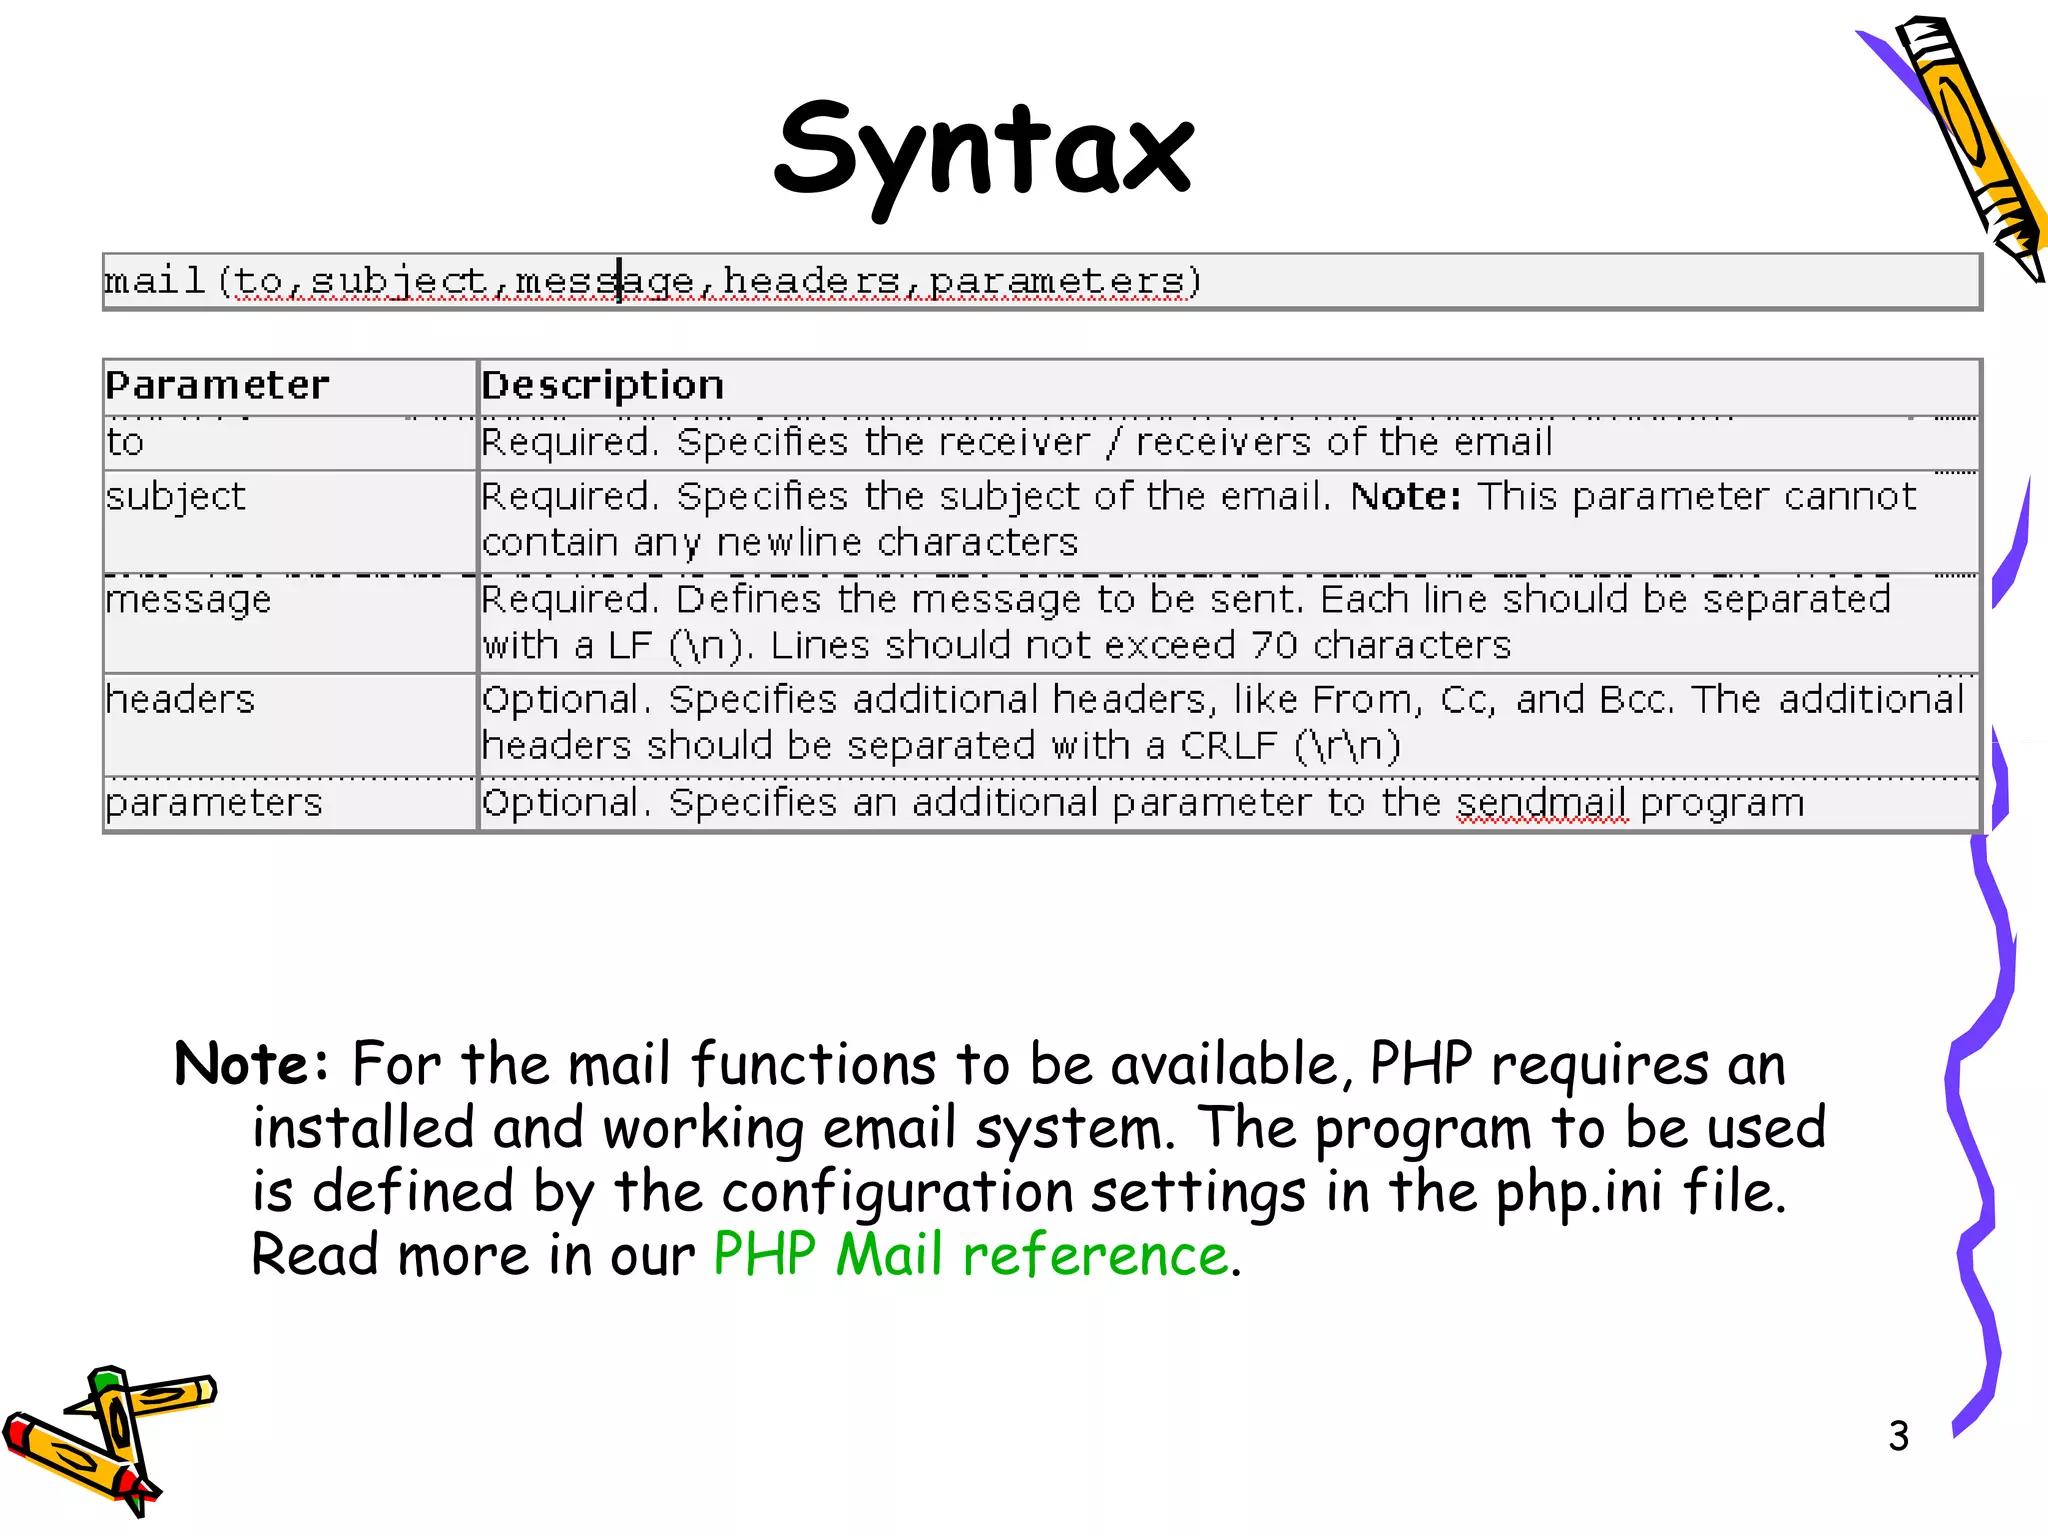
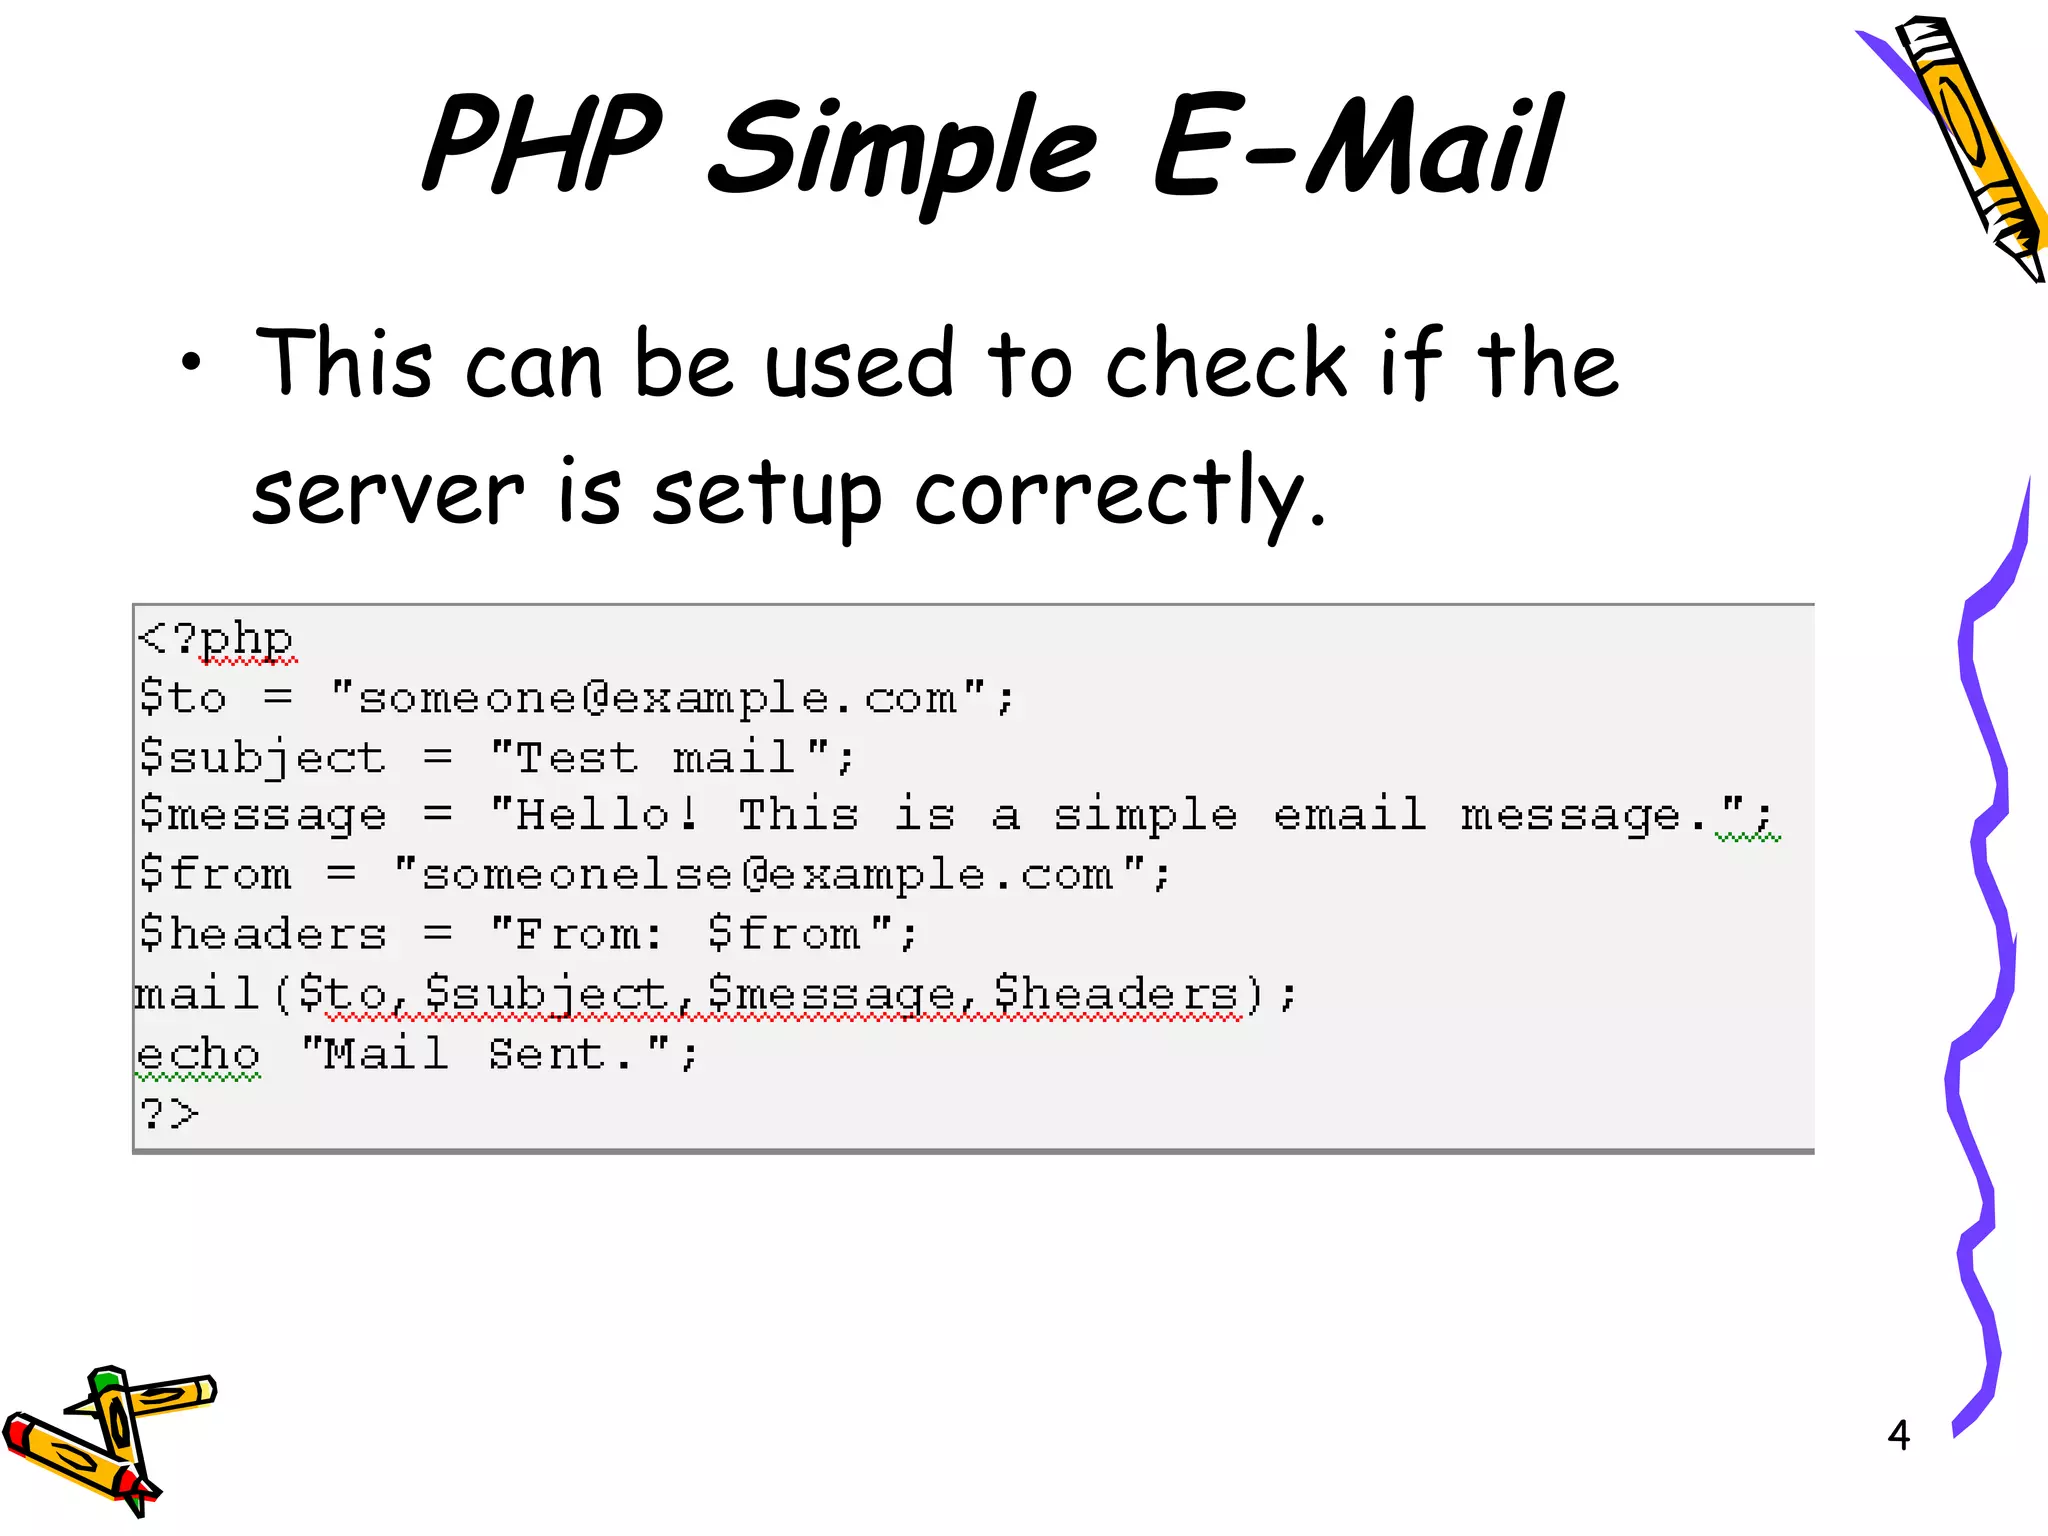
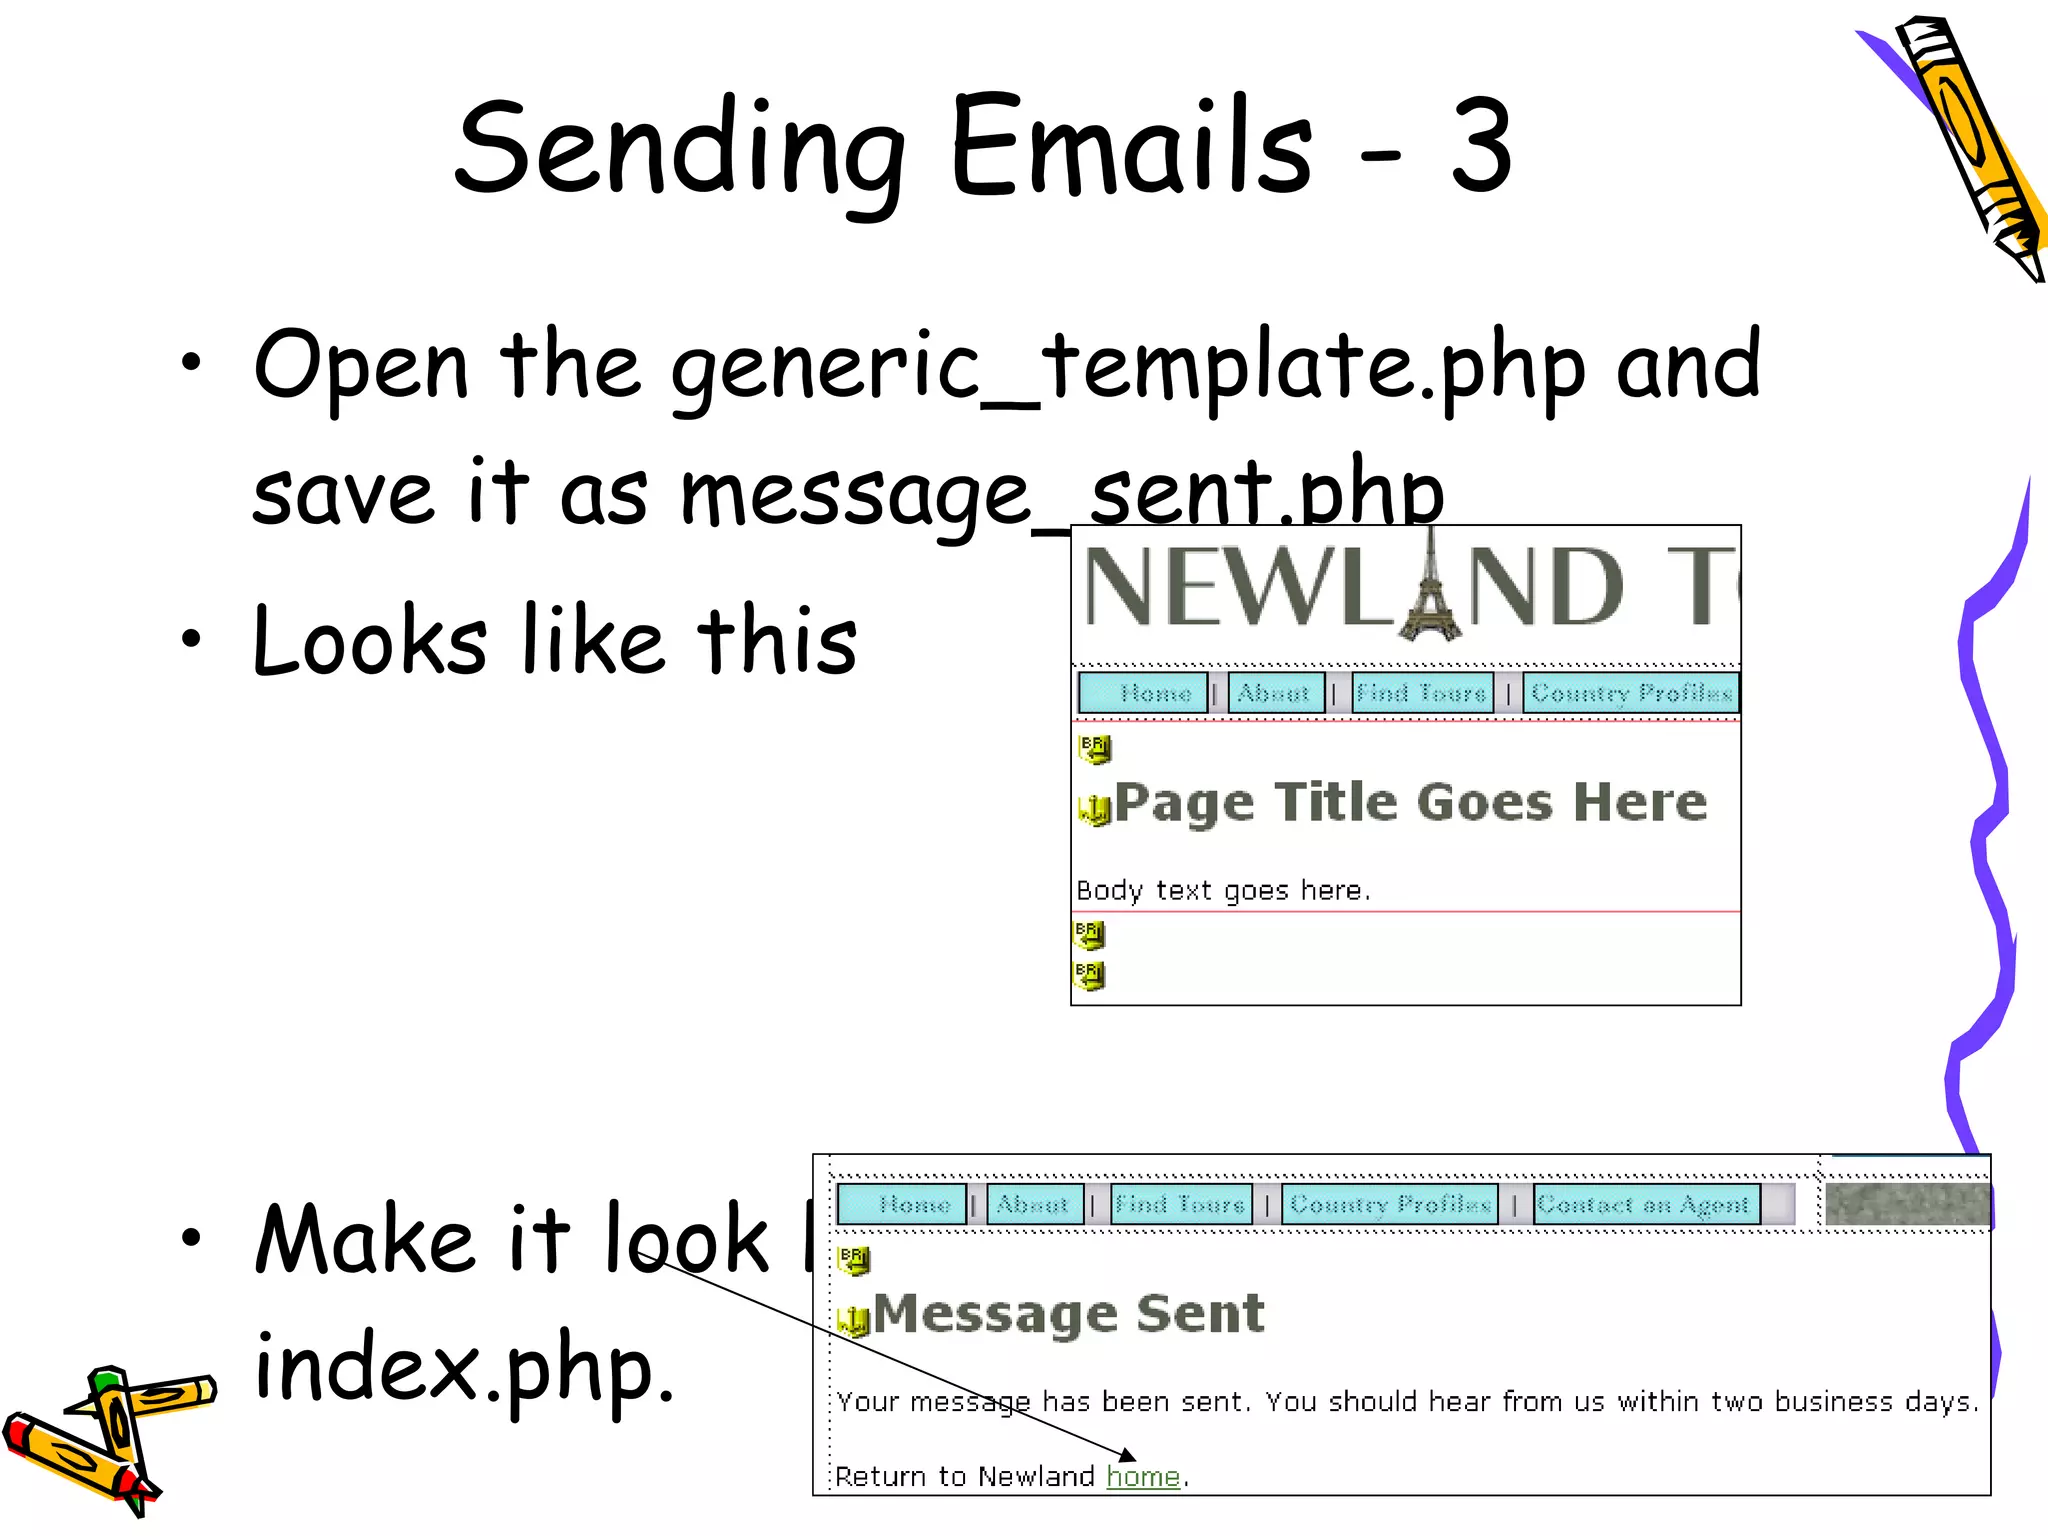
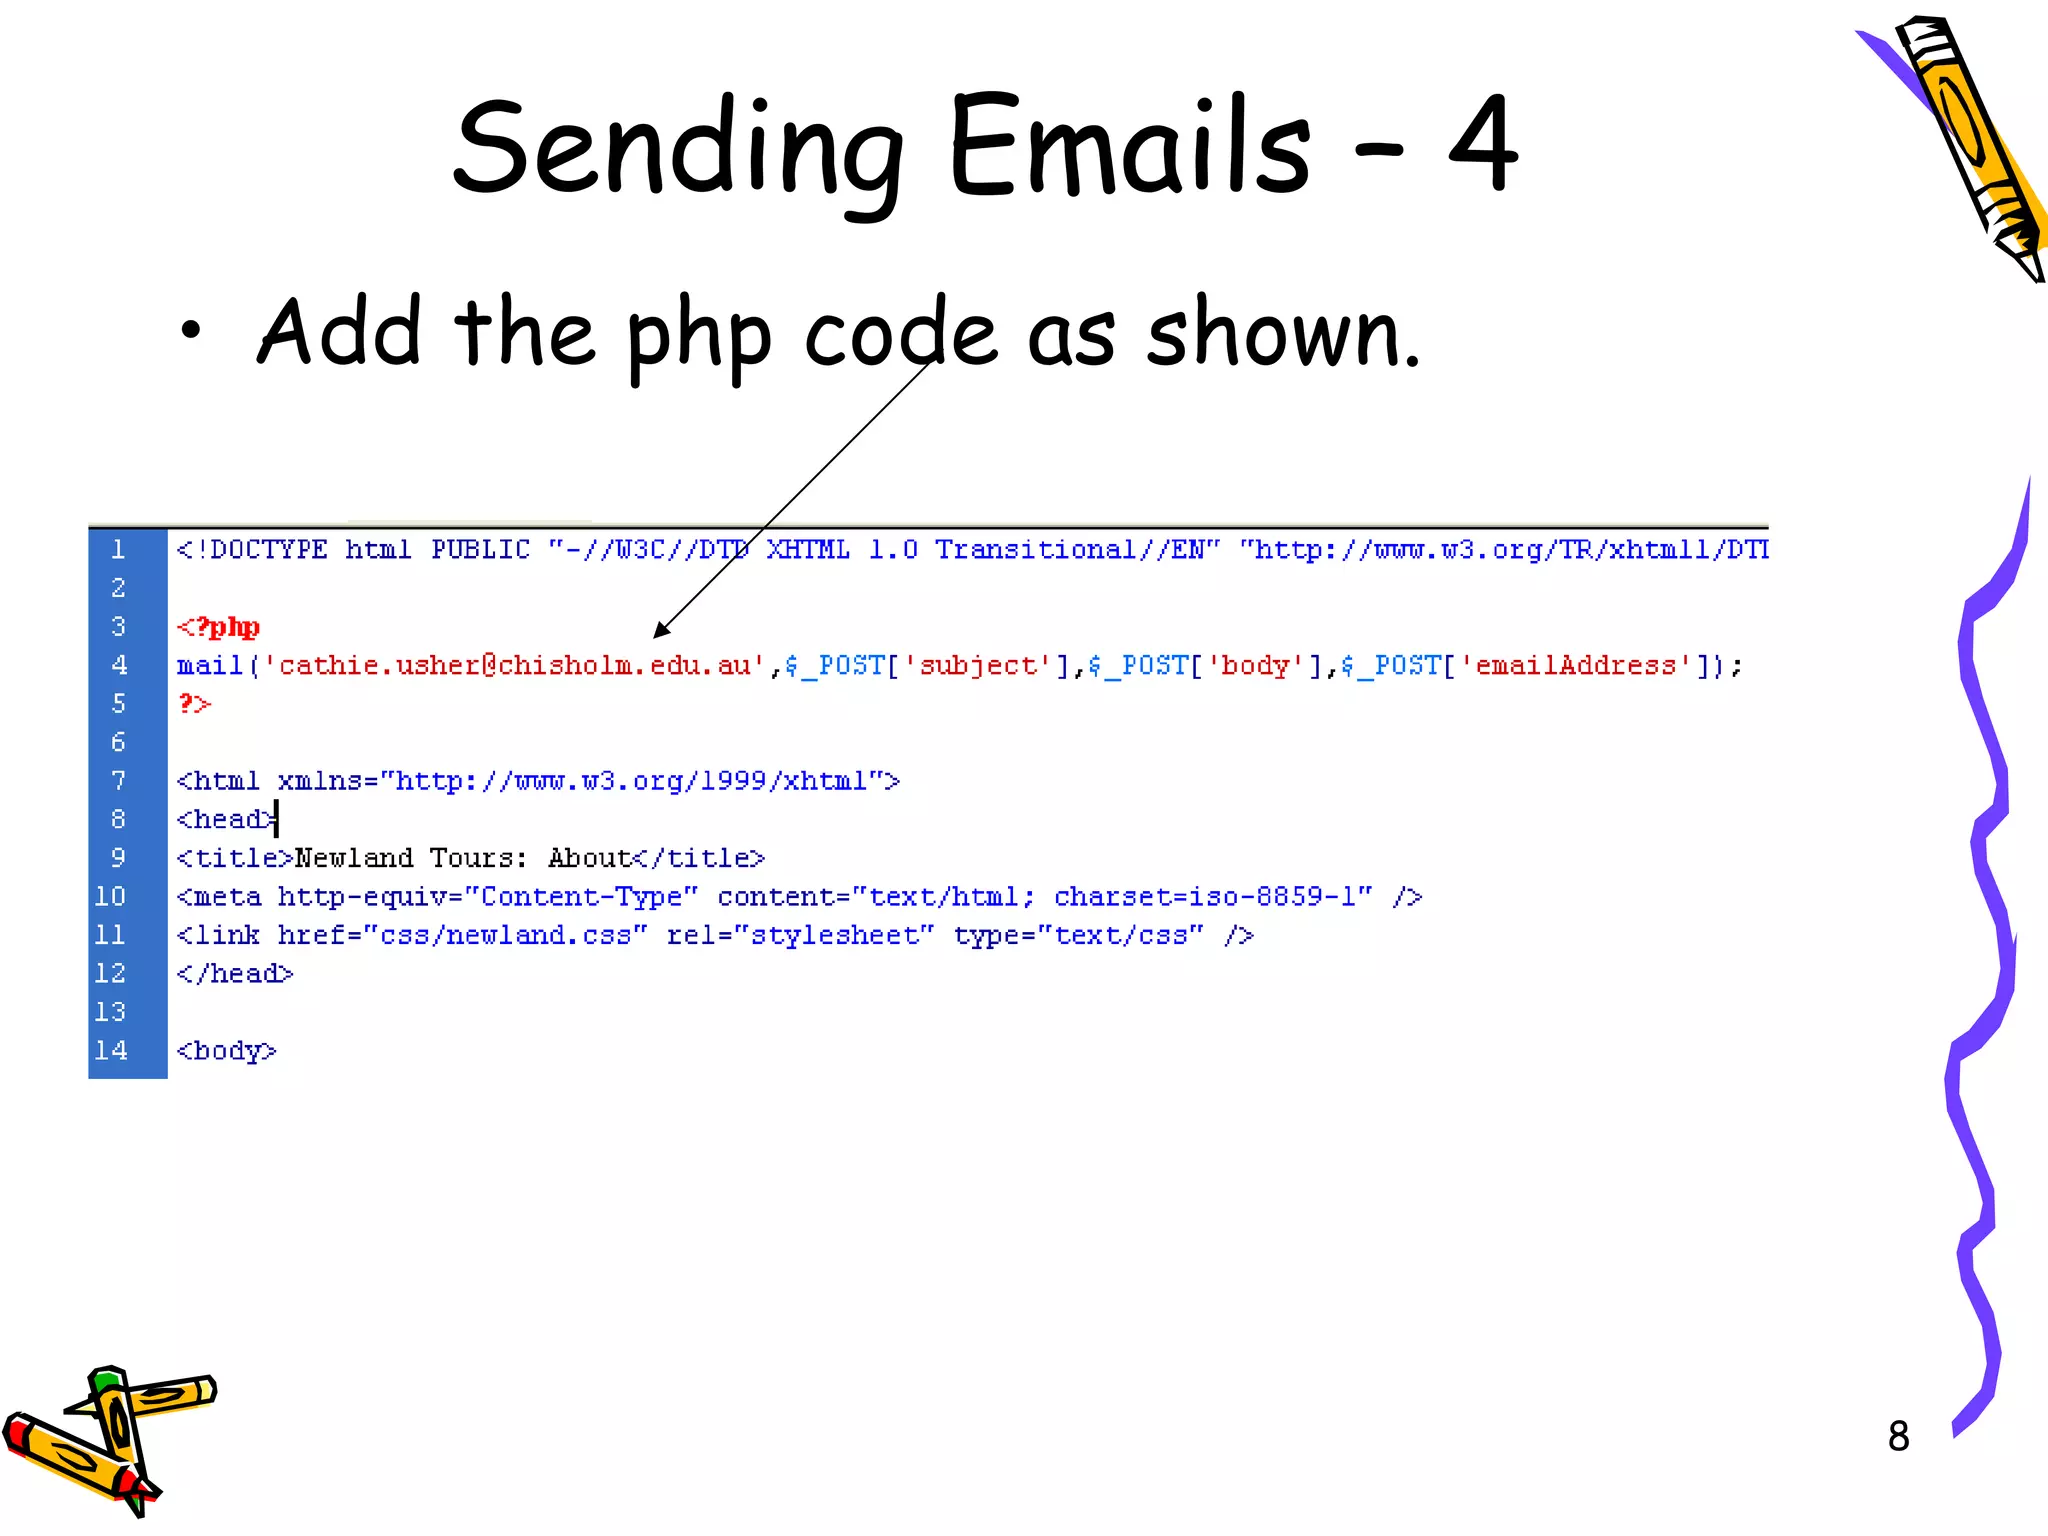
3) Creating an action page to send the form values via PHP mail() to an email address.