MS Word includesdrawing tools that would enable you to create your
own shapes, lines, texts, arrows, and many other options to draw with.
Simply select the drawing tool that you want then position your mouse
pointer to where you want to start. Then click and drag the mouse
pointer to the end of your drawing and release the mouse. The
finished shape can be resized, rotate, flipped, and colored.
3.
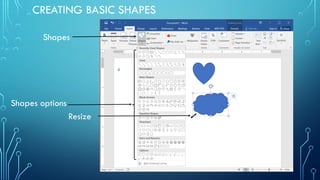
CREATING BASIC SHAPES
Youmay insert built-in shapes in your document such as Ovals, Rectangles,
Lines, Block Arrows, Flowcharts, Callout, Stars, and Banners.
1. Click the Insert Tab, go to the Illustrations group and click Shapes
arrow.
2. Select the shape you want from the drop-down menu of built-in shapes.
3. Click the mouse on the document and drag it to draw the shape.
4. Resizing the shape is like resizing the ClipArt and picture.
5. Combine any of the basic shapes to create an object.
6. Click outside the drawing to deselect the command.
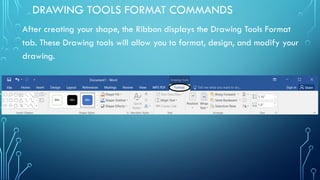
DRAWING TOOLS FORMATCOMMANDS
After creating your shape, the Ribbon displays the Drawing Tools Format
tab. These Drawing tools will allow you to format, design, and modify your
drawing.
6.
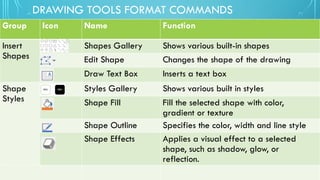
DRAWING TOOLS FORMATCOMMANDS
Group Icon Name Function
Insert
Shapes
Shapes Gallery Shows various built-in shapes
Edit Shape Changes the shape of the drawing
Draw Text Box Inserts a text box
Shape
Styles
Styles Gallery Shows various built in styles
Shape Fill Fill the selected shape with color,
gradient or texture
Shape Outline Specifies the color, width and line style
Shape Effects Applies a visual effect to a selected
shape, such as shadow, glow, or
reflection.
7.
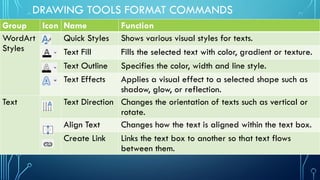
DRAWING TOOLS FORMATCOMMANDS
Group Icon Name Function
WordArt
Styles
Quick Styles Shows various visual styles for texts.
Text Fill Fills the selected text with color, gradient or texture.
Text Outline Specifies the color, width and line style.
Text Effects Applies a visual effect to a selected shape such as
shadow, glow, or reflection.
Text Text Direction Changes the orientation of texts such as vertical or
rotate.
Align Text Changes how the text is aligned within the text box.
Create Link Links the text box to another so that text flows
between them.
8.
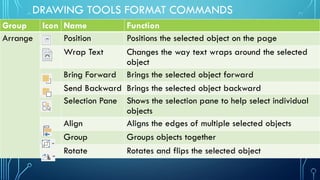
DRAWING TOOLS FORMATCOMMANDS
Group Icon Name Function
Arrange Position Positions the selected object on the page
Wrap Text Changes the way text wraps around the selected
object
Bring Forward Brings the selected object forward
Send Backward Brings the selected object backward
Selection Pane Shows the selection pane to help select individual
objects
Align Aligns the edges of multiple selected objects
Group Groups objects together
Rotate Rotates and flips the selected object
9.
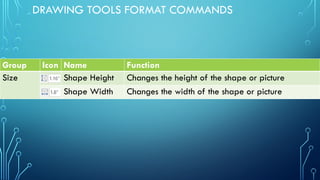
DRAWING TOOLS FORMATCOMMANDS
Group Icon Name Function
Size Shape Height Changes the height of the shape or picture
Shape Width Changes the width of the shape or picture
10.
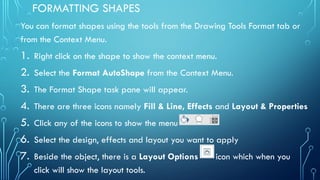
FORMATTING SHAPES
You canformat shapes using the tools from the Drawing Tools Format tab or
from the Context Menu.
1. Right click on the shape to show the context menu.
2. Select the Format AutoShape from the Context Menu.
3. The Format Shape task pane will appear.
4. There are three icons namely Fill & Line, Effects and Layout & Properties
5. Click any of the icons to show the menu
6. Select the design, effects and layout you want to apply
7. Beside the object, there is a Layout Options icon which when you
click will show the layout tools.
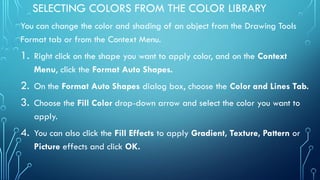
SELECTING COLORS FROMTHE COLOR LIBRARY
You can change the color and shading of an object from the Drawing Tools
Format tab or from the Context Menu.
1. Right click on the shape you want to apply color, and on the Context
Menu, click the Format Auto Shapes.
2. On the Format Auto Shapes dialog box, choose the Color and Lines Tab.
3. Choose the Fill Color drop-down arrow and select the color you want to
apply.
4. You can also click the Fill Effects to apply Gradient, Texture, Pattern or
Picture effects and click OK.
14.
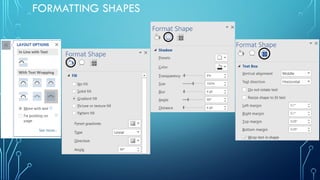
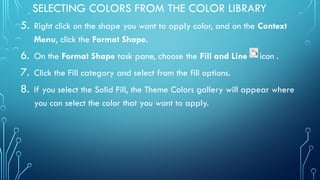
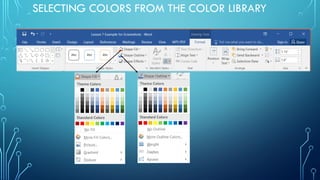
SELECTING COLORS FROMTHE COLOR LIBRARY
5. Right click on the shape you want to apply color, and on the Context
Menu, click the Format Shape.
6. On the Format Shape task pane, choose the Fill and Line icon .
7. Click the Fill category and select from the fill options.
8. If you select the Solid Fill, the Theme Colors gallery will appear where
you can select the color that you want to apply.
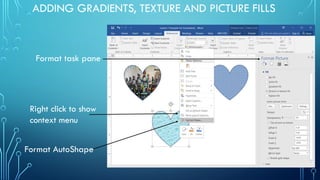
SELECTING COLORS FROMTHE COLOR LIBRARY
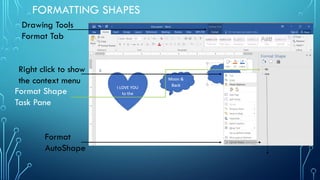
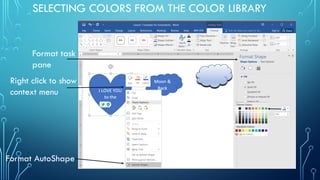
Right click to show
context menu
Format task
pane
Format AutoShape
17.
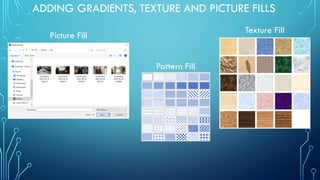
ADDING GRADIENTS, TEXTUREAND PICTURE FILLS
You can also fill the shape with Gradient Fill, Picture or Texture Fill,
and Pattern Fill.
1. Right-click on the object and on the Context Menu select Format
Shape.
2. On the Format Shape task pane, select Picture or Texture Fill or
Pattern Fill.
3. Select from the gallery of pictures, textures and pattern which
you would like to apply to the object.
18.
ADDING GRADIENTS, TEXTUREAND PICTURE FILLS
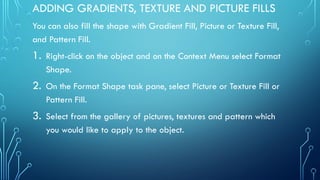
Format task pane
Right click to show
context menu
Format AutoShape