2. Learning Objectives
At the end of this lesson, you should be
able to do the following:
1. Enumerate the measurement,
needed and procedure to followed in
drafting the
a. Front part of the short pants,
b. back part of the short pants
2. Discuss and illustrate the steps in
assembling the short
3. Draft short pants.
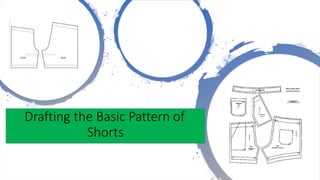
3. PROCEDURE IN
DRAFTING THE
SHORT PANTS
Measurement Needed:
as is
divide by 4
as is
divide by 4
1. Crotch
2. Waistline
3. Length
4. 1st Hip
5. 2nd Hip
6. Bottom width
divide by 4
divide by 2
5. Procedure
Step I: Vertically taken and Horizontally drawn for
the major lines
1. Measure 2 inches from the top edge and 2
inches from the left edge of the pattern paper.
Connect the marks with a perpendicular line.
2. A is the corner of two lines.
3. AB crotch measurement downward.
4. AC length measurement downward.
5. BD 4 inches upward
6. Draw Horizontal Lines for B, C, D to the right
side.
6. PROCEDURE
Step II. Marking the center line of the Front part of
the Short Pants.
7. BE is ¼ of the 2nd Hip to the right.
8. EF is ½ inch to the right
9. FG is 1 ¾ inches to the right.
10. Get the measurement from B, E, F, G and divide
the sum by two for H (center line).
11. Extend H to line a and line C.
12. I corner of AH
13. IJ is 1/8 of the waist to the left
14. IK is 1/8 of the waist to the right
15. L is corner of CH
16. LM is ½ of the bottom of the width to the left.
17. LN is ½ of the bottom width to the right.
7. PROCEDURE
• Step III: Shaping the front Short
Pants
18. Connect KF with a line
19. Corner of DF is D1
20. FF1 is 3 inches upward
21. Connect F1 to G with a curve line
22. Connect GN with a line.
23. D1 to D2 is ¼ of 2nd Hips to the left.
24. Connect J, D2 down to M using the
hip curve.
25. Cut J, I, K, F1, G down to N.
26. Cut J, D2 to M, L, N.
8. DRAFTING THE BACK PART OF THE
SHORT PANTS
• STEP I: Tracing the majors lines for the Back Part of
the Shorts Pants
1. Place the front pattern on the top of a manila
paper at least 4” from the left edge.
2. Place LMN at the edge of the pattern.
3. Trace and transfer lines ABCD and centerline of
the front pattern.
4. O mid-point of 1 + 1 1/4” upward.
5. Connect EO under the front pattern.
6. D3 is the corner of D2 and E marked under.
7. QP is 1 ¼ inches to the left (for dart allowance)
9. •8. PQ is ¼ of the waistline
plus ¾ inch to the left.
• 9. D3R is ¼ of 2nd Hips plus
¾ inch to the left.
•10. MS is 1 inch to the
right.
• 11. NT 1 inch to the right.
•12. Connect QR and S with
the use of Hip Curve.
•13. GU is 1 ¼ inches to the
right.
•14. Connect T and U with a
line.
• 15. UV is ½ inch down.
• 16. Connect EV with a line.
10. • STEP II: Remove the front pattern and shape
the back crotch.
17. Connect D3 and V with a curve line.
18. Connect Q and O with a line.
19. W is the midpoint of O and Q.
20. W, X is 6 inches downward.
21.O, P distance divided by 2 and place
between W.
22. Connect the marks with X to show the dart.
23. Cut the back pattern from Q, O, D3, V and T.
24. Cut Q, R, S and T.
11. Marking the Waistband at the Back Pattern
1. Measure 1 ½ inches
downward from Q to O
2. Connect the marks.
3. Cut and remove the
waistband.
12. Cutting the
Front Pattern
Marking the
Waistband
1.Measure 1 ½
inches from J and
K downward.
2.Connect the
marks.
3.Cut the
waistband.
13. Let's do it!
•Draft pattern for
short pants.
Rubrics
Corresponding Points
A. Process (50%)
Follow the procedure properly
Completeness of the tools
Neatness
TOTAL
35
5
10
50
B. Product (30%)
Curved lines were smoothly drawn.
Perpendicular lines were projected perfectly.
Unnecessary marks were erased neatly.
Pattern were labeled clearly and properly.
Pattern was neatly drafted.
Total
6
6
6
6
6
30
C. Work Habits (20%)
Manipulated drafting tools properly.
Observed economy in the use of materials.
Maintained clean working area.
Worked on the target time.
Total
5
5
5
5
20