This document provides steps to configure a FreeNAS server including:
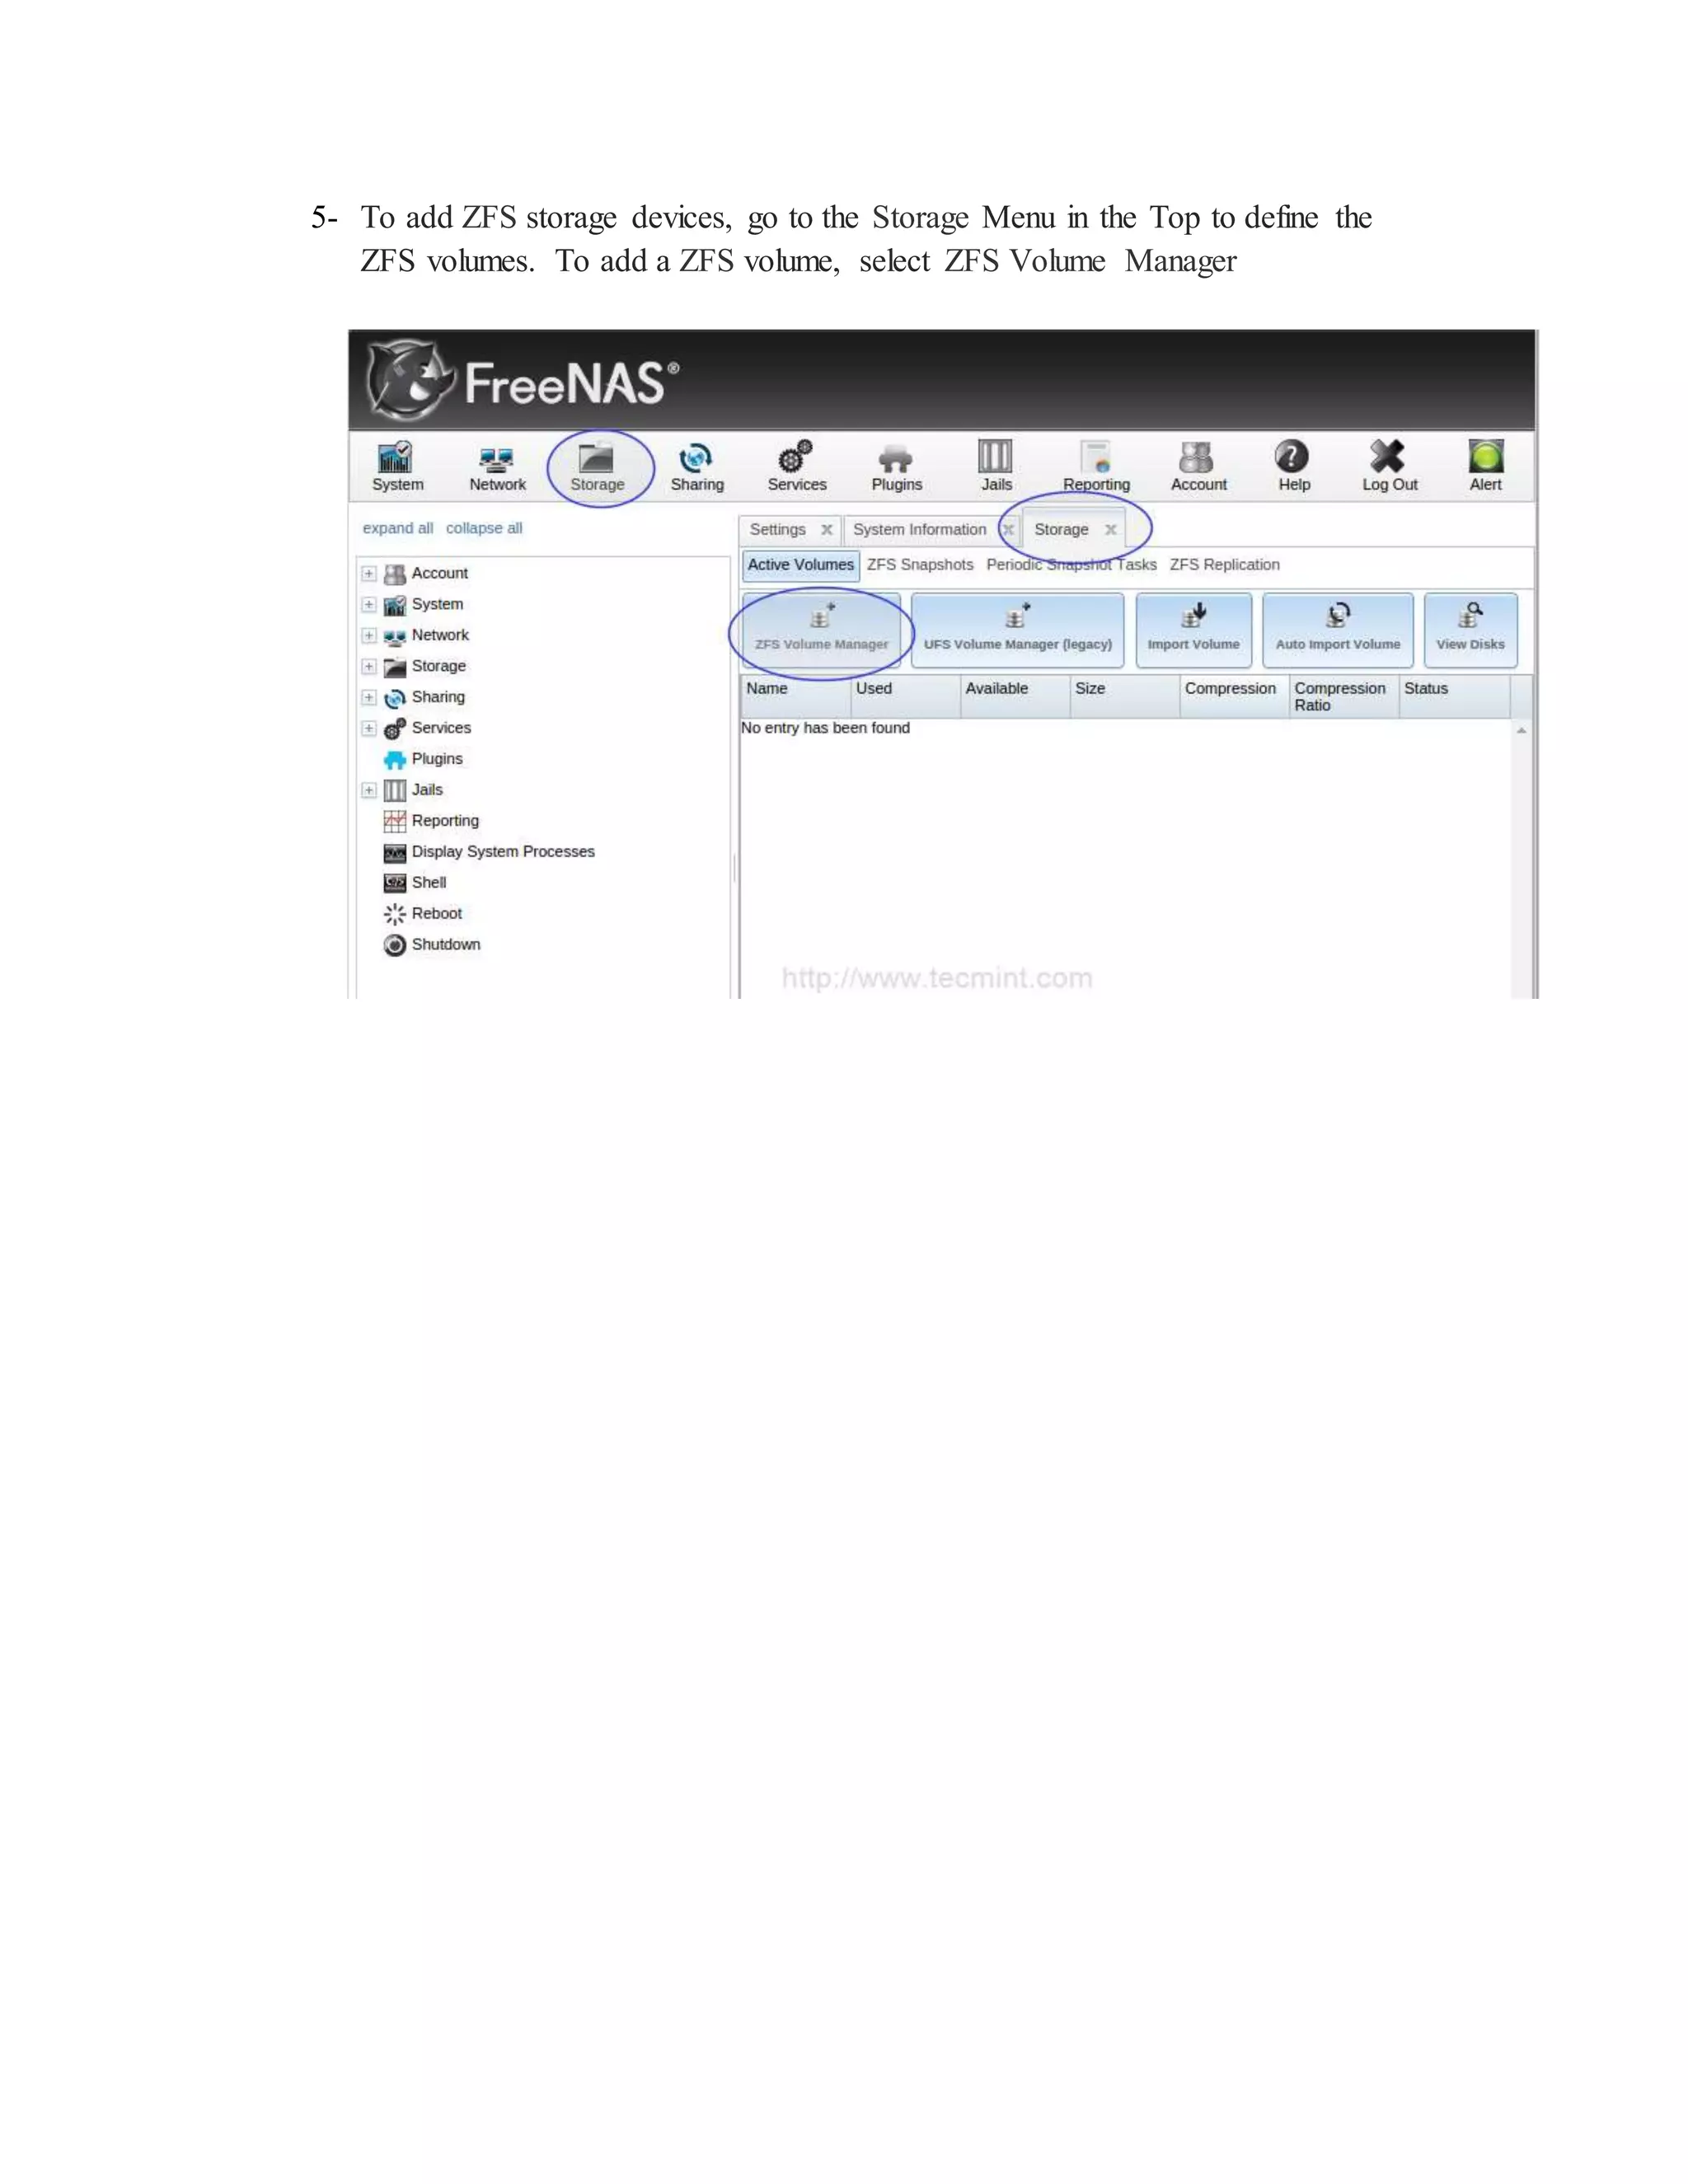
1. Configuring network settings and the FreeNAS web interface
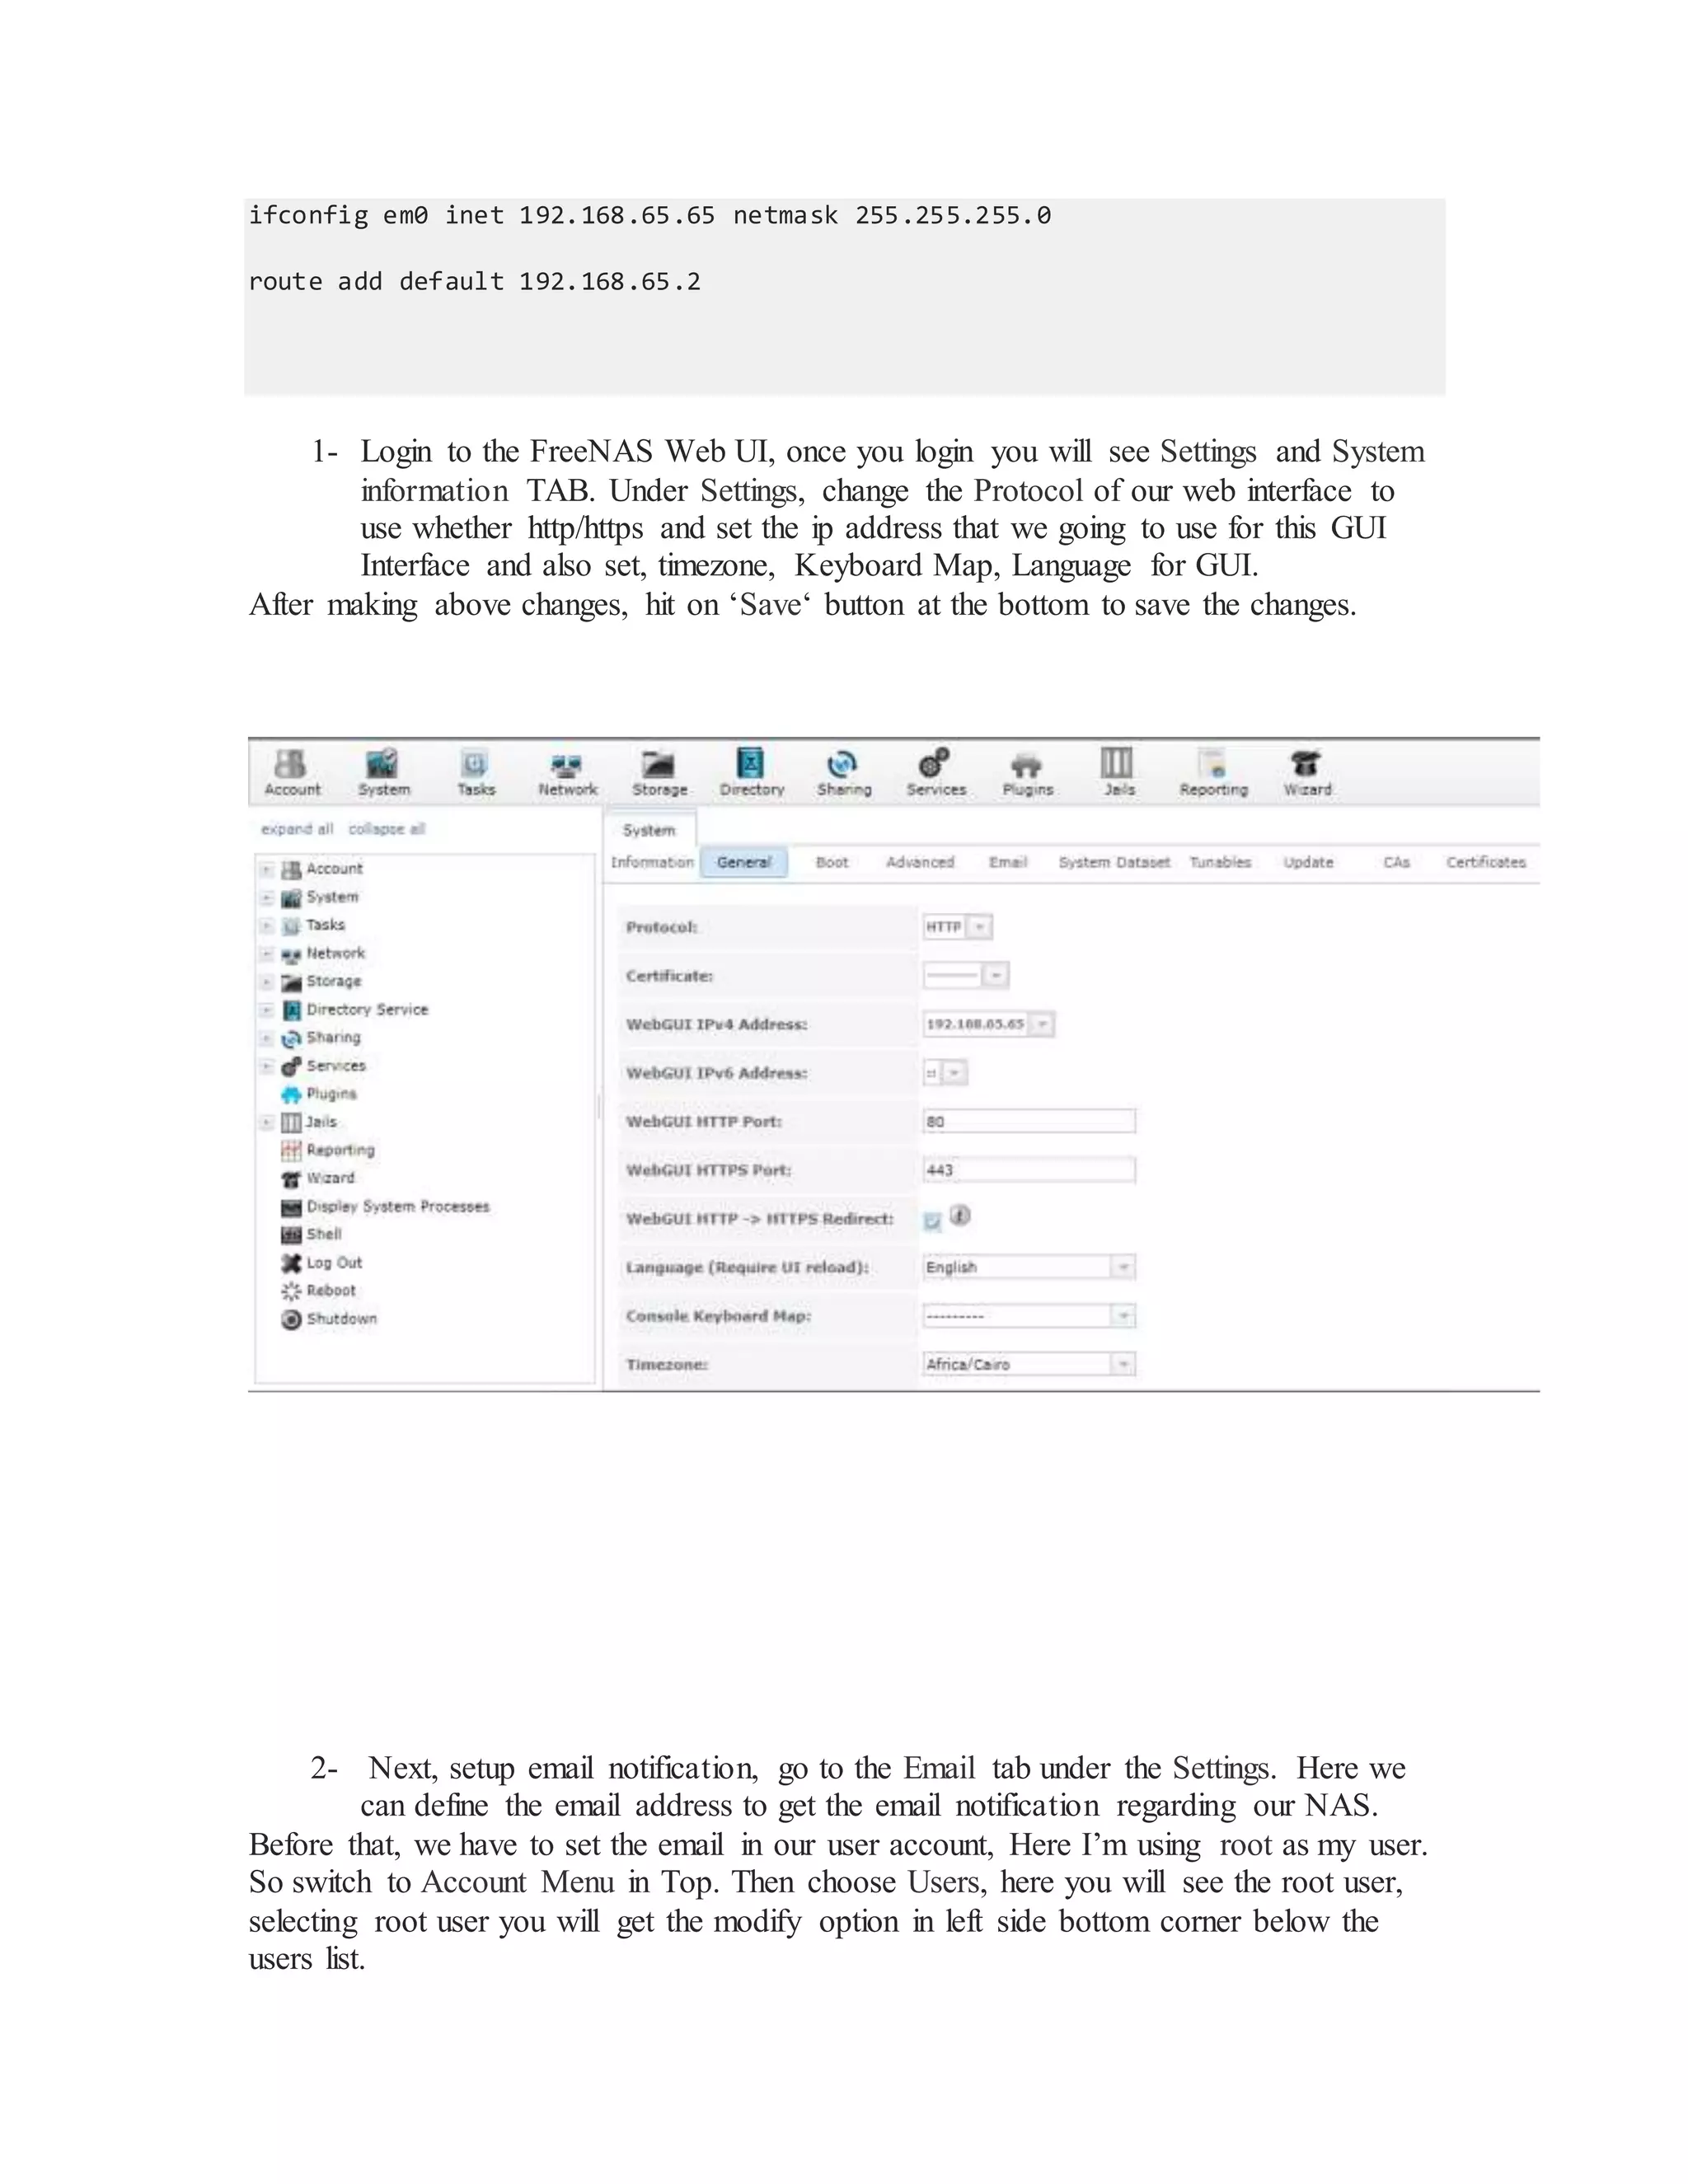
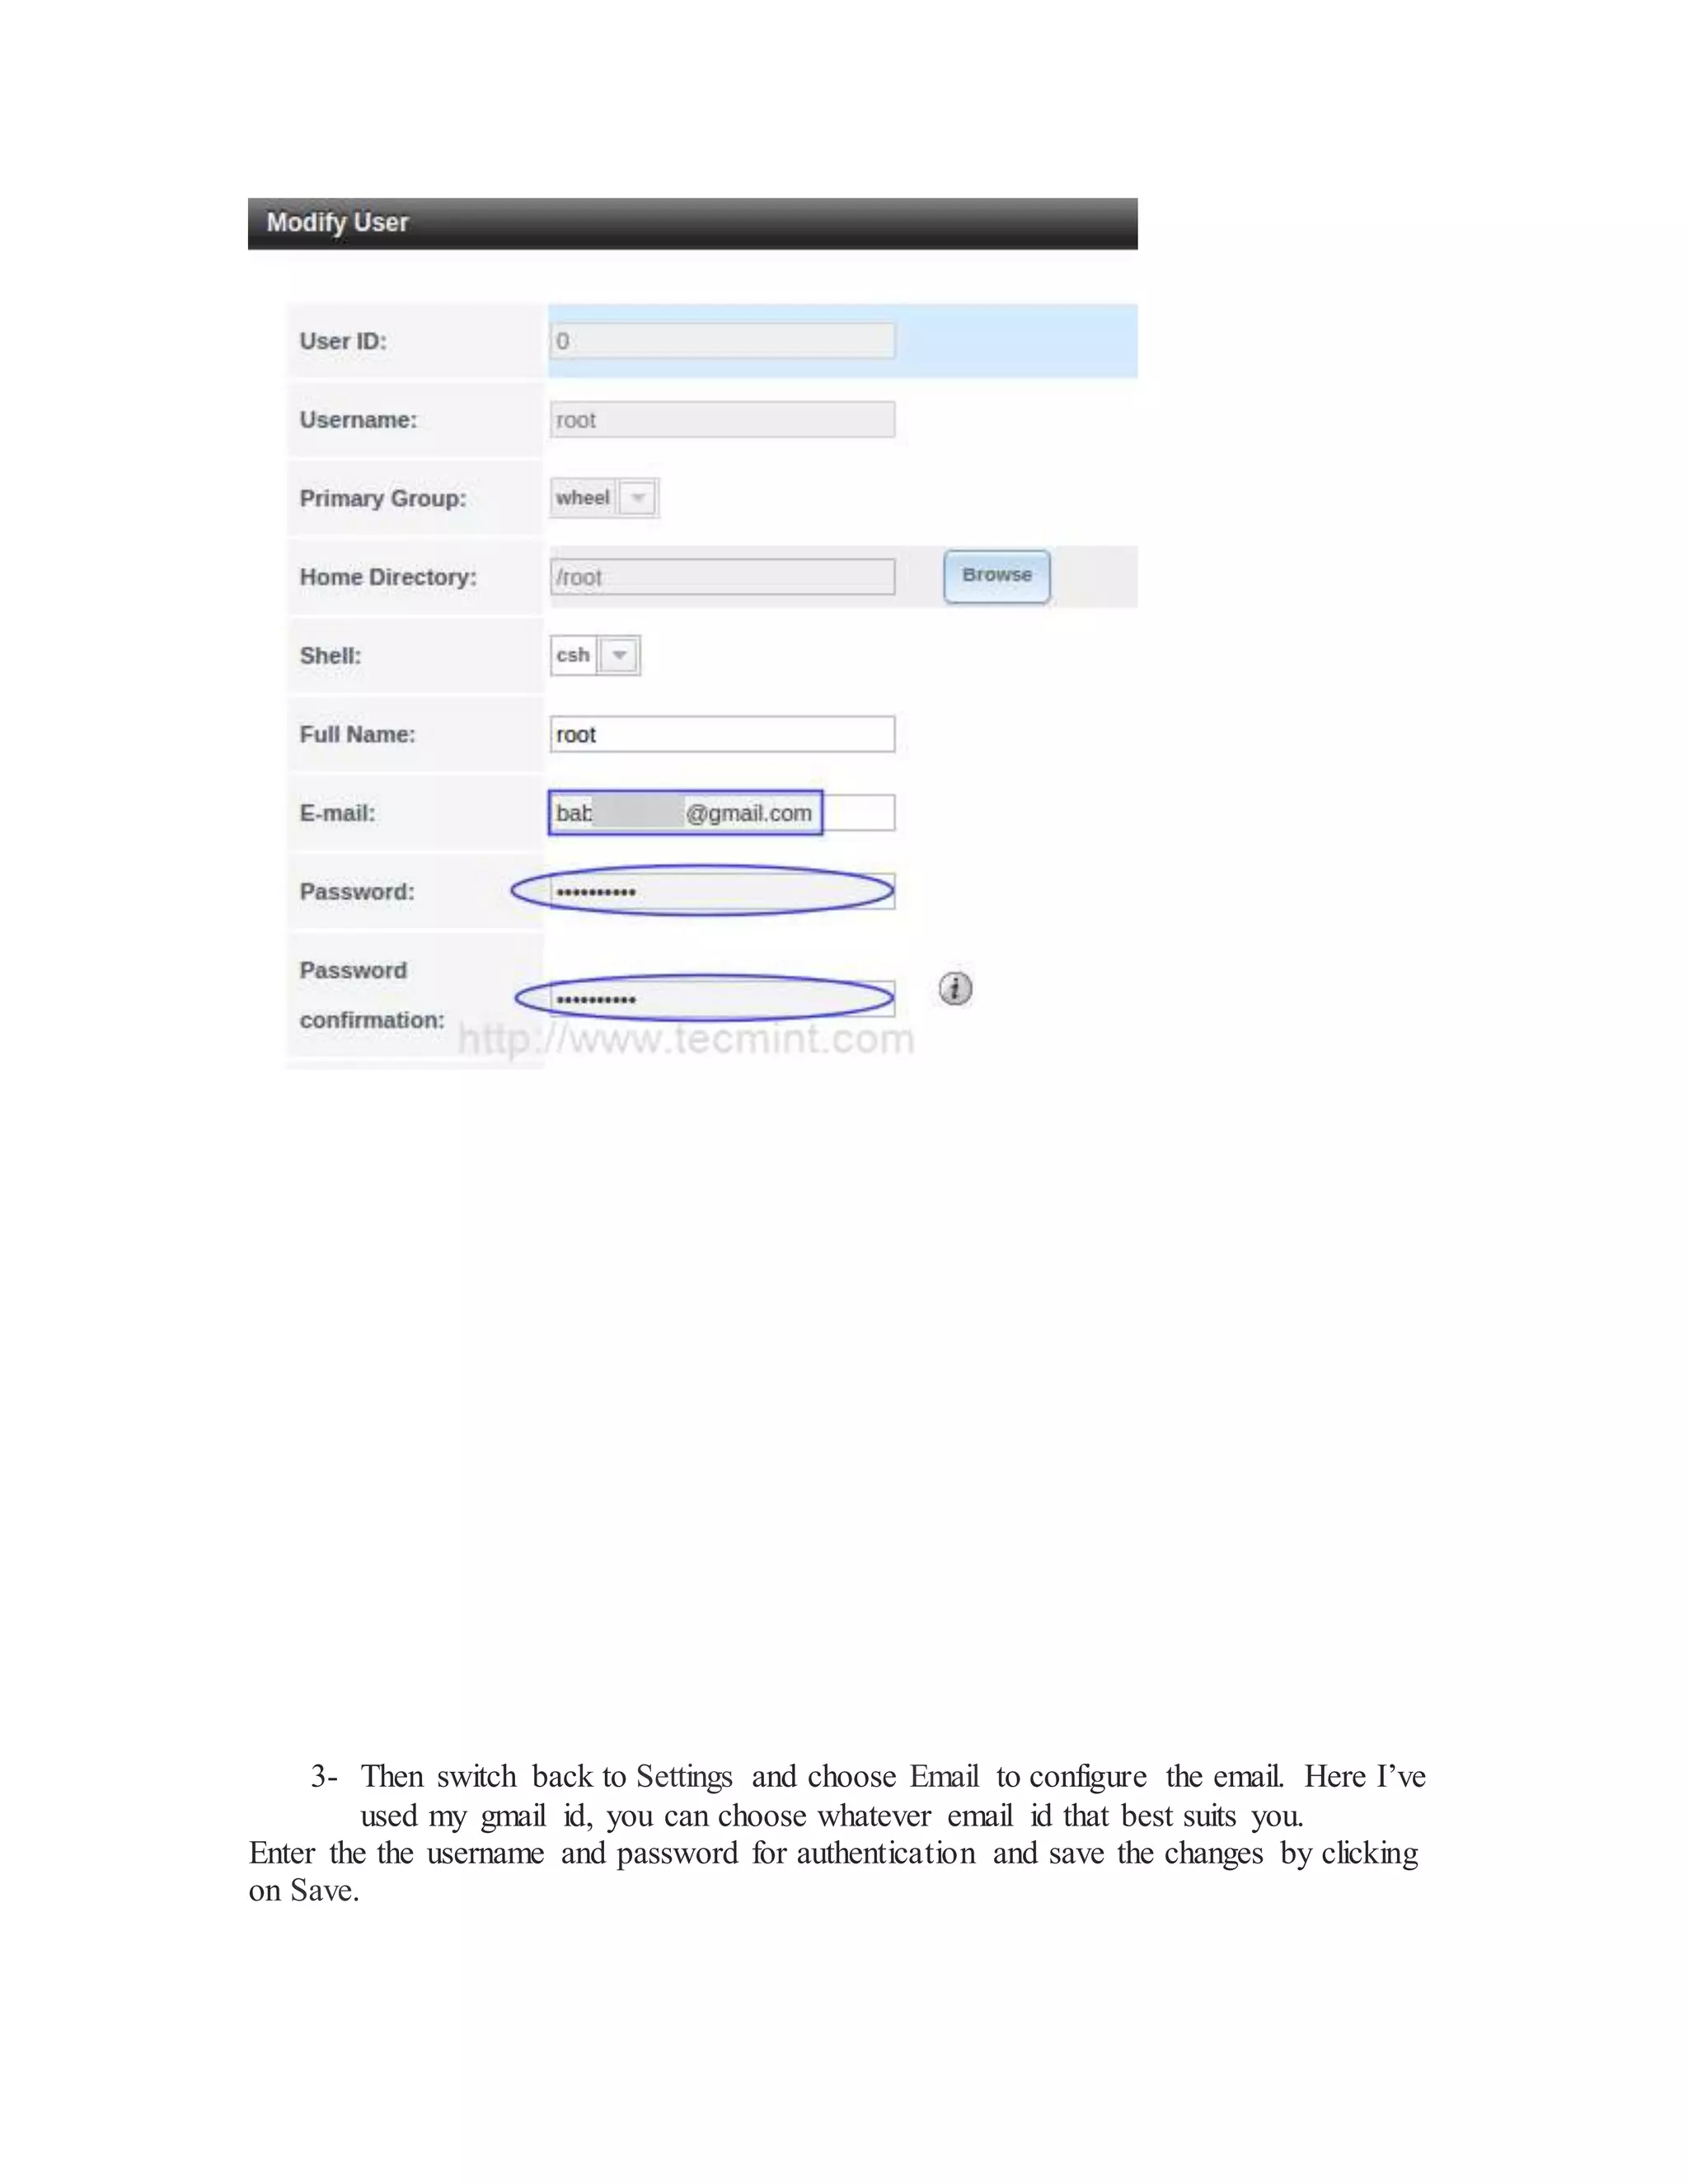
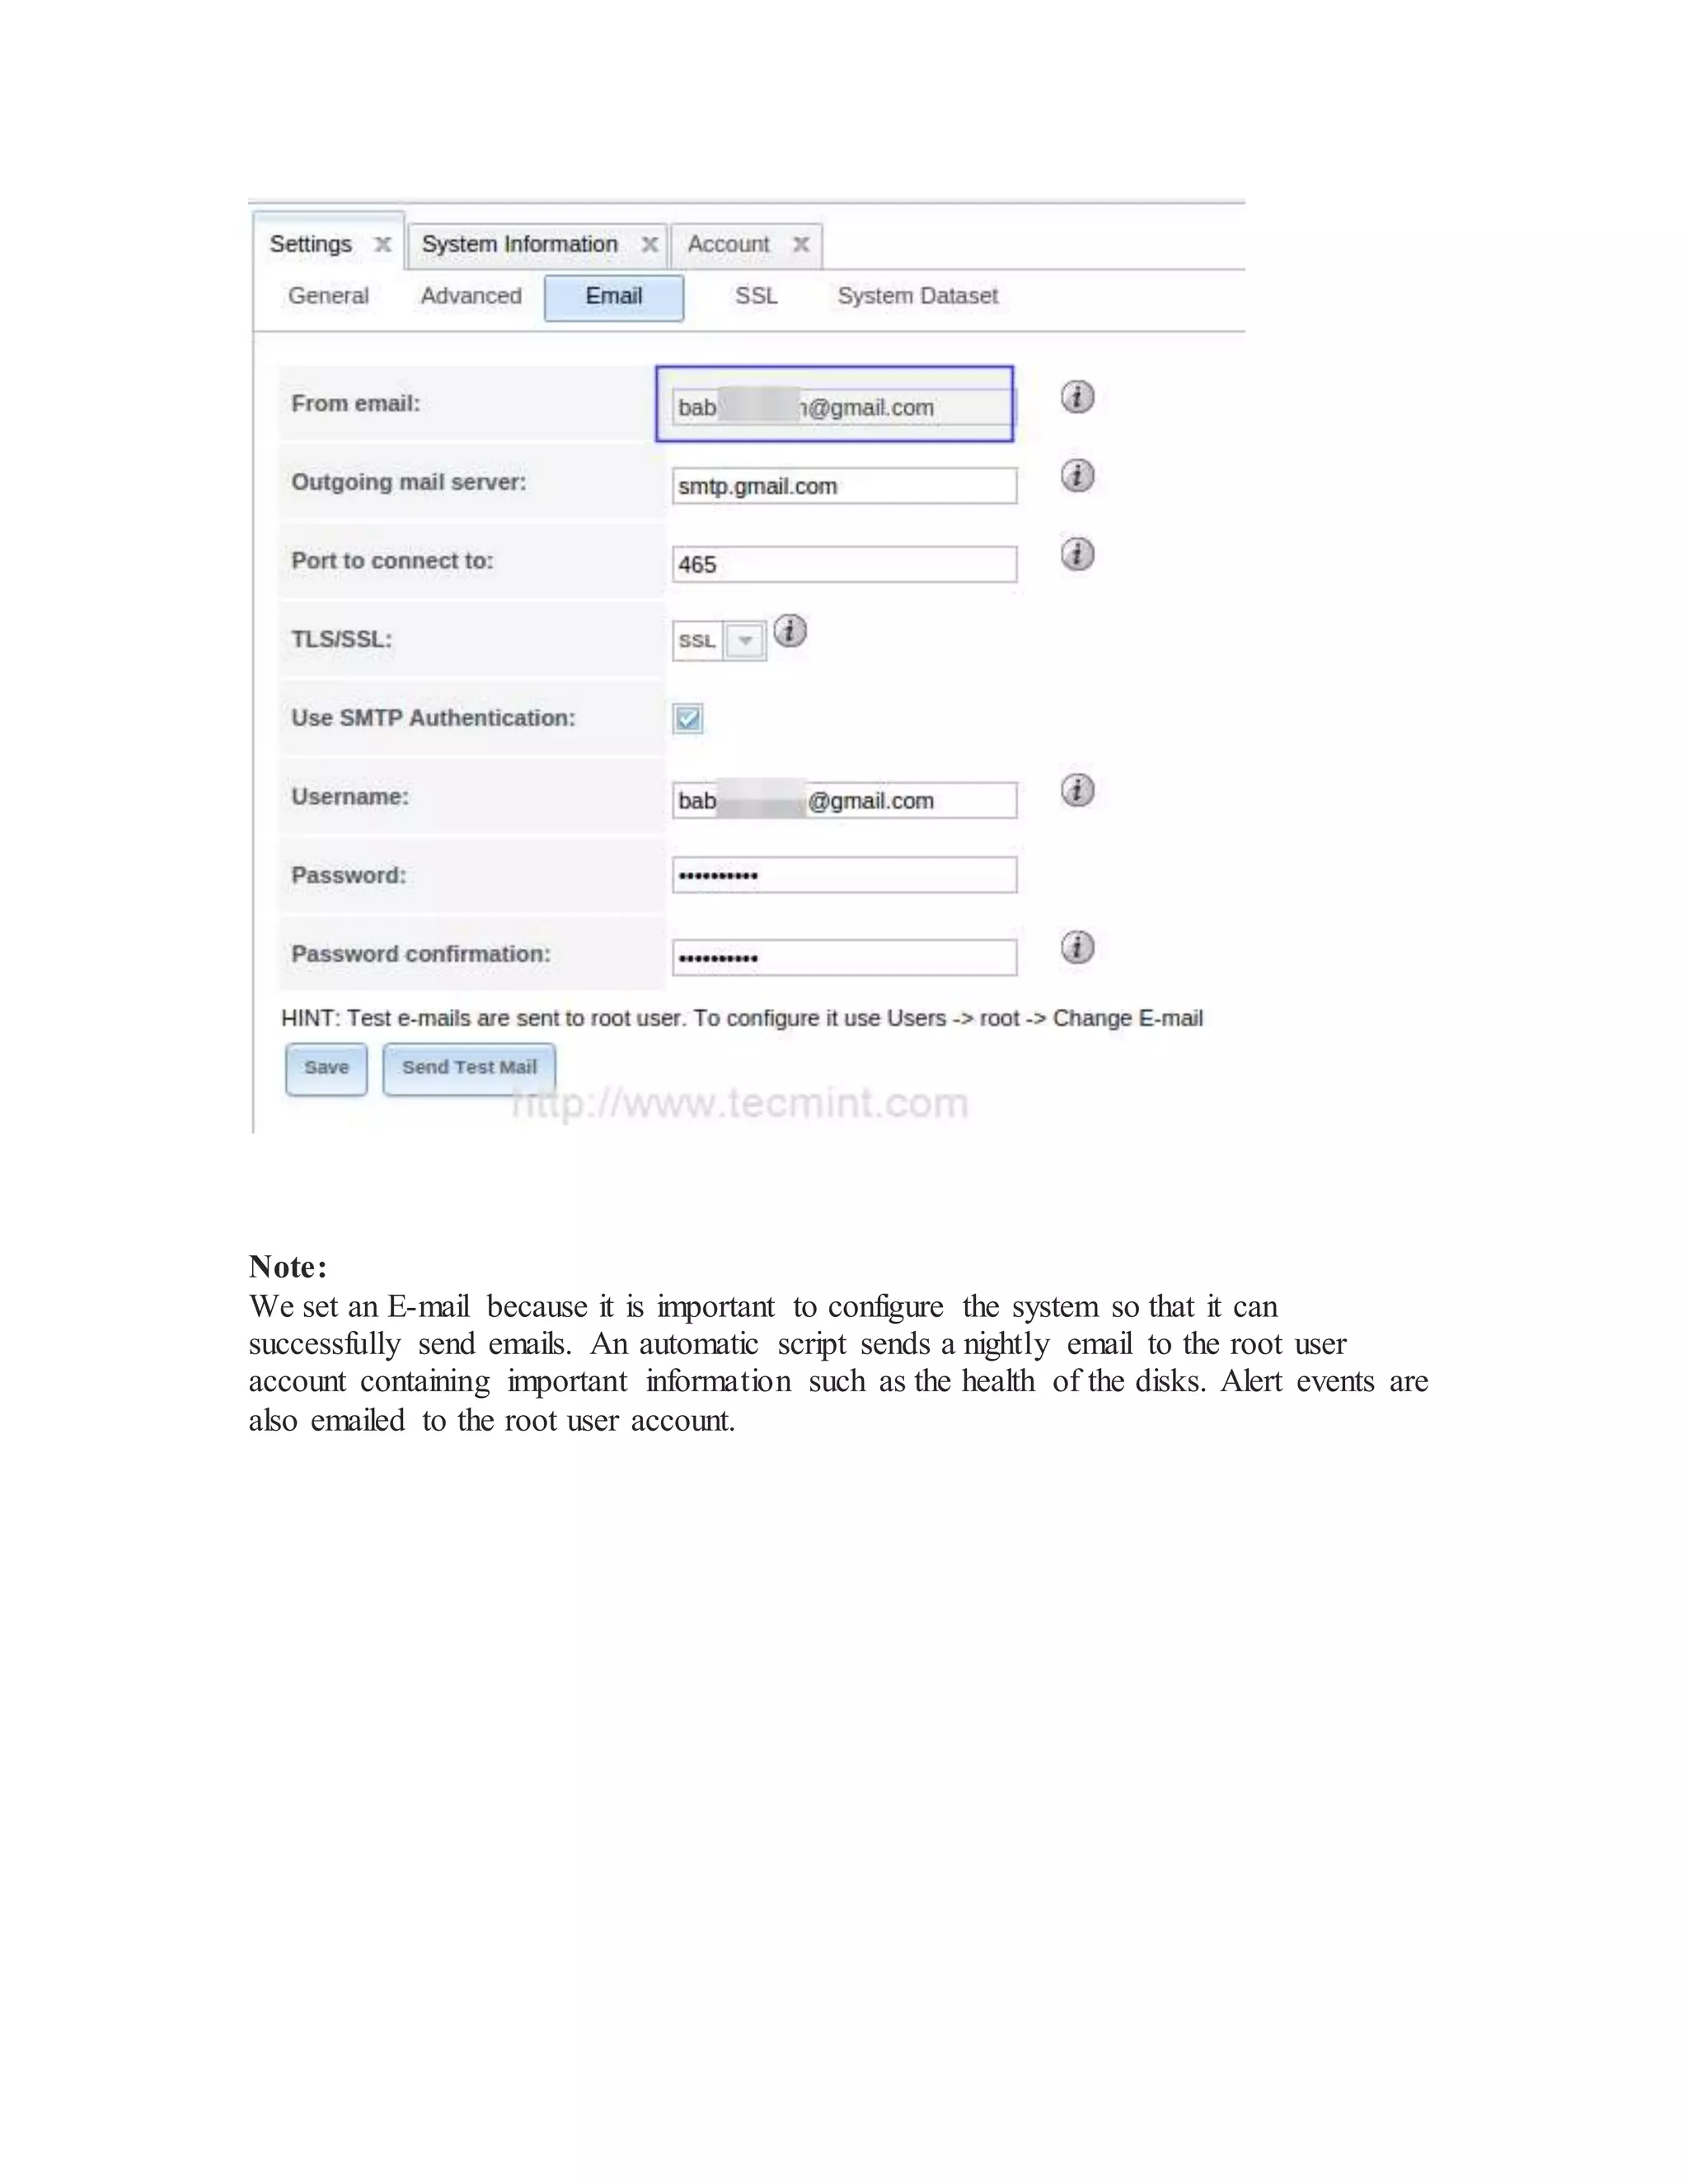
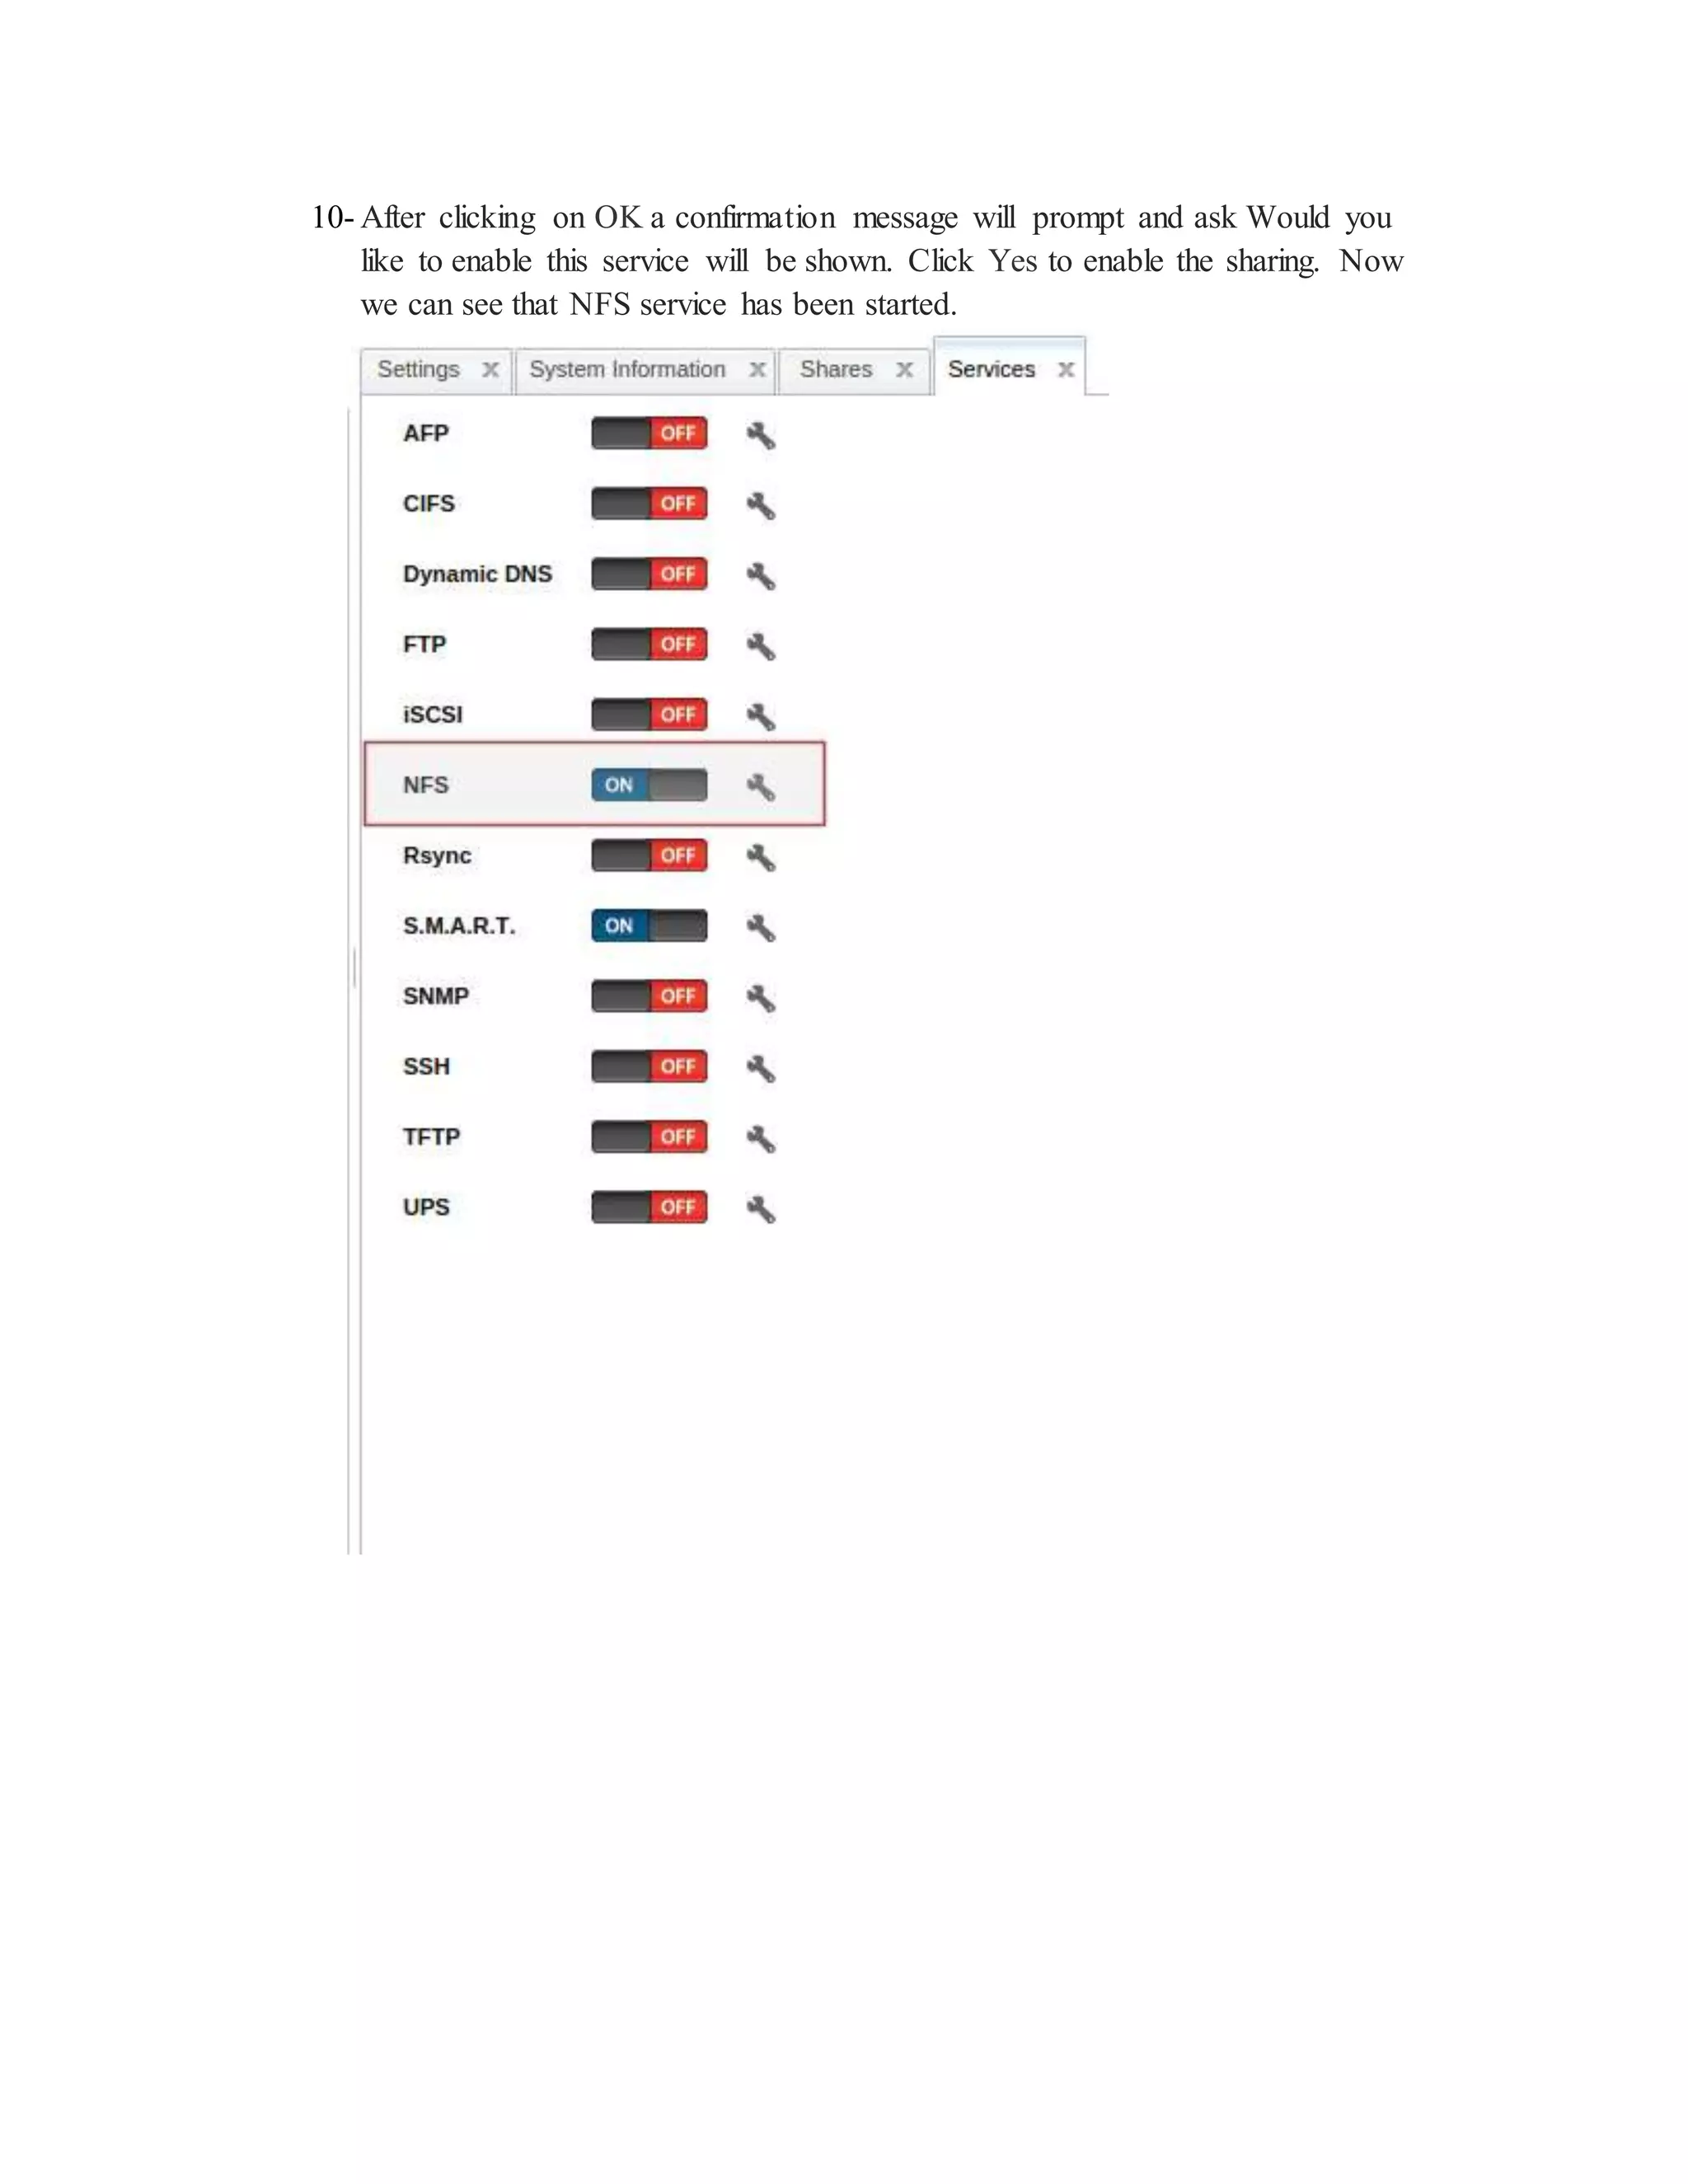
2. Setting up email notifications
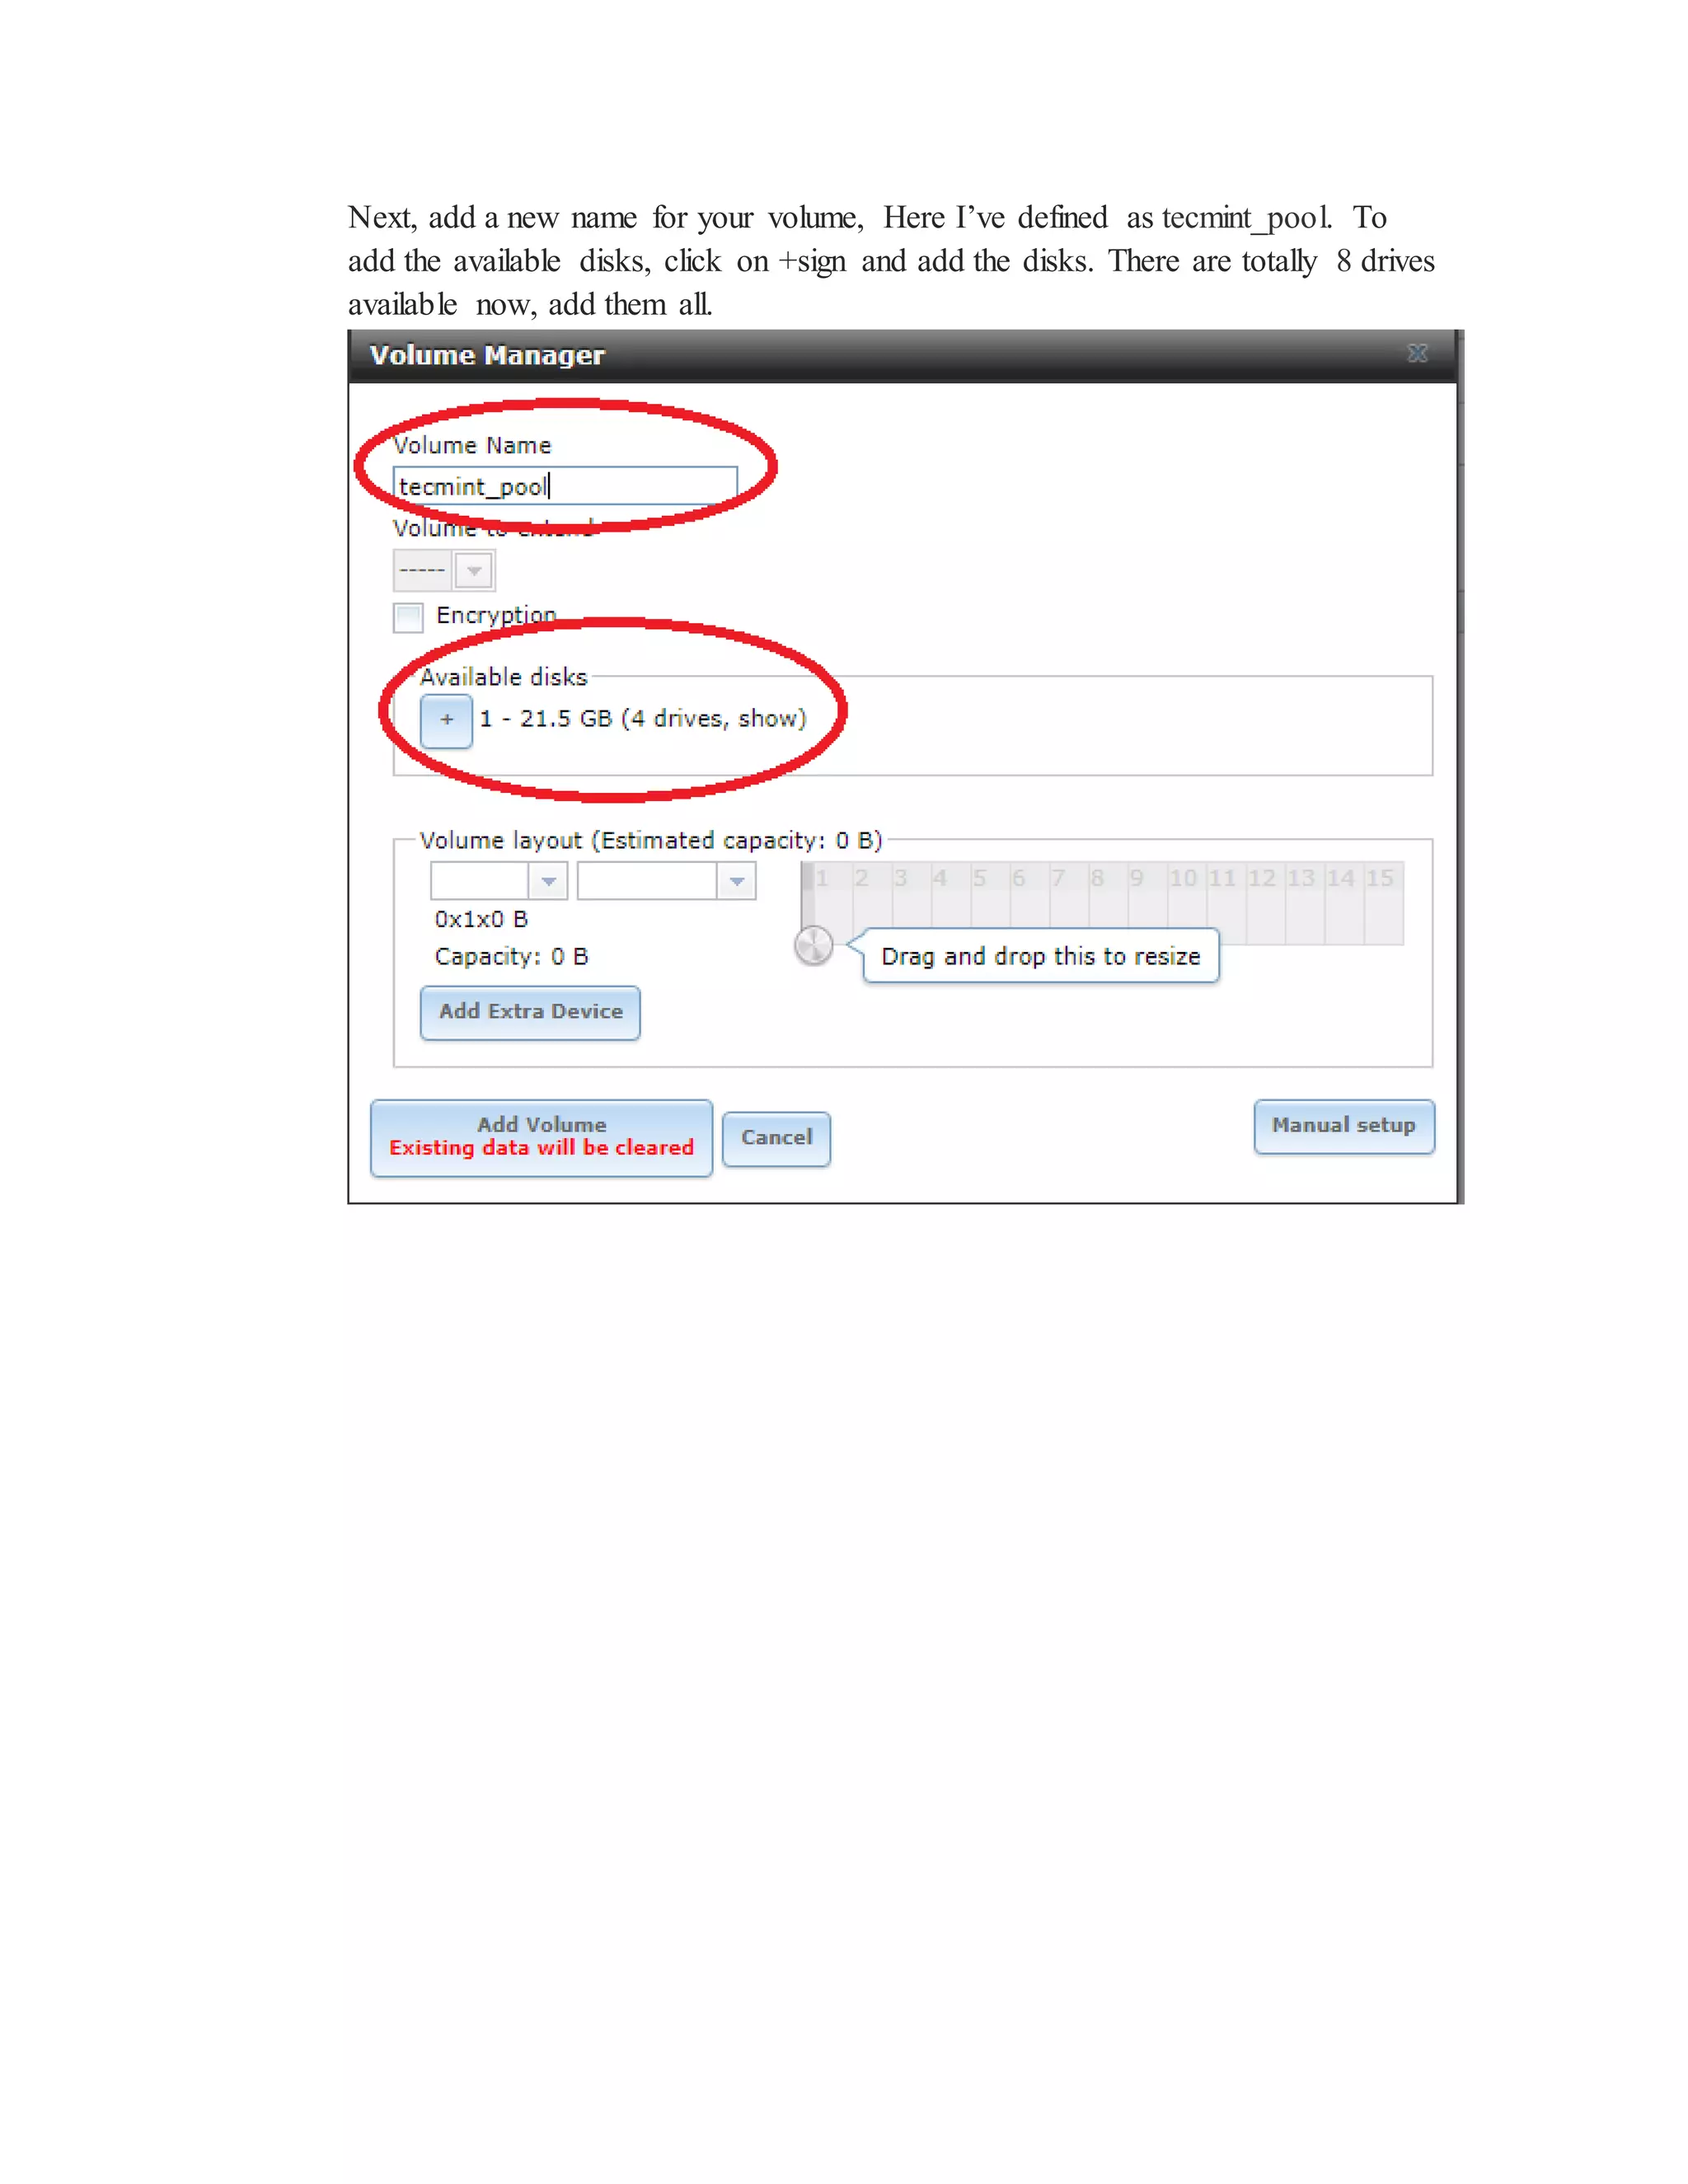
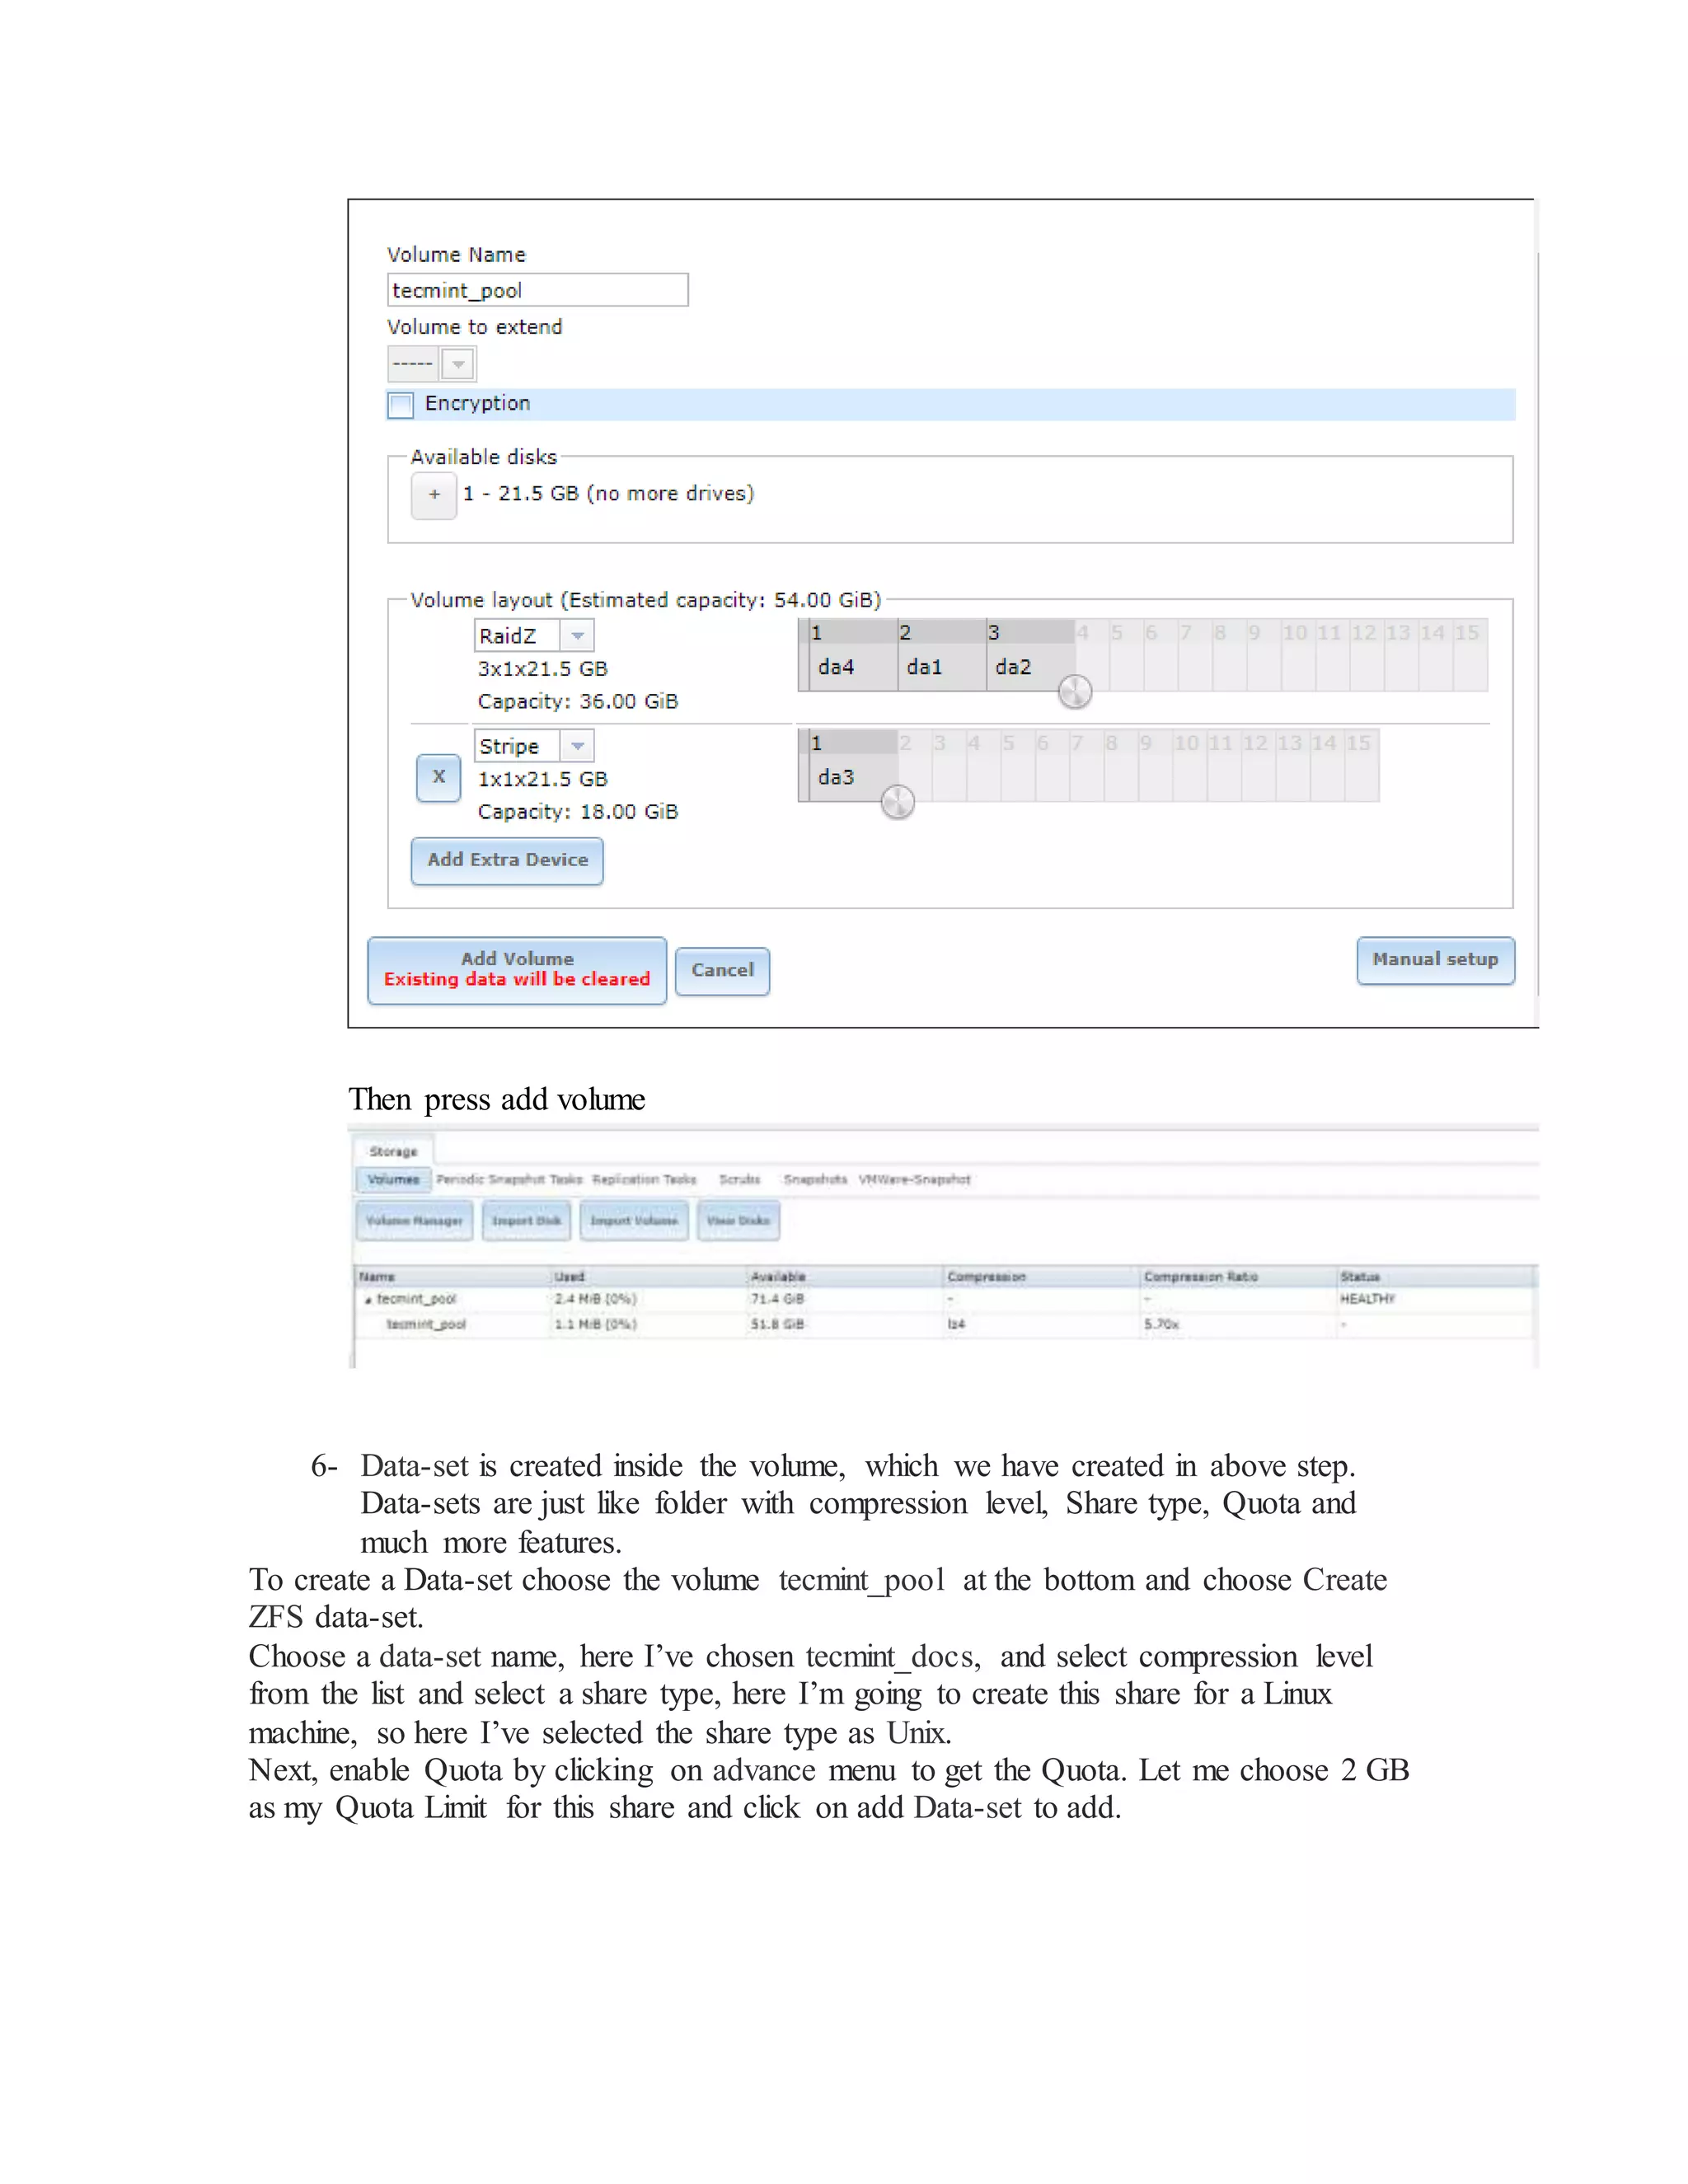
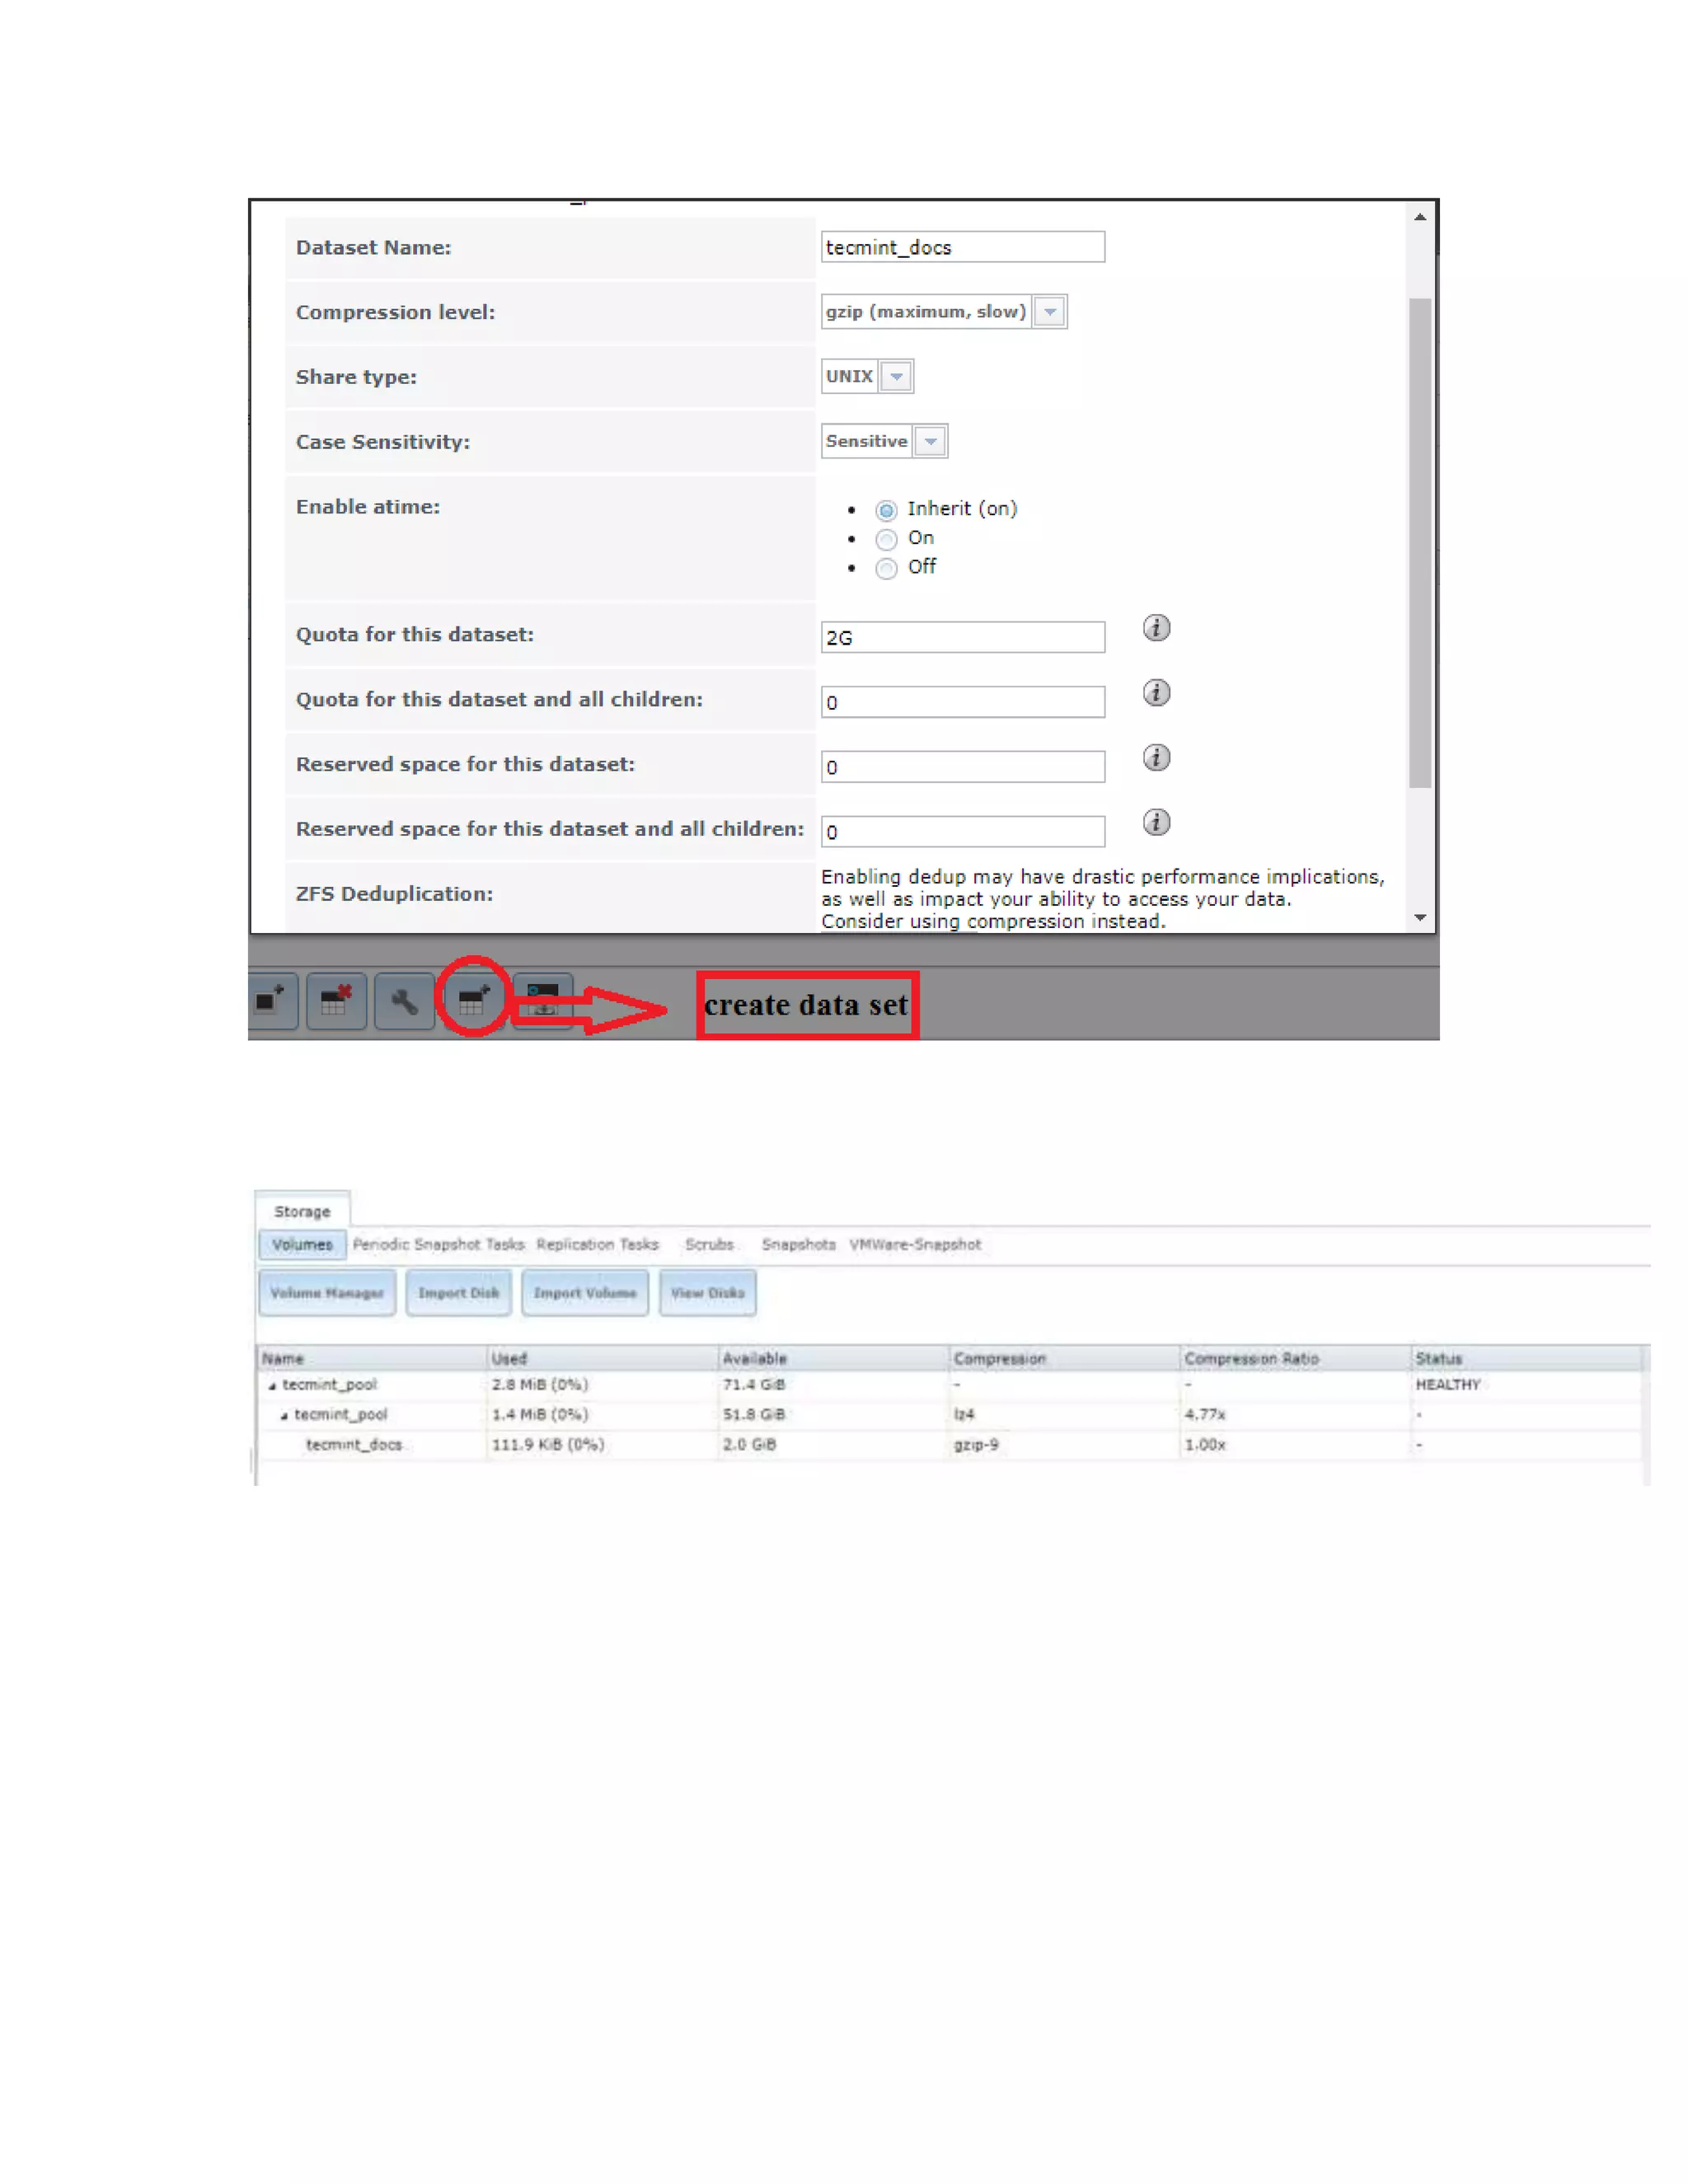
3. Creating ZFS storage pools and datasets
4. Sharing datasets over NFS to Unix clients
5. Mounting the NFS shares on a Unix client and confirming access
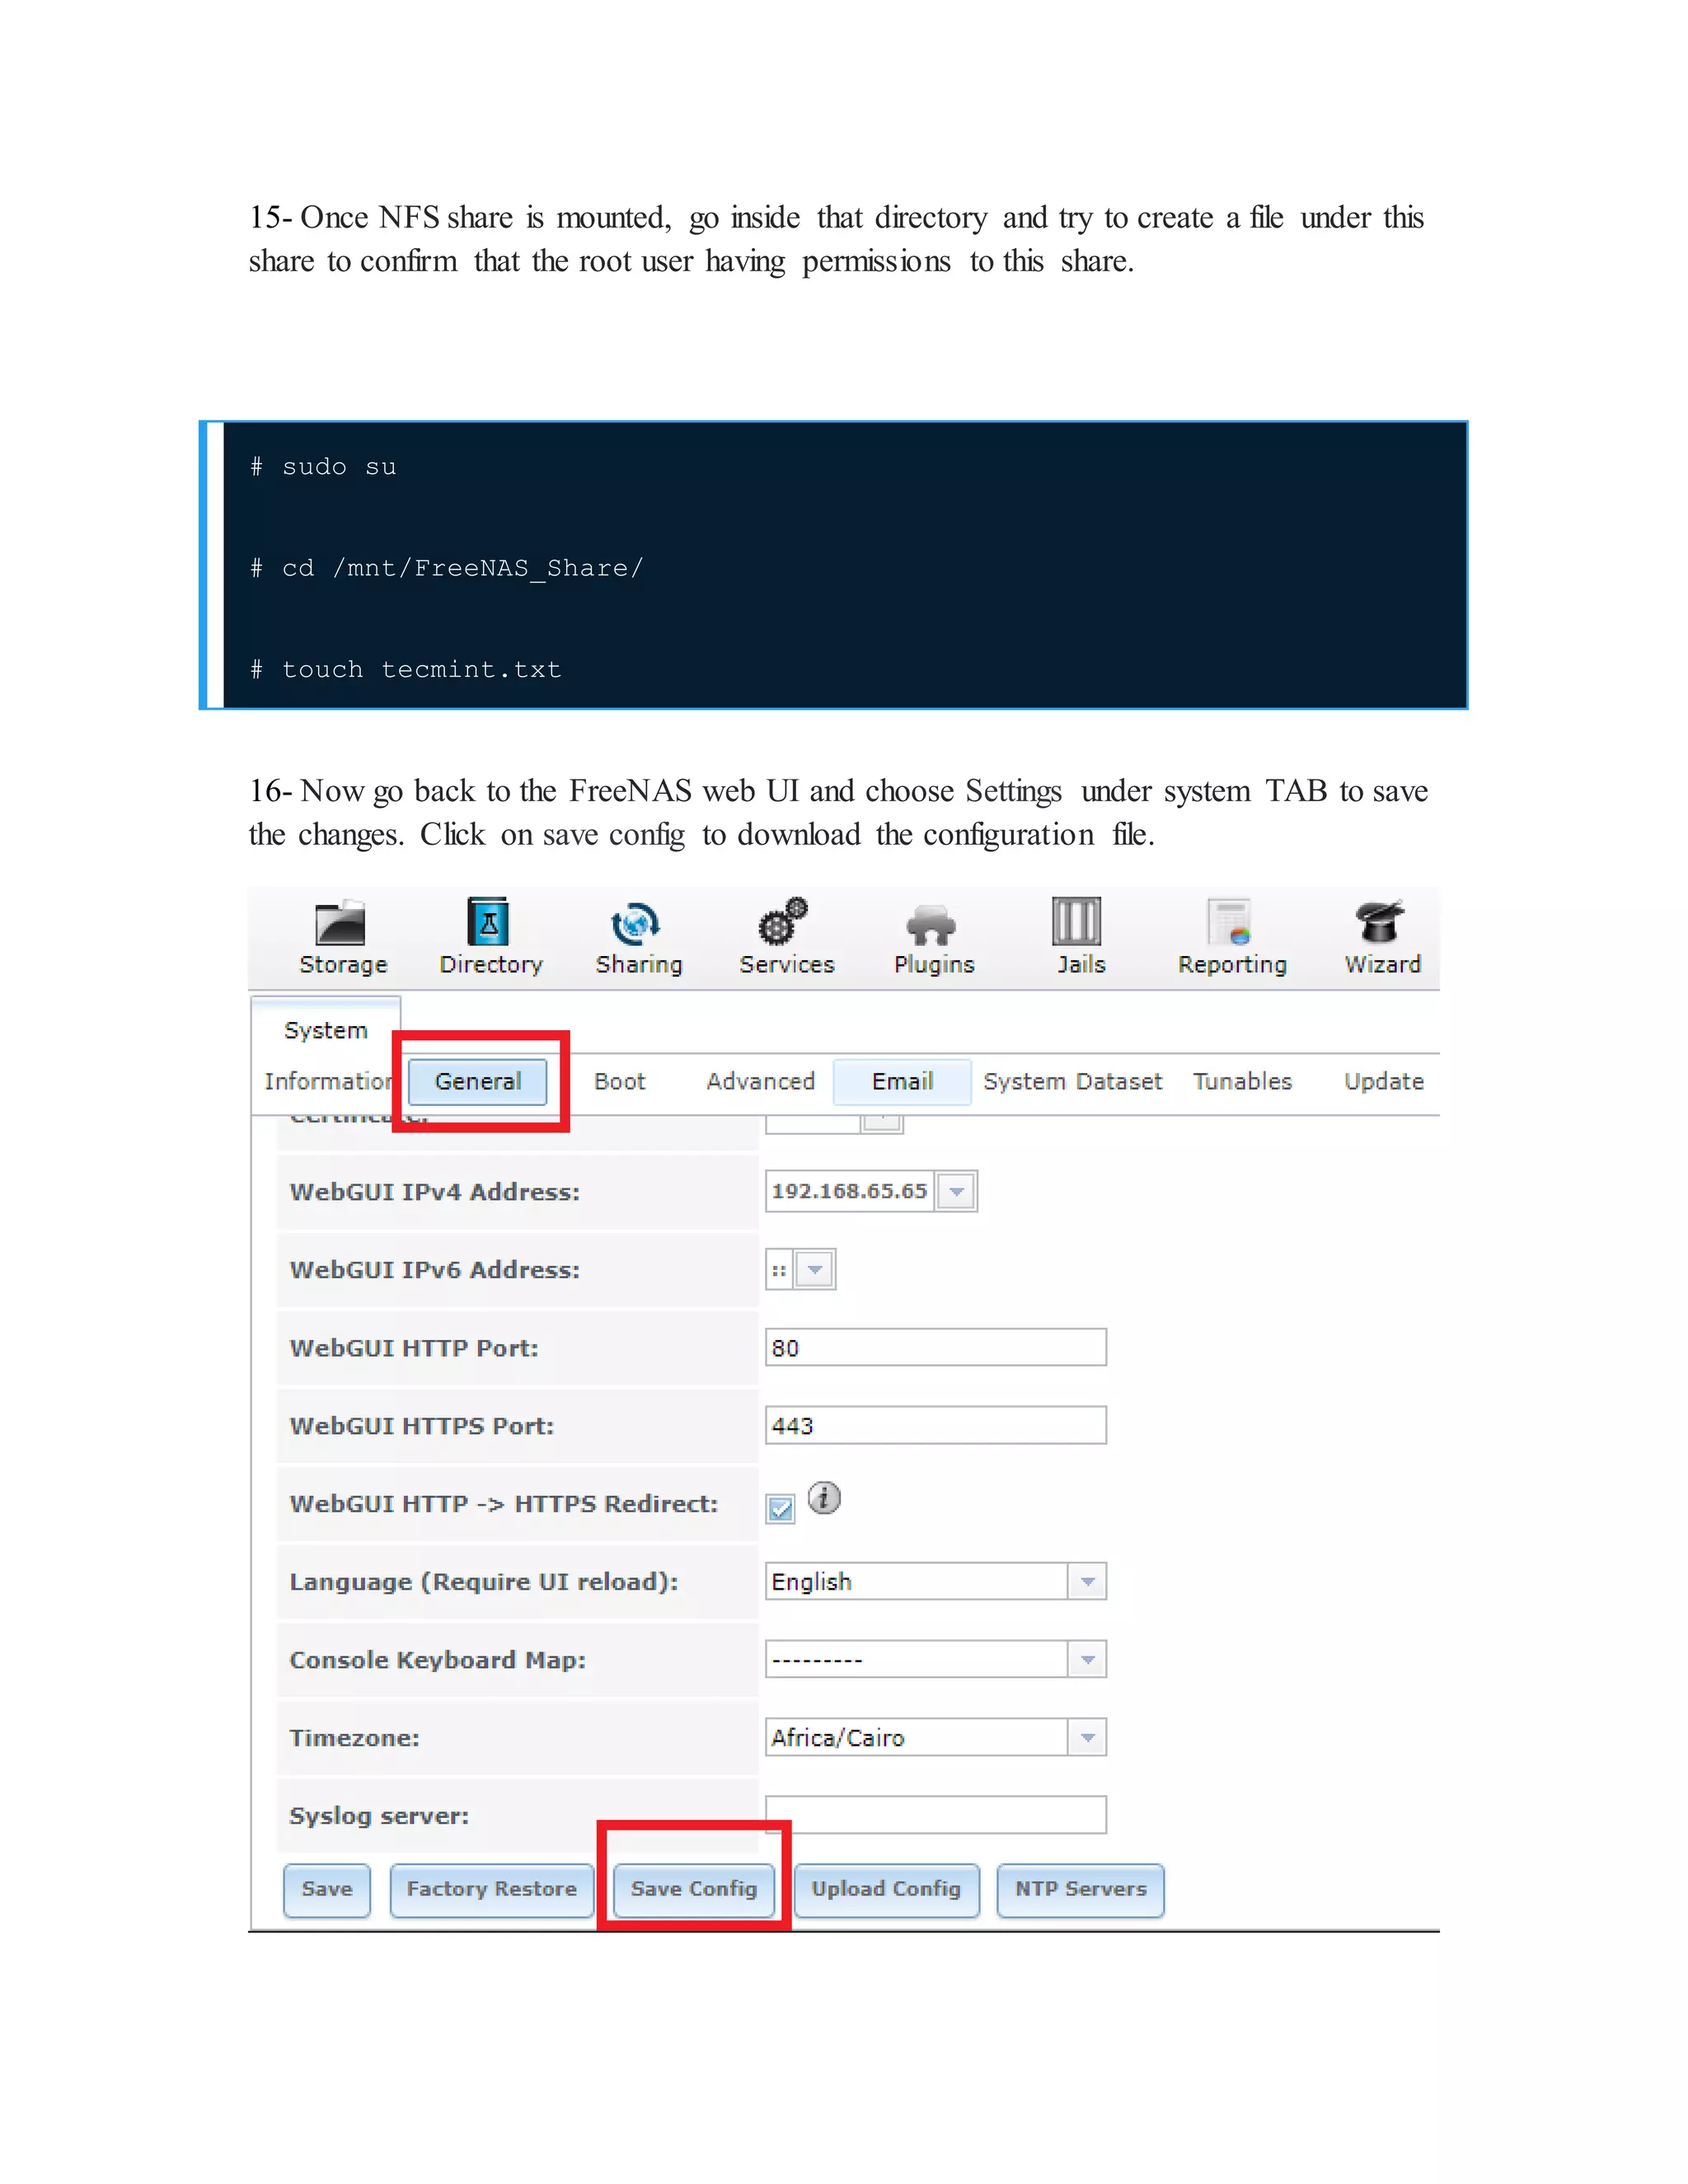
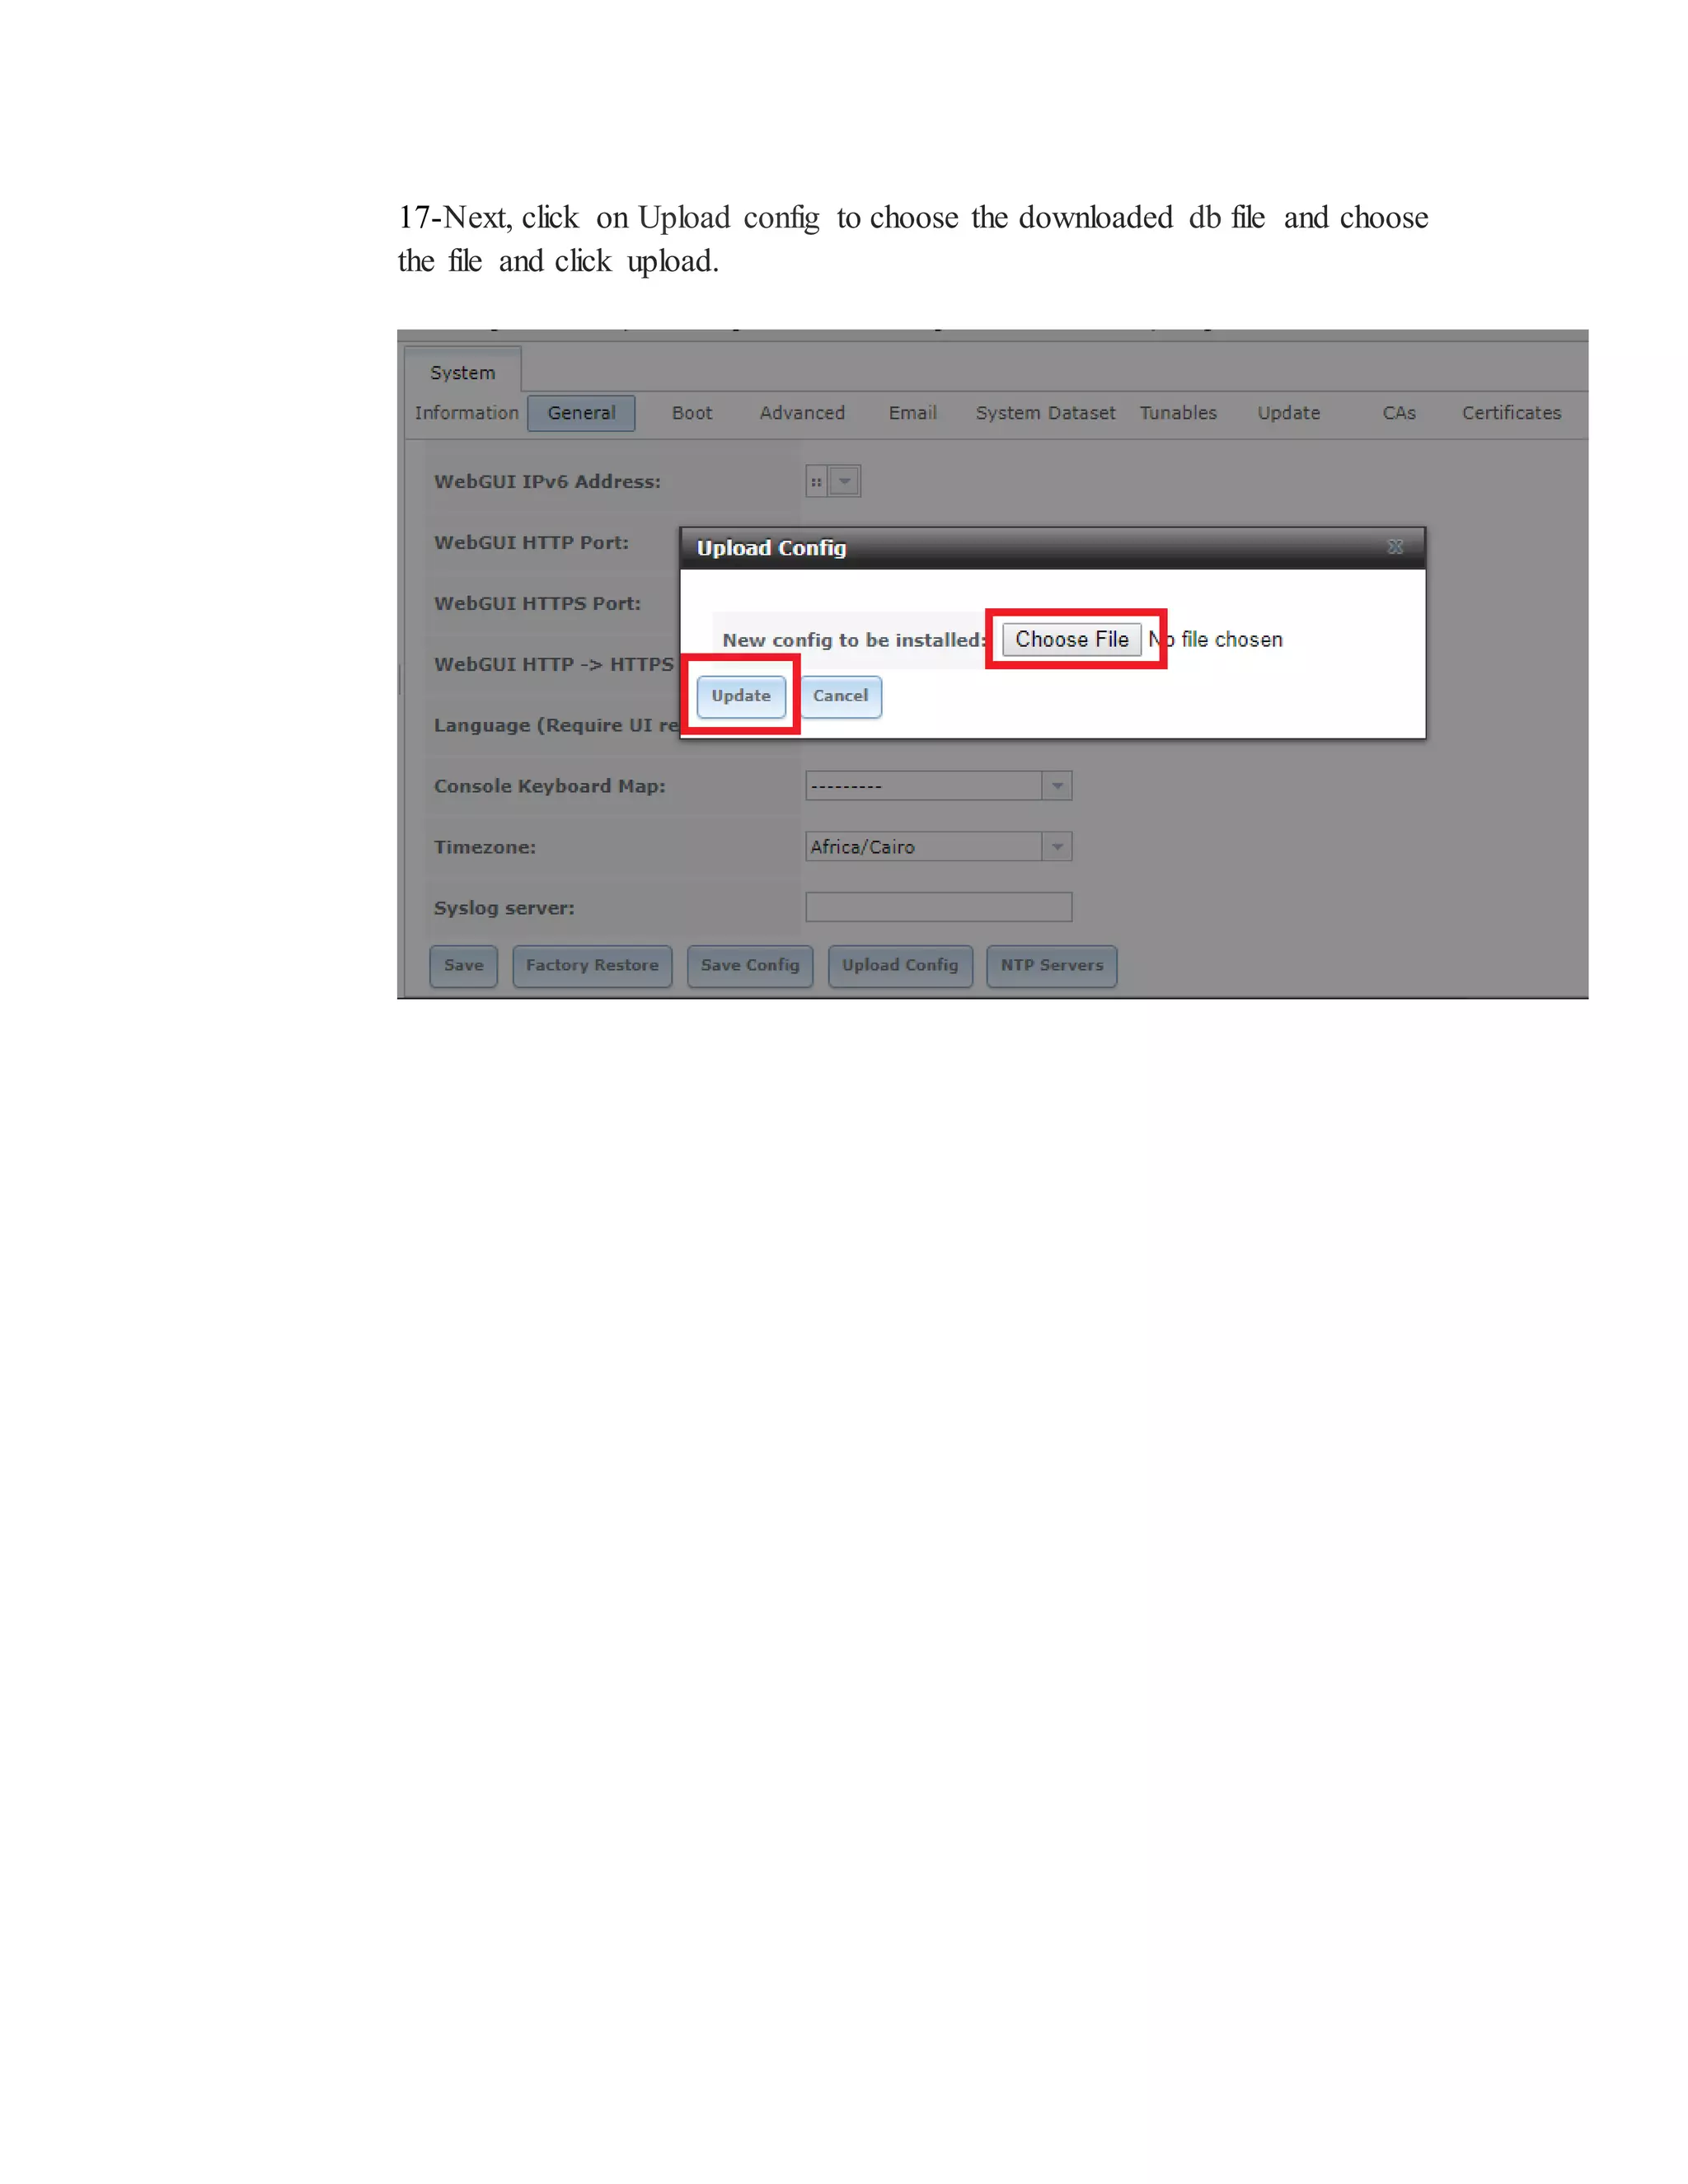
6. Saving and uploading the FreeNAS configuration
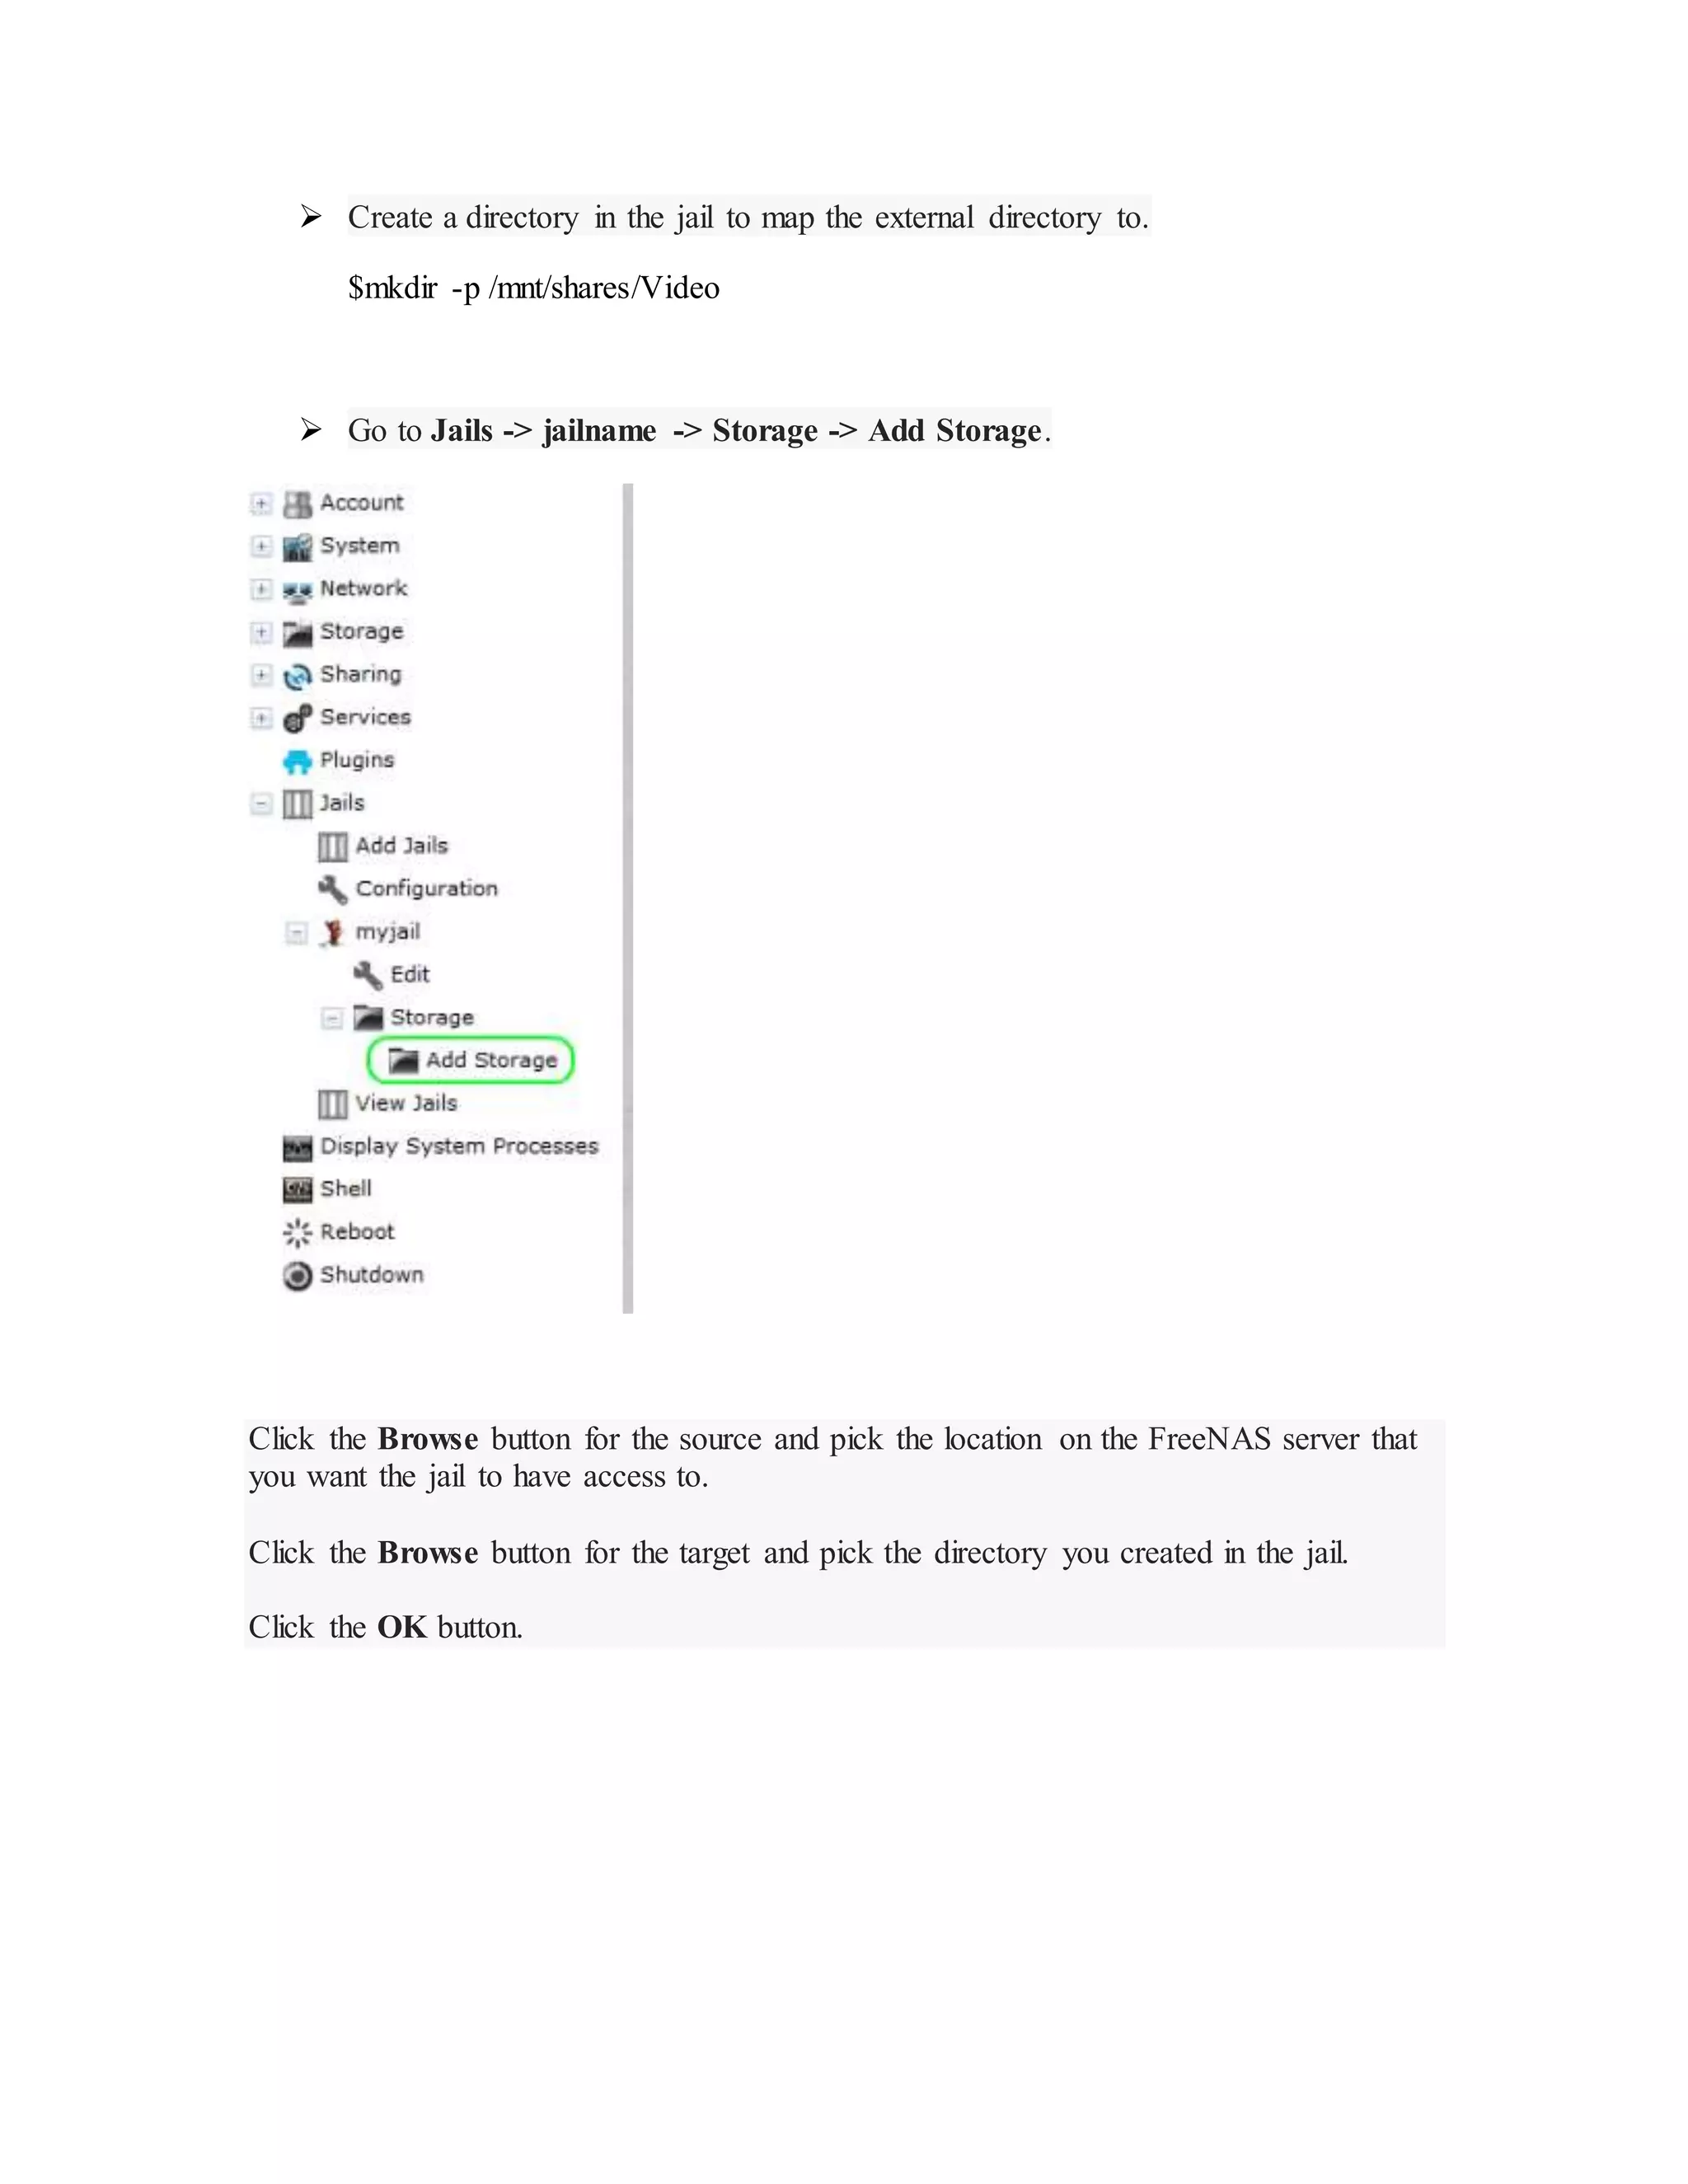
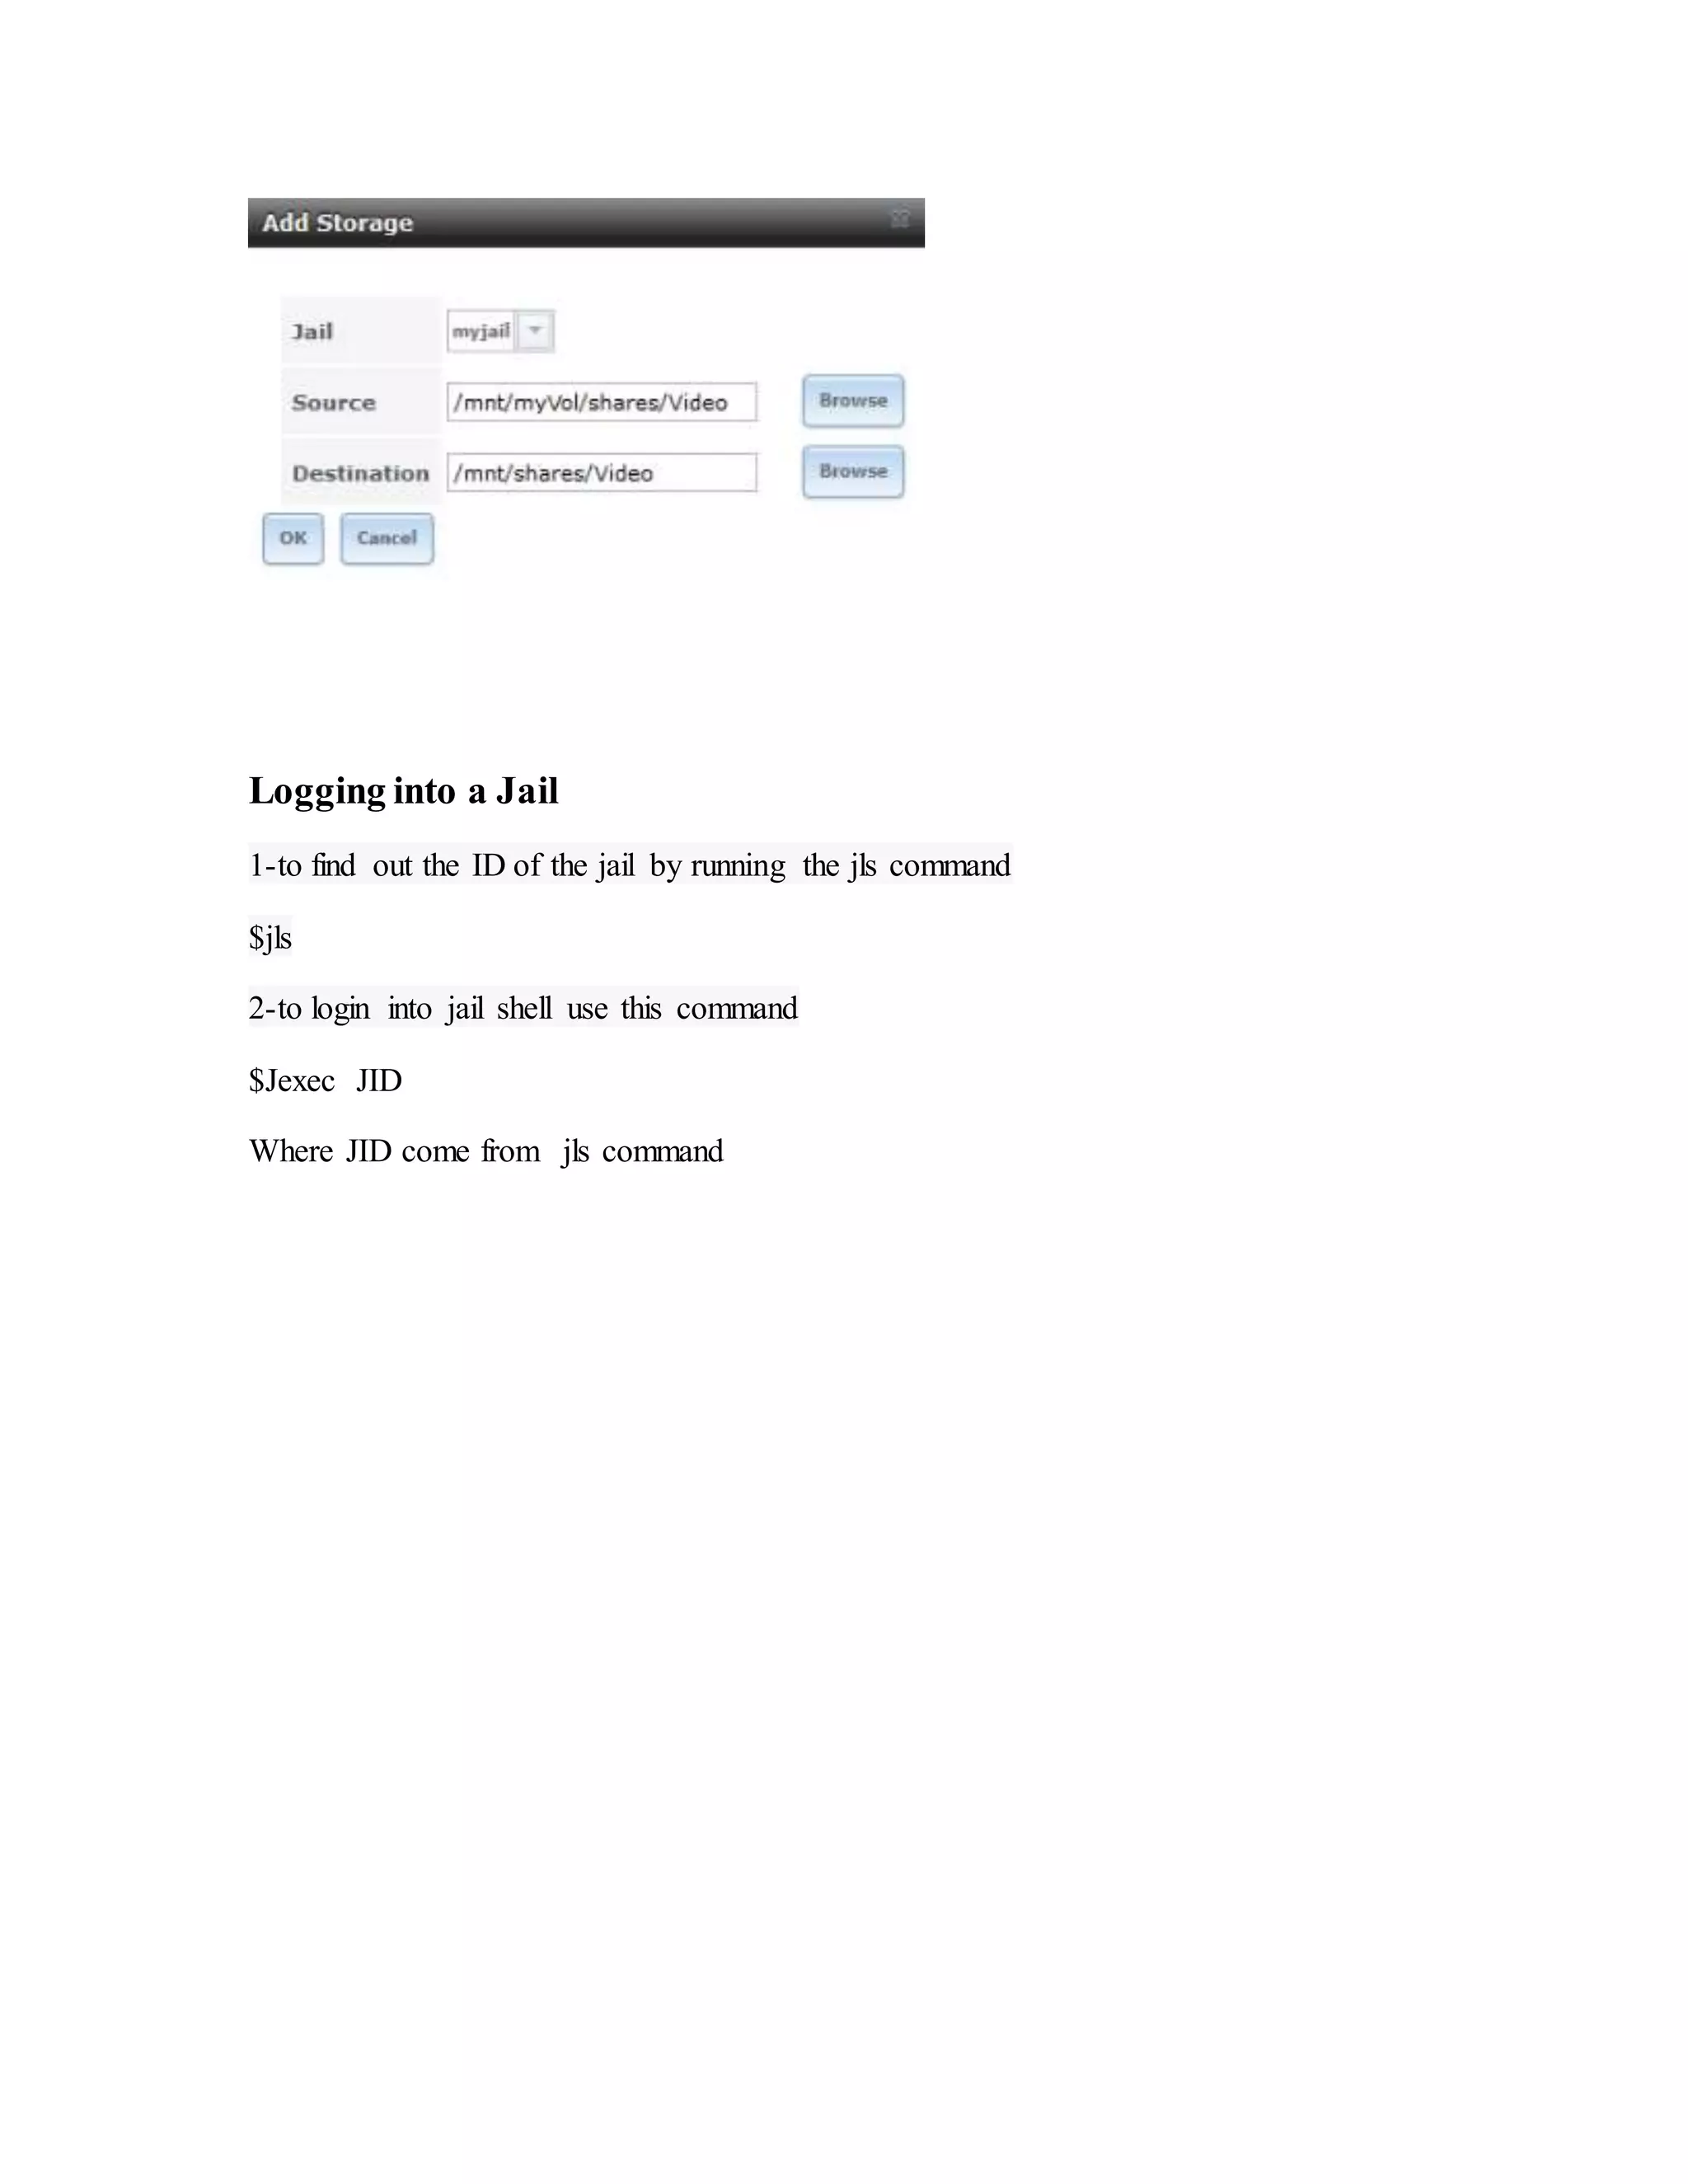
It also provides an overview of using FreeNAS plugins and jails to add additional applications and services to the NAS.
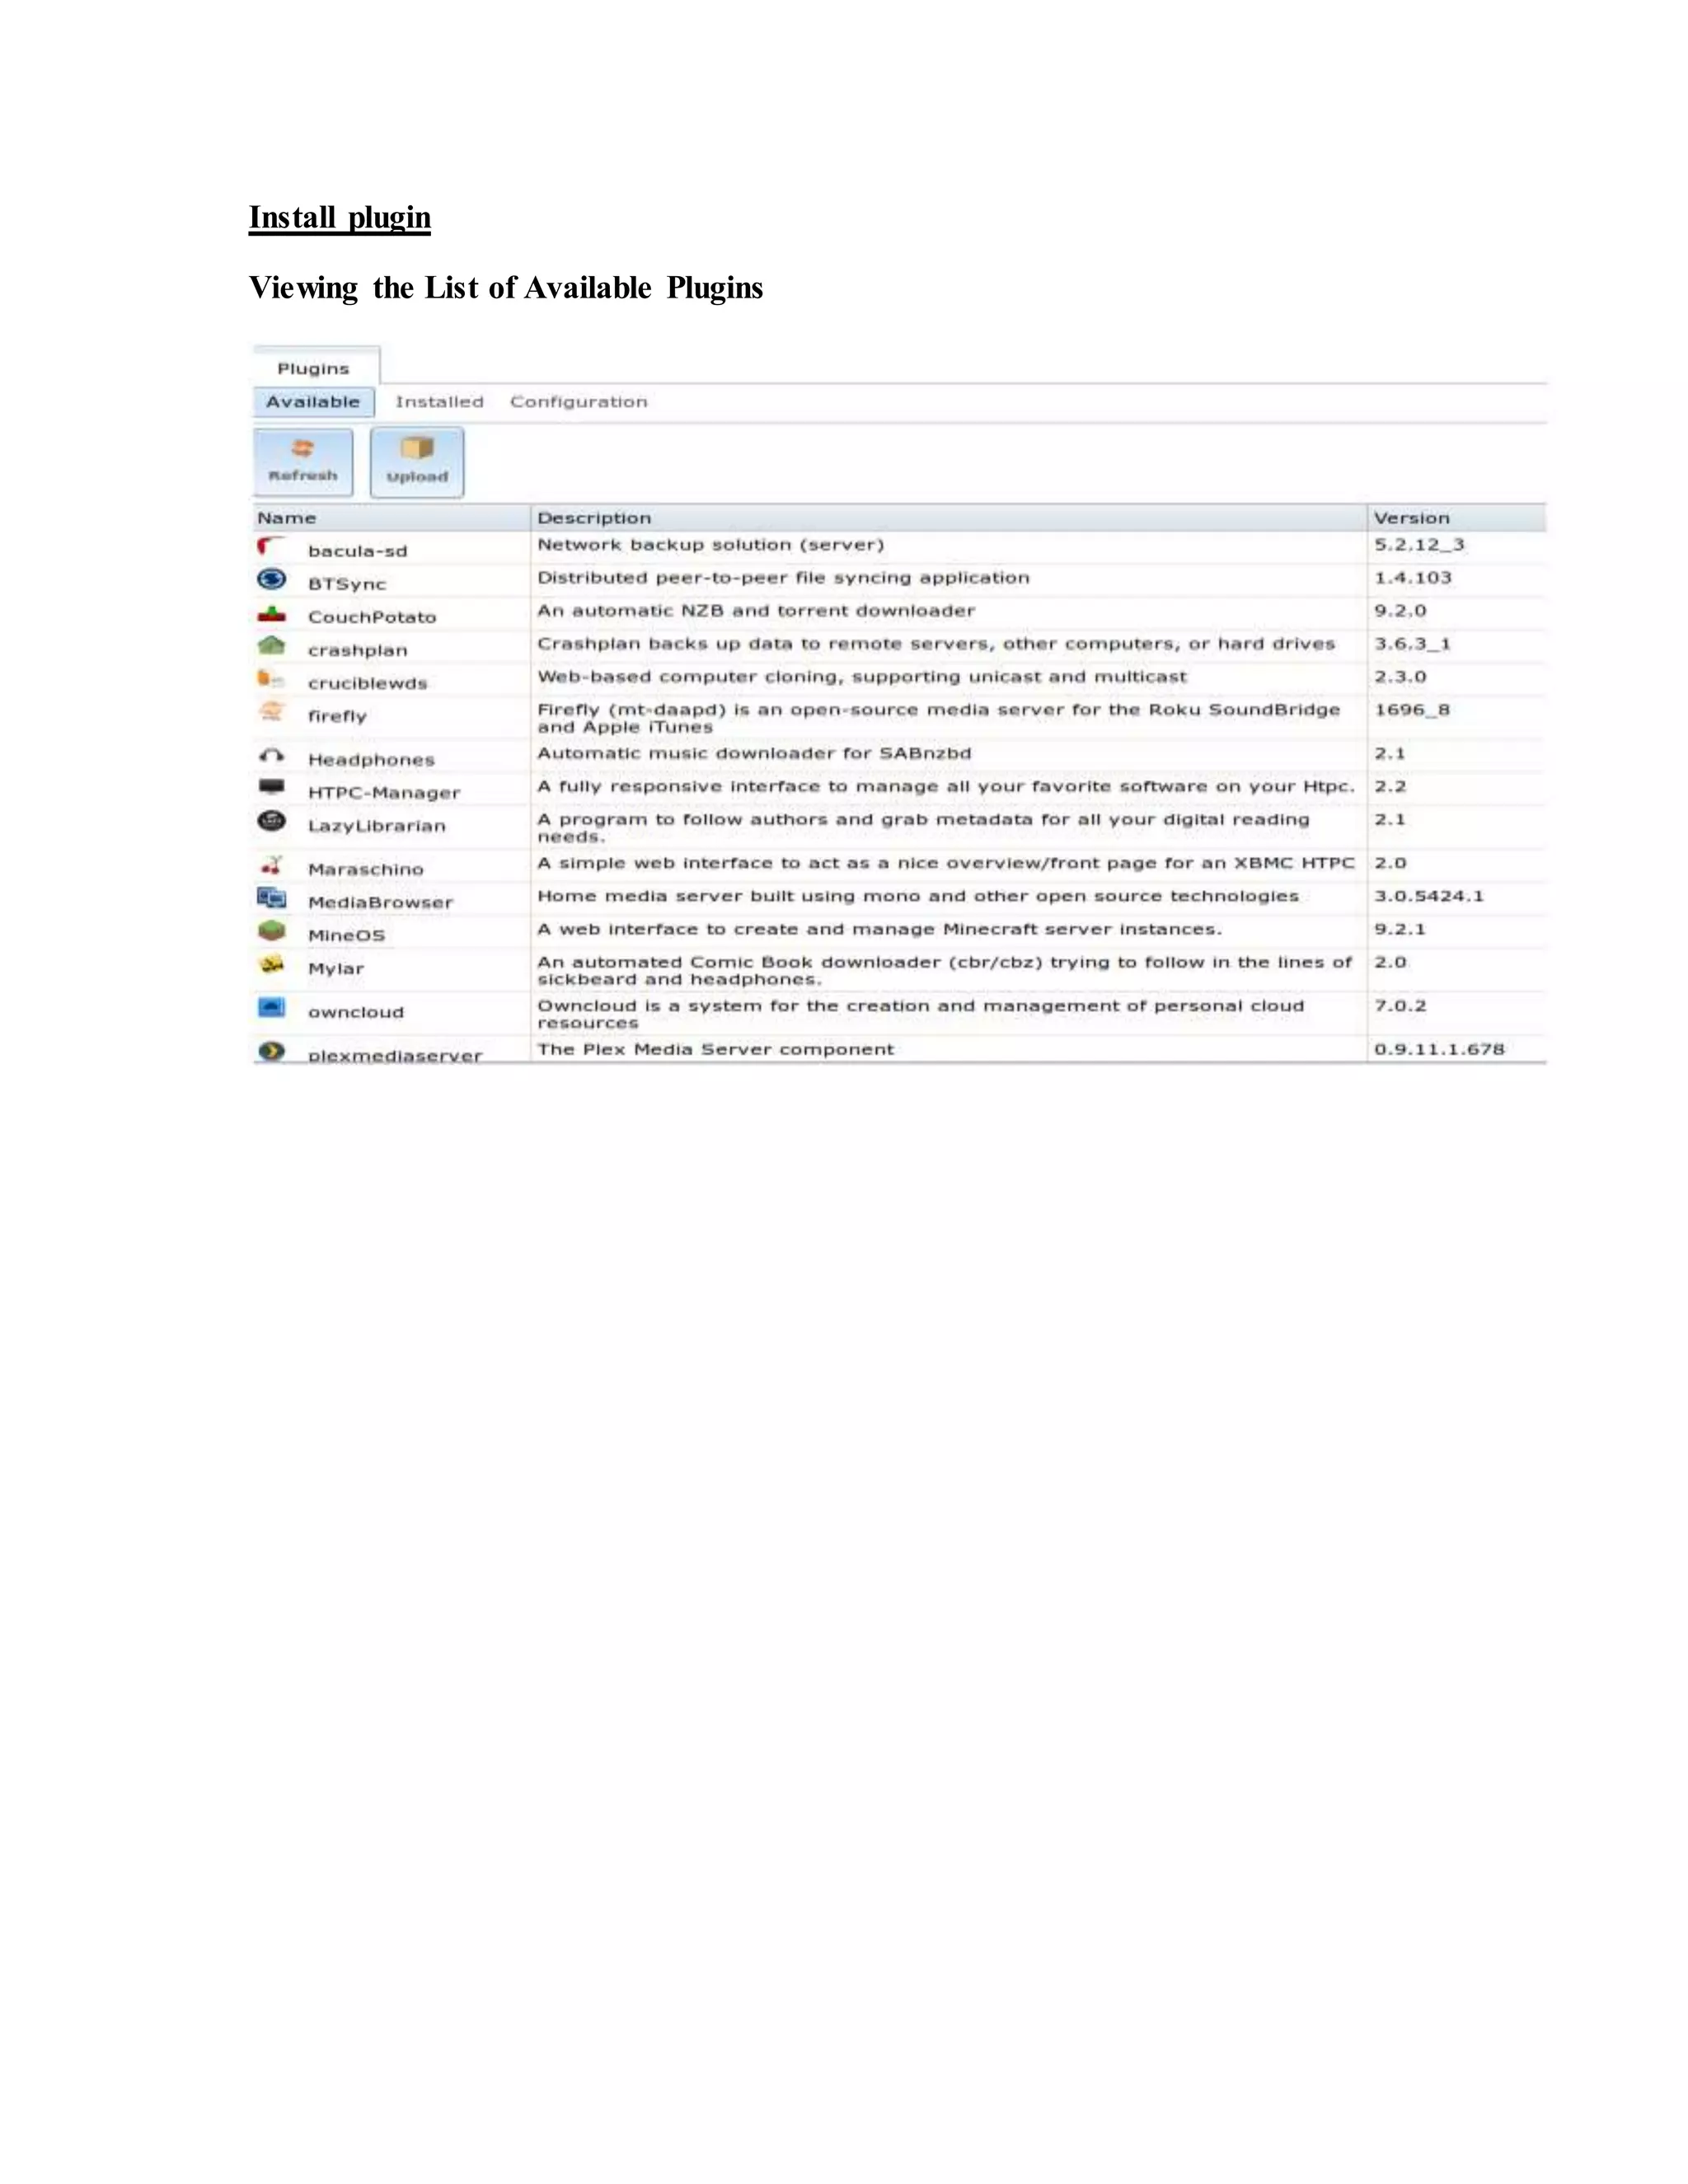
![11- Now login to your Unix client machine (Here I’ve used Redhat 7
and with IP Address 192.168.65.136), and check whether NFS share from
FreeNAS works or not.
But, before checking FreeNAS NFS shares, your client machine must have NFS package
installed on the system.
# yum install nfs-utils -y [On RedHat systems]
12- After NFS installed, use the following command to list the NFS share from
FreeNAS.
[root@localhost ~]# showmount -e 192.168.65.65
O/P:
Export list for 192.168.65.65:
/mnt/tecmint_pool/tecmint_docs 192.168.65.0
13- Now, create a mount directory under ‘/mnt/FreeNAS_Share‘ in Client machine
and mount the FreeNAS NFS Share in this mount point and confirm it using ‘df‘
command.
# sudo mkdir /mnt/Free
# sudo mount 192.168.65.65:/mnt/tecmint_pool/tecmint_docs
/mnt/FreeNAS_Share/
#df -h](https://image.slidesharecdn.com/documentationfreenas-180111115849/75/Documentation-free-nas-18-2048.jpg)
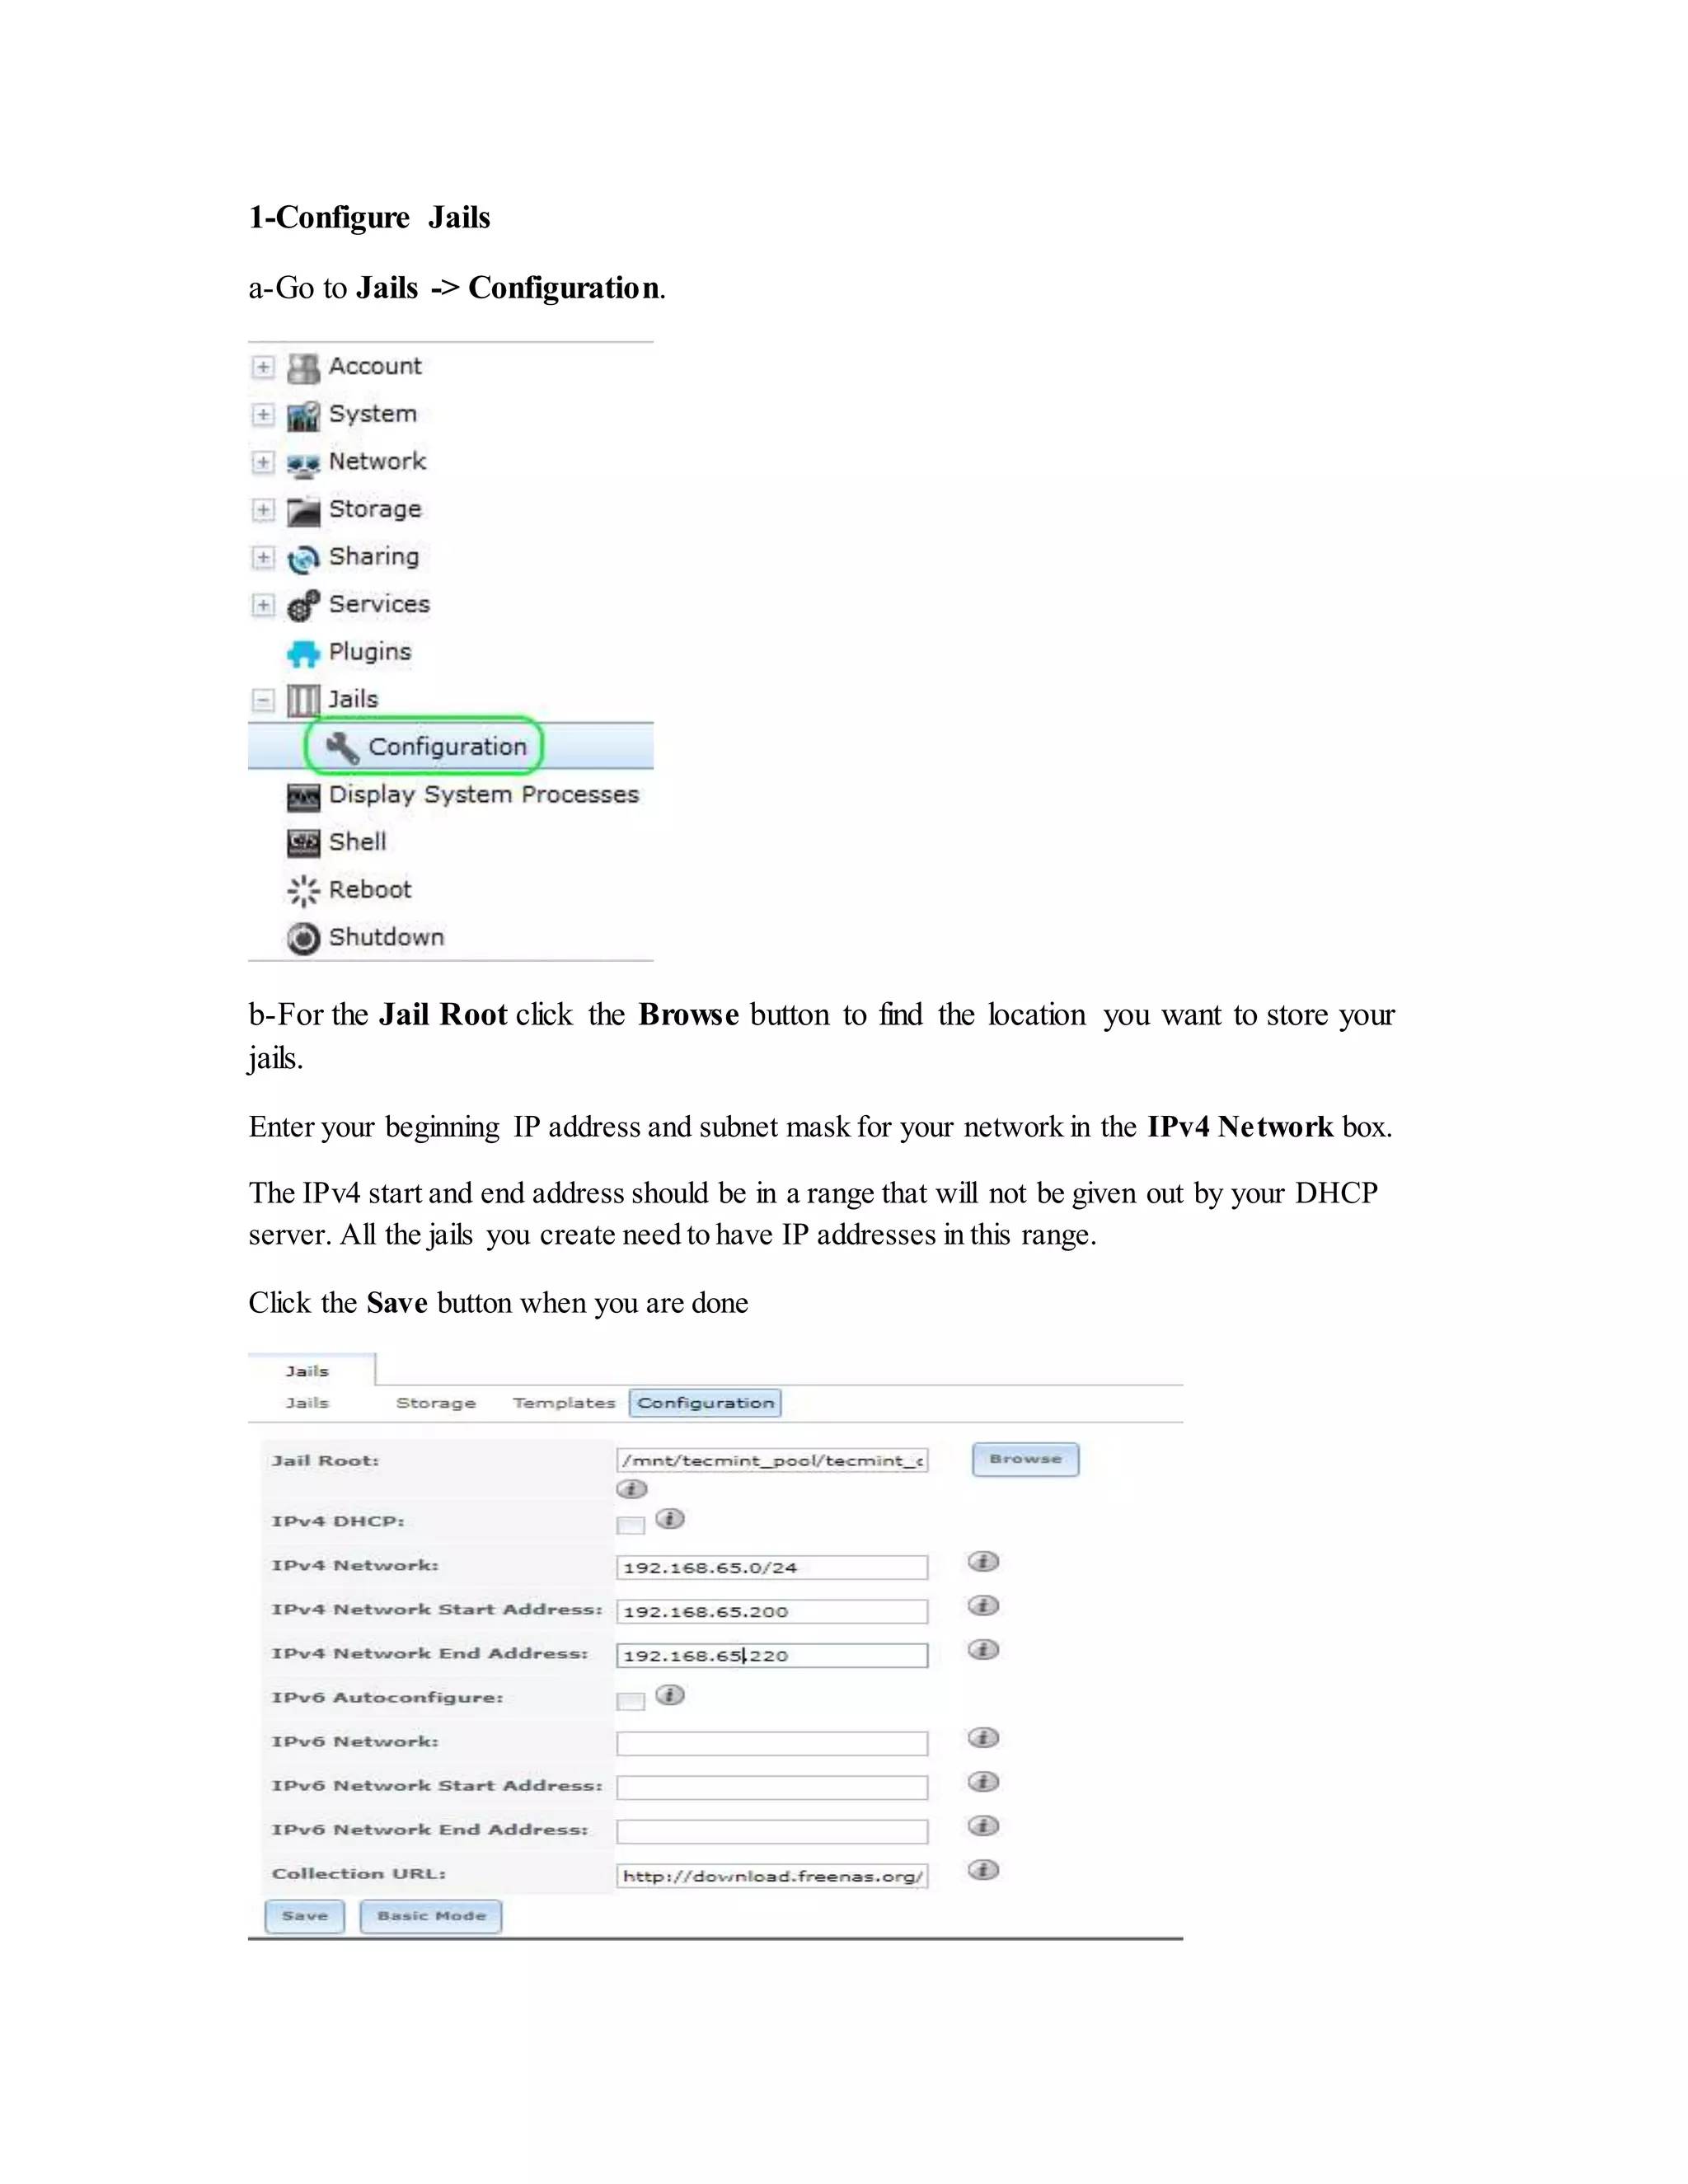
![O/P
[root@main_host~]#df -h
Filesystem Size UsedAvail Use% Mountedon
/dev/sda3 18G 4.9G 13G 28% /
devtmpfs 485M 0 485M 0% /dev
tmpfs 490M 0 490M 0% /dev/shm
tmpfs 490M 6.8M 484M 2% /run
tmpfs 490M 0 490M 0% /sys/fs/cgroup
/dev/mapper/data--vg-vol2 2.0G 6.0M 1.8G 1% /data
/dev/mapper/data--vg-vol1 4.9G 3.6M 4.7G 1% /data02
/dev/sda1 297M 80M 218M 27% /boot
192.168.65.65:/mnt/ tecmint_pool/tecmint_docs 15G 384K 15G 1% /mnt/Free/
14- Once NFS share is mounted, go inside that directory and try to create a file
under this share to confirm that the root user having permissions to this share.
15- # sudo su
16- # cd /mnt/FreeNAS_Share/
17- # touch tecmint.txt](https://image.slidesharecdn.com/documentationfreenas-180111115849/75/Documentation-free-nas-19-2048.jpg)


![Coded Agents – with UiPath SDK + LangGraph [Virtual Hands-on Workshop]](https://cdn.slidesharecdn.com/ss_thumbnails/codedagentsdeck-251215155422-5497c599-thumbnail.jpg?width=640&height=640&fit=bounds)


