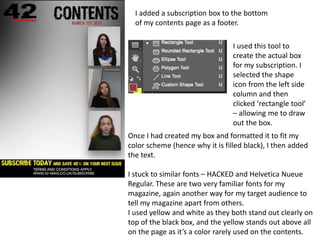
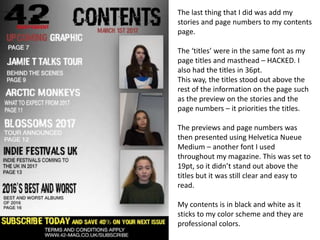
CONTENTS PAGE
Construction
The first thing that I did in the construction of
my contents page was create the background.
When creating my background I considered
the color scheme and overall theme for my
magazine that is already present in my front
cover.
The background I used is very similar to that of
my front cover.
To create my background I used the brush tool
on 2840pt. And clicked around the outside of
the page, creating this shadow effect in the
corners. I built this up by making the brush size
smaller and clicking further in the page.
Next I added the masthead and title for my contents
page. Again, I stuck to the same theme and color
scheme for my magazine.
I used the familiar font ‘HACKED’ for both my
masthead and ‘CONTENTS’.
The size of my mast head is 99.5pt and the selling line
18.29pt.
The size of my title is 90.14pt.
I made sure that my masthead was the same on both
my cover page and contents page, as this is the ‘face’
of my magazine. This is how my target audience would
be able to tell my magazine apart from others, so it’s
important that the masthead doesn’t change.
I also used the same font for my title as I did my mast
head to again stick to the theme of my magazine,
keeping it looking professional and ‘thought through’.
I added images to my contents page by clicking ‘File’
> ‘Open’ > Selecting my image and cropping it down,
then clicking and dragging it onto my contents page,
where I resized the images to fit the page
appropriately.
I added a drop
shadow effect to my
images by selecting
the effect
highlighted in the
top screenshot – this
variety of effects can
be found in the top
right corner of the
photoshop app.
I added a subscription box to the bottom
of my contents page as a footer.
I used this tool to
create the actual box
for my subscription. I
selected the shape
icon from the left side
column and then
clicked ‘rectangle tool’
– allowing me to draw
out the box.
Once I had created my box and formatted it to fit my
color scheme (hence why it is filled black), I then added
the text.
I stuck to similar fonts – HACKED and Helvetica Nueue
Regular. These are two very familiar fonts for my
magazine, again another way for my target audience to
tell my magazine apart from others.
I used yellow and white as they both stand out clearly on
top of the black box, and the yellow stands out above all
on the page as it’s a color rarely used on the contents.
The last thing that I did was add my
stories and page numbers to my contents
page.
The ‘titles’ were in the same font as my
page titles and masthead – HACKED. I
also had the titles in 36pt.
This way, the titles stood out above the
rest of the information on the page such
as the preview on the stories and the
page numbers – it priorities the titles.
The previews and page numbers was
then presented using Helvetica Nueue
Medium – another font I used
throughout my magazine. This was set to
19pt, so it didn’t stand out above the
titles but it was still clear and easy to
read.
My contents is in black and white as it
sticks to my color scheme and they are
professional colors.

Contents construction

  • 1.
  • 2.
    The first thingthat I did in the construction of my contents page was create the background. When creating my background I considered the color scheme and overall theme for my magazine that is already present in my front cover. The background I used is very similar to that of my front cover. To create my background I used the brush tool on 2840pt. And clicked around the outside of the page, creating this shadow effect in the corners. I built this up by making the brush size smaller and clicking further in the page.
  • 3.
    Next I addedthe masthead and title for my contents page. Again, I stuck to the same theme and color scheme for my magazine. I used the familiar font ‘HACKED’ for both my masthead and ‘CONTENTS’. The size of my mast head is 99.5pt and the selling line 18.29pt. The size of my title is 90.14pt. I made sure that my masthead was the same on both my cover page and contents page, as this is the ‘face’ of my magazine. This is how my target audience would be able to tell my magazine apart from others, so it’s important that the masthead doesn’t change. I also used the same font for my title as I did my mast head to again stick to the theme of my magazine, keeping it looking professional and ‘thought through’.
  • 4.
    I added imagesto my contents page by clicking ‘File’ > ‘Open’ > Selecting my image and cropping it down, then clicking and dragging it onto my contents page, where I resized the images to fit the page appropriately. I added a drop shadow effect to my images by selecting the effect highlighted in the top screenshot – this variety of effects can be found in the top right corner of the photoshop app.
  • 5.
    I added asubscription box to the bottom of my contents page as a footer. I used this tool to create the actual box for my subscription. I selected the shape icon from the left side column and then clicked ‘rectangle tool’ – allowing me to draw out the box. Once I had created my box and formatted it to fit my color scheme (hence why it is filled black), I then added the text. I stuck to similar fonts – HACKED and Helvetica Nueue Regular. These are two very familiar fonts for my magazine, again another way for my target audience to tell my magazine apart from others. I used yellow and white as they both stand out clearly on top of the black box, and the yellow stands out above all on the page as it’s a color rarely used on the contents.
  • 6.
    The last thingthat I did was add my stories and page numbers to my contents page. The ‘titles’ were in the same font as my page titles and masthead – HACKED. I also had the titles in 36pt. This way, the titles stood out above the rest of the information on the page such as the preview on the stories and the page numbers – it priorities the titles. The previews and page numbers was then presented using Helvetica Nueue Medium – another font I used throughout my magazine. This was set to 19pt, so it didn’t stand out above the titles but it was still clear and easy to read. My contents is in black and white as it sticks to my color scheme and they are professional colors.