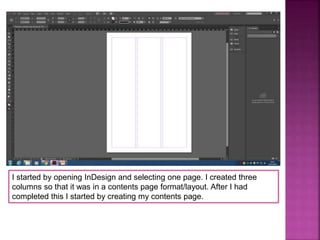
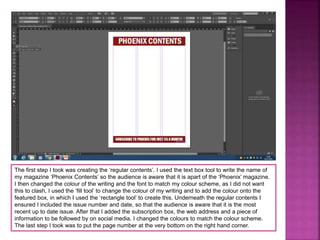
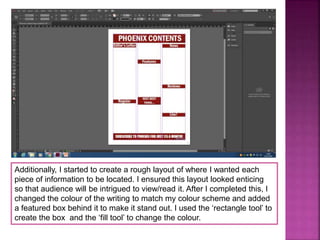
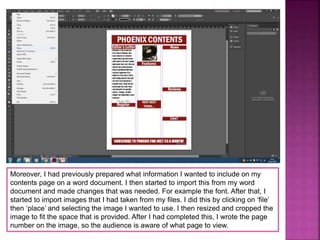
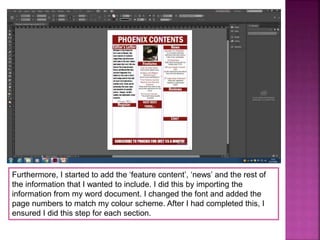
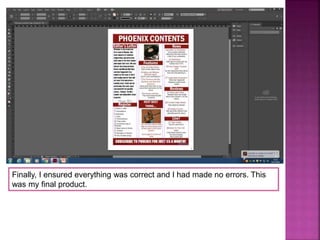
Deemple Morar
I started by opening InDesign and selecting one page. I created three
columns so that it was in a contents page format/layout. After I had
completed this I started by creating my contents page.
The first step I took was creating the ‘regular contents’. I used the text box tool to write the name of
my magazine ‘Phoenix Contents’ so the audience is aware that it is apart of the ‘Phoenix’ magazine.
I then changed the colour of the writing and the font to match my colour scheme, as I did not want
this to clash, I used the ‘fill tool’ to change the colour of my writing and to add the colour onto the
featured box, in which I used the ‘rectangle tool’ to create this. Underneath the regular contents I
ensured I included the issue number and date, so that the audience is aware that it is the most
recent up to date issue. After that I added the subscription box, the web address and a piece of
information to be followed by on social media. I changed the colours to match the colour scheme.
The last step I took was to put the page number at the very bottom on the right hand corner.
Additionally, I started to create a rough layout of where I wanted each
piece of information to be located. I ensured this layout looked enticing
so that audience will be intrigued to view/read it. After I completed this, I
changed the colour of the writing to match my colour scheme and added
a featured box behind it to make it stand out. I used the ‘rectangle tool’ to
create the box and the ‘fill tool’ to change the colour.
Moreover, I had previously prepared what information I wanted to include on my
contents page on a word document. I then started to import this from my word
document and made changes that was needed. For example the font. After that, I
started to import images that I had taken from my files. I did this by clicking on ‘file’
then ‘place’ and selecting the image I wanted to use. I then resized and cropped the
image to fit the space that is provided. After I had completed this, I wrote the page
number on the image, so the audience is aware of what page to view.
Furthermore, I started to add the ‘feature content’, ‘news’ and the rest of
the information that I wanted to include. I did this by importing the
information from my word document. I changed the font and added the
page numbers to match my colour scheme. After I had completed this, I
ensured I did this step for each section.
Finally, I ensured everything was correct and I had made no errors. This
was my final product.

Step by step process of contents page

  • 1.
  • 2.
    I started byopening InDesign and selecting one page. I created three columns so that it was in a contents page format/layout. After I had completed this I started by creating my contents page.
  • 3.
    The first stepI took was creating the ‘regular contents’. I used the text box tool to write the name of my magazine ‘Phoenix Contents’ so the audience is aware that it is apart of the ‘Phoenix’ magazine. I then changed the colour of the writing and the font to match my colour scheme, as I did not want this to clash, I used the ‘fill tool’ to change the colour of my writing and to add the colour onto the featured box, in which I used the ‘rectangle tool’ to create this. Underneath the regular contents I ensured I included the issue number and date, so that the audience is aware that it is the most recent up to date issue. After that I added the subscription box, the web address and a piece of information to be followed by on social media. I changed the colours to match the colour scheme. The last step I took was to put the page number at the very bottom on the right hand corner.
  • 4.
    Additionally, I startedto create a rough layout of where I wanted each piece of information to be located. I ensured this layout looked enticing so that audience will be intrigued to view/read it. After I completed this, I changed the colour of the writing to match my colour scheme and added a featured box behind it to make it stand out. I used the ‘rectangle tool’ to create the box and the ‘fill tool’ to change the colour.
  • 5.
    Moreover, I hadpreviously prepared what information I wanted to include on my contents page on a word document. I then started to import this from my word document and made changes that was needed. For example the font. After that, I started to import images that I had taken from my files. I did this by clicking on ‘file’ then ‘place’ and selecting the image I wanted to use. I then resized and cropped the image to fit the space that is provided. After I had completed this, I wrote the page number on the image, so the audience is aware of what page to view.
  • 6.
    Furthermore, I startedto add the ‘feature content’, ‘news’ and the rest of the information that I wanted to include. I did this by importing the information from my word document. I changed the font and added the page numbers to match my colour scheme. After I had completed this, I ensured I did this step for each section.
  • 7.
    Finally, I ensuredeverything was correct and I had made no errors. This was my final product.