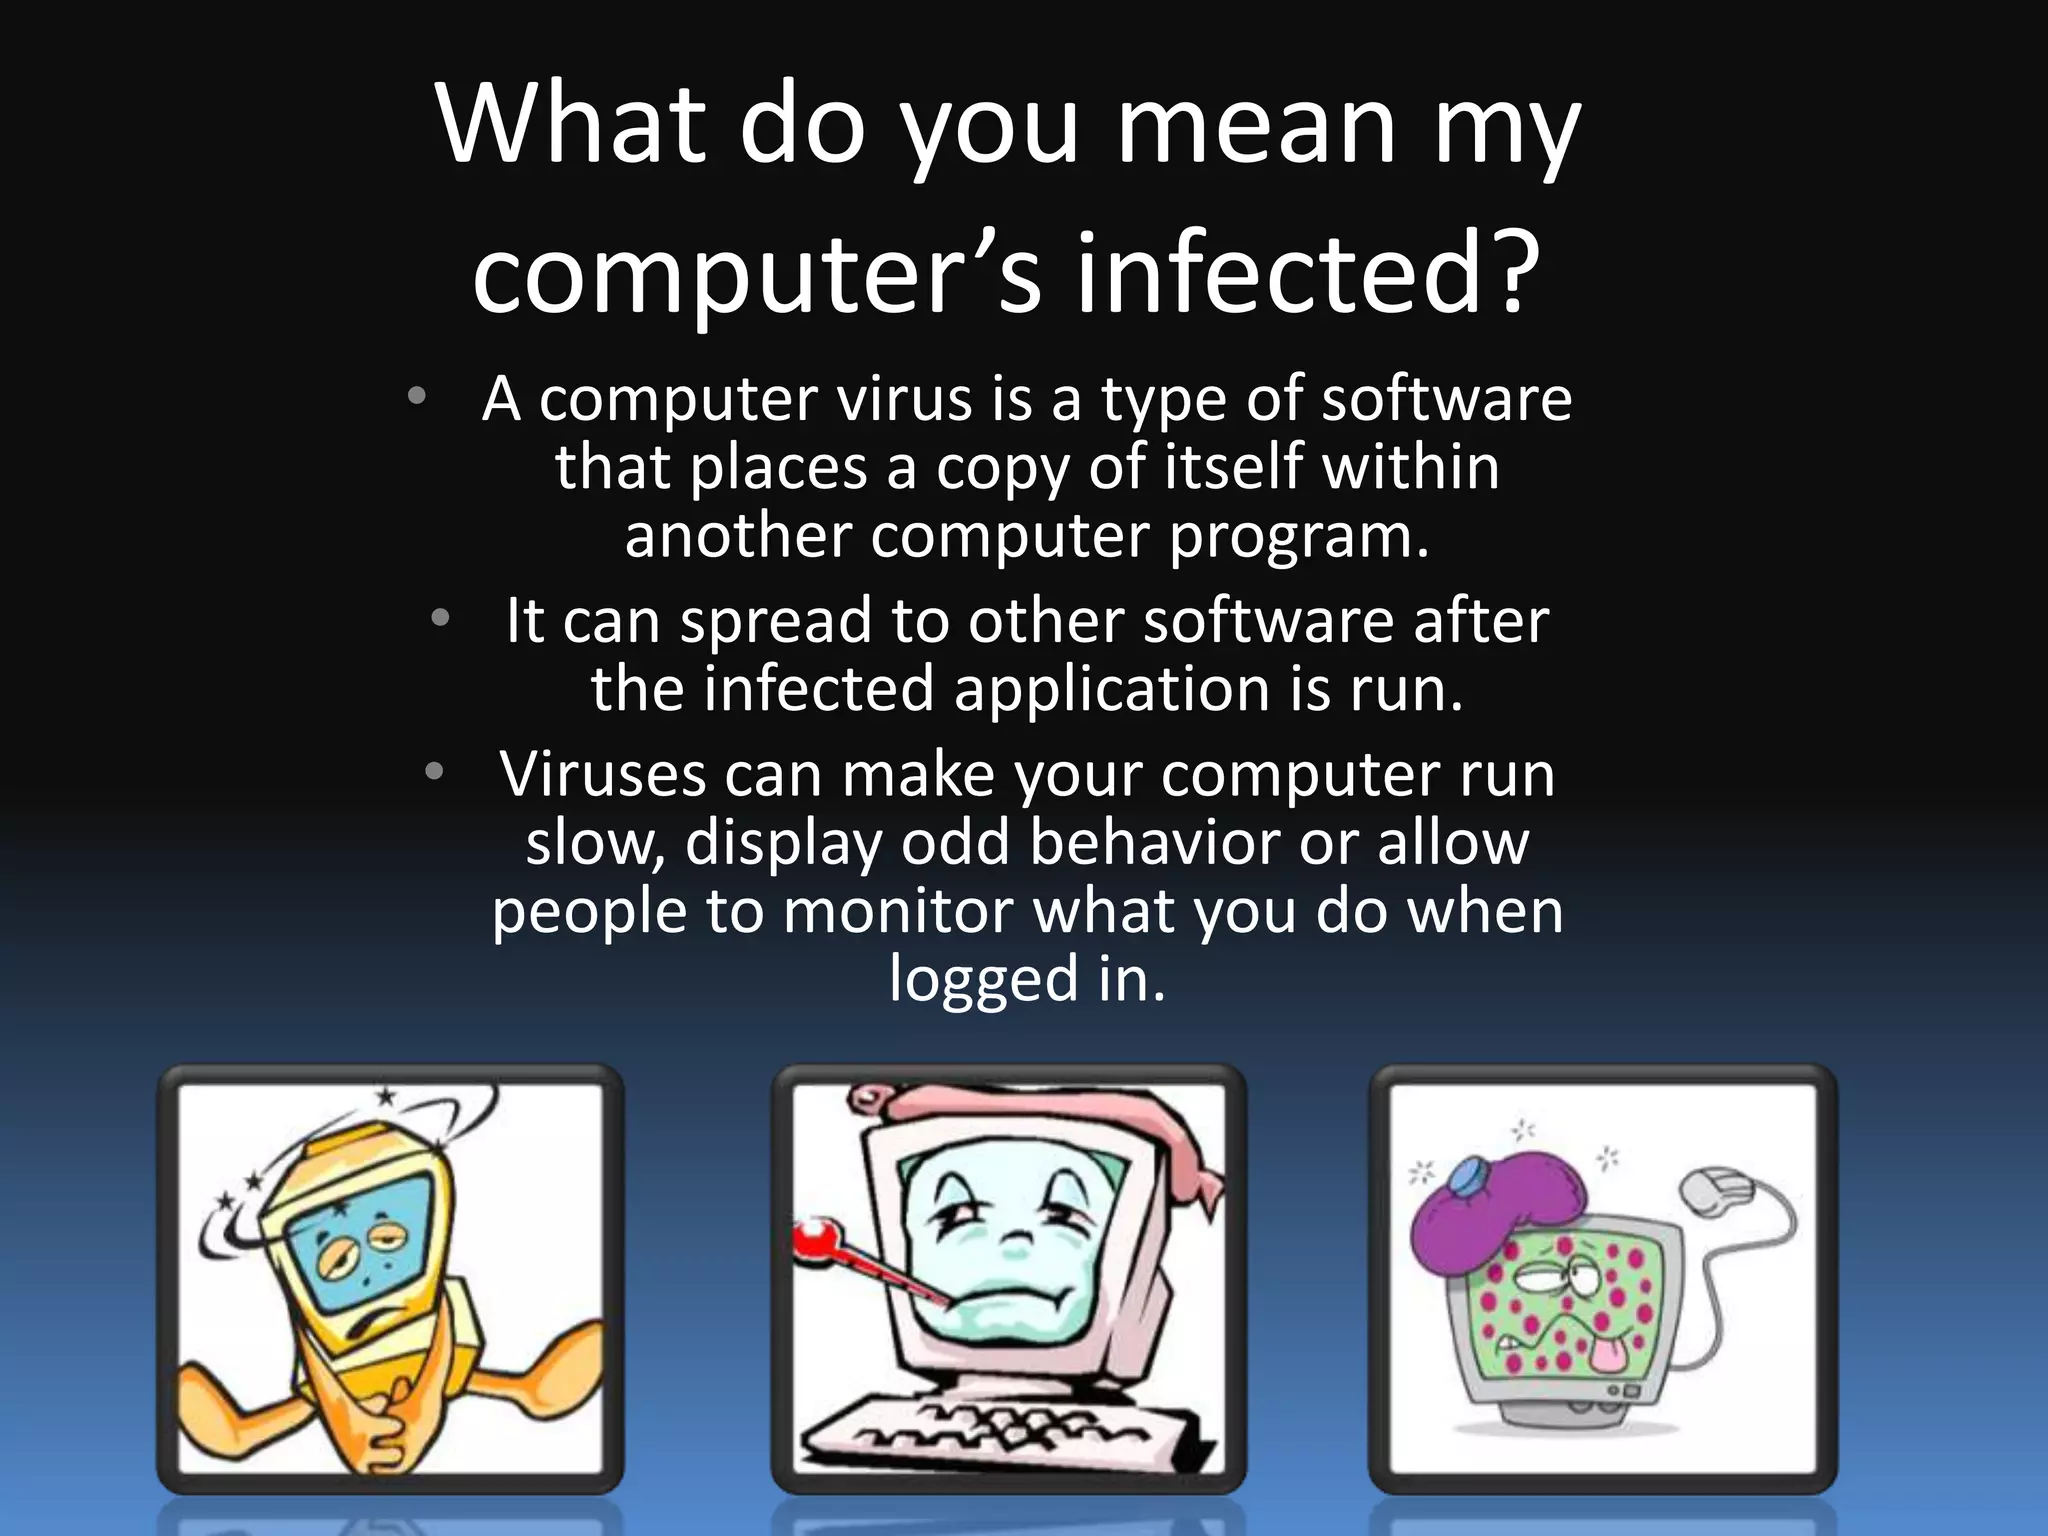
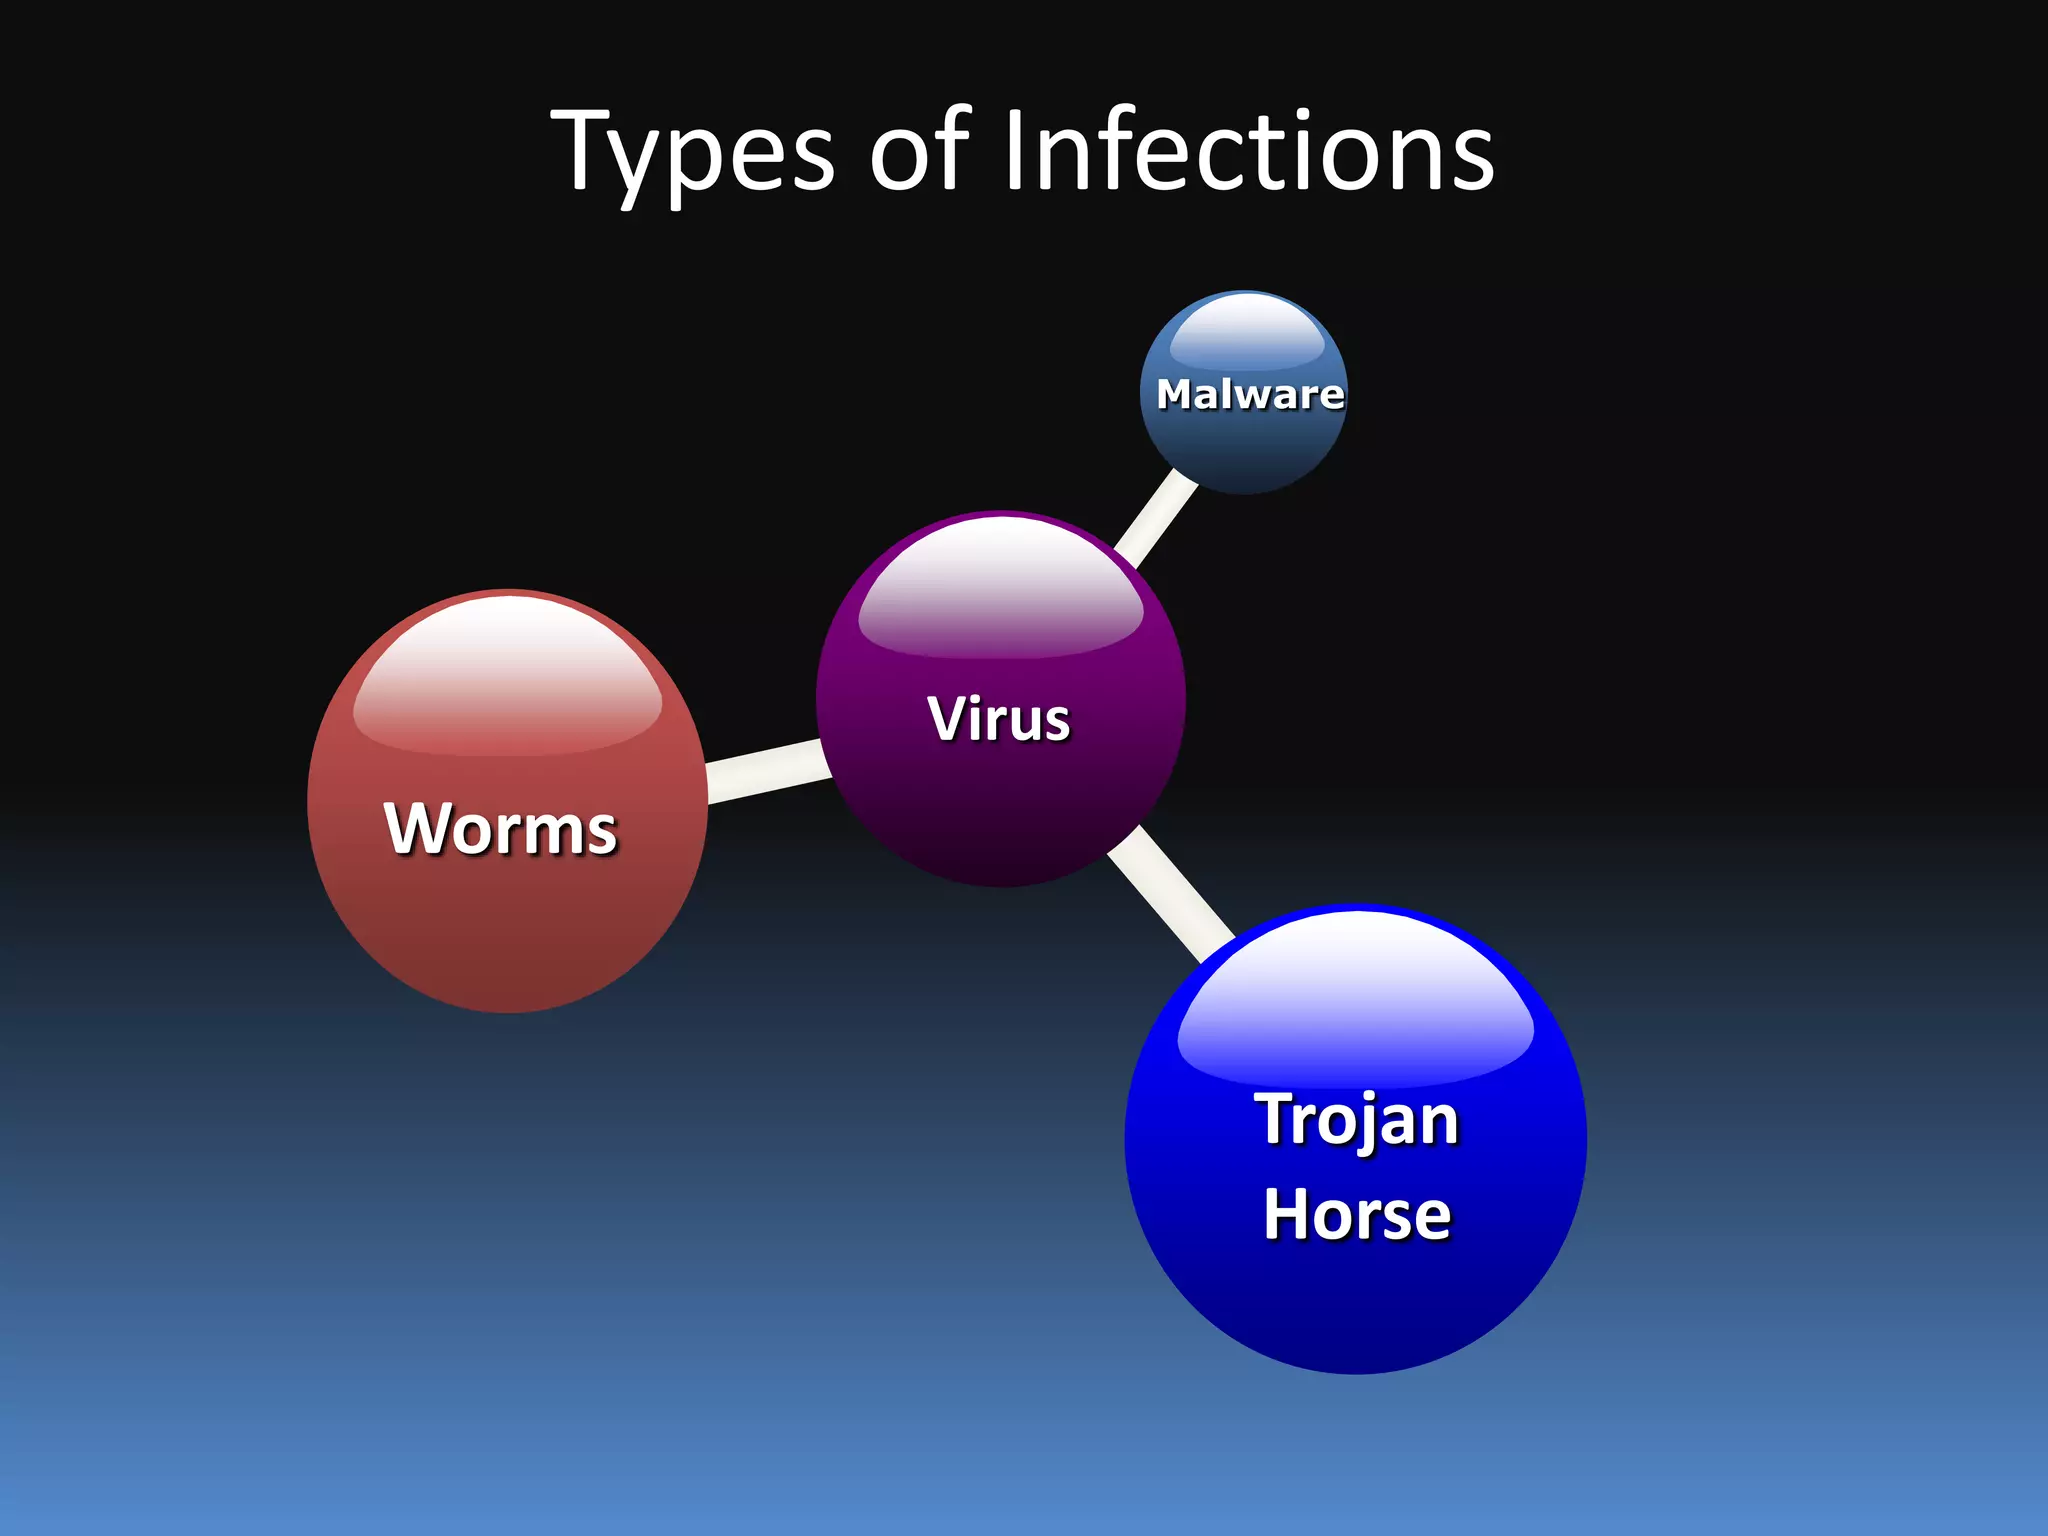
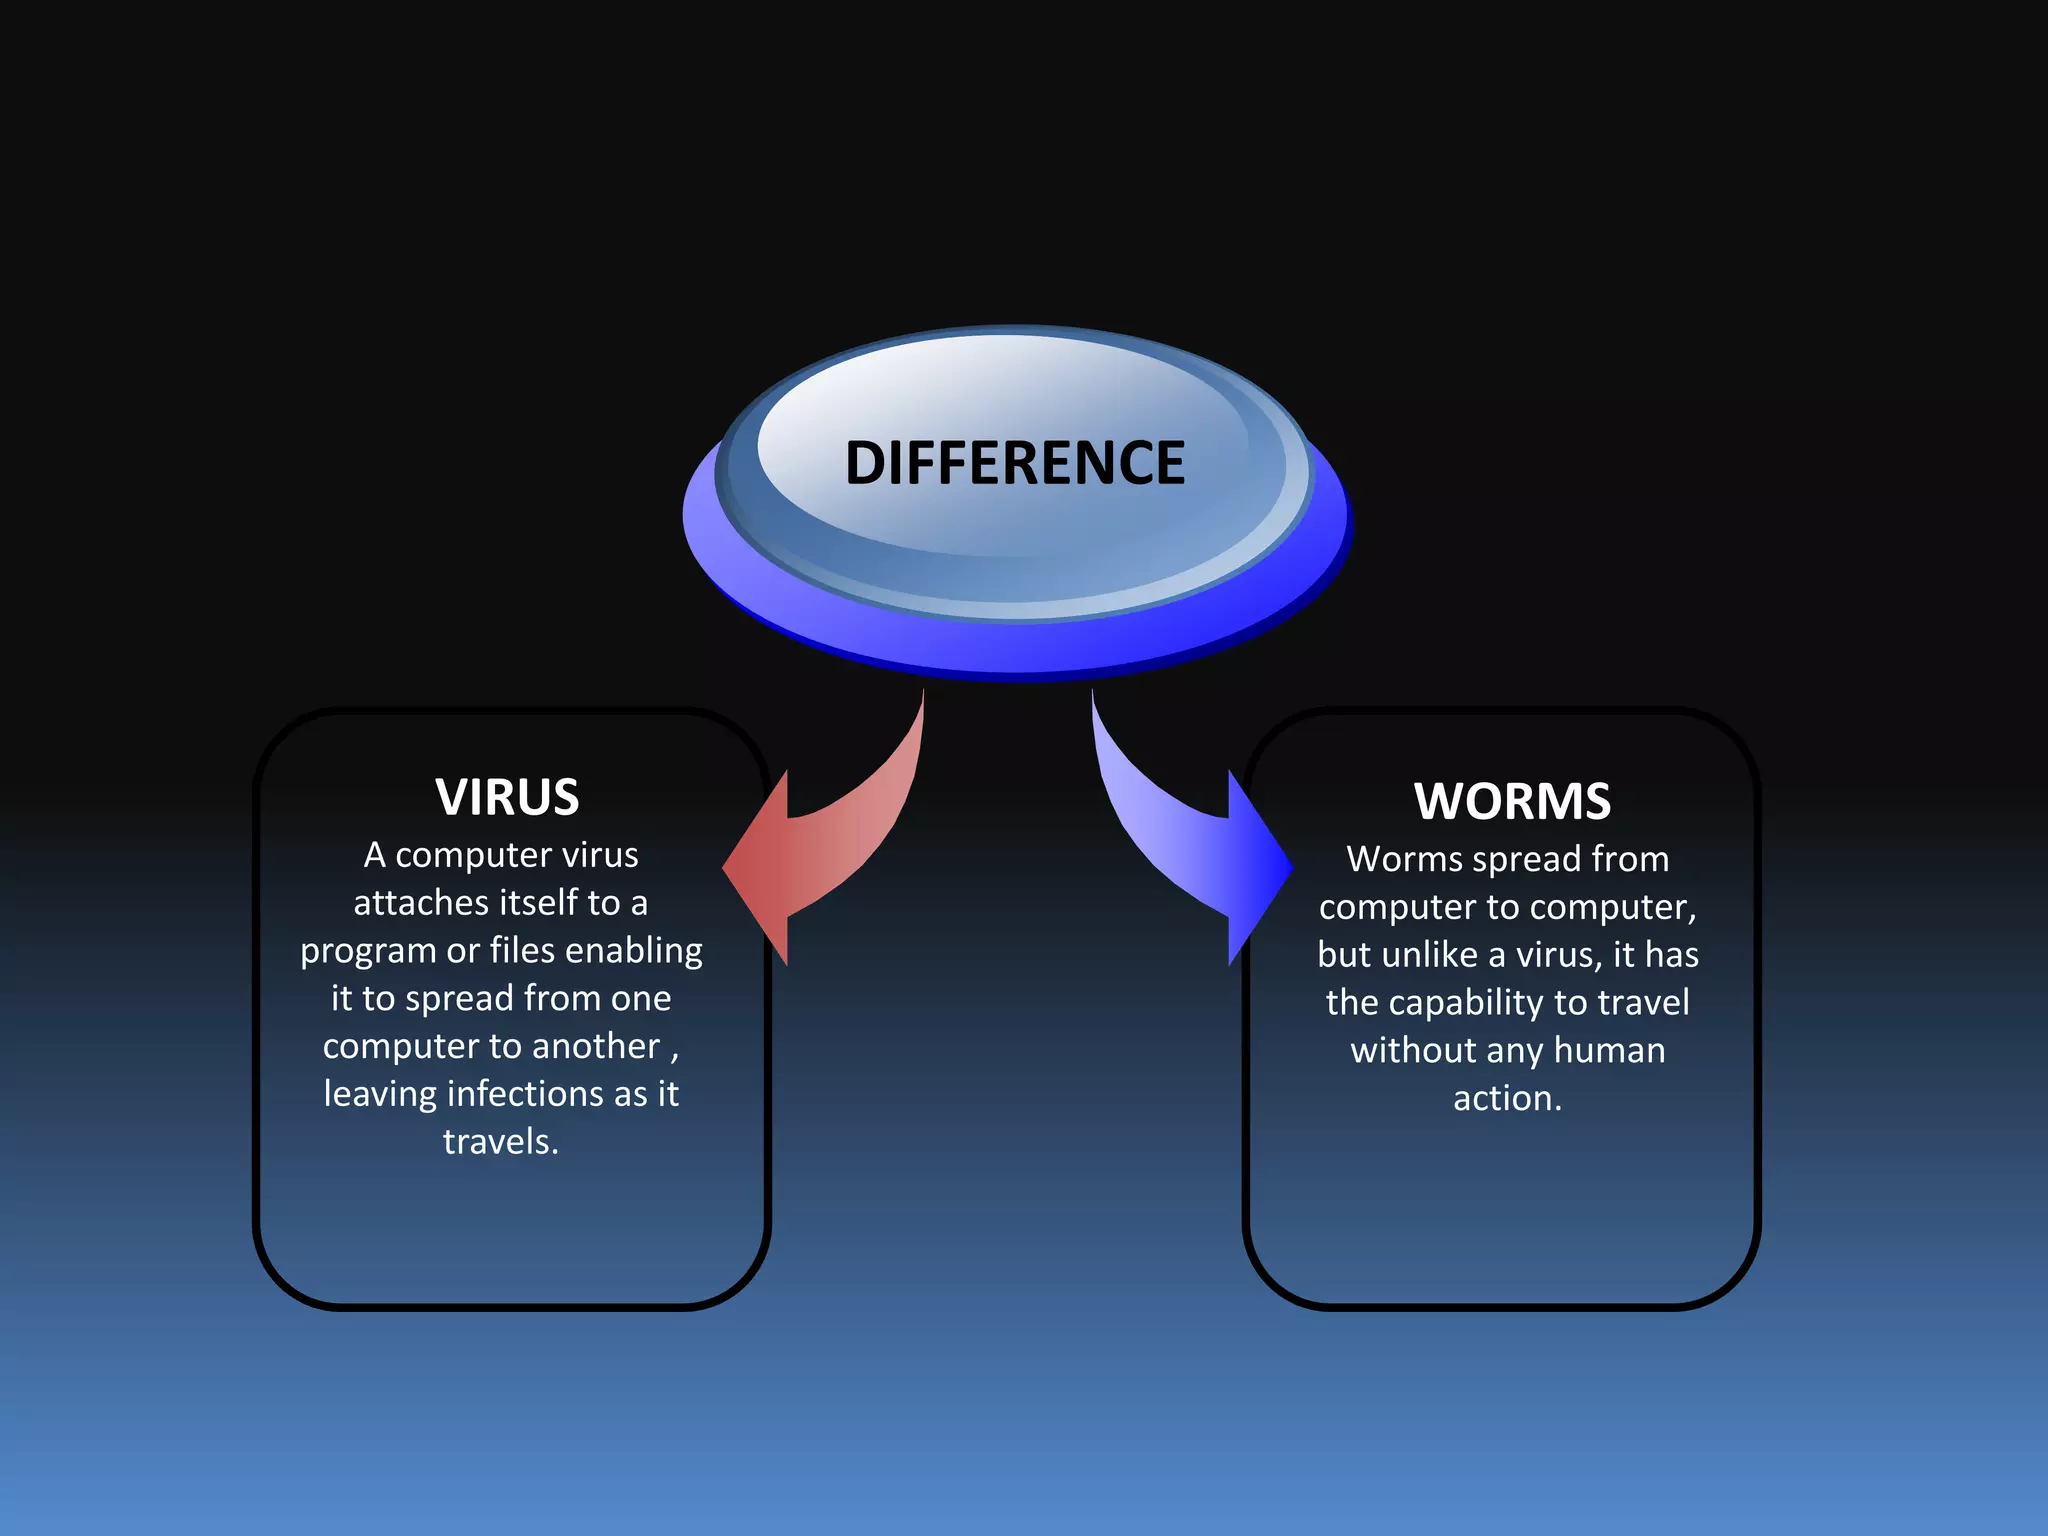
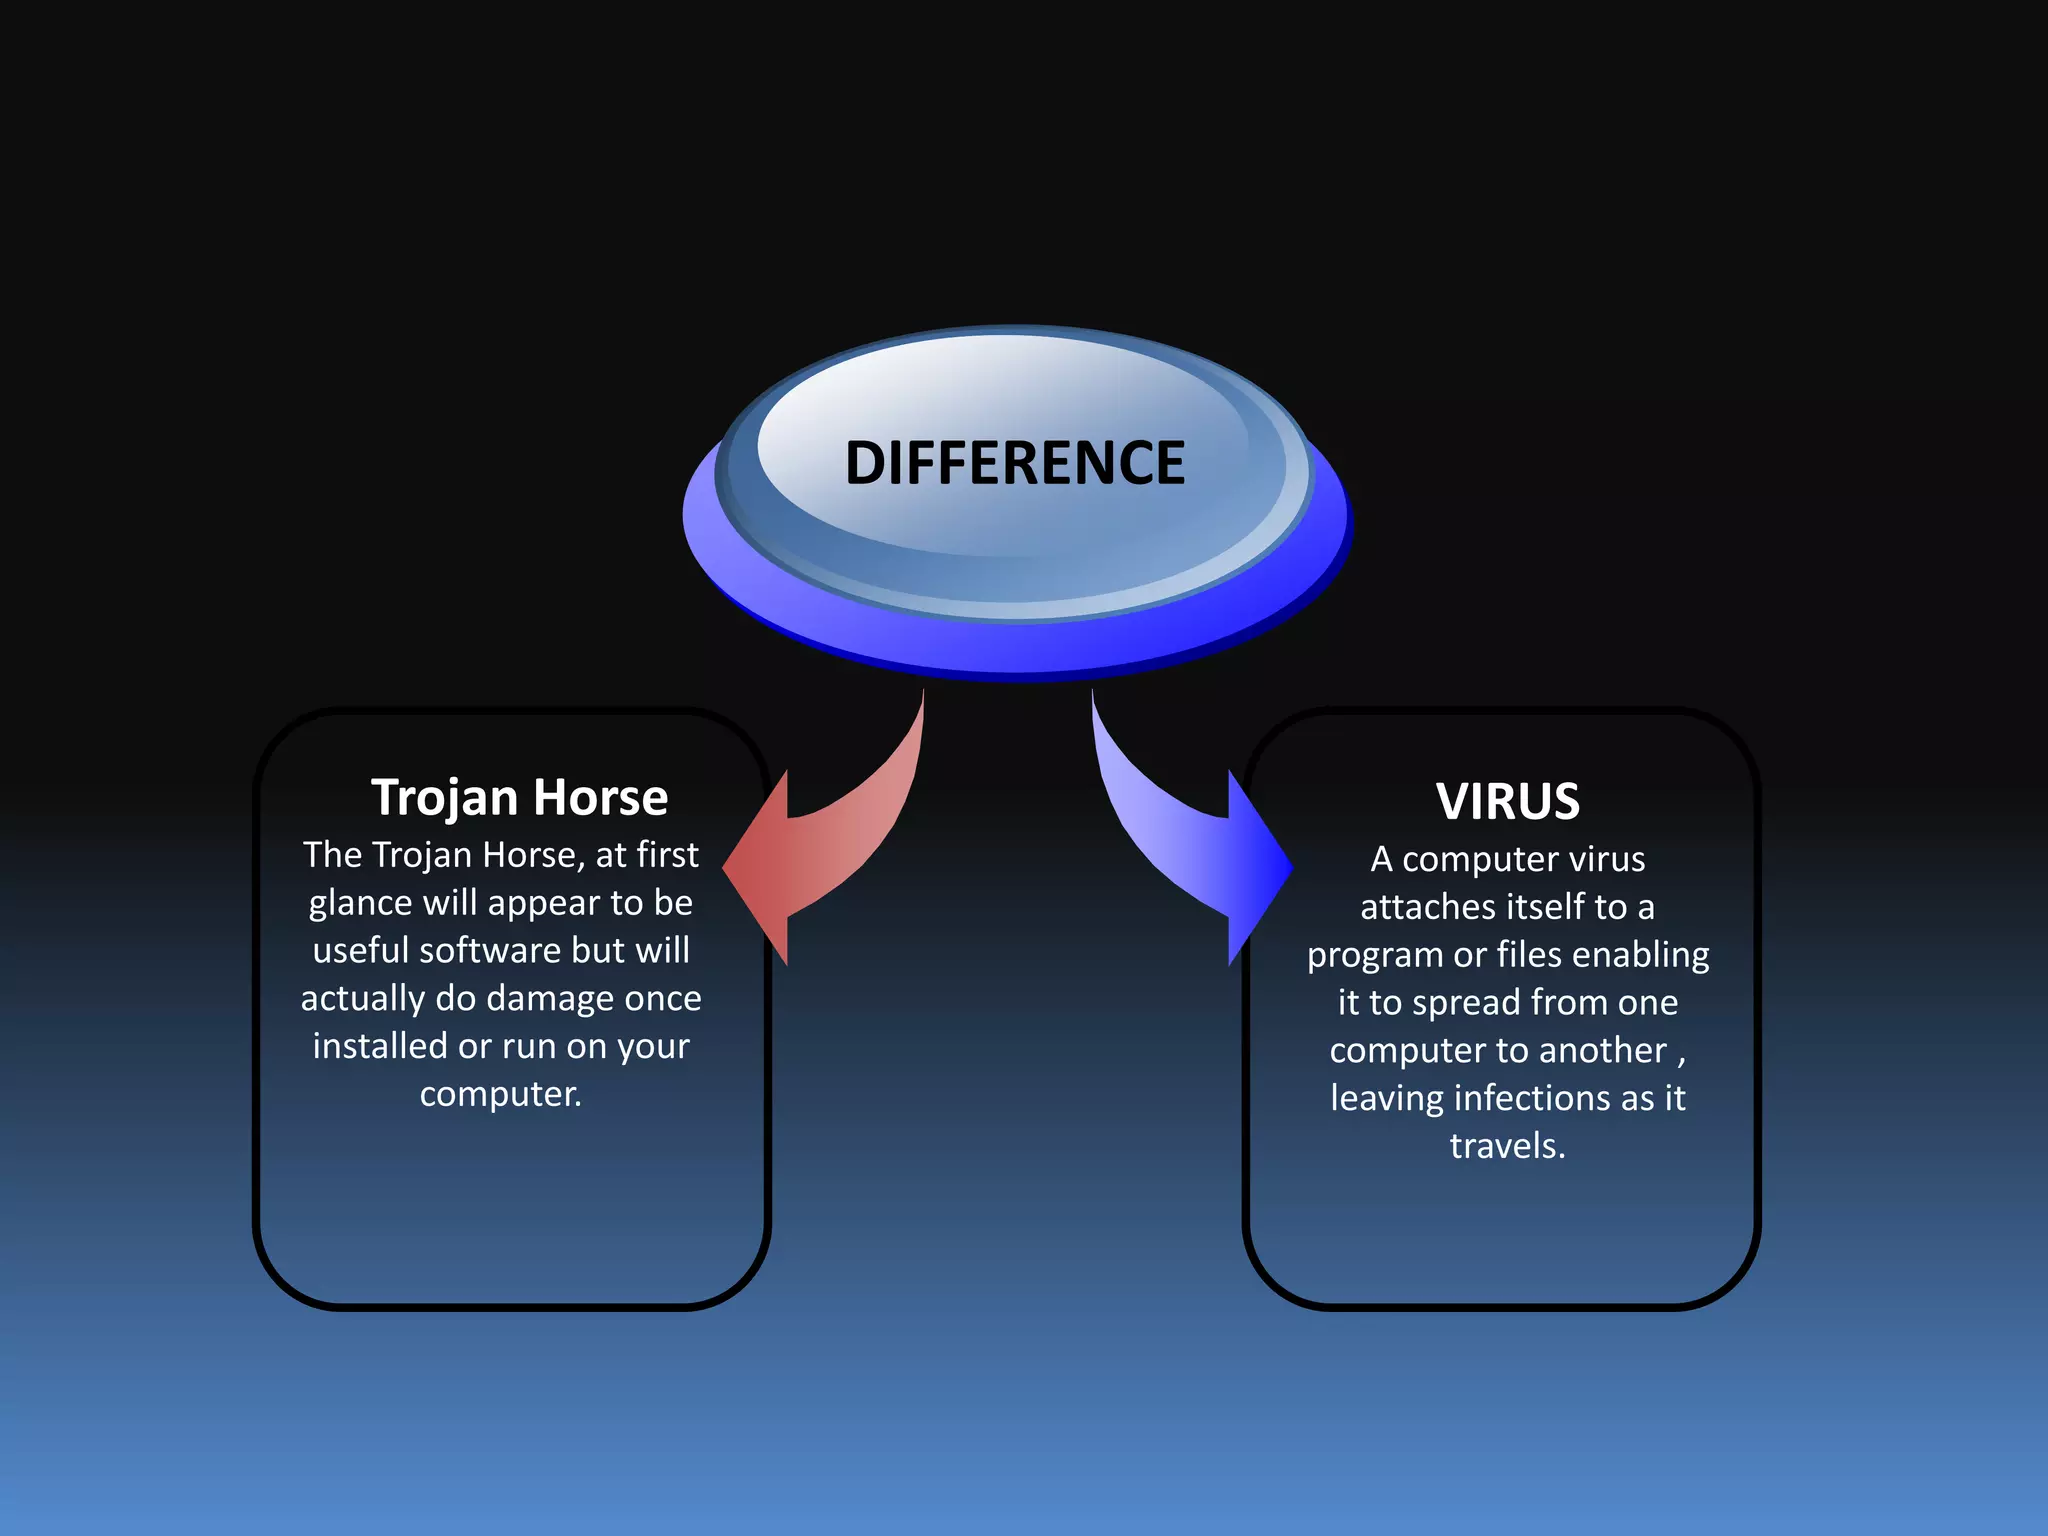
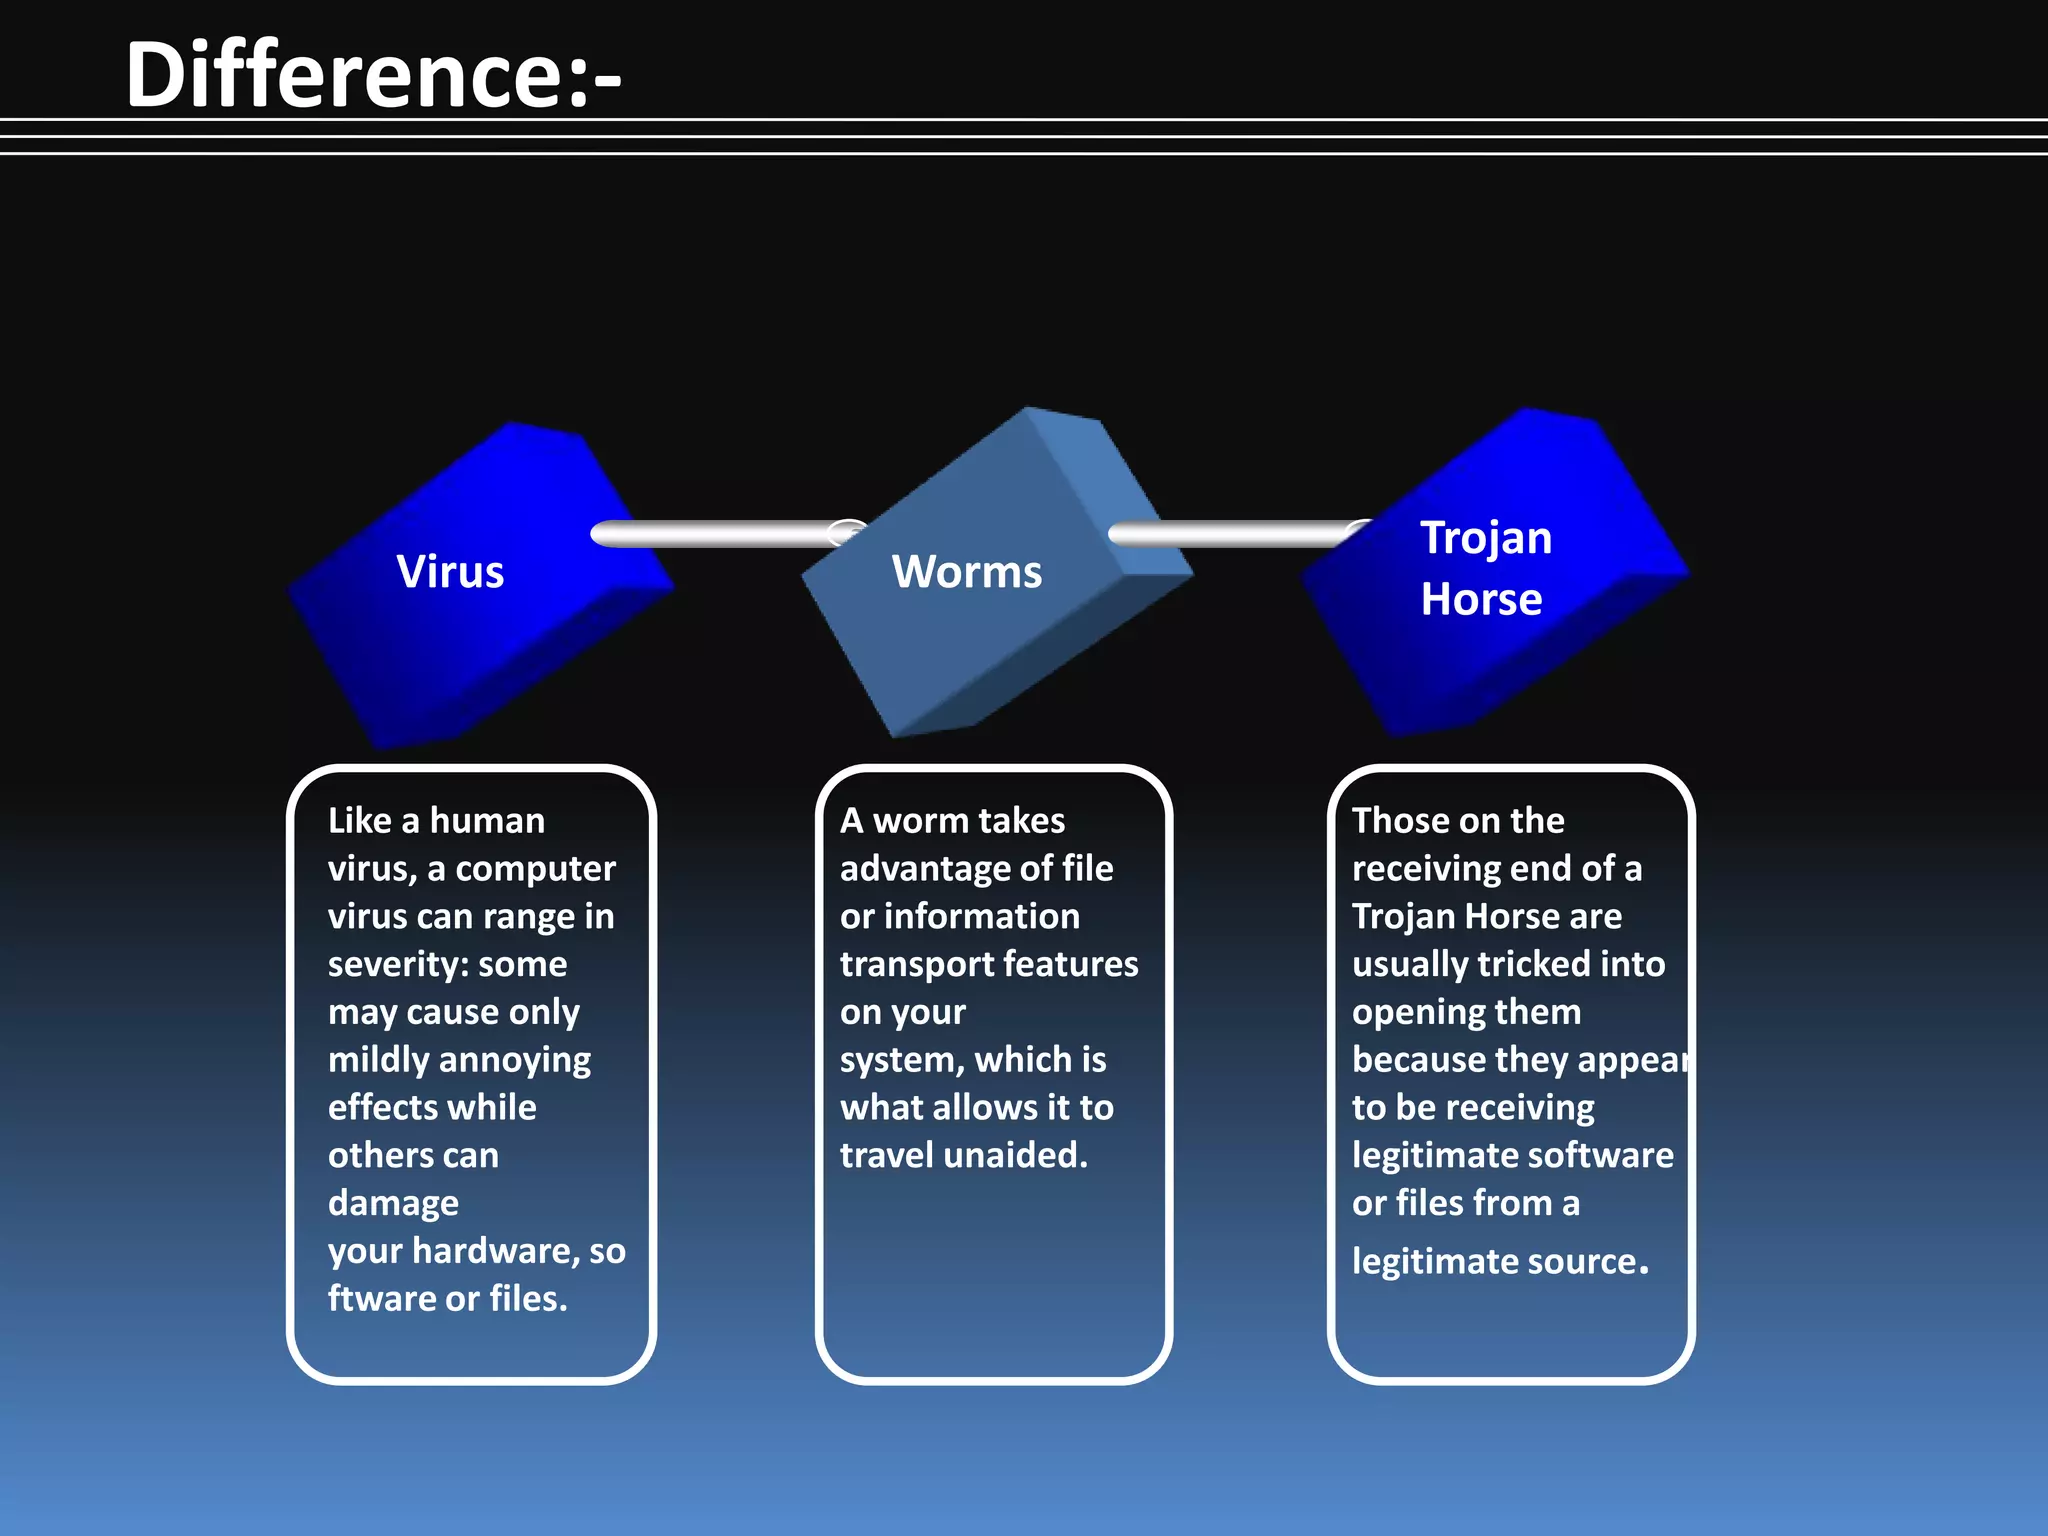
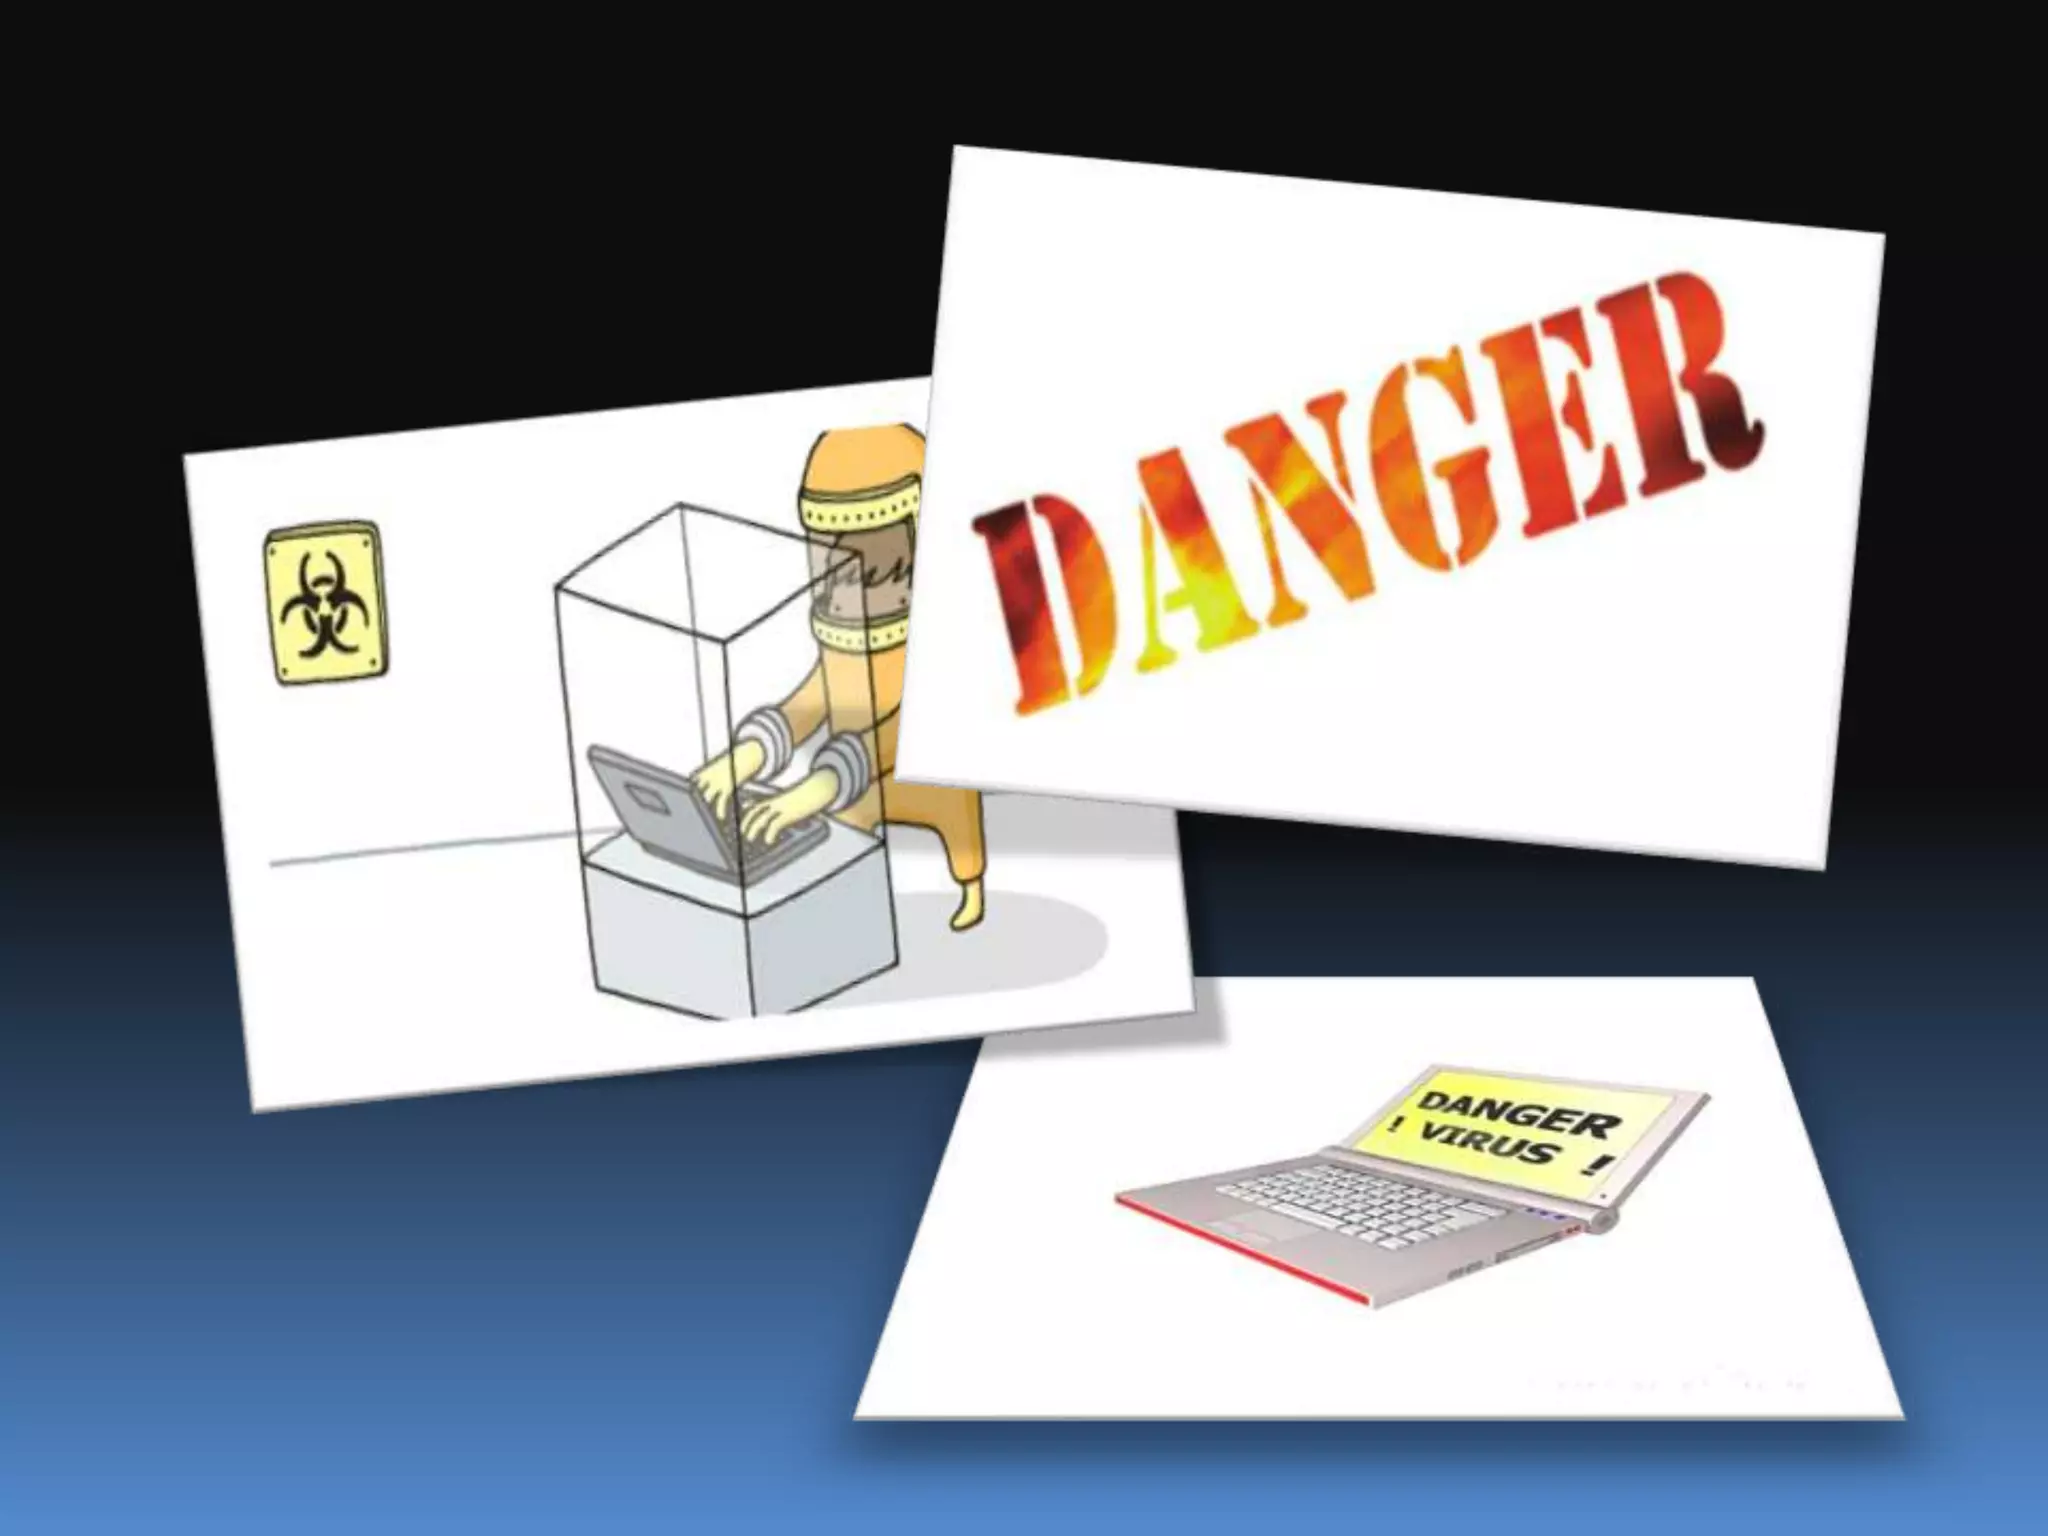
OBJECTIVES
Introduction
What Is Virus?
Why Virus Are Called “Virus”?
How Do Virus Spread?
Virus Operation
How Virus work?
Common Virus Entry Points
Symptoms Of Virus Attack
Types of Computer Virus
Techniques used by Viruses
Anti-Virus Software
Methods used by Antivirus Software
Actions to Prevent Virus Infection
Conclusion
The primary difference between a virus and a worm is that viruses must be triggered by the activation of their host; whereas worms are stand-alone malicious programs that can self-replicate and propagate independently as soon as they have breached the system.
describe the differences and similarities between viruses, worms, an.pdfmdameer02
describe the differences and similarities between viruses, worms, and Trojan horses. Provide an
example of at least one of these and describe that damage that can be done when a person or
corporation is infected.
Solution
Lets me make it clear actually what these are first and then we move to the diffrences and
similarities
A computer virus connects itself to a program or record empowering it to spread starting with
one PC then onto the next, leaving contamination as it travels. Like a human infection, a PC
virus can extend in seriousness: some may bring about just somewhat irritating impacts while
others can harm your hardware, programming or records. All viruses are joined to an executable
record, which implies the infection may exist on your PC yet it really can\'t contaminate your PC
unless you run or open the pernicious program.
A worm is like an virus by outline and is thought to be a sub-class of an infection. Worms spread
from PC to PC, yet not at all like an virus, it has the capacity to go with no human activity. A
worm exploits document or data transport includes on your framework, which is the thing that
permits it to travel unaided.
A Trojan Horse is loaded with as much cunning as the fanciful Trojan Horse it was named after.
The Trojan Horse, at first look will seem, by all accounts, to be valuable software yet will really
do harm once introduced or keep running on your PC. Those on the less than desirable end of a
Trojan Horse are normally deceived into opening them since they give off an impression of
being getting true blue programming or documents from a honest to goodness source.
Now I will Focus on the differences between Viruses, Worms and Torjan Horses
On the basis of its mode of spread
A virus attach itself to an executable file and then require a human to propogate, a worm does
not require a human action to spread,torjan horse does not replicates itself and require human
input to take into action.
similarity is that they all are malicious programs that can cause damage to your computer.
Examples:-
VIRUSES
WORMS
Torjan.
1. What is a computer security risk?
2. Virus
3. Trojan Horse
4. Worms
5. Stand-Alone Utility Programs
6. How can a virus spread through an e-mail message?
7. How does an antivirus program inoculate a program file
?
8. What is a firewall?
.
Thinking of getting a dog? Be aware that breeds like Pit Bulls, Rottweilers, and German Shepherds can be loyal and dangerous. Proper training and socialization are crucial to preventing aggressive behaviors. Ensure safety by understanding their needs and always supervising interactions. Stay safe, and enjoy your furry friends!
A review of the growth of the Israel Genealogy Research Association Database Collection for the last 12 months. Our collection is now passed the 3 million mark and still growing. See which archives have contributed the most. See the different types of records we have, and which years have had records added. You can also see what we have for the future.
A workshop hosted by the South African Journal of Science aimed at postgraduate students and early career researchers with little or no experience in writing and publishing journal articles.
Biological screening of herbal drugs: Introduction and Need for
Phyto-Pharmacological Screening, New Strategies for evaluating
Natural Products, In vitro evaluation techniques for Antioxidants, Antimicrobial and Anticancer drugs. In vivo evaluation techniques
for Anti-inflammatory, Antiulcer, Anticancer, Wound healing, Antidiabetic, Hepatoprotective, Cardio protective, Diuretics and
Antifertility, Toxicity studies as per OECD guidelines
বাংলাদেশের অর্থনৈতিক সমীক্ষা ২০২৪ [Bangladesh Economic Review 2024 Bangla.pdf] কম্পিউটার , ট্যাব ও স্মার্ট ফোন ভার্সন সহ সম্পূর্ণ বাংলা ই-বুক বা pdf বই " সুচিপত্র ...বুকমার্ক মেনু 🔖 ও হাইপার লিংক মেনু 📝👆 যুক্ত ..
আমাদের সবার জন্য খুব খুব গুরুত্বপূর্ণ একটি বই ..বিসিএস, ব্যাংক, ইউনিভার্সিটি ভর্তি ও যে কোন প্রতিযোগিতা মূলক পরীক্ষার জন্য এর খুব ইম্পরট্যান্ট একটি বিষয় ...তাছাড়া বাংলাদেশের সাম্প্রতিক যে কোন ডাটা বা তথ্য এই বইতে পাবেন ...
তাই একজন নাগরিক হিসাবে এই তথ্য গুলো আপনার জানা প্রয়োজন ...।
বিসিএস ও ব্যাংক এর লিখিত পরীক্ষা ...+এছাড়া মাধ্যমিক ও উচ্চমাধ্যমিকের স্টুডেন্টদের জন্য অনেক কাজে আসবে ...
Strategies for Effective Upskilling is a presentation by Chinwendu Peace in a Your Skill Boost Masterclass organisation by the Excellence Foundation for South Sudan on 08th and 09th June 2024 from 1 PM to 3 PM on each day.
Executive Directors Chat Leveraging AI for Diversity, Equity, and InclusionTechSoup
Let’s explore the intersection of technology and equity in the final session of our DEI series. Discover how AI tools, like ChatGPT, can be used to support and enhance your nonprofit's DEI initiatives. Participants will gain insights into practical AI applications and get tips for leveraging technology to advance their DEI goals.
15. DIFFERENCE BETWEEN VIRUS,WORMS & TROJENHORSE One common mistake that people make when the topic of a computer virus arises is to refer to a worm or Trojan horse as a virus. While the words Trojan, worm and virus are often used interchangeably, they are not exactly the same thing. Viruses, worms and Trojan Horses are all malicious programs that can cause damage to your computer, but there are differences among the three, and knowing those differences can help you better protect your computer from their often damaging effects.
16. What Is a Virus? A computer virus attaches itself to a program or file enabling it to spread from one computer to another, leaving infections as it travels. Like a human virus, a computer virus can range in severity: some may cause only mildly annoying effects while others can damage your hardware, software or files. Almost all viruses are attached to an executable file, which means the virus may exist on your computer but it actually cannot infect your computer unless you run or open the malicious program. It is important to note that a virus cannot be spread without a human action, (such as running an infected program) to keep it going. Because a virus is spread by human action people will unknowingly continue the spread of a computer virus by sharing infecting files or sending emails with viruses as attachments in the email.
17. What Is a Worm? A worm is similar to a virus by design and is considered to be a sub-class of a virus. Worms spread from computer to computer, but unlike a virus, it has the capability to travel without any human action. A worm takes advantage of file or information transport features on your system, which is what allows it to travel unaided. The biggest danger with a worm is its capability to replicate itself on your system, so rather than your computer sending out a single worm, it could send out hundreds or thousands of copies of itself, creating a huge devastating effect. One example would be for a worm to send a copy of itself to everyone listed in your e-mail address book. Then, the worm replicates and sends itself out to everyone listed in each of the receiver's address book, and the manifest continues on down the line.
18. What Is a Trojan horse? A Trojan Horse is full of as much trickery as the mythological Trojan Horse it was named after. The Trojan Horse, at first glance will appear to be useful software but will actually do damage once installed or run on your computer. Those on the receiving end of a Trojan Horse are usually tricked into opening them because they appear to be receiving legitimate software or files from a legitimate source. When a Trojan is activated on your computer, the results can vary. Some Trojans are designed to be more annoying than malicious (like changing your desktop, adding silly active desktop icons) or they can cause serious damage by deleting files and destroying information on your system. Trojans are also known to create a backdoor on your computer that gives malicious users access to your system, possibly allowing confidential or personal information to be compromised. Unlike viruses and worms, Trojans do not reproduce by infecting other files nor do they self-replicate.
19.
20. DIFFERENCE WORMS Worms spread from computer to computer, but unlike a virus, it has the capability to travel without any human action. VIRUS A computer virus attaches itself to a program or files enabling it to spread from one computer to another , leaving infections as it travels.
21. DIFFERENCE VIRUS A computer virus attaches itself to a program or files enabling it to spread from one computer to another , leaving infections as it travels. Trojan Horse The Trojan Horse, at first glance will appear to be useful software but will actually do damage once installed or run on your computer.
22. Difference:- Trojan Horse Virus Worms Like a human virus, a computer virus can range in severity: some may cause only mildly annoying effects while others can damage your hardware, software or files. A worm takes advantage of file or information transport features on your system, which is what allows it to travel unaided. Those on the receiving end of a Trojan Horse are usually tricked into opening them because they appear to be receiving legitimate software or files from a legitimate source.
Framed pictures in a row in perspective (Intermediate)To reproduce the picture effects on this slide, do the following:On the Home tab, in the Slides group, click Layout and then click Blank. On the Insert tab, in the Illustrations group, click Picture. In the Insert Picture dialog box, select a picture and then click Insert.Under Picture Tools, on the Format tab, in the bottom right corner of the Size group, click the Size and Position dialog box launcher. In the Size and Position dialog box, on the Size tab, resize or crop the picture as needed so that under Size and rotate, the Height box is set to 2” and the Width box is set to 2.67”. Resize the picture under Size and rotate by entering values into the Height and Width boxes. Crop the picture under Crop from by entering values into the Left, Right, Top, and Bottom boxes. Under Picture Tools, on the Format tab, in the Picture Styles group, click Reflected Beveled, Black.Select the picture. On the Home tab, in the Clipboard group, click the arrow under Paste, and then click Duplicate. Right-click the duplicate picture, and then click Change Picture. In the Insert Picture dialog box, select a picture and click Insert. If the inserted picture is a different height and width, adjust the width and height. Under Picture Tools, on the Format tab, in the bottom right corner of the Size group, click the Size and Position dialog box launcher. In the Size and Position dialog box, on the Size tab, resize or crop the picture as needed so that under Size and rotate, the Height box is set to 2” and the Width box is set to 2.67”. Resize the picture under Size and rotate by entering values into the Height and Width boxes. Crop the picture under Crop from by entering values into the Left, Right, Top, and Bottom boxes. Repeat the process in steps 6-8 to create another duplicate picture, for a total of three pictures. Drag the pictures to form a row across the slide. Press and hold SHIFT and select all three pictures. On the Home tab, in the Drawing group, click Arrange, and then do the following:Point to Align, and then click Align to Slide. Point to Align, and then click Align Middle.Point to Align, and then click Distribute Horizontally. Click Group. On the Home tab, in the Drawing group, click Shape Effects, point to 3-D Rotation, and then under Perspective click Perspective Contrasting Left (second row, fourth option from the left). Drag the group to position it above the middle of the slide and also position it slightly to the left. To reproduce the background effects on this slide, do the following:Right-click the slide background area, and then click Format Background. In the Format Background dialog box, click Fill in the left pane, select Gradient fill in the Fill pane, and then do the following:In the Type list, select Linear.Click the button next to Direction, and then click Linear Down (first row, second option from the left).In the Angle text box, enter 90⁰.Under Gradient stops, click Add or Remove until two stops appear in the drop-down list.Also under Gradient stops, customize the gradient stops that you added as follows:Select Stop 1 from the list, and then do the following:In the Stop position box, enter 50%.Click the button next to Color, and then under Theme Colors click Black, Text 1, Lighter 5% (sixth row, second option from the left).Select Stop 2 from the list, and then do the following: In the Stop position box, enter 100%.Click the button next to Color, and then under Theme Colors click Dark Blue, Text 2, Lighter 40% (fourth row, fourth option from the left).
Floating picture with curled corner(Basic)To reproduce the effects on this slide, do the following:On the Home tab, in the Slides group, click Layout, and then click Blank.On the Insert tab, in the Illustrations group, click Picture. In the Insert Picture dialog box, select a picture, and then click Insert.On the slide, select the picture. Under Picture Tools, on the Format tab, in the bottom right corner of the Size group, click the Size and Position dialog box launcher. In the Size and Position dialog box, on the Size tab, resize or crop the picture as needed so that under Size and rotate, the Height box is set to 5.64” and the Width box is set to 3.77”. Resize the picture under Size and rotate by entering values into the Height and Width boxes. Crop the picture under Crop from by entering values into the Left, Right, Top, and Bottom boxes. Under Picture Tools, on the Format tab, in the Picture Styles group, click Picture Shape, and then under Rectangles click Snip Single Corner Rectangle (third option from the left).On the Home tab, in the Drawing group, click Shapes, and then under Basic Shapes click Right Triangle (first row, fourth option from the left). On the slide, drag to draw a right triangle. Select the triangle. Under DrawingTools, on the Format tab, in the Size group, do the following:In the Shape Height box, enter 0.55”.In the Shape Width box, enter 0.55”.On the Home tab, in the bottom right corner of the Drawing group, click the Format Shape dialog box launcher. In the Format Shape dialog box, click Fill in the left pane, selectGradient fill in the Fill pane, and then do the following:In the Type list, select Linear.Click the button next to Direction, and then click Linear Diagonal (first row, third option from the left).In the Angle box, enter 135°.Under Gradient stops, click Add or Remove until two stops appear in the drop-down list.Also under Gradient stops, customize the gradient stops that you added as follows:Select Stop 1 from the list, and then do the following:In the Stop position box, enter 47%.Click the button next to Color, and then under Theme Colors click White, Background 1 (first row, first option from the left).Select Stop 2 from the list, and then do the following: In the Stop position box, enter 100%.Click the button next to Color, and then under Theme Colors click Black, Text 1, Lighter 35% (third row, second option from the left). Also in the Format Shape dialog box, click Shadow in the left pane. In the Shadow pane, click the button next to Presets, and then under Outer, click Offset Diagonal Bottom Left (first row, third option from the left).Press and hold SHIFT, and then select both the picture and the triangle on the slide. On the Home tab, in the Drawing group, click Arrange, point to Align, and then do the following:Click Align to Slide. Click Align Top.Click Align Right. Select the picture.Drag the yellow diamond adjustment handle left or right to align the snipped corner with the top edge of the triangle. Press and hold SHIFT, and then select both the picture and the triangle on the slide. On the Home tab, in the Drawing group, click Arrange, and then click Group. Select the group. On the Home tab, in the bottom right corner of the Drawing group, click the Format Picture dialog box launcher. In the Format Picture dialog box, in the left pane, click 3-D Rotation. In the 3-D Rotation pane, click the button next to Presets, under Perspective click Perspective Relaxed Moderately (second row, second option from the left), and then do the following:In the X box, enter 2.3°.In the Y box, enter 338.5°.In the Z box, enter 347.1°.In the Perspective box, enter 60°.Also in the Format Picture dialog box, click Shadow in the left pane. In the Shadow pane, click the button next to Presets, under Outer click Offset Diagonal Bottom Left (first row, third option from the left), and then do the following:In the Transparency box, enter 70°.In the Size box, enter 104%.In the Blur box, enter 27 pt. In the Angle box, enter 120°.In the Distance box, enter 20 pt.To reproduce the background effects on this slide, do the following:Right-click the slide background area, and then click Format Background. In the Format Background dialog box, click Fill in the left pane, select Gradient fill in the Fill pane, and then do the following:In the Type list, select Radial.Click the button next to Direction, and then click From Center (third option from the left).Under Gradient stops, click Add or Remove until two stops appear in the drop-down list.Also under Gradient stops, customize the gradient stops that you added as follows:Select Stop 1 from the list, and then do the following:In the Stop position box, enter 10%.Click the button next to Color, and then click White, Background 1, Darker 5% (second row, first option from the left).Select Stop 2 from the list, and then do the following: In the Stop position box, enter 99%.Click the button next to Color, and then click White, Background 1, Darker 35% (fifth row, first option from the left).
Three pictures in frames(Basic)To reproduce the picture effects on this slide, do the following:On the Home tab, in the Slides group, click Layout and then click Blank. On the Insert tab, in the Illustrations group, click Picture. In the Insert Picture dialog box, select a picture and then click Insert.Under Picture Tools, on the Format tab, in the bottom right corner of the Size group, click the Size and Position dialog box launcher. In the Size and Position dialog box, on the Size tab, resize or crop the picture as needed so that under Size and rotate, the Height box is set to 2” and the Width box is set to 2.67”. Resize the picture under Size and rotate by entering values into the Height and Width boxes. Crop the picture under Crop from by entering values into the Left, Right, Top, and Bottom boxes. Under Picture Tools, on the Format tab, in the Picture Styles group, click More, and then click Reflected Beveled, Black.Select the picture. On the Home tab, in the Clipboard group, click the arrow under Paste, and then click Duplicate. Right-click the duplicate picture, and then click Change Picture. In the Insert Picture dialog box, select a picture and click Insert. If the inserted picture is a different height and width, under Picture Tools, on the Format tab, in the bottom right corner of the Size group, click the Size and Position dialog box launcher. In the Size and Position dialog box, on the Size tab, resize or crop the picture as needed so that under Size and rotate, the Height box is set to 2” and the Width box is set to 2.67”. Resize the picture under Size and rotate by entering values into the Height and Width boxes. Crop the picture under Crop from by entering values into the Left, Right, Top, and Bottom boxes. Repeat the process in steps 6-8 to create another duplicate picture, for a total of three pictures. Drag the pictures to form a row across the slide, slightly above the middle of the slide. Press and hold SHIFT and select all three pictures. On the Home tab, in the Drawing group, click Arrange, point to Align, and then do the following:Click Align to Slide. Click Distribute Horizontally. To reproduce the background effects on this slide, do the following:Right-click the slide background area, and then click Format Background. In the Format Background dialog box, click Fill in the left pane, select Gradient fill in the Fill pane, and then do the following:In the Type list, select Linear.Click the button next to Direction, and then click Linear Down (first row, second option from the left).In the Angle text box, enter 90⁰.Under Gradient stops, click Add or Remove until two stops appear in the drop-down list.Also under Gradient stops, customize the gradient stops that you added as follows:Select Stop 1 from the list, and then do the following:In the Stop position box, enter 50%.Click the button next to Color, and then under Theme Colors click Black, Text 1, Lighter 5% (sixth row, second option from the left).Select Stop 2 from the list, and then do the following: In the Stop position box, enter 100%.Click the button next to Color, and then under Theme Colors click Dark Blue, Text 2, Lighter 40% (fourth row, fourth option from the left).
Falling pictures(Intermediate)To reproduce the picture effects on this slide, do the following:On the Home tab, in the Slides group, click Layout, and then click Blank.On the Insert tab, in the Illustrations group, click Picture. In the Insert Picture dialog box, select a picture, and then click Insert. Select the picture. Under Picture Tools, on the Format tab, in the bottom right corner of the Size group, click the Size and Position dialog box launcher. In the Size and Position dialog box, on the Size tab, resize or crop the picture as needed so that under Size and rotate, the Height box is set to 2.93” and the Width box is set to 4.41”. Resize the picture under Size and rotate by entering values into the Height and Width boxes. Crop the picture under Crop from by entering values into the Left, Right, Top, and Bottom boxes. Under Picture Tools, on the Format tab, in the Picture Styles group, click More, and then click Beveled Matte, White (first row, second option from the left). Under Picture Tools, on the Format tab, in the bottom right corner of the Size group, click the Size and Position dialog box launcher. In the Size and Position dialog box, on the Size tab, under Size and rotate, in the Rotation box, enter 5°.Under Picture Tools, on the Format tab, in the bottom right corner of the Picture Styles group, click the FormatPicture dialog box launcher. In the FormatPicture dialog box, in the left pane, click Shadow. Inthe Shadow pane, click the button next to Presets, and then under Outer click Offset Diagonal Bottom Left (first row, third option from the left).In the Distance box, enter 20 pt. Drag the picture into the top right corner of the slide.Select the picture. On the Home tab, in the Clipboard group, click the arrow under Paste, and then click Duplicate.Drag the second (duplicate) picture to the left middle of the slide.Select the second picture. Under Picture Tools, on the Format tab, in the bottom right corner of the Size group, click the Size and Position dialog box launcher. In the Size and Position dialog box, on the Size tab, under Size and rotation, in the Rotation box, enter 0°.Right-click the second picture and click Change Picture. In the Insert Picture dialog box, select a picture, and then click Insert. Select the second picture. Under Picture Tools, on the Format tab, in the bottom right corner of the Size group, click the Size and Position dialog box launcher. In the Size and Position dialog box, on the Size tab, resize or crop the picture as needed so that under Size and rotate, the Height box is set to 2.93” and the Width box is set to 4.41”. Resize the picture under Size and rotate by entering values into the Height and Width boxes. Crop the picture under Crop from by entering values into the Left, Right, Top, and Bottom boxes. Under Picture Tools, on the Format tab, in the bottom right corner of the Picture Styles group, click the FormatPicture dialog box launcher. In the FormatPicture dialog box, in the left pane, click 3-D Rotation. In the 3-D Rotation pane, click the button next to Presets, under Perspective click Perspective Relaxed (second row, third option from the left), and then do the following:In the X box, enter 0°.In the Y box, enter 320°.In the Z box, enter 10°.In the Perspective box, enter 80°. On the Home tab, in the Drawing group, click Arrange, and then click Send to Back. Select the second picture. On the Home tab, in the Clipboard group, click the arrow under Paste, and then click Duplicate.Drag the third picture to the bottom right corner of the slide, under the first picture.Right-click the third picture and click Change Picture. In the Insert Picture dialog box, select a picture, and then click Insert. Select the third picture. Under Picture Tools, on the Format tab, in the bottom right corner of the Size group, click the Size and Position dialog box launcher. In the Size and Position dialog box, on the Size tab, resize or crop the picture as needed so that under Size and rotate, the Height box is set to 2.93” and the Width box is set to 4.41”. Resize the picture under Size and rotate by entering values into the Height and Width boxes. Crop the picture under Crop from by entering values into the Left, Right, Top, and Bottom boxes. Under Picture Tools, on the Format tab, in the bottom right corner of the Picture Styles group, click the FormatShape dialog box launcher. In the FormatPicture dialog box, in the left pane, click 3-D Rotation. In the 3-D Rotation pane, click the button next to Presets, under Perspective click Perspective Relaxed (second row, third option from the left), and then do the following:In the X box, enter 0°.In the Y box, enter 300°.In the Z box, enter 0°.In the Perspective box, enter 60°. On the Home tab, in the Drawing group, click Arrange, and then click Send to Back. To reproduce the background effects on this slide, do the following:Right-click the slide background area, and then click Format Background. In the Format Background dialog box, click Fill in the left pane, select Gradient fill in the Fill pane, and then do the following:In the Type list, select Linear.Click the button next to Direction, and then click Linear Down (first row, second option from the left). Under Gradient stops, click Add or Remove until two stops appear in the drop-down list.Also under Gradient stops, customize the gradient stops that you added as follows:Select Stop 1 from the list, and then do the following:In the Stop position box, enter 70%.Click the button next to Color, and then click Black, Text 1, Lighter 5% (sixth row, second option from the left). Select Stop 2 from the list, and then do the following: In the Stop position box, enter 100%.Click the button next to Color, click More Colors, and then in the Colors dialog box, on the Custom tab, enter values for Red: 87, Green: 78, Blue: 51.
Picture with mat and frame (Intermediate)To reproduce one of the framed pictures on this slide, do the following:On the Home tab, in the Slides group, click Layout, and then click Blank.On the Home tab, in the Drawing group, click Shapes, and then under Rectangles, click Rectangle (first option from the left). On the slide, drag to draw a rectangle.Select the rectangle. Under DrawingTools, on the Format tab, in the Size group, do the following:In the Shape Height box, enter 2.5”.In the Shape Width box, enter 2.6”.On the Home tab, in the bottom right corner of the Drawing group, click the Format Shape dialog box launcher. In the Format Shape dialog box, click Fill in the left pane, selectGradient fill in the Fill pane, and then do the following:In the Type list, select Linear.Click the button next to Direction, and then click Linear Down (first row, second option from the left).Under Gradient stops, click Add or Remove until two stops appear in the drop-down list.Also under Gradient stops, customize the gradient stops that you added as follows:Select Stop 1 from the list, and then do the following:In the Stop position box, enter 0%.Click the button next to Color, and then under Theme Colors click White, Background 1 (first row, first option from the left). Select Stop 2 from the list, and then do the following: In the Stop position box, enter 100%.Click the button next to Color, and then under Theme Colors click White, Background 1, Darker 15% (third row, first option from the left). Also in the Format Shape dialog box, click Line Color in the left pane, select Gradient line in the Line Color pane, and then do the following:In the Type list, select Linear.Click the button next to Direction, and then click Linear Right (first row, fourth option from the left).Under Gradient stops, click Add or Remove until two stops appear in the drop-down list.Also under Gradient stops, customize the gradient stops that you added as follows:Select Stop 1 from the list, and then do the following:In the Stop position box, enter 0%.Click the button next to Color, and then under Theme Colors click White, Background 1, Darker 35% (fifth row, first option from the left). Select Stop 2 from the list, and then do the following: In the Stop position box, enter 100%.Click the button next to Color, and then under Theme Colors click White, Background 1, Darker 25% (fourth row, first option from the left). Also in the Format Shape dialog box, click Line Style in the left pane, and then in the Line Style pane, in the Width box, enter 8 pt. Also in the Format Shape dialog box, click 3-D Formatin the left pane, and then do the following in the 3-D Format pane:Under Bevel, click the button next to Top, and then under Bevel click Relaxed Inset (first row, second option from the left). Next to Top, in the Width box, enter 6 pt, and in the Height box, enter 6 pt. Under Surface, click the button next to Material, and then under Standard click Warm Matte (second option from the left). Click the button next to Lighting, and then under Neutral, click Three Point (first row, first option from the left). On the Home tab, in the Drawing group, click Shape Effects, point to Glow, and then do the following:Under Glow Variations, click Accent color 1, 5 pt glow (first row, first option from the left). Point to More Glow Colors, and then under Theme Colors click White, Background 1 (first row, first option from the left).On the Insert tab, in the Illustrations group, click Picture. In the Insert Picture dialog box, select a picture and then click Insert.Under Picture Tools, on the Format tab, in the bottom right corner of the Size group, click the Size and Position dialog box launcher. In the Size and Position dialog box, on the Size tab, resize or crop the picture as needed so that under Size and rotate, the Height box is set to 1.8” and the Width box is set to 2”. Resize the picture under Size and rotate by entering values into the Height and Width boxes. Crop the picture under Crop from by entering values into the Left, Right, Top, and Bottom boxes. Under Picture Tools, on the Format tab, in the bottom right corner of the Picture Styles group, click the Format Picture dialog box launcher. In the Format Picture dialog box, click Line Color in the left pane, click Solid line in the Line Color pane, click the button next to Color, and then under Theme Colors, click White, Background 1, Darker 15% (third row, first option from the left). Also in the Format Picturedialog box, click Line Style in the left pane, and then in the Line Style pane, in the Width box, enter 1 pt. Also in the Format Picturedialog box, click Shadow in the left pane, and then in the Shadow pane do the following:Click the button next to Presets, and then under Inner, click Inside Diagonal Top Right (first row, third option from the left). In the Transparency box, enter 21%.In the Blur box, enter 3 pt. In the Distance box, enter 1 pt. Press and hold SHIFT and select both the picture and the rectangle on the slide. On the Home tab, in the Drawing group, click Arrange, point to Align, and then do the following:Click Align to Slide.Click Align Center.Click Align Middle. To reproduce the other framed pictures on this slide, do the following:Press and hold SHIFT and select both the picture and rectangle. On the Home tab, in the Drawing group, click Arrange, and then click Group.On the Home tab, in the Clipboard group, click the arrow under Paste and then click Duplicate. Repeat this process for a total of three framed picture groups. Drag the framed picture groups away from the center of the slide.Select one of the duplicate framed picture groups. On the Home tab, in the Drawing group, click Arrange, and then click Ungroup.Right-click the ungrouped duplicate picture and select Change Picture.In the Insert Picture dialog box, select a picture and then click Insert.Under Picture Tools, on the Format tab, in the bottom right corner of the Size group, click the Size and Position dialog box launcher. In the Size and Position dialog box, on the Size tab, resize or crop the picture as needed so that under Size and rotate, the Height box is set to 1.8” and the Width box is set to 2”. Resize the picture under Size and rotate by entering values into the Height and Width boxes. Crop the picture under Crop from by entering values into the Left, Right, Top, and Bottom boxes.Select the ungrouped duplicate picture and its frame. On the Home tab, in the Drawing group, click Arrange, and then do the following:Point to Align, and then click Align to Slide.Point to Align, and then click Align Center.Point to Align, and then click Align Middle.Click Group. Drag this group away from the center of the slide. Repeat steps 4-9 with the other duplicate framed picture group. Drag the three groups into a row across the slide.Press and hold SHIFT and select all three groups on the slide. On the Home tab, in the Drawing group, click Arrange, point to Align, and then do the following:Click Align Middle. Click Distribute Horizontally. To reproduce the background effects on this slide, do the following:Right-click the slide background area, and then click Format Background. In the Format Background dialog box, click Fill in the left pane, select Gradient fill in the Fill pane, and then do the following:In the Type list, select Radial.Click the button next to Direction, and then click From Center (third option from the left).Under Gradient stops, click Add or Remove until two stops appear in the drop-down list.Also under Gradient stops, customize the gradient stops that you added as follows:Select Stop 1 from the list, and then do the following:In the Stop position box, enter 0%.Click the button next to Color, and then under Theme Colors click White, Background 1 (first row, first option from the left).Select Stop 2 from the list, and then do the following: In the Stop position box, enter 100%.Click the button next to Color, click More Colors, and then in the Colors dialog box, on the Custom tab, enter values for Red: 169, Green: 169, Blue: 161.
Picture triptych(Intermediate)Tip: For best results with the effects on this slide, use pictures with a “portrait” (vertical) orientation. To reproduce the picture effects on this slide, do the following:On the Home tab, in the Slides group, click Layout, and then click Blank.On the Insert tab, in the Illustrations group, click Picture.In the Insert Picture dialog box, select a picture, and then click Insert. Select the picture. Under Picture Tools, on the Format tab, in the bottom right corner of the Size group, click the Size and Position dialog box launcher. In the Size and Position dialog box, on the Size tab, resize or crop the picture as needed so that under Size and rotate, the Height box is set to 3.5” and the Width box is set to 2.35”. Resize the picture under Size and rotate by entering values into the Height and Width boxes. Crop the picture under Crop from by entering values into the Left, Right, Top, and Bottom boxes. On the Home tab, in the Drawing group, click Arrange, point to Align, and then do the following:Click Align to Slide.Click Align Center.On the Home tab, in the bottom right corner of the Drawing group, click the Format Picture dialog box launcher. In the Format Picture dialog box, click Line Color in the left pane. In the Line Color pane, select Solid line, click the button next to Color, and then under Theme Colors click Black, Text 1, Lighter 25% (fourth row, second option from the left). Also in the Format Picture dialog box, click Line Style in the left pane, and then in the Line Style pane, in the Width box, enter 8 pt.Also in the Format Picture dialog box, click Shadow in the left pane. In the Shadow pane, click the button next to Presets, and then under Perspective, click Perspective Diagonal Upper Right (first row, second option from the left).Also in the Format Picture dialog box, click 3-D Formatin the left pane, and then do the following in the 3-D Format pane:Under Bevel, click the button next to Top, and then under Bevel click Relaxed Inset (first row, second option from the left). Next to Top, in the Width box, enter 8 pt, and in the Height box, enter 6 pt. Under Depth, click the button next to Color, and then under Theme Colors click Black, Text 1, Lighter 25% (fourth row, second option from the left). In the Depth box, enter 12 pt. Under Surface, click the button next to Material, and then under Standard click Warm Matte (second option from the left). On the Home tab, in the Clipboard group, click the arrow under Paste, and then click Duplicate. Drag the duplicate picture to the right on the slide. Right-click the duplicate picture, and click Change Picture. In the Insert Picture dialog box, select a picture and click Insert.Select the first picture. On the Home tab, in the Clipboard group, click the arrow under Paste, and then click Duplicate. Drag the duplicate picture to the left on the slide. Right-click the duplicate picture, and click Change Picture. In the Insert Picture dialog box, select a picture and click Insert.Select the picture on the left side of the slide. On the Home tab, in the bottom right corner of the Drawing group, click the Format Picture dialog box launcher. In the Format Picture dialog box, click 3-D Rotation in the left pane. In the 3-D Rotation pane, click the button next to Presets, and then under Perspective, click Perspective Heroic Extreme Right (third row, third option from the left).Under Picture Tools, on the Format tab, in the bottom right corner of the Size group, click the Size and Position dialog box launcher. In the Size and Position dialog box, on the Size tab, resize or crop the picture as needed so that under Size and rotate, the Height box is set to 3.8” and the Width box is set to 2.53”. Resize the picture under Size and rotate by entering values into the Height and Width boxes. Crop the picture under Crop from by entering values into the Left, Right, Top, and Bottom boxes. Select the picture on the right side of the slide. On the Home tab, in the bottom right corner of the Drawing group, click the Format Picture dialog box launcher. In the Format Picture dialog box, click 3-D Rotation in the left pane. In the 3-D Rotation pane, click the button next to Presets, and then under Perspective, click Perspective Heroic Extreme Left (third row, second option from the left).Under Picture Tools, on the Format tab, in the bottom right corner of the Size group, click the Size and Position dialog box launcher. In the Size and Position dialog box, on the Size tab, resize or crop the picture as needed so that under Size and rotate, the Height box is set to 4.17” and the Width box is set to 2.78”. Resize the picture under Size and rotate by entering values into the Height and Width boxes. Crop the picture under Crop from by entering values into the Left, Right, Top, and Bottom boxes. To reproduce the background effects on this slide, do the following:Right-click the slide background area, and then click Format Background. In the Format Background dialog box, click Fill in the left pane, select Gradient fill in the Fill pane, and then do the following:In the Type list, select Linear.Click the button next to Direction, and then click Linear Down (first row, second option from the left). In the Angle box, enter 90⁰.Under Gradient stops, click Add or Remove until four stops appear in the drop-down list.Also under Gradient stops, customize the gradient stops that you added as follows:Select Stop 1 from the list, and then do the following:In the Stop position box, enter 0%.Click the button next to Color, and then under Theme Colors click Black, Text 1, Lighter 5% (sixth row, second option from the left).Select Stop 2 from the list, and then do the following: In the Stop position box, enter 24%.Click the button next to Color, and then under Theme Colors click White, Background 1, Darker 50% (sixth row, first option from the left).Select Stop 3 from the list, and then do the following:In the Stop position box, enter 35%.Click the button next to Color, and then under Theme Colors click White, Background 1, Darker 50% (sixth row, first option from the left).Select Stop 4 from the list, and then do the following:In the Stop position box, enter 90%.Click the button next to Color, and then under Theme Colors click Black, Text 1, Lighter 5% (sixth row, second option from the left).
Framed pictures in a row in perspective (Intermediate)To reproduce the picture effects on this slide, do the following:On the Home tab, in the Slides group, click Layout and then click Blank. On the Insert tab, in the Illustrations group, click Picture. In the Insert Picture dialog box, select a picture and then click Insert.Under Picture Tools, on the Format tab, in the bottom right corner of the Size group, click the Size and Position dialog box launcher. In the Size and Position dialog box, on the Size tab, resize or crop the picture as needed so that under Size and rotate, the Height box is set to 2” and the Width box is set to 2.67”. Resize the picture under Size and rotate by entering values into the Height and Width boxes. Crop the picture under Crop from by entering values into the Left, Right, Top, and Bottom boxes. Under Picture Tools, on the Format tab, in the Picture Styles group, click Reflected Beveled, Black.Select the picture. On the Home tab, in the Clipboard group, click the arrow under Paste, and then click Duplicate. Right-click the duplicate picture, and then click Change Picture. In the Insert Picture dialog box, select a picture and click Insert. If the inserted picture is a different height and width, adjust the width and height. Under Picture Tools, on the Format tab, in the bottom right corner of the Size group, click the Size and Position dialog box launcher. In the Size and Position dialog box, on the Size tab, resize or crop the picture as needed so that under Size and rotate, the Height box is set to 2” and the Width box is set to 2.67”. Resize the picture under Size and rotate by entering values into the Height and Width boxes. Crop the picture under Crop from by entering values into the Left, Right, Top, and Bottom boxes. Repeat the process in steps 6-8 to create another duplicate picture, for a total of three pictures. Drag the pictures to form a row across the slide. Press and hold SHIFT and select all three pictures. On the Home tab, in the Drawing group, click Arrange, and then do the following:Point to Align, and then click Align to Slide. Point to Align, and then click Align Middle.Point to Align, and then click Distribute Horizontally. Click Group. On the Home tab, in the Drawing group, click Shape Effects, point to 3-D Rotation, and then under Perspective click Perspective Contrasting Left (second row, fourth option from the left). Drag the group to position it above the middle of the slide and also position it slightly to the left. To reproduce the background effects on this slide, do the following:Right-click the slide background area, and then click Format Background. In the Format Background dialog box, click Fill in the left pane, select Gradient fill in the Fill pane, and then do the following:In the Type list, select Linear.Click the button next to Direction, and then click Linear Down (first row, second option from the left).In the Angle text box, enter 90⁰.Under Gradient stops, click Add or Remove until two stops appear in the drop-down list.Also under Gradient stops, customize the gradient stops that you added as follows:Select Stop 1 from the list, and then do the following:In the Stop position box, enter 50%.Click the button next to Color, and then under Theme Colors click Black, Text 1, Lighter 5% (sixth row, second option from the left).Select Stop 2 from the list, and then do the following: In the Stop position box, enter 100%.Click the button next to Color, and then under Theme Colors click Dark Blue, Text 2, Lighter 40% (fourth row, fourth option from the left).
Transition effect for picture triptych, slide 1: split outOne common mistake that people make when the topic of a computer virus arises is to refer to a worm or Trojan horse as a virus. While the words Trojan, worm and virus are often used interchangeably, they are not exactly the same thing. Viruses, worms and Trojan Horses are all malicious programs that can cause damage to your computer, but there are differences among the three, and knowing those differences can help you better protect your computer from their often damaging effects.(Intermediate)Tip: For best results with the effects on this slide, use pictures with a “portrait” (vertical) orientation. To reproduce the picture effects on this slide, do the following:On the Home tab, in the Slides group, click Layout, and then click Blank.On the Insert tab, in the Illustrations group, click Picture. In the Insert Picture dialog box, select a picture, and then click Insert. Select the picture. Under Picture Tools, on the Format tab, in the bottom right corner of the Size group, click the Size and Position dialog box launcher. In the Size and Position dialog box, on the Size tab, resize or crop the picture as needed so that under Size and rotate, the Height box is set to 3.5” and the Width box is set to 2.35”. Resize the picture under Size and rotate by entering values into the Height and Width boxes. Crop the picture under Crop from by entering values into the Left, Right, Top, and Bottom boxes. On the Home tab, in the Drawing group, click Arrange, point to Align, and then do the following:Click Align to Slide.Click Align Center.On the Home tab, in the bottom right corner of the Drawing group, click the Format Picture dialog box launcher. In the Format Picture dialog box, click Line Color in the left pane. In the Line Color pane, select Solid line, click the button next to Color, and then under Theme Colors click Black, Text 1, Lighter 25% (fourth row, second option from the left). Also in the Format Picture dialog box, click Line Style in the left pane, and then in the Line Style pane, in the Width box, enter 8 pt.Also in the Format Picture dialog box, click Shadow in the left pane. In the Shadow pane, click the button next to Presets, and then under Perspective, click Perspective Diagonal Upper Right (first row, second option from the left).Also in the Format Picture dialog box, click 3-D Formatin the left pane, and then do the following in the 3-D Format tab:Under Bevel, click the button next to Top, and then under Bevel click Relaxed Inset (first row, second option from the left). Next to Top, in the Width box, enter 8 pt, and in the Height box, enter 6 pt. Under Depth, click the button next to Color, and then under Theme Colors click Black, Text 1, Lighter 25% (fourth row, second option from the left). In the Depth box, enter 12 pt. Under Surface, click the button next to Material, and then under Standard click Warm Matte (second option from the left). On the Home tab, in the Clipboard group, click the arrow under Paste, and then click Duplicate. Drag the duplicate picture to the right on the slide. Right-click the duplicate picture, and click Change Picture. In the Insert Picture dialog box, select a picture and click Insert.Select the first picture. On the Home tab, in the Clipboard group, click the arrow under Paste, and then click Duplicate. Drag the duplicate picture to the left on the slide. Right-click the duplicate picture, and click Change Picture. In the Insert Picture dialog box, select a picture and click Insert.Select the picture on the left side of the slide. On the Home tab, in the bottom right corner of the Drawing group, click the Format Picture dialog box launcher. In the Format Picture dialog box, click 3-D Rotation in the left pane. In the 3-D Rotation pane, click the button next to Presets, and then under Perspective, click Perspective Heroic Extreme Right (third row, third option from the left).Under Picture Tools, on the Format tab, in the bottom right corner of the Size group, click the Size and Position dialog box launcher. In the Size and Position dialog box, on the Size tab, resize or crop the picture as needed so that under Size and rotate, the Height box is set to 3.8” and the Width box is set to 2.53”. Resize the picture under Size and rotate by entering values into the Height and Width boxes. Crop the picture under Crop from by entering values into the Left, Right, Top, and Bottom boxes. Select the picture on the right side of the slide. On the Home tab, in the bottom right corner of the Drawing group, click the Format Picture dialog box launcher. In the Format Picture dialog box, click 3-D Rotation in the left pane. In the 3-D Rotation pane, click the button next to Presets, and then under Perspective, click Perspective Heroic Extreme Left (third row, second option from the left).Under Picture Tools, on the Format tab, in the bottom right corner of the Size group, click the Size and Position dialog box launcher. In the Size and Position dialog box, on the Size tab, resize or crop the picture as needed so that under Size and rotate, the Height box is set to 4.17” and the Width box is set to 2.78”. Resize the picture under Size and rotate by entering values into the Height and Width boxes. Crop the picture under Crop from by entering values into the Left, Right, Top, and Bottom boxes. To reproduce the transition and background effects on this slide, do the following:On the Animations tab, in the Transition to this Slide group, click More, and then under Wipes, click Split Vertical Out.Right-click the slide background area, and then click Format Background. In the Format Background dialog box, click Fill in the left pane, select Gradient fill in the Fill pane, and then do the following:In the Type list, select Linear.Click the button next to Direction, and then click Linear Down (first row, second option from the left). In the Angle box, enter 90⁰.Under Gradient stops, click Add or Remove until four stops appear in the drop-down list.Also under Gradient stops, customize the gradient stops that you added as follows:Select Stop 1 from the list, and then do the following:In the Stop position box, enter 0%.Click the button next to Color, and then under Theme Colors click Black, Text 1, Lighter 5% (sixth row, second option from the left).Select Stop 2 from the list, and then do the following: In the Stop position box, enter 24%.Click the button next to Color, and then under Theme Colors click White, Background 1, Darker 50% (sixth row, first option from the left).Select Stop 3 from the list, and then do the following:In the Stop position box, enter 35%.Click the button next to Color, and then under Theme Colors click White, Background 1, Darker 50% (sixth row, first option from the left).Select Stop 4 from the list, and then do the following:In the Stop position box, enter 90%.Click the button next to Color, and then under Theme Colors click Black, Text 1, Lighter 5% (sixth row, second option from the left).
Transition effect for picture triptych, slide 1: split out(Intermediate)Tip: For best results with the effects on this slide, use pictures with a “portrait” (vertical) orientation. To reproduce the picture effects on this slide, do the following:On the Home tab, in the Slides group, click Layout, and then click Blank.On the Insert tab, in the Illustrations group, click Picture. In the Insert Picture dialog box, select a picture, and then click Insert. Select the picture. Under Picture Tools, on the Format tab, in the bottom right corner of the Size group, click the Size and Position dialog box launcher. In the Size and Position dialog box, on the Size tab, resize or crop the picture as needed so that under Size and rotate, the Height box is set to 3.5” and the Width box is set to 2.35”. Resize the picture under Size and rotate by entering values into the Height and Width boxes. Crop the picture under Crop from by entering values into the Left, Right, Top, and Bottom boxes. On the Home tab, in the Drawing group, click Arrange, point to Align, and then do the following:Click Align to Slide.Click Align Center.On the Home tab, in the bottom right corner of the Drawing group, click the Format Picture dialog box launcher. In the Format Picture dialog box, click Line Color in the left pane. In the Line Color pane, select Solid line, click the button next to Color, and then under Theme Colors click Black, Text 1, Lighter 25% (fourth row, second option from the left). Also in the Format Picture dialog box, click Line Style in the left pane, and then in the Line Style pane, in the Width box, enter 8 pt.Also in the Format Picture dialog box, click Shadow in the left pane. In the Shadow pane, click the button next to Presets, and then under Perspective, click Perspective Diagonal Upper Right (first row, second option from the left).Also in the Format Picture dialog box, click 3-D Formatin the left pane, and then do the following in the 3-D Format tab:Under Bevel, click the button next to Top, and then under Bevel click Relaxed Inset (first row, second option from the left). Next to Top, in the Width box, enter 8 pt, and in the Height box, enter 6 pt. Under Depth, click the button next to Color, and then under Theme Colors click Black, Text 1, Lighter 25% (fourth row, second option from the left). In the Depth box, enter 12 pt. Under Surface, click the button next to Material, and then under Standard click Warm Matte (second option from the left). On the Home tab, in the Clipboard group, click the arrow under Paste, and then click Duplicate. Drag the duplicate picture to the right on the slide. Right-click the duplicate picture, and click Change Picture. In the Insert Picture dialog box, select a picture and click Insert.Select the first picture. On the Home tab, in the Clipboard group, click the arrow under Paste, and then click Duplicate. Drag the duplicate picture to the left on the slide. Right-click the duplicate picture, and click Change Picture. In the Insert Picture dialog box, select a picture and click Insert.Select the picture on the left side of the slide. On the Home tab, in the bottom right corner of the Drawing group, click the Format Picture dialog box launcher. In the Format Picture dialog box, click 3-D Rotation in the left pane. In the 3-D Rotation pane, click the button next to Presets, and then under Perspective, click Perspective Heroic Extreme Right (third row, third option from the left).Under Picture Tools, on the Format tab, in the bottom right corner of the Size group, click the Size and Position dialog box launcher. In the Size and Position dialog box, on the Size tab, resize or crop the picture as needed so that under Size and rotate, the Height box is set to 3.8” and the Width box is set to 2.53”. Resize the picture under Size and rotate by entering values into the Height and Width boxes. Crop the picture under Crop from by entering values into the Left, Right, Top, and Bottom boxes. Select the picture on the right side of the slide. On the Home tab, in the bottom right corner of the Drawing group, click the Format Picture dialog box launcher. In the Format Picture dialog box, click 3-D Rotation in the left pane. In the 3-D Rotation pane, click the button next to Presets, and then under Perspective, click Perspective Heroic Extreme Left (third row, second option from the left).Under Picture Tools, on the Format tab, in the bottom right corner of the Size group, click the Size and Position dialog box launcher. In the Size and Position dialog box, on the Size tab, resize or crop the picture as needed so that under Size and rotate, the Height box is set to 4.17” and the Width box is set to 2.78”. Resize the picture under Size and rotate by entering values into the Height and Width boxes. Crop the picture under Crop from by entering values into the Left, Right, Top, and Bottom boxes. To reproduce the transition and background effects on this slide, do the following:On the Animations tab, in the Transition to this Slide group, click More, and then under Wipes, click Split Vertical Out.Right-click the slide background area, and then click Format Background. In the Format Background dialog box, click Fill in the left pane, select Gradient fill in the Fill pane, and then do the following:In the Type list, select Linear.Click the button next to Direction, and then click Linear Down (first row, second option from the left). In the Angle box, enter 90⁰.Under Gradient stops, click Add or Remove until four stops appear in the drop-down list.Also under Gradient stops, customize the gradient stops that you added as follows:Select Stop 1 from the list, and then do the following:In the Stop position box, enter 0%.Click the button next to Color, and then under Theme Colors click Black, Text 1, Lighter 5% (sixth row, second option from the left).Select Stop 2 from the list, and then do the following: In the Stop position box, enter 24%.Click the button next to Color, and then under Theme Colors click White, Background 1, Darker 50% (sixth row, first option from the left).Select Stop 3 from the list, and then do the following:In the Stop position box, enter 35%.Click the button next to Color, and then under Theme Colors click White, Background 1, Darker 50% (sixth row, first option from the left).Select Stop 4 from the list, and then do the following:In the Stop position box, enter 90%.Click the button next to Color, and then under Theme Colors click Black, Text 1, Lighter 5% (sixth row, second option from the left).
Framed pictures in a row in perspective (Intermediate)To reproduce the picture effects on this slide, do the following:On the Home tab, in the Slides group, click Layout and then click Blank. On the Insert tab, in the Illustrations group, click Picture. In the Insert Picture dialog box, select a picture and then click Insert.Under Picture Tools, on the Format tab, in the bottom right corner of the Size group, click the Size and Position dialog box launcher. In the Size and Position dialog box, on the Size tab, resize or crop the picture as needed so that under Size and rotate, the Height box is set to 2” and the Width box is set to 2.67”. Resize the picture under Size and rotate by entering values into the Height and Width boxes. Crop the picture under Crop from by entering values into the Left, Right, Top, and Bottom boxes. Under Picture Tools, on the Format tab, in the Picture Styles group, click Reflected Beveled, Black.Select the picture. On the Home tab, in the Clipboard group, click the arrow under Paste, and then click Duplicate. Right-click the duplicate picture, and then click Change Picture. In the Insert Picture dialog box, select a picture and click Insert. If the inserted picture is a different height and width, adjust the width and height. Under Picture Tools, on the Format tab, in the bottom right corner of the Size group, click the Size and Position dialog box launcher. In the Size and Position dialog box, on the Size tab, resize or crop the picture as needed so that under Size and rotate, the Height box is set to 2” and the Width box is set to 2.67”. Resize the picture under Size and rotate by entering values into the Height and Width boxes. Crop the picture under Crop from by entering values into the Left, Right, Top, and Bottom boxes. Repeat the process in steps 6-8 to create another duplicate picture, for a total of three pictures. Drag the pictures to form a row across the slide. Press and hold SHIFT and select all three pictures. On the Home tab, in the Drawing group, click Arrange, and then do the following:Point to Align, and then click Align to Slide. Point to Align, and then click Align Middle.Point to Align, and then click Distribute Horizontally. Click Group. On the Home tab, in the Drawing group, click Shape Effects, point to 3-D Rotation, and then under Perspective click Perspective Contrasting Left (second row, fourth option from the left). Drag the group to position it above the middle of the slide and also position it slightly to the left. To reproduce the background effects on this slide, do the following:Right-click the slide background area, and then click Format Background. In the Format Background dialog box, click Fill in the left pane, select Gradient fill in the Fill pane, and then do the following:In the Type list, select Linear.Click the button next to Direction, and then click Linear Down (first row, second option from the left).In the Angle text box, enter 90⁰.Under Gradient stops, click Add or Remove until two stops appear in the drop-down list.Also under Gradient stops, customize the gradient stops that you added as follows:Select Stop 1 from the list, and then do the following:In the Stop position box, enter 50%.Click the button next to Color, and then under Theme Colors click Black, Text 1, Lighter 5% (sixth row, second option from the left).Select Stop 2 from the list, and then do the following: In the Stop position box, enter 100%.Click the button next to Color, and then under Theme Colors click Dark Blue, Text 2, Lighter 40% (fourth row, fourth option from the left).