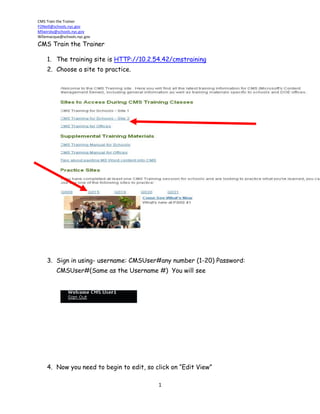
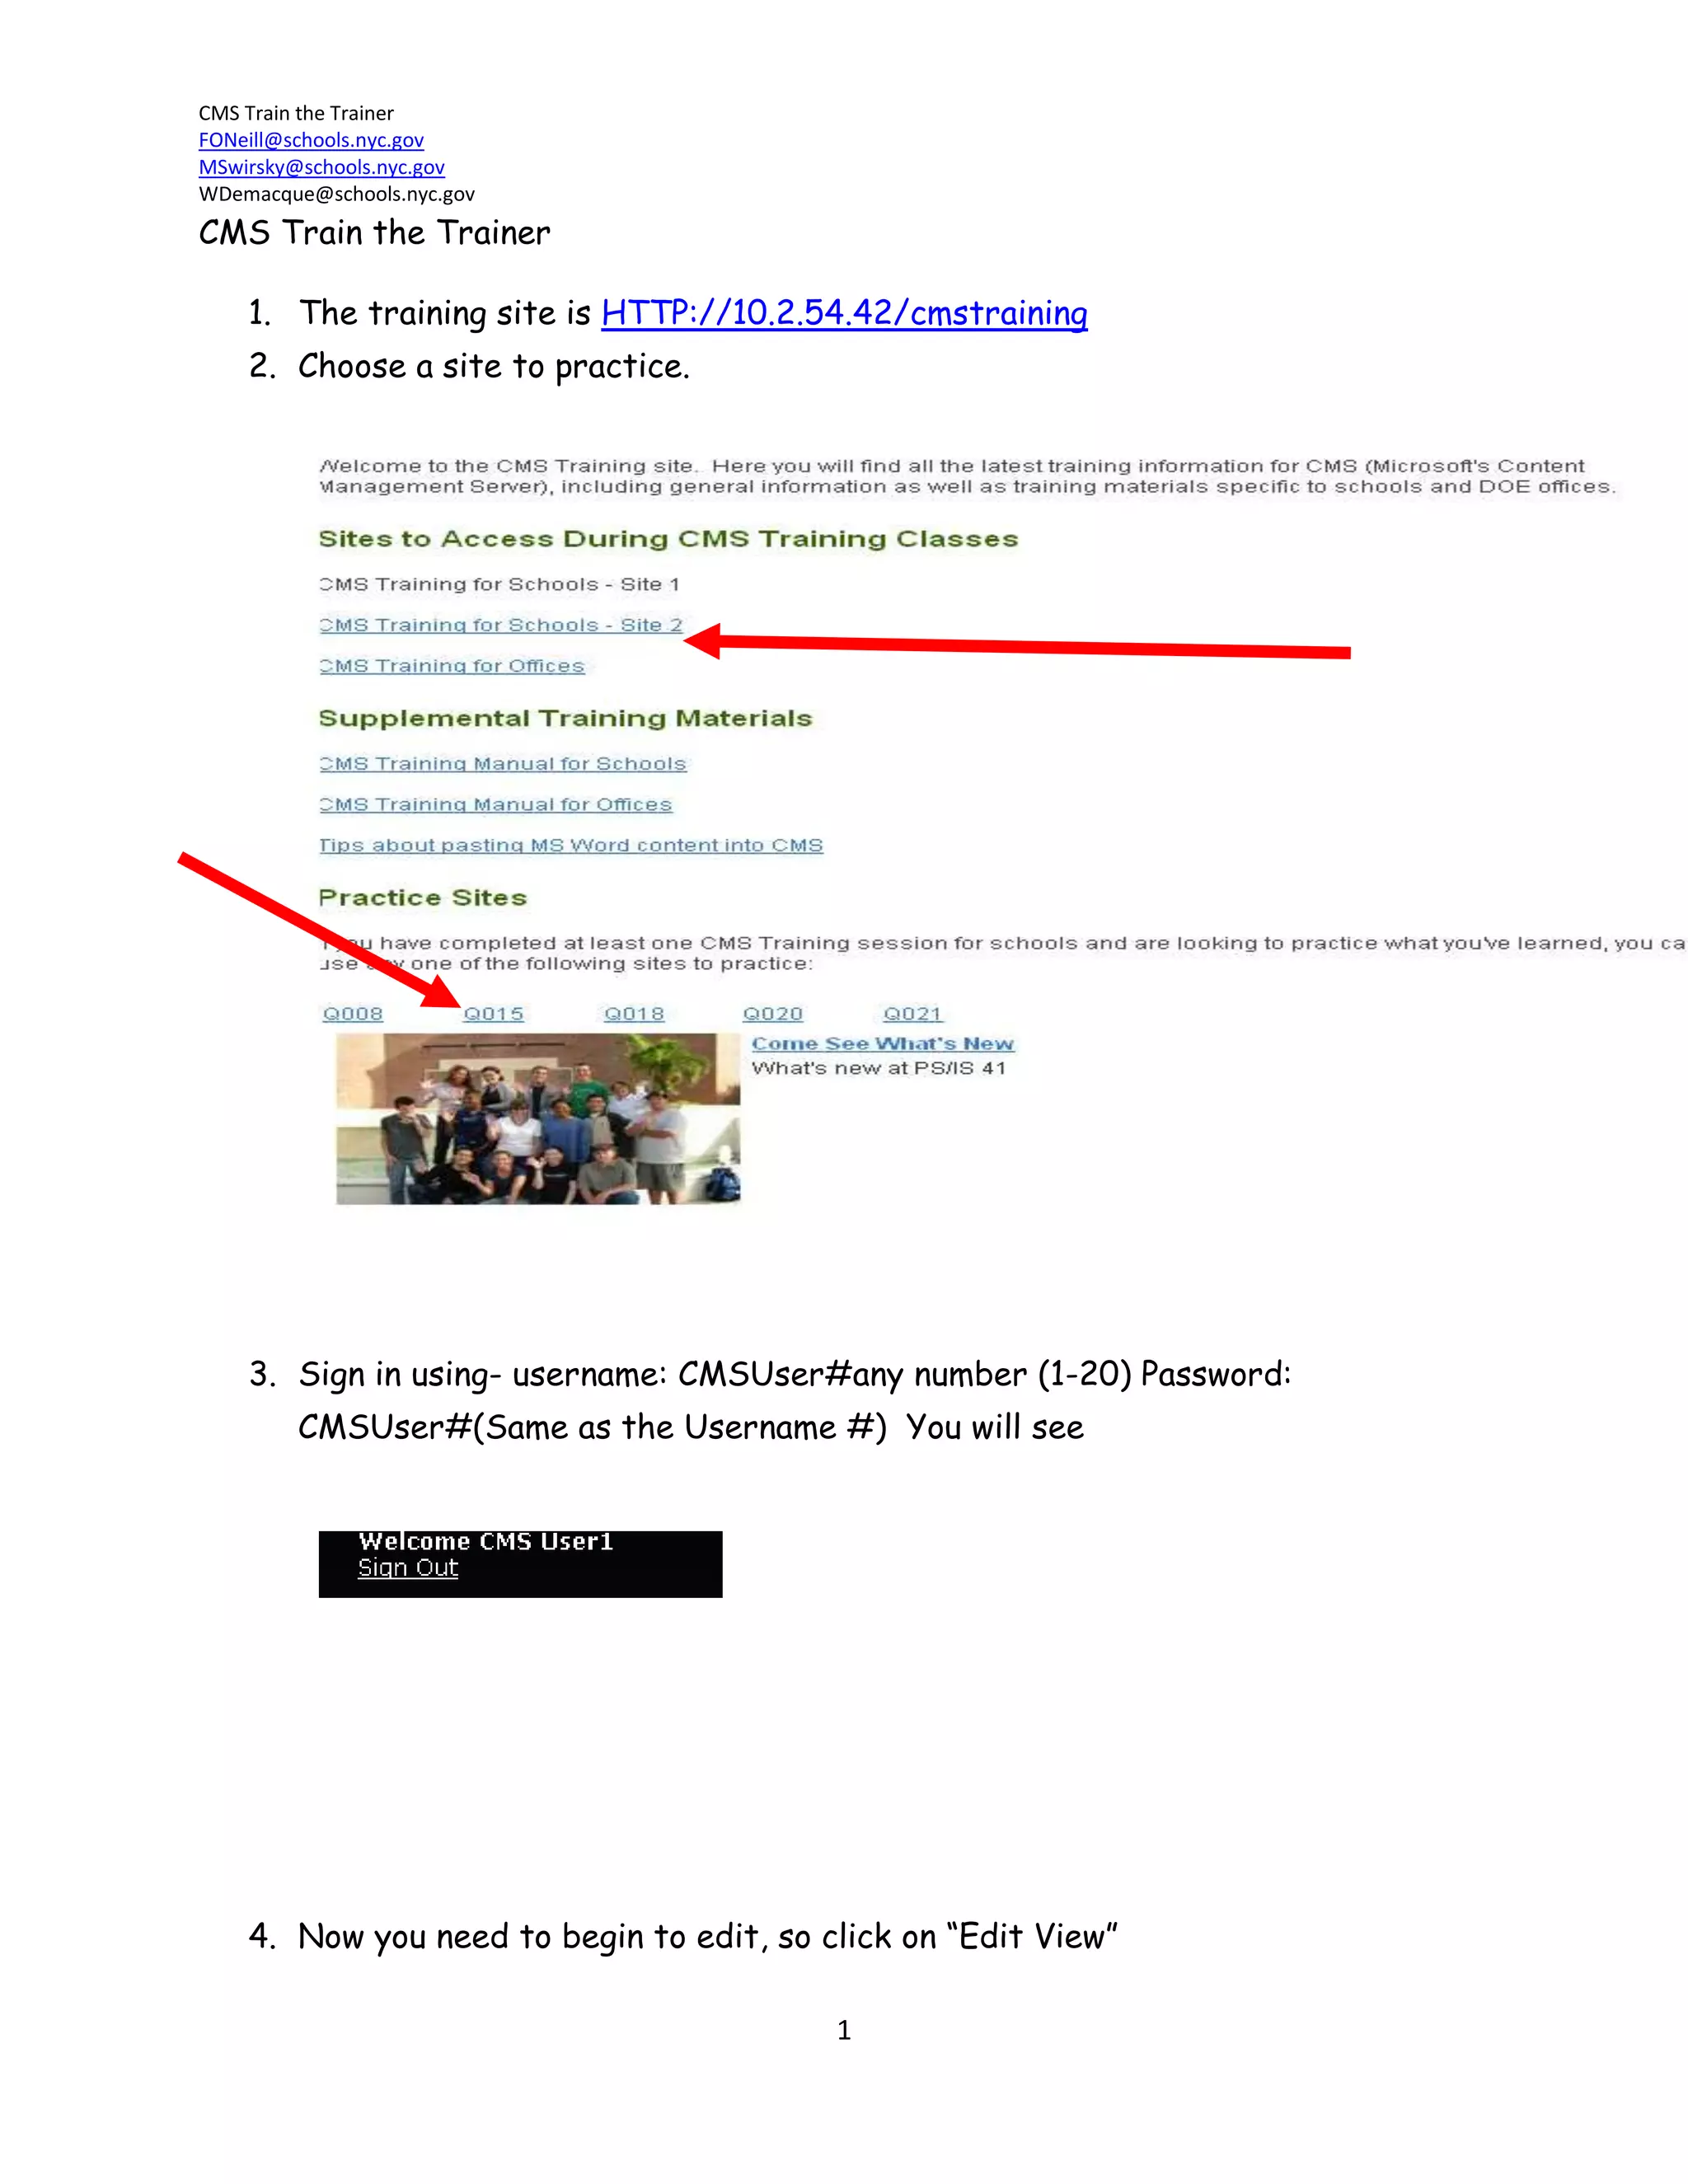
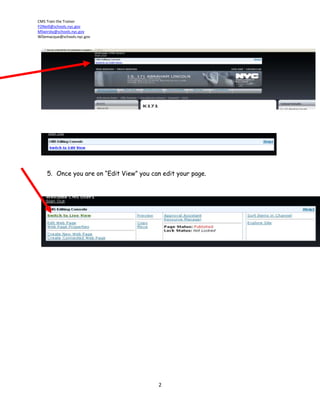
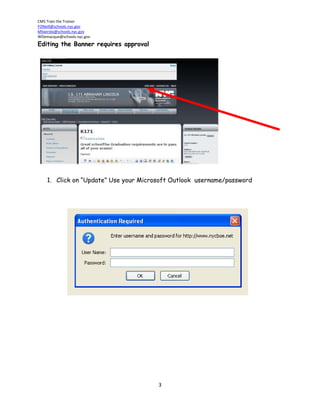
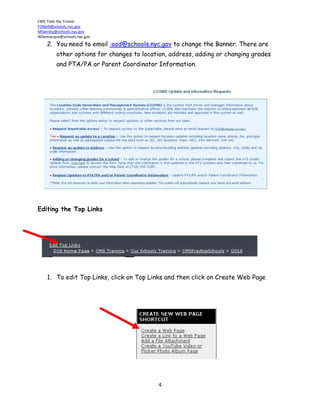
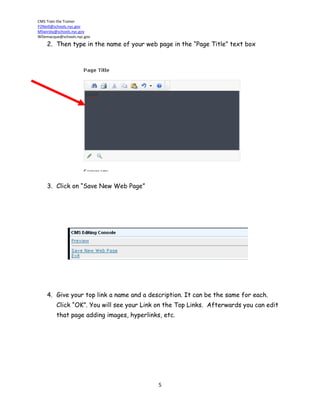
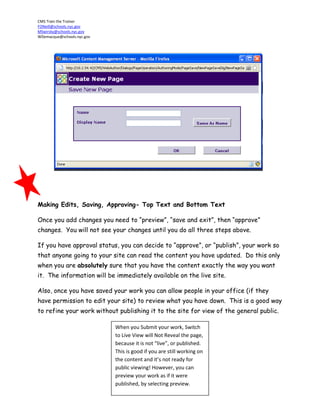
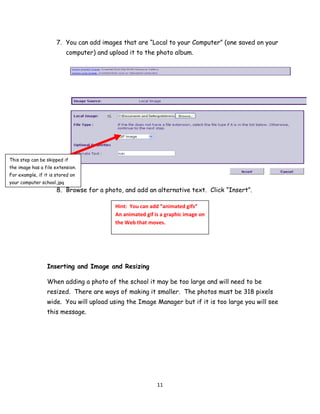
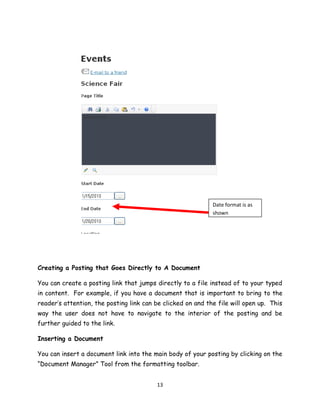
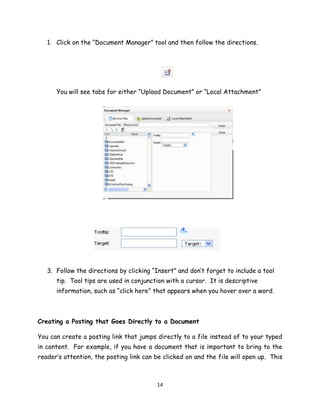
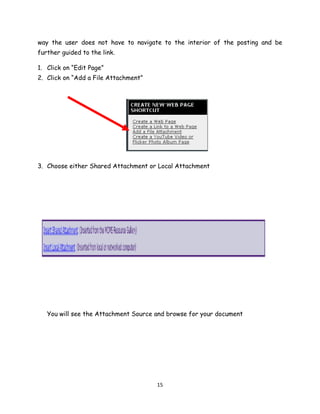
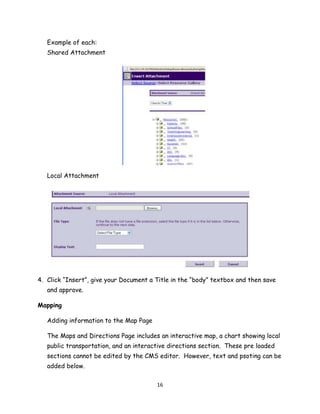
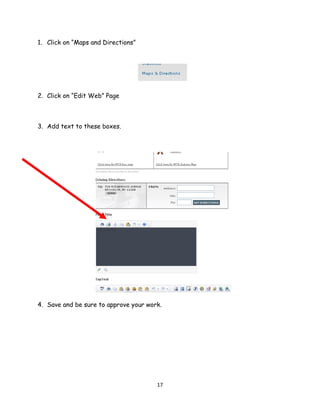
CMS Train the TrainerThe training site is HTTP://10.2.54.42/cmstraining
Choose a site to practice.
Sign in using- username: CMSUser#any number (1-20) Password: CMSUser#(Same as the Username #)  You will see
Now you need to begin to edit, so click on “Edit View”
Once you are on “Edit View” you can edit your page. Editing the Banner requires approvalClick on “Update” Use your Microsoft Outlook  username/password
You need to email :ood@schools.nyc.gov to change the Banner. There are other options for changes to location, address, adding or changing grades and PTA/PA or Parent Coordinator Information.Editing the Top LinksTo edit Top Links, click on Top Links and then click on Create Web Page
Then type in the name of your web page in the “Page Title” text box
Click on “Save New Web Page”
Give your top link a name and a description. It can be the same for each. Click “OK”. You will see your Link on the Top Links.  Afterwards you can edit that page adding images, hyperlinks, etc. Making Edits, Saving, Approving- Top Text and Bottom TextOnce you add changes you need to “preview”, “save and exit”, then “approve” changes.  You will not see your changes until you do all three steps above. If you have approval status, you can decide to “approve”, or “publish”, your work so that anyone going to your site can read the content you have updated.  Do this only when you are absolutely sure that you have the content exactly the way you want it.  The information will be immediately available on the live site. Also, once you have saved your work you can allow people in your office (if they have permission to edit your site) to review what you have down.  This is a good way to refine your work without publishing it to the site for view of the general public.  When you Submit your work, Switch to Live View will Not Reveal the page, because it is not “live”, or published.  This is good if you are still working on the content and it’s not ready for public viewing! However, you can preview your work as if it were published, by selecting preview.  The steps are the same for any changes.  Use the tools on the tool bar needed and don’t forget to “Save and Exit” and “Approve” to publish.  Editing the Summary Page (Overview)To make changes to the summary, which is located on the left navigation bar, click on “Edit Page”, and “Overview”.   Use the text box to make changes.  Add images, hyperlinks, text and/or any content that you choose.
The top area is good for summary information, important announcements and so on.
Any postings (links to other web pages) that you add will appear in between the two editing areas.
Anything added in the bottom text area appears below the postings.  It is good for adding notes, contact phone numbers and so on.
Go to “Edit View”, and make a change to the Top Text.  You will see there is a text box similar to one used in Microsoft Office.  Let us take a look at the toolbar.   Spell check
Find and Replace
Copy( Control + C)
Paste (Control + V)
Paste form Word

Cms Train The Trainer Guide

  • 1.
    CMS Train theTrainerThe training site is HTTP://10.2.54.42/cmstraining
  • 2.
    Choose a siteto practice.
  • 3.
    Sign in using-username: CMSUser#any number (1-20) Password: CMSUser#(Same as the Username #) You will see
  • 4.
    Now you needto begin to edit, so click on “Edit View”
  • 5.
    Once you areon “Edit View” you can edit your page. Editing the Banner requires approvalClick on “Update” Use your Microsoft Outlook username/password
  • 6.
    You need toemail :ood@schools.nyc.gov to change the Banner. There are other options for changes to location, address, adding or changing grades and PTA/PA or Parent Coordinator Information.Editing the Top LinksTo edit Top Links, click on Top Links and then click on Create Web Page
  • 7.
    Then type inthe name of your web page in the “Page Title” text box
  • 8.
    Click on “SaveNew Web Page”
  • 9.
    Give your toplink a name and a description. It can be the same for each. Click “OK”. You will see your Link on the Top Links. Afterwards you can edit that page adding images, hyperlinks, etc. Making Edits, Saving, Approving- Top Text and Bottom TextOnce you add changes you need to “preview”, “save and exit”, then “approve” changes. You will not see your changes until you do all three steps above. If you have approval status, you can decide to “approve”, or “publish”, your work so that anyone going to your site can read the content you have updated. Do this only when you are absolutely sure that you have the content exactly the way you want it. The information will be immediately available on the live site. Also, once you have saved your work you can allow people in your office (if they have permission to edit your site) to review what you have down. This is a good way to refine your work without publishing it to the site for view of the general public. When you Submit your work, Switch to Live View will Not Reveal the page, because it is not “live”, or published. This is good if you are still working on the content and it’s not ready for public viewing! However, you can preview your work as if it were published, by selecting preview. The steps are the same for any changes. Use the tools on the tool bar needed and don’t forget to “Save and Exit” and “Approve” to publish. Editing the Summary Page (Overview)To make changes to the summary, which is located on the left navigation bar, click on “Edit Page”, and “Overview”. Use the text box to make changes. Add images, hyperlinks, text and/or any content that you choose.
  • 10.
    The top areais good for summary information, important announcements and so on.
  • 11.
    Any postings (linksto other web pages) that you add will appear in between the two editing areas.
  • 12.
    Anything added inthe bottom text area appears below the postings. It is good for adding notes, contact phone numbers and so on.
  • 13.
    Go to “EditView”, and make a change to the Top Text. You will see there is a text box similar to one used in Microsoft Office. Let us take a look at the toolbar. Spell check
  • 14.
  • 15.
  • 16.
  • 17.