1. 1
Weebly Training Manual
Your new website is now being hosted through Weebly, a much easier content management system than
your previous one, GoDaddy. A content management system (CMS) is just a fancy way of saying how you
as a staff add and edit the content on your website. They are designed to make it easy for people who
aren’t tech-savvy or experienced in website development to manage their website. Weebly makes it as
easy as possible and has a chat feature found at the bottom of their support page. Along with the chat
support, you can also reach their support team via phone at 1-844-493-3259.
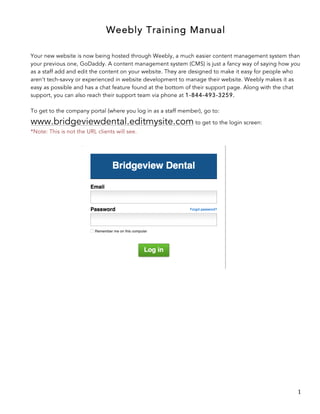
To get to the company portal (where you log in as a staff member), go to:
www.bridgeviewdental.editmysite.com to get to the login screen:
*Note: This is not the URL clients will see.
2. 2
After you’ve successfully logged in, click on Bridgeview Dental and click “edit.”
This will take you to the main editing screen:
Notice the toolbar on the left side. This is where all of your editing options are. Weebly is a “drag and
drop” CMS, which means you can simply drag the feature over from the left to the exact location you
want on your website (on the right side of the screen), and it will be added. It’s super easy! You can get
specific training and help on how to do this on the Weebly Support page by watching their training
videos.
Click on the orange preview button in the top right corner of the editing screen to see what your website
looks like. This will open the site in a new window and displays the site how the user will see it. You can
click the preview button as many times as you’d like, or keep refreshing the preview page you have open
each time you want to view a new edit.
3. 3
Note: This does not publish the site! So if you don’t like the way something looks when previewing it, no
worries! No one else will see it until it goes Live.
Notice that you are currently under the “Build” option on the blue toolbar near the top of the screen.
Clicking “Build” at any time will take you back to this main editing screen and will be the screen you see
initially each time you log in.
When you roll your cursor over any of the features on the website, additional editing options will appear.
For example, when you roll the cursor over the first paragraph of text on the site, a blue box forms
around it. This shows the size of the feature (in this case a textbox is the feature). You can:
• Delete the feature by clicking the “x” icon in the upper right corner of the box
• Move the feature by clicking and dragging the button in the top-middle of the box
• Move or copy the feature to a different page on the site by clicking the arrow in the top left of
the box
Click on the feature to get the text toolbar:
This is like your typical Microsoft Word toolbar, but here is what each button does in case you’re not
familiar with the options:
“Undo” and “redo”
“Remove formatting” – eliminates any changes you have made (like changing the font) and
brings the feature back to its original style. You won’t have to worry about this much.
“Bulleted list” or “numbered list”
“Align” – either left-, center-, or right-align the text you have highlighted
“Link” – highlight the text you want to link to, then choose either “Website URL” to link to an
outside site (you will have to copy and paste the site’s URL), or choose “Standard page” and
paste the page you would like to go to that is on your site.
Change font color
Make font larger or smaller
4. 4
The last three icons on the far left of the toolbar are your typical bold, italic, and underline tools.
Header: To change the layout of your header (the big blue part on the screen), click the “Settings”
button in the bottom right corner of the header (next to “edit image”):
This tool is helpful when you want to change the size of the header or completely eliminate it. You can
also do this by going to “Pages” which is located up in the same blue toolbar as “Build.” If a page
doesn’t have a header, or if you delete the header and want to get it back, go to “Pages” and select the
page you want to change/add the header to.
Pages: This is also where you can add or delete pages of your website. Say you no longer wanted to have
a “Connect” page on the site. You would want to delete this page completely, meaning it would no
longer show up in the navigation visible to the user. When I say navigation (or nav bar), I mean this:
When you add a new page, you will typically choose “Standard Page”:
5. 5
The only time you would use an External Link as a page is if you want the user to be redirected to a page
outside of your website (like a Facebook page) right when they click on that link.
Once added, name your page then choose the layout you’d like it to have. The pages on your site are all
currently Short Header. Click “Save & Edit” in the bottom right corner when you are finished.
Notice the “Delete Page” and “Copy Page” options. Copying a page is useful if you’d like a future page
to be very similar to the one you are creating. Delete a page only if you are sure you do not need it
anymore. If a page is accidentally deleted, the Weebly support staff can easily get it back for you.
While under “Pages,” these options seen above can also be viewed on an existing page. Click on the
page you want to delete, copy, or edit from the left navigation.
Tip: Drag pages up/down to reorder the navigation. Drag them left/right to create subpages. Hide a
page from the navigation by selecting the box, “Hide page in navigation.” Each staff member’s page
under “Meet the Staff” is hidden in the main navigation. Rather, each staff member’s page is only
accessible from the actual “Meet the Staff”page.
Theme: Changing the theme of your entire website should be done every so often. Click on “Design” at
the top of the screen, and you will see “Change Theme.” By hovering over each theme, you have the
option to preview what it would look like, or change the color of it. Weebly has a ton of awesome
themes, so if you ever get bored with your website, check them out!
Mobile: This website is responsive, unlike your old site. Responsive design means that the website
changes its layout and appearance, to an extent, when it is viewed on a different sized screen, like a
mobile phone or tablet. This is a must-have nowadays, so you’re in luck! To view what the website looks
like from a mobile phone, click the icon that looks like a phone up in the upper right by the “Preview”
button:
You can change basic features of the mobile site by using the toolbar on the right side of the screen. You
can also change the view from an iPhone to an Android in the bottom right corner of the screen, but not
a whole lot should change. You can still add any of the same things from the main tools on the left side
of the screen. Keep in mind that anything added to the mobile site will also be added to the desktop
version, just for consistency. Therefore, you do not need to make the same changes on both the mobile
and desktop sites, or you will start getting duplicate features.
All edits are saved automatically after clicking “Preview.”