Download to read offline
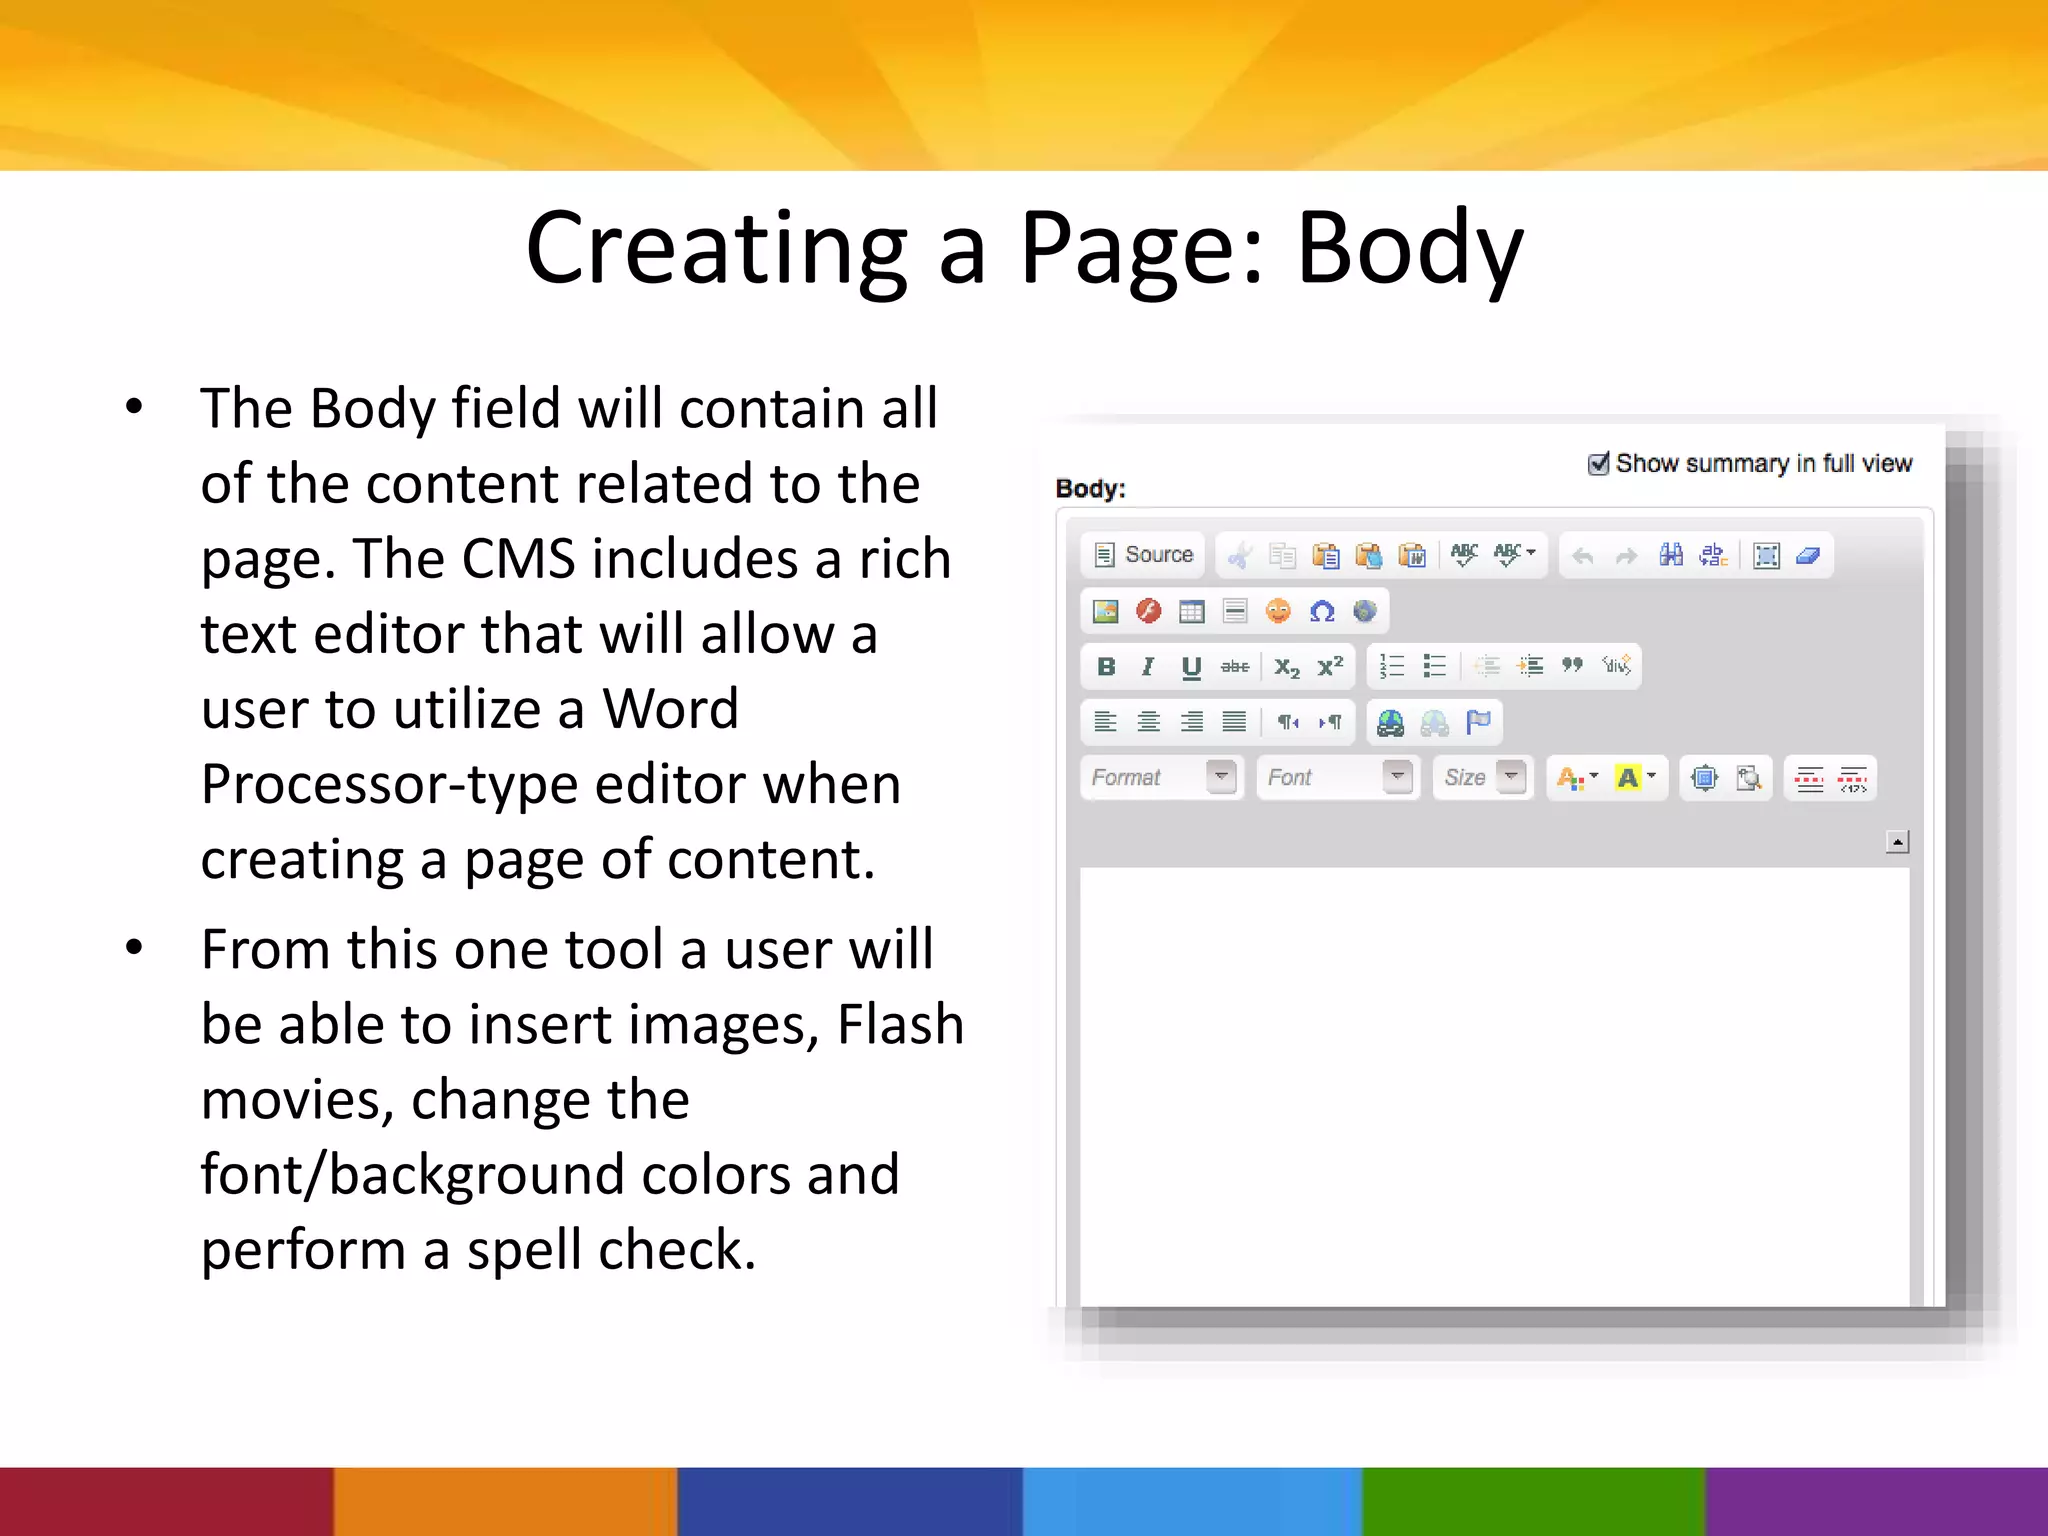
![Creating a Page: Body [Source]
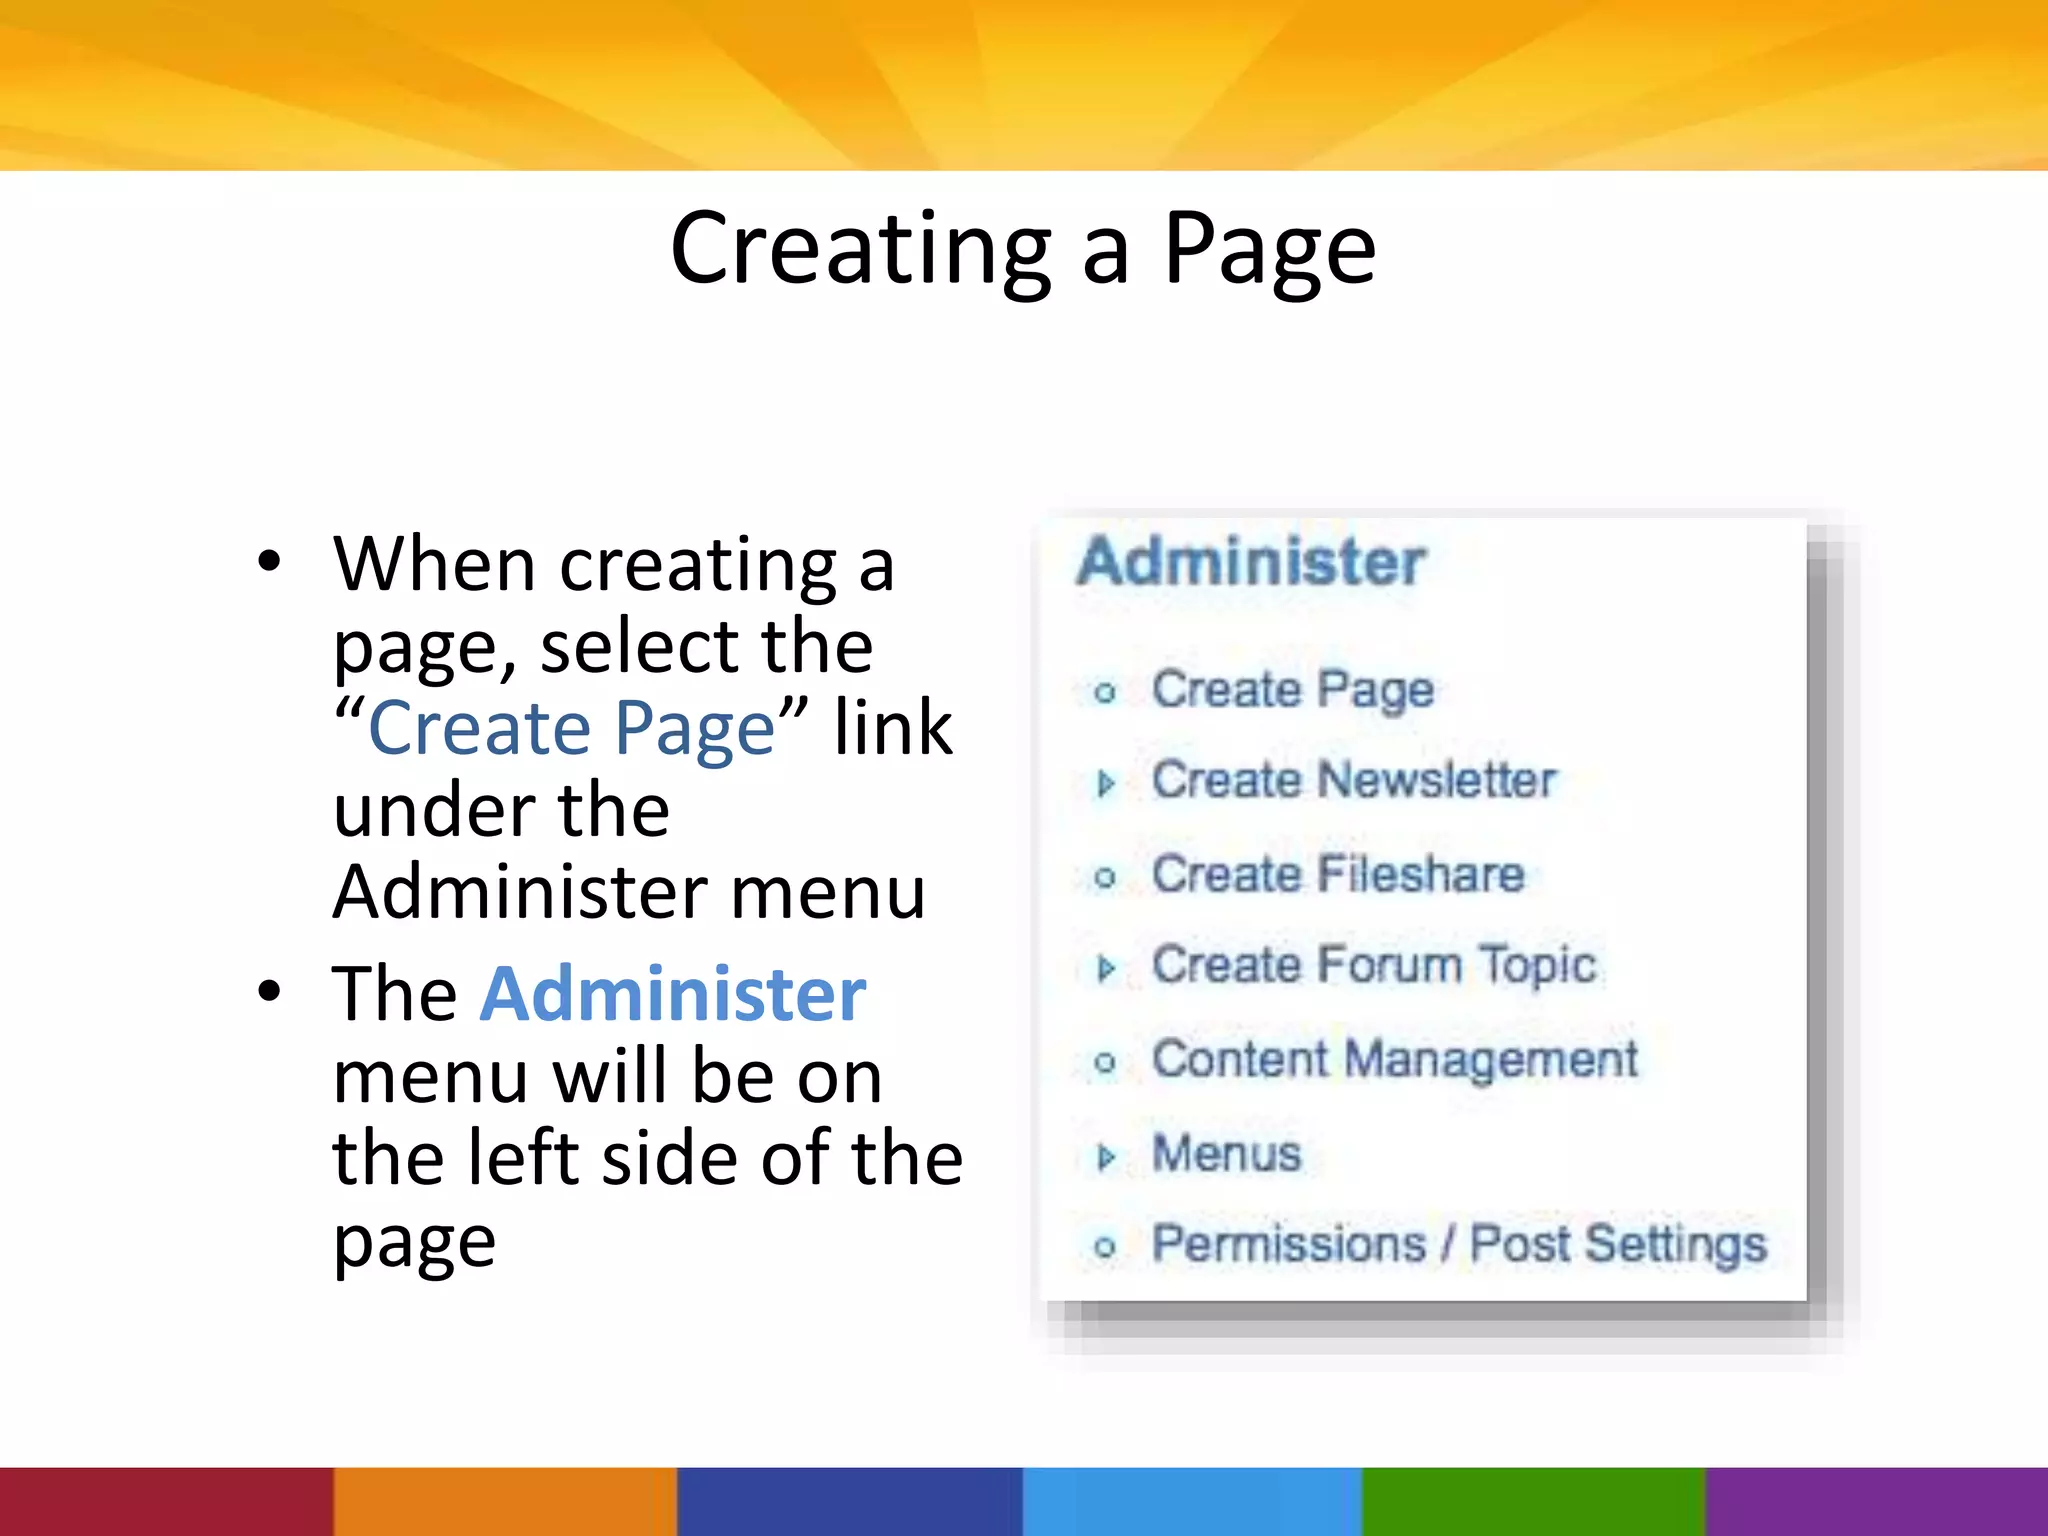
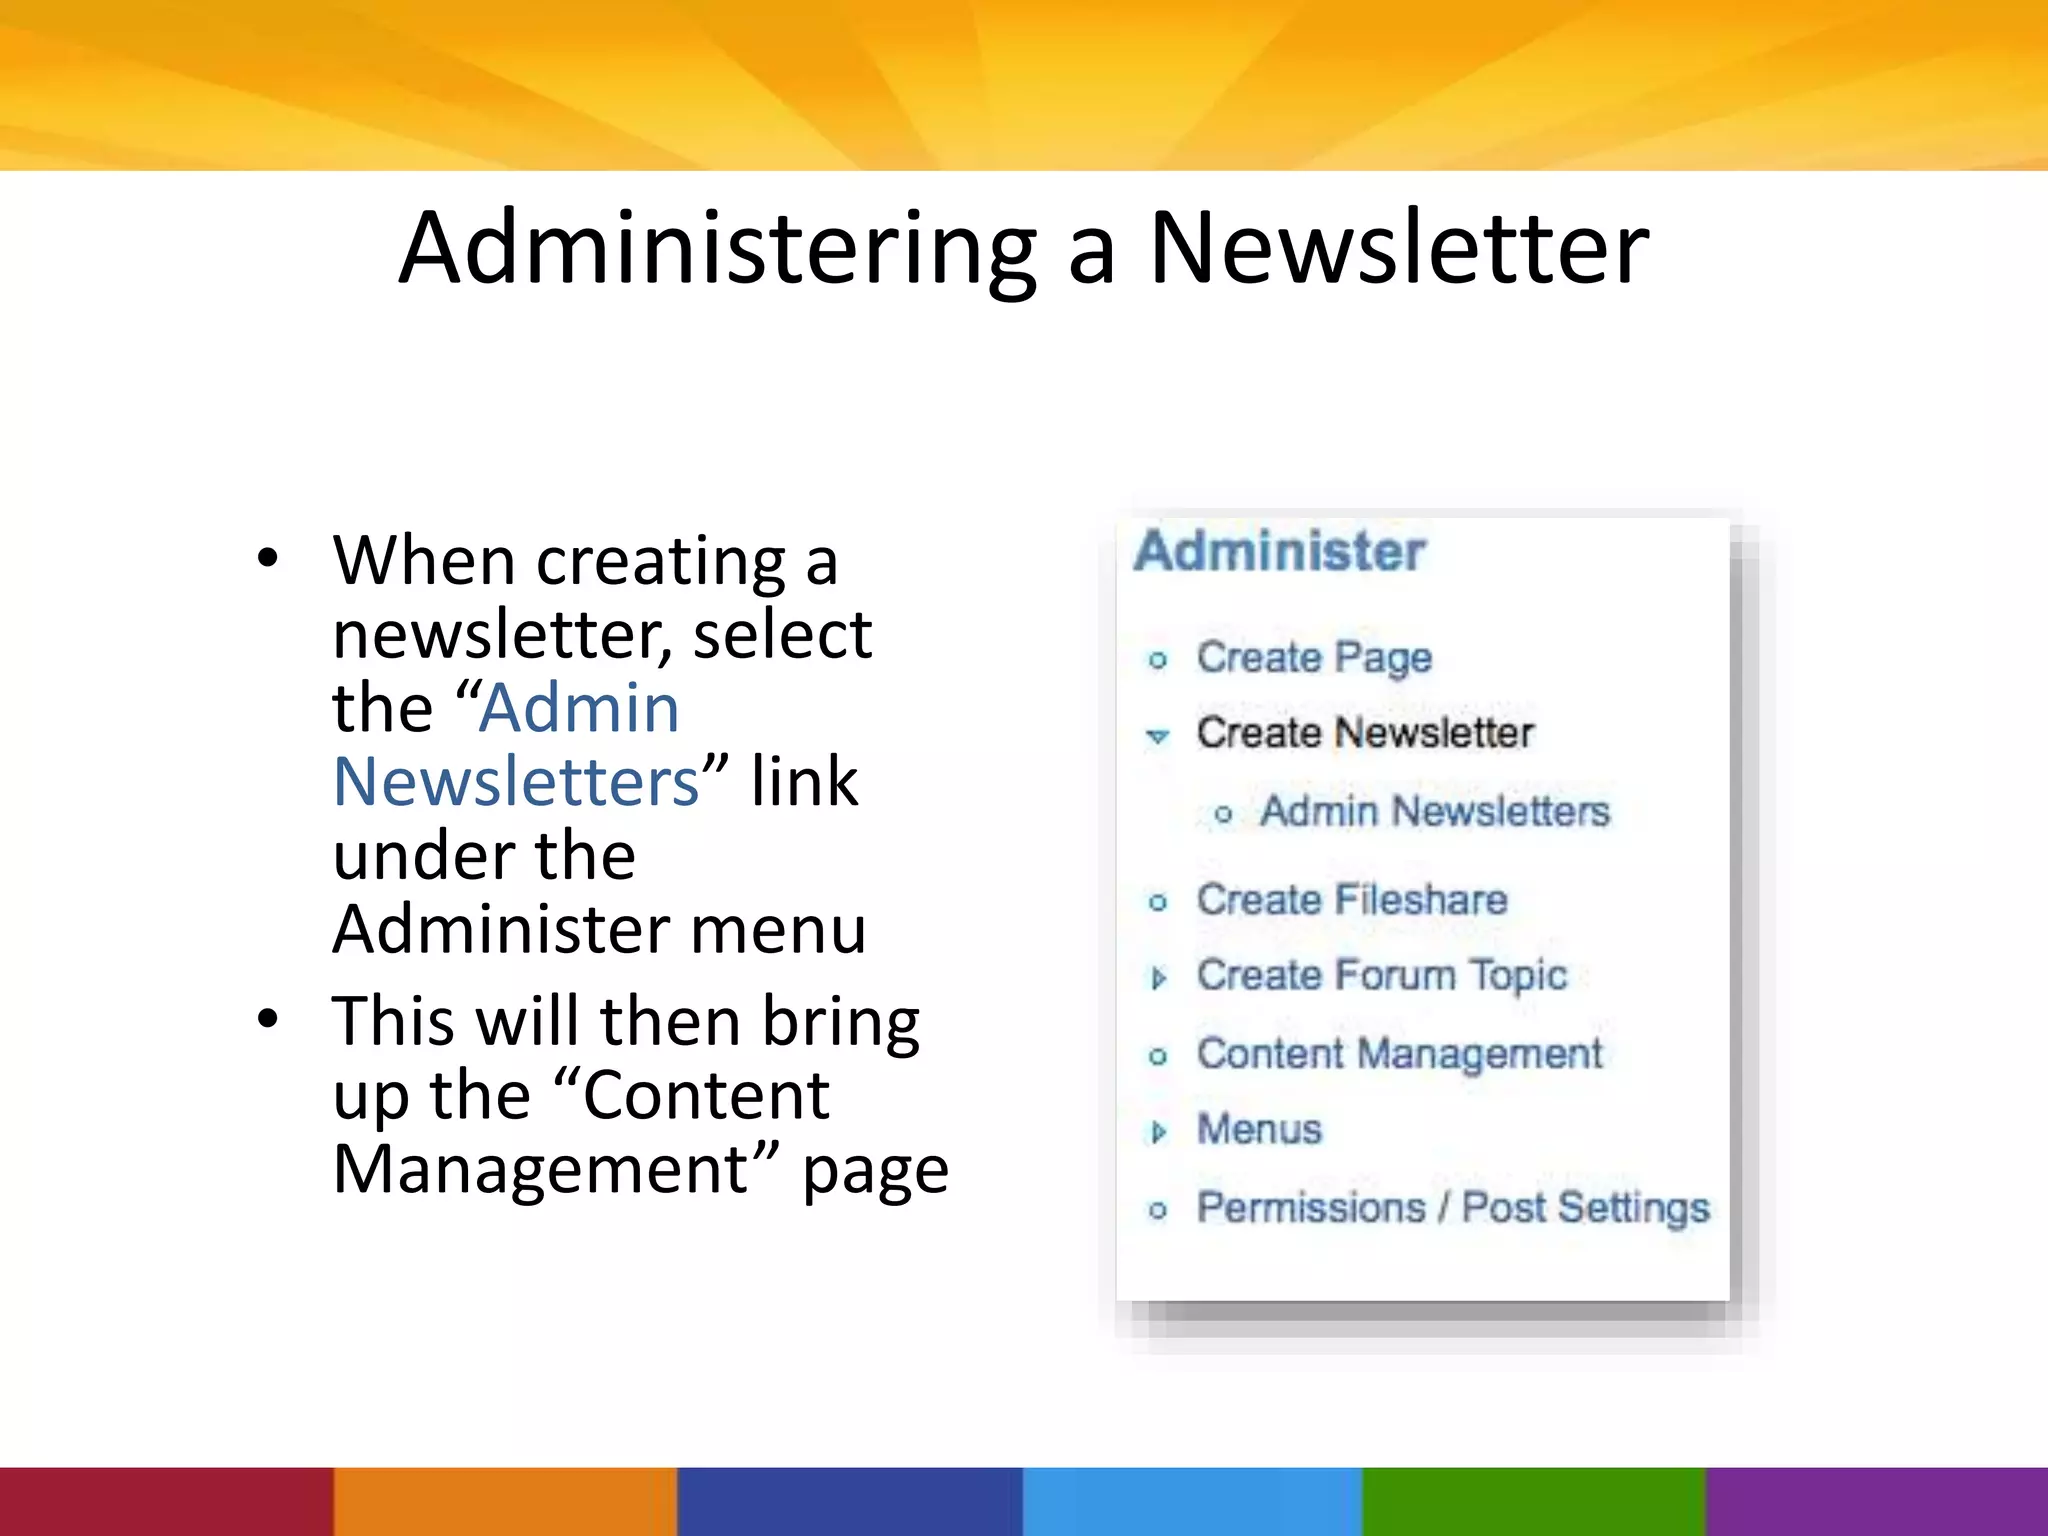
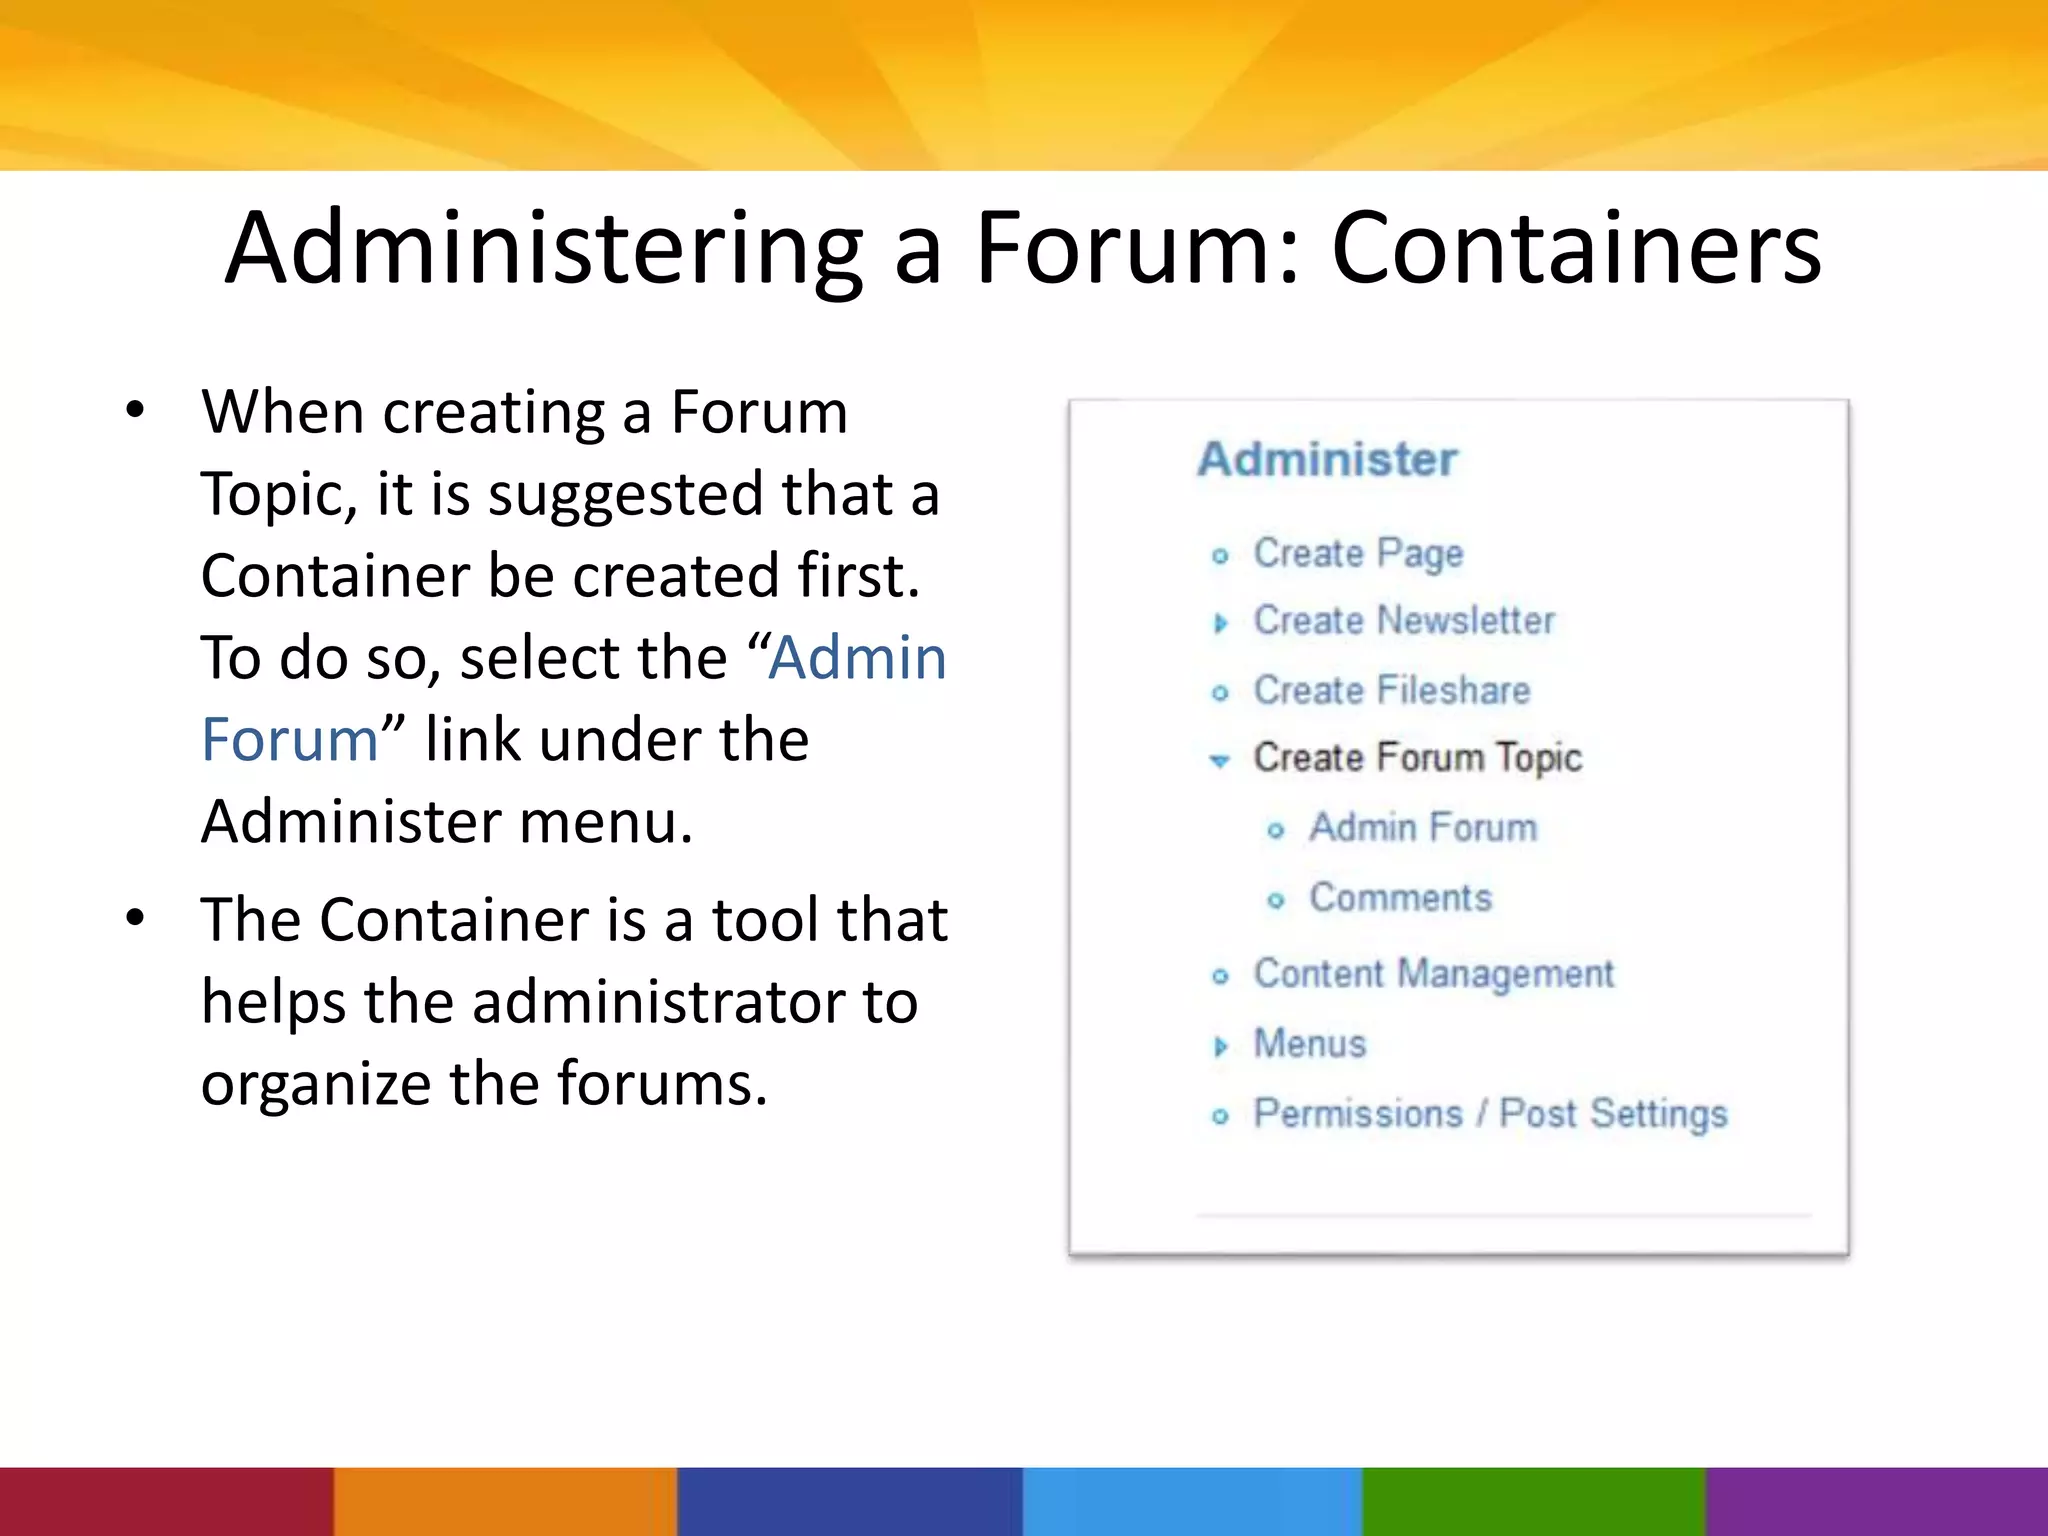
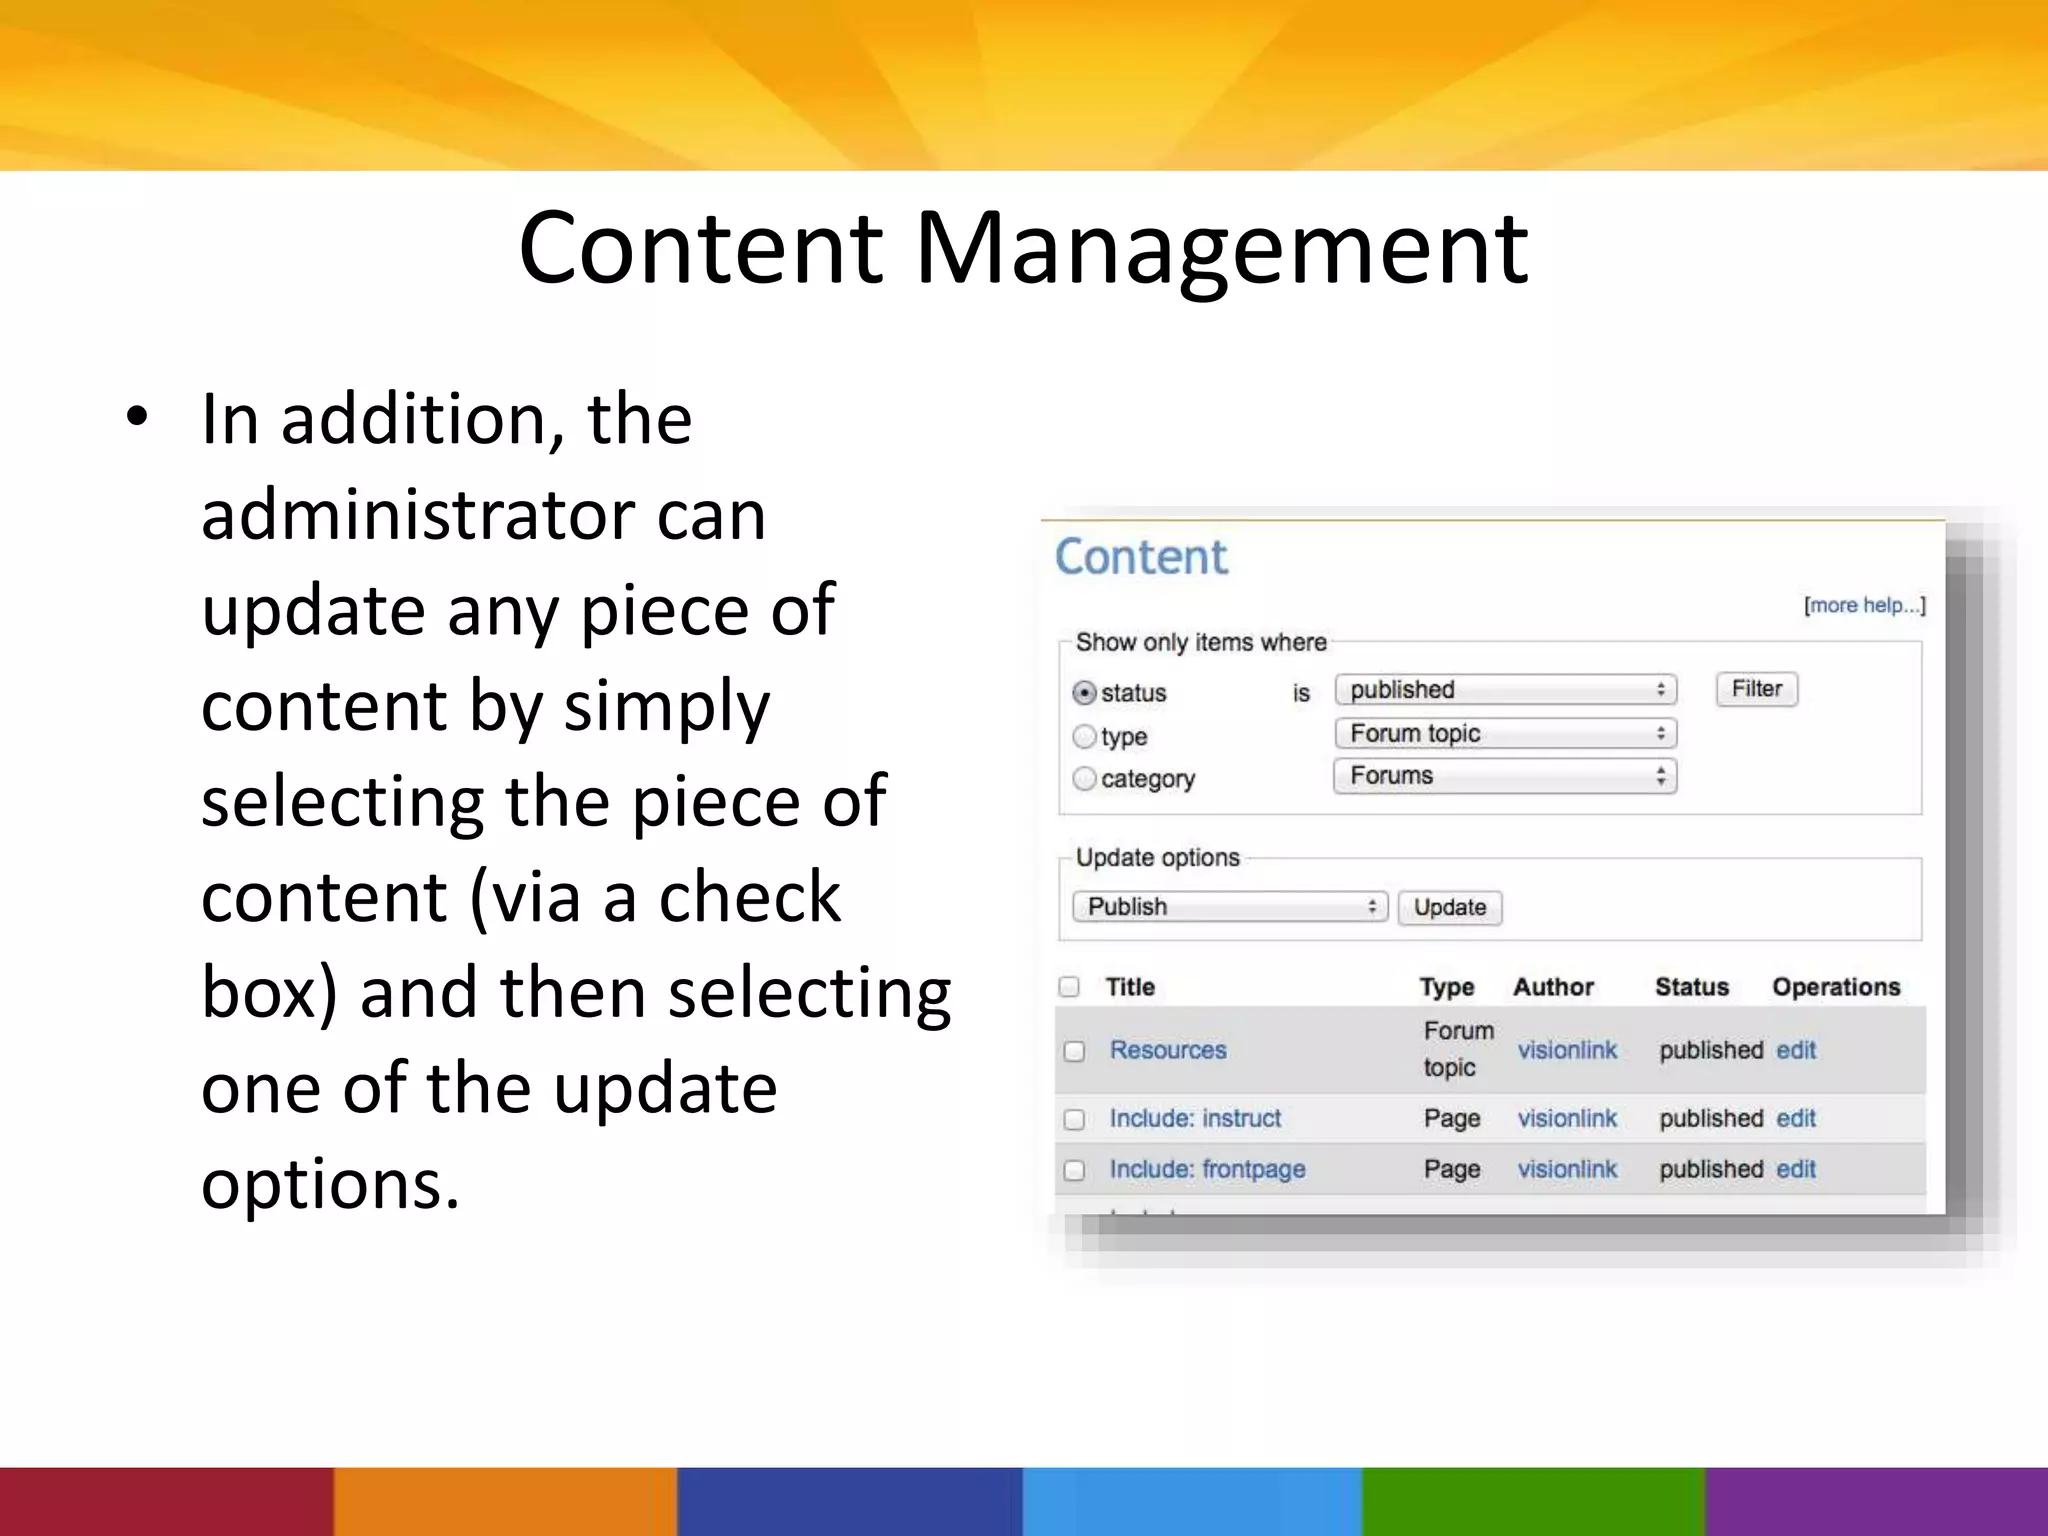
• For the users that are
comfortable with working
with HTML Code, they can
select the “Source” button.
• This will convert the body
text into html code so that
the user can manually enter
or manipulate the page](https://image.slidesharecdn.com/2013nvcvoadportalprojectdzedits-150206121250-conversion-gate01/75/2013-NVC-Voad-Portal-Project-15-2048.jpg)
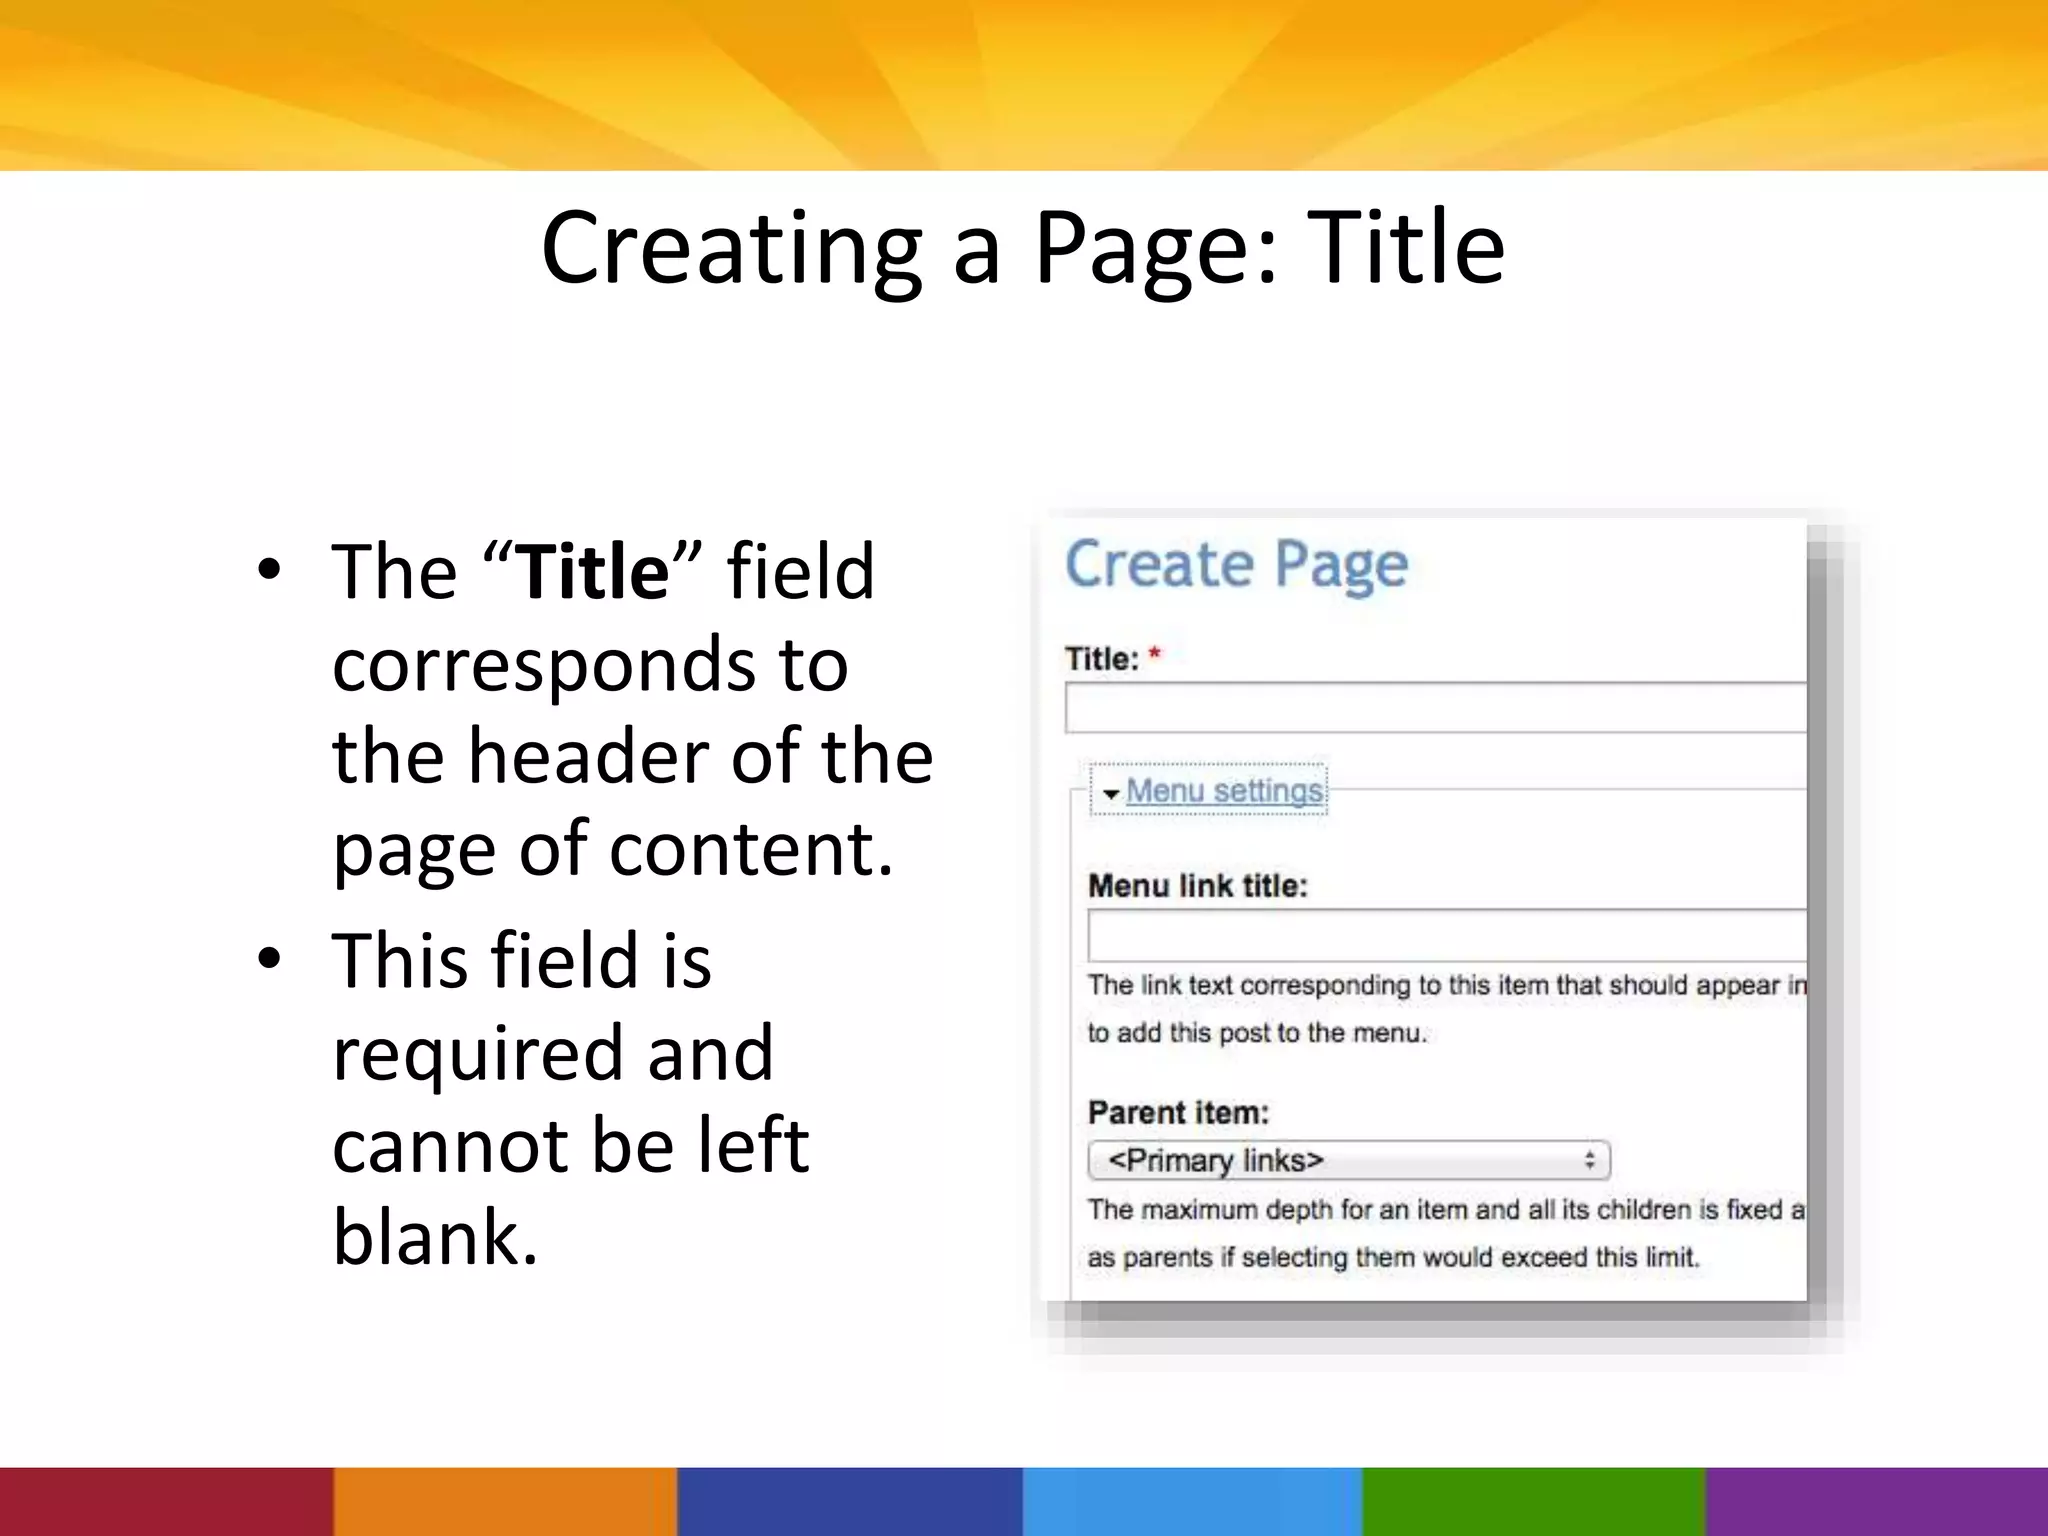
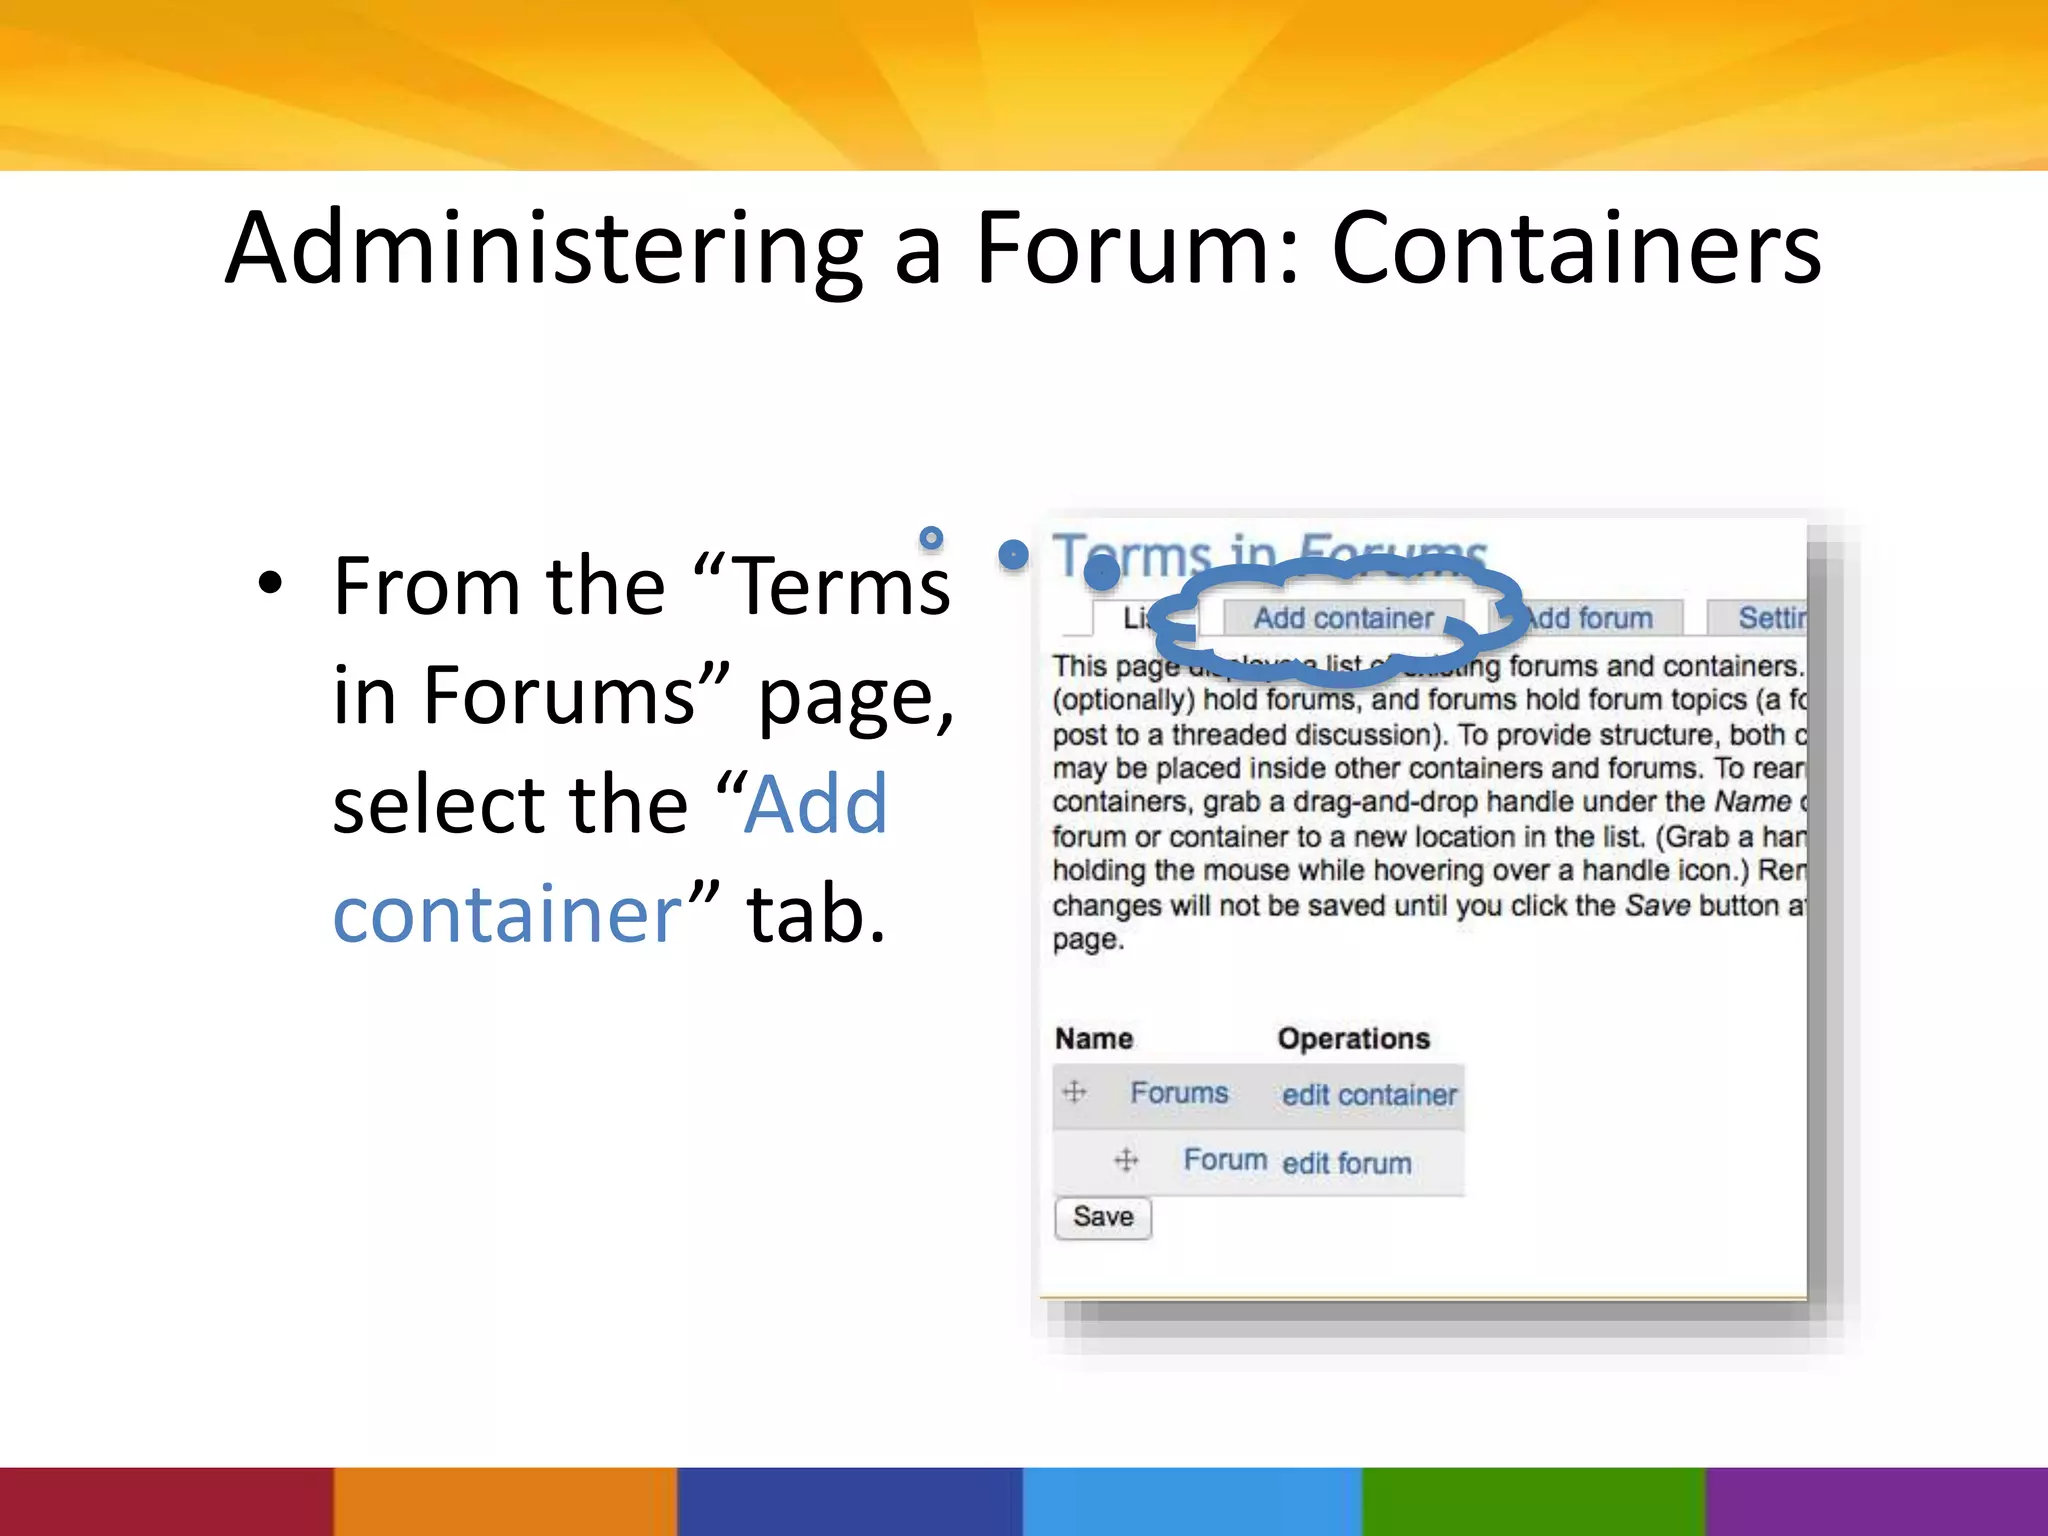
![Creating a Page: Body [Image Upload]
• Adding images to the CMS
requires selecting this
button, which will bring up
a new window](https://image.slidesharecdn.com/2013nvcvoadportalprojectdzedits-150206121250-conversion-gate01/75/2013-NVC-Voad-Portal-Project-16-2048.jpg)
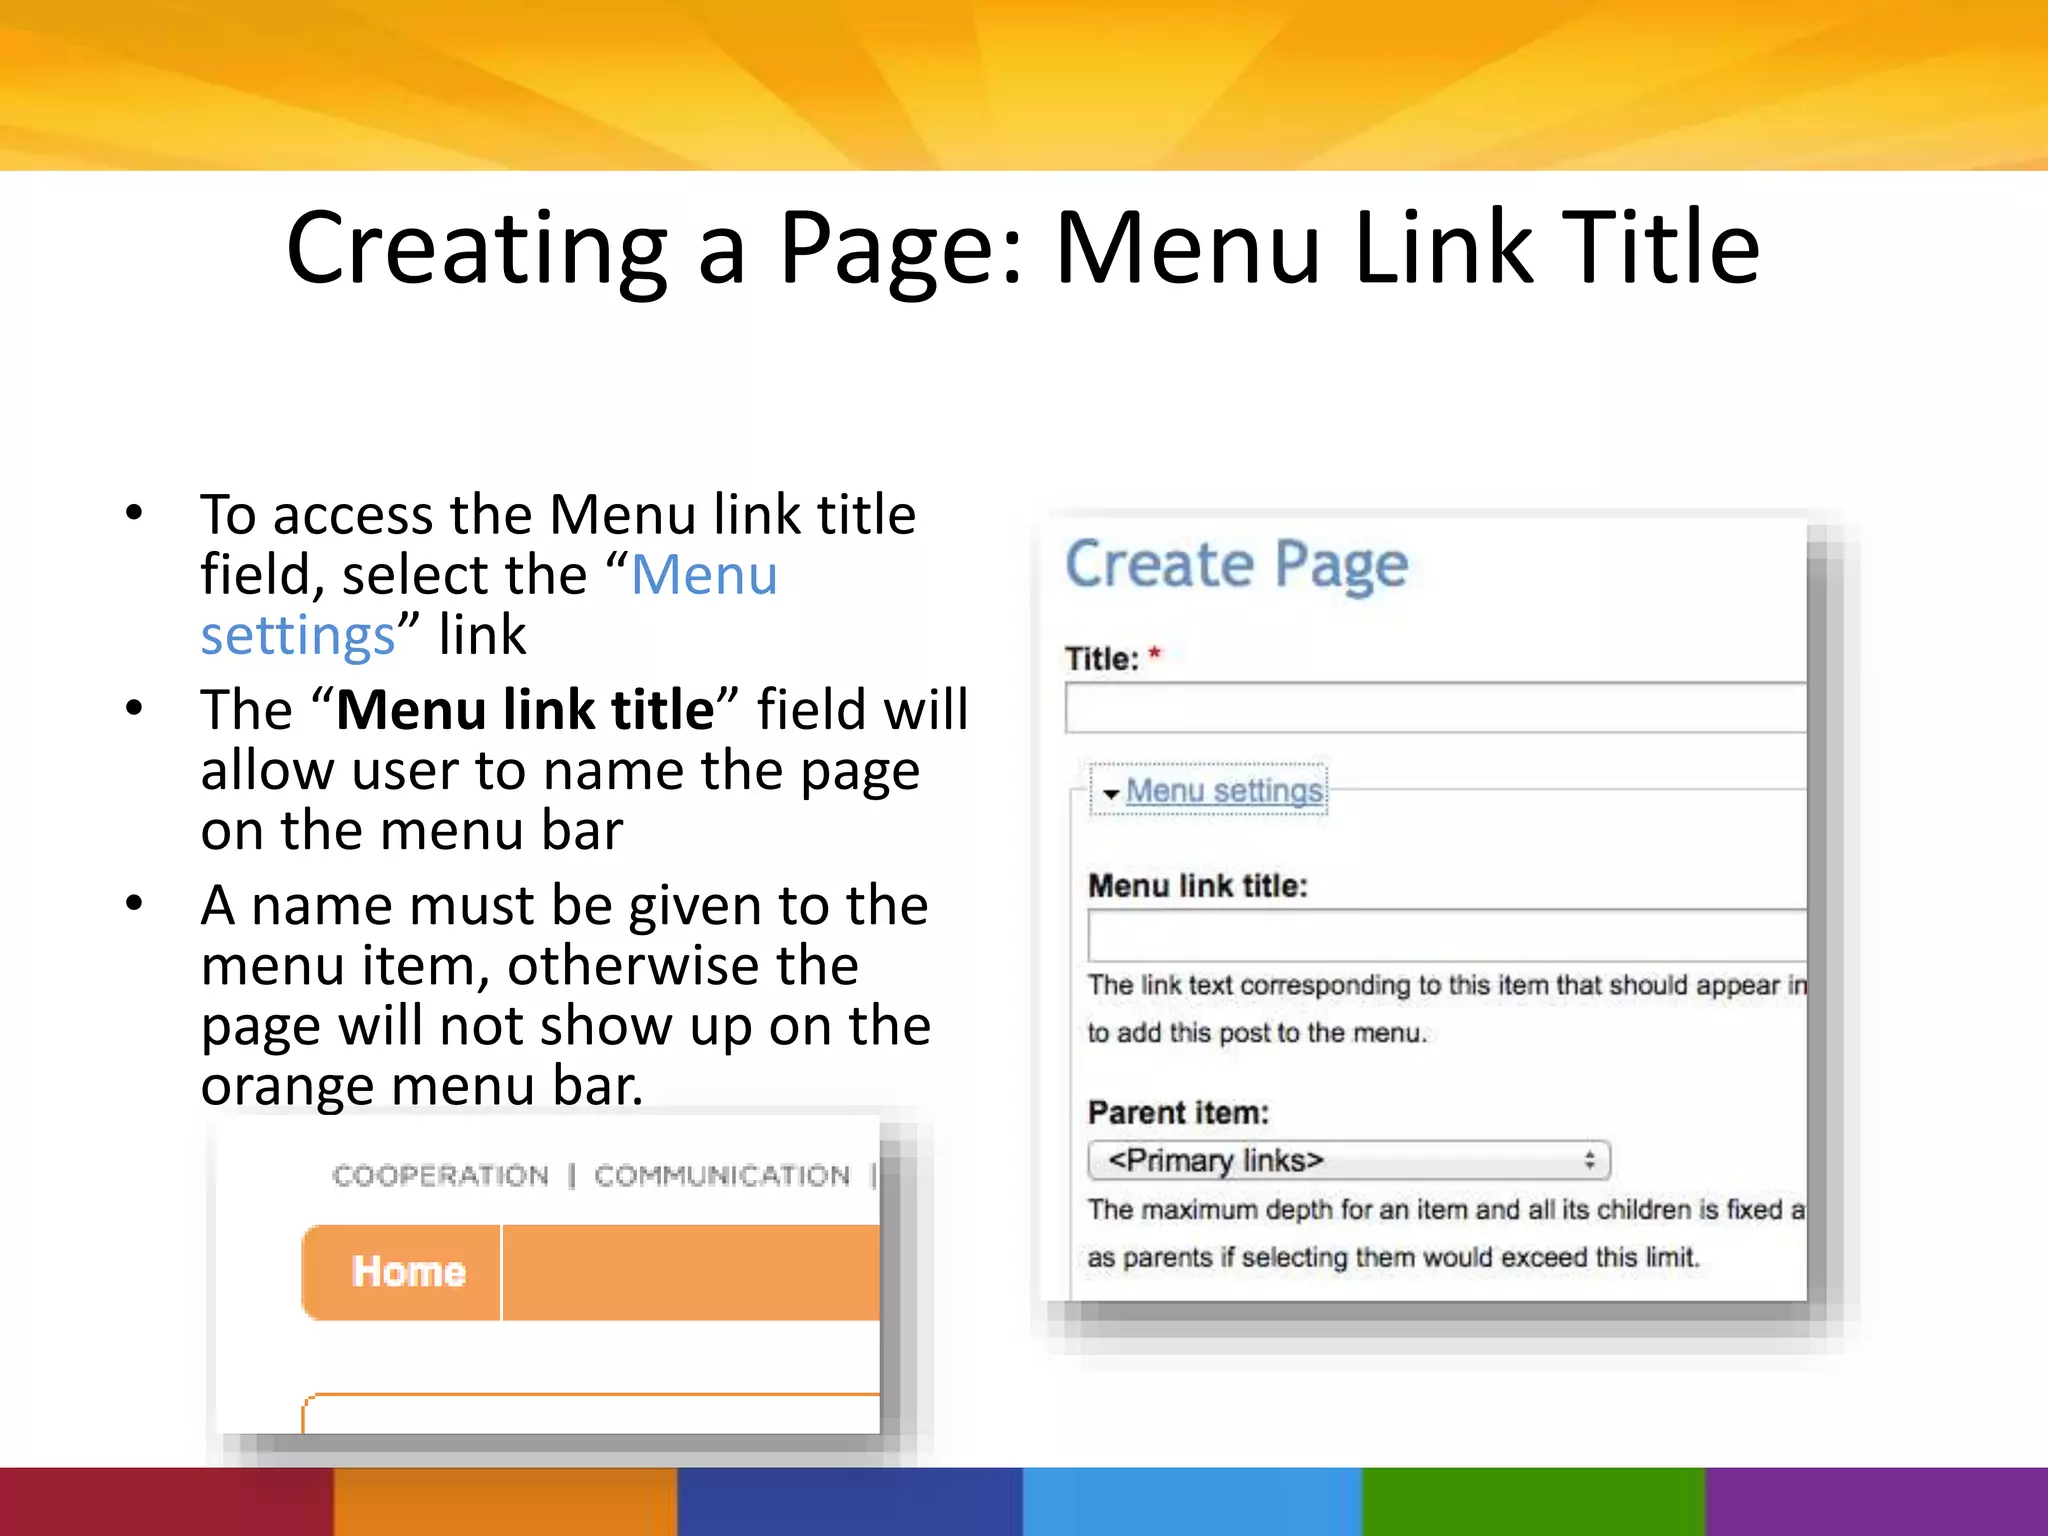
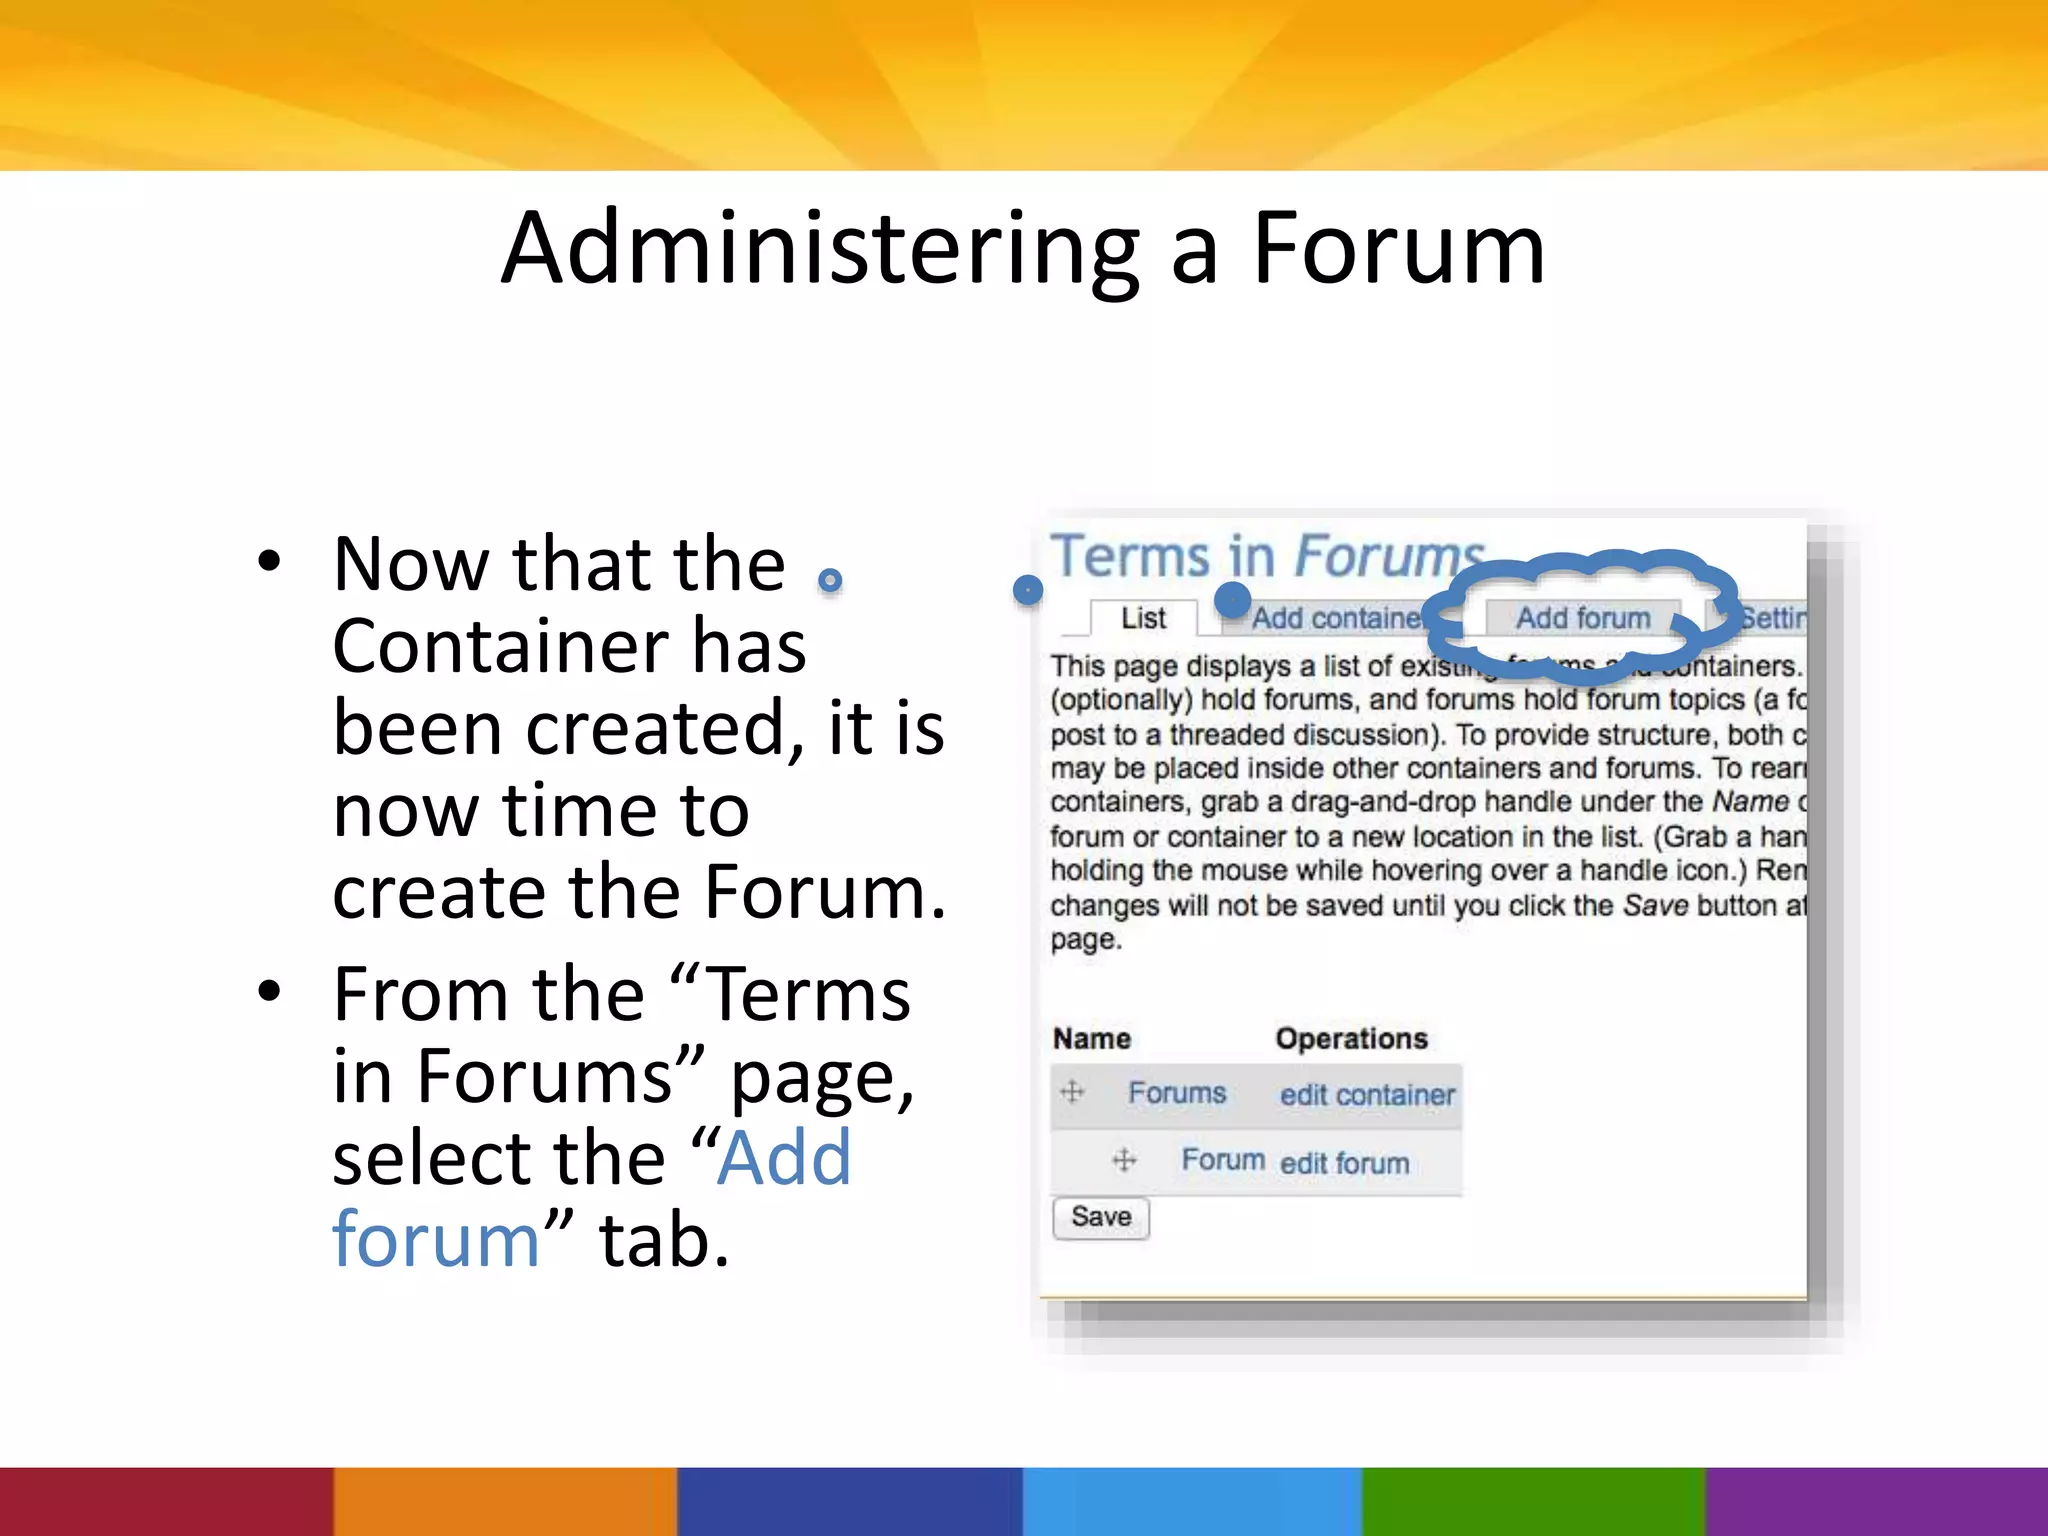
![Creating a Page: Body [Image Upload]
• From here, the image can
be formatted to fit the
user’s needs
• The image dimensions
can be set using the
“Width” and “Height”
fields
• The image alignment can
be set under the “Align”
field. This will allow the
image to be “right-
aligned”, “left-aligned,
etc.](https://image.slidesharecdn.com/2013nvcvoadportalprojectdzedits-150206121250-conversion-gate01/75/2013-NVC-Voad-Portal-Project-17-2048.jpg)
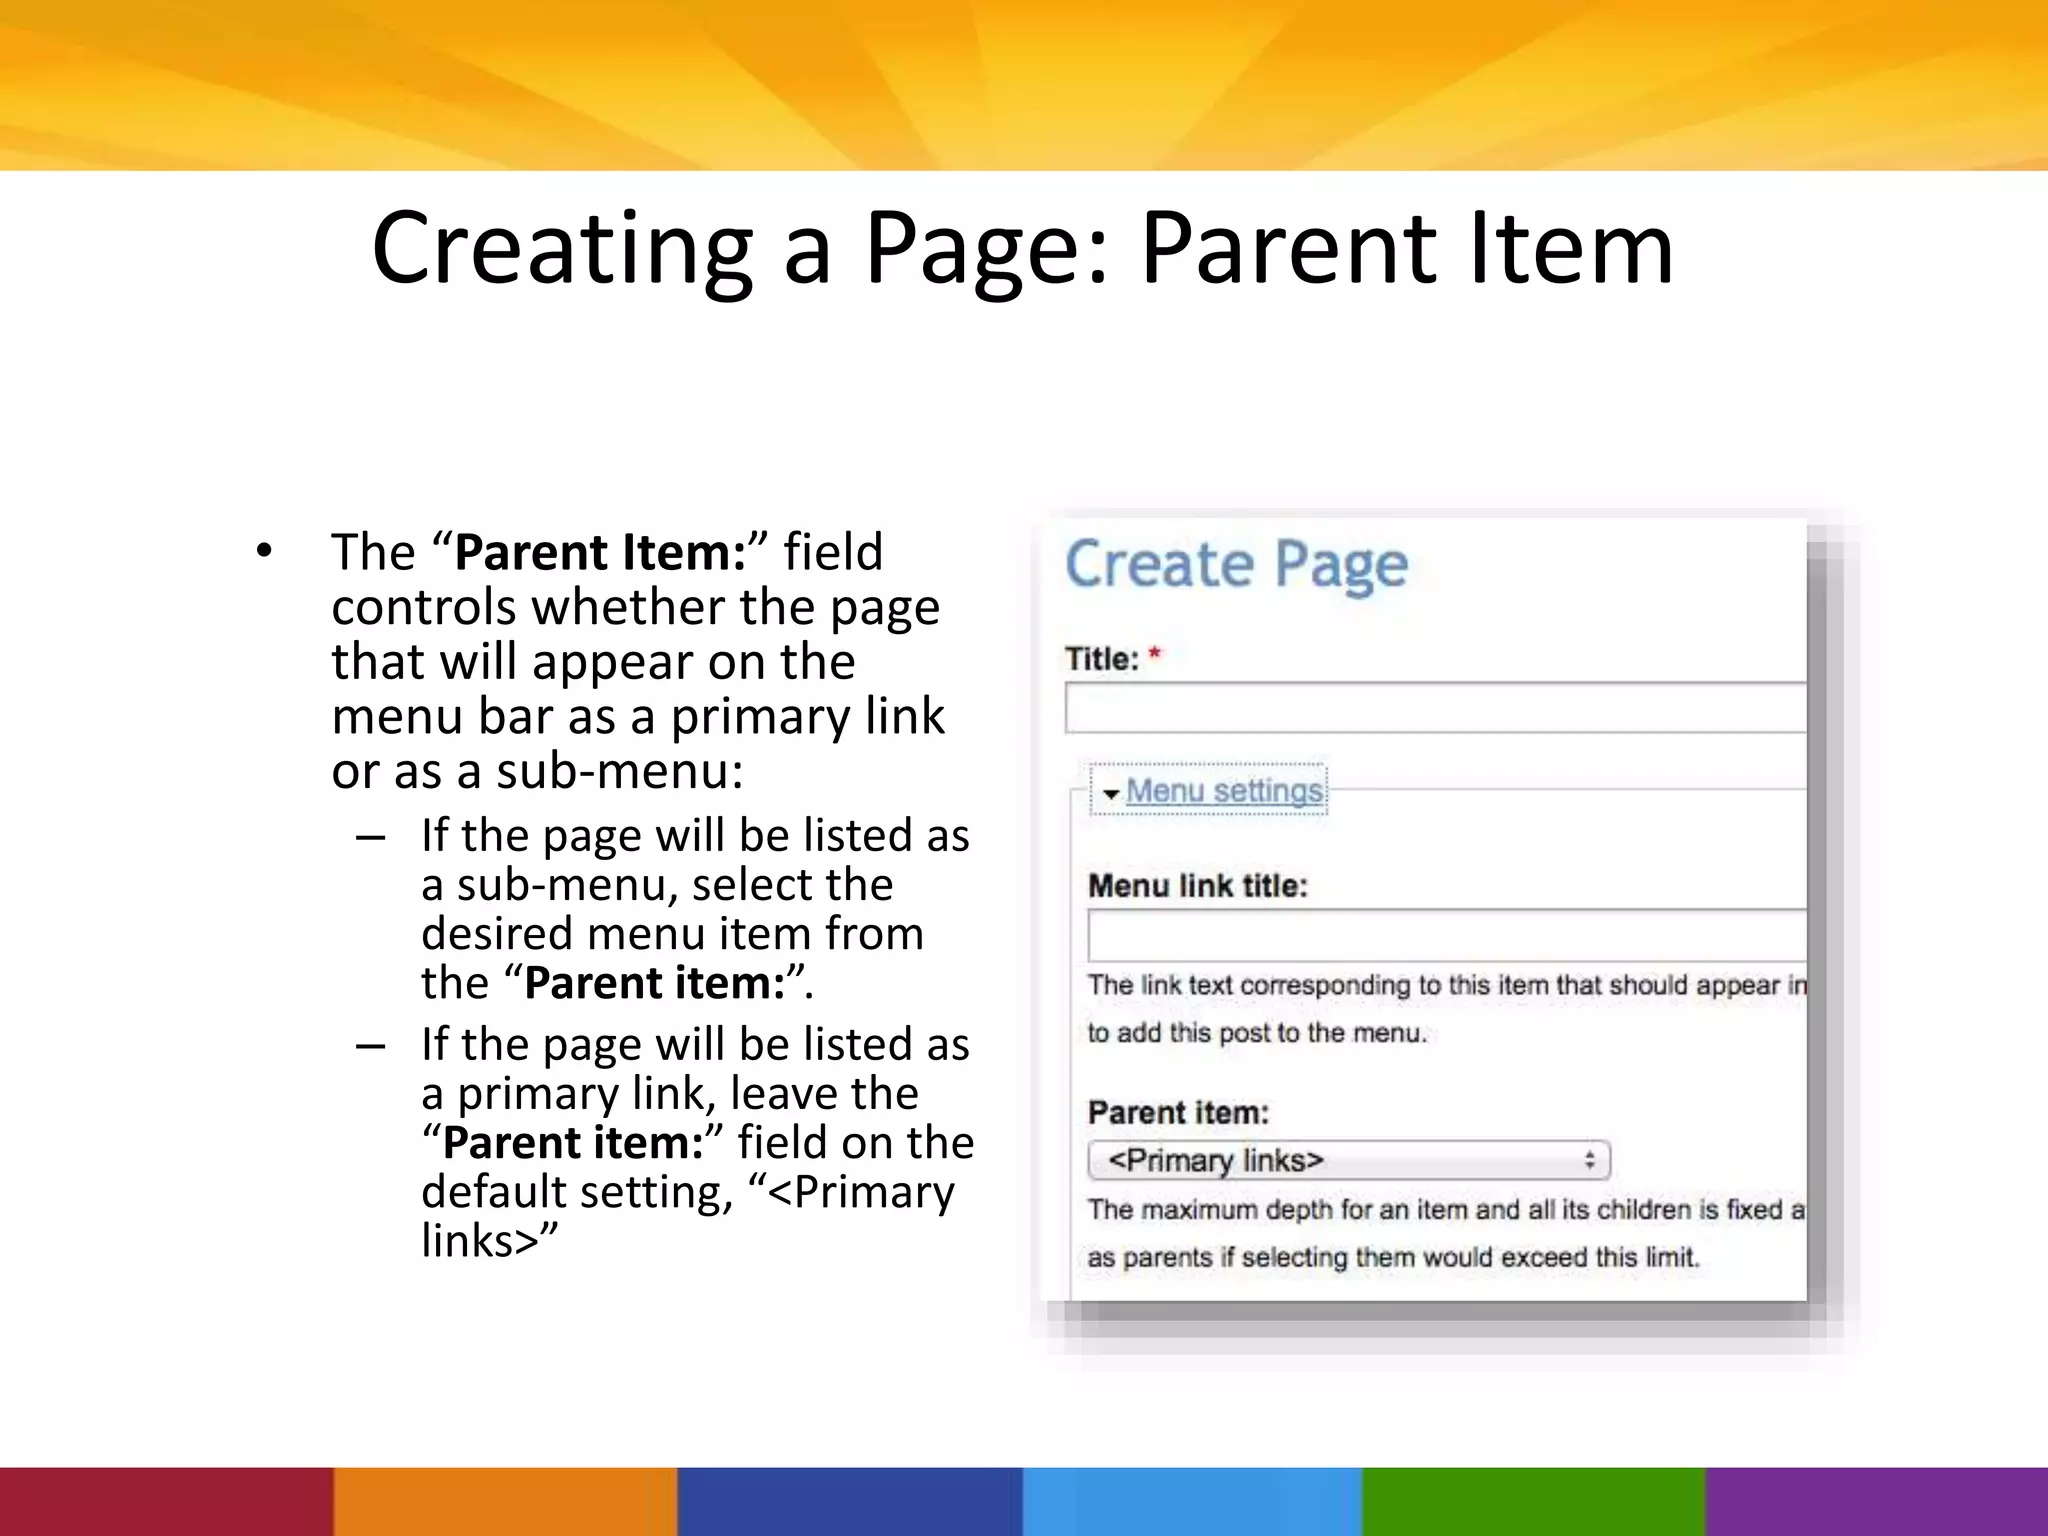
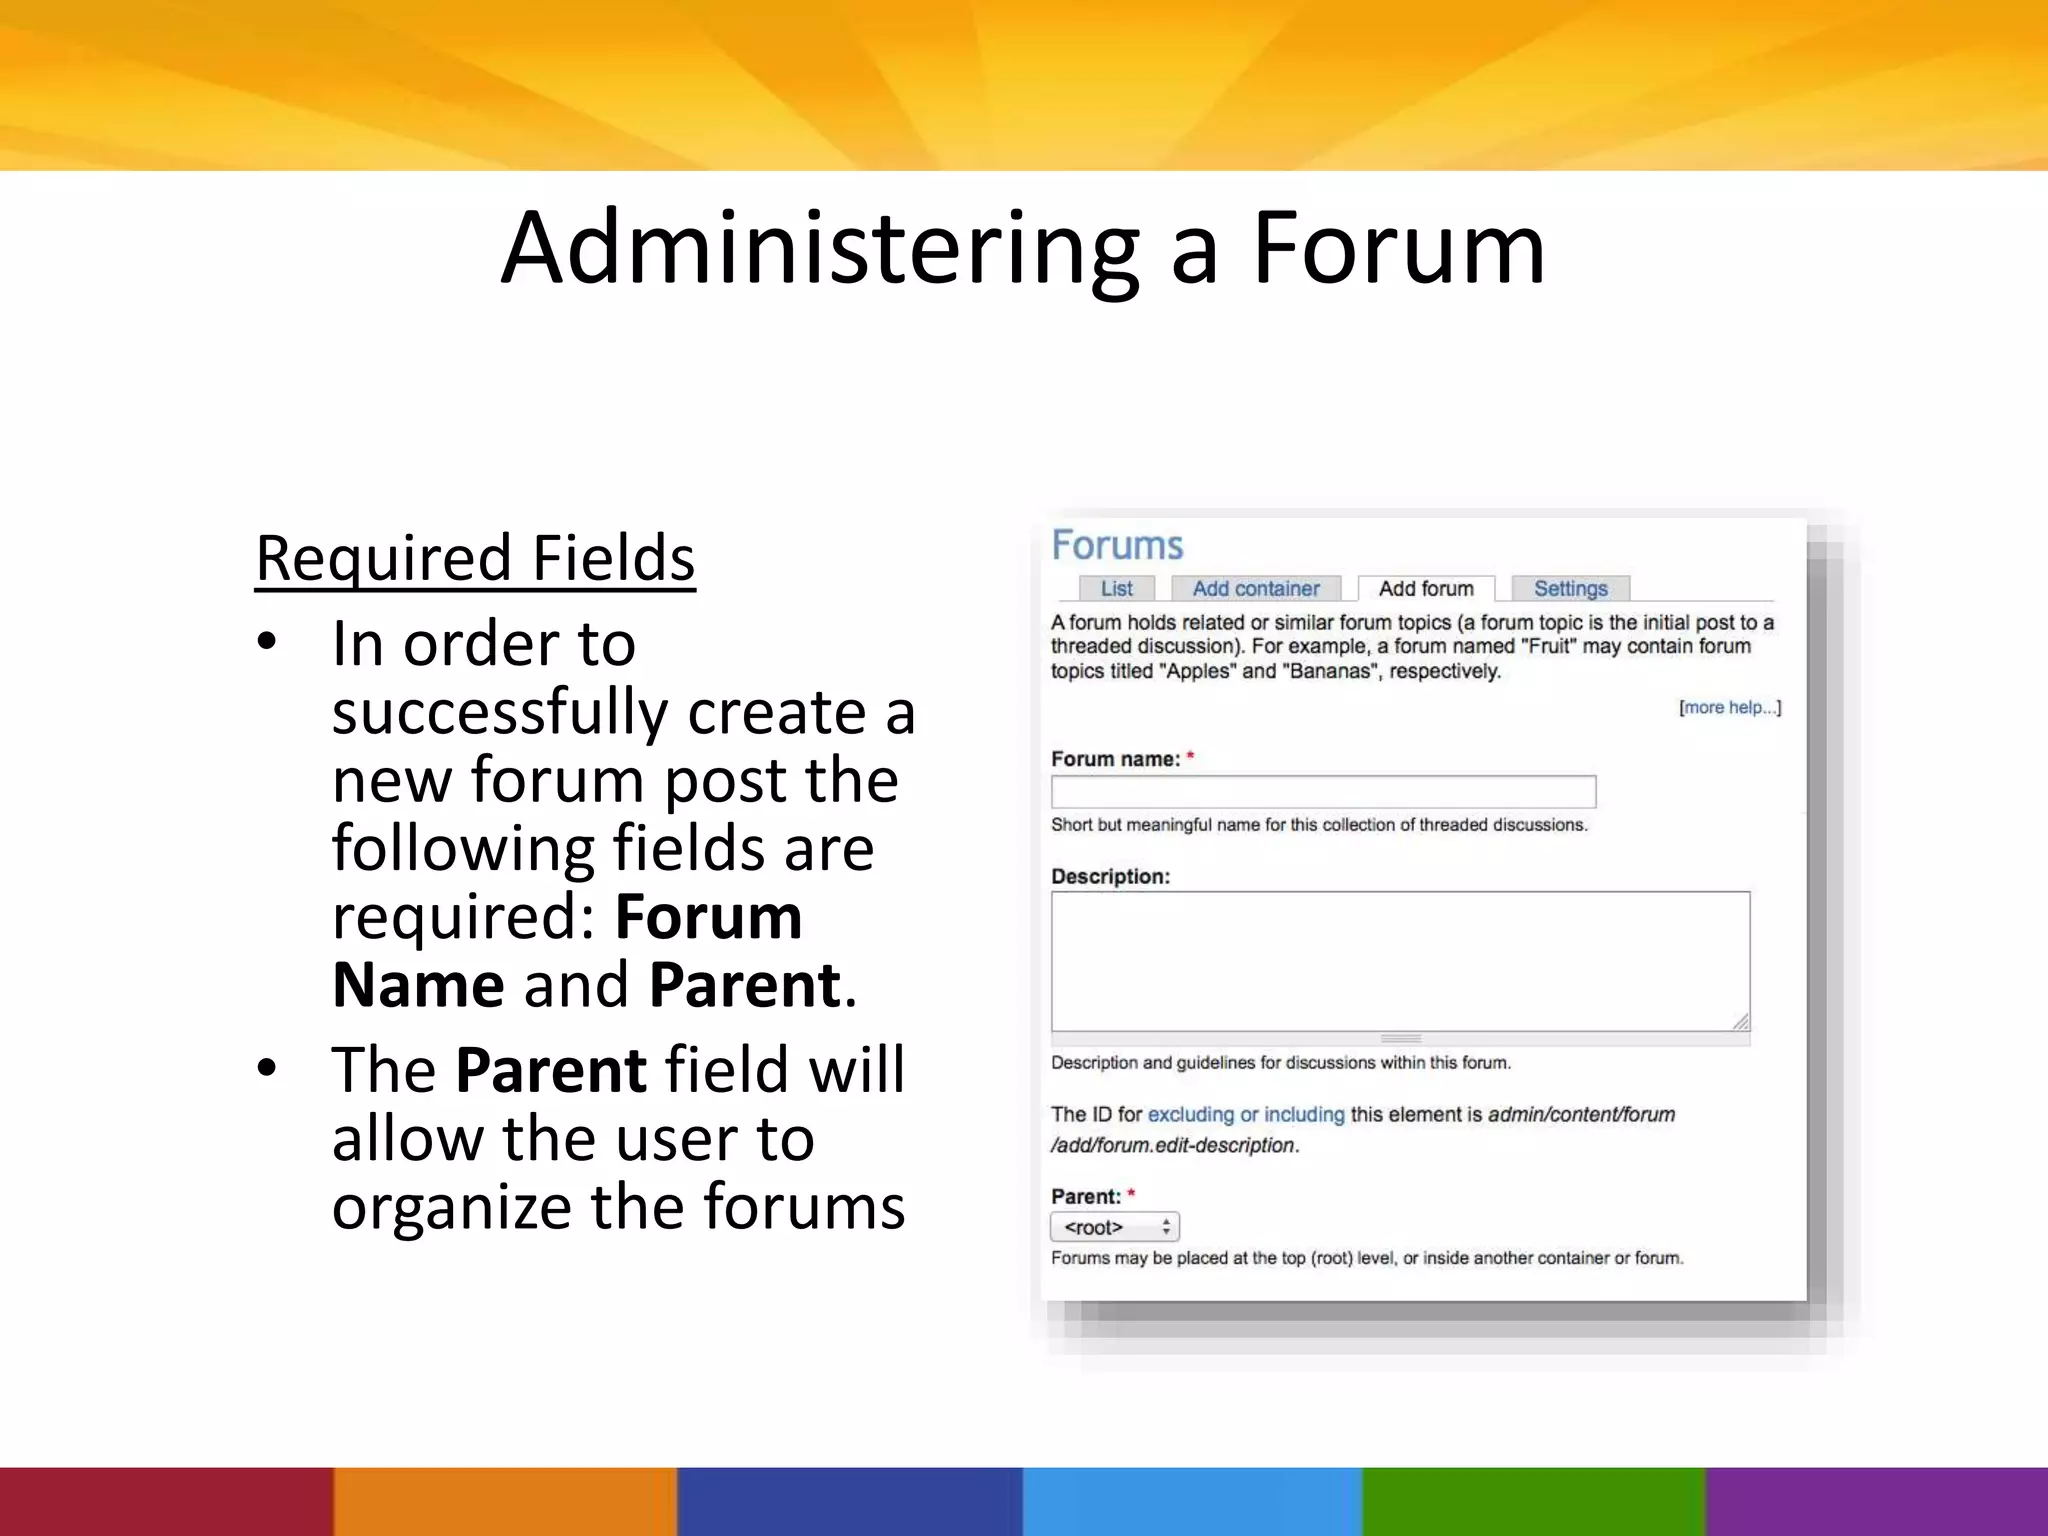
![Creating a Page: Body [Hyperlink]
• Adding hyperlinks to the
CMS requires selecting this
button, which will bring up
a new window
• The secondary hyperlink
symbol allows the user to
remove the hyperlink](https://image.slidesharecdn.com/2013nvcvoadportalprojectdzedits-150206121250-conversion-gate01/75/2013-NVC-Voad-Portal-Project-18-2048.jpg)
![Creating a Page: Body [Adding Tables]
• Adding tables to
the CMS requires
selecting this
button, which
will bring up a
new window](https://image.slidesharecdn.com/2013nvcvoadportalprojectdzedits-150206121250-conversion-gate01/75/2013-NVC-Voad-Portal-Project-19-2048.jpg)
![Creating a Page: Body [Adding Tables]
• Within each box, the
user can add in their
data
• Tables can be used to
organize data on the
page
• The borders can also be
made to be invisible](https://image.slidesharecdn.com/2013nvcvoadportalprojectdzedits-150206121250-conversion-gate01/75/2013-NVC-Voad-Portal-Project-20-2048.jpg)
![Creating a Page: Body [Coloring]
• Changing the color of the
font, can be done by
selecting “A” button with
the color squares
• Adding color to the area
behind the text can be
done by selecting the
yellow “A” button](https://image.slidesharecdn.com/2013nvcvoadportalprojectdzedits-150206121250-conversion-gate01/75/2013-NVC-Voad-Portal-Project-21-2048.jpg)


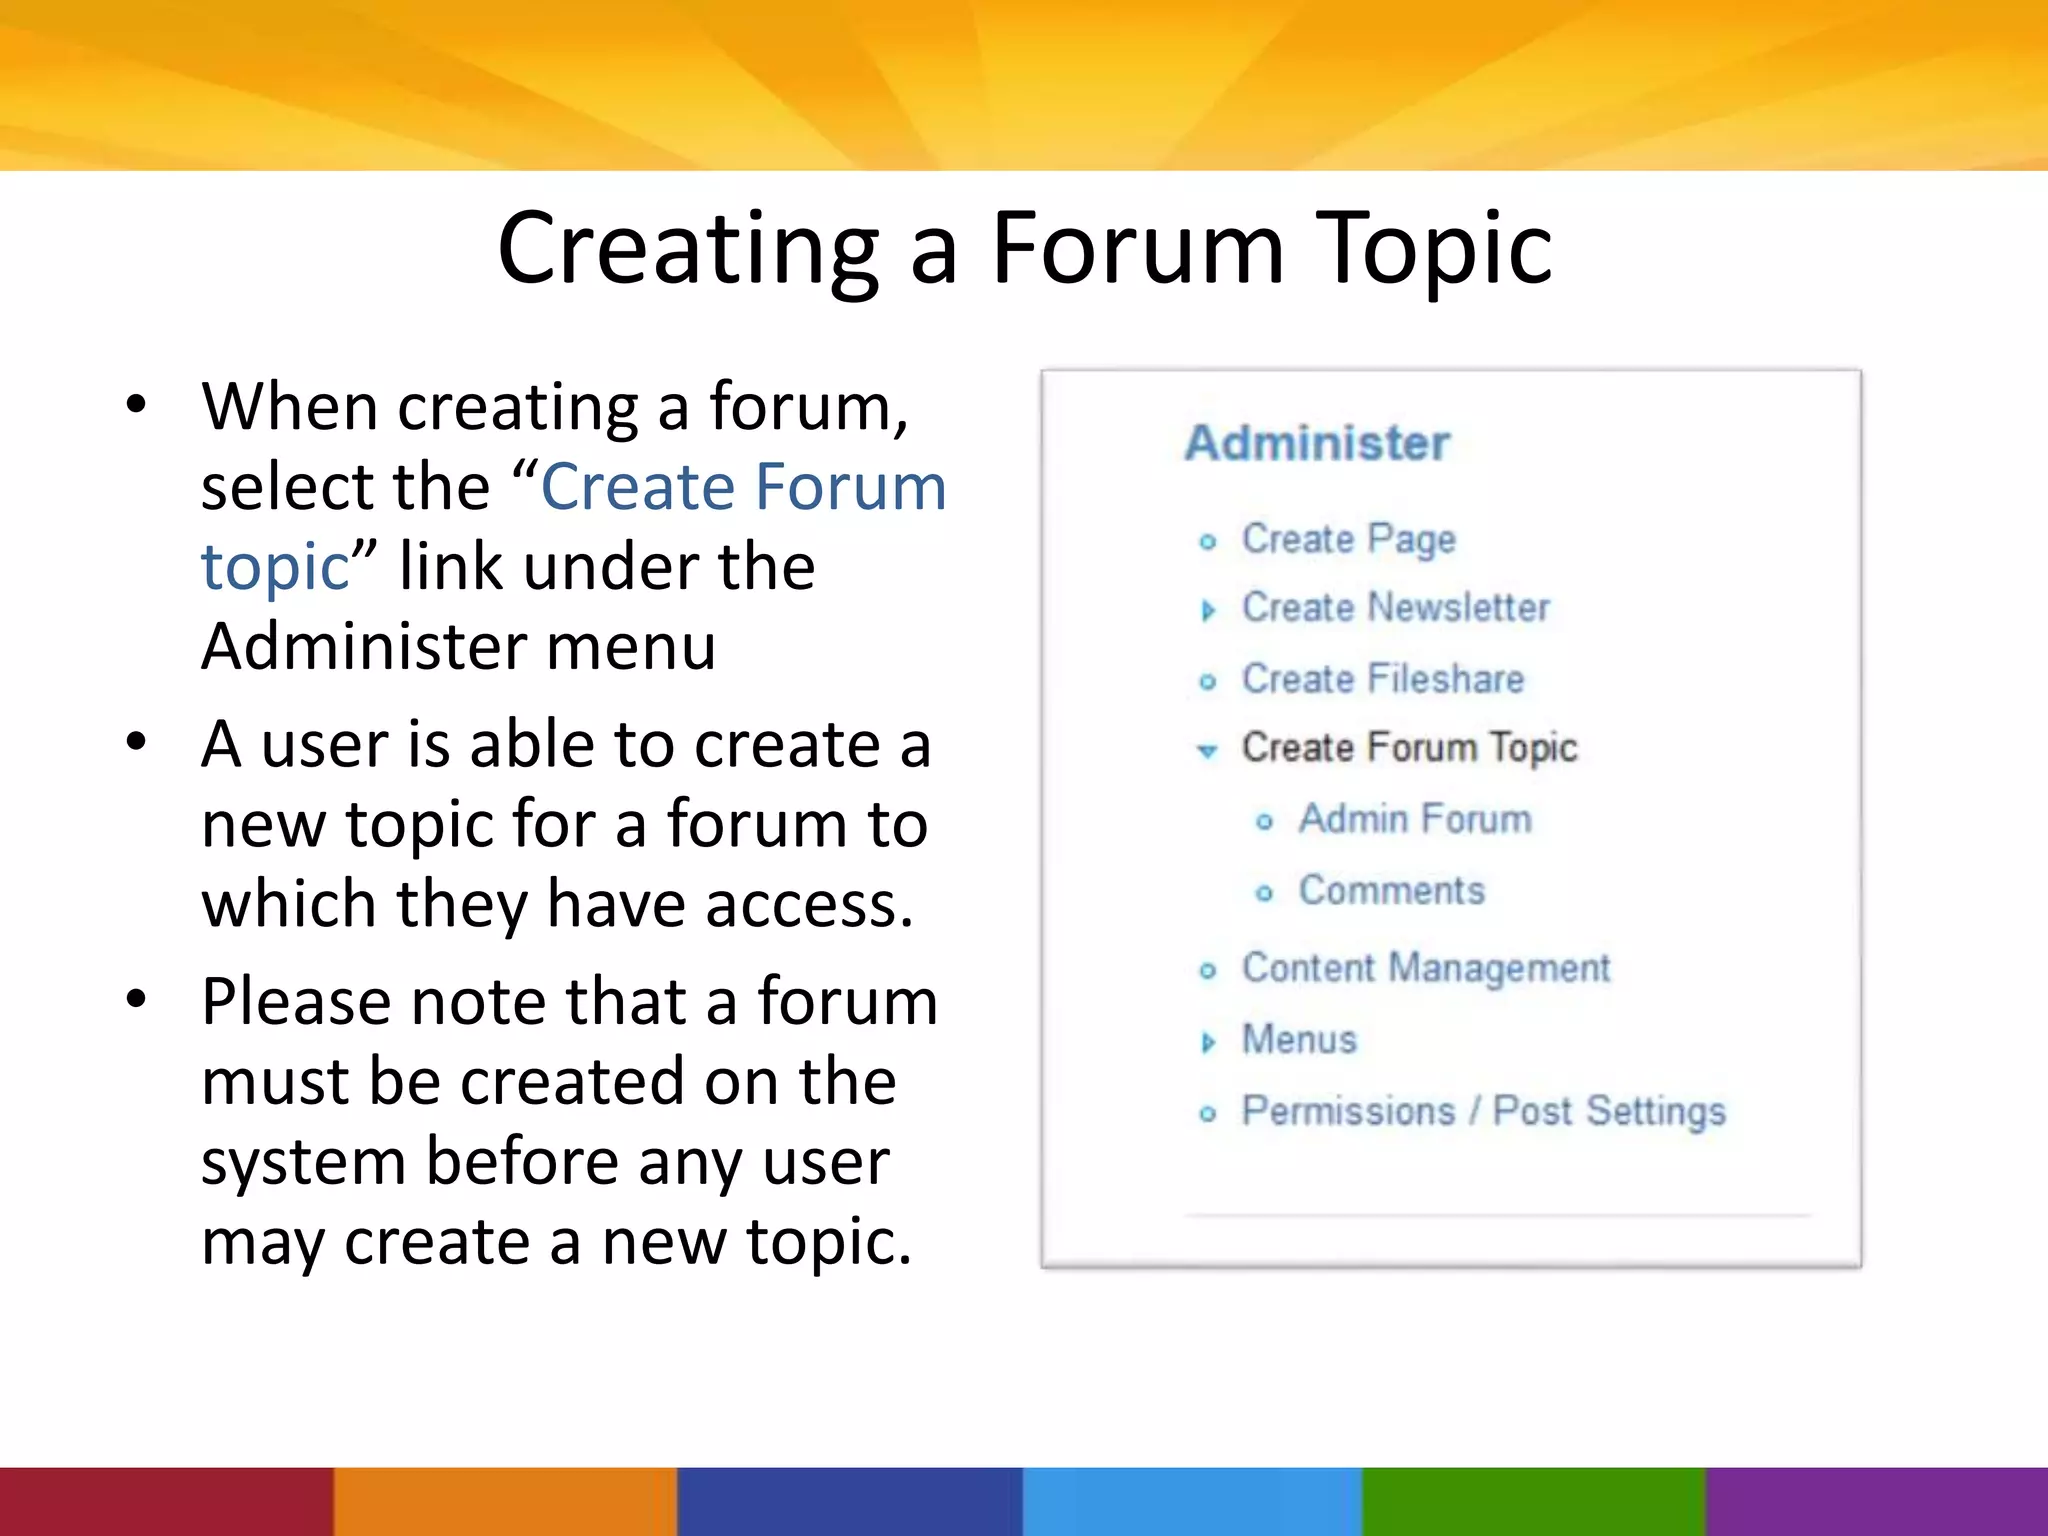

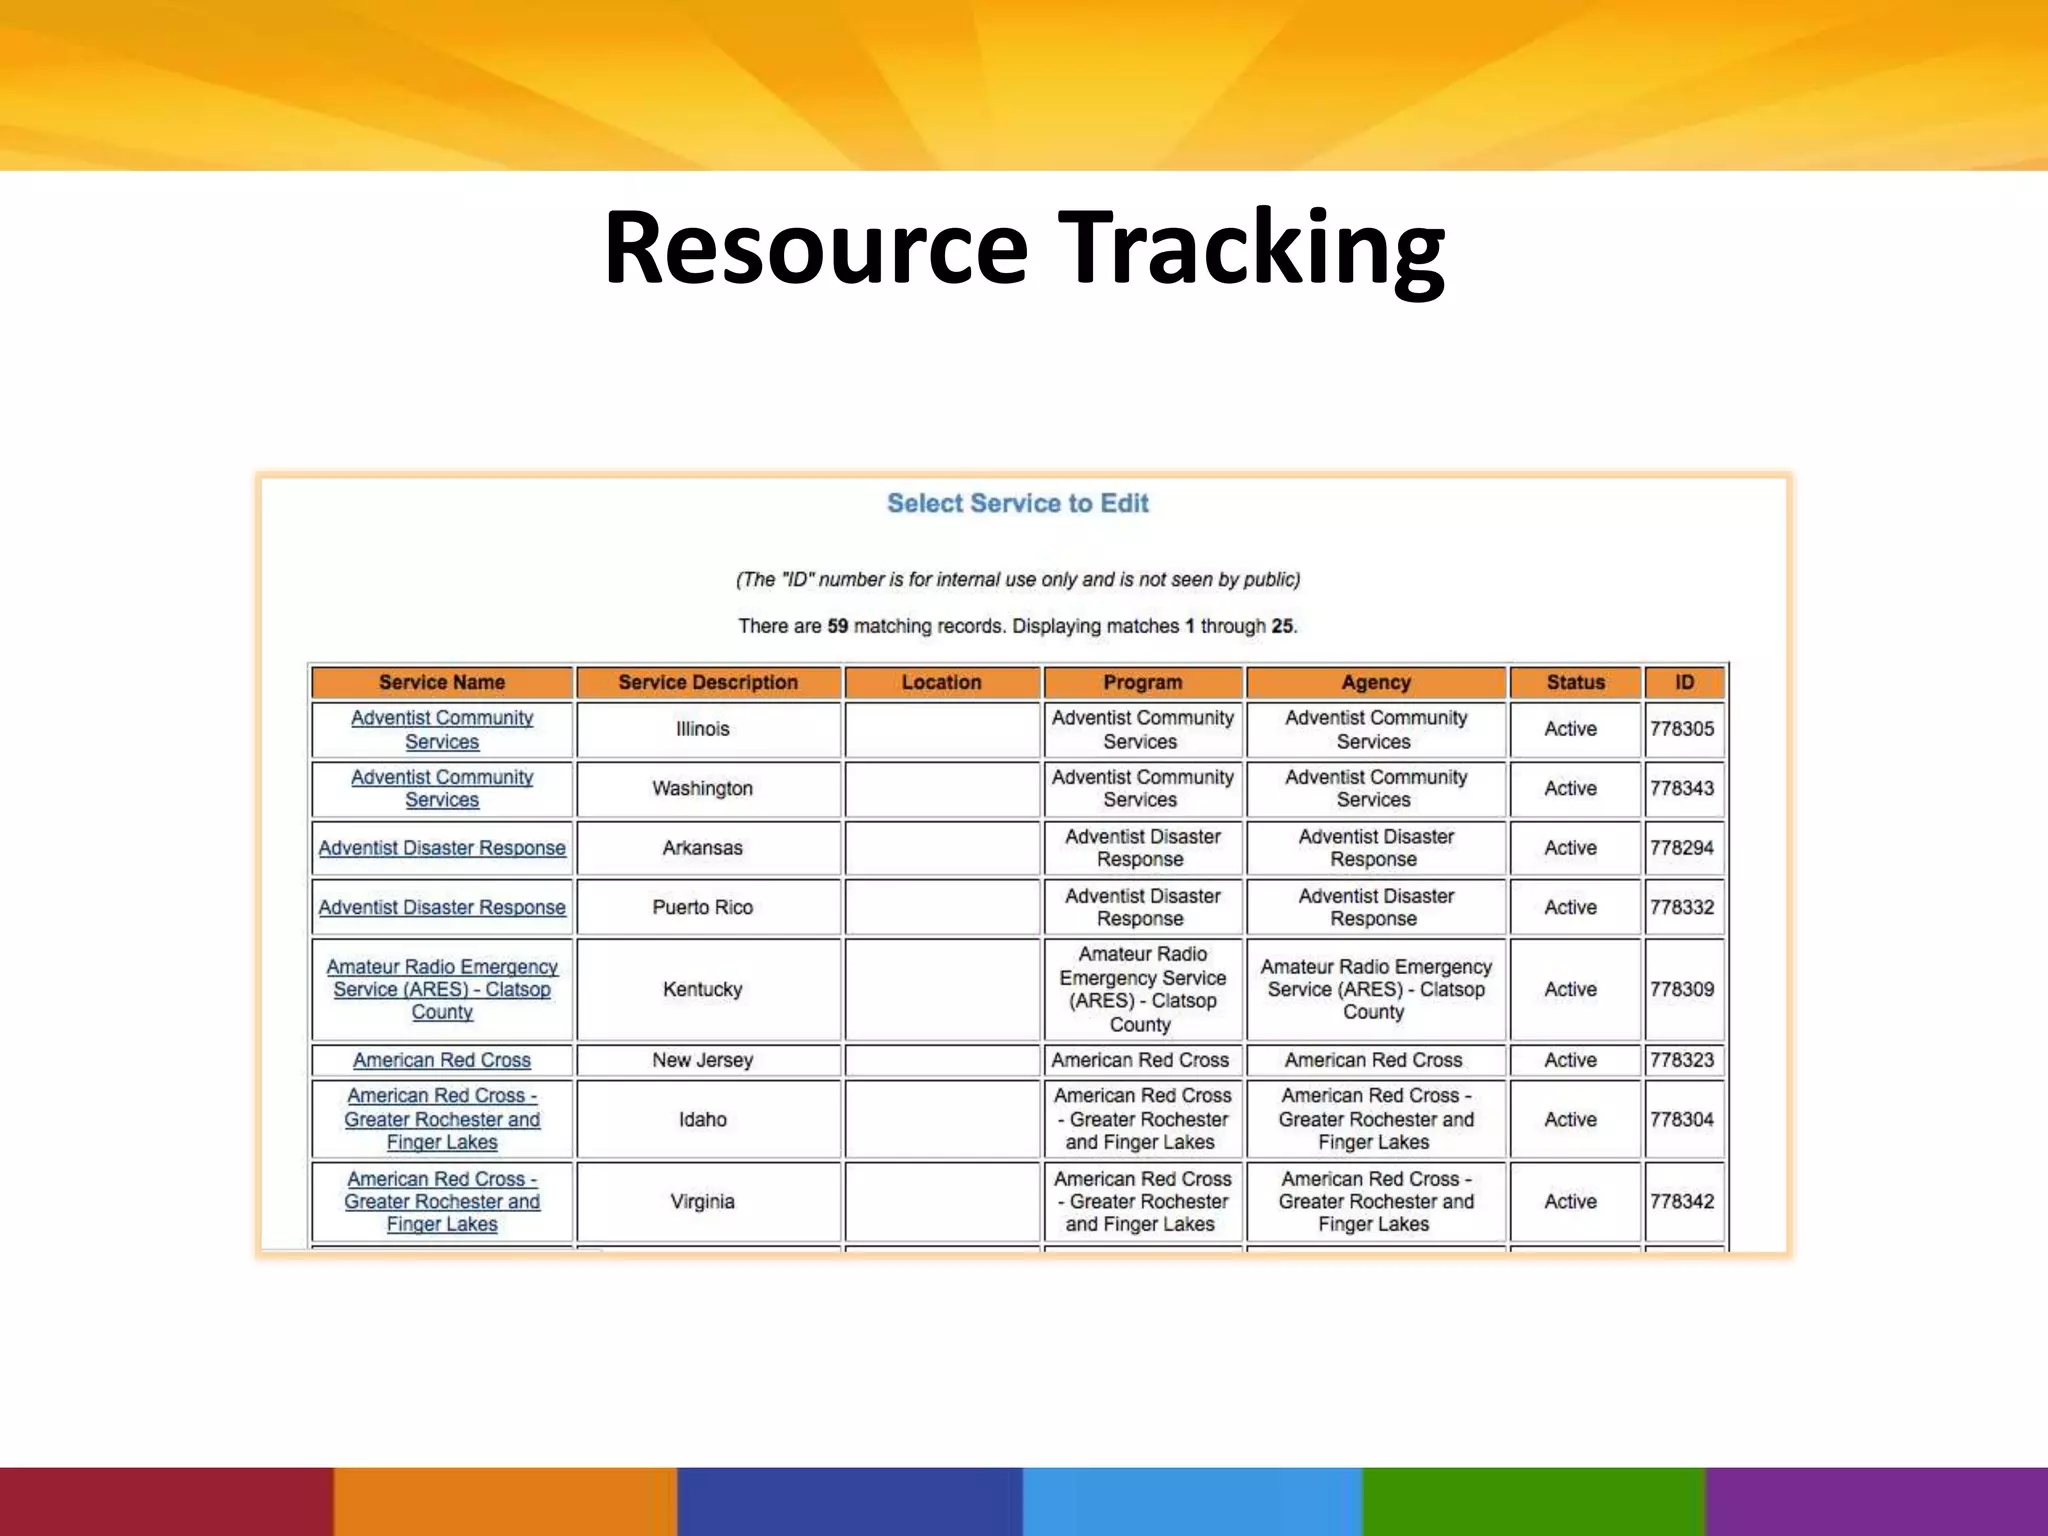

This document provides an overview and instructions for using a Content Management System (CMS) called CommunityOS to manage various types of content for state Voluntary Organizations Active in Disaster (VOAD) websites. It describes how to create pages, newsletters, fileshares, forums and customize the website. Users can contact National VOAD for training and support on using CommunityOS to manage content for their state VOAD portal.


![Introduction-to-Content-Management-System_(1)[1]1.pptx](https://cdn.slidesharecdn.com/ss_thumbnails/introduction-to-content-management-system111-250709181255-41860a4c-thumbnail.jpg?width=640&height=640&fit=bounds)


