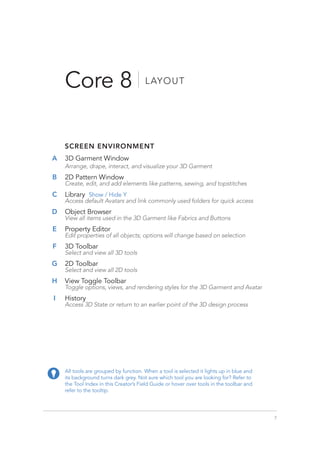
The document provides an overview of the basic principles and tools in the CLO virtual fashion program, known as the Core 8. It discusses the layout of the interface, navigation tools, selection tools, simulation features, arrangement and avatar tools, sewing functions, material application, particle distance settings, and a tool index. The goal is to introduce users to the main components and capabilities of the program.


![Copyright 2017 © CLO Virtual Fashion Inc. All Rights Reserved.
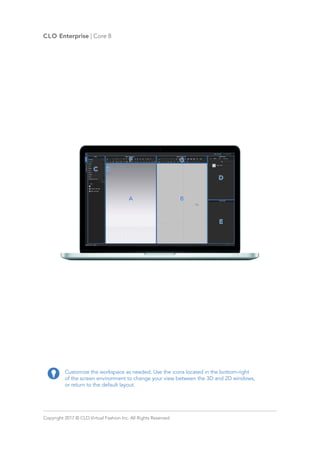
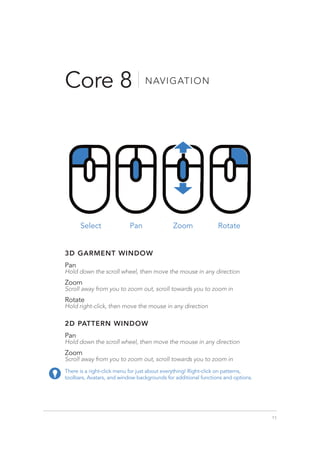
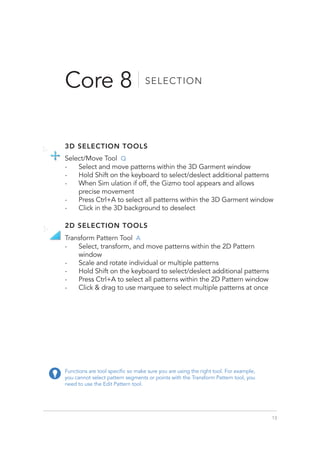
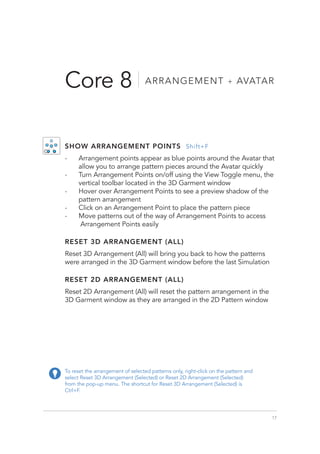
CLO Enterprise | Core 8
The Gizmo allows for specific control of objects in the 3D Garment
window:
-
- Utilize the Gizmo when Arrangement Points do not offer enough
precision
-
- Gizmo only appears when Simulation is off
-
- Lines move the object along the x,y,z axes
-
- Circles rotate the object along the x,y,z axes
-
- The yellow square moves the pattern
-
- The axis of the Gizmo depends on the current viewpoint; a
different viewpoint will alter the direction of movement
-
- To hide the Gizmo, but maintain the current selection, press the
Esc-key
GIZMO TOOL
SUPERIMPOSE OVER Ctrl+[
SUPERIMPOSE UNDER Ctrl+]
SUPERIMPOSE SIDE
Use Superimpose to arrange patterns directly over, under, or on the
side of the patterns they are sewn to. Sewing must be applied to
patterns for Superimpose to work.](https://image.slidesharecdn.com/clo3dmanual-240201063653-0e874e7d/85/Clo3D-Manual-pdf-18-320.jpg)


![Lect 1 Number systems and base conversions. [Autosaved].pptx](https://cdn.slidesharecdn.com/ss_thumbnails/lect1numbersystemsandbaseconversions-260111134109-67c2d865-thumbnail.jpg?width=640&height=640&fit=bounds)

