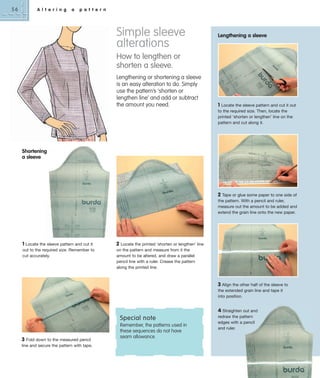
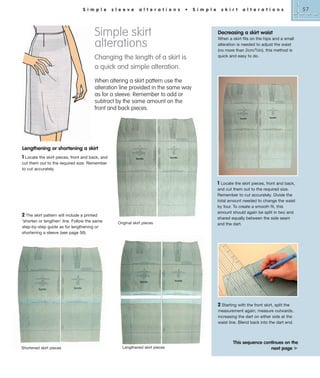
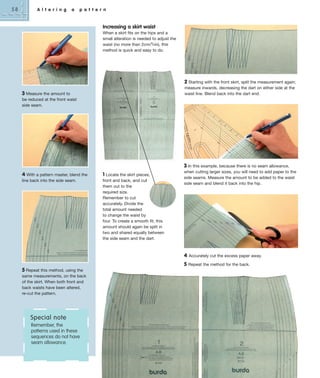
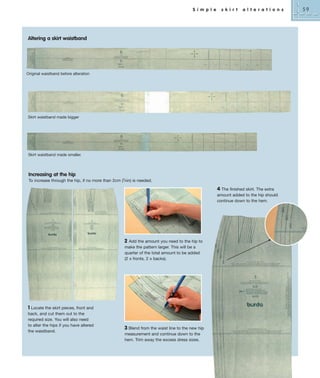
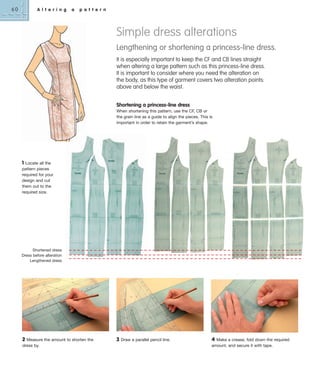
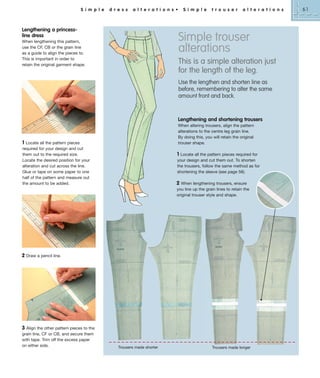
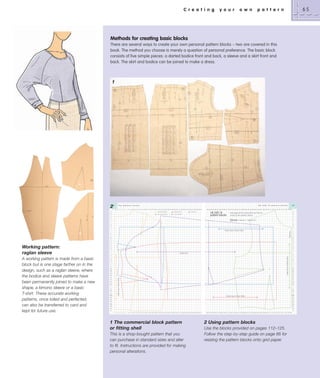
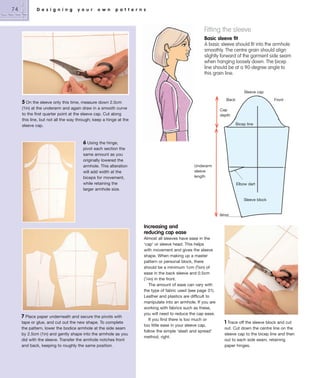
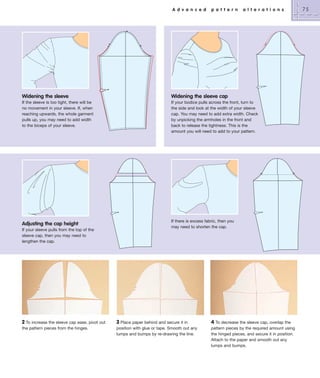
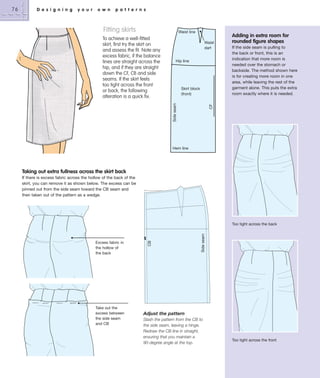
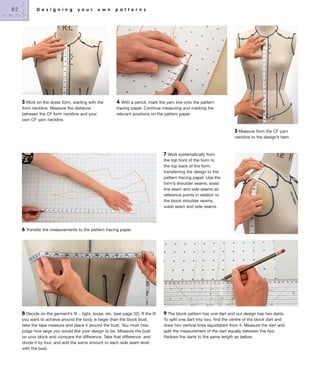
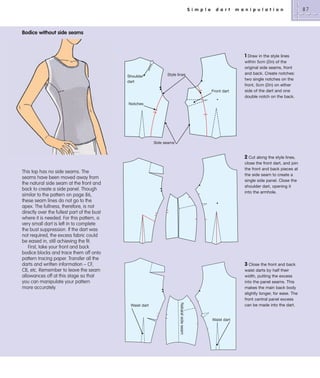
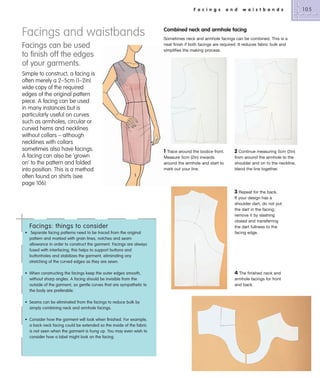
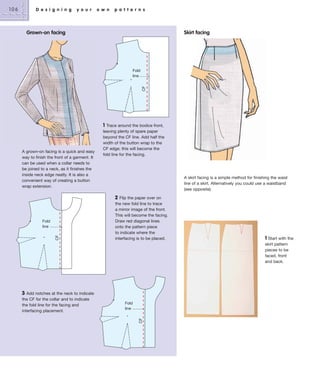
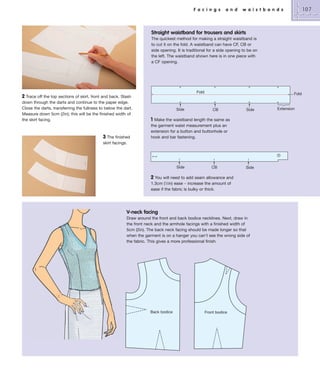
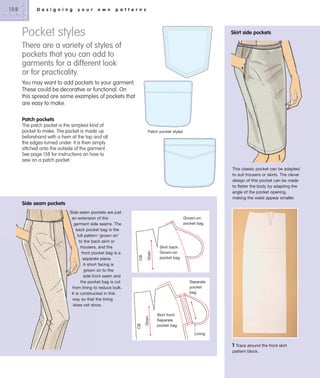
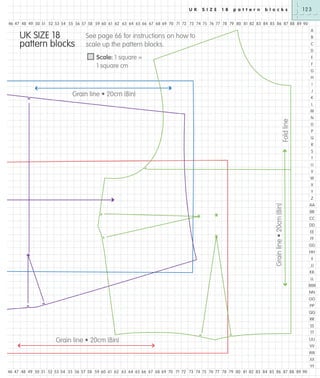
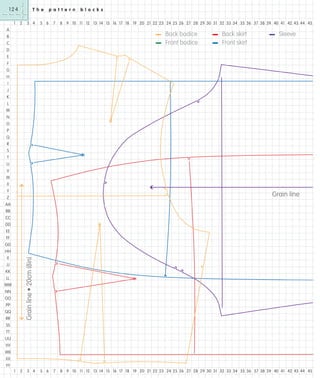
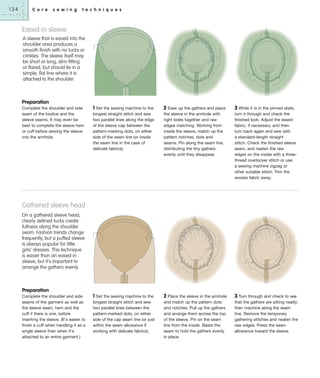
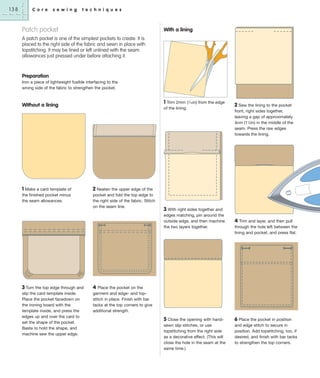
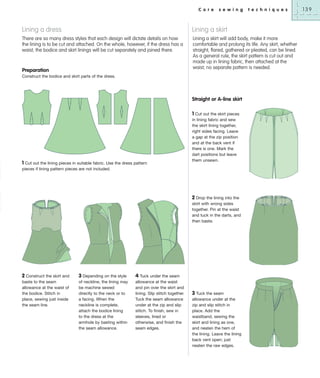
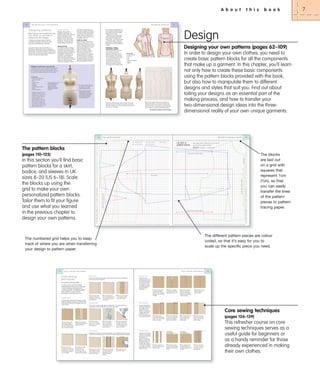
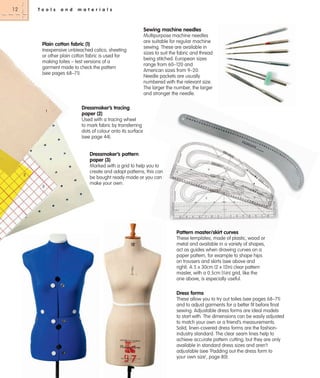
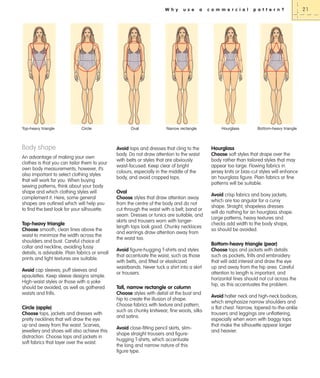
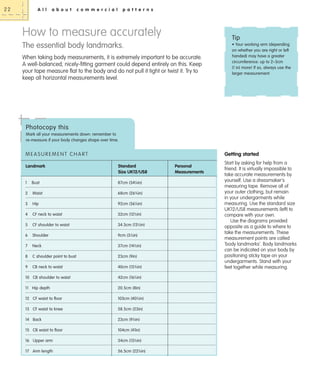
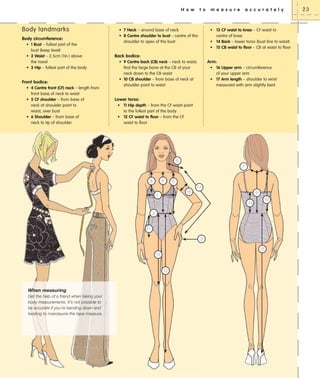
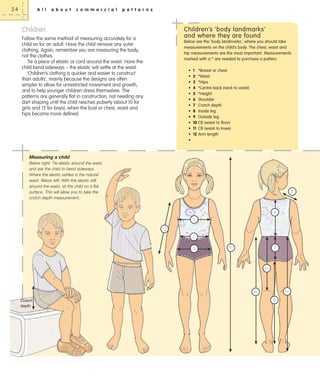
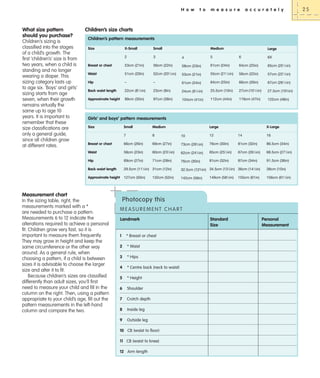
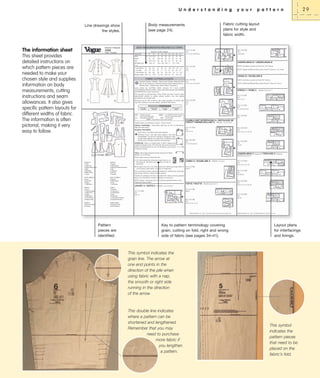
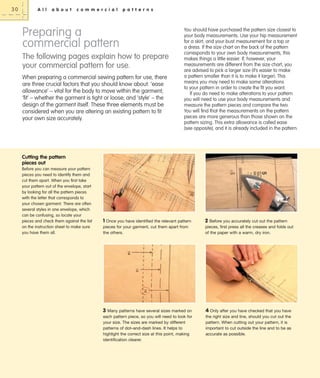
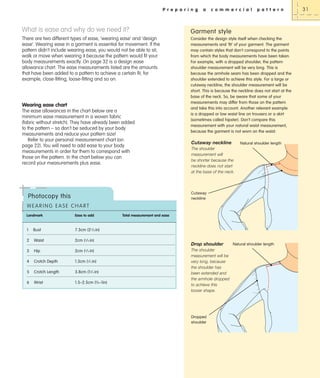
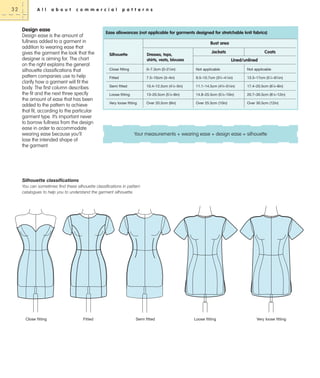
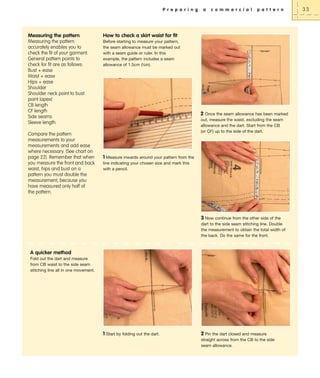
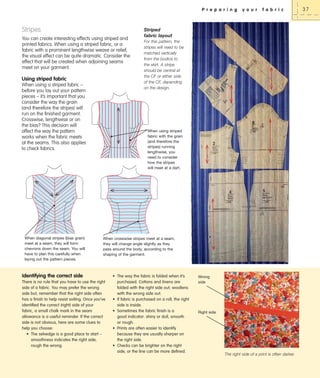
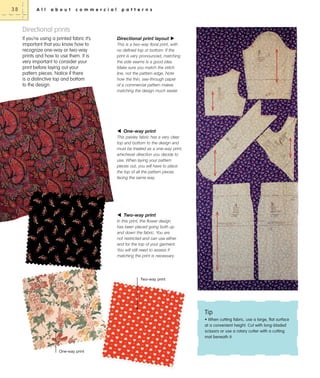
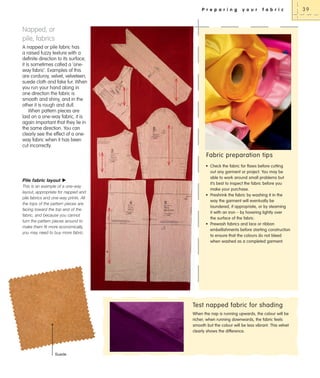
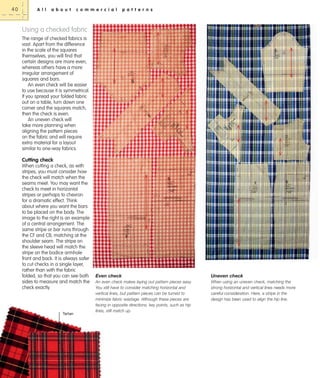
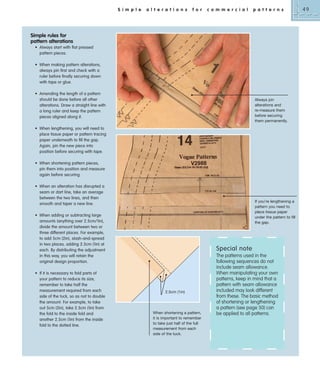
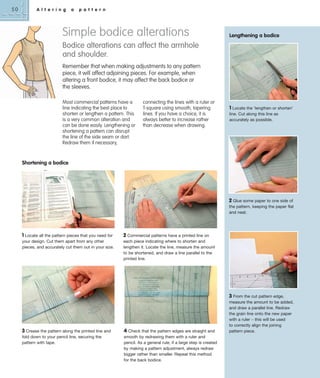
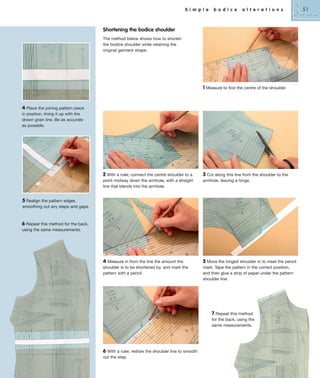
The document provides guidance on measuring the body accurately for sewing patterns. It includes a body measurement chart with explanations of key body landmarks to measure, such as bust, waist, hip, shoulders, arms, and torso. Readers are advised to remove outer clothing and have a friend help take accurate measurements. The correct techniques for using a measuring tape are explained. Sample measurements for a UK size 12/US size 8 are provided for comparison. Measuring accurately is important for obtaining a well-fitted garment.


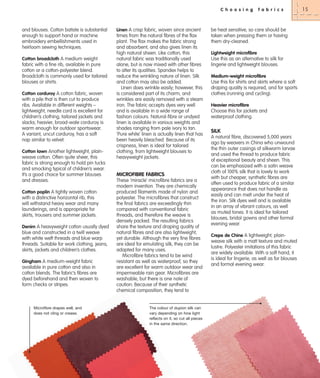

![S i m p l e
b o d i c e
a l t e r a t i o n s
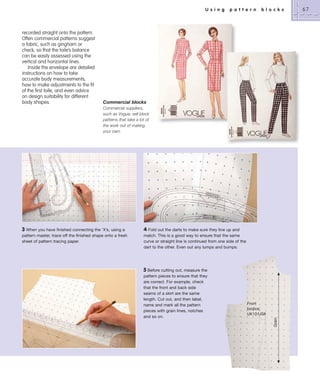
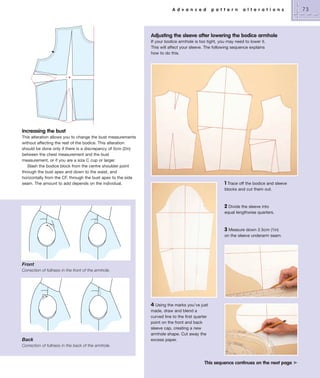
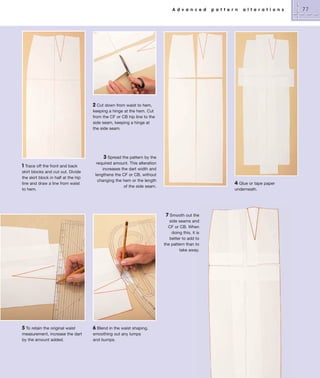
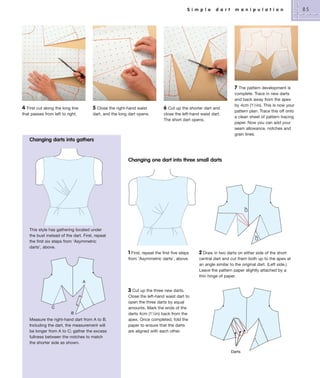
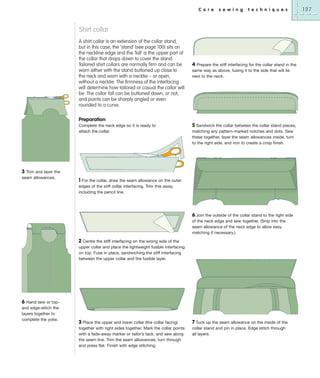
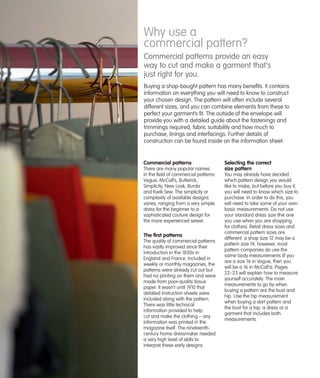
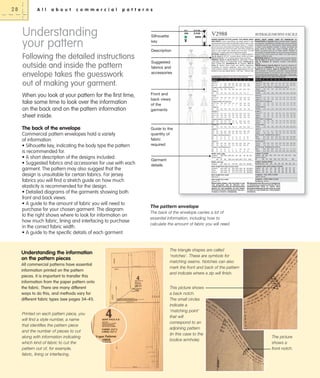
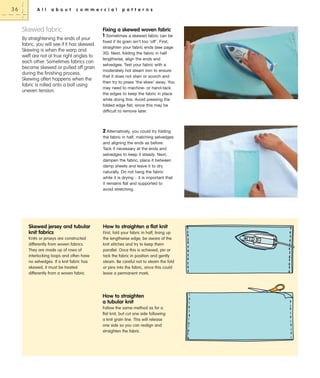
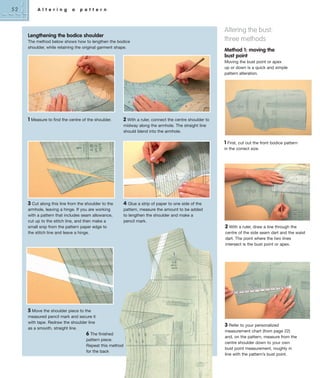
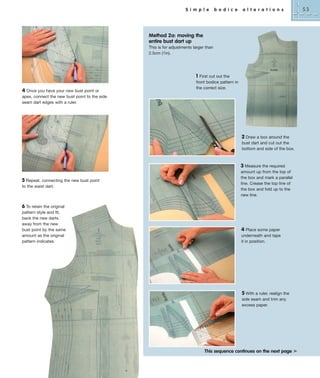
Method 3: increasing the bust by
small amounts, 2cm (3⁄4in) or less
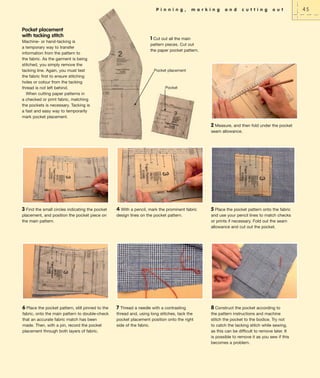
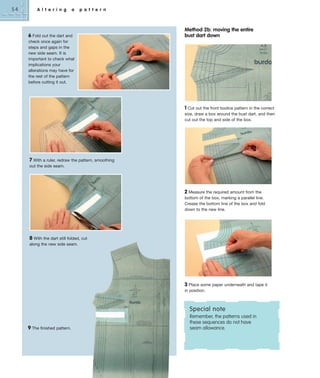
4 Fold out the dart and check for
steps and gaps in the new side
seam. It is important to check what
implications your alterations may
have for the rest of the pattern
before cutting it out.
5 With the dart still folded, redraw the
When a small amount extra is needed to
increase the bust, the seam allowance can be
used. Taking too much fabric from the seam
allowance will weaken your garment, so small
amounts only are possible, for example, 2cm
(3⁄4in) in total. Adding to the bust through the
side seams will also add to the armhole
circumference. To ensure the sleeve will fit
correctly, you will need to add the same
amount to the sleeve pattern and to the back.
2 Fold out the bust dart.
1 Cut out your pattern pieces in the correct
size and add extra paper to the side seams
of the bodice and sleeve (if there is no seam
allowance included on the pattern).
3 Measure out from the side seam the
amount to be added (up to 5mm [3⁄16in]).
side seam, smoothing out any steps
and gaps using a ruler.
6 The finished pattern.
4 With a pattern master, blend the added
measurement into the side seam while
the dart is folded closed.
6
Adding to the bust
circumference also
increases the armhole.
Add the same amount to
the sleeve bicep width.
5 Keeping the dart folded closed, cut
along the new side seam line.
55](https://image.slidesharecdn.com/howtouseadaptanddesignsewingpatterns-140126122350-phpapp01/85/How-to-use-adapt-and-design-sewing-patterns-56-320.jpg)