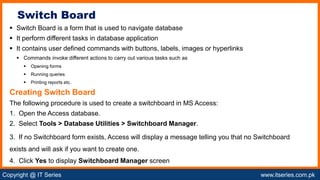
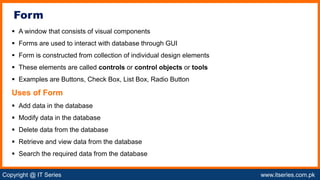
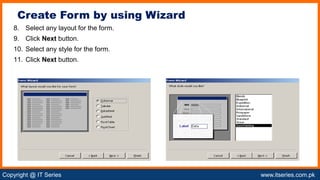
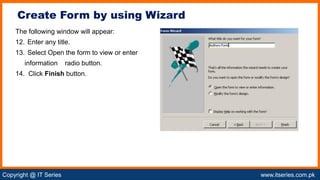
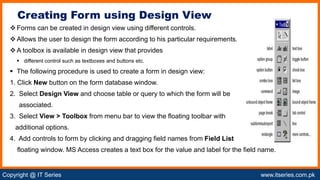
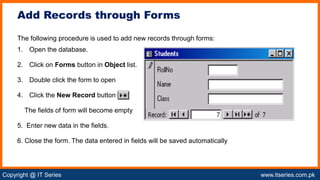
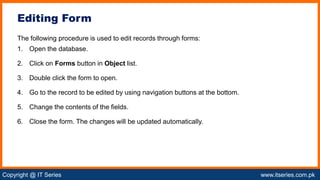
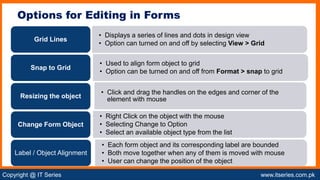
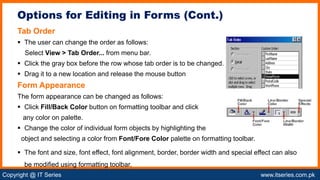
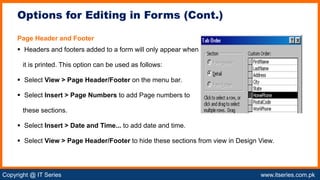
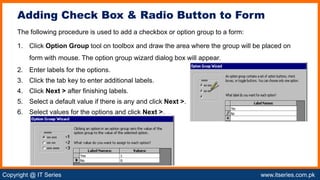
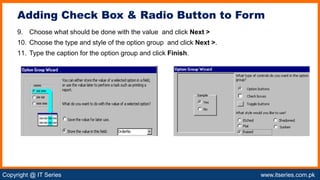
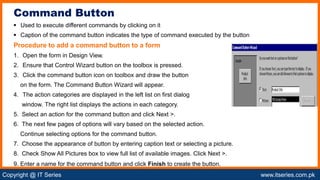
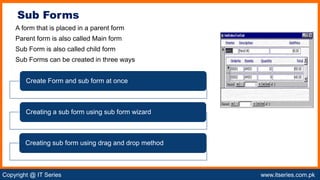
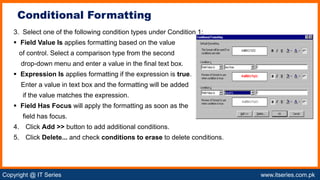
Chapter 7 covers forms and reports in MS Access, detailing types of forms, their creation using wizards and design view, and editing capabilities. It discusses controls such as text boxes, check boxes, and command buttons, alongside methods for using sub forms and conditional formatting. The chapter aims to enhance user interaction with databases through graphical user interfaces and efficient data manipulation methods.


![Copyright @ IT Series www.itseries.com.pk
possible to perform mathematical operation on character values
A textbox can be used as password field by modifying the properties of the textbox.
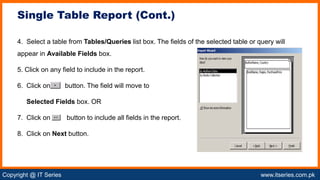
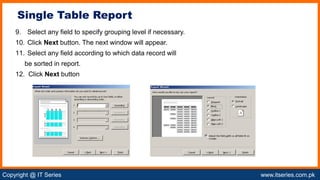
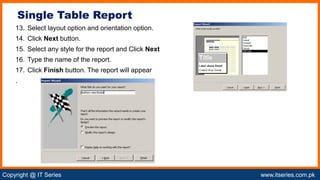
Each character should appear as an asterisk as the user types information in textbox.
The asterisks appear in the textbox as the user types in it
Actual characters will be saved in the database instead of asterisks.
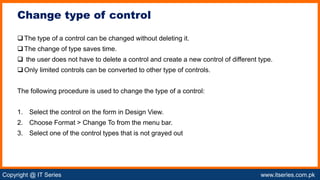
The following procedure is used to use a textbox as password field:
1. Select the text field in Design View.
2. Click Properties.
3. Select Data tab.
4. Click in Input Mask field and click button [...].
5. Choose Password from list of input masks and click Finish.
Tex Box using Password](https://image.slidesharecdn.com/chapter07microsoftaccessformsandreports-241117165410-58f9db22/85/Chapter07-Microsoft-Access-Forms-and-Reports-pdf-33-320.jpg)