1. The document provides step-by-step instructions for assembling a computer, outlining the necessary tools, materials, and 13 steps to complete the assembly.
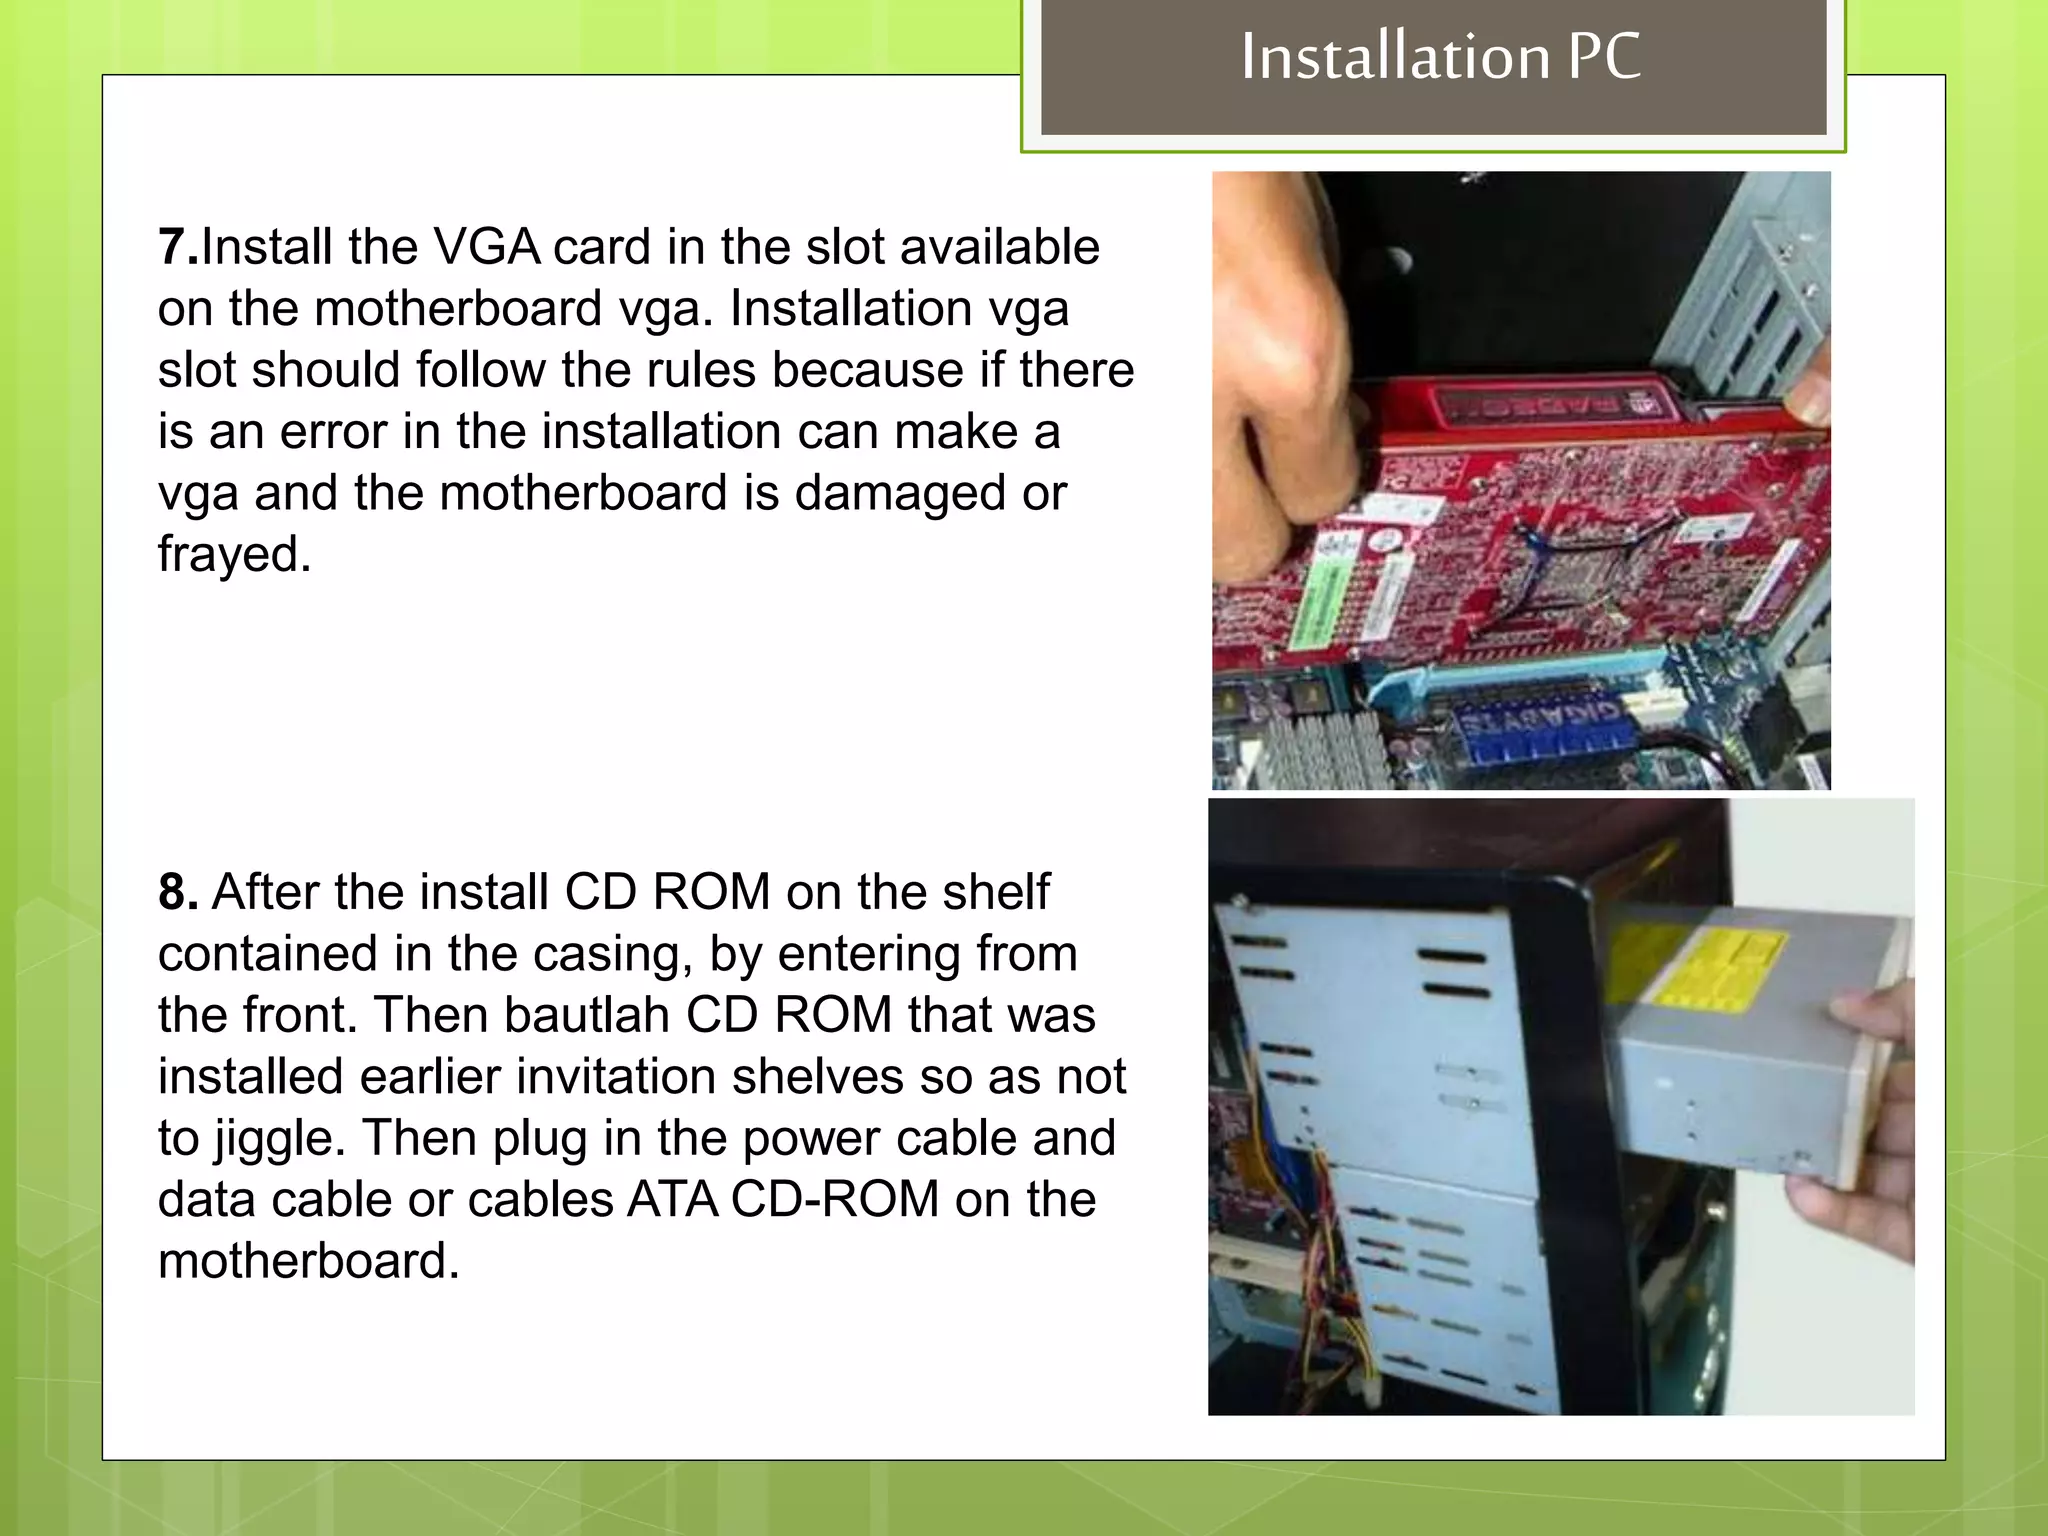
2. Key steps include laying the motherboard in place, installing the processor, RAM, VGA card, hard drive, power supply, and connecting all cables and components.
3. The final step is to test if the computer can successfully boot up once fully assembled.