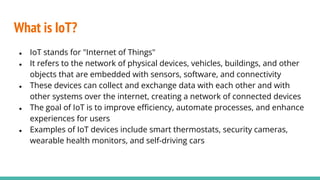
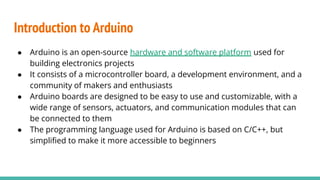
The Arduino community provides a wealth of tutorials, examples, and libraries that you can use to learn how to use Arduino and build your own projects
Some basic concepts to understand when working with Arduino include digital and analog signals, input and output pins, and pulse width modulation (PWM) for controlling the brightness of LEDs or the speed of motors
2. Chapter
1. What is IoT?
2. Introduction to Arduino
3. Getting started with Arduino
4. IoT project ideas with Arduino
5. Components used in IoT projects
6. Building an IoT project with Arduino
7. Tips and tricks for successful IoT projects
8. Conclusion
3. What is IoT?
● IoT stands for "Internet of Things"
● It refers to the network of physical devices, vehicles, buildings, and other
objects that are embedded with sensors, software, and connectivity
● These devices can collect and exchange data with each other and with
other systems over the internet, creating a network of connected devices
● The goal of IoT is to improve efficiency, automate processes, and enhance
experiences for users
● Examples of IoT devices include smart thermostats, security cameras,
wearable health monitors, and self-driving cars
4. Introduction to Arduino
● Arduino is an open-source hardware and software platform used for
building electronics projects
● It consists of a microcontroller board, a development environment, and a
community of makers and enthusiasts
● Arduino boards are designed to be easy to use and customizable, with a
wide range of sensors, actuators, and communication modules that can
be connected to them
● The programming language used for Arduino is based on C/C++, but
simplified to make it more accessible to beginners
5. Introduction to Arduino
● Arduino boards come in different shapes and sizes, with different features and
capabilities, but all of them are compatible with the Arduino development
environment and the vast library of existing code and examples
● Arduino is widely used in IoT projects because of its flexibility, affordability,
and ease of use.
6. Getting started with Arduino
● To get started with Arduino, you will need an Arduino board, a computer, and
the Arduino Integrated Development Environment (IDE)
● The Arduino IDE is a software application that you use to write, compile, and
upload code to your Arduino board
● Once you have installed the Arduino IDE, you can open it and start a new
sketch
● A sketch is a program written in Arduino programming language that you
upload to your Arduino board
● In the Arduino IDE, you can write code, test it with a simulator, and then
upload it to your Arduino board to see it in action
7. Getting started with Arduino
● The Arduino community provides a wealth of tutorials, examples, and
libraries that you can use to learn how to use Arduino and build your own
projects
● Some basic concepts to understand when working with Arduino include
digital and analog signals, input and output pins, and pulse width
modulation (PWM) for controlling the brightness of LEDs or the speed of
motors
● There are also many different types of Arduino boards available, each
with its own set of features and capabilities, so it's important to choose
the right board for your project.
8. IoT project ideas with Arduino
● Smart home automation: Use Arduino boards to control lights, HVAC
systems, and other appliances based on occupancy, temperature, and
other sensors. Examples include smart thermostats, lighting systems, and
security systems.
● Weather monitoring station: Use Arduino boards and sensors to collect
data on temperature, humidity, pressure, and other weather-related
parameters. This data can be used to inform local weather forecasts or to
optimize agricultural processes.
9. IoT project ideas with Arduino
● Motion detection and security systems: Use Arduino boards and motion
sensors to detect intruders or other unwanted activity in a space. This can
be used for home security or to monitor a warehouse or other
commercial space.
● Health monitoring devices: Use Arduino boards and health sensors to
monitor vital signs such as heart rate, blood pressure, and body
temperature. This data can be used to detect early warning signs of
medical conditions or to track fitness goals.
10. IoT project ideas with Arduino
● Smart irrigation system: Use Arduino boards and moisture sensors to
monitor soil moisture levels and control the irrigation of crops or gardens.
This can help conserve water and optimize crop yields.
● Smart traffic control: Use Arduino boards and traffic sensors to detect
traffic patterns and optimize traffic flow. This can be used in cities to
reduce congestion and improve traffic safety.
11. Components used in IoT projects
● Arduino board: The heart of the project, responsible for controlling and
processing data.
● Sensors: Collect data from the environment, such as temperature,
humidity, light, motion, and sound.
● Actuators: Respond to data collected from the sensors and perform
actions, such as turning on lights, opening doors, or controlling motors.
12. Components used in IoT projects
● Communication modules: Enable the Arduino board to communicate with
other devices, such as Wi-Fi or Bluetooth modules.
● Power supply: Provides power to the Arduino board and the other
components. This can be done through a battery or through a power
adapter.
● Prototyping board: A breadboard or perfboard can be used to create a
prototype of the project and to connect the components together.
13. Components used in IoT projects
● Jumper wires: Used to connect the components on the prototyping board
to the Arduino board.
● LEDs: Used to provide visual feedback, such as indicating that a sensor
has detected something or that an actuator is in use.
● Resistors: Used to limit the flow of electricity and to protect components
from damage.
14. Components used in IoT projects
● Capacitors: Used to store and release electrical energy and to smooth out
power fluctuations.
● Transistors: Used to amplify or switch electrical signals, such as
controlling the speed of a motor or the brightness of an LED.
15. Building an IoT project with Arduino
● Choose a project idea: Decide on the type of IoT project you want to build
based on your interests and needs.
● Gather components: Identify the required components for your project
and acquire them. You can find many of these components online or at
electronics stores.
● Create a circuit: Use a prototyping board and jumper wires to connect the
components to the Arduino board. Refer to the project schematic and
documentation for guidance.
16. Building an IoT project with Arduino
● Write and upload the code: Use the Arduino IDE to write the code for your
project. Test it using the simulator and then upload it to your Arduino
board.
● Test and troubleshoot: Test your project to ensure that it works as
intended. If there are issues, troubleshoot by checking the wiring and
code for errors
17. Building an IoT project with Arduino
● Refine and improve: Once your project is functional, you can refine and
improve it by adding more features or optimizing its performance.
● Documentation and sharing: Document your project by taking photos and
videos and writing instructions. Share your project with the Arduino
community to inspire and help others.
● Iterate and learn: Continue to build more projects and learn from your
mistakes and successes. Keep exploring and experimenting to push the
limits of what you can do with Arduino and IoT.
18. Tips and tricks for successful IoT projects
● Start small: Begin with simple projects to gain familiarity with the
components and the Arduino board. Gradually work your way up to more
complex projects.
● Plan ahead: Before you start building your project, take the time to plan it
out. Sketch out a schematic of the circuit and write out the code structure.
● Use libraries: Take advantage of the many libraries available in the
Arduino community. These can save time and simplify the coding process.
19. Tips and tricks for successful IoT projects
● Test frequently: Test your project frequently to catch errors early and
avoid costly mistakes. Test each component individually before
integrating them into the larger project.
● Document your project: Take pictures and videos of your project and
write down instructions. This will make it easier to troubleshoot and share
your project with others.
20. Tips and tricks for successful IoT projects
● Use modular design: Break down your project into smaller modules that
can be easily modified or replaced. This will make it easier to make
changes and improvements as needed.
● Power management: Pay attention to power consumption and use sleep
modes when possible to conserve battery life. Also, use appropriate
power supplies for your components to avoid damage.
21. Tips and tricks for successful IoT projects
● Be patient: Building IoT projects with Arduino can take time and require
patience. Don't get discouraged if things don't work the first time, keep
trying and learning from your mistakes.
● Collaborate: Join online forums or attend local maker groups to
collaborate with other Arduino enthusiasts. This can lead to new ideas,
feedback, and opportunities to learn from others.
22. Conclusion
● IoT projects with Arduino can be a fun and rewarding way to learn about
electronics and programming.
● With the wide range of components and resources available, there are
countless possibilities for building unique and innovative projects.
● By following best practices such as planning ahead, testing frequently,
and collaborating with others, you can increase your chances of success
and enjoy the process of building your own IoT projects.
23. Conclusion
● Remember to start small and work your way up to more complex
projects, and don't be afraid to experiment and learn from your mistakes.
● With a little patience and perseverance, you can become a proficient
Arduino maker and contribute to the vibrant and creative community of
IoT enthusiasts.
24. About TechieYan Technologies
Welcome to Techieyan Technologies! We are pioneers in Artificial Intelligence,
Robotics, Machine Learning, IOT, and Electronics. Our training offers real-time
industry projects to work on, making learning more fun and productive. So far,
we have trained over 2000+ students in these latest technologies and we
provide both online and classroom training. With us, you can get certified in
any of these courses, and get a chance to join our internship program - the
experience of a lifetime! We look forward to your joining us soon.
25. Contact Us
Address
16-11-16/V/24, Sri Ram Sadan, Moosarambagh, Malakpet
Dilsuknagar Hyderabad, Hyderabad, India - 500036
Landmark: -RTA Office
Phone No : +91 7075575787
Website: https://techieyantechnologies.com/