Downloaded 47 times


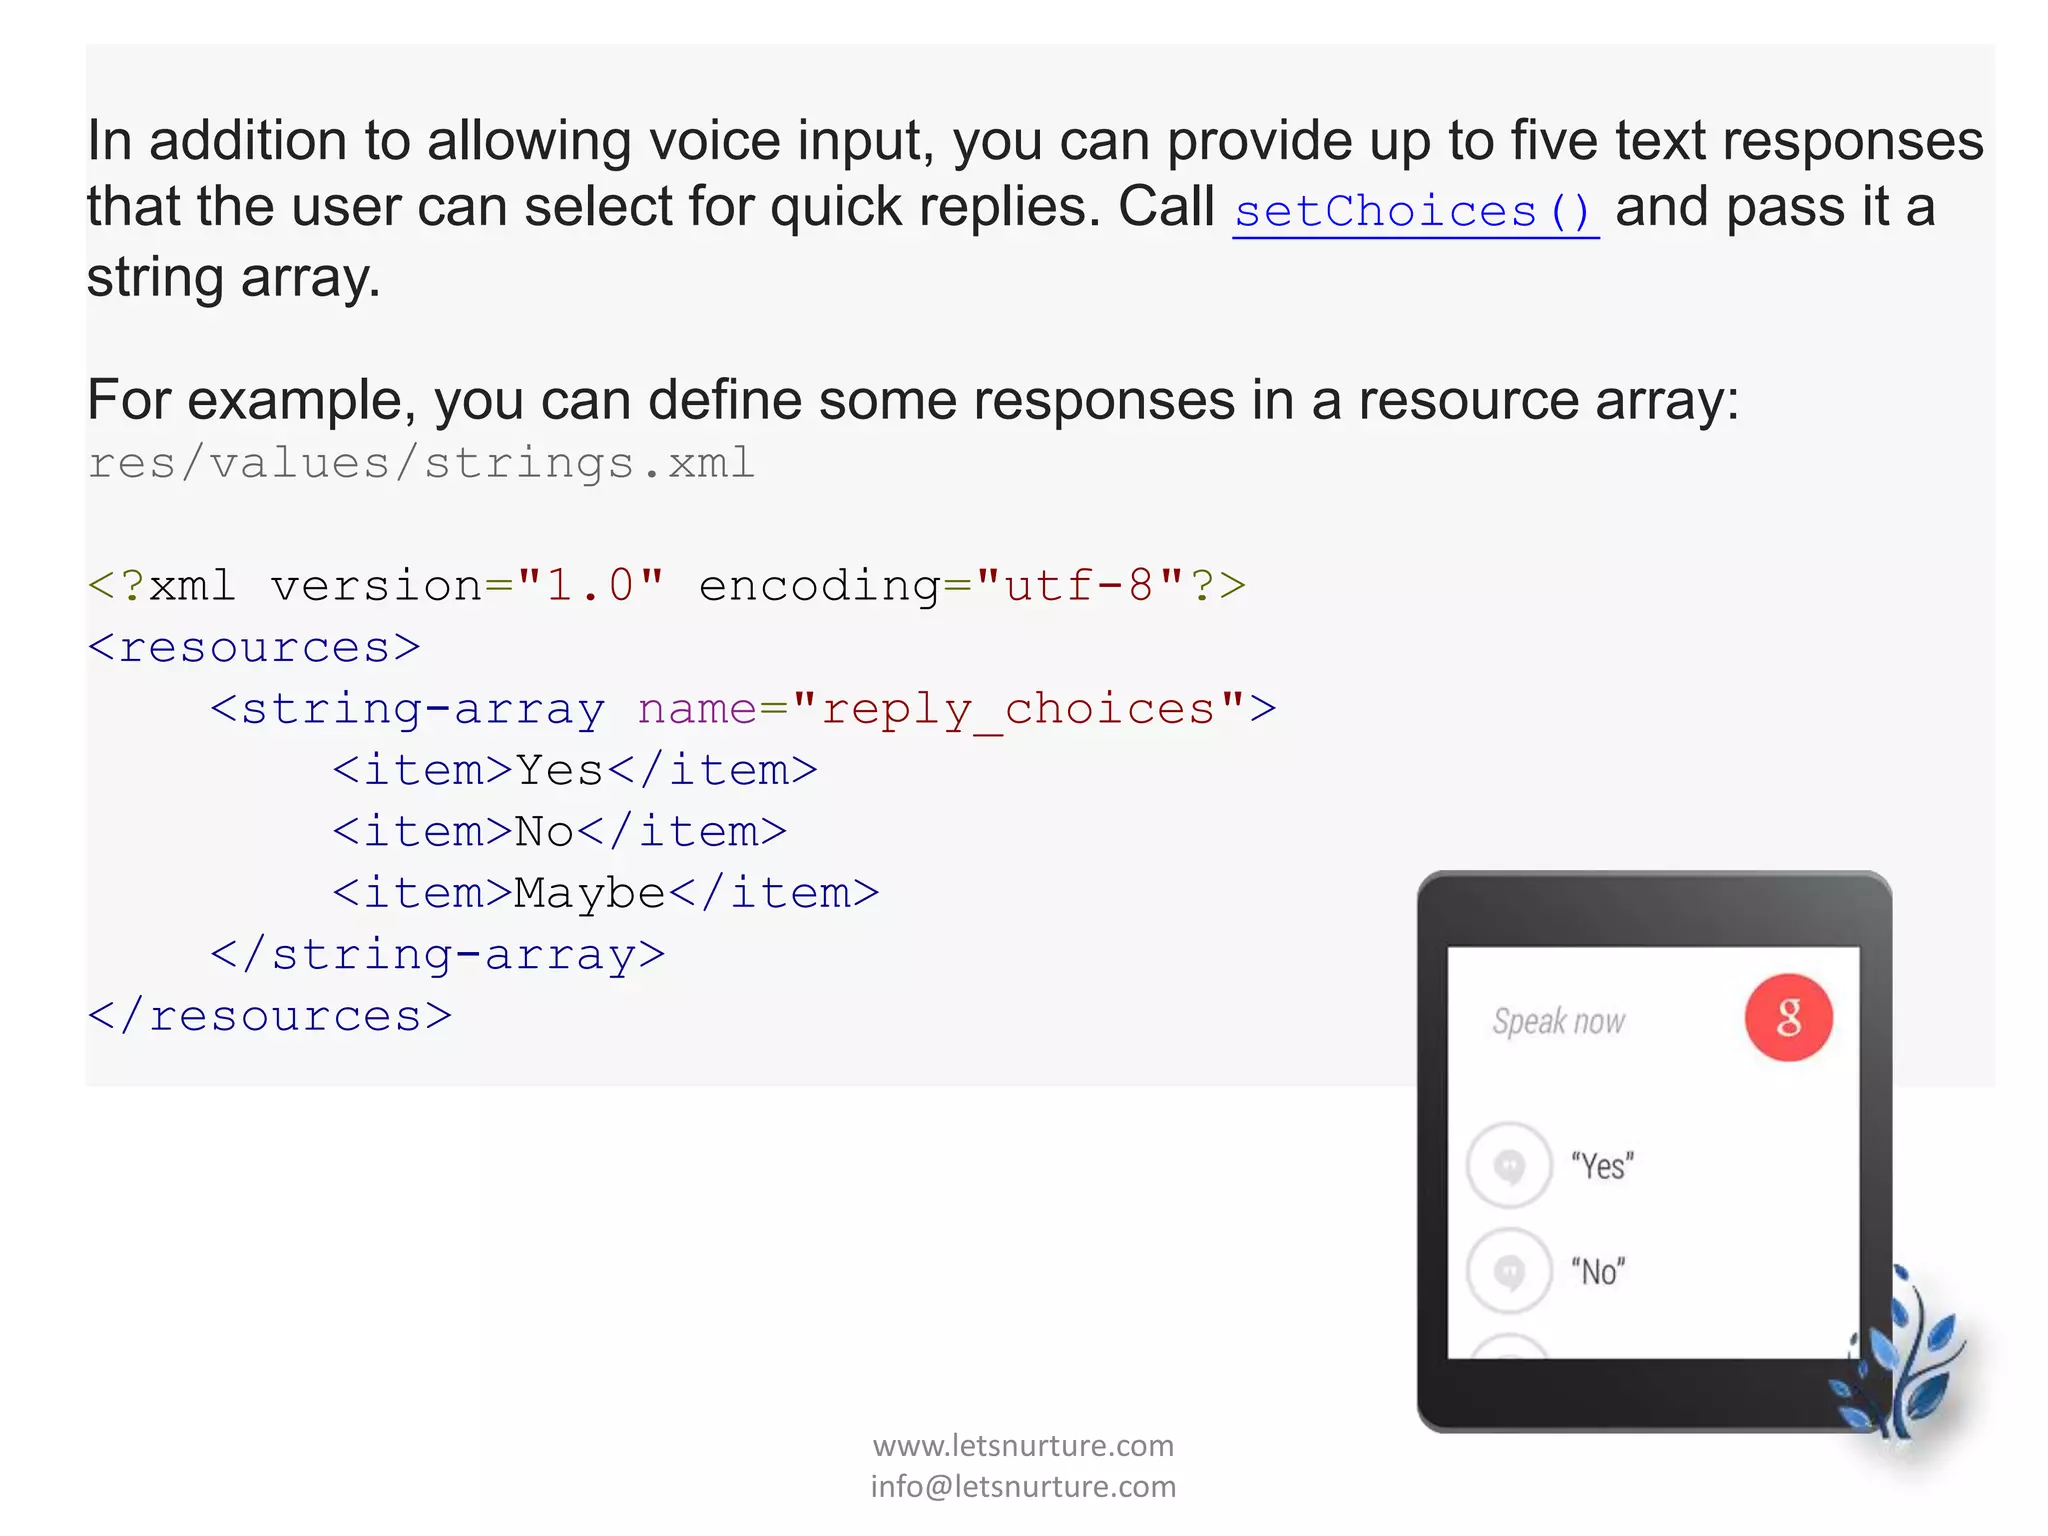
![Then, inflate the string array and add it to
the RemoteInput:
public static final EXTRA_VOICE_REPLY =
"extra_voice_reply";
...
String replyLabel =
getResources().getString(R.string.reply_label);
String[] replyChoices =
getResources().getStringArray(R.array.reply_choices
);
RemoteInput remoteInput = new
RemoteInput.Builder(EXTRA_VOICE_REPLY)
.setLabel(replyLabel)
.setChoices(replyChoices)
.build();
www.letsnurture.com
info@letsnurture.com](https://image.slidesharecdn.com/androidwear-ii-140812120546-phpapp02/75/Android-Wearables-ii-20-2048.jpg)
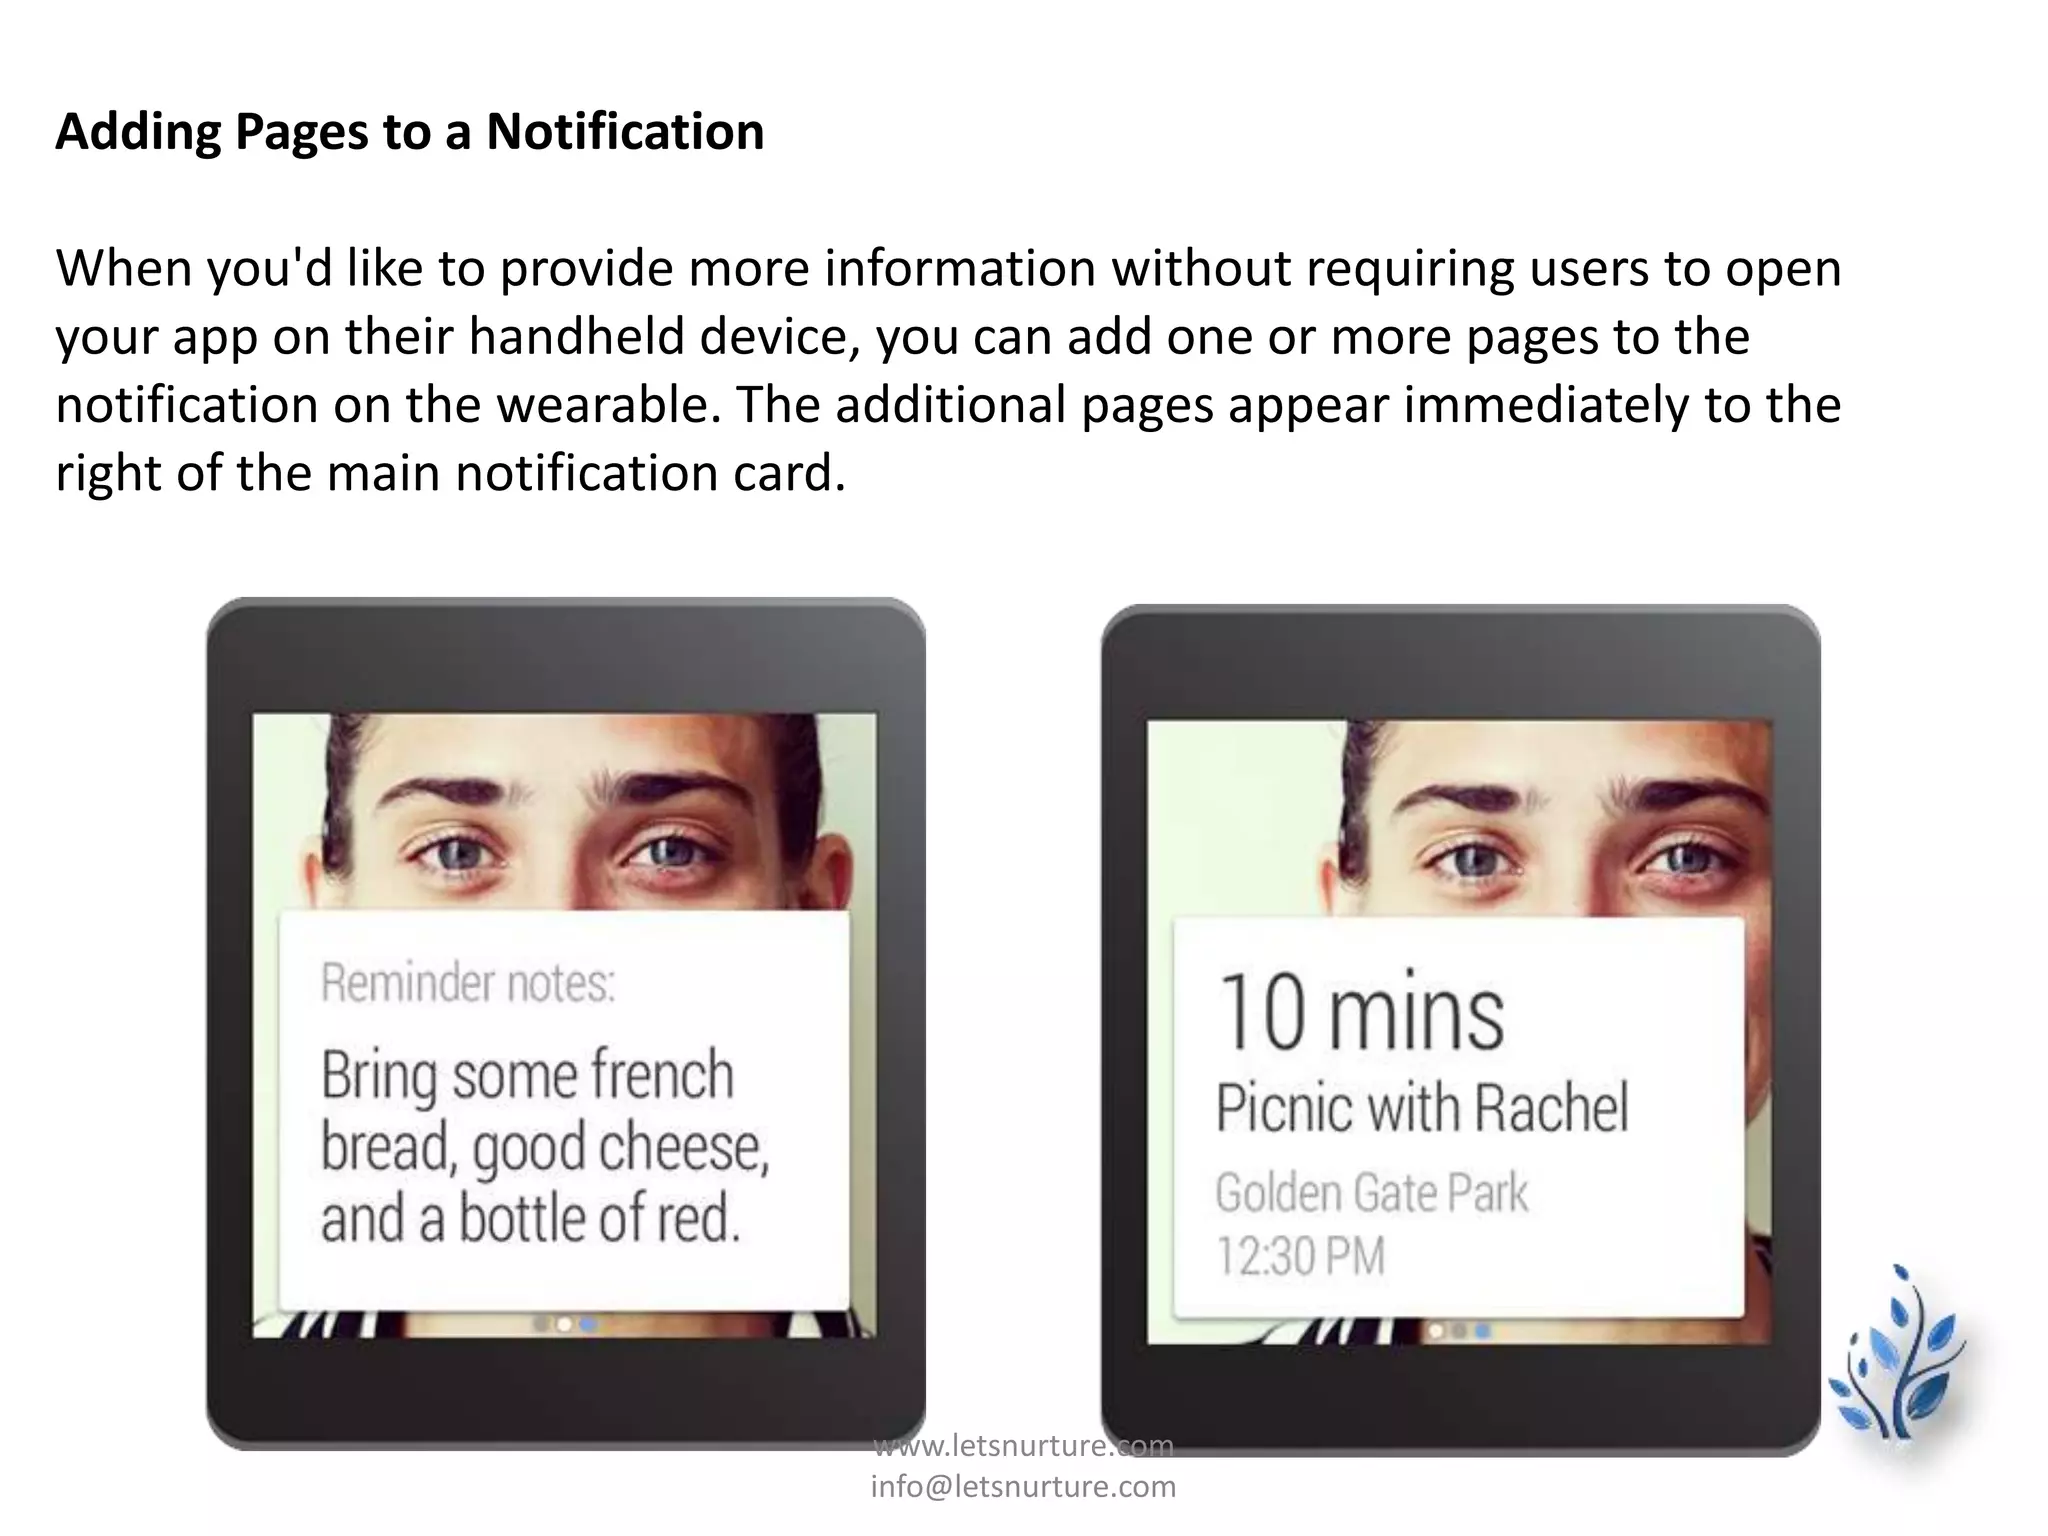
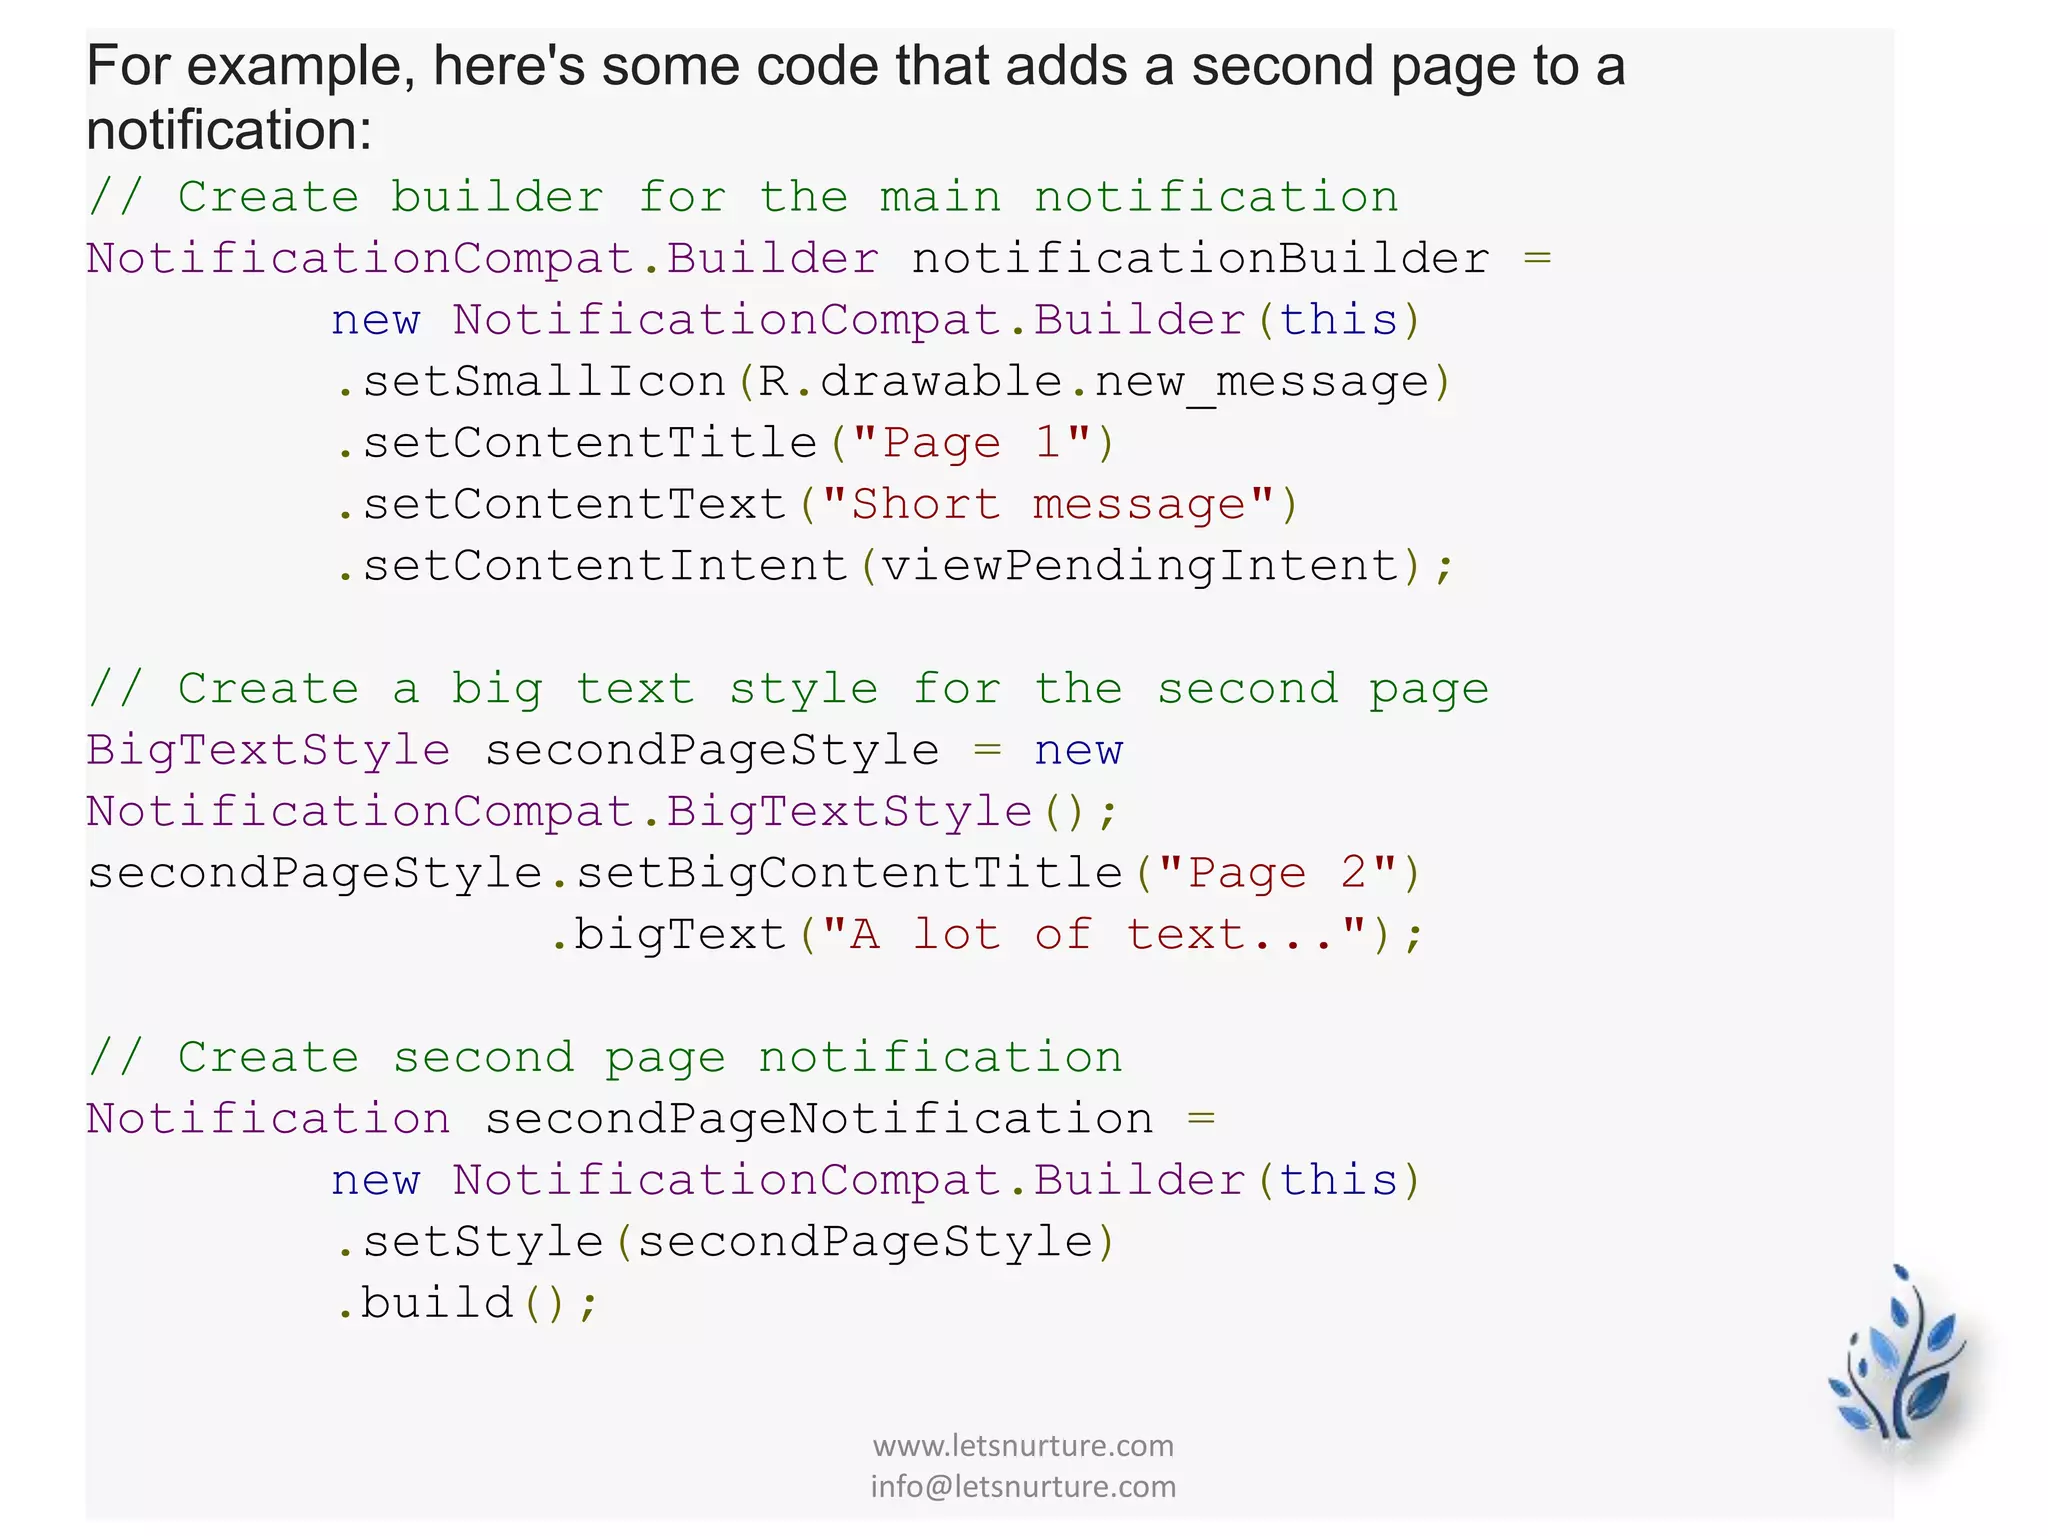
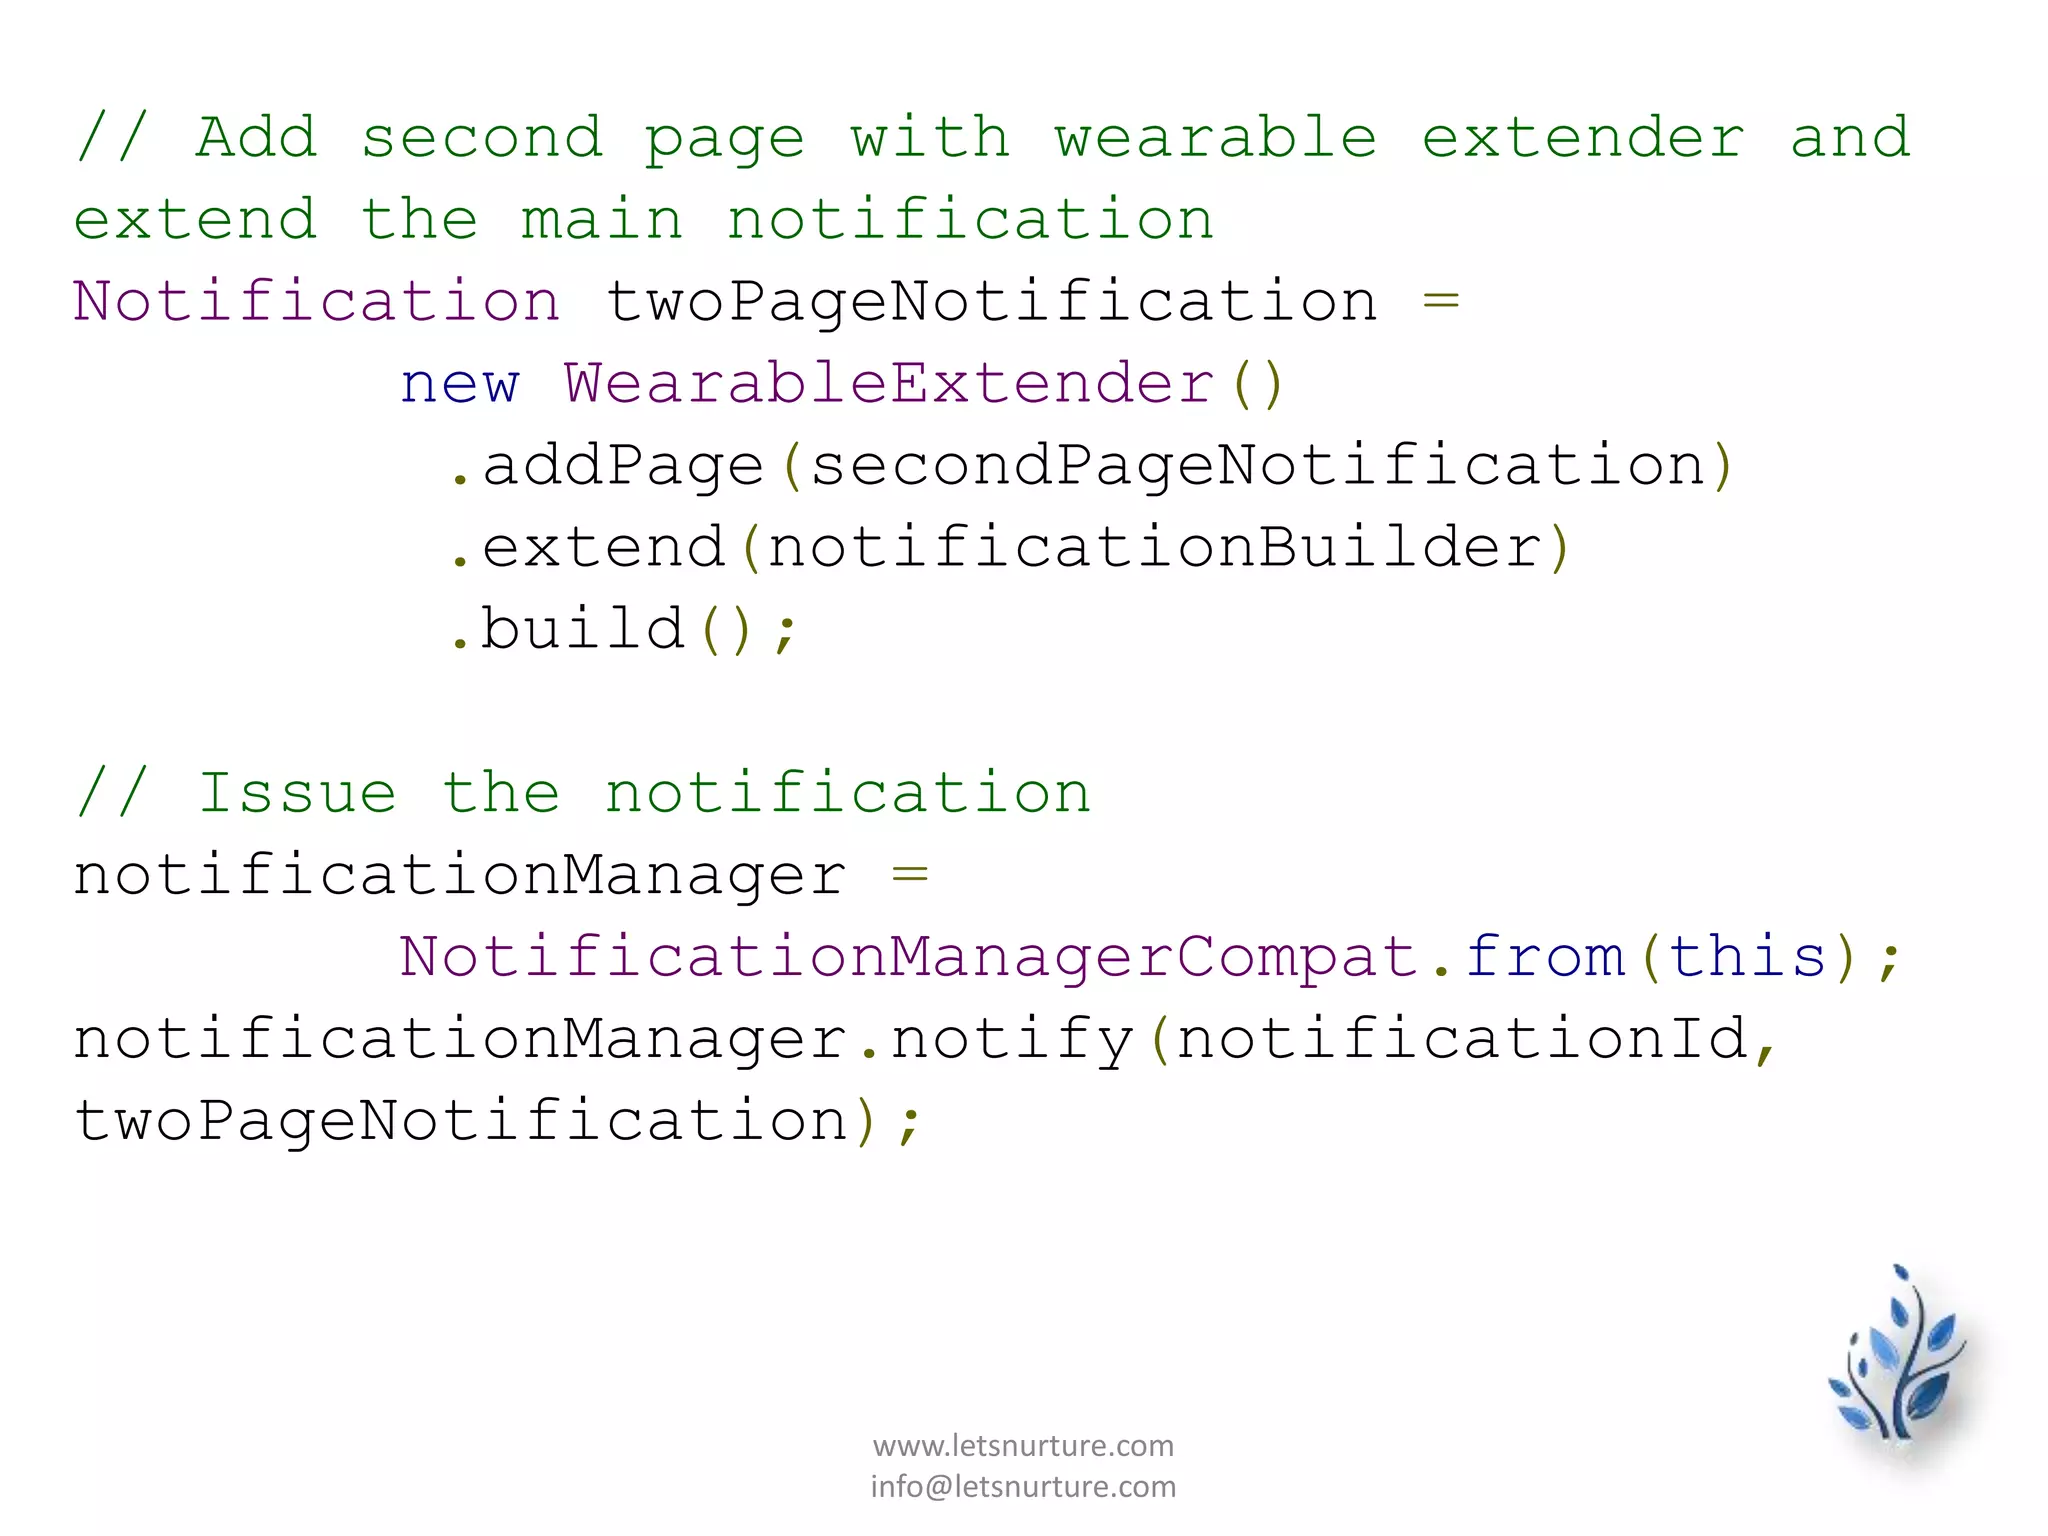

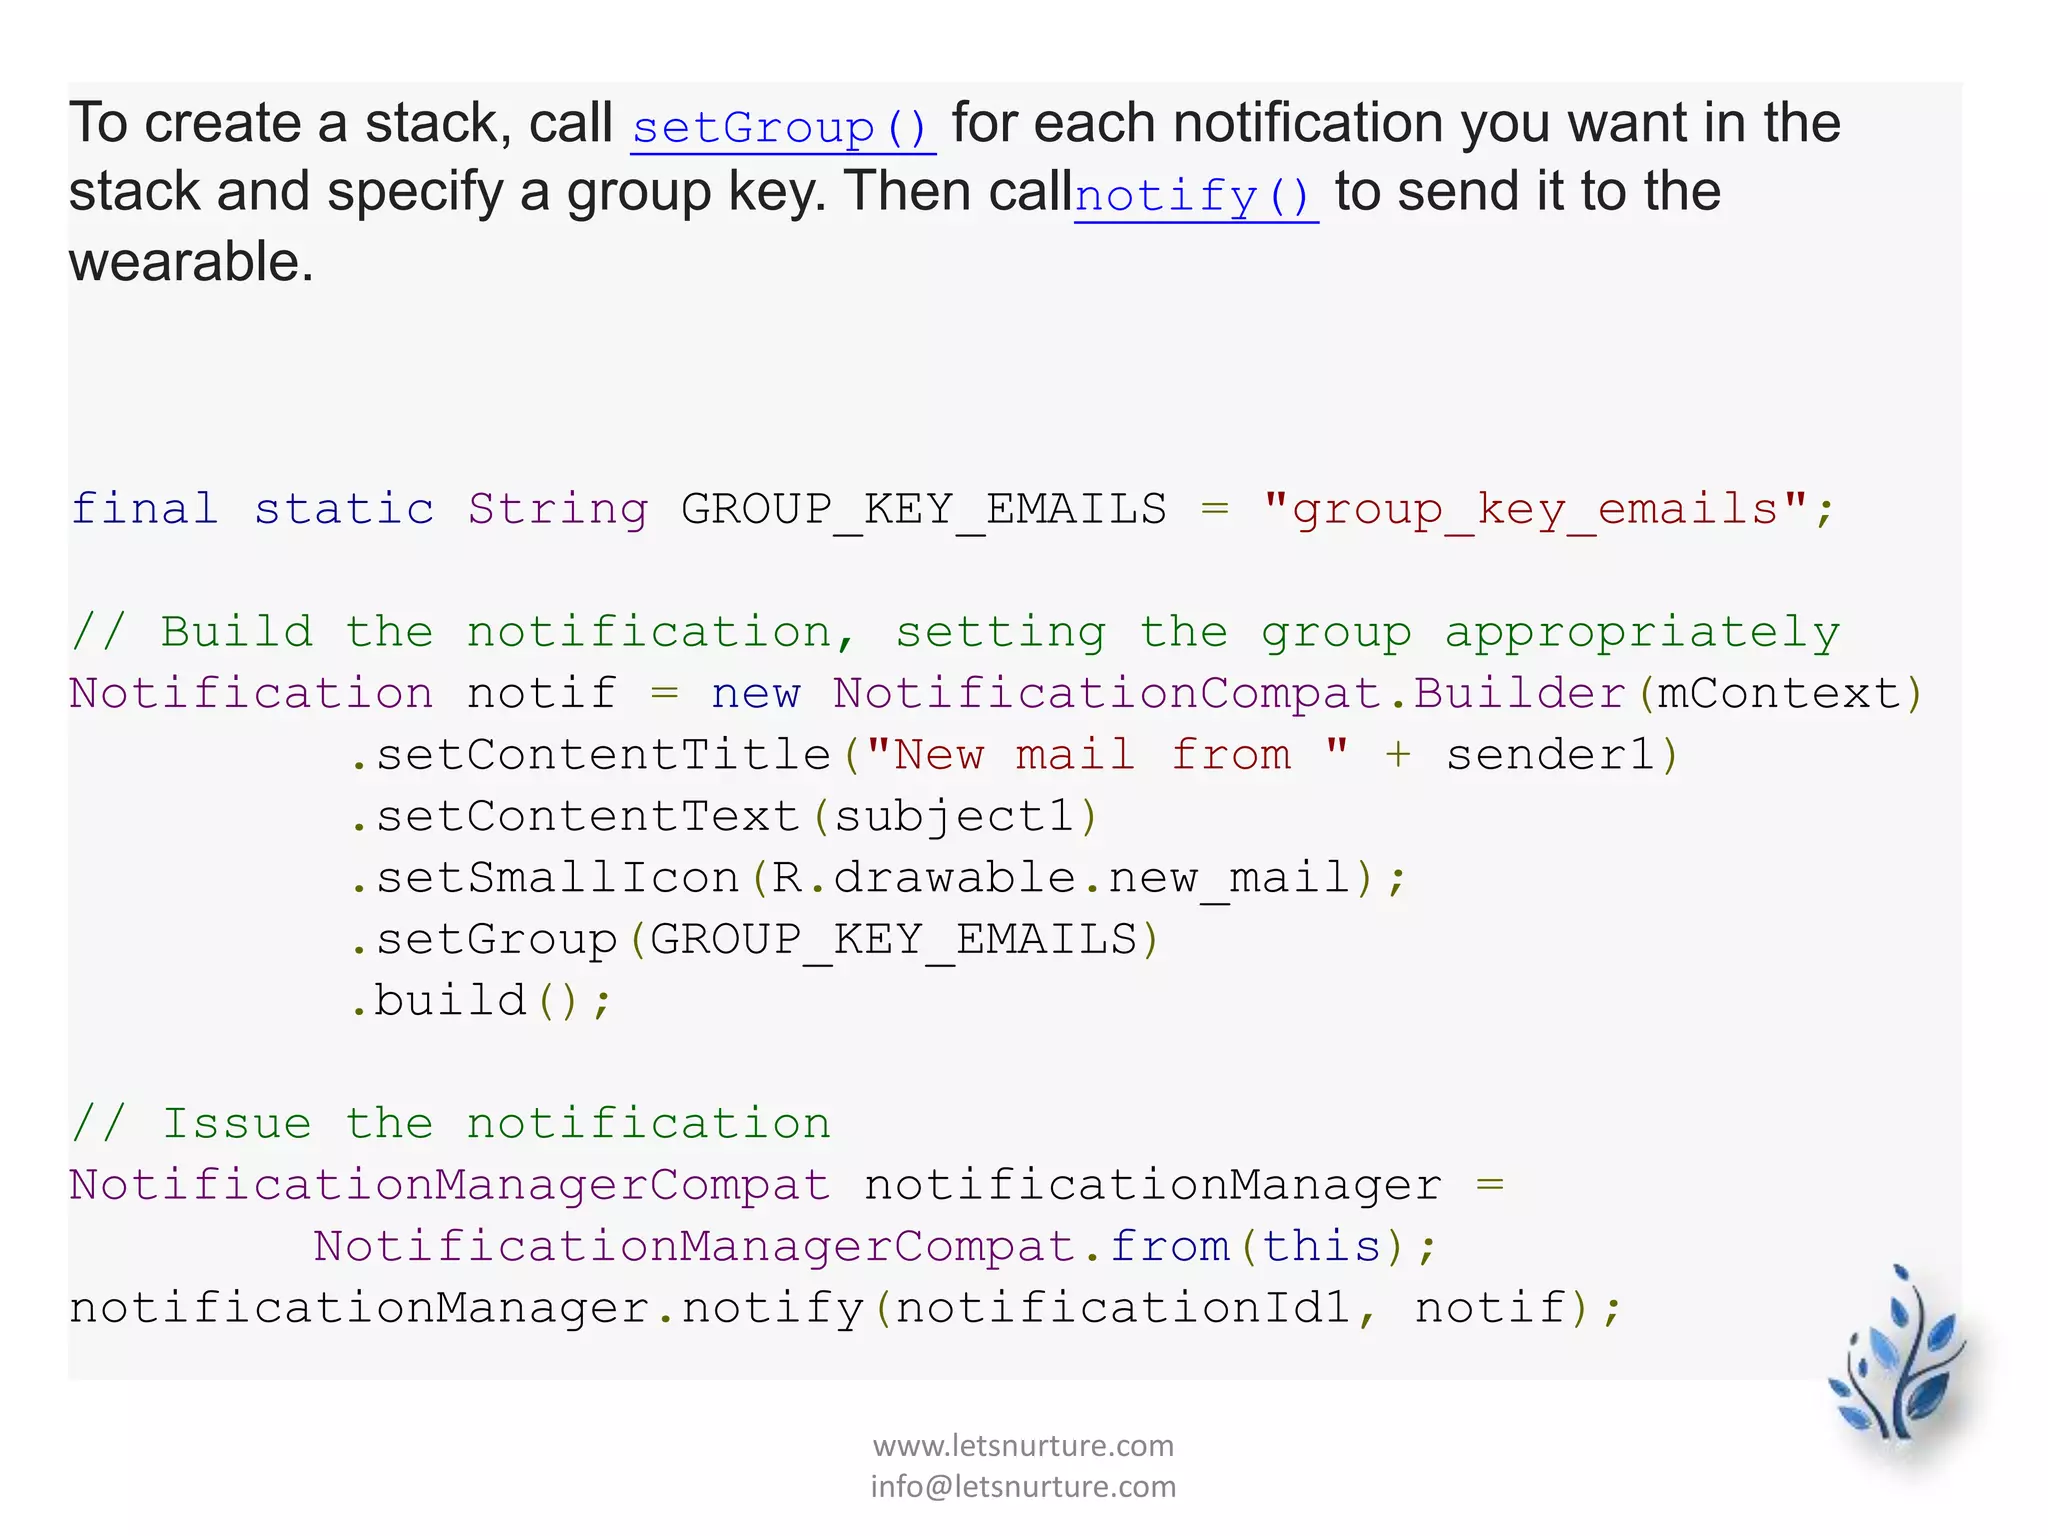


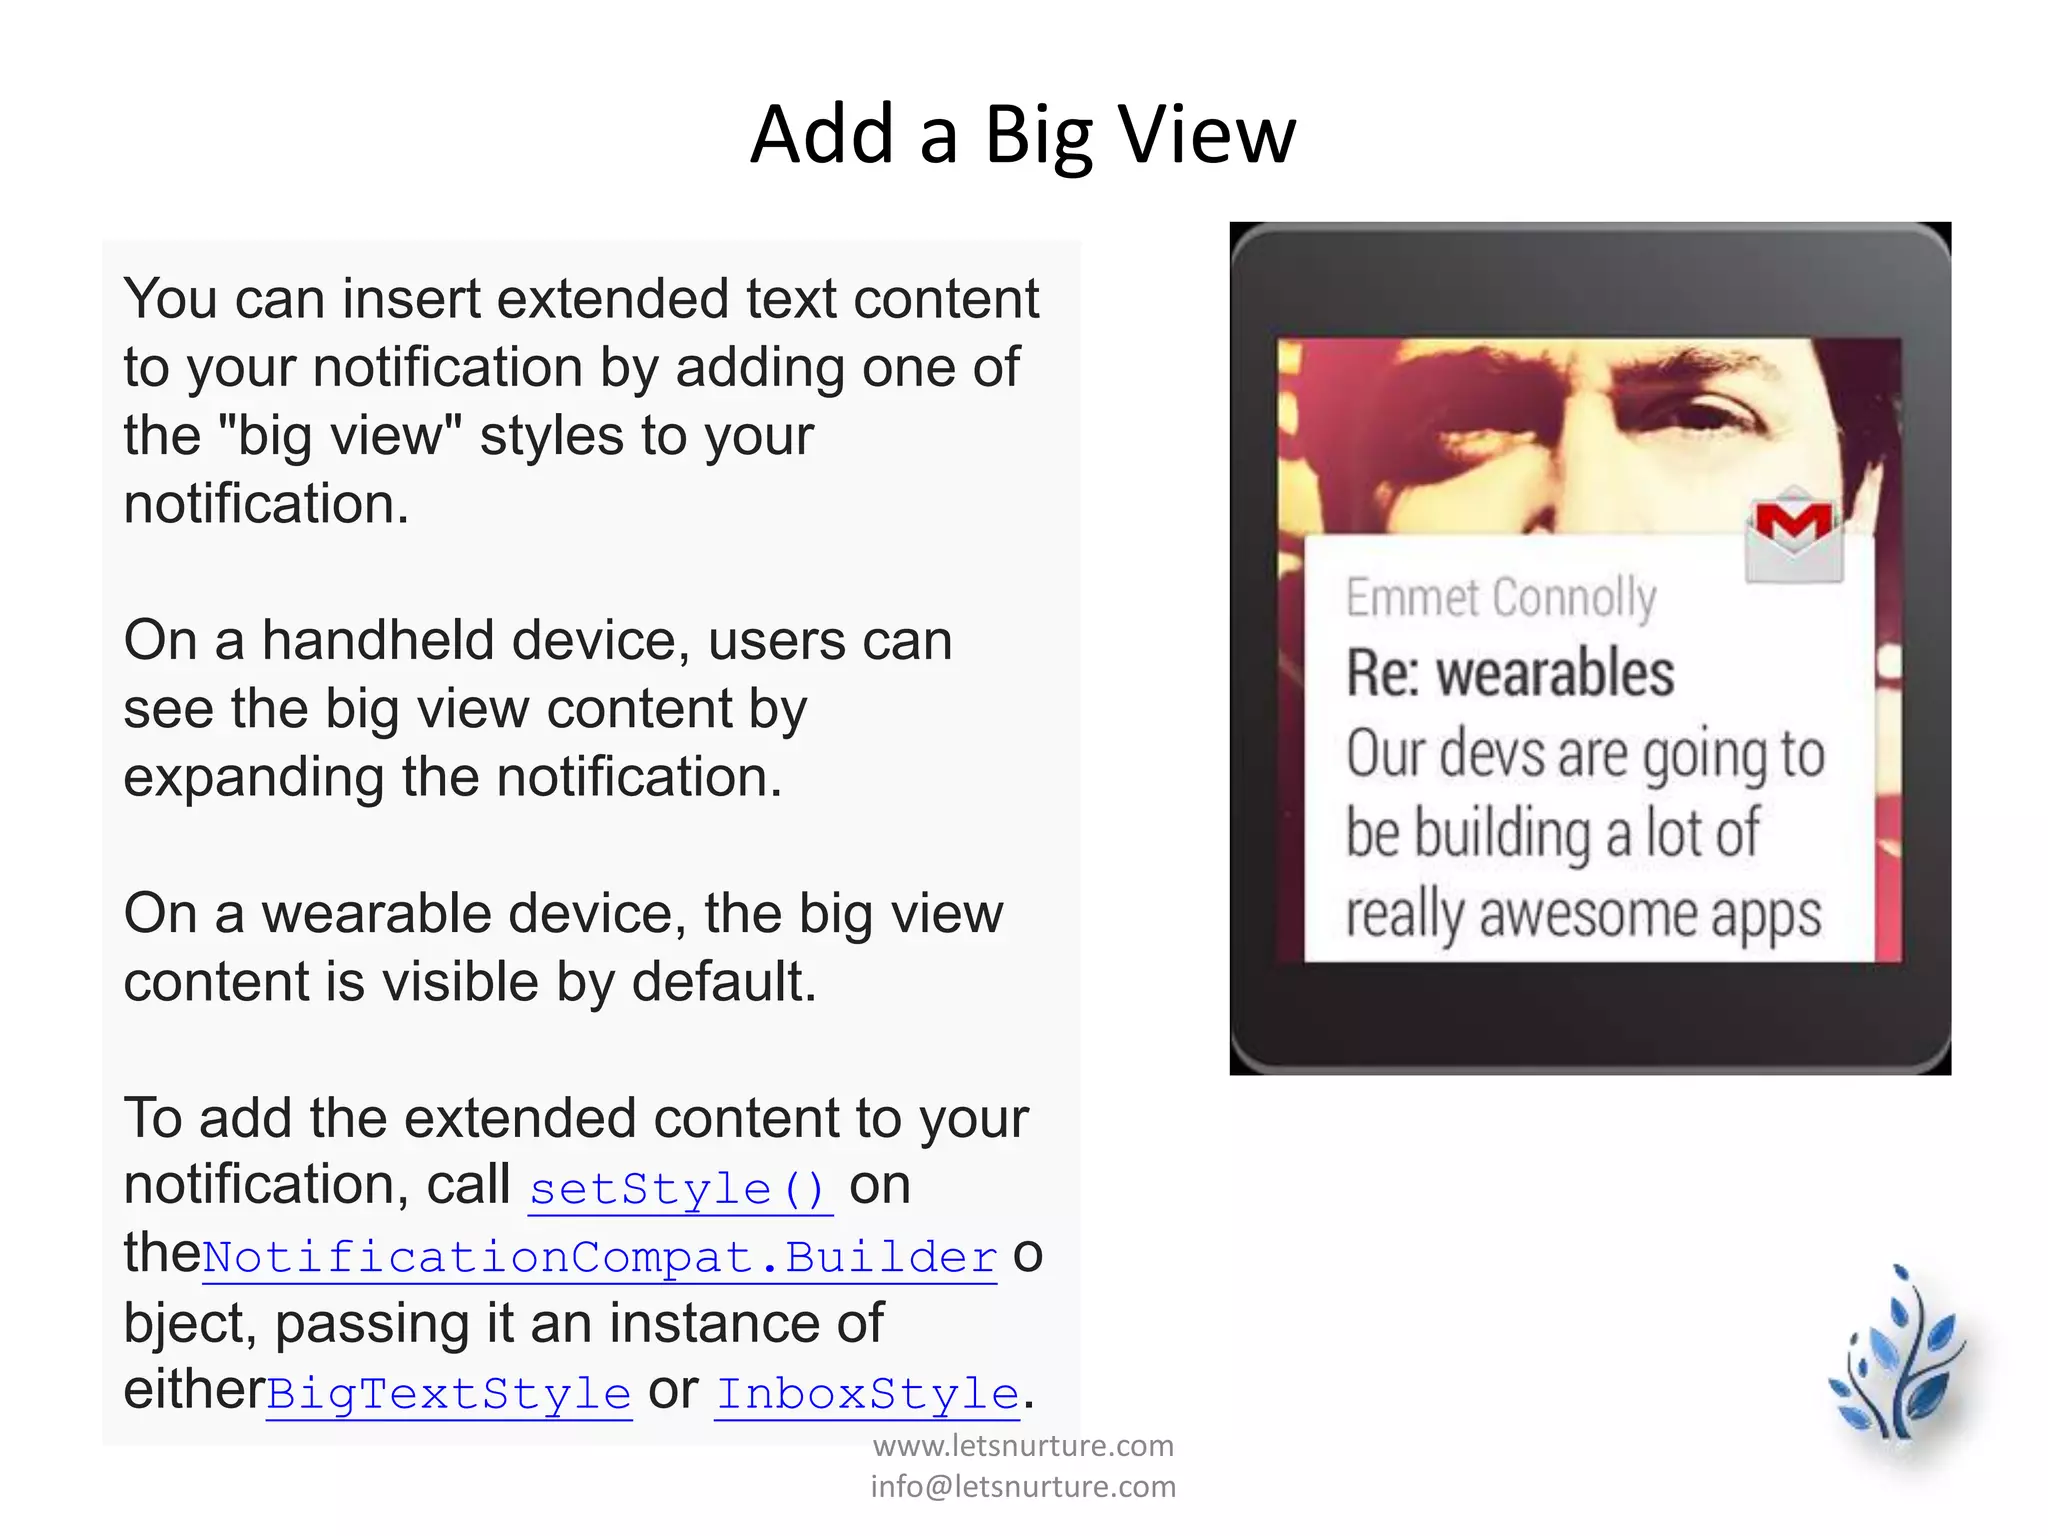
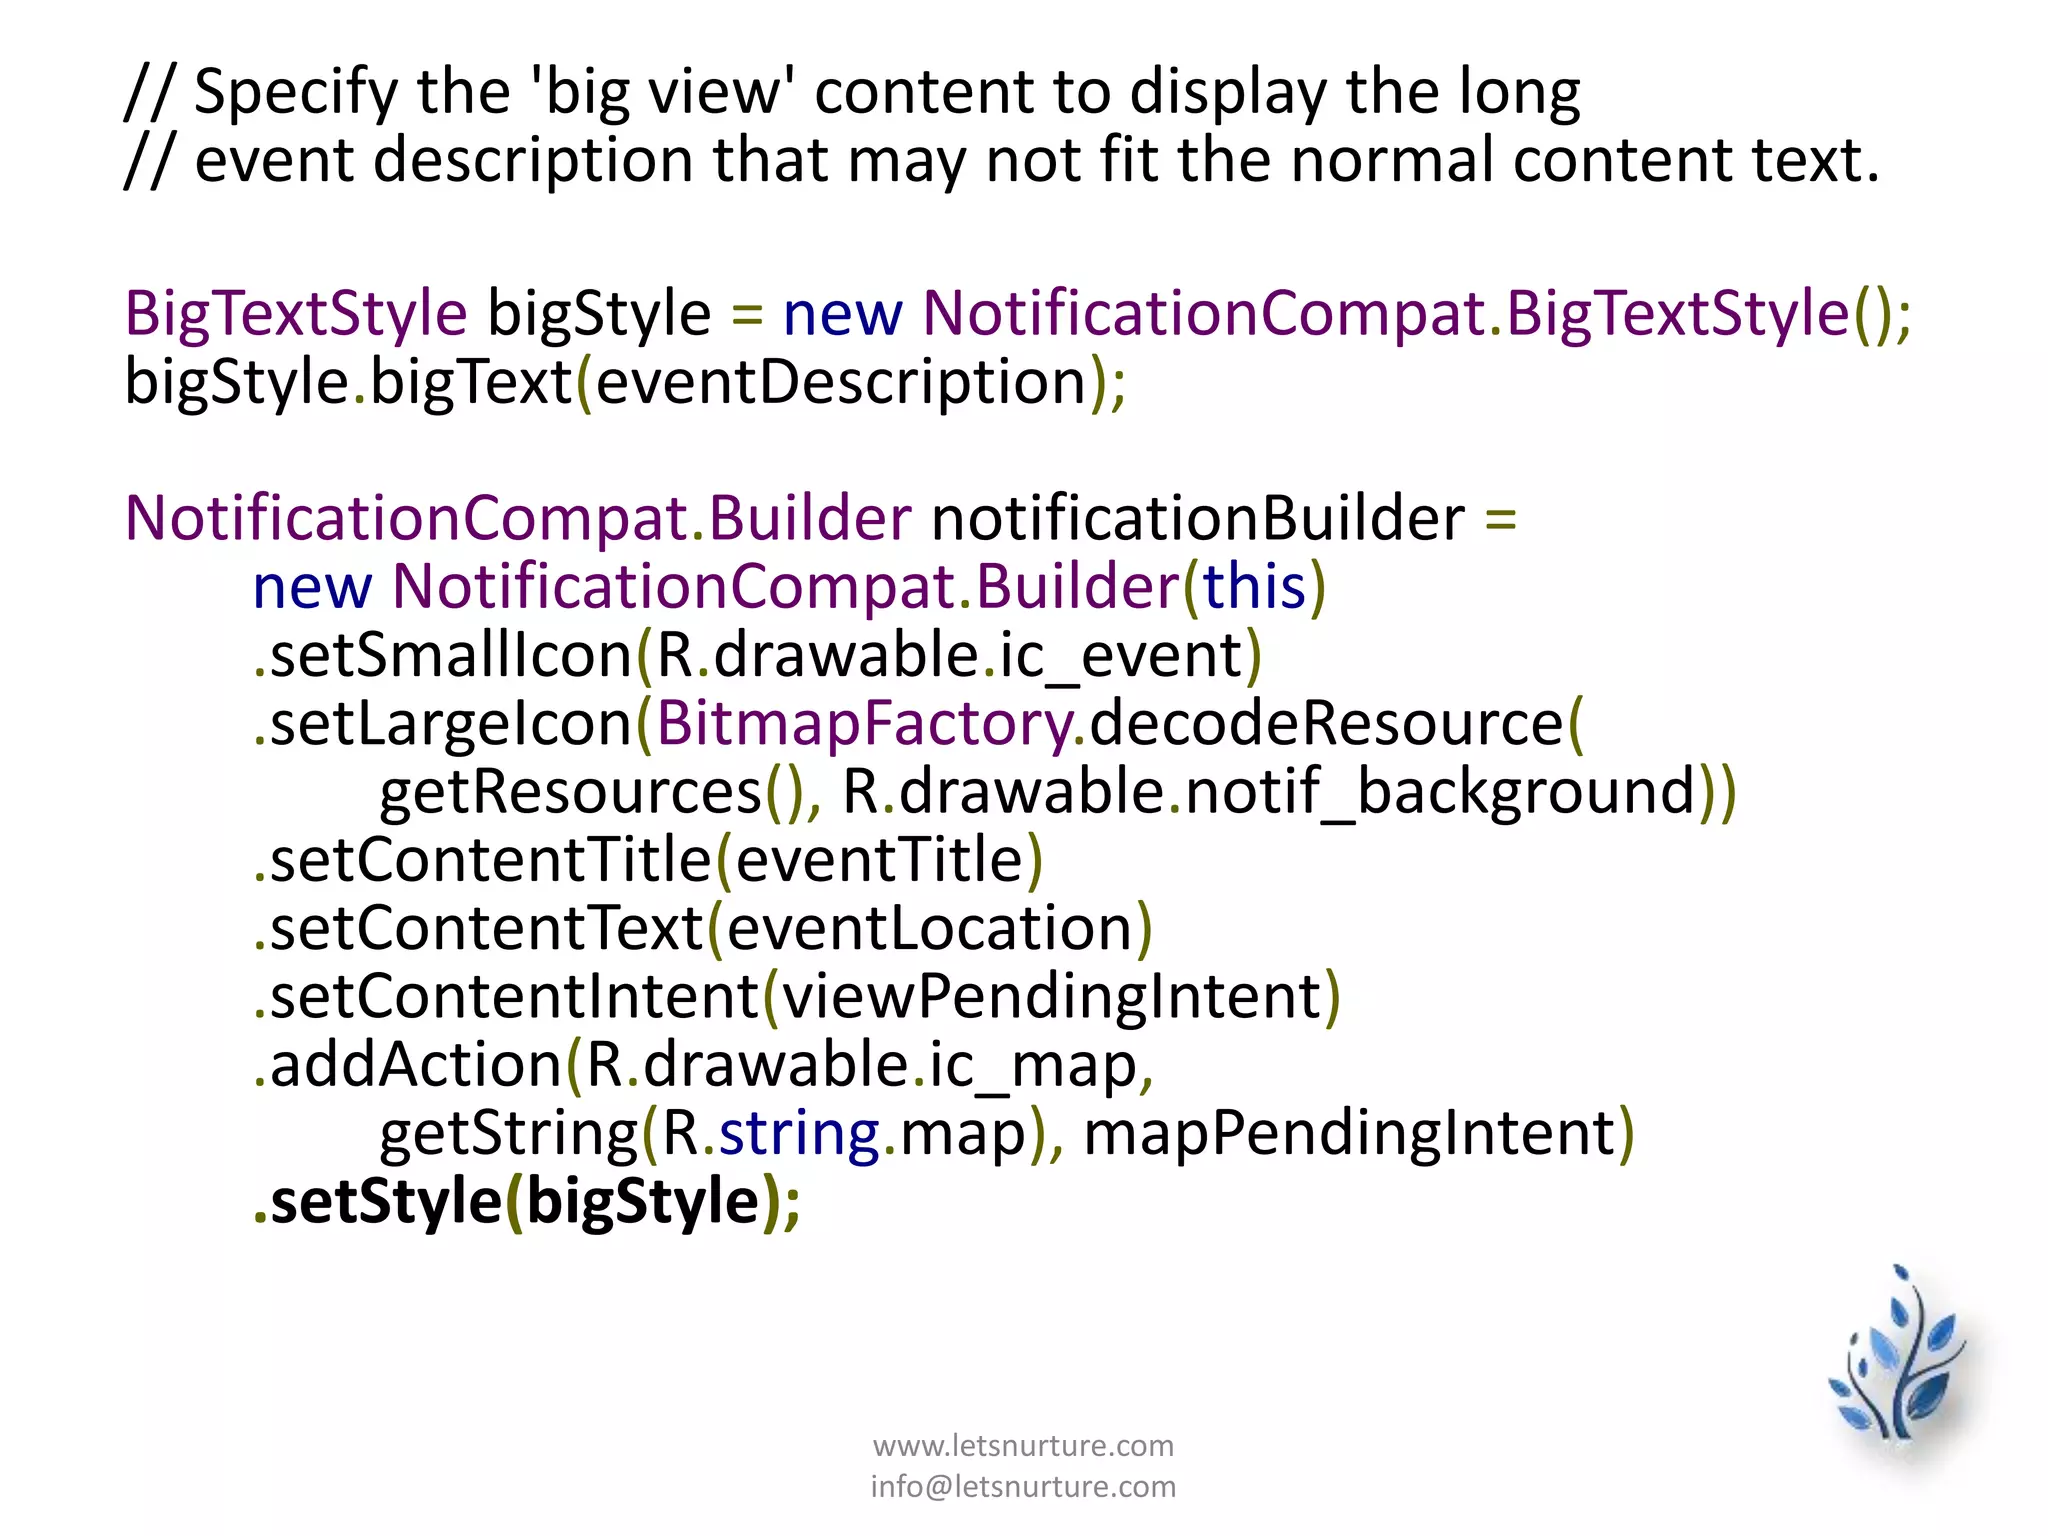
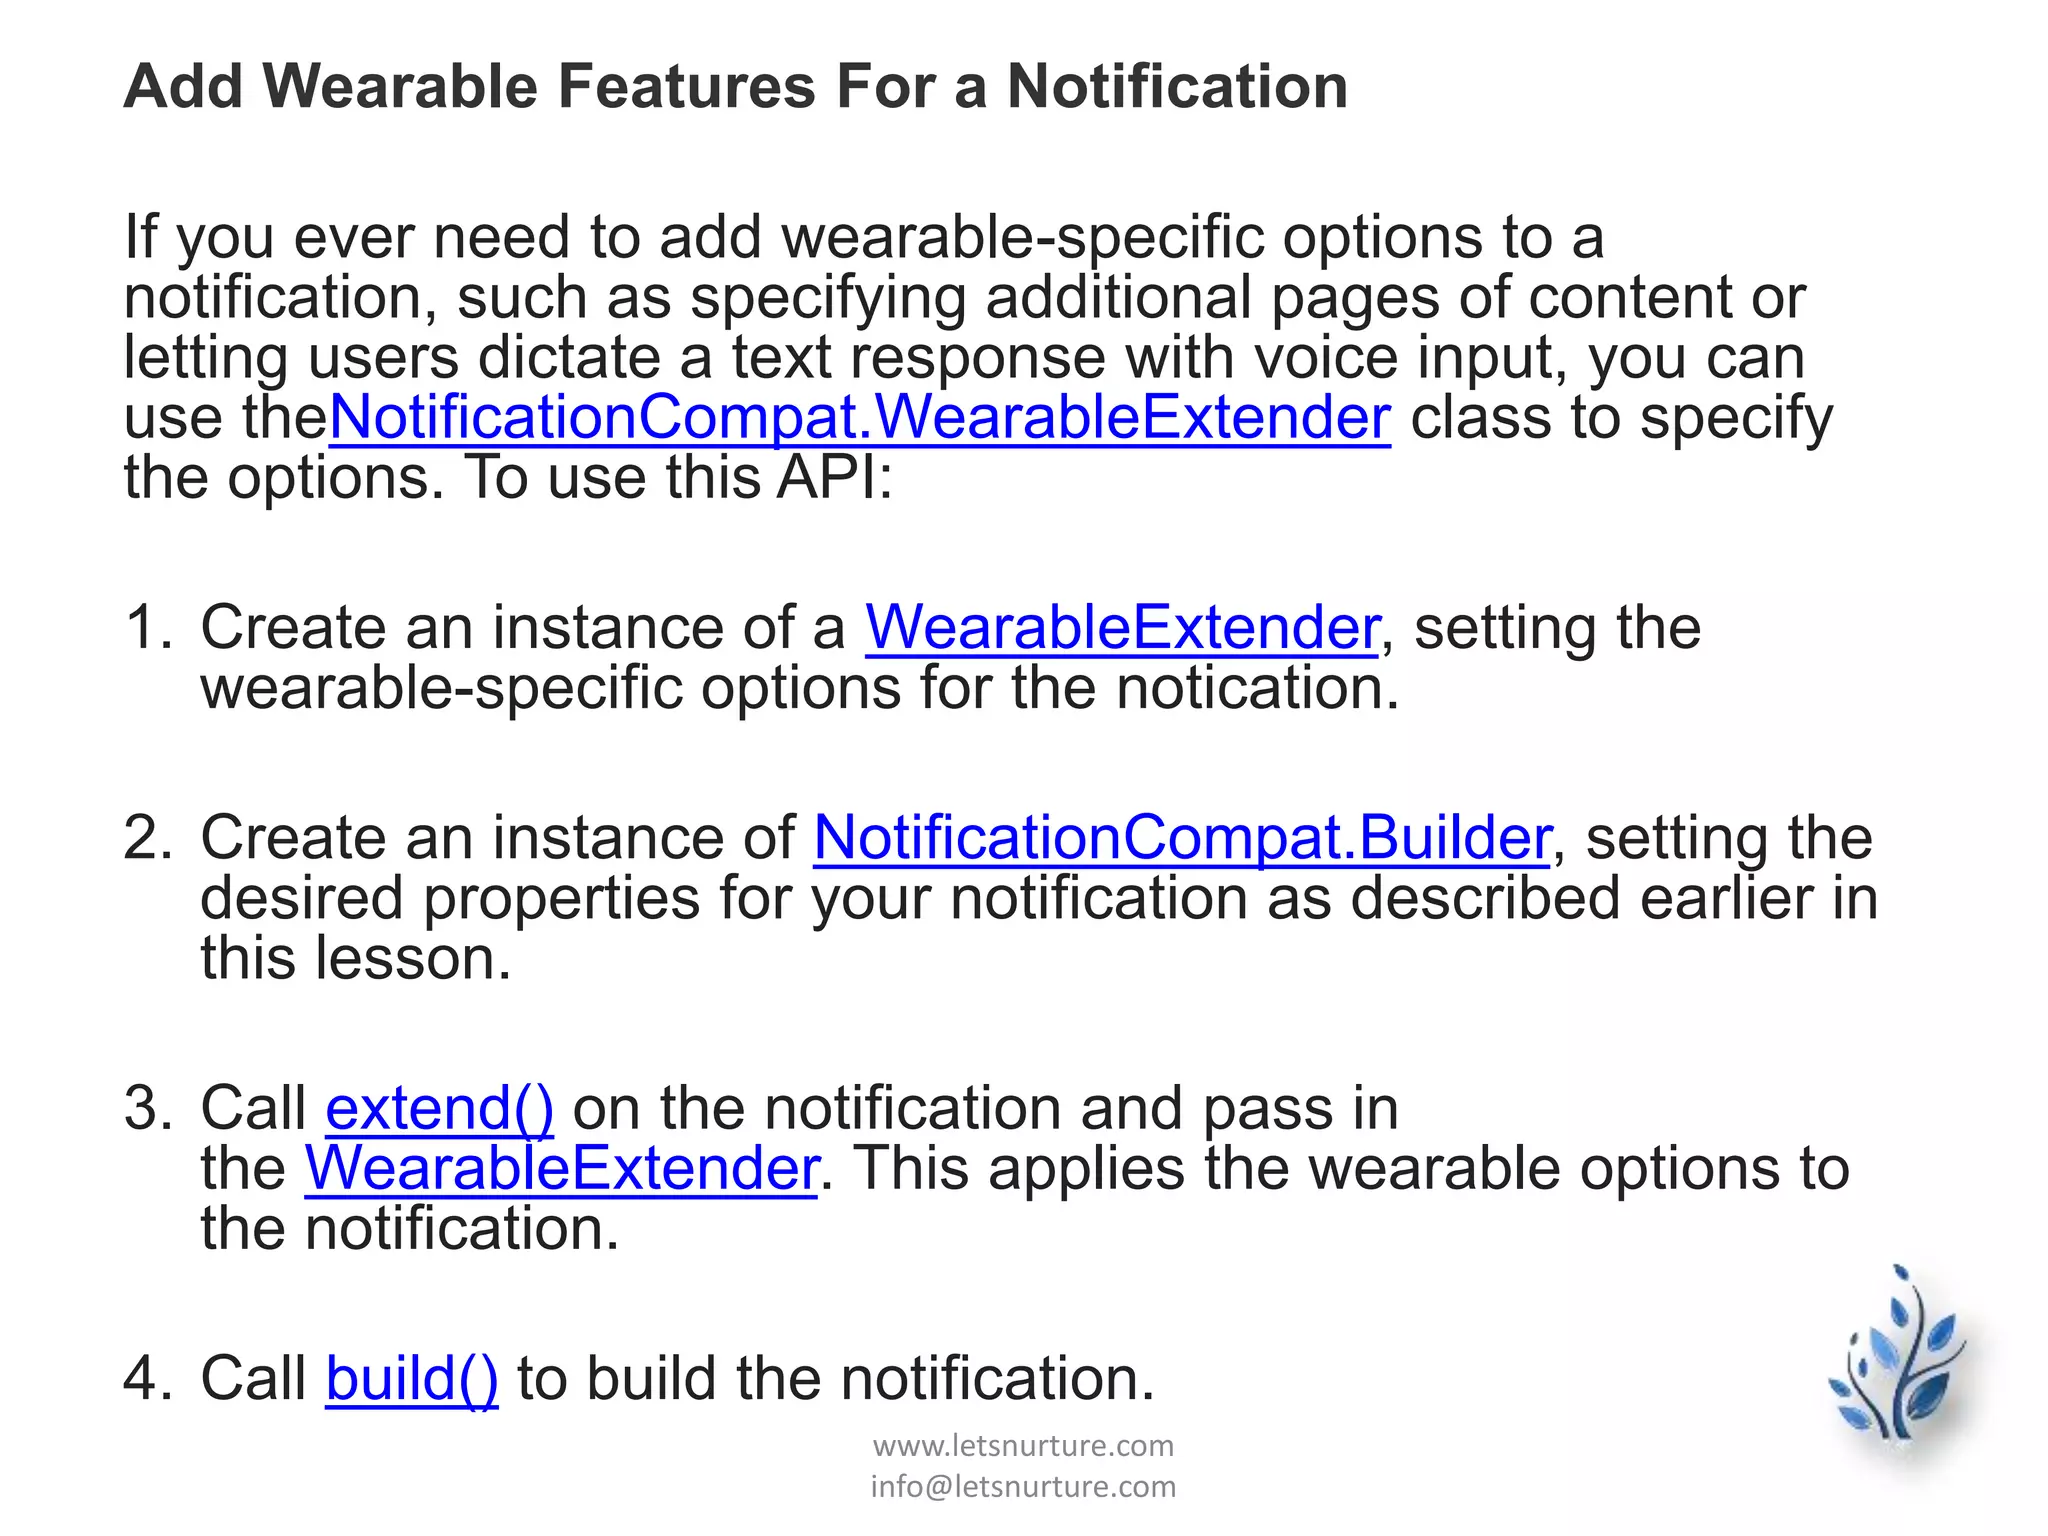
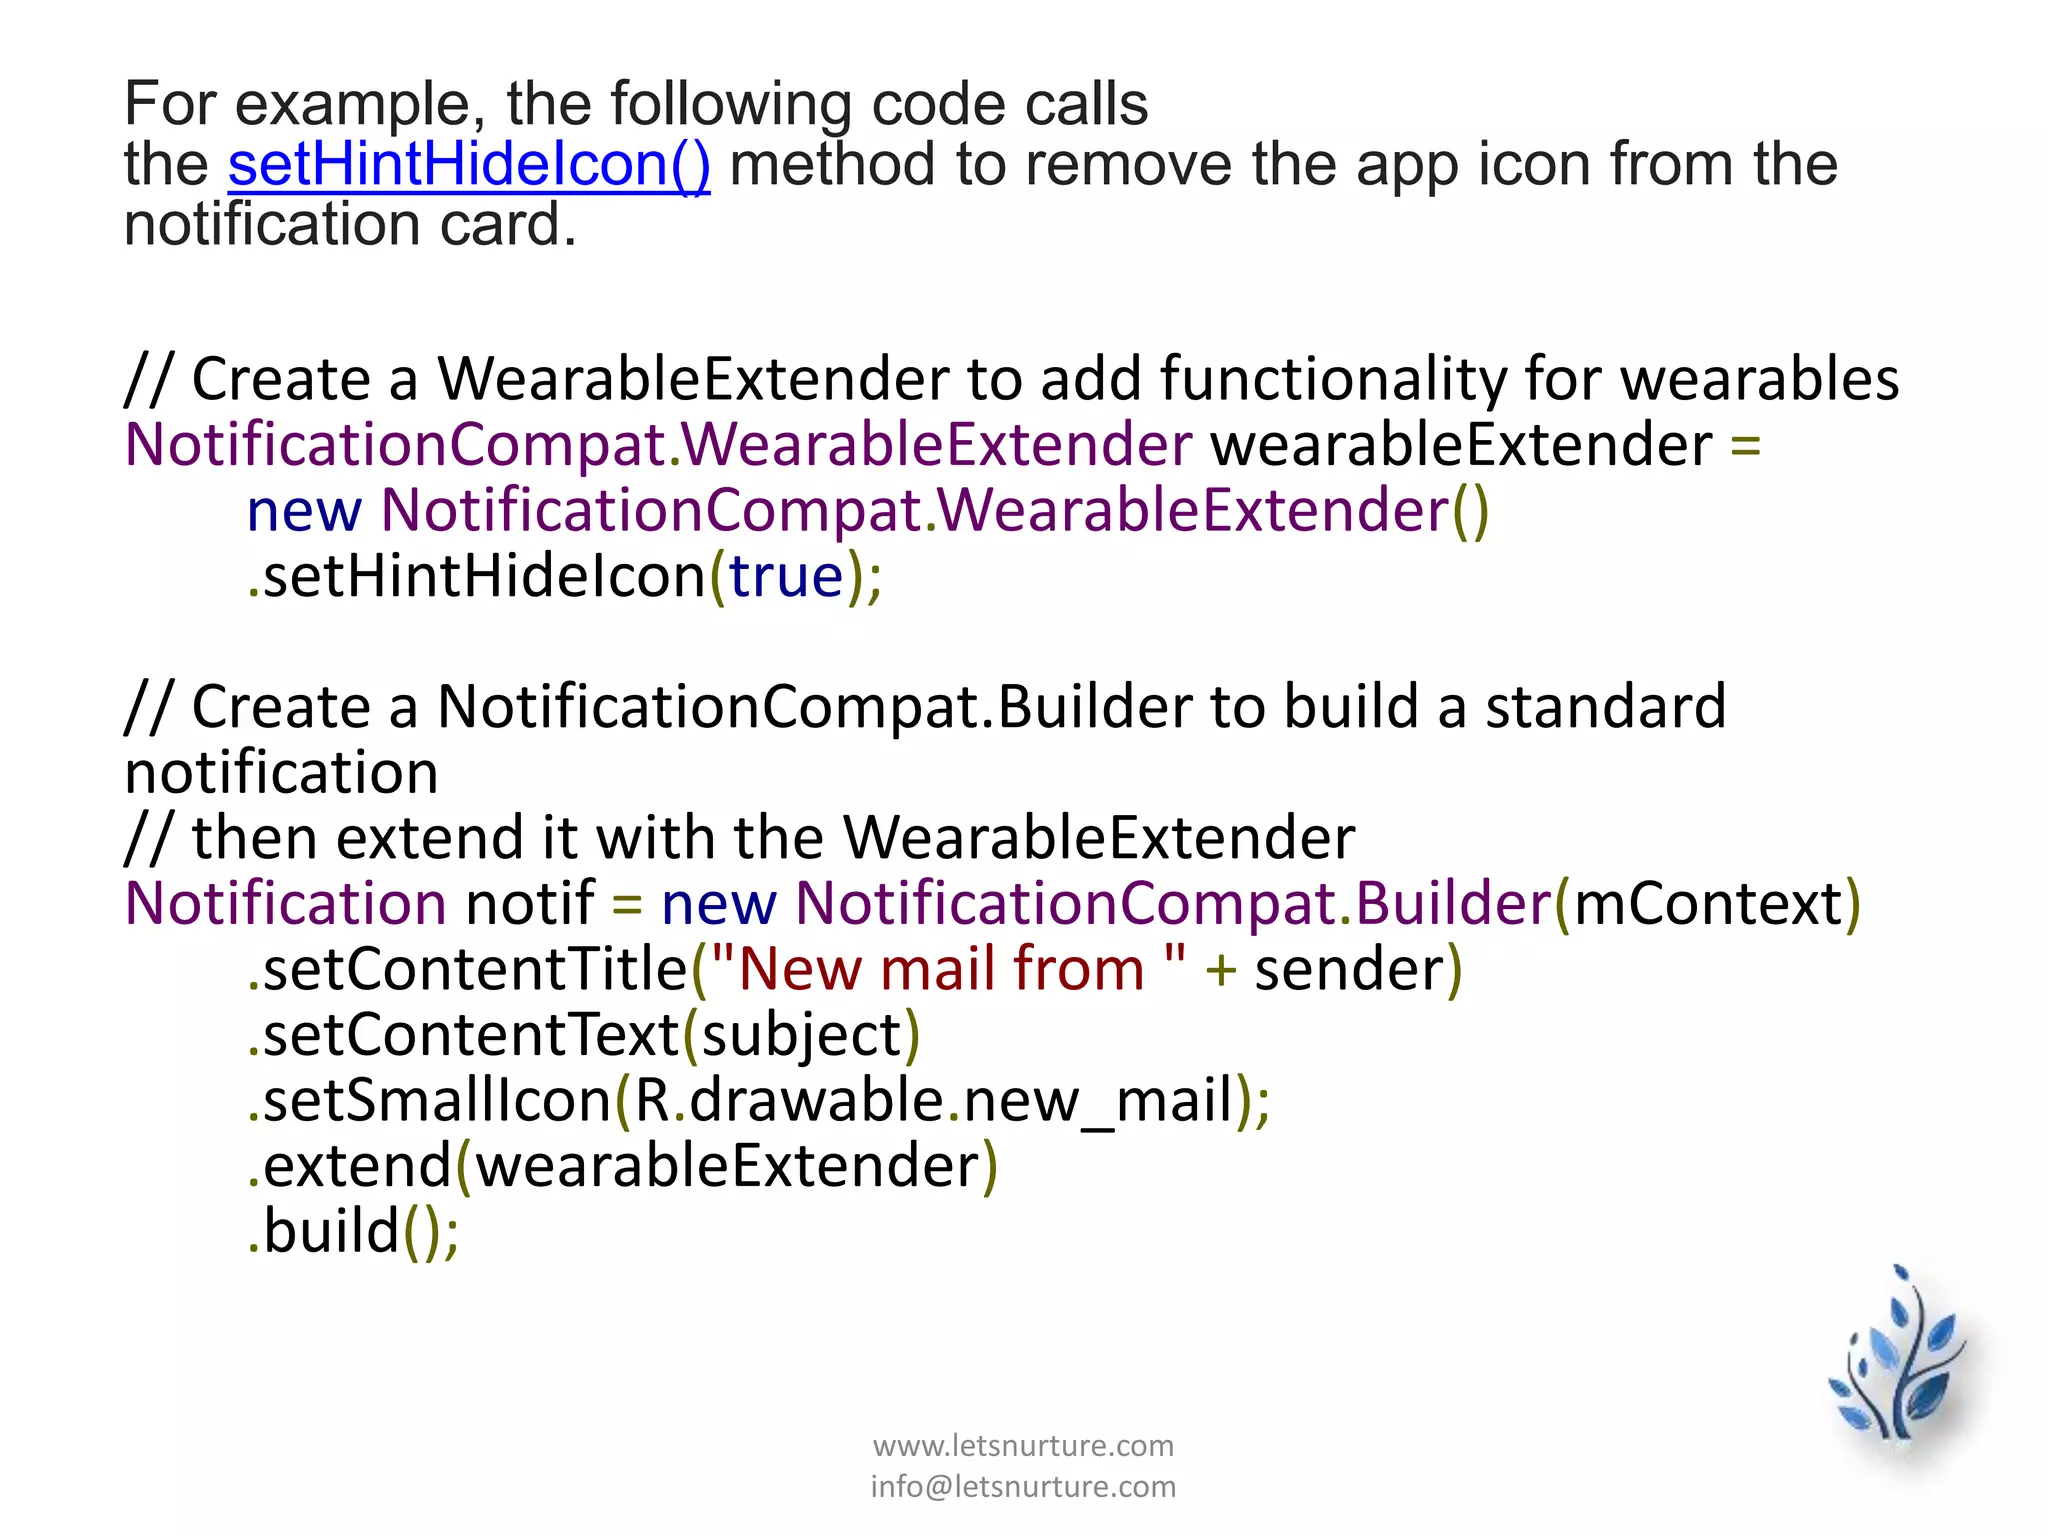
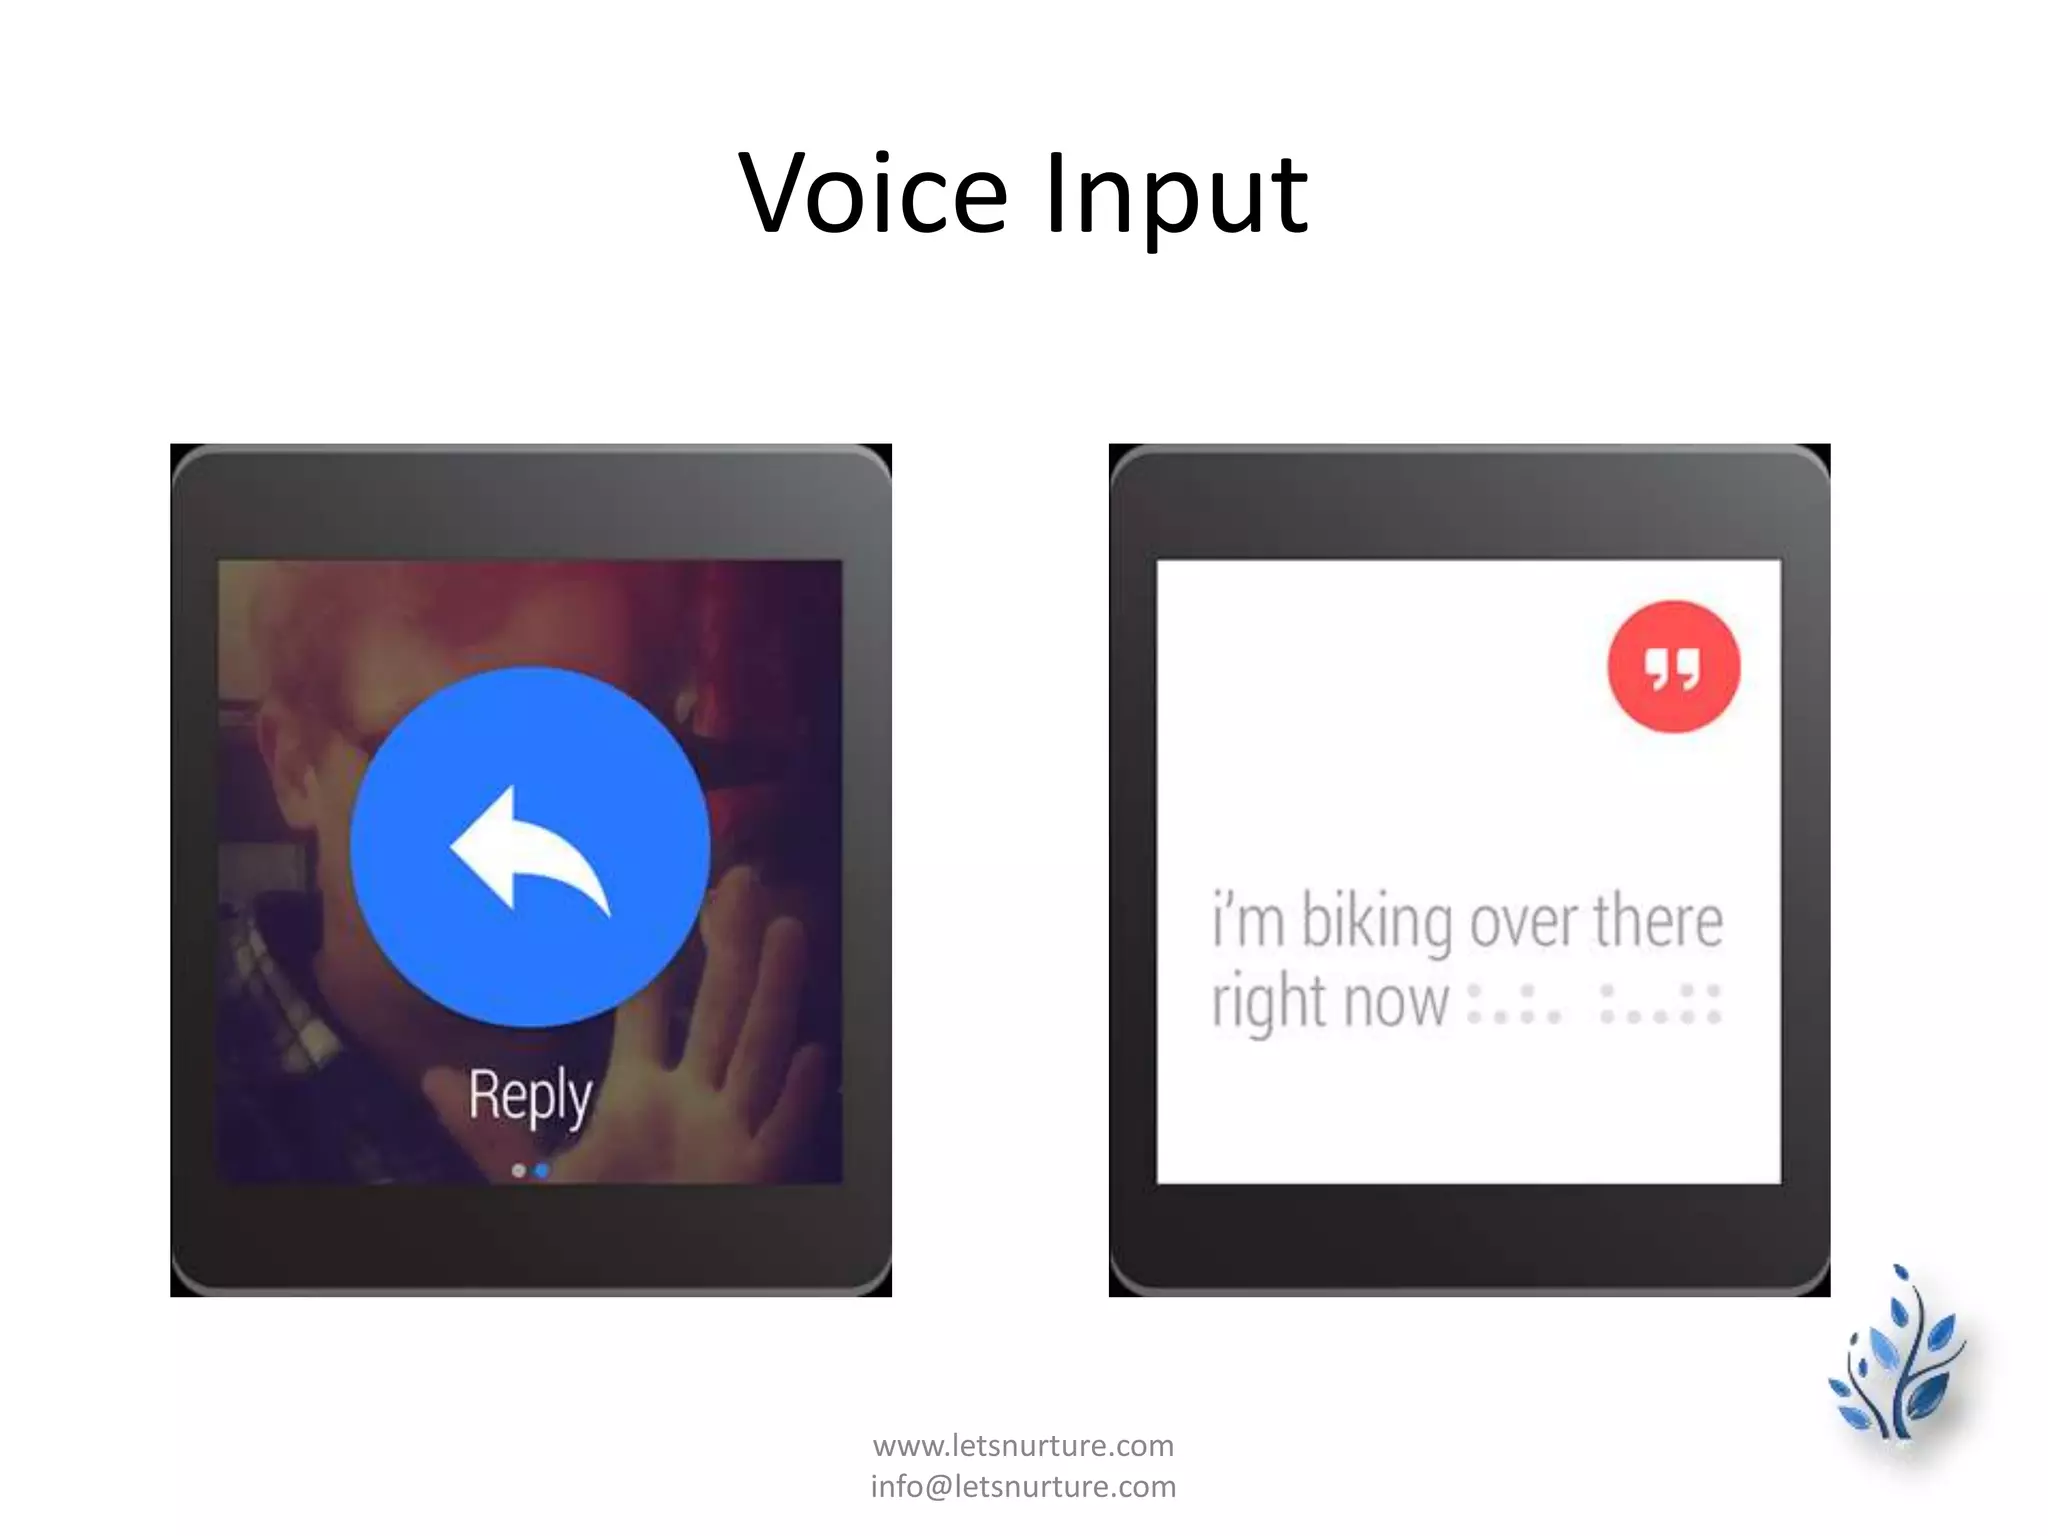
The document provides guidance on creating notifications for Android Wear apps. It discusses using NotificationCompat.Builder to build notifications that are displayed properly on both handheld devices and wearables. It covers adding actions, remote voice input, multiple pages, and stacking notifications on wearables. The key aspects covered are using NotificationCompat.Builder to create standard notifications, and NotificationCompat.WearableExtender to add wearable-specific functionality like extra pages and background images.


![Coded Agents – with UiPath SDK + LangGraph [Virtual Hands-on Workshop]](https://cdn.slidesharecdn.com/ss_thumbnails/codedagentsdeck-251215155422-5497c599-thumbnail.jpg?width=640&height=640&fit=bounds)


