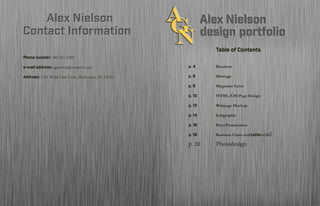
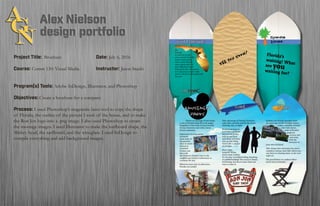
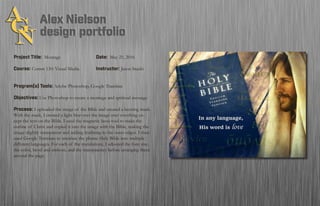
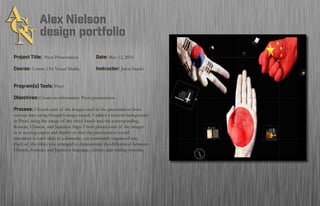
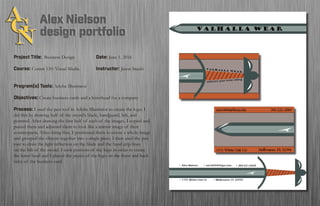
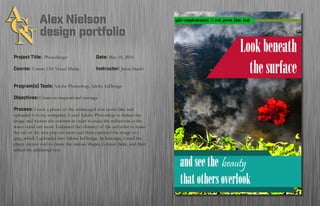
Table of Contents
			
p. 4	 		Brochure
	
p. 6	 		Montage
p. 8	 		HTML/CSS Site design
p. 10			 Infographic
p. 12			 Prezi Presentation
p. 14			 Web Page Mockup
	
p. 16			 Logo Design and Letterhead
p. 18			 Magazine Cover
p. 20		Photodesign
			Table of Contents
			
p. 4	 		Brochure
	
p. 6	 		Montage
p. 8	 		Magazine Cover
p. 10			 HTML/CSS Page Design
p. 12			 Webpage Mockup
p. 14			 Infographic
	
p. 16			 Prezi Presentation
p. 18			 Business Cards and Letterhead
p. 20		 Photodesign
Contact InformationContact Information
Phone number: 385-221-2009
e-mail address: agnielson@outlook.com
Address: 1151 White Oak Circle, Melbourne, FL 32934
Alex NielsonAlex Nielson
Project Title: Brochure				Date: July 6, 2016
Course: Comm 130: Visual Media 		 Instructor: Jason Stucki
Program(s) Tools: Adobe InDesign, Illustrator, and Photoshop
Objectives: Create a brochure for a company
Process: I used Photoshop’s magenetic lasso tool to copy the shape
of Florida, the outline of the picture I took of the house, and to make
the Ron Jon logo into a .png image. I also used Photoshop to create
the montage images. I used Illustrator to make the surfboard shape, the
Mickey head, the surfboard, and the wineglass. I used InDesign to
compile everything and add background images.
Project Title: Montage				Date: May 25, 2016
Course: Comm 130: Visual Media 		 Instructor: Jason Stucki
Program(s) Tools: Adobe Photoshop, Google Translate
Objectives: Use Photoshop to create a montage and spiritual message
Process: I uploaded the image of the Bible and created a layering mask.
With the mask, I created a light blur over the image over everthing ex-
cept the text on the Bible. I used the magnetic lasso tool to make the
outline of Christ and copied it into the image with the Bible, making the
image slightly transparent and adding feathring to the outer edges. I then
used Google Translate to translate the pharse Holy Bible into multiple
different languages. For each of the translations, I adjusted the font size,
the color, bevel and emboss, and the transparency before arranging them
around the page.
Project Title: Magazine Cover		 Date: May 5, 2016
Course: Comm 130: Visual Media 		 Instructor: Jason Stucki
Program(s) Tools: Adobe Photoshop, Adobe InDesign
Objectives: Create a magazine cover for a real or fictional magzine
Process: I uploaded the photo of myself into Adobe Photoshop. I
adjusted the lighting to make the image slightly darker, then I used the
magnetic lasso tool to make an outline of myself, after which I inserted
the image of the flames and set is as the background. I then used the pen
tool to draw a random shape, which I filled in with an image of static
that I found on Google. I exported the file to jpeg and imported it into
Adobe InDesign, where I added the text and the textual characteristics
such as stroke size, drop shadow, beveling and embossing.
Project Title: HTML/CSS Design		 Date: June 16, 2016
Course: Comm 130: Visual Media 		 Instructor: Jason Stucki
Program(s) Tools: Notepad ++, Adobe InDesign
Objectives: Use HTML and CSS to design a Web page for a company
Process: I used Adobe InDesign to make some minor changes to the
Valhallawear logo that I had previously created. I found the image of the
viking on Google and downloaded it to m desktop. I then opened
Notepad ++ and edited the existing code, changing the coloring, font
family, font size, and inserted the background image as well as the logo.
Project Title: Webpage Mockup		Date: June 22, 2016
Course: Comm 130: Visual Media 		 Instructor: Jason Stucki
Program(s) Tools: Adobe Photoshop, Illustrator, InDesign
Objectives: Create a webpage mockup design
Process: I had previously created the logo for another project. I
uploaded the logo into the Photoshop and used the magnetic lasso tool
to create .png image and did the same for the outlines of America and
China. I used Adobe Illustrator to draw the four quadrants of a circle
and uloaded the image into Adobe InDesign where I grouped the four
segments and set the background as an yin yang. For each of the images,
I created a rectangle with the shape creator tool and added an image for
the background by placing a linked image and positioning it
appropriately. I created all the other shapes and then added the text.
Project Title: Infographic		 		Date: June 9, 2016
Course: Comm 130: Visual Media 		 Instructor: Jason Stucki
Program(s) Tools: Adobe InDesign, Adobe Illustrator
Objectives: Create an infographic with custom images
Process: I used Adobe Photoshop’s magentic lasso tool to trace the
letters in the word Hollywood. I exported each letter as a .png image and
uploaded each one into Illustrator where I arranged them to match the
iconic Hollywood sign. I used Illustrator to create the searchlights, the
beams of light, the Christmas tree, the rollercoaster, the football, the
pie graph, the two gender symbols and the mounts in the background.
I created the shapes that serve as the backdrops for the text, placed and
colored them before adding and adjusting the text.
Project Title: Prezi Presentation		Date: May 12, 2016
Course: Comm 130: Visual Media 		 Instructor: Jason Stucki
Program(s) Tools: Prezi
Objectives: Create an informative Prezi presentation
Process: I found each of the images used in the presentation from
various sites using Google’s image search. I added a custom background
in Prezi, using the image of the three hands and the corresponding
Korean, Chinese, and Japanese flags. I then placed each of the images
in at varying angles and depths so that the presentation would
transition to each slide in a dramatic, yet consitently organized way.
Each of the slides was arranged to demonstrate the differences between
Chinese, Korean, and Japanese language, culture, and writing systems.
Project Title: Business Design	 		Date: June 1, 2016
Course: Comm 130: Visual Media 		 Instructor: Jason Stucki
Program(s) Tools: Adobe Illustrator
Objectives: Create business cards and a letterhead for a company
Process: I used the pen tool in Adobe Illustrator to create the logo. I
did this by drawing half of the sword’s blade, handguard, hilt, and
pommel. After drawing the first half of each of the images, I copied and
pasted them and adjusted them to look like a mirror image of their
counterparts. After doing that, I positioned them to create a whole image
and grouped the objects together into a single piece. I then used the pen
tool to draw the light reflection on the blade and the hand grip lines
on the hilt of the sword. I took portions of the logo in order to create
the letter head and I placed the pieces of the logo on the front and back
sides of the business card.
Valhalla Wear
embrace your inner viking
Project Title: Photodesign		 		Date: May 18, 2016
Course: Comm 130: Visual Media 		 Instructor: Jason Stucki
Program(s) Tools: Adobe Photoshop, Adobe InDesign
Objectives: Create an inspirational message
Process: I took a photo of the submerged rose in the lake and
uploaded it to my computer. I used Adobe Photoshop to darken the
image and increse the contrast in order to make the reflections in the
water stand out more. I adjusted the vibrancy of the red color to make
the red of the rose pop out more and then exported the image as a
jpeg, which I uploaded into Adobe InDesign. In Indesign, I used the
shape creator tool to create the various shapes, colored them, and then
added the additional text.

Alex Nielson Visual Media Portfolio

  • 2.
    Table of Contents p.4 Brochure p. 6 Montage p. 8 HTML/CSS Site design p. 10 Infographic p. 12 Prezi Presentation p. 14 Web Page Mockup p. 16 Logo Design and Letterhead p. 18 Magazine Cover p. 20 Photodesign Table of Contents p. 4 Brochure p. 6 Montage p. 8 Magazine Cover p. 10 HTML/CSS Page Design p. 12 Webpage Mockup p. 14 Infographic p. 16 Prezi Presentation p. 18 Business Cards and Letterhead p. 20 Photodesign Contact InformationContact Information Phone number: 385-221-2009 e-mail address: agnielson@outlook.com Address: 1151 White Oak Circle, Melbourne, FL 32934 Alex NielsonAlex Nielson
  • 3.
    Project Title: Brochure Date:July 6, 2016 Course: Comm 130: Visual Media Instructor: Jason Stucki Program(s) Tools: Adobe InDesign, Illustrator, and Photoshop Objectives: Create a brochure for a company Process: I used Photoshop’s magenetic lasso tool to copy the shape of Florida, the outline of the picture I took of the house, and to make the Ron Jon logo into a .png image. I also used Photoshop to create the montage images. I used Illustrator to make the surfboard shape, the Mickey head, the surfboard, and the wineglass. I used InDesign to compile everything and add background images.
  • 4.
    Project Title: Montage Date:May 25, 2016 Course: Comm 130: Visual Media Instructor: Jason Stucki Program(s) Tools: Adobe Photoshop, Google Translate Objectives: Use Photoshop to create a montage and spiritual message Process: I uploaded the image of the Bible and created a layering mask. With the mask, I created a light blur over the image over everthing ex- cept the text on the Bible. I used the magnetic lasso tool to make the outline of Christ and copied it into the image with the Bible, making the image slightly transparent and adding feathring to the outer edges. I then used Google Translate to translate the pharse Holy Bible into multiple different languages. For each of the translations, I adjusted the font size, the color, bevel and emboss, and the transparency before arranging them around the page.
  • 5.
    Project Title: MagazineCover Date: May 5, 2016 Course: Comm 130: Visual Media Instructor: Jason Stucki Program(s) Tools: Adobe Photoshop, Adobe InDesign Objectives: Create a magazine cover for a real or fictional magzine Process: I uploaded the photo of myself into Adobe Photoshop. I adjusted the lighting to make the image slightly darker, then I used the magnetic lasso tool to make an outline of myself, after which I inserted the image of the flames and set is as the background. I then used the pen tool to draw a random shape, which I filled in with an image of static that I found on Google. I exported the file to jpeg and imported it into Adobe InDesign, where I added the text and the textual characteristics such as stroke size, drop shadow, beveling and embossing.
  • 6.
    Project Title: HTML/CSSDesign Date: June 16, 2016 Course: Comm 130: Visual Media Instructor: Jason Stucki Program(s) Tools: Notepad ++, Adobe InDesign Objectives: Use HTML and CSS to design a Web page for a company Process: I used Adobe InDesign to make some minor changes to the Valhallawear logo that I had previously created. I found the image of the viking on Google and downloaded it to m desktop. I then opened Notepad ++ and edited the existing code, changing the coloring, font family, font size, and inserted the background image as well as the logo.
  • 7.
    Project Title: WebpageMockup Date: June 22, 2016 Course: Comm 130: Visual Media Instructor: Jason Stucki Program(s) Tools: Adobe Photoshop, Illustrator, InDesign Objectives: Create a webpage mockup design Process: I had previously created the logo for another project. I uploaded the logo into the Photoshop and used the magnetic lasso tool to create .png image and did the same for the outlines of America and China. I used Adobe Illustrator to draw the four quadrants of a circle and uloaded the image into Adobe InDesign where I grouped the four segments and set the background as an yin yang. For each of the images, I created a rectangle with the shape creator tool and added an image for the background by placing a linked image and positioning it appropriately. I created all the other shapes and then added the text.
  • 8.
    Project Title: Infographic Date: June 9, 2016 Course: Comm 130: Visual Media Instructor: Jason Stucki Program(s) Tools: Adobe InDesign, Adobe Illustrator Objectives: Create an infographic with custom images Process: I used Adobe Photoshop’s magentic lasso tool to trace the letters in the word Hollywood. I exported each letter as a .png image and uploaded each one into Illustrator where I arranged them to match the iconic Hollywood sign. I used Illustrator to create the searchlights, the beams of light, the Christmas tree, the rollercoaster, the football, the pie graph, the two gender symbols and the mounts in the background. I created the shapes that serve as the backdrops for the text, placed and colored them before adding and adjusting the text.
  • 9.
    Project Title: PreziPresentation Date: May 12, 2016 Course: Comm 130: Visual Media Instructor: Jason Stucki Program(s) Tools: Prezi Objectives: Create an informative Prezi presentation Process: I found each of the images used in the presentation from various sites using Google’s image search. I added a custom background in Prezi, using the image of the three hands and the corresponding Korean, Chinese, and Japanese flags. I then placed each of the images in at varying angles and depths so that the presentation would transition to each slide in a dramatic, yet consitently organized way. Each of the slides was arranged to demonstrate the differences between Chinese, Korean, and Japanese language, culture, and writing systems.
  • 10.
    Project Title: BusinessDesign Date: June 1, 2016 Course: Comm 130: Visual Media Instructor: Jason Stucki Program(s) Tools: Adobe Illustrator Objectives: Create business cards and a letterhead for a company Process: I used the pen tool in Adobe Illustrator to create the logo. I did this by drawing half of the sword’s blade, handguard, hilt, and pommel. After drawing the first half of each of the images, I copied and pasted them and adjusted them to look like a mirror image of their counterparts. After doing that, I positioned them to create a whole image and grouped the objects together into a single piece. I then used the pen tool to draw the light reflection on the blade and the hand grip lines on the hilt of the sword. I took portions of the logo in order to create the letter head and I placed the pieces of the logo on the front and back sides of the business card. Valhalla Wear embrace your inner viking
  • 11.
    Project Title: Photodesign Date: May 18, 2016 Course: Comm 130: Visual Media Instructor: Jason Stucki Program(s) Tools: Adobe Photoshop, Adobe InDesign Objectives: Create an inspirational message Process: I took a photo of the submerged rose in the lake and uploaded it to my computer. I used Adobe Photoshop to darken the image and increse the contrast in order to make the reflections in the water stand out more. I adjusted the vibrancy of the red color to make the red of the rose pop out more and then exported the image as a jpeg, which I uploaded into Adobe InDesign. In Indesign, I used the shape creator tool to create the various shapes, colored them, and then added the additional text.