This document is the user manual for Oracle VM VirtualBox version 7.0.0. It contains instructions for installing VirtualBox on various host operating systems, creating and configuring virtual machines, and using features like snapshots, cloning, importing/exporting in OVF format, and integration with Oracle Cloud Infrastructure. The first chapter covers getting started tasks like installation, creating a first VM, basic operations within the VirtualBox Manager UI, and an overview of additional features. Subsequent chapters provide more details on installation, supported guest OSes, VM configuration settings, and other topics.


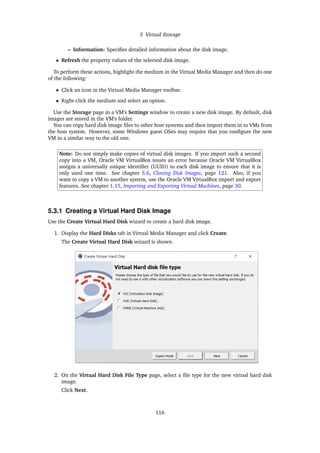
![2 Installation Details
2.1.3 Uninstallation
As Oracle VM VirtualBox uses the standard Microsoft Windows installer, Oracle VM VirtualBox
can be safely uninstalled at any time. Click the program entry in the Add/Remove Programs
list in the Windows Control Panel.
2.1.4 Unattended Installation
Unattended installations can be performed using the standard MSI support.
2.1.5 Public Properties
Public properties can be specified with the MSI API, to control additional behavior and features
of the Windows host installer. Use either of the following commands:
VirtualBox.exe -msiparams NAME=VALUE [...]
msiexec /i VirtualBox-<version>-Win.msi NAME=VALUE [...]
The following public properties are available.
• VBOX_INSTALLDESKTOPSHORTCUT
Specifies whether or not an Oracle VM VirtualBox icon on the desktop should be created.
Set to 1 to enable, 0 to disable. Default is 1.
• VBOX_INSTALLQUICKLAUNCHSHORTCUT
Specifies whether or not an Oracle VM VirtualBox icon in the Quick Launch Bar should be
created.
Set to 1 to enable, 0 to disable. Default is 1.
• VBOX_REGISTERFILEEXTENSIONS
Specifies whether or not the file extensions .vbox, .vbox-extpack, .ovf, .ova, .vdi, .vmdk,
.vhd and .vdd should be associated with Oracle VM VirtualBox. Files of these types then
will be opened with Oracle VM VirtualBox.
Set to 1 to enable, 0 to disable. Default is 1.
• VBOX_START
Specifies whether to start Oracle VM VirtualBox right after successful installation.
Set to 1 to enable, 0 to disable. Default is 1.
2.2 Installing on macOS Hosts
2.2.1 Performing the Installation
For macOS hosts, Oracle VM VirtualBox ships in a dmg disk image file. Perform the following
steps to install on a macOS host:
1. Double-click on the dmg file, to mount the contents.
2. A window opens, prompting you to double-click on the VirtualBox.pkg installer file dis-
played in that window.
3. This starts the installer, which enables you to select where to install Oracle VM VirtualBox.
4. An Oracle VM VirtualBox icon is added to the Applications folder in the Finder.
57](https://image.slidesharecdn.com/vboxusermanual-230728224837-47de127d/85/VBoxUserManual-pdf-72-320.jpg)


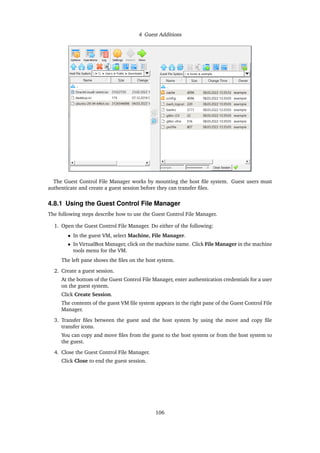
![4 Guest Additions
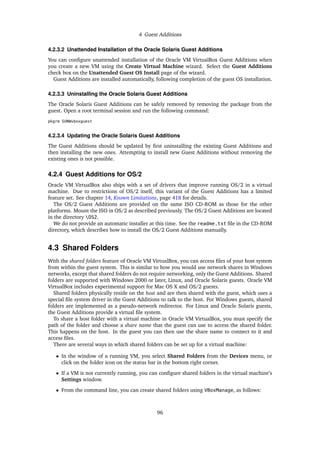
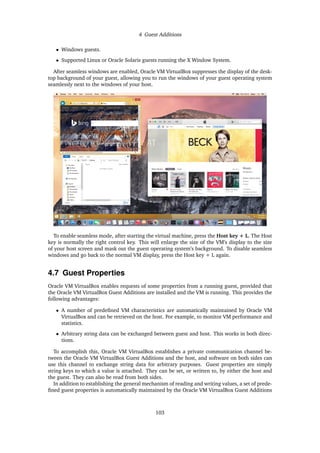
VBoxManage sharedfolder add "VM name" --name "sharename" --hostpath "C:test"
See chapter 8.42, VBoxManage sharedfolder, page 277.
There are two types of shares:
• Permanent shares, that are saved with the VM settings.
• Transient shares, that are added at runtime and disappear when the VM is powered
off. These can be created using a check box in VirtualBox Manager, or by using the
--transient option of the VBoxManage sharedfolder add command.
Shared folders can either be read-write or read-only. This means that the guest is either
allowed to both read and write, or just read files on the host. By default, shared folders are
read-write. Read-only folders can be created using a check box in the VirtualBox Manager, or
with the --readonly option of the VBoxManage sharedfolder add command.
Oracle VM VirtualBox shared folders also support symbolic links, also called symlinks, under
the following conditions:
• The host operating system must support symlinks. For example, a macOS, Linux, or Oracle
Solaris host is required.
• Currently only Linux and Oracle Solaris Guest Additions support symlinks.
• For security reasons the guest OS is not allowed to create symlinks by default. If you trust
the guest OS to not abuse the functionality, you can enable creation of symlinks for a shared
folder as follows:
VBoxManage setextradata "VM name" VBoxInternal2/SharedFoldersEnableSymlinksCreate/<sharename> 1
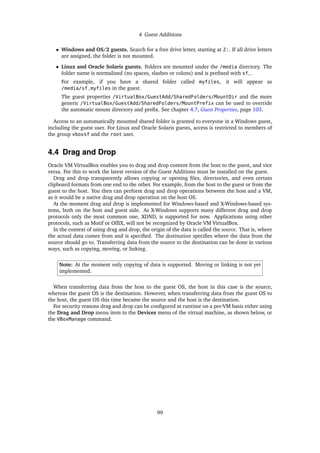
4.3.1 Manual Mounting
You can mount the shared folder from inside a VM, in the same way as you would mount an
ordinary network share:
• In a Windows guest, shared folders are browseable and therefore visible in Windows Ex-
plorer. To attach the host’s shared folder to your Windows guest, open Windows Explorer
and look for the folder in My Networking Places, Entire Network, Oracle VM VirtualBox
Shared Folders. By right-clicking on a shared folder and selecting Map Network Drive
from the menu that pops up, you can assign a drive letter to that shared folder.
Alternatively, on the Windows command line, use the following command:
net use x: vboxsvrsharename
While vboxsvr is a fixed name, note that vboxsrv would also work, replace x: with
the drive letter that you want to use for the share, and sharename with the share name
specified with VBoxManage.
• In a Linux guest, use the following command:
mount -t vboxsf [-o OPTIONS] sharename mountpoint
To mount a shared folder during boot, add the following entry to /etc/fstab:
sharename mountpoint vboxsf defaults 0 0
97](https://image.slidesharecdn.com/vboxusermanual-230728224837-47de127d/85/VBoxUserManual-pdf-112-320.jpg)
![4 Guest Additions
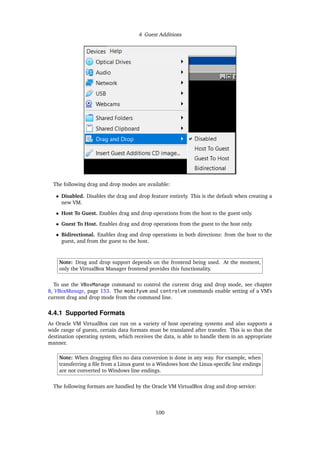
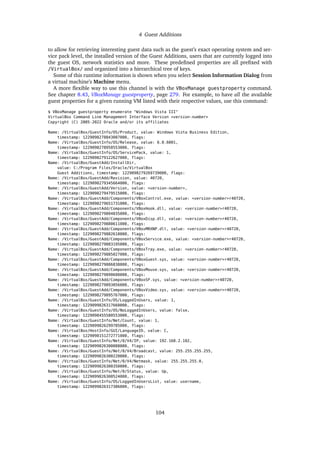
• In a Oracle Solaris guest, use the following command:
mount -F vboxfs [-o OPTIONS] sharename mountpoint
Replace sharename, use a lowercase string, with the share name specified with
VBoxManage or VirtualBox Manager. Replace mountpoint with the path where you want
the share to be mounted on the guest, such as /mnt/share. The usual mount rules apply.
For example, create this directory first if it does not exist yet.
Here is an example of mounting the shared folder for the user jack on Oracle Solaris:
$ id
uid=5000(jack) gid=1(other)
$ mkdir /export/home/jack/mount
$ pfexec mount -F vboxfs -o uid=5000,gid=1 jackshare /export/home/jack/mount
$ cd ~/mount
$ ls
sharedfile1.mp3 sharedfile2.txt
$
Beyond the standard options supplied by the mount command, the following are available:
iocharset CHARSET
This option sets the character set used for I/O operations. Note that on Linux guests, if the
iocharset option is not specified, then the Guest Additions driver will attempt to use the
character set specified by the CONFIG_NLS_DEFAULT kernel option. If this option is not
set either, then UTF-8 is used.
convertcp CHARSET
This option specifies the character set used for the shared folder name. This is UTF-8 by
default.
The generic mount options, documented in the mount manual page, apply also. Especially
useful are the options uid, gid and mode, as they can allow access by normal users in
read/write mode, depending on the settings, even if root has mounted the filesystem.
• In an OS/2 guest, use the VBoxControl command to manage shared folders. For example:
VBoxControl sharedfolder use D: MyShareName
VBoxControl sharedfolder unuse D:
VBoxControl sharedfolder list
As with Windows guests, shared folders can also be accessed via UNC using VBoxSF,
VBoxSvr or VBoxSrv as the server name and the shared folder name as sharename.
4.3.2 Automatic Mounting
Oracle VM VirtualBox provides the option to mount shared folders automatically. When auto-
matic mounting is enabled for a shared folder, the Guest Additions service will mount it for you
automatically. For Windows or OS/2, a preferred drive letter can also be specified. For Linux or
Oracle Solaris, a mount point directory can also be specified.
If a drive letter or mount point is not specified, or is in use already, an alternative location is
found by the Guest Additions service. The service searches for an alternative location depending
on the guest OS, as follows:
98](https://image.slidesharecdn.com/vboxusermanual-230728224837-47de127d/85/VBoxUserManual-pdf-113-320.jpg)


![6 Virtual Networking
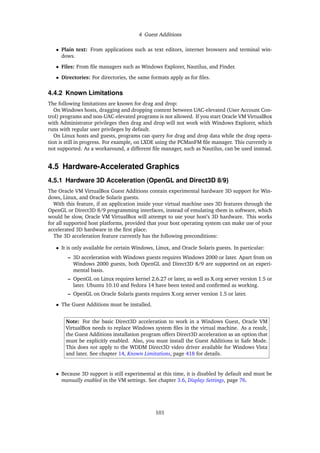
A DHCP server provides a list of registered nameservers, but does not map servers from the
127/8 network.
To start the NAT service, use the following command:
VBoxManage natnetwork start --netname natnet1
If the network has a DHCP server attached then it will start together with the NAT network
service.
To stop the NAT network service, together with any DHCP server:
VBoxManage natnetwork stop --netname natnet1
To delete the NAT network service:
VBoxManage natnetwork remove --netname natnet1
This command does not remove the DHCP server if one is enabled on the internal network.
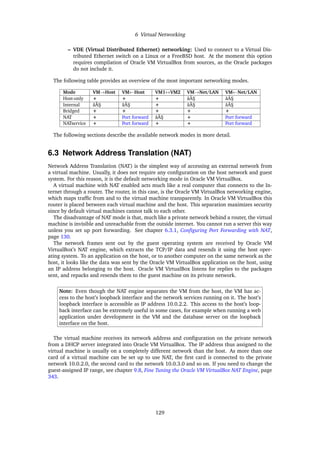
Port-forwarding is supported, using the --port-forward-4 switch for IPv4 and
--port-forward-6 for IPv6. For example:
VBoxManage natnetwork modify
--netname natnet1 --port-forward-4 "ssh:tcp:[]:1022:[192.168.15.5]:22"
This adds a port-forwarding rule from the host’s TCP 1022 port to the port 22 on the guest
with IP address 192.168.15.5. Host port, guest port and guest IP are mandatory. To delete the
rule, use the following command:
VBoxManage natnetwork modify --netname natnet1 --port-forward-4 delete ssh
It is possible to bind a NAT service to specified interface. For example:
VBoxManage setextradata global "NAT/win-nat-test-0/SourceIp4" 192.168.1.185
To see the list of registered NAT networks, use the following command:
VBoxManage list natnetworks
NAT networks can also be created, deleted, and configured using the Network Manager tool in
VirtualBox Manager. Click File, Tools, Network Manager. See chapter 6.11, Network Manager,
page 138.
Note: Even though the NAT service separates the VM from the host, the VM has ac-
cess to the host’s loopback interface and the network services running on it. The host’s
loopback interface is accessible as IP address 10.0.2.2 (assuming the default configura-
tion, in other configurations it’s the respective address in the configured IPv4 or IPv6
network range). This access to the host’s loopback interface can be extremely useful
in some cases, for example when running a web application under development in the
VM and the database server on the loopback interface on the host.
132](https://image.slidesharecdn.com/vboxusermanual-230728224837-47de127d/85/VBoxUserManual-pdf-147-320.jpg)
![6 Virtual Networking
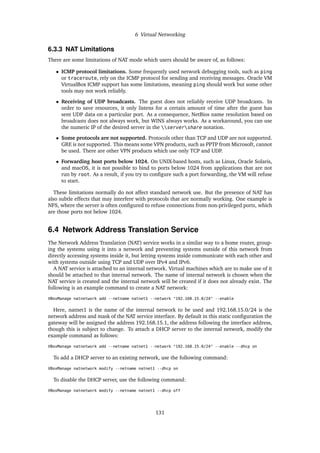
Note: On UNIX-based hosts, such as Linux, Oracle Solaris, and Mac OS X, it is not
possible to bind to ports below 1024 from applications that are not run by root. As a
result, if you try to configure such a source UDP port, the VM will refuse to start.
6.9 VDE Networking
Virtual Distributed Ethernet (VDE) is a flexible, virtual network infrastructure system, spanning
across multiple hosts in a secure way. It enables L2/L3 switching, including spanning-tree pro-
tocol, VLANs, and WAN emulation. It is an optional part of Oracle VM VirtualBox which is only
included in the source code.
VDE is a project developed by Renzo Davoli, Associate Professor at the University of Bologna,
Italy.
The basic building blocks of the infrastructure are VDE switches, VDE plugs, and VDE wires
which interconnect the switches.
The Oracle VM VirtualBox VDE driver has a single parameter: VDE network. This is the name
of the VDE network switch socket to which the VM will be connected.
The following basic example shows how to connect a virtual machine to a VDE switch.
1. Create a VDE switch:
vde_switch -s /tmp/switch1
2. Configure VMs using the command-line:
VBoxManage modifyvm "VM name" --nic<x> generic
VBoxManage modifyvm "VM name" --nic-generic-drv<x> VDE
To connect to an automatically allocated switch port:
VBoxManage modifyvm "VM name" --nic-property<x> network=/tmp/switch1
To connect to a specific switch port n:
VBoxManage modifyvm "VM name" --nic-property<x> network=/tmp/switch1[<n>]
This command can be useful for VLANs.
3. (Optional) Map between a VDE switch port and a VLAN.
Using the switch command line:
vde$ vlan/create <VLAN>
vde$ port/setvlan <port> <VLAN>
VDE is available on Linux and FreeBSD hosts only. It is only available if the VDE software and
the VDE plugin library from the VirtualSquare project are installed on the host system.
Note: For Linux hosts, the shared library libvdeplug.so must be available in the search
path for shared libraries.
For more information on setting up VDE networks, please see the documentation accompany-
ing the software. See also http://wiki.virtualsquare.org.
137](https://image.slidesharecdn.com/vboxusermanual-230728224837-47de127d/85/VBoxUserManual-pdf-152-320.jpg)
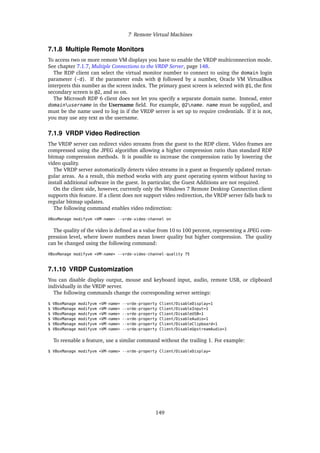
![7 Remote Virtual Machines
• On Windows, you can use the Microsoft Terminal Services Connector, mstsc.exe, that is
included with Windows. Press the Windows key + R, to display the Run dialog. Enter
mstsc to start the program. You can also find the program in Start, All Programs, Acces-
sories, Remote Desktop Connection. If you use the Run dialog, you can enter options
directly. For example:
mstsc 1.2.3.4:3389
Replace 1.2.3.4 with the host IP address, and 3389 with a different port, if necessary.
Note:
– IPv6 addresses must be enclosed in square brackets to specify a port. For example:
mstsc [fe80::1:2:3:4]:3389
– When connecting to localhost in order to test the connection, the addresses
localhost and 127.0.0.1 might not work using mstsc.exe. Instead, the ad-
dress 127.0.0.2[:3389] has to be used.
• On other systems, you can use the standard open source rdesktop program. This ships
with most Linux distributions.
With rdesktop, use a command line such as the following:
$ rdesktop -a 16 -N 1.2.3.4:3389
Replace 1.2.3.4 with the host IP address, and 3389 with a different port, if necessary. The
-a 16 option requests a color depth of 16 bits per pixel, which we recommend. For best
performance, after installation of the guest operating system, you should set its display
color depth to the same value. The -N option enables use of the NumPad keys.
• You can use the Remmina remote desktop client with VRDP. This application is included
with some Linux distributions, such as Debian and Ubuntu.
• If you run the KDE desktop, you can use krdc, the KDE RDP viewer. A typical command
line is as follows:
$ krdc rdp://1.2.3.4:3389
Replace 1.2.3.4 with the host IP address, and 3389 with a different port, if necessary. The
rdp:// prefix is required with krdc to switch it into RDP mode.
• With Sun Ray thin clients you can use uttsc, which is part of the Sun Ray Windows
Connector package. See the Sun Ray documentation for details.
7.1.2 VBoxHeadless, the Remote Desktop Server
While any VM started from VirtualBox Manager is capable of running virtual machines remotely,
it is not convenient to have to run the full GUI if you never want to have VMs displayed locally
in the first place. In particular, if you are running server hardware whose only purpose is to host
VMs, and all your VMs are supposed to run remotely over VRDP, then it is pointless to have a
graphical user interface on the server at all. This is especially true for Linux or Oracle Solaris
hosts, as the VirtualBox Manager comes with dependencies on the Qt and SDL libraries. This is
inconvenient if you would rather not have the X Window system on your server at all.
Oracle VM VirtualBox therefore comes with a front-end called VBoxHeadless, which produces
no visible output on the host at all, but still can optionally deliver VRDP data. This front-end has
no dependencies on the X Window system on Linux and Oracle Solaris hosts.
143](https://image.slidesharecdn.com/vboxusermanual-230728224837-47de127d/85/VBoxUserManual-pdf-158-320.jpg)

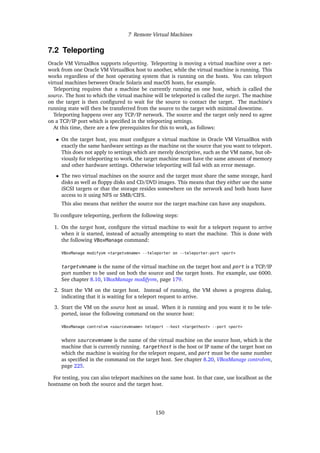
![7 Remote Virtual Machines
Note: In rare cases, if the CPUs of the source and the target are very different, teleport-
ing can fail with an error message, or the target may hang. This may happen especially
if the VM is running application software that is highly optimized to run on a particular
CPU without correctly checking that certain CPU features are actually present. Ora-
cle VM VirtualBox filters what CPU capabilities are presented to the guest operating
system. Advanced users can attempt to restrict these virtual CPU capabilities with the
VBoxManage modifyvm --cpuid-portability-level command. See chapter 8.10,
VBoxManage modifyvm, page 179.
7.3 VBoxHeadless
Oracle VM VirtualBox remote desktop server.
Synopsis
VBoxHeadless [--startvm= [uuid | vmname] ] [--vrde= on | off | config ]
[--vrdeproperty=prop-name=[prop-value]] [--settingspw=[password]]
[--settingspwfile=password-file] [--start-paused=vmname] [--capture]
[--width=width] [--height=height] [--bitrate=bit-rate]
[--filename=filename]
Description
The VBoxHeadless command is an alternate front end that enables you to remotely manage
virtual machines (VMs). The front end is a CLI rather than the VirtualBox Manager graphical
user interface (GUI).
For information about using this command, see chapter 7.1.2, VBoxHeadless, the Remote Desk-
top Server, page 143.
Command Options
--startvm=<uuid> | <vmname>
Specifies the Universally Unique Identifier (UUID) or name of the VM to start.
Use the VBoxManage list vms command to obtain VM information.
The short versions of this option are -s and -startvm.
--vrde=on | off | config
Specifies how to use the VRDP server. The default value is config. Valid values are as
follows:
• on enables the VRDP server.
VBoxHeadless --startvm=<vmname> --vrde=on
• off disables the VRDP server.
VBoxHeadless --startvm=<vmname> --vrde=off
• config enables the VRDP server depending on the VM configuration.
VBoxHeadless --startvm=<vmname> --vrde=config
The short version of this option is -v.
--vrdeproperty=<prop-name>=<prop-value>
Specifies a value for one of the following properties:
151](https://image.slidesharecdn.com/vboxusermanual-230728224837-47de127d/85/VBoxUserManual-pdf-166-320.jpg)
![7 Remote Virtual Machines
• The TCP/Ports property value is a comma-separated list of ports to which the VRDE
server can bind. Use a hyphen (-) between two port numbers to specify a range of
ports.
• The TCP/Address property value is the interface IP address to which to bind the VRDE
server.
--settingspw=[<password>]
Specifies a settings password to access encrypted settings. If you do not specify the pass-
word on the command line, VBoxHeadless prompts you for the password.
--settingspwfile=<password-file>
Specifies the file that contains the settings password.
--start-paused=<vmname>
Starts the specified VM in the paused state.
--capture
Records the VM screen output to a file. In addition to this option, you must use the
--filename option to specify the name of the file.
--width=<width>
Specifies the frame width of the recording in pixels. This option is associated with the
--capture option.
--height=<height>
Specifies the frame height of the recording in pixels. This option is associated with the
--capture option.
--bitrate=<bit-rate>
Specifies the bit rate of the recording in kilobits per second. This option is associated with
the --capture option.
--filename=<filename>
Specifies the name of the file in which to store the recording. The codec used is based on
the file extension that you choose. You must specify this option if you use the --capture
option.
Examples
The following command starts the ol7u4 VM:
$ VBoxHeadless --startvm "ol7u4"
The following command starts the ol7u6 VM in the Paused state.
$ VBoxHeadless --startvm "ol7u6" --start-paused
The following command starts the ol7u6 VM and records the session. The recording is saved
to the ol7u6-recording WebM file.
$ VBoxHeadless --startvm "ol7u6" --capture --filename ol7u6-recording.webm
See Also
chapter 8.5, VBoxManage list, page 169, chapter 8.19, VBoxManage startvm, page 223
152](https://image.slidesharecdn.com/vboxusermanual-230728224837-47de127d/85/VBoxUserManual-pdf-167-320.jpg)
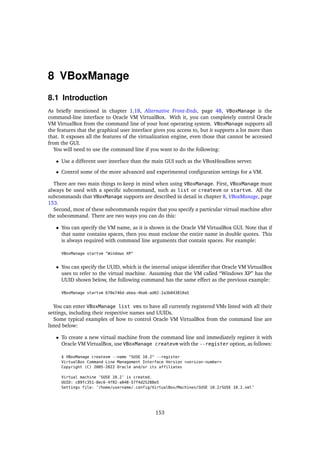
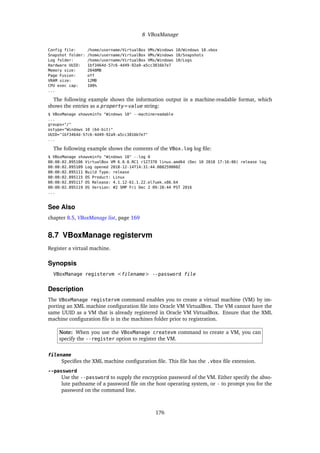
![8 VBoxManage
As can be seen from the above output, a new virtual machine has been created with a new
UUID and a new XML settings file.
For more details, see chapter 8.9, VBoxManage createvm, page 177.
• To show the configuration of a particular VM, use VBoxManage showvminfo. See chapter
8.6, VBoxManage showvminfo, page 174 for details and an example.
• To change settings while a VM is powered off, use VBoxManage modifyvm. For example:
VBoxManage modifyvm "Windows XP" --memory 512
See also chapter 8.10, VBoxManage modifyvm, page 179.
• To change the storage configuration, such as to add a storage controller and then a virtual
disk, use VBoxManage storagectl and VBoxManage storageattach. See chapter 8.27,
VBoxManage storagectl, page 255 and chapter 8.26, VBoxManage storageattach, page 250.
• To control VM operation, use one of the following:
– To start a VM that is currently powered off, use VBoxManage startvm. See chapter
8.19, VBoxManage startvm, page 223.
– To pause or save a VM that is currently running or change some of its settings, use
VBoxManage controlvm. See chapter 8.20, VBoxManage controlvm, page 225.
8.2 Commands Overview
When running VBoxManage without parameters or when supplying an invalid command line, the
following command syntax list is shown. Note that the output will be slightly different depending
on the host platform. If in doubt, check the output of VBoxManage for the commands available
on your particular host.
VBoxManage [-V | --version] [--dump-build-type] [-q | --nologo]
[--settingspw=password] [--settingspwfile=pw-file] [@response-file]
[[help] subcommand]
VBoxManage list [--long] [--sorted] [bridgedifs | cloudnets | cloudprofiles
| cloudproviders | cpu-profiles | dhcpservers | dvds | extpacks | floppies
| groups | hddbackends | hdds | hostcpuids | hostdrives | hostdvds
| hostfloppies | hostinfo | hostonlyifs | hostonlynets | intnets | natnets
| ostypes | runningvms | screenshotformats | systemproperties | usbfilters
| usbhost | vms | webcams]
VBoxManage showvminfo <uuid | vmname> [--details] [--machinereadable]
[--password-id] [--password]
VBoxManage showvminfo <uuid | vmname> <--log=index> [--password-id id]
[--password file|-]
VBoxManage registervm <filename> --password file
VBoxManage unregistervm <uuid | vmname> [--delete]
VBoxManage createvm <--name=name> [--basefolder=basefolder] [--default]
[--group=group-ID,...] [--ostype=ostype] [--register] [--uuid=uuid]
[--cipher cipher] [--password-id password-id] [--password file]
154](https://image.slidesharecdn.com/vboxusermanual-230728224837-47de127d/85/VBoxUserManual-pdf-169-320.jpg)
![8 VBoxManage
VBoxManage modifyvm <uuid | vmname> [--name=name]
[--groups= group [,group...] ] [--description=description]
[--os-type=OS-type] [--icon-file=filename] [--memory=size-in-MB]
[--page-fusion= on | off ] [--vram=size-in-MB] [--acpi= on | off ]
[--ioapic= on | off ] [--hardware-uuid=UUID] [--cpus=CPU-count]
[--cpu-hotplug= on | off ] [--plug-cpu=CPU-ID] [--unplug-cpu=CPU-ID]
[--cpu-execution-cap=number] [--pae= on | off ] [--long-mode= on | off ]
[--ibpb-on-vm-exit= on | off ] [--ibpb-on-vm-entry= on | off ]
[--spec-ctrl= on | off ] [--l1d-flush-on-sched= on | off ]
[--l1d-flush-on-vm-entry= on | off ] [--mds-clear-on-sched= on | off ]
[--mds-clear-on-vm-entry= on | off ] [--cpu-profile= host | Intel 8086
| Intel 80286 | Intel 80386 ] [--hpet= on | off ] [--hwvirtex= on | off ]
[--triple-fault-reset= on | off ] [--apic= on | off ] [--x2apic= on | off ]
[--paravirt-provider= none | default | legacy | minimal | hyperv | kvm ]
[--paravirt-debug= key=value [,key=value...] ] [--nested-paging= on
| off ] [--large-pages= on | off ] [--vtx-vpid= on | off ] [--vtx-ux= on
| off ] [--nested-hw-virt= on | off ] [--virt-vmsave-vmload= on | off ]
[--accelerate-3d= on | off ] [--accelerate-2d-video= on | off ]
[--chipset= ich9 | piix3 ] [--iommu= none | automatic | amd | intel ]
[--tpm-type= none | 1.2 | 2.0 | host | swtpm ] [--tpm-location= location ]
[--bios-logo-fade-in= on | off ] [--bios-logo-fade-out= on | off ]
[--bios-logo-display-time=msec] [--bios-logo-image-path=pathname]
[--bios-boot-menu= disabled | menuonly | messageandmenu ] [--bios-apic=
disabled | apic | x2apic ] [--bios-system-time-offset=msec]
[--bios-pxe-debug= on | off ] [--system-uuid-le= on | off ] [--bootX= none
| floppy | dvd | disk | net ] [--rtc-use-utc= on | off ]
[--graphicscontroller= none | vboxvga | vmsvga | vboxsvga ]
[--snapshot-folder= default | pathname ] [--firmware= bios | efi | efi32
| efi64 ] [--guest-memory-balloon=size-in-MB] [--default-frontend=
default | name ] [--vm-process-priority= default | flat | low | normal | high
]
VBoxManage modifyvm <uuid | vmname> [--nicN= none | null | nat | bridged
| intnet | hostonly | hostonlynet | generic | natnetwork | cloud ]
[--nic-typeN= Am79C970A | Am79C973 | 82540EM | 82543GC | 82545EM | virtio ]
[--cable-connectedN= on | off ] [--nic-traceN= on | off ]
[--nic-trace-fileN=filename] [--nic-propertyN=name= [value] ]
[--nic-speedN=kbps] [--nic-boot-prioN=priority] [--nic-promiscN= deny
| allow-vms | allow-all ] [--nic-bandwidth-groupN= none | name ]
[--bridge-adapterN= none | device-name ] [--cloud-networkN=network-name]
[--host-only-adapterN= none | device-name ]
[--host-only-netN=network-name] [--intnetN=network-name]
[--nat-networkN=network-name] [--nic-generic-drvN=driver-name]
[--mac-addressN= auto | MAC-address ]
VBoxManage modifyvm <uuid | vmname> [--nat-netN= network | default ]
[--nat-pfN= [rule-name],tcp | udp,[host-IP],hostport,[guest-IP],guestport
] [--nat-pfN=delete=rule-name] [--nat-tftp-prefixN=prefix]
[--nat-tftp-fileN=filename] [--nat-tftp-serverN=IP-address]
[--nat-bind-ipN=IP-address] [--nat-dns-pass-domainN= on | off ]
[--nat-dns-proxyN= on | off ] [--nat-dns-host-resolverN= on | off ]
[--nat-localhostreachableN= on | off ]
[--nat-settingsN=[mtu],[socksnd],[sockrcv],[tcpsnd],[tcprcv]]
[--nat-alias-modeN= default | [log],[proxyonly],[sameports] ]
155](https://image.slidesharecdn.com/vboxusermanual-230728224837-47de127d/85/VBoxUserManual-pdf-170-320.jpg)
![8 VBoxManage
VBoxManage modifyvm <uuid | vmname> [--mouse= ps2 | usb | usbtablet
| usbmultitouch | usbmtscreenpluspad ] [--keyboard= ps2 | usb ] [--uartN=
off | IO-baseIRQ ] [--uart-modeN= disconnected | server pipe | client pipe
| tcpserver port | tcpclient hostname:port | file filename | device-name ]
[--uart-typeN= 16450 | 16550A | 16750 ] [--lpt-modeN=device-name] [--lptN=
off | IO-baseIRQ ] [--audio= none | default | null | dsound | was | oss | alsa
| pulse | coreaudio ] [--audio-controller= ac97 | hda | sb16 ]
[--audio-codec= stac9700 | ad1980 | stac9221 | sb16 ] [--audio-in= on | off
] [--audio-out= on | off ] [--clipboard-mode= disabled | hosttoguest
| guesttohost | bidirectional ] [--drag-and-drop= disabled | hosttoguest
| guesttohost | bidirectional ] [--monitor-count=number] [--usb-ehci= on
| off ] [--usb-ohci= on | off ] [--usb-xhci= on | off ]
[--usb-rename=old-namenew-name]
VBoxManage modifyvm <uuid | vmname> [--recording= on | off ]
[--recording-screens= all | none | screen-ID[,screen-ID...] ]
[--recording-file=filename] [--recording-max-size=MB]
[--recording-max-time=msec] [--recording-opts= key=value[,key=value...]
] [--recording-video-fps=fps] [--recording-video-rate=rate]
[--recording-video-res=widthheight]
VBoxManage modifyvm <uuid | vmname> [--vrde= on | off ]
[--vrde-property=property-name= [property-value] ] [--vrde-extpack=
default | name ] [--vrde-port=port] [--vrde-address=hostip]
[--vrde-auth-type= null | external | guest ] [--vrde-auth-library= default
| name ] [--vrde-multi-con= on | off ] [--vrde-reuse-con= on | off ]
[--vrde-video-channel= on | off ] [--vrde-video-channel-quality=percent]
VBoxManage modifyvm <uuid | vmname> [--teleporter= on | off ]
[--teleporter-port=port] [--teleporter-address= address | empty ]
[--teleporter-password=password] [--teleporter-password-file= filename
| stdin ] [--cpuid-portability-level=level] [--cpuid-set=leaf [:subleaf]
eaxÂăebxÂăecxÂăedx] [--cpuid-remove=leaf [:subleaf] ]
[--cpuid-remove-all]
VBoxManage modifyvm <uuid | vmname> [--tracing-enabled= on | off ]
[--tracing-config=string] [--tracing-allow-vm-access= on | off ]
VBoxManage modifyvm <uuid | vmname> [--usb-card-reader= on | off ]
VBoxManage modifyvm <uuid | vmname> [--autostart-enabled= on | off ]
[--autostart-delay=seconds]
VBoxManage modifyvm <uuid | vmname> [--guest-debug-provider= none | native
| gdb | kd ] [--guest-debug-io-provider= none | tcp | udp | ipc ]
[--guest-debug-address= IP-Address | path ] [--guest-debug-port=port]
VBoxManage modifyvm <uuid | vmname> [--pci-attach=host-PCI-address
[@guest-PCI-bus-address] ] [--pci-detach=host-PCI-address]
VBoxManage modifyvm <uuid | vmname> [--testing-enabled= on | off ]
[--testing-mmio= on | off ] [--testing-cfg-dwordidx=value]
VBoxManage clonevm <vmname|uuid> [--basefolder=basefolder]
[--groups=group,. . . ] [--mode=machine | --mode=machinechildren
| --mode=all] [--name=name] [--options=option,. . . ] [--register]
[--snapshot=snapshot-name] [--uuid=uuid]
VBoxManage movevm <uuid | vmname> [--type=basic] [--folder=folder-name]
VBoxManage encryptvm <uuid | vmname> setencryption --old-password file
--cipher cipher-identifier --new-password file
--new-password-id password-identifier --force
156](https://image.slidesharecdn.com/vboxusermanual-230728224837-47de127d/85/VBoxUserManual-pdf-171-320.jpg)
![8 VBoxManage
VBoxManage encryptvm <uuid | vmname> checkpassword <file>
VBoxManage encryptvm <uuid | vmname> addpassword --password file
--password-id password-identifier
VBoxManage encryptvm <uuid | vmname> removepassword <password-identifier>
VBoxManage cloud <--provider=name> <--profile=name>
list instances [--state=string] [--compartment-id=string]
VBoxManage cloud <--provider=name> <--profile=name>
list images <--compartment-id=string> [--state=string]
VBoxManage cloud <--provider=name> <--profile=name>
instance create <--domain-name=name> <<--image-id=id>
| <--boot-volume-id=id>> <--display-name=name> <--shape=type>
<--subnet=id> [--boot-disk-size=size in GB] [--publicip=true/false]
[--privateip=IP address] [--public-ssh-key=key string. . . ]
[--launch-mode=NATIVE/EMULATED/PARAVIRTUALIZED]
[--cloud-init-script-path=path to a script]
VBoxManage cloud <--provider=name> <--profile=name>
instance info <--id=unique id>
VBoxManage cloud <--provider=name> <--profile=name>
instance terminate <--id=unique id>
VBoxManage cloud <--provider=name> <--profile=name>
instance start <--id=unique id>
VBoxManage cloud <--provider=name> <--profile=name>
instance pause <--id=unique id>
VBoxManage cloud <--provider=name> <--profile=name>
image create <--display-name=name> [--bucket-name=name]
[--object-name=name] [--instance-id=unique id]
VBoxManage cloud <--provider=name> <--profile=name>
image info <--id=unique id>
VBoxManage cloud <--provider=name> <--profile=name>
image delete <--id=unique id>
VBoxManage cloud <--provider=name> <--profile=name>
image import <--id=unique id> [--bucket-name=name] [--object-name=name]
VBoxManage cloud <--provider=name> <--profile=name>
image export <--id=unique id> <--display-name=name>
[--bucket-name=name] [--object-name=name]
VBoxManage cloud <--provider=name> <--profile=name>
network setup [--gateway-os-name=string] [--gateway-os-version=string]
[--gateway-shape=string] [--tunnel-network-name=string]
[--tunnel-network-range=string] [--proxy=string]
[--compartment-id=string]
VBoxManage cloud <--provider=name> <--profile=name>
network create <--name=string> <--network-id=string> [--enable
| --disable]
VBoxManage cloud network update <--name=string> [--network-id=string]
[--enable | --disable]
VBoxManage cloud network delete <--name=string>
VBoxManage cloud network info <--name=string>
VBoxManage cloudprofile <--provider=name> <--profile=name> add
[--clouduser=unique id] [--fingerprint=MD5 string] [--keyfile=path]
[--passphrase=string] [--tenancy=unique id] [--compartment=unique id]
[--region=string]
157](https://image.slidesharecdn.com/vboxusermanual-230728224837-47de127d/85/VBoxUserManual-pdf-172-320.jpg)
![8 VBoxManage
VBoxManage cloudprofile <--provider=name> <--profile=name> update
[--clouduser=unique id] [--fingerprint=MD5 string] [--keyfile=path]
[--passphrase=string] [--tenancy=unique id] [--compartment=unique id]
[--region=string]
VBoxManage cloudprofile <--provider=name> <--profile=name> delete
VBoxManage cloudprofile <--provider=name> <--profile=name> show
VBoxManage import <ovfname | ovaname> [--dry-run] [--options= keepallmacs
| keepnatmacs | importtovdi ] [--vsys=n] [--ostype=ostype] [--vmname=name]
[--settingsfile=file] [--basefolder=folder] [--group=group] [--memory=MB]
[--cpus=n] [--description=text] [--eula= show | accept ] [--unit=n]
[--ignore] [--scsitype= BusLogic | LsiLogic ] [--disk=path]
[--controller=index] [--port=n]
VBoxManage import OCI:// --cloud [--ostype=ostype] [--vmname=name]
[--basefolder=folder] [--memory=MB] [--cpus=n] [--description=text]
<--cloudprofile=profile> <--cloudinstanceid=id>
[--cloudbucket=bucket]
VBoxManage export <machines> <--output=name> [--legacy09 | --ovf09
| --ovf10 | --ovf20] [--manifest] [--options= manifest | iso | nomacs
| nomacsbutnat . . . ] [--vsys=virtual-system-number]
[--description=description-info] [--eula=license-text]
[--eulafile=filename] [--product=product-name]
[--producturl=product-URL] [--vendor=vendor-name]
[--vendorurl=vendor-URL] [--version=version-info] [--vmname=vmname]
VBoxManage export <machine> <--output=cloud-service-provider> [--opc10]
[--vmname=vmname] [--cloud=virtual-system-number]
[--cloudprofile=cloud-profile-name] [--cloudshape=cloud-shape-name]
[--clouddomain=cloud-domain] [--clouddisksize=disk-size-in-GB]
[--cloudbucket=bucket-name] [--cloudocivcn=OCI-VCN-ID]
[--cloudocisubnet=OCI-subnet-ID] [--cloudkeepobject= true | false ]
[--cloudlaunchinstance= true | false ] [--cloudlaunchmode= EMULATED
| PARAVIRTUALIZED ] [--cloudpublicip= true | false ]
VBoxManage signova <ova> <--certificate=file> <--private-key=file>
[--private-key-password-file=password-file
| --private-key-password=password] [--digest-type=type] [--pkcs7
| --no-pkcs7] [--intermediate-cert=file] [--force] [--verbose] [--quiet]
[--dry-run]
VBoxManage startvm <uuid | vmname . . . > [--putenv=name[=value]] [--type= [gui
| headless | sdl | separate] ] --password file --password-id password
identifier
VBoxManage controlvm <uuid | vmname> pause
VBoxManage controlvm <uuid | vmname> resume
VBoxManage controlvm <uuid | vmname> reset
VBoxManage controlvm <uuid | vmname> poweroff
VBoxManage controlvm <uuid | vmname> savestate
VBoxManage controlvm <uuid | vmname> acpipowerbutton
VBoxManage controlvm <uuid | vmname> acpisleepbutton
VBoxManage controlvm <uuid | vmname> reboot
VBoxManage controlvm <uuid | vmname> shutdown [--force]
VBoxManage controlvm <uuid | vmname> keyboardputscancode <hex> [hex. . . ]
VBoxManage controlvm <uuid | vmname> keyboardputstring <string> [string. . . ]
158](https://image.slidesharecdn.com/vboxusermanual-230728224837-47de127d/85/VBoxUserManual-pdf-173-320.jpg)
![8 VBoxManage
VBoxManage controlvm <uuid | vmname> keyboardputfile <filename>
VBoxManage controlvm <uuid | vmname> setlinkstateN <on | off>
VBoxManage controlvm <uuid | vmname> nicN <null | nat | bridged | intnet
| hostonly | generic | natnetwork> [device-name]
VBoxManage controlvm <uuid | vmname> nictraceN <on | off>
VBoxManage controlvm <uuid | vmname> nictracefileN <filename>
VBoxManage controlvm <uuid | vmname> nicpropertyN <prop-name=prop-value>
VBoxManage controlvm <uuid | vmname> nicpromiscN <deny | allow-vms
| allow-all>
VBoxManage controlvm <uuid | vmname> natpfN <[rulename] ,tcp | udp,
[host-IP] , hostport, [guest-IP] , guestport >
VBoxManage controlvm <uuid | vmname> natpfN delete <rulename>
VBoxManage controlvm <uuid | vmname> guestmemoryballoon <balloon-size>
VBoxManage controlvm <uuid | vmname> usbattach <uuid | address>
[--capturefile=filename]
VBoxManage controlvm <uuid | vmname> usbdetach <uuid | address>
VBoxManage controlvm <uuid | vmname> audioin <on | off>
VBoxManage controlvm <uuid | vmname> audioout <on | off>
VBoxManage controlvm <uuid | vmname> clipboard mode <disabled | hosttoguest
| guesttohost | bidirectional>
VBoxManage controlvm <uuid | vmname> clipboard filetransfers <on | off>
VBoxManage controlvm <uuid | vmname> draganddrop <disabled | hosttoguest
| guesttohost | bidirectional>
VBoxManage controlvm <uuid | vmname> vrde <on | off>
VBoxManage controlvm <uuid | vmname> vrdeport <port>
VBoxManage controlvm <uuid | vmname> vrdeproperty <prop-name=prop-value>
VBoxManage controlvm <uuid | vmname> vrdevideochannelquality <percentage>
VBoxManage controlvm <uuid | vmname> setvideomodehint <xres> <yres>
<bpp> [[display] [enabled:yes | no | [x-originÂăy-origin]] ]
VBoxManage controlvm <uuid | vmname> setscreenlayout <display> <on
| primary x-originÂăy-originÂăx-resolutionÂăy-resolutionÂăbpp | off>
VBoxManage controlvm <uuid | vmname> screenshotpng <filename> [display]
VBoxManage controlvm <uuid | vmname> recording <on | off>
VBoxManage controlvm <uuid | vmname> recording screens <all | none
| screen-ID[,screen-ID...]>
VBoxManage controlvm <uuid | vmname> recording filename <filename>
VBoxManage controlvm <uuid | vmname> recording videores <widthxheight>
VBoxManage controlvm <uuid | vmname> recording videorate <rate>
VBoxManage controlvm <uuid | vmname> recording videofps <fps>
VBoxManage controlvm <uuid | vmname> recording maxtime <sec>
VBoxManage controlvm <uuid | vmname> recording maxfilesize <MB>
VBoxManage controlvm <uuid | vmname> setcredentials <username>
--passwordfile= <filename | password> <domain-name> --allowlocallogon=
<yes | no>
VBoxManage controlvm <uuid | vmname> teleport <--host=host-name>
<--port=port-name> [--maxdowntime=msec] [--passwordfile=filename
| --password=password]
VBoxManage controlvm <uuid | vmname> plugcpu <ID>
VBoxManage controlvm <uuid | vmname> unplugcpu <ID>
VBoxManage controlvm <uuid | vmname> cpuexecutioncap <num>
VBoxManage controlvm <uuid | vmname> vm-process-priority <default | flat
| low | normal | high>
VBoxManage controlvm <uuid | vmname> webcam attach [pathname [settings] ]
159](https://image.slidesharecdn.com/vboxusermanual-230728224837-47de127d/85/VBoxUserManual-pdf-174-320.jpg)
![8 VBoxManage
VBoxManage controlvm <uuid | vmname> webcam detach [pathname]
VBoxManage controlvm <uuid | vmname> webcam list
VBoxManage controlvm <uuid | vmname> addencpassword <ID> <password-file
| -> [--removeonsuspend= yes | no ]
VBoxManage controlvm <uuid | vmname> removeencpassword <ID>
VBoxManage controlvm <uuid | vmname> removeallencpasswords
VBoxManage controlvm <uuid | vmname> changeuartmodeN disconnected
| server pipe-name | client pipe-name | tcpserver port
| tcpclient hostname:port | file filename | device-name
VBoxManage controlvm <uuid | vmname> autostart-enabledN on | off
VBoxManage controlvm <uuid | vmname> autostart-delayseconds
VBoxManage unattended detect <--iso=install-iso> [--machine-readable]
VBoxManage unattended install <uuid|vmname> <--iso=install-iso>
[--user=login] [--password=password] [--password-file=file]
[--full-user-name=name] [--key=product-key] [--install-additions]
[--no-install-additions] [--additions-iso=add-iso] [--install-txs]
[--no-install-txs] [--validation-kit-iso=testing-iso] [--locale=ll_CC]
[--country=CC] [--time-zone=tz] [--hostname=fqdn]
[--package-selection-adjustment=keyword] [--dry-run]
[--auxiliary-base-path=path] [--image-index=number]
[--script-template=file] [--post-install-template=file]
[--post-install-command=command]
[--extra-install-kernel-parameters=params] [--language=lang]
[--start-vm=session-type]
VBoxManage discardstate <uuid | vmname>
VBoxManage adoptstate <uuid | vmname> <state-filename>
VBoxManage snapshot <uuid|vmname>
VBoxManage snapshot <uuid|vmname> take <snapshot-name>
[--description=description] [--live]
[--uniquename Number,Timestamp,Space,Force]
VBoxManage snapshot <uuid|vmname> delete <snapshot-name>
VBoxManage snapshot <uuid|vmname> restore <snapshot-name>
VBoxManage snapshot <uuid|vmname> restorecurrent
VBoxManage snapshot <uuid|vmname> edit <snapshot-name | --current>
[--description=description] [--name=new-name]
VBoxManage snapshot <uuid|vmname> list [[--details] | [--machinereadable]]
VBoxManage snapshot <uuid|vmname> showvminfo <snapshot-name>
VBoxManage closemedium [disk | dvd | floppy] <uuid | filename> [--delete]
VBoxManage storageattach <uuid | vmname> <--storagectl=name>
[--bandwidthgroup= name | none ] [--comment=text] [--device=number]
[--discard= on | off ] [--encodedlun=lun] [--forceunmount]
[--hotpluggable= on | off ] [--initiator=initiator] [--intnet] [--lun=lun]
[--medium= none | emptydrive | additions | uuid | filename | host:drive
| iscsi ] [--mtype= normal | writethrough | immutable | shareable | readonly
| multiattach ] [--nonrotational= on | off ] [--passthrough= on | off ]
[--passwordfile=file] [--password=password] [--port=number] [--server=
name | ip ] [--setparentuuid=uuid] [--setuuid=uuid] [--target=target]
[--tempeject= on | off ] [--tport=port] [--type= dvddrive | fdd | hdd ]
[--username=username]
160](https://image.slidesharecdn.com/vboxusermanual-230728224837-47de127d/85/VBoxUserManual-pdf-175-320.jpg)
![8 VBoxManage
VBoxManage storagectl <uuid | vmname> <--name=controller-name> [--add=
floppy | ide | pcie | sas | sata | scsi | usb ] [--controller= BusLogic
| I82078 | ICH6 | IntelAhci | LSILogic | LSILogicSAS | NVMe | PIIX3 | PIIX4
| USB | VirtIO ] [--bootable= on | off ] [--hostiocache= on | off ]
[--portcount=count] [--remove] [--rename=new-controller-name]
VBoxManage bandwidthctl <uuid | vmname> add <bandwidth-group-name>
<--limit=bandwidth-limit[k|m|g|K|M|G]> <--type=disk|network>
VBoxManage bandwidthctl <uuid | vmname> list [--machinereadable]
VBoxManage bandwidthctl <uuid | vmname> remove <bandwidth-group-name>
VBoxManage bandwidthctl <uuid | vmname> set <bandwidth-group-name>
<--limit=bandwidth-limit[k|m|g|K|M|G]>
VBoxManage showmediuminfo [disk | dvd | floppy] <uuid | filename>
VBoxManage createmedium [disk | dvd | floppy] <--filename=filename>
[--size=megabytes | --sizebyte=bytes] [--diffparent= UUID | filename ]
[--format= VDI | VMDK | VHD ]
[--variant Standard,Fixed,Split2G,Stream,ESX,Formatted,RawDisk]
--property name=value. . .
--property-file name=/path/to/file/with/value. . .
VBoxManage modifymedium [disk | dvd | floppy] <uuid | filename>
[--autoreset=on | off] [--compact] [--description=description]
[--move=pathname] [--property=name=[value]]
[--resize=megabytes | --resizebyte=bytes] [--setlocation=pathname]
[--type=normal | writethrough | immutable | shareable | readonly | multiattach]
VBoxManage clonemedium <uuid | source-medium> <uuid | target-medium> [disk
| dvd | floppy] [--existing] [--format= VDI | VMDK | VHD | RAW | other ]
[--variant=Standard,Fixed,Split2G,Stream,ESX]
VBoxManage mediumproperty [disk | dvd | floppy] set <uuid | filename>
<property-name> <property-value>
VBoxManage mediumproperty [disk | dvd | floppy] get <uuid | filename>
<property-name>
VBoxManage mediumproperty [disk | dvd | floppy] delete <uuid | filename>
<property-name>
VBoxManage encryptmedium <uuid | filename> [--cipher=cipher-ID]
[--newpassword=password] [--newpasswordid=password-ID]
[--oldpassword=password]
VBoxManage checkmediumpwd <uuid | filename> <password-file>
VBoxManage convertfromraw <inputfile> <outputfile> [--format= VDI | VMDK
| VHD ] [--uuid=uuid] [--variant=Standard,Fixed,Split2G,Stream,ESX]
VBoxManage convertfromraw stdin <outputfile> [--format= VDI | VMDK | VHD ]
[--uuid=uuid] [--variant=Standard,Fixed,Split2G,Stream,ESX]
VBoxManage mediumio <--disk=uuid|filename | --dvd=uuid|filename
| --floppy=uuid|filename> [--password-file=-|filename] formatfat
[--quick]
VBoxManage mediumio <--disk=uuid|filename | --dvd=uuid|filename
| --floppy=uuid|filename> [--password-file=-|filename] cat [--hex]
[--offset=byte-offset] [--size=bytes] [--output=-|filename]
VBoxManage mediumio <--disk=uuid|filename | --dvd=uuid|filename
| --floppy=uuid|filename> [--password-file=-|filename] stream
[--format=image-format] [--variant=image-variant] [--output=-|filename]
161](https://image.slidesharecdn.com/vboxusermanual-230728224837-47de127d/85/VBoxUserManual-pdf-176-320.jpg)
![8 VBoxManage
VBoxManage setextradata <global | uuid | vmname> <keyword> [value]
VBoxManage getextradata <global | uuid | vmname> <keyword> | [enumerate]
VBoxManage setproperty <property-name> <property-value>
VBoxManage usbfilter add <index,0-N> <--target= <uuid | vmname | global> >
<--name=string> <--action=ignore | hold> [--active=yes | no]
[--vendorid=XXXX] [--productid=XXXX] [--revision=IIFF]
[--manufacturer=string] [--product=string] [--remote=yes | no]
[--serialnumber=string] [--maskedinterfaces=XXXXXXXX]
VBoxManage usbfilter modify <index,0-N> <--target= <uuid | vmname
| global> > [--name=string] [--action=ignore | hold] [--active=yes | no]
[--vendorid=XXXX | ""] [--productid=XXXX | ""] [--revision=IIFF | ""]
[--manufacturer=string | ""] [--product=string | ""] [--remote=yes | no]
[--serialnumber=string | ""] [--maskedinterfaces=XXXXXXXX]
VBoxManage usbfilter remove <index,0-N> <--target= <uuid | vmname
| global> >
VBoxManage sharedfolder add <uuid | vmname> <--name=name>
<--hostpath=hostpath> [--readonly] [--transient] [--automount]
[--auto-mount-point=path]
VBoxManage sharedfolder remove <uuid | vmname> <--name=name> [--transient]
VBoxManage guestproperty get <uuid | vmname> <property-name> [--verbose]
VBoxManage guestproperty enumerate <uuid | vmname> [--no-timestamp]
[--no-flags] [--relative] [--old-format] [patterns. . . ]
VBoxManage guestproperty set <uuid | vmname> <property-name>
[property-value [--flags=flags] ]
VBoxManage guestproperty unset <uuid | vmname> <property-name>
VBoxManage guestproperty wait <uuid | vmname> <patterns> [--timeout=msec]
[--fail-on-timeout]
VBoxManage guestcontrol <uuid | vmname> run [--domain=domainname]
[--dos2unix] [--exe=filename] [--ignore-orphaned-processes]
[--no-wait-stderr | --wait-stderr] [--no-wait-stdout | --wait-stdout]
[--passwordfile=password-file | --password=password] [--profile]
[--putenv=var-name=[value]] [--quiet] [--timeout=msec] [--unix2dos]
[--unquoted-args] [--username=username] [--verbose] <-- program/arg0
[argument. . . ] >
VBoxManage guestcontrol <uuid | vmname> start [--domain=domainname]
[--exe=filename] [--ignore-orphaned-processes]
[--passwordfile=password-file | --password=password] [--profile]
[--putenv=var-name=[value]] [--quiet] [--timeout=msec] [--unquoted-args]
[--username=username] [--verbose] <-- program/arg0 [argument. . . ] >
VBoxManage guestcontrol <uuid | vmname> copyfrom [--domain=domainname]
[--follow] [--passwordfile=password-file | --password=password] [--quiet]
[--recursive] [--username=username] [--verbose] <guest-source0>
guest-source1 [...] <host-destination>
VBoxManage guestcontrol <uuid | vmname> copyfrom [--domain=domainname]
[--follow] [--passwordfile=password-file | --password=password] [--quiet]
[--recursive] [--target-directory=host-destination-dir]
[--username=username] [--verbose] <guest-source0> guest-source1 [...]
VBoxManage guestcontrol <uuid | vmname> copyto [--domain=domainname]
[--follow] [--passwordfile=password-file | --password=password] [--quiet]
162](https://image.slidesharecdn.com/vboxusermanual-230728224837-47de127d/85/VBoxUserManual-pdf-177-320.jpg)
![8 VBoxManage
[--recursive] [--username=username] [--verbose] <host-source0>
host-source1 [...] <guest-destination>
VBoxManage guestcontrol <uuid | vmname> copyto [--domain=domainname]
[--follow] [--passwordfile=password-file | --password=password] [--quiet]
[--recursive] [--target-directory=guest-destination-dir]
[--username=username] [--verbose] <host-source0> host-source1 [...]
VBoxManage guestcontrol <uuid | vmname> mkdir [--domain=domainname]
[--mode=mode] [--parents] [--passwordfile=password-file
| --password=password] [--quiet] [--username=username] [--verbose]
<guest-directory. . . >
VBoxManage guestcontrol <uuid | vmname> rmdir [--domain=domainname]
[--passwordfile=password-file | --password=password] [--quiet]
[--recursive] [--username=username] [--verbose] <guest-directory. . . >
VBoxManage guestcontrol <uuid | vmname> rm [--domain=domainname] [--force]
[--passwordfile=password-file | --password=password] [--quiet]
[--username=username] [--verbose] <guest-directory. . . >
VBoxManage guestcontrol <uuid | vmname> mv [--domain=domainname]
[--passwordfile=password-file | --password=password] [--quiet]
[--username=username] [--verbose] <source. . . > <destination-directory>
VBoxManage guestcontrol <uuid | vmname> mktemp [--domain=domainname]
[--mode=mode] [--passwordfile=password-file | --password=password]
[--quiet] [--secure] [--tmpdir=directory-name] [--username=username]
[--verbose] <template-name>
VBoxManage guestcontrol <uuid | vmname> stat [--domain=domainname]
[--passwordfile=password-file | --password=password] [--quiet]
[--username=username] [--verbose] <filename>
VBoxManage guestcontrol <uuid | vmname> list <all | files | processes
| sessions> [--quiet] [--verbose]
VBoxManage guestcontrol <uuid | vmname> closeprocess [--session-id=ID
| --session-name=name-or-pattern] [--quiet] [--verbose] <PID. . . >
VBoxManage guestcontrol <uuid | vmname> closesession [--all
| --session-id=ID | --session-name=name-or-pattern] [--quiet] [--verbose]
VBoxManage guestcontrol <uuid | vmname> updatega [--quiet] [--verbose]
[--source=guest-additions.ISO] [--wait-start] [-- [argument. . . ] ]
VBoxManage guestcontrol <uuid | vmname> watch [--quiet] [--verbose]
VBoxManage debugvm <uuid|vmname> dumpvmcore [--filename=name]
VBoxManage debugvm <uuid|vmname> info <item> [args. . . ]
VBoxManage debugvm <uuid|vmname> injectnmi
VBoxManage debugvm <uuid|vmname> log [[--release] | [--debug]]
[group-settings. . . ]
VBoxManage debugvm <uuid|vmname> logdest [[--release] | [--debug]]
[destinations. . . ]
VBoxManage debugvm <uuid|vmname> logflags [[--release] | [--debug]]
[flags. . . ]
VBoxManage debugvm <uuid|vmname> osdetect
VBoxManage debugvm <uuid|vmname> osinfo
VBoxManage debugvm <uuid|vmname> osdmesg [--lines=lines]
VBoxManage debugvm <uuid|vmname> getregisters [--cpu=id]
[reg-set.reg-name. . . ]
VBoxManage debugvm <uuid|vmname> setregisters [--cpu=id]
[reg-set.reg-name=value. . . ]
VBoxManage debugvm <uuid|vmname> show [[--human-readable] | [--sh-export]
| [--sh-eval] | [--cmd-set]] [settings-item. . . ]
163](https://image.slidesharecdn.com/vboxusermanual-230728224837-47de127d/85/VBoxUserManual-pdf-178-320.jpg)
![8 VBoxManage
VBoxManage debugvm <uuid|vmname> stack [--cpu=id]
VBoxManage debugvm <uuid|vmname> statistics [--reset] [--descriptions]
[--pattern=pattern]
VBoxManage debugvm <uuid|vmname> guestsample [--filename=filename]
[--sample-interval-us=interval] [--sample-time-us=time]
VBoxManage metrics collect [--detach] [--list] [--period=seconds]
[--samples=count] [* | host | vmname [metric-list] ]
VBoxManage metrics disable [--list] [* | host | vmname [metric-list] ]
VBoxManage metrics enable [--list] [* | host | vmname [metric-list] ]
VBoxManage metrics list [* | host | vmname [metric-list] ]
VBoxManage metrics query [* | host | vmname [metric-list] ]
VBoxManage metrics setup [--list] [--period seconds] [--samples count] [*
| host | vmname [metric-list] ]
VBoxManage natnetwork add [--disable | --enable] <--netname=name>
<--network=network> [--dhcp=on|off] [--ipv6=on|off] [--loopback-4=rule]
[--loopback-6=rule] [--port-forward-4=rule] [--port-forward-6=rule]
VBoxManage natnetwork list [filter-pattern]
VBoxManage natnetwork modify [--dhcp=on|off] [--disable | --enable]
<--netname=name> <--network=network> [--ipv6=on|off]
[--loopback-4=rule] [--loopback-6=rule] [--port-forward-4=rule]
[--port-forward-6=rule]
VBoxManage natnetwork remove <--netname=name>
VBoxManage natnetwork start <--netname=name>
VBoxManage natnetwork stop <--netname=name>
VBoxManage hostonlyif ipconfig <ifname> [--dhcp | --ip=IPv4-address
[--netmask=IPv4-netmask] | --ipv6=IPv6-address
[--netmasklengthv6=length] ]
VBoxManage hostonlyif create
VBoxManage hostonlyif remove <ifname>
VBoxManage hostonlynet add <--name=netname> [--id=netid] <--netmask=mask>
<--lower-ip=address> <--upper-ip=address> [--enable | --disable]
VBoxManage hostonlynet modify <--name=netname | --id=netid>
[--lower-ip=address] [--upper-ip=address] [--netmask=mask] [--enable
| --disable]
VBoxManage hostonlynet remove <--name=netname | --id=netid>
VBoxManage dhcpserver add <--network=netname | --interface=ifname>
<--server-ip=address> <--netmask=mask> <--lower-ip=address>
<--upper-ip=address> <--enable | --disable>
[[--global] | [--set-opt=dhcp-opt-no value. . . ] | [--set-opt-hex=dhcp-opt-no
hexstring. . . ] | [--force-opt=dhcp-opt-no. . . ]
| [--supress-opt=dhcp-opt-no. . . ] | [--min-lease-time=seconds]
| [--default-lease-time=seconds] | [--max-lease-time=seconds] . . . ]
[<--group=name> | [--set-opt=dhcp-opt-no value. . . ]
| [--set-opt-hex=dhcp-opt-no hexstring. . . ] | [--force-opt=dhcp-opt-no. . . ]
| [--supress-opt=dhcp-opt-no. . . ] | [--incl-mac=address. . . ]
| [--excl-mac=address. . . ] | [--incl-mac-wild=pattern. . . ]
| [--excl-mac-wild=pattern. . . ] | [--incl-vendor=string. . . ]
| [--excl-vendor=string. . . ] | [--incl-vendor-wild=pattern. . . ]
| [--excl-vendor-wild=pattern. . . ] | [--incl-user=string. . . ]
| [--excl-user=string. . . ] | [--incl-user-wild=pattern. . . ]
164](https://image.slidesharecdn.com/vboxusermanual-230728224837-47de127d/85/VBoxUserManual-pdf-179-320.jpg)
![8 VBoxManage
| [--excl-user-wild=pattern. . . ] | [--min-lease-time=seconds]
| [--default-lease-time=seconds] | [--max-lease-time=seconds] . . . ]
[<--vm=name|uuid> | [--nic=1-N] | [--set-opt=dhcp-opt-no value. . . ]
| [--set-opt-hex=dhcp-opt-no hexstring. . . ] | [--force-opt=dhcp-opt-no. . . ]
| [--supress-opt=dhcp-opt-no. . . ] | [--min-lease-time=seconds]
| [--default-lease-time=seconds] | [--max-lease-time=seconds]
| [--fixed-address=address] . . . ]
[<--mac-address=address> | [--set-opt=dhcp-opt-no value. . . ]
| [--set-opt-hex=dhcp-opt-no hexstring. . . ] | [--force-opt=dhcp-opt-no. . . ]
| [--supress-opt=dhcp-opt-no. . . ] | [--min-lease-time=seconds]
| [--default-lease-time=seconds] | [--max-lease-time=seconds]
| [--fixed-address=address] . . . ]
VBoxManage dhcpserver modify <--network=netname | --interface=ifname>
[--server-ip=address] [--lower-ip=address] [--upper-ip=address]
[--netmask=mask] [--enable | --disable]
[[--global] | [--del-opt=dhcp-opt-no. . . ] | [--set-opt=dhcp-opt-no value. . . ]
| [--set-opt-hex=dhcp-opt-no hexstring. . . ] | [--force-opt=dhcp-opt-no. . . ]
| [--unforce-opt=dhcp-opt-no. . . ] | [--supress-opt=dhcp-opt-no. . . ]
| [--unsupress-opt=dhcp-opt-no. . . ] | [--min-lease-time=seconds]
| [--default-lease-time=seconds] | [--max-lease-time=seconds]
| [--remove-config] . . . ]
[<--group=name> | [--set-opt=dhcp-opt-no value. . . ]
| [--set-opt-hex=dhcp-opt-no hexstring. . . ] | [--force-opt=dhcp-opt-no. . . ]
| [--unforce-opt=dhcp-opt-no. . . ] | [--supress-opt=dhcp-opt-no. . . ]
| [--unsupress-opt=dhcp-opt-no. . . ] | [--del-mac=address. . . ]
| [--incl-mac=address. . . ] | [--excl-mac=address. . . ]
| [--del-mac-wild=pattern. . . ] | [--incl-mac-wild=pattern. . . ]
| [--excl-mac-wild=pattern. . . ] | [--del-vendor=string. . . ]
| [--incl-vendor=string. . . ] | [--excl-vendor=string. . . ]
| [--del-vendor-wild=pattern. . . ] | [--incl-vendor-wild=pattern. . . ]
| [--excl-vendor-wild=pattern. . . ] | [--del-user=string. . . ]
| [--incl-user=string. . . ] | [--excl-user=string. . . ]
| [--del-user-wild=pattern. . . ] | [--incl-user-wild=pattern. . . ]
| [--excl-user-wild=pattern. . . ] | [--zap-conditions]
| [--min-lease-time=seconds] | [--default-lease-time=seconds]
| [--max-lease-time=seconds] | [--remove-config] . . . ]
[<--vm=name|uuid> | [--nic=1-N] | [--del-opt=dhcp-opt-no. . . ]
| [--set-opt=dhcp-opt-no value. . . ] | [--set-opt-hex=dhcp-opt-no
hexstring. . . ] | [--force-opt=dhcp-opt-no. . . ]
| [--unforce-opt=dhcp-opt-no. . . ] | [--supress-opt=dhcp-opt-no. . . ]
| [--unsupress-opt=dhcp-opt-no. . . ] | [--min-lease-time=seconds]
| [--default-lease-time=seconds] | [--max-lease-time=seconds]
| [--fixed-address=address] | [--remove-config] . . . ]
[<--mac-address=address> | [--del-opt=dhcp-opt-no. . . ]
| [--set-opt=dhcp-opt-no value. . . ] | [--set-opt-hex=dhcp-opt-no
hexstring. . . ] | [--force-opt=dhcp-opt-no. . . ]
| [--unforce-opt=dhcp-opt-no. . . ] | [--supress-opt=dhcp-opt-no. . . ]
| [--unsupress-opt=dhcp-opt-no. . . ] | [--min-lease-time=seconds]
| [--default-lease-time=seconds] | [--max-lease-time=seconds]
| [--fixed-address=address] | [--remove-config] . . . ]
VBoxManage dhcpserver remove <--network=netname | --interface=ifname>
VBoxManage dhcpserver start <--network=netname | --interface=ifname>
VBoxManage dhcpserver restart <--network=netname | --interface=ifname>
165](https://image.slidesharecdn.com/vboxusermanual-230728224837-47de127d/85/VBoxUserManual-pdf-180-320.jpg)
![8 VBoxManage
VBoxManage dhcpserver stop <--network=netname | --interface=ifname>
VBoxManage dhcpserver findlease <--network=netname | --interface=ifname>
<--mac-address=mac>
VBoxManage usbdevsource add <source-name> <--backend=backend>
<--address=address>
VBoxManage usbdevsource remove <source-name>
VBoxManage extpack install [--replace] [--accept-license=sha256] <tarball>
VBoxManage extpack uninstall [--force] <name>
VBoxManage extpack cleanup
VBoxManage updatecheck perform [--machine-readable]
VBoxManage updatecheck list [--machine-readable]
VBoxManage updatecheck modify [--disable | --enable] [--channel=stable |
withbetas | all] [--frequency=days]
VBoxManage modifynvram <uuid|vmname> inituefivarstore
VBoxManage modifynvram <uuid|vmname> enrollmssignatures
VBoxManage modifynvram <uuid|vmname> enrollorclpk
VBoxManage modifynvram <uuid|vmname> enrollpk [--platform-key=filename]
[--owner-uuid=uuid]
VBoxManage modifynvram <uuid|vmname> listvars
VBoxManage modifynvram <uuid|vmname> queryvar [--name=name]
[--filename=filename]
VBoxManage modifynvram <uuid|vmname> deletevar [--name=name]
[--owner-uuid=uuid]
VBoxManage modifynvram <uuid|vmname> changevar [--name=name]
[--filename=filename]
Each time VBoxManage is invoked, only one command can be executed. However, a command
might support several subcommands which then can be invoked in one single call. The following
sections provide detailed reference information on the different commands.
8.3 General Options
• -v|--version: Show the version of this tool and exit.
• --nologo: Suppress the output of the logo information. This option is useful for scripts.
• --settingspw: Specifiy a settings password.
• --settingspwfile: Specify a file containing the settings password.
The settings password is used for certain settings which need to be stored in encrypted form
for security reasons. At the moment, the only encrypted setting is the iSCSI initiator secret, see
chapter 8.26, VBoxManage storageattach, page 250. As long as no settings password is specified,
this information is stored in plain text. After using the --settingspw|--settingspwfile option
once, it must be always used. Otherwise, the encrypted setting cannot be unencrypted.
8.4 VBoxManage
Oracle VM VirtualBox command-line interface.
166](https://image.slidesharecdn.com/vboxusermanual-230728224837-47de127d/85/VBoxUserManual-pdf-181-320.jpg)
![8 VBoxManage
Synopsis
VBoxManage [-V | --version] [--dump-build-type] [-q | --nologo]
[--settingspw=password] [--settingspwfile=pw-file] [@response-file]
[[help] subcommand]
Description
The VBoxManage command is the command-line interface (CLI) for the Oracle VM VirtualBox
software. The CLI supports all the features that are available with the Oracle VM VirtualBox
graphical user interface (GUI). In addition, you can use the VBoxManage command to manage
the features of the virtualization engine that cannot be managed by the GUI.
Each time you invoke the VBoxManage command, only one command is executed. Note that
some VBoxManage subcommands invoke several subcommands.
Run the VBoxManage command from the command line of the host operating system (OS) to
control Oracle VM VirtualBox software.
The VBoxManage command is stored in the following locations on the host system:
• Linux: /usr/bin/VBoxManage
• Mac OS X: /Applications/VirtualBox.app/Contents/MacOS/VBoxManage
• Oracle Solaris: /opt/VirtualBox/bin/VBoxManage
• Windows: C:Program FilesOracleVirtualBoxVBoxManage.exe
In addition to managing virtual machines (VMs) with this CLI or the GUI, you can use the
VBoxHeadless CLI to manage VMs remotely.
The VBoxManage command performs particular tasks by using subcommands, such as list,
createvm, and startvm. See the associated information for each VBoxManage subcommand.
If required, specify the VM by its name or by its Universally Unique Identifier (UUID).
Use the VBoxManage list vms command to obtain information about all currently registered
VMs, including the VM names and associated UUIDs.
Note that you must enclose the entire VM name in double quotes if it contains spaces.
General Options
--nologo
Suppresses the output of the logo information, which is useful for scripts.
The short version of this option is -q.
--settingspw=[<password>]
Specifies the settings password. You can optionally specify the password as an argument
to this option. If you do not specify the password in this way, the VBoxManage command
prompts you for the password.
The settings password is a security feature that encrypts stored settings, which are stored
as plain text by default.
You cannot unencrypt encrypted settings. So, if the settings are encrypted, you must con-
tinue to specify the --settingspw or --settingspwfile option.
Only the iSCSI secret is encrypted at this time.
--settingspwfile=<pw-filename>
Specifies the file that contains the settings password.
167](https://image.slidesharecdn.com/vboxusermanual-230728224837-47de127d/85/VBoxUserManual-pdf-182-320.jpg)
![8 VBoxManage
8.5 VBoxManage list
View system information and VM configuration details.
Synopsis
VBoxManage list [--long] [--sorted] [bridgedifs | cloudnets | cloudprofiles
| cloudproviders | cpu-profiles | dhcpservers | dvds | extpacks | floppies
| groups | hddbackends | hdds | hostcpuids | hostdrives | hostdvds
| hostfloppies | hostinfo | hostonlyifs | hostonlynets | intnets | natnets
| ostypes | runningvms | screenshotformats | systemproperties | usbfilters
| usbhost | vms | webcams]
Description
The VBoxManage list subcommands enable you to obtain information about the Oracle VM
VirtualBox software, the VMs and associated services that you create.
Common Options
--long
Shows detailed information about each information entry if available. The short form of
this option is -l.
--sorted
Sorts the list of information entries alphabetically. The short form of this option is -s.
List the Bridged Network Interfaces on the Host System
VBoxManage list bridgedifs
The VBoxManage list bridgedifs command lists the bridged network interfaces that are
currently available on the host system. The output shows detailed configuration information
about each interface. See chapter 6, Virtual Networking, page 127.
List the Cloud Network Interfaces
VBoxManage list cloudnets
The VBoxManage list cloudnets command lists the cloud network interfaces that have been
configured. A cloud network interface provides connectivity between local VMs and a cloud
network.
List the Cloud Profiles
VBoxManage list cloudprofiles
The VBoxManage list cloudprofiles command lists the cloud profiles that have been con-
figured. A cloud profile contains settings for a cloud service account.
169](https://image.slidesharecdn.com/vboxusermanual-230728224837-47de127d/85/VBoxUserManual-pdf-184-320.jpg)
![8 VBoxManage
List Virtual Machines
VBoxManage list vms
The VBoxManage list vms command lists all virtual machines (VMs) that are currently reg-
istered with Oracle VM VirtualBox. By default this command displays a compact list that shows
the name and UUID of each VM.
List the Webcams Attached to a Running Virtual Machine
VBoxManage list webcams
The VBoxManage list webcams command shows the list of webcams that are attached to the
running VM.
The output is a list of absolute paths or aliases that are used to attach the webcams to the VM
by using the VBoxManage webcam attach command.
Examples
The following command lists the VM groups configured for Oracle VM VirtualBox.
$ VBoxManage list groups
"/Linux-VMs"
"/Windows-VMs"
The following command lists the VMs that are currently running.
$ VBoxManage list runningvms
"ol7" {<ol7-UUID>}
"win8" {<win8-UUID>}
8.6 VBoxManage showvminfo
Show configuration information or log file contents for a virtual machine.
Synopsis
VBoxManage showvminfo <uuid | vmname> [--details] [--machinereadable]
[--password-id] [--password]
VBoxManage showvminfo <uuid | vmname> <--log=index> [--password-id id]
[--password file|-]
Description
The VBoxManage showvminfo command outputs configuration information or log file contents
for a specified virtual machine (VM).
174](https://image.slidesharecdn.com/vboxusermanual-230728224837-47de127d/85/VBoxUserManual-pdf-189-320.jpg)
![8 VBoxManage
Viewing Virtual Machine Information
VBoxManage showvminfo <uuid | vmname> [--details] [--machinereadable]
[--password-id] [--password]
The VBoxManage showvminfo command outputs information about the specified VM in a de-
tailed format or in a machine-readable format.
The VBoxManage showvminfo command shows the same information for the specified VM in
the same format as the VBoxManage list vms --long command.
--details
Includes detailed information about the VM.
--machinereadable
Specifies that the VM information be in a machine-readable format.
--password-id <id>
Specifies password id of the VM if it is encrypted.
--password <file>|-
Specifies password of the VM if it is encrypted. Either specify the absolute pathname of a
password file on the host operating system, or - to prompt you for the password.
Viewing Virtual Machine Log Contents
VBoxManage showvminfo <uuid | vmname> <--log=index> [--password-id id]
[--password file|-]
The VBoxManage showvminfo --log command outputs the contents of one of the specified
VM’s log files.
--log=<index>
Specifies a numerical index that identifies the log file.
The index value starts at 0, which indicates the VBox.log file. An index value of 1 indicates
the VBoxHardening.log file. Index values starting at 2 indicate other log files, such as the
VBox.log.1 file.
--password-id <id>
Specifies password id of the VM if it is encrypted.
--password <file>|-
Specifies password of the VM if it is encrypted. Either specify the absolute pathname of a
password file on the host operating system, or - to prompt you for the password.
Examples
The following example shows typical output for this command:
$ VBoxManage showvminfo "Windows 10"
VirtualBox Command Line Management Interface Version <version-number>
Copyright (C) 2005-2022 Oracle and/or its affiliates
Name: Windows 10
Groups: /
Guest OS: Windows 10 (64-bit)
UUID: 1bf3464d-57c6-4d49-92a9-a5cc3816b7e7
175](https://image.slidesharecdn.com/vboxusermanual-230728224837-47de127d/85/VBoxUserManual-pdf-190-320.jpg)
![8 VBoxManage
Examples
The following command registers a VM called vm2. The XML machine configuration file for the
VM is located in the default machines folder.
$ VBoxManage registervm "/home/user/VirtualBox VMs/vm2/vm2.vbox"
See Also
chapter 8.9, VBoxManage createvm, page 177, chapter 8.8, VBoxManage unregistervm, page 177
8.8 VBoxManage unregistervm
Unregister a virtual machine.
Synopsis
VBoxManage unregistervm <uuid | vmname> [--delete]
Description
The VBoxManage unregistervm command unregisters a virtual machine (VM).
uuid|vmname
Specifies the name or Universally Unique Identifier (UUID) of the VM.
--delete
Deletes the following files related to the VM automatically:
• All hard disk image files, including differencing files.
• All saved state files that the machine created, including one for each snapshot.
• XML VM machine definition file and its backups.
• VM log files.
• The empty directory associated with the unregistered VM.
Examples
The following command unregisters a VM called vm2.
$ VBoxManage unregistervm vm2
The following command unregisters a VM called vm3. All files associated with the VM are
deleted.
$ VBoxManage unregistervm vm3 --delete
%...10%...20%...30%...40%...50%...60%...70%...80%...90%...100%
See Also
chapter 8.7, VBoxManage registervm, page 176
8.9 VBoxManage createvm
Create a new virtual machine.
177](https://image.slidesharecdn.com/vboxusermanual-230728224837-47de127d/85/VBoxUserManual-pdf-192-320.jpg)
![8 VBoxManage
Synopsis
VBoxManage createvm <--name=name> [--basefolder=basefolder] [--default]
[--group=group-ID,...] [--ostype=ostype] [--register] [--uuid=uuid]
[--cipher cipher] [--password-id password-id] [--password file]
Description
The VBoxManage createvm command creates a new XML virtual machine (VM) definition file.
You must specify the name of the VM by using --name <name>. This name is used by default
as the name of the settings file that has the .vbox extension and the machine folder, which is a
subfolder of the $HOME/VirtualBox VMs directory.
The actual file name may not correspond directly to the VM name if it violates the host OS file
name requirements (such as using the path separator or other reserved characters, they will be
substituted with a placeholder). If you later rename the VM, the file and folder names will be
updated to match the new name automatically.
Command Options
In addition to specifying the name or UUID of the VM, which is required, you can specify any of
the following options:
--basefolder=<basefolder>
Specifies the name of the folder in which to save the machine configuration file for the new
VM.
Note that the names of the file and the folder do not change if you rename the VM.
--default
Applies a default hardware configuration for the specified guest OS. By default, the VM is
created with minimal hardware.
--group=<group-ID>,...
Assigns the VM to the specified groups. If you specify more than one group, separate each
group name with a comma.
Note that each group is identified by a group ID that starts with a slash character (/) so
that groups can be nested. By default, a VM is always assigned membership to the / group.
--ostype=<ostype>
Specifies the guest OS to run in the VM. Run the VBoxManage list ostypes command to
see the available OS types.
--register
Registers the VM with your Oracle VM VirtualBox installation. By default, the
VBoxManage createvm command creates only the XML configuration for the VM but
does not register the VM. If you do not register the VM at creation, you can run the
VBoxManage registervm command after you create the VM.
--uuid=<uuid>
Specifies the Universally Unique Identifier (UUID) of the VM. Ensure that this UUID is
unique within the Oracle VM VirtualBox namespace of the host or of its VM group mem-
berships if you decide to register the VM. By default, Oracle VM VirtualBox provides the
UUID.
--cipher <cipher>
Specifies the cipher to use for encryption. Valid values are AES-128 or AES-256.
This option enables you to set up encryption on VM.
178](https://image.slidesharecdn.com/vboxusermanual-230728224837-47de127d/85/VBoxUserManual-pdf-193-320.jpg)
![8 VBoxManage
--password-id <password-id>
Specifies a new password identifier that is used for correct identification when supplying
multiple passwords for the VM.
This option enables you to set up encryption on VM.
--password <file>
Use the --password to supply the encryption password of the VM. Either specify the abso-
lute pathname of a password file on the host operating system, or - to prompt you for the
password on the command line.
This option enables you to set up encryption on VM.
Examples
The following command creates a VM called vm2 where you plan to run a 64-bit version of Oracle
Linux.
$ VBoxManage createvm --name "vm2" --ostype "Oracle_64"
The following command creates and registers a VM called vm3.
$ VBoxManage createvm --name "vm3" --register
See Also
chapter 8.5, VBoxManage list, page 169, chapter 8.7, VBoxManage registervm, page 176
8.10 VBoxManage modifyvm
Change settings for a virtual machine that is stopped.
Synopsis
VBoxManage modifyvm <uuid | vmname> [--name=name]
[--groups= group [,group...] ] [--description=description]
[--os-type=OS-type] [--icon-file=filename] [--memory=size-in-MB]
[--page-fusion= on | off ] [--vram=size-in-MB] [--acpi= on | off ]
[--ioapic= on | off ] [--hardware-uuid=UUID] [--cpus=CPU-count]
[--cpu-hotplug= on | off ] [--plug-cpu=CPU-ID] [--unplug-cpu=CPU-ID]
[--cpu-execution-cap=number] [--pae= on | off ] [--long-mode= on | off ]
[--ibpb-on-vm-exit= on | off ] [--ibpb-on-vm-entry= on | off ]
[--spec-ctrl= on | off ] [--l1d-flush-on-sched= on | off ]
[--l1d-flush-on-vm-entry= on | off ] [--mds-clear-on-sched= on | off ]
[--mds-clear-on-vm-entry= on | off ] [--cpu-profile= host | Intel 8086
| Intel 80286 | Intel 80386 ] [--hpet= on | off ] [--hwvirtex= on | off ]
[--triple-fault-reset= on | off ] [--apic= on | off ] [--x2apic= on | off ]
[--paravirt-provider= none | default | legacy | minimal | hyperv | kvm ]
[--paravirt-debug= key=value [,key=value...] ] [--nested-paging= on
| off ] [--large-pages= on | off ] [--vtx-vpid= on | off ] [--vtx-ux= on
| off ] [--nested-hw-virt= on | off ] [--virt-vmsave-vmload= on | off ]
[--accelerate-3d= on | off ] [--accelerate-2d-video= on | off ]
[--chipset= ich9 | piix3 ] [--iommu= none | automatic | amd | intel ]
[--tpm-type= none | 1.2 | 2.0 | host | swtpm ] [--tpm-location= location ]
[--bios-logo-fade-in= on | off ] [--bios-logo-fade-out= on | off ]
179](https://image.slidesharecdn.com/vboxusermanual-230728224837-47de127d/85/VBoxUserManual-pdf-194-320.jpg)
![8 VBoxManage
[--bios-logo-display-time=msec] [--bios-logo-image-path=pathname]
[--bios-boot-menu= disabled | menuonly | messageandmenu ] [--bios-apic=
disabled | apic | x2apic ] [--bios-system-time-offset=msec]
[--bios-pxe-debug= on | off ] [--system-uuid-le= on | off ] [--bootX= none
| floppy | dvd | disk | net ] [--rtc-use-utc= on | off ]
[--graphicscontroller= none | vboxvga | vmsvga | vboxsvga ]
[--snapshot-folder= default | pathname ] [--firmware= bios | efi | efi32
| efi64 ] [--guest-memory-balloon=size-in-MB] [--default-frontend=
default | name ] [--vm-process-priority= default | flat | low | normal | high
]
VBoxManage modifyvm <uuid | vmname> [--nicN= none | null | nat | bridged
| intnet | hostonly | hostonlynet | generic | natnetwork | cloud ]
[--nic-typeN= Am79C970A | Am79C973 | 82540EM | 82543GC | 82545EM | virtio ]
[--cable-connectedN= on | off ] [--nic-traceN= on | off ]
[--nic-trace-fileN=filename] [--nic-propertyN=name= [value] ]
[--nic-speedN=kbps] [--nic-boot-prioN=priority] [--nic-promiscN= deny
| allow-vms | allow-all ] [--nic-bandwidth-groupN= none | name ]
[--bridge-adapterN= none | device-name ] [--cloud-networkN=network-name]
[--host-only-adapterN= none | device-name ]
[--host-only-netN=network-name] [--intnetN=network-name]
[--nat-networkN=network-name] [--nic-generic-drvN=driver-name]
[--mac-addressN= auto | MAC-address ]
VBoxManage modifyvm <uuid | vmname> [--nat-netN= network | default ]
[--nat-pfN= [rule-name],tcp | udp,[host-IP],hostport,[guest-IP],guestport
] [--nat-pfN=delete=rule-name] [--nat-tftp-prefixN=prefix]
[--nat-tftp-fileN=filename] [--nat-tftp-serverN=IP-address]
[--nat-bind-ipN=IP-address] [--nat-dns-pass-domainN= on | off ]
[--nat-dns-proxyN= on | off ] [--nat-dns-host-resolverN= on | off ]
[--nat-localhostreachableN= on | off ]
[--nat-settingsN=[mtu],[socksnd],[sockrcv],[tcpsnd],[tcprcv]]
[--nat-alias-modeN= default | [log],[proxyonly],[sameports] ]
VBoxManage modifyvm <uuid | vmname> [--mouse= ps2 | usb | usbtablet
| usbmultitouch | usbmtscreenpluspad ] [--keyboard= ps2 | usb ] [--uartN=
off | IO-baseIRQ ] [--uart-modeN= disconnected | server pipe | client pipe
| tcpserver port | tcpclient hostname:port | file filename | device-name ]
[--uart-typeN= 16450 | 16550A | 16750 ] [--lpt-modeN=device-name] [--lptN=
off | IO-baseIRQ ] [--audio= none | default | null | dsound | was | oss | alsa
| pulse | coreaudio ] [--audio-controller= ac97 | hda | sb16 ]
[--audio-codec= stac9700 | ad1980 | stac9221 | sb16 ] [--audio-in= on | off
] [--audio-out= on | off ] [--clipboard-mode= disabled | hosttoguest
| guesttohost | bidirectional ] [--drag-and-drop= disabled | hosttoguest
| guesttohost | bidirectional ] [--monitor-count=number] [--usb-ehci= on
| off ] [--usb-ohci= on | off ] [--usb-xhci= on | off ]
[--usb-rename=old-namenew-name]
VBoxManage modifyvm <uuid | vmname> [--recording= on | off ]
[--recording-screens= all | none | screen-ID[,screen-ID...] ]
[--recording-file=filename] [--recording-max-size=MB]
[--recording-max-time=msec] [--recording-opts= key=value[,key=value...]
] [--recording-video-fps=fps] [--recording-video-rate=rate]
[--recording-video-res=widthheight]
180](https://image.slidesharecdn.com/vboxusermanual-230728224837-47de127d/85/VBoxUserManual-pdf-195-320.jpg)
![8 VBoxManage
VBoxManage modifyvm <uuid | vmname> [--vrde= on | off ]
[--vrde-property=property-name= [property-value] ] [--vrde-extpack=
default | name ] [--vrde-port=port] [--vrde-address=hostip]
[--vrde-auth-type= null | external | guest ] [--vrde-auth-library= default
| name ] [--vrde-multi-con= on | off ] [--vrde-reuse-con= on | off ]
[--vrde-video-channel= on | off ] [--vrde-video-channel-quality=percent]
VBoxManage modifyvm <uuid | vmname> [--teleporter= on | off ]
[--teleporter-port=port] [--teleporter-address= address | empty ]
[--teleporter-password=password] [--teleporter-password-file= filename
| stdin ] [--cpuid-portability-level=level] [--cpuid-set=leaf [:subleaf]
eaxÂăebxÂăecxÂăedx] [--cpuid-remove=leaf [:subleaf] ]
[--cpuid-remove-all]
VBoxManage modifyvm <uuid | vmname> [--tracing-enabled= on | off ]
[--tracing-config=string] [--tracing-allow-vm-access= on | off ]
VBoxManage modifyvm <uuid | vmname> [--usb-card-reader= on | off ]
VBoxManage modifyvm <uuid | vmname> [--autostart-enabled= on | off ]
[--autostart-delay=seconds]
VBoxManage modifyvm <uuid | vmname> [--guest-debug-provider= none | native
| gdb | kd ] [--guest-debug-io-provider= none | tcp | udp | ipc ]
[--guest-debug-address= IP-Address | path ] [--guest-debug-port=port]
VBoxManage modifyvm <uuid | vmname> [--pci-attach=host-PCI-address
[@guest-PCI-bus-address] ] [--pci-detach=host-PCI-address]
VBoxManage modifyvm <uuid | vmname> [--testing-enabled= on | off ]
[--testing-mmio= on | off ] [--testing-cfg-dwordidx=value]
Description
The VBoxManage modifyvm command enables you to change the properties of a registered vir-
tual machine (VM) that is not running.
Most of these properties correspond to the VM settings that are shown in each VM’s Settings
dialog in the VirtualBox Manager. See chapter 3, Configuring Virtual Machines, page 67. How-
ever, some settings can only be viewed and managed with the VBoxManage command.
You can use the VBoxManage modifyvm command to change VM settings only when the VM is
powered off. The VM cannot be running or in saved state when you use this command.
You can use the VBoxManage controlvm command to dynamically change some VM machine
settings while the VM is running. See chapter 8.20, VBoxManage controlvm, page 225.
General Settings
VBoxManage modifyvm <uuid | vmname> [--name=name]
[--groups= group [,group...] ] [--description=description]
[--os-type=OS-type] [--icon-file=filename] [--memory=size-in-MB]
[--page-fusion= on | off ] [--vram=size-in-MB] [--acpi= on | off ]
[--ioapic= on | off ] [--hardware-uuid=UUID] [--cpus=CPU-count]
[--cpu-hotplug= on | off ] [--plug-cpu=CPU-ID] [--unplug-cpu=CPU-ID]
[--cpu-execution-cap=number] [--pae= on | off ] [--long-mode= on | off ]
[--ibpb-on-vm-exit= on | off ] [--ibpb-on-vm-entry= on | off ]
[--spec-ctrl= on | off ] [--l1d-flush-on-sched= on | off ]
181](https://image.slidesharecdn.com/vboxusermanual-230728224837-47de127d/85/VBoxUserManual-pdf-196-320.jpg)
![8 VBoxManage
[--l1d-flush-on-vm-entry= on | off ] [--mds-clear-on-sched= on | off ]
[--mds-clear-on-vm-entry= on | off ] [--cpu-profile= host | Intel 8086
| Intel 80286 | Intel 80386 ] [--hpet= on | off ] [--hwvirtex= on | off ]
[--triple-fault-reset= on | off ] [--apic= on | off ] [--x2apic= on | off ]
[--paravirt-provider= none | default | legacy | minimal | hyperv | kvm ]
[--paravirt-debug= key=value [,key=value...] ] [--nested-paging= on
| off ] [--large-pages= on | off ] [--vtx-vpid= on | off ] [--vtx-ux= on
| off ] [--nested-hw-virt= on | off ] [--virt-vmsave-vmload= on | off ]
[--accelerate-3d= on | off ] [--accelerate-2d-video= on | off ]
[--chipset= ich9 | piix3 ] [--iommu= none | automatic | amd | intel ]
[--tpm-type= none | 1.2 | 2.0 | host | swtpm ] [--tpm-location= location ]
[--bios-logo-fade-in= on | off ] [--bios-logo-fade-out= on | off ]
[--bios-logo-display-time=msec] [--bios-logo-image-path=pathname]
[--bios-boot-menu= disabled | menuonly | messageandmenu ] [--bios-apic=
disabled | apic | x2apic ] [--bios-system-time-offset=msec]
[--bios-pxe-debug= on | off ] [--system-uuid-le= on | off ] [--bootX= none
| floppy | dvd | disk | net ] [--rtc-use-utc= on | off ]
[--graphicscontroller= none | vboxvga | vmsvga | vboxsvga ]
[--snapshot-folder= default | pathname ] [--firmware= bios | efi | efi32
| efi64 ] [--guest-memory-balloon=size-in-MB] [--default-frontend=
default | name ] [--vm-process-priority= default | flat | low | normal | high
]
The following options enable you to modify general information about your VM.
The VBoxManage modifyvm command supports the following options:
--name=<vmname>
Changes the name of the VM and its related internal VM files. See chapter 8.9, VBoxManage
createvm, page 177.
--groups=<group>
Changes the group membership of a VM. Group names always begin with a slash character
(/) and can be nested. By default, VMs are members of the / group. A VM can be member
of multiple groups, but its primary group determines the directory structure where the
internal VM files are placed by default.
--description=<desc>
Changes the optional VM description. Use a description to record details about the VM
in a meaningful way. The GUI interprets HTML markup while the VBoxManage modifyvm
command enables you include arbitrary strings that can contain multiple lines.
--os-type=<OS-type>
Specifies the guest operating system (OS) information for the VM. Use the
VBoxManage list ostypes command to view the OS type identifiers.
--icon-file=<filename>
Specifies the path to the VM icon file in PNG format on the host system. The icon is shown
in the VM manager UI and when running the VM with UI.
--memory=<size>
Specifies the amount of host system RAM to allocate to the VM. The size is in MB. See
chapter 1.8, Creating Your First Virtual Machine, page 13.
--page-fusion=on | off
Enables or disables the Page Fusion feature, which is disabled by default. Use the Page
182](https://image.slidesharecdn.com/vboxusermanual-230728224837-47de127d/85/VBoxUserManual-pdf-197-320.jpg)
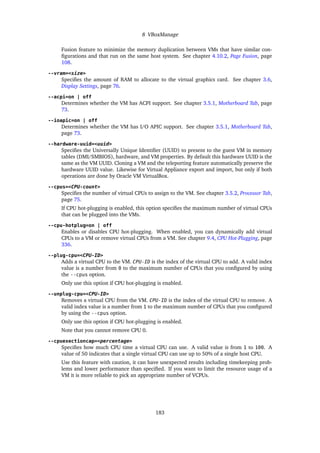
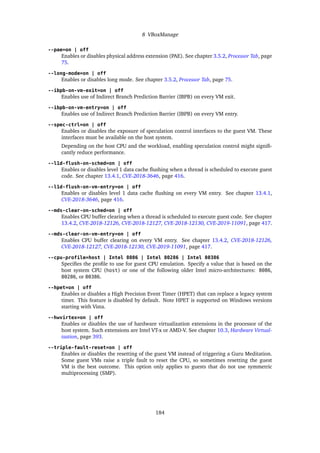
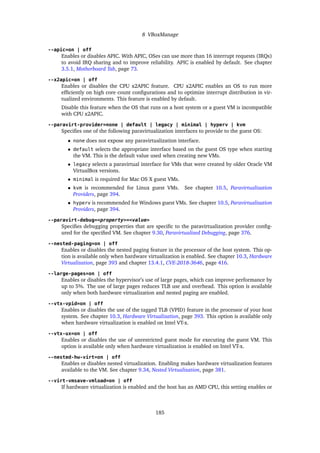
![8 VBoxManage
--snapshot-folder=default | <pathname>
Specifies the name of the VM’s snapshot storage folder. If you specify default, the folder
name is Snapshots/ in the machine folder.
--firmware=bios | efi | efi32 | efi64
Specifies the firmware used to boot the VM. Valid values are: bios, efi, efi32, or efi64.
Use EFI values with care.
By default, BIOS firmware is used.
--guest-memory-balloon=<size>
Specifies the size of the guest memory balloon. The guest memory balloon is the memory
allocated by the Guest Additions from the guest OS and returned to the hypervisor for use
by other VMs. Specify size in megabytes. The default value is 0 megabytes. See chapter
4.10.1, Memory Ballooning, page 107.
--default-frontend=default | <name>
Specifies the default frontend to use when starting the specified VM. If you specify default,
the VM is shown in a window on the user’s desktop. See chapter 8.19, VBoxManage startvm,
page 223.
--vm-process-priority=default | flat | low | normal | high
Specifies the priority scheme of the VM process to use when starting the specified VM and
while the VM runs.
The following valid values are:
• default âĂŞ Default process priority determined by the OS.
• flat âĂŞ Assumes a scheduling policy which puts the process at the default priority
and with all threads at the same priority.
• low âĂŞ Assumes a scheduling policy which puts the process mostly below the default
priority of the host OS.
• normal âĂŞ Assume a scheduling policy which shares the CPU resources fairly with
other processes running with the default priority of the host OS.
• high âĂŞ Assumes a scheduling policy which puts the task above the default priority
of the host OS. This policy might easily cause other tasks in the system to starve.
Networking Settings
VBoxManage modifyvm <uuid | vmname> [--nicN= none | null | nat | bridged
| intnet | hostonly | hostonlynet | generic | natnetwork | cloud ]
[--nic-typeN= Am79C970A | Am79C973 | 82540EM | 82543GC | 82545EM | virtio ]
[--cable-connectedN= on | off ] [--nic-traceN= on | off ]
[--nic-trace-fileN=filename] [--nic-propertyN=name= [value] ]
[--nic-speedN=kbps] [--nic-boot-prioN=priority] [--nic-promiscN= deny
| allow-vms | allow-all ] [--nic-bandwidth-groupN= none | name ]
[--bridge-adapterN= none | device-name ] [--cloud-networkN=network-name]
[--host-only-adapterN= none | device-name ]
[--host-only-netN=network-name] [--intnetN=network-name]
[--nat-networkN=network-name] [--nic-generic-drvN=driver-name]
[--mac-addressN= auto | MAC-address ]
The following options enable you to modify networking on your VM. With all these options, N
is an integer greater than zero that represents the particular virtual network adapter to configure.
188](https://image.slidesharecdn.com/vboxusermanual-230728224837-47de127d/85/VBoxUserManual-pdf-203-320.jpg)

![8 VBoxManage
NAT Networking Settings
VBoxManage modifyvm <uuid | vmname> [--nat-netN= network | default ]
[--nat-pfN= [rule-name],tcp | udp,[host-IP],hostport,[guest-IP],guestport
] [--nat-pfN=delete=rule-name] [--nat-tftp-prefixN=prefix]
[--nat-tftp-fileN=filename] [--nat-tftp-serverN=IP-address]
[--nat-bind-ipN=IP-address] [--nat-dns-pass-domainN= on | off ]
[--nat-dns-proxyN= on | off ] [--nat-dns-host-resolverN= on | off ]
[--nat-localhostreachableN= on | off ]
[--nat-settingsN=[mtu],[socksnd],[sockrcv],[tcpsnd],[tcprcv]]
[--nat-alias-modeN= default | [log],[proxyonly],[sameports] ]
The following options use N to specify the particular virtual network adapter to modify.
--nat-net<N>=default | <network>
Specifies the IP address range to use for this network. See chapter 9.8, Fine Tuning the
Oracle VM VirtualBox NAT Engine, page 343. Use this option only if the networking type is
nat, not natnetwork.
--nat-pf<N>=[<name>],tcp |
udp,[<host-IP>],<hostport>,[<guest-IP>],<guestport>
Specifies the NAT port-forwarding rule to use. See chapter 6.3.1, Configuring Port Forward-
ing with NAT, page 130.
--nat-pf<N>=delete <name>
Specifies the NAT port-forwarding rule to delete. See chapter 6.3.1, Configuring Port For-
warding with NAT, page 130.
--nat-tftp-prefix<N>=<prefix>
Specifies a prefix to use for the built-in TFTP server. For example, you might use a prefix
to indicate where the boot file is located. See chapter 6.3.2, PXE Booting with NAT, page
130 and chapter 9.8.2, Configuring the Boot Server (Next Server) of a NAT Network Interface,
page 343.
--nat-tftp-file<N>=<boot-file>
Specifies the name of the TFT boot file. See chapter 9.8.2, Configuring the Boot Server (Next
Server) of a NAT Network Interface, page 343.
--nat-tftp-server<N>=<tftp-server>
Specifies the address of the TFTP server from which to boot. See chapter 9.8.2, Configuring
the Boot Server (Next Server) of a NAT Network Interface, page 343.
--nat-bind-ip<N>=<IP-address>
Specifies an alternate IP address to which the NAT engine binds. See chapter 9.8.3, Tuning
TCP/IP Buffers for NAT, page 343. By default, Oracle VM VirtualBox’s NAT engine routes
TCP/IP packets through the default interface assigned by the host’s TCP/IP stack.
--nat-dns-pass-domain<N>=on | off
Specifies whether the built-in DHCP server passes the domain name for network name
resolution.
--nat-dns-proxy<N>=on | off
Specifies whether the NAT engine is the proxy for all guest DNS requests to the host system’s
DNS servers. See chapter 9.8.5, Enabling DNS Proxy in NAT Mode, page 344.
--nat-dns-host-resolver<N>=on | off
Specifies whether the NAT engine uses the host system’s resolver mechanisms to handle
DNS requests. See chapter 9.8.5, Enabling DNS Proxy in NAT Mode, page 344.
191](https://image.slidesharecdn.com/vboxusermanual-230728224837-47de127d/85/VBoxUserManual-pdf-206-320.jpg)
![8 VBoxManage
--nat-localhostreachable<N>=on | off
Specifies whether the NAT engine allows traffic from the guest directed to 10.0.2.2 to pass
to the host’s loopback interface, i.e. localhost or 127.0.0.1.
--nat-settings<N>=[<mtu>],[<socksnd>],[<sockrcv>],[<tcpsnd>],[<tcprcv>]
Specifies values for tuning NAT performance. See chapter 9.8.3, Tuning TCP/IP Buffers for
NAT, page 343.
--nat-alias-mode<N>=default | [log],[proxyonly],[sameports]
Specifies the behavior of the NAT engine core as follows:
• log enables logging
• proxyonly switches off aliasing mode and makes NAT transparent
• sameports enforces that the NAT engine sends packets through the same port on
which they originated
• default disables all aliasing modes
For more information, see chapter 9.8.7, Configuring Aliasing of the NAT Engine, page 345.
Other Hardware Settings
VBoxManage modifyvm <uuid | vmname> [--mouse= ps2 | usb | usbtablet
| usbmultitouch | usbmtscreenpluspad ] [--keyboard= ps2 | usb ] [--uartN=
off | IO-baseIRQ ] [--uart-modeN= disconnected | server pipe | client pipe
| tcpserver port | tcpclient hostname:port | file filename | device-name ]
[--uart-typeN= 16450 | 16550A | 16750 ] [--lpt-modeN=device-name] [--lptN=
off | IO-baseIRQ ] [--audio= none | default | null | dsound | was | oss | alsa
| pulse | coreaudio ] [--audio-controller= ac97 | hda | sb16 ]
[--audio-codec= stac9700 | ad1980 | stac9221 | sb16 ] [--audio-in= on | off
] [--audio-out= on | off ] [--clipboard-mode= disabled | hosttoguest
| guesttohost | bidirectional ] [--drag-and-drop= disabled | hosttoguest
| guesttohost | bidirectional ] [--monitor-count=number] [--usb-ehci= on
| off ] [--usb-ohci= on | off ] [--usb-xhci= on | off ]
[--usb-rename=old-namenew-name]
The following options enable you to configure other hardware, such as the serial port, monitor,
audio device, USB ports, and the clipboard, and drag-and-drop features.
--mouse=ps2 | usb | usbtablet | usbmultitouch | usbmtscreenpluspad
Specifies the mode of the mouse to use in the VM. Valid values are: ps2, usb, usbtablet,
usbmultitouch and usbmtscreenpluspad.
--keyboard=ps2 | usb
Specifies the mode of the keyboard to use in the VM. Valid values are: ps2 and usb.
--uart<N>=off | <I/O-base><IRQ>
Configures virtual serial ports for the VM. N represents the serial port to modify. Valid
values are off to disable the port or an I/O base address and IRQ. For information about
the traditional COM port I/O base address and IRQ values, see chapter 3.10, Serial Ports,
page 80.
--uart-mode<N>=<mode>
Specifies how Oracle VM VirtualBox connects the specified virtual serial port to the host
system that runs the VM. See chapter 3.10, Serial Ports, page 80.
Ensure that you first configure the virtual serial port by using the --uart<N> option.
Specify one of the following connection modes for each port:
192](https://image.slidesharecdn.com/vboxusermanual-230728224837-47de127d/85/VBoxUserManual-pdf-207-320.jpg)

![8 VBoxManage
--audio-in=on|off
Specifies whether to enable or disable audio capture from the host system.
--audio-out=on|off
Specifies whether to enable or disable audio playback from the guest VM.
--clipboard-mode=<value>
Specifies how to share the guest VM or host system OS’s clipboard with the host system
or guest VM, respectively. Valid values are: disabled, hosttoguest, guesttohost, and
bidirectional. See chapter 3.4, General Settings, page 72.
The clipboard feature is available only if you have the Guest Additions be installed in the
VM.
--drag-and-drop=<value>
Specifies how to use the drag and drop feature between the host system and the VM. Valid
values are: disabled, hosttoguest, guesttohost, and bidirectional. See chapter 4.4,
Drag and Drop, page 99.
The drag and drop feature is available only if you have the Guest Additions be installed in
the VM.
--monitor-count=<count>
Enables you to configure multiple monitors. See chapter 3.6, Display Settings, page 76.
--usb-ohci=on | off
Enables or disables the VM’s virtual USB 1.1 controller. See chapter 3.11.1, USB Settings,
page 82.
--usb-ehci=on | off
Enables or disables the VM’s virtual USB 2.0 controller. See chapter 3.11.1, USB Settings,
page 82.
--usb-xhci=on | off
Enables or disables the VM’s virtual USB 3.0 controller. This is the most efficient option if
the VM supports it. See chapter 3.11.1, USB Settings, page 82.
--usb-rename=<old-name><new-name>
Rename’s the VM’s virtual USB controller from old-name to new-name.
Recording Settings
VBoxManage modifyvm <uuid | vmname> [--recording= on | off ]
[--recording-screens= all | none | screen-ID[,screen-ID...] ]
[--recording-file=filename] [--recording-max-size=MB]
[--recording-max-time=msec] [--recording-opts= key=value[,key=value...]
] [--recording-video-fps=fps] [--recording-video-rate=rate]
[--recording-video-res=widthheight]
The following options enable you to modify settings for video recording, audio recording, or
both.
--recording=on | off
Enables or disables the recording of a VM session into a WebM or VP8 file. When set to on,
recording begins when the VM session starts.
194](https://image.slidesharecdn.com/vboxusermanual-230728224837-47de127d/85/VBoxUserManual-pdf-209-320.jpg)
![8 VBoxManage
--recording-screens=all | none | <screen-ID>[,<screen-ID>...
Enables you to specify the VM screens to record. The recording for each screen is output
to its own file. Valid values are: all, which records all screens, none, which records no
screens, or one or more specified screens.
--recording-file=<filename>
Specifies the name of the file in which to save the recording.
--recording-max-size=<MB>
Specifies the maximum size of the recorded video file in megabytes. When the file reaches
the specified size, recording stops. If the value is 0, recording continues until you manually
stop recording.
--recording-max-time=<seconds>
Specifies the maximum amount of time to record in seconds. When the specified time
elapses, recording stops. If the value is 0, recording continues until you manually stop
recording.
--recording-opts=<keyword>=<value>
Specifies additional video-recording properties as a comma-separated property keyword-
value list. For example, foo=bar,a=b.
Only use this option if you are an advanced user. For information about keywords, see the
Oracle VM VirtualBox Programming Guide and Reference.
--recording-video-fps=<fps>
Specifies the maximum number of video frames per second (FPS) to record. The recording
ignores any frames that have a higher frequency. When you increase the FPS, fewer frames
are ignored but the recording and the size of the recording file increases.
--recording-video-rate=<bit-rate>
Specifies the bit rate of the video in kilobits per second. When you increase the bit rate,
the recording appearance improves and the size of the recording file increases.
--recording-video-res=<width>x<height>
Specifies the video resolution (width and height) of the recorded video in pixels.
Remote Machine Settings
VBoxManage modifyvm <uuid | vmname> [--vrde= on | off ]
[--vrde-property=property-name= [property-value] ] [--vrde-extpack=
default | name ] [--vrde-port=port] [--vrde-address=hostip]
[--vrde-auth-type= null | external | guest ] [--vrde-auth-library= default
| name ] [--vrde-multi-con= on | off ] [--vrde-reuse-con= on | off ]
[--vrde-video-channel= on | off ] [--vrde-video-channel-quality=percent]
The following options enable you to modify the VirtualBox Remote Desktop Extension (VRDE)
behavior.
--vrde=on | off
Enables or disables the VRDE server.
--vrde-property=TCP/Ports=<port>
port is the port or port range to which the VRDE server binds. The default or 0 value
uses port 3389, which is the standard RDP port.
Also see the --vrde-port option description.
195](https://image.slidesharecdn.com/vboxusermanual-230728224837-47de127d/85/VBoxUserManual-pdf-210-320.jpg)
![8 VBoxManage
--vrde-address=<IP-address>
Specifies the IP address of the host network interface to which the VRDE server binds. If
you specify an IP address, the server accepts connections only on the specified host network
interface.
Use this option to specify whether the VRDP server should accept IPv4, IPv6, or both type
of connections:
• Only IPv4: Use the --vrde-address="0.0.0.0" option.
• Only IPv6: Use the --vrde-address="::" option.
• Both IPv6 and IPv4: Use the --vrde-address="" option. This is the default value.
--vrde-auth-type=null | external | guest
Specify whether to use authorization and how to perform authorization. See chapter 7.1.5,
RDP Authentication, page 146. Valid values are as follows:
• null provides no authentication.
• external provides external authentication through an authentication library.
• guest performs authentication by using guest user accounts. This unsupported
method requires that you install the Guest Additions on the VM.
--vrde-auth-library=default | <name>
Specifies the library to use for RDP authentication. The default library for external authen-
tication is VBoxAuth. See chapter 7.1.5, RDP Authentication, page 146.
--vrde-multi-con=on | off
Enables or disables the multiple connections VRDE server feature, if supported. See chapter
7.1.7, Multiple Connections to the VRDP Server, page 148.
--vrde-reuse-con=on | off
Specifies how the VRDE server behaves when multiple connections are disabled. When the
value is on, the server permits a new client to connect and drops the existing connection.
When the value is off, a new connection is not accepted if a client is already connected to
the server. This is the default value.
--vrde-video-channel=on | off
Enables video redirection if supported by the VRDE server. See chapter 7.1.9, VRDP Video
Redirection, page 149.
--vrde-video-channel-quality=<percent>
Specifies the image quality for video redirection as a value from 10 to 100 percent. The per-
centage represents the JPEG compression level where a lower number diminishes quality
and provides higher compression. See chapter 7.1.9, VRDP Video Redirection, page 149.
Teleporting Settings
VBoxManage modifyvm <uuid | vmname> [--teleporter= on | off ]
[--teleporter-port=port] [--teleporter-address= address | empty ]
[--teleporter-password=password] [--teleporter-password-file= filename
| stdin ] [--cpuid-portability-level=level] [--cpuid-set=leaf [:subleaf]
eaxÂăebxÂăecxÂăedx] [--cpuid-remove=leaf [:subleaf] ]
[--cpuid-remove-all]
The following options enable you to configure a machine as a teleporting target. See chapter
7.2, Teleporting, page 150.
198](https://image.slidesharecdn.com/vboxusermanual-230728224837-47de127d/85/VBoxUserManual-pdf-213-320.jpg)
![8 VBoxManage
--teleporter=on | off
Enables or disables the teleporter. When enabled, a machine starts up and waits to receive
a teleporting request from the network instead of booting normally.
Teleporting requests are received on the port and address specified using the following
parameters.
--teleporter-port=<port>
Specifies the port on which the VM listens to receive a teleporting request from another
VM. port is any free TCP/IP port number, such as 6000. You must also specify the
--teleporter option.
--teleporter-address=<IP-address>
Specifies the IP address on which the VM listens to receive a teleporting request from
another VM. IP-address is any IP address or host name and specifies the TCP/IP socket
on which to bind. The default IP address is 0.0.0.0, which represents any IP address. You
must also specify the --teleporter option.
--teleporter-password=<password>
Specifies the password to use for authentication. When specified, the teleporting request
only succeeds if the password on the source machine is the same password as the one you
specify.
--teleporter-password-file=<filename>
Specifies a file that contains the password to use for authentication. When specified, the
teleporting request only succeeds if the password on the source machine is the same pass-
word as the one you specify in the password file. A value of stdin reads the password
from standard input.
--cpuid-portability-level=<level>
Restricts the virtual CPU capabilities that Oracle VM VirtualBox presents to the guest OS
by using portability rules. Higher integer values designate more restrictive behavior. The
default level of 0 indicates that all virtualized features supported by the host are made
available to the guest. The value 3 supresses most features. Values of 1 and 2 represent
restrictions in between. The behavior may change depending on the product version.
--cpuid-set=<leaf>[:<subleaf>] <eax>Âă<ebx>Âă<ecx>Âă<edx>
Advanced users can use this setting before a teleporting operation (in fact before starting
the VM) to restrict the virtual CPU capabilities that Oracle VM VirtualBox presents to the
guest operating system. This must be run on both the source and the target machines in-
volved in teleporting and will then modify what the guest sees when it executes the CPUID
machine instruction. This might help with misbehaving applications that wrongly assume
that certain CPU capabilities are present. The meaning of the parameters is hardware
dependent. Refer to the AMD or Intel processor documentation.
The values of leaf, subleaf (optional), eax, ebx, ecx and edx are integers given in
hexadecimal format, i.e. using a radix (base) of 16 without requiring any prefix.
--cpuid-remove=<leaf>[:<subleaf>]
Removes an adjustment established with --cpuid-set.
--cpuid-remove-all
Removes all adjustments established with --cpuid-set.
Debugging Settings
VBoxManage modifyvm <uuid | vmname> [--tracing-enabled= on | off ]
[--tracing-config=string] [--tracing-allow-vm-access= on | off ]
199](https://image.slidesharecdn.com/vboxusermanual-230728224837-47de127d/85/VBoxUserManual-pdf-214-320.jpg)
![8 VBoxManage
Only use the following options to perform low-level VM debugging. These options are for
advanced users only.
--tracing-enabled=on | off
Enables or disables the trace buffer. Note that when specified, the trace buffer consumes
some memory and adds overhead.
--tracing-config=<config-string>
Enables a tracing configuration that defines which group of trace points are enabled.
--tracing-allow-vm-access=on | off
Enables or disables VM access to the trace buffer. The default value is off, which disables
access.
USB Card Reader Settings
VBoxManage modifyvm <uuid | vmname> [--usb-card-reader= on | off ]
The following options specify the access to a USB Card Reader by the guest environment. A
USB card reader can access data on memory cards, such as CompactFlash (CF), Secure Digital
(SD), and MultiMediaCard (MMC).
--usb-card-reader=on | off
Enables or disables the USB card reader interface.
Autostarting VMs During Host System Boot
The following options enable you to configure the VM autostart feature, which automatically
starts the VM at host system boot-up. You must do some host system configuration before you
can use this feature. See chapter 9.21, Starting Virtual Machines During System Boot, page 368.
VBoxManage modifyvm <uuid | vmname> [--autostart-enabled= on | off ]
[--autostart-delay=seconds]
--autostart-enabled=on | off
Enables or disables VM autostart at host system boot-up for the specified users.
--autostart-delay=<seconds>
Specifies the number of seconds after host system boot-up to autostart the VM.
Guest Debugging
These options are for configuring the VMM for guest debugging.
VBoxManage modifyvm <uuid | vmname> [--guest-debug-provider= none | native
| gdb | kd ] [--guest-debug-io-provider= none | tcp | udp | ipc ]
[--guest-debug-address= IP-Address | path ] [--guest-debug-port=port]
--guest-debug-provider=none | native | gdb | kd
Selects the given debug stub provider.
--guest-debug-io-provider=none | tcp | udp | ipc
Selects the given I/O transport backend for the selected provider.
200](https://image.slidesharecdn.com/vboxusermanual-230728224837-47de127d/85/VBoxUserManual-pdf-215-320.jpg)
![8 VBoxManage
--guest-debug-address=<IP-Address> | <path>
Sets the path the debugger is accessible under, depends on the selected I/O transport.
--guest-debug-port=<port>
Sets the port the debugger is accessible under, depends on the selected I/O transport.
PCI Passthrough Settings
The following options enable you to configure the PCI passthrough feature, which currently is
not available in Oracle VM VirtualBox. It is planned to bring this functionality back in the future.
VBoxManage modifyvm <uuid | vmname> [--pci-attach=host-PCI-address
[@guest-PCI-bus-address] ] [--pci-detach=host-PCI-address]
--pci-attach=<host-PCI-address>[@<guest-PCI-bus-address>]
Attaches the specified PCI network controller on the host to the guest VM. You can option-
ally specify the PCI bus on the guest VM on which to attach the controller.
--pci-detach=<host-PCI-address>
Detaches the specified PCI network controller from the attached PCI bus on the guest VM.
Testing (ValidationKit / Bootsector)
These options are for configuring the testing functionality of the VMM device and almost exclu-
sively used by the bootsector testcases in the ValidationKit.
VBoxManage modifyvm <uuid | vmname> [--testing-enabled= on | off ]
[--testing-mmio= on | off ] [--testing-cfg-dwordidx=value]
--testing-enabled=on | off
Enabled the testing functionality of the VMMDev. See VMMDevTesting.h for details.
--testing-mmio=on | off
Enabled the MMIO region of the VMMDev testing feature.
--testing-cfg-dword<idx>=<value>
This sets one of the 10 dword configuration values. The idx must be in the range 0 thru 9.
The value is limited to 32 bits (dword).
Examples
The following command changes the description for the ol7 VM.
$ VBoxManage modifyvm ol7 --description "Oracle Linux 7 with UEK4"
The following command enables VirtualBox Remote Display Protocol (VRDP) support for the
ol7 VM.
$ VBoxManage modifyvm ol7 --vrde on
See Also
chapter 8.6, VBoxManage showvminfo, page 174, chapter 8.20, VBoxManage controlvm, page
225, chapter 8.9, VBoxManage createvm, page 177, chapter 8.19, VBoxManage startvm, page
223chapter 8.5, VBoxManage list, page 169
201](https://image.slidesharecdn.com/vboxusermanual-230728224837-47de127d/85/VBoxUserManual-pdf-216-320.jpg)
![8 VBoxManage
8.11 VBoxManage clonevm
Create a clone of an existing virtual machine.
Synopsis
VBoxManage clonevm <vmname|uuid> [--basefolder=basefolder]
[--groups=group,. . . ] [--mode=machine | --mode=machinechildren
| --mode=all] [--name=name] [--options=option,. . . ] [--register]
[--snapshot=snapshot-name] [--uuid=uuid]
Description
The VBoxManage clonevm command creates a clone of an existing virtual machine (VM). The
clone can be a full copy of the VM or a linked copy of a VM.
You must specify the name or the universal unique identifier (UUID) of the VM you want to
clone.
Command Operand and Options
The following list describes the operand and the options that you can use with the
VBoxManage clonevm command:
vmname|uuid
Specifies the name or UUID of the VM to clone.
--basefolder=<basefolder>
Specifies the name of the folder in which to save the configuration for the new VM.
--groups=<group>,...
Assigns the clone to the specified group or groups. If you specify more than one group,
separate each group name with a comma.
Note that each group is identified by a group ID that starts with a slash character (/) so
that groups can be nested. By default, a clone is always assigned membership to the /
group.
--mode=machine|machineandchildren|all
Specifies which of the following cloning modes to use:
• machine mode clones the current state of the existing VM without any snapshots. This
is the default mode.
• machineandchildren mode clones the snapshot specified by by the --snapshot op-
tion and all child snapshots.
• all mode clones all snapshots and the current state of the existing VM.
--name=<name>
Specifies a new name for the new VM. The default value is original-name Clone where
original-name is the original name of the VM.
--options=<option>,...
Specifies how to create the new clone.
The --options argument can be used multiple times to enable multiple options, or the
options can be given as a comma separated list. The options are case insensitive.
The following options (case-insensitive) are recognized:
202](https://image.slidesharecdn.com/vboxusermanual-230728224837-47de127d/85/VBoxUserManual-pdf-217-320.jpg)
![8 VBoxManage
8.12 VBoxManage movevm
Move a virtual machine to a new location on the host system.
Synopsis
VBoxManage movevm <uuid | vmname> [--type=basic] [--folder=folder-name]
Description
The VBoxManage movevm command moves a virtual machine (VM) to a new location on the host
system.
When moved, all of the files that are associated with the VM, such as settings files and disk
image files, are moved to the new location. The Oracle VM VirtualBox configuration is updated
automatically.
uuid|vmname
Specifies the Universally Unique Identifier (UUID) or name of the VM to move.
--type=basic
Specifies the type of the move operation. So far basic is the only recognized value and
also the default if not specified.
--folder=<folder-name>
Specifies a full path name or relative path name of the new location on the host file system.
Not specifying the option or specifying the current location is allowed, and moves disk
images and other parts of the VM to this location if they are currently in other locations.
Examples
The following command moves the ol7 VM to a new location on the host system.
$ VBoxManage movevm ol7 --folder "/home/testuser/vms" --type basic
0%...10%...20%...30%...40%...50%...60%...70%...80%...90%...100%
Machine has been successfully moved into /home/testuser/vms
8.13 VBoxManage encryptvm
Change encryption and passwords of the VM.
Synopsis
VBoxManage encryptvm <uuid | vmname> setencryption --old-password file
--cipher cipher-identifier --new-password file
--new-password-id password-identifier --force
VBoxManage encryptvm <uuid | vmname> checkpassword <file>
VBoxManage encryptvm <uuid | vmname> addpassword --password file
--password-id password-identifier
VBoxManage encryptvm <uuid | vmname> removepassword <password-identifier>
204](https://image.slidesharecdn.com/vboxusermanual-230728224837-47de127d/85/VBoxUserManual-pdf-219-320.jpg)
![8 VBoxManage
The VBoxManage encryptvm vmname removepassword command removes a password used
for decrypting the VM.
Specify the password identifier for removing. The password becomes unknown and the VM
can not be decrypted.
Examples
The following command encrypts the ol7 VM using AES-256 giving password via command
prompt:
$ VBoxManage encryptvm ol7 setencryption --cipher=AES-256 --new-password - --new-password-id vmid
See Also
chapter 8.9, VBoxManage createvm, page 177,
8.14 VBoxManage cloud
Manage the cloud entities.
Synopsis
VBoxManage cloud <--provider=name> <--profile=name>
list instances [--state=string] [--compartment-id=string]
VBoxManage cloud <--provider=name> <--profile=name>
list images <--compartment-id=string> [--state=string]
VBoxManage cloud <--provider=name> <--profile=name>
instance create <--domain-name=name> <<--image-id=id>
| <--boot-volume-id=id>> <--display-name=name> <--shape=type>
<--subnet=id> [--boot-disk-size=size in GB] [--publicip=true/false]
[--privateip=IP address] [--public-ssh-key=key string. . . ]
[--launch-mode=NATIVE/EMULATED/PARAVIRTUALIZED]
[--cloud-init-script-path=path to a script]
VBoxManage cloud <--provider=name> <--profile=name>
instance info <--id=unique id>
VBoxManage cloud <--provider=name> <--profile=name>
instance terminate <--id=unique id>
VBoxManage cloud <--provider=name> <--profile=name>
instance start <--id=unique id>
VBoxManage cloud <--provider=name> <--profile=name>
instance pause <--id=unique id>
VBoxManage cloud <--provider=name> <--profile=name>
image create <--display-name=name> [--bucket-name=name]
[--object-name=name] [--instance-id=unique id]
VBoxManage cloud <--provider=name> <--profile=name>
image info <--id=unique id>
206](https://image.slidesharecdn.com/vboxusermanual-230728224837-47de127d/85/VBoxUserManual-pdf-221-320.jpg)
![8 VBoxManage
VBoxManage cloud <--provider=name> <--profile=name>
image delete <--id=unique id>
VBoxManage cloud <--provider=name> <--profile=name>
image import <--id=unique id> [--bucket-name=name] [--object-name=name]
VBoxManage cloud <--provider=name> <--profile=name>
image export <--id=unique id> <--display-name=name>
[--bucket-name=name] [--object-name=name]
VBoxManage cloud <--provider=name> <--profile=name>
network setup [--gateway-os-name=string] [--gateway-os-version=string]
[--gateway-shape=string] [--tunnel-network-name=string]
[--tunnel-network-range=string] [--proxy=string]
[--compartment-id=string]
VBoxManage cloud <--provider=name> <--profile=name>
network create <--name=string> <--network-id=string> [--enable
| --disable]
VBoxManage cloud network update <--name=string> [--network-id=string]
[--enable | --disable]
VBoxManage cloud network delete <--name=string>
VBoxManage cloud network info <--name=string>
Description
Common options
The word “cloud” is an umbrella for all commands related to the interconnection with the Cloud.
The next common options must be placed between the “cloud” and the following sub-commands:
–provider=name
Short cloud provider name.
–profile=name
Cloud profile name.
cloud list instances
VBoxManage cloud <--provider=name> <--profile=name>
list instances [--state=string] [--compartment-id=string]
Displays the list of the instances for a specified compartment.
–state"running/paused/terminated"
The state of cloud instance. The possible states are “running/paused/terminated” at mo-
ment. If the state isn’t provided the list of instances with all possible states is returned.
--compartment-id
A compartment is the logical container used to organize and isolate cloud resources. The
different cloud providers can have the different names for this entity.
207](https://image.slidesharecdn.com/vboxusermanual-230728224837-47de127d/85/VBoxUserManual-pdf-222-320.jpg)
![8 VBoxManage
cloud list images
VBoxManage cloud <--provider=name> <--profile=name>
list images <--compartment-id=string> [--state=string]
Displays the list of the images for a specified compartment.
–state"available/disabled/deleted"
The state of cloud image. The possible states are “available/disabled/deleted” at moment.
If the state isn’t provided the list of images with all possible states is returned.
--compartment-id
A compartment is the logical container used to organize and isolate cloud resources. The
different cloud providers can have the different names for this entity.
cloud instance create
VBoxManage cloud <--provider=name> <--profile=name>
instance create <--domain-name=name> <<--image-id=id>
| <--boot-volume-id=id>> <--display-name=name> <--shape=type>
<--subnet=id> [--boot-disk-size=size in GB] [--publicip=true/false]
[--privateip=IP address] [--public-ssh-key=key string. . . ]
[--launch-mode=NATIVE/EMULATED/PARAVIRTUALIZED]
[--cloud-init-script-path=path to a script]
Creates new instance in the Cloud. There are two standard ways to create an instance in
the Cloud: 1. Create an instance from an existing custom image. 2. Create an instance from
an existing bootable volume. This bootable volume shouldn’t be attached to any instance. For
the 1st approach next parameters are required: image-id, boot-disk-size. For the 2nd approach
next parameters are required: boot-volume-id. The rest parameters are common for both cases:
display-name, launch-mode, subnet-id, publicIP, privateIP, shape, domain.
--domain-name
Cloud domain where new instance is created.
--image-id
Unique identifier which fully identifies a custom image in the Cloud.
--boot-volume-id
Unique identifier which fully identifies a boot volume in the Cloud.
--display-name
Name for new instance in the Cloud.
--shape
The shape of instance, defines the number of CPUs and RAM memory.
--subnet
Unique identifier which fully identifies an existing subnet in the Cloud which will be used
by the instance.
--boot-disk-size
The size of bootable image in GB. Default is 50GB.
--publicip
Whether the instance will have a public IP or not.
208](https://image.slidesharecdn.com/vboxusermanual-230728224837-47de127d/85/VBoxUserManual-pdf-223-320.jpg)
![8 VBoxManage
--privateip
Private IP address for the created instance.
--public-ssh-key
Public SSH key used to connect to the instance via SSH. This parameter may be re-
peated if you plan to use more than one key as: “–public-ssh-key=firstSSHKey –public-
ssh-key=secondSSHKey”.
--launch-mode
The most known values here may be EMULATED, NATIVE, PARAVIRTUALIZED.
--cloud-init-script-path
Absolute path to the user cloud-init script.
cloud instance info
Display information about a cloud instance with a specified id.
--id
Unique identifier which fully identify the instance in the Cloud.
cloud instance termination
Delete a cloud instance with a specified id.
--id
Unique identifier which fully identify the instance in the Cloud.
cloud instance start
Start a cloud instance with a specified id.
--id
Unique identifier which fully identify the instance in the Cloud.
cloud instance pause
Pause a cloud instance with a specified id.
--id
Unique identifier which fully identify the instance in the Cloud.
cloud image create
VBoxManage cloud <--provider=name> <--profile=name>
image create <--display-name=name> [--bucket-name=name]
[--object-name=name] [--instance-id=unique id]
Creates new image in the Cloud. There are two standard ways to create an image in the
Cloud: 1. Create an image from an object in the Cloud Storage; 2. Create an image from an
existing cloud instance. For the 1st approach next parameters are required: bucket-name - cloud
bucket name where an object is located; object-name - name of object in the bucket; display-
name - name for new image in the Cloud. For the 2d approach next parameters are required:
instance-id - Id of instance in the Cloud; display-name - name for new image in the Cloud.
209](https://image.slidesharecdn.com/vboxusermanual-230728224837-47de127d/85/VBoxUserManual-pdf-224-320.jpg)
![8 VBoxManage
--display-name
Name for new image in the Cloud.
--bucket-name
Cloud bucket name where an object is located.
--object-name
Name of object in the bucket.
--instance-id
Unique identifier which fully identifies the instance in the Cloud.
cloud image info
VBoxManage cloud <--provider=name> <--profile=name>
image info <--id=unique id>
Display information about a cloud image with a specified id.
--id
Unique identifier which fully identifies the image in the Cloud.
cloud image delete
VBoxManage cloud <--provider=name> <--profile=name>
image delete <--id=unique id>
Delete an image with a specified id from the Cloud.
--id
Unique identifier which fully identifies the image in the Cloud.
cloud image import
VBoxManage cloud <--provider=name> <--profile=name>
image import <--id=unique id> [--bucket-name=name] [--object-name=name]
Import an image with a specified id from the Cloud to a local host. The result is an object
in the local “temp” folder on the local host. Possible approach may have two general steps: 1.
Create an object from an image in the Cloud Storage; 2. Download the object to the local host.
So the next parameters may be required: bucket-name - cloud bucket name where the object will
be created; object-name - name of object in the bucket. if parameter “object-name” is absent a
displayed image name is used. If the first step isn’t needed only the parameter “id” is required.
--id
Unique identifier which fully identifies the image in the Cloud.
--bucket-name
Cloud bucket name where an object will be created.
--object-name
Name of created object in the bucket. The downloaded object will have this name.
210](https://image.slidesharecdn.com/vboxusermanual-230728224837-47de127d/85/VBoxUserManual-pdf-225-320.jpg)
![8 VBoxManage
cloud image export
VBoxManage cloud <--provider=name> <--profile=name>
image export <--id=unique id> <--display-name=name>
[--bucket-name=name] [--object-name=name]
Export an existing VBox image with a specified uuid from a local host to the Cloud. The result
is new image in the Cloud. Possible approach may have two general steps: 1. Upload VBox image
to the Cloud Storage; 2. Create an image from the uploaded object. So the next parameters may
be required: bucket-name -cloud bucket name where the object will be uploaded; object-name -
name of object in the bucket. If parameter “object-name” is absent the image id is used; display-
name - name for new image in the Cloud. If the first step isn’t needed the parameters “id” and
“display-name” are required only.
--id
Unique identifier of the image in the VirtualBox.
--display-name
Name for new image in the Cloud.
--bucket-name
Cloud bucket name where the image (object) will be uploaded.
--object-name
Name of object in the bucket.
cloud network setup
VBoxManage cloud <--provider=name> <--profile=name>
network setup [--gateway-os-name=string] [--gateway-os-version=string]
[--gateway-shape=string] [--tunnel-network-name=string]
[--tunnel-network-range=string] [--proxy=string]
[--compartment-id=string]
Set up a cloud network environment for the specified cloud profile.
--gateway-os-name
The name of OS to use for a cloud gateway.
--gateway-os-version
The version of OS to use for a cloud gateway.
--gateway-shape
The instance shape to use for a cloud gateway.
--tunnel-network-name
The name of VCN/subnet to use for tunneling.
--tunnel-network-range
The IP address range to use for tunneling.
--proxy
The proxy URL to be used in local gateway installation.
--compartment-id
The compartment to create the tunnel network in.
211](https://image.slidesharecdn.com/vboxusermanual-230728224837-47de127d/85/VBoxUserManual-pdf-226-320.jpg)
![8 VBoxManage
cloud network create
VBoxManage cloud <--provider=name> <--profile=name>
network create <--name=string> <--network-id=string> [--enable
| --disable]
Create a new cloud network descriptor associated with an existing cloud subnet.
--name
The name to assign to the cloud network descriptor.
--network-id
The unique identifier of an existing subnet in the cloud.
--enable, –disable
Whether to enable the network descriptor or disable it. If not specified, the network will
be enabled.
cloud network update
VBoxManage cloud network update <--name=string> [--network-id=string]
[--enable | --disable]
Modify an existing cloud network descriptor.
--name
The name of an existing cloud network descriptor.
--network-id
The unique identifier of an existing subnet in the cloud.
--enable, –disable
Whether to enable the network descriptor or disable it.
cloud network delete
VBoxManage cloud network delete <--name=string>
Delete an existing cloud network descriptor.
--name
The name of an existing cloud network descriptor.
cloud network info
VBoxManage cloud network info <--name=string>
Display information about a cloud network descriptor.
--name
The name of an existing cloud network descriptor.
212](https://image.slidesharecdn.com/vboxusermanual-230728224837-47de127d/85/VBoxUserManual-pdf-227-320.jpg)
![8 VBoxManage
8.15 VBoxManage cloudprofile
Manage the cloud profiles.
Synopsis
VBoxManage cloudprofile <--provider=name> <--profile=name> add
[--clouduser=unique id] [--fingerprint=MD5 string] [--keyfile=path]
[--passphrase=string] [--tenancy=unique id] [--compartment=unique id]
[--region=string]
VBoxManage cloudprofile <--provider=name> <--profile=name> update
[--clouduser=unique id] [--fingerprint=MD5 string] [--keyfile=path]
[--passphrase=string] [--tenancy=unique id] [--compartment=unique id]
[--region=string]
VBoxManage cloudprofile <--provider=name> <--profile=name> delete
VBoxManage cloudprofile <--provider=name> <--profile=name> show
Description
Common options
The subcommands of cloudprofile implement the standard CRUD operations for a cloud pro-
file. The next common options must be placed between the “cloud” and the following sub-
commands:
–provider=name
Short cloud provider name.
–profile=name
Cloud profile name.
cloudprofile add
VBoxManage cloudprofile <--provider=name> <--profile=name> add
[--clouduser=unique id] [--fingerprint=MD5 string] [--keyfile=path]
[--passphrase=string] [--tenancy=unique id] [--compartment=unique id]
[--region=string]
Add new cloud profile for a specified cloud provider.
--clouduser
The name which fully identifies the user in the specified cloud provider.
--fingerprint
Fingerprint for the key pair being used.
--keyfile
Full path and filename of the private key.
--passphrase
Passphrase used for the key, if it is encrypted.
213](https://image.slidesharecdn.com/vboxusermanual-230728224837-47de127d/85/VBoxUserManual-pdf-228-320.jpg)
![8 VBoxManage
--tenancy
ID of your tenancy.
--compartment
ID of your compartment.
--region
Region name. Region is where you plan to deploy an application.
cloudprofile show
VBoxManage cloudprofile <--provider=name> <--profile=name> show
Display information about a cloud profile for a specified cloud provider.
cloudprofile update
VBoxManage cloudprofile <--provider=name> <--profile=name> update
[--clouduser=unique id] [--fingerprint=MD5 string] [--keyfile=path]
[--passphrase=string] [--tenancy=unique id] [--compartment=unique id]
[--region=string]
Modify a cloud profile for the specified cloud provider.
--clouduser
The name which fully identifies the user in the specified cloud provider.
--fingerprint
Fingerprint for the key pair being used.
--keyfile
Full path and filename of the private key.
--passphrase
Passphrase used for the key, if it is encrypted.
--tenancy
ID of your tenancy.
--compartment
ID of your compartment.
--region
Region name. Region is where you plan to deploy an application.
cloudprofile delete
VBoxManage cloudprofile <--provider=name> <--profile=name> delete
Delete a cloud profile for a specified cloud provider.
8.16 VBoxManage import
Import a virtual appliance in OVF format or from a cloud service and create virtual machines.
214](https://image.slidesharecdn.com/vboxusermanual-230728224837-47de127d/85/VBoxUserManual-pdf-229-320.jpg)
![8 VBoxManage
Synopsis
VBoxManage import <ovfname | ovaname> [--dry-run] [--options= keepallmacs
| keepnatmacs | importtovdi ] [--vsys=n] [--ostype=ostype] [--vmname=name]
[--settingsfile=file] [--basefolder=folder] [--group=group] [--memory=MB]
[--cpus=n] [--description=text] [--eula= show | accept ] [--unit=n]
[--ignore] [--scsitype= BusLogic | LsiLogic ] [--disk=path]
[--controller=index] [--port=n]
VBoxManage import OCI:// --cloud [--ostype=ostype] [--vmname=name]
[--basefolder=folder] [--memory=MB] [--cpus=n] [--description=text]
<--cloudprofile=profile> <--cloudinstanceid=id>
[--cloudbucket=bucket]
Description
The VBoxManage import command imports a virtual appliance either in OVF format or from a
cloud service such as Oracle Cloud Infrastructure. The import is performed by copying virtual
disk images (by default using the VMDK image format) and by creating virtual machines (VMs)
in Oracle VM VirtualBox. See chapter 1.15, Importing and Exporting Virtual Machines, page 30.
You must specify the path name of an OVF file or OVA archive to use as input, or a placeholder
for the cloud case. For OVF appliances ensure that any disk images are in the same directory as
the OVF file.
Note that any options you specify to control the imported virtual appliance or to modify the
import parameters rely on the contents of the OVF file or the information from the cloud service.
Before you use the import operation to create the VM, perform a dry run to verify the correct-
ness of your configuration. This is more useful with an OVF or OVA appliance, because with a
cloud service even a dry run needs to perform most of the time consuming steps.
The import from a cloud service downloads a temporary file containing both the boot image
and some metadata describing the details of the VM instance. The temporary file is deleted after
successful import.
Common Options
ovfname | ovaname
Specifies the name of the OVF file or OVA archive that describes the appliance. In the cloud
case this is usually a fixed string such as OCI://.
--dry-run
Performs a dry run of the VBoxManage import command before you perform the actual
import operation. A dry run operation does the following:
• Outputs a description of the appliance’s contents based on the specified OVF or OVA
file.
• Shows how the appliance would be imported into Oracle VM VirtualBox. In addition,
the output shows any options that you can use to change the import behavior.
The shortened form of this option is -n.
--options=keepallmacs | keepnatmacs | importtovdi
Enables you to fine tune the import operation.
Valid arguments are as follows:
• keepallmacs: Specifies that the MAC addresses of every virtual network card are left
unchanged.
215](https://image.slidesharecdn.com/vboxusermanual-230728224837-47de127d/85/VBoxUserManual-pdf-230-320.jpg)
![8 VBoxManage
• keepnatmacs: Specifies that the MAC addresses of every virtual network card are left
unchanged if the network type is NAT.
• importtovdi: Specifies that all new disk images are in VDI file format.
--ostype=<ostype>
Specifies the guest operating system (OS) information for the VM. Use the
VBoxManage list ostypes command to view the OS type identifiers.
--vmname=<name>
Specifies the name of the VM to be used by Oracle VM VirtualBox.
--basefolder=<folder>
Specifies the folder where the files of the imported VM are stored.
--memory=<MB>
Specifies the memory size in Megabytes for the imported VM.
--cpus=<n>
Specifies the number of CPUs for the imported VM.
--description=<text>
Specifies the description text visible in the GUI and CLI when checking the VM details.
OVF / OVA Import Options
The following options are specific for importing a virtual appliance in OVF or OVA format. Such
an appliance can contain one or more VMs, which requires specifying which VM configuration
should be adjusted in case you want to change it. See chapter 1.15.2, Importing an Appliance in
OVF Format, page 31.
VBoxManage import <ovfname | ovaname> [--dry-run] [--options= keepallmacs
| keepnatmacs | importtovdi ] [--vsys=n] [--ostype=ostype] [--vmname=name]
[--settingsfile=file] [--basefolder=folder] [--group=group] [--memory=MB]
[--cpus=n] [--description=text] [--eula= show | accept ] [--unit=n]
[--ignore] [--scsitype= BusLogic | LsiLogic ] [--disk=path]
[--controller=index] [--port=n]
--vsys=<n>
Specifies the index selecting a specific VM within the appliance. Affects the following
options.
--unit=<n>
Specifies the index selecting a specific unit of a VM within the appliance. Affects the fol-
lowing options.
--settingsfile=<file>
Specifies the name (with or without path) of the VM config file which will be created as
part of the import. Usually the preferred way is overriding the VM name with --vmname
and if necessary specify the folder in which to create the VM with --basefolder.
--group=<group>
Specifies the primary group of the imported VM.
--eula=show | accept
Enables you to show or accept the license conditions of a VM within the appliance,
Valid arguments are as follows:
216](https://image.slidesharecdn.com/vboxusermanual-230728224837-47de127d/85/VBoxUserManual-pdf-231-320.jpg)
![8 VBoxManage
• show: Shows the EULA of a VM.
• accepts: Accepts the EULA of a VM. Any VMs in an appliance which have an EULA
require accepting it, otherwise the import will fail.
--ignore
Ignores the current unit of an imported VM, effectively removing the associated hardware.
--scsitype=BusLogic | LsiLogic
Enables you to select the type of the SCSI controller for the current unit of an imported
VM.
Valid arguments are as follows:
• BusLogic: Uses the (very old) BusLogic SCSI controller type.
• LsiLogic: Uses the (more modern) LsiLogic SCSI controller type.
Cloud Import Options
The following options are specific for importing a VM instance from a cloud service provider.
It always deals with a single VM. See chapter 1.16.9, Importing an Instance from Oracle Cloud
Infrastructure, page 45.
VBoxManage import OCI:// --cloud [--ostype=ostype] [--vmname=name]
[--basefolder=folder] [--memory=MB] [--cpus=n] [--description=text]
<--cloudprofile=profile> <--cloudinstanceid=id>
[--cloudbucket=bucket]
--cloud
Specifies that the import should be from the cloud.
--cloudprofile=<profile>
Specifies the cloud profile which is used to connect to the cloud service provider. The cloud
profile contains your Oracle Cloud Infrastructure account details, such as your user OCID
and the fingerprint for your public key. To use a cloud profile, you must have the required
permissions on Oracle Cloud Infrastructure.
--cloudinstanceid=<id>
Specifies the ID of an existing instance in the cloud.
--cloudbucket=<bucket>
Specifies the bucket name in which to store the object created from the instance. In Oracle
Cloud Infrastructure, a bucket is a logical container for storing objects. By default the first
bucket available with the cloud profile is used.
Examples
The following example performs the dry run of an OVF import operation for a sample appliance
that contains a Windows 10 guest:
$ VBoxManage import Windows10.ovf --dry-run
Interpreting Windows10.ovf...
OK.
Virtual system 0:
0: Suggested OS type: "Windows10_64"
(change with "--vsys 0 --ostype <type>"; use "list ostypes" to list all)
1: Suggested VM name "win10-appliance"
(change with "--vsys 0 --vmname <name>")
2: Suggested VM group "/"
217](https://image.slidesharecdn.com/vboxusermanual-230728224837-47de127d/85/VBoxUserManual-pdf-232-320.jpg)
![8 VBoxManage
8.17 VBoxManage export
Export one or more virtual machines to a virtual appliance or to a cloud service.
Synopsis
VBoxManage export <machines> <--output=name> [--legacy09 | --ovf09
| --ovf10 | --ovf20] [--manifest] [--options= manifest | iso | nomacs
| nomacsbutnat . . . ] [--vsys=virtual-system-number]
[--description=description-info] [--eula=license-text]
[--eulafile=filename] [--product=product-name]
[--producturl=product-URL] [--vendor=vendor-name]
[--vendorurl=vendor-URL] [--version=version-info] [--vmname=vmname]
VBoxManage export <machine> <--output=cloud-service-provider> [--opc10]
[--vmname=vmname] [--cloud=virtual-system-number]
[--cloudprofile=cloud-profile-name] [--cloudshape=cloud-shape-name]
[--clouddomain=cloud-domain] [--clouddisksize=disk-size-in-GB]
[--cloudbucket=bucket-name] [--cloudocivcn=OCI-VCN-ID]
[--cloudocisubnet=OCI-subnet-ID] [--cloudkeepobject= true | false ]
[--cloudlaunchinstance= true | false ] [--cloudlaunchmode= EMULATED
| PARAVIRTUALIZED ] [--cloudpublicip= true | false ]
Description
The VBoxManage export command enables you to export one or more virtual machines (VMs)
from Oracle VM VirtualBox. You can export the VM to one of the following:
• Virtual appliance in OVF format. Includes the copying of its virtual disk images to com-
pressed VMDK.
• Cloud service such as Oracle Cloud Infrastructure. Exports a single VM.
For more information about exporting VMs from Oracle VM VirtualBox, see chapter 1.15,
Importing and Exporting Virtual Machines, page 30
Export a Virtual Machine to an OVF Virtual Appliance
VBoxManage export <machines> <--output=name> [--legacy09 | --ovf09
| --ovf10 | --ovf20] [--manifest] [--options= manifest | iso | nomacs
| nomacsbutnat . . . ] [--vsys=virtual-system-number]
[--description=description-info] [--eula=license-text]
[--eulafile=filename] [--product=product-name]
[--producturl=product-URL] [--vendor=vendor-name]
[--vendorurl=vendor-URL] [--version=version-info] [--vmname=vmname]
The VBoxManage export command enables you to export a VM as a virtual appliance in OVF
format.
machines
Specifies a comma-separated list of one or more machines to export to the same OVF file.
219](https://image.slidesharecdn.com/vboxusermanual-230728224837-47de127d/85/VBoxUserManual-pdf-234-320.jpg)
![8 VBoxManage
--version=<version-info>
Specifies version information.
--vmname=<vmname>
Specifies the name of the exported VM.
--vsys=<virtual-system-number>
Specifies the number of the virtual system.
Export a Virtual Machine to Oracle Cloud Infrastructure
VBoxManage export <machine> <--output=cloud-service-provider> [--opc10]
[--vmname=vmname] [--cloud=virtual-system-number]
[--cloudprofile=cloud-profile-name] [--cloudshape=cloud-shape-name]
[--clouddomain=cloud-domain] [--clouddisksize=disk-size-in-GB]
[--cloudbucket=bucket-name] [--cloudocivcn=OCI-VCN-ID]
[--cloudocisubnet=OCI-subnet-ID] [--cloudkeepobject= true | false ]
[--cloudlaunchinstance= true | false ] [--cloudlaunchmode= EMULATED
| PARAVIRTUALIZED ] [--cloudpublicip= true | false ]
The VBoxManage export command enables you to export a VM to a cloud service provider
such as Oracle Cloud Infrastructure. By default, the exported disk image is converted into com-
pressed VMDK format. This minimizes the amount of data to transfer to the cloud service.
Some of the following options are configuration settings for the VM instance. As a result,
specify an Oracle Cloud Identifier (OCID) for a resource. Use the Oracle Cloud Infrastructure
Console to view OCIDs.
--output=<cloud-service-provider>
Specifies the short name of the cloud service provider to which you export the VM. For
Oracle Cloud Infrastructure, specify OCI://.
The short form of this option is -o.
--opc10
Exports in Oracle Cloud Infrastructure format.
--cloud=<number-of-virtual-system>
Specifies a number that identifies the VM to export. Numbering starts at 0 for the first VM.
--vmname=<vmname>
Specifies the name of the exported VM, which is used as the VM instance name in Oracle
Cloud Infrastructure.
--cloudprofile=<cloud-profile-name>
Specifies the cloud profile to use to connect to the cloud service provider. The cloud profile
contains your Oracle Cloud Infrastructure account details, such as your user OCID and the
fingerprint for your public key.
To use a cloud profile, you must have the required permissions on Oracle Cloud Infrastruc-
ture.
--cloudshape=<cloud-shape-name>
Specifies the shape used by the VM instance. The shape defines the number of CPUs and
the amount of memory that is allocated to the VM instance. Ensure that the shape is
compatible with the exported image.
221](https://image.slidesharecdn.com/vboxusermanual-230728224837-47de127d/85/VBoxUserManual-pdf-236-320.jpg)
![8 VBoxManage
--clouddomain=<cloud-domain>
Specifies the availability domain to use for the VM instance. Enter the full name of the
availability domain.
--clouddisksize=<disk-size-in-GB>
Specifies the amount of disk space, in gigabytes, to use for the exported disk image. Valid
values are from 50 GB to 300 GB.
--cloudbucket=<bucket-name>
Specifies the bucket in which to store uploaded files. In Oracle Cloud Infrastructure, a
bucket is a logical container for storing objects.
--cloudocivcn=<OCI-VCN-ID>
Specifies the OCID of the virtual cloud network (VCN) to use for the VM instance.
--cloudocisubnet=<OCI-subnet-ID>
Specifies the OCID of the VCN subnet to use for the VM instance.
--cloudkeepobject=true | false
Specifies whether to store the exported disk image in Oracle Object Storage.
--cloudlaunchinstance=true | false
Specifies whether to start the VM instance after the export to Oracle Cloud Infrastructure
completes.
--cloudlaunchinstance=EMULATED | PARAVIRTUALIZED
Specifies the launch mode used for the instance. Paravirtualized mode gives improved
performance.
--cloudpublicip=true | false
Specifies whether to enable a public IP address for the VM instance.
Example
The following example shows how to export the myVM VM to Oracle Cloud Infrastructure. The
command’s option arguments describe the configuration of the myVM_Cloud VM in Oracle Cloud
Infrastructure.
# VBoxManage export myVM --output=OCI:// --cloud=0 --vmname=myVM_Cloud
--cloudprofile="standard user" --cloudbucket=myBucket
--cloudshape=VM.Standard2.1 --clouddomain=US-ASHBURN-AD-1 --clouddisksize=50
--cloudocivcn=ocid1.vcn.oc1.iad.aaaa... --cloudocisubnet=ocid1.subnet.oc1.iad.aaaa...
--cloudkeepobject=true --cloudlaunchinstance=true --cloudpublicip=true
8.18 VBoxManage signova
Digitally sign an OVA.
Synopsis
VBoxManage signova <ova> <--certificate=file> <--private-key=file>
[--private-key-password-file=password-file
| --private-key-password=password] [--digest-type=type] [--pkcs7
| --no-pkcs7] [--intermediate-cert=file] [--force] [--verbose] [--quiet]
[--dry-run]
222](https://image.slidesharecdn.com/vboxusermanual-230728224837-47de127d/85/VBoxUserManual-pdf-237-320.jpg)
![8 VBoxManage
Description
The VBoxManage signova command adds a digital signature to an OVA file.
ova
The OVA file to sign.
--certificate=<file>
File containing the certificate that the OVA should be signed with. This can either be in
PEM format (base64) or DER (binary), the command will detect which.
--private-key=<file>
The file containing the private key. This can either be in PEM (base64) or DER (binary)
format, the command will detect which.
--private-key-password-file=<password-file>
File containing the private key password.
--private-key-password=<password>
The private key password.
--digest-type=<type>
Select the cryptographic digest algorithm to use in the signing. Possible values: SHA-256
(default), SHA-512 and SHA-1.
Some older versions of OVFTool and other VMware produces may require
--digest-type=sha-1 to accept the OVA.
--pkcs7, --no-pkcs7
Enables or disables the creation of an additional PKCS#7/CMS signature. This is enabled
by default.
--intermediate-cert=<file>
File containing an intermediary certificate that should be included in the optional
PKCS#7/CMS signature. Like the others, the file can either be in PEM or DER format.
This option can be repeated to add multiple intermediate certificates. This option implies
the --pkcs7 option.
--force
Overwrite existing signature if present. The default behaviour is to fail if the OVA is already
signed.
--dry-run
Do not actually modify the OVA, just test-run the signing operation.
-v, --verbose, -q, --quiet
Controls the verbositity of the command execution. The --verbose option can be used
multiple times to get more output.
8.19 VBoxManage startvm
Start a virtual machine.
Synopsis
VBoxManage startvm <uuid | vmname . . . > [--putenv=name[=value]] [--type= [gui
| headless | sdl | separate] ] --password file --password-id password
identifier
223](https://image.slidesharecdn.com/vboxusermanual-230728224837-47de127d/85/VBoxUserManual-pdf-238-320.jpg)
![8 VBoxManage
See Also
chapter 7.1.2, VBoxHeadless, the Remote Desktop Server, page 143, chapter 8.40, VBoxManage
setproperty, page 273, chapter 8.10, VBoxManage modifyvm, page 179.
8.20 VBoxManage controlvm
Change state and settings for a running virtual machine.
Synopsis
VBoxManage controlvm <uuid | vmname> pause
VBoxManage controlvm <uuid | vmname> resume
VBoxManage controlvm <uuid | vmname> reset
VBoxManage controlvm <uuid | vmname> poweroff
VBoxManage controlvm <uuid | vmname> savestate
VBoxManage controlvm <uuid | vmname> acpipowerbutton
VBoxManage controlvm <uuid | vmname> acpisleepbutton
VBoxManage controlvm <uuid | vmname> reboot
VBoxManage controlvm <uuid | vmname> shutdown [--force]
VBoxManage controlvm <uuid | vmname> keyboardputscancode <hex> [hex. . . ]
VBoxManage controlvm <uuid | vmname> keyboardputstring <string> [string. . . ]
VBoxManage controlvm <uuid | vmname> keyboardputfile <filename>
VBoxManage controlvm <uuid | vmname> setlinkstateN <on | off>
VBoxManage controlvm <uuid | vmname> nicN <null | nat | bridged | intnet
| hostonly | generic | natnetwork> [device-name]
VBoxManage controlvm <uuid | vmname> nictraceN <on | off>
VBoxManage controlvm <uuid | vmname> nictracefileN <filename>
VBoxManage controlvm <uuid | vmname> nicpropertyN <prop-name=prop-value>
VBoxManage controlvm <uuid | vmname> nicpromiscN <deny | allow-vms
| allow-all>
VBoxManage controlvm <uuid | vmname> natpfN <[rulename] ,tcp | udp,
[host-IP] , hostport, [guest-IP] , guestport >
VBoxManage controlvm <uuid | vmname> natpfN delete <rulename>
VBoxManage controlvm <uuid | vmname> guestmemoryballoon <balloon-size>
VBoxManage controlvm <uuid | vmname> usbattach <uuid | address>
[--capturefile=filename]
225](https://image.slidesharecdn.com/vboxusermanual-230728224837-47de127d/85/VBoxUserManual-pdf-240-320.jpg)
![8 VBoxManage
VBoxManage controlvm <uuid | vmname> usbdetach <uuid | address>
VBoxManage controlvm <uuid | vmname> audioin <on | off>
VBoxManage controlvm <uuid | vmname> audioout <on | off>
VBoxManage controlvm <uuid | vmname> clipboard mode <disabled | hosttoguest
| guesttohost | bidirectional>
VBoxManage controlvm <uuid | vmname> clipboard filetransfers <on | off>
VBoxManage controlvm <uuid | vmname> draganddrop <disabled | hosttoguest
| guesttohost | bidirectional>
VBoxManage controlvm <uuid | vmname> vrde <on | off>
VBoxManage controlvm <uuid | vmname> vrdeport <port>
VBoxManage controlvm <uuid | vmname> vrdeproperty <prop-name=prop-value>
VBoxManage controlvm <uuid | vmname> vrdevideochannelquality <percentage>
VBoxManage controlvm <uuid | vmname> setvideomodehint <xres> <yres>
<bpp> [[display] [enabled:yes | no | [x-originÂăy-origin]] ]
VBoxManage controlvm <uuid | vmname> setscreenlayout <display> <on
| primary x-originÂăy-originÂăx-resolutionÂăy-resolutionÂăbpp | off>
VBoxManage controlvm <uuid | vmname> screenshotpng <filename> [display]
VBoxManage controlvm <uuid | vmname> recording <on | off>
VBoxManage controlvm <uuid | vmname> recording screens <all | none
| screen-ID[,screen-ID...]>
VBoxManage controlvm <uuid | vmname> recording filename <filename>
VBoxManage controlvm <uuid | vmname> recording videores <widthxheight>
VBoxManage controlvm <uuid | vmname> recording videorate <rate>
VBoxManage controlvm <uuid | vmname> recording videofps <fps>
VBoxManage controlvm <uuid | vmname> recording maxtime <sec>
VBoxManage controlvm <uuid | vmname> recording maxfilesize <MB>
VBoxManage controlvm <uuid | vmname> setcredentials <username>
--passwordfile= <filename | password> <domain-name> --allowlocallogon=
<yes | no>
VBoxManage controlvm <uuid | vmname> teleport <--host=host-name>
<--port=port-name> [--maxdowntime=msec] [--passwordfile=filename
| --password=password]
VBoxManage controlvm <uuid | vmname> plugcpu <ID>
VBoxManage controlvm <uuid | vmname> unplugcpu <ID>
226](https://image.slidesharecdn.com/vboxusermanual-230728224837-47de127d/85/VBoxUserManual-pdf-241-320.jpg)
![8 VBoxManage
VBoxManage controlvm <uuid | vmname> cpuexecutioncap <num>
VBoxManage controlvm <uuid | vmname> vm-process-priority <default | flat
| low | normal | high>
VBoxManage controlvm <uuid | vmname> webcam attach [pathname [settings] ]
VBoxManage controlvm <uuid | vmname> webcam detach [pathname]
VBoxManage controlvm <uuid | vmname> webcam list
VBoxManage controlvm <uuid | vmname> addencpassword <ID> <password-file
| -> [--removeonsuspend= yes | no ]
VBoxManage controlvm <uuid | vmname> removeencpassword <ID>
VBoxManage controlvm <uuid | vmname> removeallencpasswords
VBoxManage controlvm <uuid | vmname> changeuartmodeN disconnected
| server pipe-name | client pipe-name | tcpserver port
| tcpclient hostname:port | file filename | device-name
VBoxManage controlvm <uuid | vmname> autostart-enabledN on | off
VBoxManage controlvm <uuid | vmname> autostart-delayseconds
Description
The VBoxManage controlvm command enables you to change the state of a running virtual
machine (VM). The following sections describe the subcommands that you can use:
Pause a Virtual Machine
VBoxManage controlvm <uuid | vmname> pause
The VBoxManage controlvm vmname pause command temporarily stops the execution of a
VM. When paused, the VM’s state is not permanently changed.
The VM window appears as gray and the title bar of the window indicates that the VM is
currently Paused. This action is equivalent to selecting Pause from the Machine menu of the
GUI.
Resume a Paused Virtual Machine
VBoxManage controlvm <uuid | vmname> resume
The VBoxManage controlvm vmname resume command restarts the execution of a paused
VM. This action is equivalent to selecting Resume from the Machine menu of the GUI.
Reset a Virtual Machine
VBoxManage controlvm <uuid | vmname> reset
The VBoxManage controlvm vmname reset command performs a cold reset the VM. This
command has the same effect on a VM as pressing the Reset button on a physical computer.
The cold reboot immediately restarts and reboots the guest operating system (OS). The state
of the VM is not saved prior to the reset, so data might be lost. This action is equivalent to
selecting Reset from the Machine menu of the GUI.
227](https://image.slidesharecdn.com/vboxusermanual-230728224837-47de127d/85/VBoxUserManual-pdf-242-320.jpg)

![8 VBoxManage
Shut down the guest OS
VBoxManage controlvm <uuid | vmname> shutdown [--force]
The VBoxManage controlvm vmname shutdown command asks the guest OS to halt + shut-
down, optionally forcing the shutdown.
This commands requires Guest Additions to be installed in the VM.
Send Keyboard Scancodes to a Virtual Machine
VBoxManage controlvm <uuid | vmname> keyboardputscancode <hex> [hex. . . ]
The VBoxManage controlvm vmname keyboardputscancode command sends keyboard
scancode commands to the VM.
For information about keyboard scancodes, see http://www.win.tue.nl/~aeb/linux/kbd/
scancodes-1.html.
Send Keyboard Strings to a Virtual Machine
VBoxManage controlvm <uuid | vmname> keyboardputstring <string> [string. . . ]
The VBoxManage controlvm vmname keyboardputstring command sends keyboard strings
to the VM.
Send a File to a Virtual Machine
VBoxManage controlvm <uuid | vmname> keyboardputfile <filename>
The VBoxManage controlvm vmname keyboardputfile command sends a file to the VM.
Set the Link State for a Virtual Machine
VBoxManage controlvm <uuid | vmname> setlinkstateN <on | off>
VBoxManage controlvm vmname setlinkstateN command enables you to connect or dis-
connect the virtual network cable from the network interface instance (N). Valid values are on
and off. The default value is on.
Set the Type of Networking to Use for a Virtual Machine
VBoxManage controlvm <uuid | vmname> nicN <null | nat | bridged | intnet
| hostonly | generic | natnetwork> [device-name]
The VBoxManage controlvm vmname nicN command specifies the type of networking to use
on the specified VM’s virtual network card. N numbering begins with 1.
The following valid network types are also described in chapter 6.2, Introduction to Networking
Modes, page 128:
• null specifies that the VM is is not connected to the host system.
229](https://image.slidesharecdn.com/vboxusermanual-230728224837-47de127d/85/VBoxUserManual-pdf-244-320.jpg)
![8 VBoxManage
Specify a NAT Port Forwarding Rule for a Virtual Machine
VBoxManage controlvm <uuid | vmname> natpfN <[rulename] ,tcp | udp,
[host-IP] , hostport, [guest-IP] , guestport >
The VBoxManage controlvm vmname natpfN command specifies a NAT port-forwarding rule.
See chapter 6.3.1, Configuring Port Forwarding with NAT, page 130.
Delete a NAT Port Forwarding Rule for a Virtual Machine
VBoxManage controlvm <uuid | vmname> natpfN delete <rulename>
The VBoxManage controlvm vmname natpfN delete command deletes the specified NAT
port-forwarding rule. See chapter 6.3.1, Configuring Port Forwarding with NAT, page 130.
Change Size of a Virtual Machine’s Guest Memory Balloon
VBoxManage controlvm <uuid | vmname> guestmemoryballoon <balloon-size>
The VBoxManage controlvm vmname guestmemoryballoon command changes the size of
the guest memory balloon. The guest memory balloon is the memory allocated by the Oracle VM
VirtualBox Guest Additions from the guest OS and returned to the hypervisor for reuse by other
VMs. The value you specify is in megabytes. See chapter 4.10.1, Memory Ballooning, page 107.
Make a Host System USB Device Visible to a Virtual Machine
VBoxManage controlvm <uuid | vmname> usbattach <uuid | address>
[--capturefile=filename]
The VBoxManage controlvm vmname usbattach command dynamically attaches a host USB
device to the VM, which makes it visible. You do not need to create a filter.
Specify a USB device by its Universally Unique Identifier (UUID) or by its address on the host
system. Use the VBoxManage list usbhost command to obtain information about USB devices
on the host system.
Use the --capturefile option to specify the absolute path of a file in which to write logging
data.
Make a Host System USB Device Invisible to a Virtual Machine
VBoxManage controlvm <uuid | vmname> usbdetach <uuid | address>
The VBoxManage controlvm vmname usbdetach command dynamically detaches a host USB
device from the VM, which makes it invisible. You do not need to create a filter.
Specify a USB device by its UUID or by its address on the host system. Use the
VBoxManage list usbhost command to obtain information about USB devices on the host
system.
231](https://image.slidesharecdn.com/vboxusermanual-230728224837-47de127d/85/VBoxUserManual-pdf-246-320.jpg)
![8 VBoxManage
– VRDP_AUDIO_MODE_CS specifies to use the client sync mode to prevent underflow or
overflow of the client queue.
• Audio/LogPath specifies the absolute path of the audio log file.
Specify the Image Quality for VRDP Video Redirection
VBoxManage controlvm <uuid | vmname> vrdevideochannelquality <percentage>
The VBoxManage controlvm vmname vrdevideochannelquality command sets the image
quality, as a JPEG compression level value, for video redirection. Valid values are between 10%
and 100%, inclusive. Lower values mean lower quality but higher compression. See chapter
7.1.9, VRDP Video Redirection, page 149.
Specify the Video Mode for the Guest VM
VBoxManage controlvm <uuid | vmname> setvideomodehint <xres> <yres>
<bpp> [[display] [enabled:yes | no | [x-originÂăy-origin]] ]
The VBoxManage controlvm vmname setvideomodehint command specifies the video
mode for the guest VM to use. You must have the Oracle VM VirtualBox Guest Additions in-
stalled. Note that this feature does not work for all guest systems.
Specify the Screen Layout for a Display on the Guest VM
VBoxManage controlvm <uuid | vmname> setscreenlayout <display> <on
| primary x-originÂăy-originÂăx-resolutionÂăy-resolutionÂăbpp | off>
The VBoxManage controlvm vmname setscreenlayout command can be used to configure
multiscreen displays. The specified screen on the guest VM can be enabled or disabled, or a
custom screen layout can be configured.
Take a Screen Shot of the Virtual Machine Display
VBoxManage controlvm <uuid | vmname> screenshotpng <filename> [display]
The VBoxManage controlvm vmname screenshotpng command takes a screenshot of the
guest display and saves it as PNG in the specified file.
• filename specifies the name of the PNG file to create.
• display specifies the display number for the screen shot. For a single monitor guest dis-
play, this is 0.
Enable or Disable the Recording of a Virtual Machine Session
VBoxManage controlvm <uuid | vmname> recording <on | off>
The VBoxManage controlvm vmname recording command enables or disables the recording
of a VM session into a WebM/VP8 file. Valid values are on, which begins recording when the VM
session starts and off, which disables recording. The default value is off.
235](https://image.slidesharecdn.com/vboxusermanual-230728224837-47de127d/85/VBoxUserManual-pdf-250-320.jpg)
![8 VBoxManage
Specify the Virtual Machine Screens to Record
VBoxManage controlvm <uuid | vmname> recording screens <all | none
| screen-ID[,screen-ID...]>
The VBoxManage controlvm vmname recording screens command enables you to specify
which VM screens to record. The recording for each screen that you specify is saved to its own
file in the machine folder. You cannot modify this setting while recording is enabled.
• all specifies that you record all VM screens.
• none specifies that you do not record any VM screens.
• screen-ID specifies one or more VM screens to record.
Specify the File in Which to Save Virtual Machine Recording
VBoxManage controlvm <uuid | vmname> recording filename <filename>
The VBoxManage controlvm vmname recording filename command specifies the file in
which to save the recording. You cannot modify this setting while recording is enabled.
The default setting is to store a recording in the machine folder, using the VM name as the file
name, with a webm file name extension.
Specify the Resolution of the Recorded Video
VBoxManage controlvm <uuid | vmname> recording videores <widthxheight>
VBoxManage controlvm vmname recording videores command specifies the resolution of
the recorded video in pixels. You cannot modify this setting while recording is enabled.
Use the Settings tool to view the video recording settings, which are based on the resolution
(frame size). See the Frame Size field on the Recording tab of the Display page to view the
default value.
Specify the resolution as widthxheight:
• width specifies the width in pixels.
• height specifies the height in pixels.
Specify the Bit Rate of the Video
VBoxManage controlvm <uuid | vmname> recording videorate <rate>
The VBoxManage controlvm vmname recording videorate command specifies the bit
rate, bit-rate, of the video in kilobits per second. Increasing this value improves the appear-
ance of the video at the cost of an increased file size. You cannot modify this setting while
recording is enabled.
Use the Settings tool to view the video recording settings, which are based on the frame size.
See the Video Quality field on the Recording tab of the Display page to view the default value.
236](https://image.slidesharecdn.com/vboxusermanual-230728224837-47de127d/85/VBoxUserManual-pdf-251-320.jpg)
![8 VBoxManage
Configure a Virtual Machine Target for Teleporting
VBoxManage controlvm <uuid | vmname> teleport <--host=host-name>
<--port=port-name> [--maxdowntime=msec] [--passwordfile=filename
| --password=password]
The VBoxManage controlvm vmname teleport command initiates a teleporting operation
between the specified VM and the specified host system. See chapter 7.2, Teleporting, page 150.
If you specify a password, it must match the password you specified when you issued the
VBoxManage modifyvm command for the target machine.
--host=<hostname>
Specifies the name of the VM.
--port=<port>
Specifies the port on the VM that should listen for a teleporting request from other VMs.
The port number can be any free TCP/IP port number, such as 6000.
--maxdowntime=<msec>
Specifies the maximum downtime, in milliseconds, for the teleporting target VM.
--password=<password>
Specifies the password that the source machine uses for the teleporting request. The re-
quest succeeds only if the source machine specifies the same password.
The --password is mutually exclusive with the --passwordfile option.
--passwordfile=<filename>
Specifies the file from which to obtain the password that the source machine uses for the
teleporting request. The request succeeds only if the source machine specifies the same
password.
When you specify a file name of stdin, you can read the password from standard input.
The --passwordfile is mutually exclusive with the --password option.
Add a Virtual CPU to a Virtual Machine
VBoxManage controlvm <uuid | vmname> plugcpu <ID>
The VBoxManage controlvm vmname plugcpu command adds a virtual CPU to the specified
VM if CPU hot-plugging is enabled. ID specifies the index of the virtual CPU to be added and
must be a number from 0 to the maximum number of CPUs configured.
Remove a Virtual CPU From a Virtual Machine
VBoxManage controlvm <uuid | vmname> unplugcpu <ID>
The VBoxManage controlvm vmname unplugcpu command removes a virtual CPU from the
specified VM if CPU hot-plugging is enabled. ID specifies the index of the virtual CPU to be
removed and must be a number from 0 to the maximum number of CPUs configured. You cannot
remove CPU 0.
238](https://image.slidesharecdn.com/vboxusermanual-230728224837-47de127d/85/VBoxUserManual-pdf-253-320.jpg)
![8 VBoxManage
Set the Maximum Amount of Physical CPU Time Used by a Virtual CPU
VBoxManage controlvm <uuid | vmname> cpuexecutioncap <num>
The VBoxManage controlvm vmname cpuexecutioncap command specifies how the maxi-
mum amount of physical CPU time used by a virtual CPU. Valid values are a percentage between
1 and 100. A value of 50 specifies that a single virtual CPU can use up to 50% of a physical CPU.
The default value is 100.
Use this feature with caution, it can have unexpected results including timekeeping problems
and lower performance than specified. If you want to limit the resource usage of a VM it is more
reliable to pick an appropriate number of VCPUs.
Change the Priority of a VM Process
VBoxManage controlvm <uuid | vmname> vm-process-priority <default | flat
| low | normal | high>
The VBoxManage controlvm vmname vm-process-priority command specifies the priority
scheme of the VM process to use when starting the specified VM and while the VM runs.
Valid values are:
• default âĂŞ Default process priority determined by the OS.
• flat âĂŞ Assumes a scheduling policy which puts the process at the default priority and
with all threads at the same priority.
• low âĂŞ Assumes a scheduling policy which puts the process mostly below the default
priority of the host OS.
• normal âĂŞ Assume a scheduling policy which shares the CPU resources fairly with other
processes running with the default priority of the host OS.
• high âĂŞ Assumes a scheduling policy which puts the task above the default priority of the
host OS. This policy might easily cause other tasks in the system to starve.
Attach a Webcam to a Virtual Machine
VBoxManage controlvm <uuid | vmname> webcam attach [pathname [settings] ]
The VBoxManage controlvm vmname webcam attach command attaches a webcam to a run-
ning VM. Specify the webcam as the absolute path of the webcam on the host OS or as an alias.
Use the VBoxManage list webcams command to obtain the webcam alias.
Note that the .0 alias is the default video input device on the host OS. .1 is the first video
input device, .2 is the second video input device, and so on. The order of the devices is specific
to the host system.
You can specify optional settings in the form of semi-colon-separated (;) name-value pairs.
These properties enable you to configure the emulated webcam device.
The following settings are supported:
MaxFramerate
Specifies the highest rate at which to send video frames to the VM. The rate is in frames
per second. Higher frame rates increase CPU load, so you can use this setting to reduce
CPU load. The default value is no maximum limit. This value enables the VM to use any
frame rate supported by the webcam.
239](https://image.slidesharecdn.com/vboxusermanual-230728224837-47de127d/85/VBoxUserManual-pdf-254-320.jpg)
![8 VBoxManage
MaxPayloadTransferSize
Specifies the maximum number of bytes that the VM receives from the emulated webcam
in one buffer. The default setting is 3060 bytes, which is used by some webcams. If the VM
is able to use larger buffers, higher values might reduce CPU load slightly. Note that some
guest OSes might not suppport higher MaxPayloadTransferSize values.
Detach a Webcam From a Virtual Machine
VBoxManage controlvm <uuid | vmname> webcam detach [pathname]
The VBoxManage controlvm vmname webcam detach command detaches a webcam from a
running VM. Specify the webcam as the absolute path of the webcam on the host OS or as an
alias. Use the VBoxManage list webcams to obtain the webcam alias.
When a webcam device is detached from the host, the host OS determines how the emulated
webcam behaves.
• Windows hosts: The emulated webcam device is detached from the VM automatically.
• Mac OS X hosts that run at least OS X 10.7: The emulated webcam de-
vice remains attached to the VM and you must detach it manually by using the
VBoxManage controlvm webcam detach command.
• Linux hosts: The emulated webcam device is detached from the VM automatically only
if the webcam is actively streaming video. If the emulated webcam is inactive, manually
detach it by using the VBoxManage controlvm vmname webcam detach command.
List the Webcams Attached to a Virtual Machine
VBoxManage controlvm <uuid | vmname> webcam list
The VBoxManage controlvm vmname webcam list command lists webcams that are at-
tached to the running VM. The output shows a list of absolute paths or aliases that attached the
webcams to the VM by using the VBoxManage controlvm vmname webcam attach command.
Set an Encryption Password for a Virtual Machine
VBoxManage controlvm <uuid | vmname> addencpassword <ID> <password-file
| -> [--removeonsuspend= yes | no ]
The VBoxManage controlvm vmname addencpassword command provides the vmname en-
crypted VM with the encryption password to enable a headless start. Specify the absolute path
of a password file on the host system. If filename is -, VBoxManage prompts for the encryption
password.
Use the --removeonsuspend option to specify whether to save the passsword or clear it from
VM memory when the VM is suspended.
If the VM is suspended and the password is cleared, use the
VBoxManage controlvm vmname addencpassword to provide the password to resume
execution on the VM. Use this feature when you do not want to store the password in VM
memory while the VM is suspended by a host suspend event.
240](https://image.slidesharecdn.com/vboxusermanual-230728224837-47de127d/85/VBoxUserManual-pdf-255-320.jpg)
![8 VBoxManage
Synopsis
VBoxManage unattended detect <--iso=install-iso> [--machine-readable]
VBoxManage unattended install <uuid|vmname> <--iso=install-iso>
[--user=login] [--password=password] [--password-file=file]
[--full-user-name=name] [--key=product-key] [--install-additions]
[--no-install-additions] [--additions-iso=add-iso] [--install-txs]
[--no-install-txs] [--validation-kit-iso=testing-iso] [--locale=ll_CC]
[--country=CC] [--time-zone=tz] [--hostname=fqdn]
[--package-selection-adjustment=keyword] [--dry-run]
[--auxiliary-base-path=path] [--image-index=number]
[--script-template=file] [--post-install-template=file]
[--post-install-command=command]
[--extra-install-kernel-parameters=params] [--language=lang]
[--start-vm=session-type]
Description
unattended detect
VBoxManage unattended detect <--iso=install-iso> [--machine-readable]
Detects the guest operating system (OS) on the specified installation ISO and displays the
result. This can be used as input when creating a VM for the ISO to be installed in.
--iso=<install-iso>
The installation ISO to run the detection on.
--machine-readable
Produce output that is simpler to parse from a script.
unattended install
VBoxManage unattended install <uuid|vmname> <--iso=install-iso>
[--user=login] [--password=password] [--password-file=file]
[--full-user-name=name] [--key=product-key] [--install-additions]
[--no-install-additions] [--additions-iso=add-iso] [--install-txs]
[--no-install-txs] [--validation-kit-iso=testing-iso] [--locale=ll_CC]
[--country=CC] [--time-zone=tz] [--hostname=fqdn]
[--package-selection-adjustment=keyword] [--dry-run]
[--auxiliary-base-path=path] [--image-index=number]
[--script-template=file] [--post-install-template=file]
[--post-install-command=command]
[--extra-install-kernel-parameters=params] [--language=lang]
[--start-vm=session-type]
Reconfigures the specified VM for installation and optionally starts it up.
uuid|vmname
Either the UUID or the name (case sensitive) of a VM.
--iso=<install-iso>
The installation ISO to run the detection on.
243](https://image.slidesharecdn.com/vboxusermanual-230728224837-47de127d/85/VBoxUserManual-pdf-258-320.jpg)
![8 VBoxManage
--auxiliary-base-path=<path>
The path prefix to the media related files generated for the installation. (default:
vm-config-dir/Unattended-vm-uuid-)
--image-index=<number>
Windows installation image index. (default: 1)
--script-template=<file>
The unattended installation script template. (default: IMachine::OSTypeId dependent)
--post-install-template=<file>
The post installation script template. (default: IMachine::OSTypeId dependent)
--post-install-command=<command>
A single command to run after the installation is completed. The exact format and exactly
when this is run is guest OS installer dependent.
--extra-install-kernel-parameters=<params>
List of extra linux kernel parameters to use during the installation. (default: IMa-
chine::OSTypeId dependent)
--language=<lang>
Specifies the UI language for a Windows installation. The lang is generally on the form
{ll}-{CC}. See detectedOSLanguages results from VBoxManage unattended detect. (de-
fault: detectedOSLanguages[0])
8.22 VBoxManage discardstate
Discard the saved state of a virtual machine.
Synopsis
VBoxManage discardstate <uuid | vmname>
Description
The VBoxManage discardstate command discards the saved state of a virtual machine (VM)
that is not currently running. This command causes the VM’s operating system to restart the next
time you start the VM.
Note: Where possible, avoid performing this action. The effects of this command are
equivalent to unplugging the power cable on a physical machine.
uuid|vmname
Specifies the Universally Unique Identifier (UUID) or name of the VM.
Examples
The following command discards the saved state file for the VM called vm2. When you next start
the VM, the VM’s operating system is restarted.
$ VBoxManage discardstate vm2
245](https://image.slidesharecdn.com/vboxusermanual-230728224837-47de127d/85/VBoxUserManual-pdf-260-320.jpg)
![8 VBoxManage
See Also
chapter 8.23, VBoxManage adoptstate, page 246
8.23 VBoxManage adoptstate
Change a virtual machine’s state based on a saved state file.
Synopsis
VBoxManage adoptstate <uuid | vmname> <state-filename>
Description
The VBoxManage adoptstate command enables you to change the state of a virtual machine
(VM) to a state described in a saved state file (.sav). This action is referred to as a VM adopting
a saved state file. The saved state file must be separate from the VM configuration.
When you start the VM after adopting the saved state, the VM restores its state from the saved
state file.
Only use this command for custom deployments.
uuid | vmname
Specifies the Universally Unique Identifier (UUID) or name of the VM.
state-filename
Specifies the name of the saved state file.
Examples
The following command adopts a saved state file called mystate.sav by a VM called vm2. A
subsequent start of the VM called vm2 restores the state from the saved state file mystate.sav.
$ VBoxManage adoptstate vm2 /home/user/mystate.sav
See Also
chapter 8.22, VBoxManage discardstate, page 245
8.24 VBoxManage snapshot
Manage virtual machine snapshots.
Synopsis
VBoxManage snapshot <uuid|vmname>
VBoxManage snapshot <uuid|vmname> take <snapshot-name>
[--description=description] [--live]
[--uniquename Number,Timestamp,Space,Force]
VBoxManage snapshot <uuid|vmname> delete <snapshot-name>
VBoxManage snapshot <uuid|vmname> restore <snapshot-name>
246](https://image.slidesharecdn.com/vboxusermanual-230728224837-47de127d/85/VBoxUserManual-pdf-261-320.jpg)
![8 VBoxManage
VBoxManage snapshot <uuid|vmname> restorecurrent
VBoxManage snapshot <uuid|vmname> edit <snapshot-name | --current>
[--description=description] [--name=new-name]
VBoxManage snapshot <uuid|vmname> list [[--details] | [--machinereadable]]
VBoxManage snapshot <uuid|vmname> showvminfo <snapshot-name>
Description
The VBoxManage snapshot command manages snapshots.
Oracle VM VirtualBox uses the snapshot to capture the state of a virtual machine (VM). You
can later use the snapshot to revert to the state described by the snapshot.
A snapshot is a complete copy of a VM’s settings. If you take the snapshot while the VM is
running, the snapshot also includes the VM’s state file.
After you take a snapshot, Oracle VM VirtualBox creates a differencing hard disk for each
normal hard disk that is associated with the host machine. When you restore a snapshot, Oracle
VM VirtualBox uses these differencing files to quickly reset the contents of the VM’s virtual hard
disks.
For each VBoxManage snapshot command, you must specify the name or the universal unique
identifier (UUID) of the VM for which you want to take a snapshot.
General Command Operand
uuid|vmname
Specifies the UUID or name of the VM.
Take a Snapshot of a Virtual Machine
VBoxManage snapshot <uuid|vmname> take <snapshot-name>
[--description=description] [--live]
[--uniquename Number,Timestamp,Space,Force]
The VBoxManage snapshot take command takes a snapshot of the current state of the VM.
You must supply a name for the snapshot and can optionally supply a description. The new
snapshot is inserted into the snapshots tree as a child of the current snapshot and then becomes
the new current snapshot.
--description=<description>
Specifies a description of the snapshot.
--live
Specifies that the VM is not stopped while you create the snapshot. This operation is know
as live snapshotting.
--uniquename Number,Timestamp,Space,Force
TBD.
snapshot-name
Specifies the name of the snapshot to create.
247](https://image.slidesharecdn.com/vboxusermanual-230728224837-47de127d/85/VBoxUserManual-pdf-262-320.jpg)
![8 VBoxManage
Delete a Snapshot
VBoxManage snapshot <uuid|vmname> delete <snapshot-name>
The VBoxManage snapshot delete command removes the specified snapshot.
The delete operation may take some time to finish. This is because the differencing images that
are associated with the snapshot may need to be merged with their child differencing images.
snapshot-name
Specifies the UUID or name of the snapshot.
Restore a Snapshot
VBoxManage snapshot <uuid|vmname> restore <snapshot-name>
The VBoxManage snapshot restore command restores the specified snapshot. This opera-
tion resets the VM’s settings and current state to that of the snapshot. The state of the VM on
which you restore a snapshot is lost. When restored, the specified snapshot becomes the new
current snapshot and subsequent snapshots are children of that snapshot.
snapshot-name
Specifies the UUID or name of the snapshot.
Restore the Current Snapshot
VBoxManage snapshot <uuid|vmname> restorecurrent
The VBoxManage snapshot restorecurrent command restores the current snapshot. The
current snapshot is the one from which the current state is derived. This command is equivalent
to using the VBoxManage snapshot restore command and specifying the name or UUID of the
current snapshot.
Change the Name or Description of an Existing Snapshot
VBoxManage snapshot <uuid|vmname> edit <snapshot-name | --current>
[--description=description] [--name=new-name]
The VBoxManage snapshot edit command enables you to change the name or the descrip-
tion of a specified snapshot.
snapshot-name
Specifies the UUID or name of the snapshot to edit.
This option is mutually exclusive with the --current option.
--current
Specifies that you update the current version of the snapshot.
This option is mutually exclusive with a specific snapshot name or its UUID.
--description=<description>
Specifies a new description for the snapshot.
--name=<new-name>
Specifies a new name for the snapshot.
248](https://image.slidesharecdn.com/vboxusermanual-230728224837-47de127d/85/VBoxUserManual-pdf-263-320.jpg)
![8 VBoxManage
List the Snapshots
VBoxManage snapshot <uuid|vmname> list [[--details] | [--machinereadable]]
The VBoxManage snapshot list command lists all the snapshots for a VM.
--details
Specifies that the output shows detailed information about the snapshot.
This option is mutually exclusive with the --machinereadable option.
--machinereadable
Specifies that the output is shown in a machine-readable format.
This option is mutually exclusive with the --details option.
Show Information About a Snapshot’s Settings
VBoxManage snapshot <uuid|vmname> showvminfo <snapshot-name>
The VBoxManage snapshot showvminfo command enables you to view the VM settings that
are part of an existing snapshot.
snapshot-name
Specifies the UUID or name of the snapshot.
Examples
The following command creates a snapshot of the ol7u4 VM. The snapshot is called
ol7u4-snap-001. The command uses the --description option to provide a description of
the snapshot contents.
$ VBoxManage snapshot ol7u4 take ol7u4-snap-001
--description="Oracle Linux 7.4"
The following command lists the snapshots for the ol7u4 VM.
$ VBoxManage snapshot ol7u4 list
The following command changes the description for the ol7u4-snap-001 snapshot of the
ol7u4 VM.
$ VBoxManage snapshot ol7u4 edit ol7u4-snap-001
--description="Oracle Linux 7.4 with UEK4 kernel"
The following command shows VM settings for the ol7u1-snap-001 snapshot of the ol7u4
VM.
$ VBoxManage snapshot ol7u4 showvminfo ol7u4-snap-001
Name: ol7u4
Groups: /
Guest OS: Oracle (64-bit)
UUID: 43349d78-2ab3-4cb8-978f-0e755cd98090
249](https://image.slidesharecdn.com/vboxusermanual-230728224837-47de127d/85/VBoxUserManual-pdf-264-320.jpg)
![8 VBoxManage
Config file: C:Usersuser1VirtualBox VMsol7u4ol7u4.vbox
...
Snapshots:
Name: ol7u4-snap-001 (UUID: 1cffc37d-5c37-4b86-b9c5-a0f157a55f43)
Description: Oracle Linux 7.4 with UEK4 kernel
8.25 VBoxManage closemedium
Remove a hard disk, DVD, or floppy image from the media registry.
Synopsis
VBoxManage closemedium [disk | dvd | floppy] <uuid | filename> [--delete]
Description
The VBoxManage closemedium command removes a hard disk, DVD, or floppy image from the
list of known media used by Oracle VM VirtualBox. The image is then unavailable for selection
in the Virtual Media Manager.
To use this command, the image must not be attached to any VMs.
Optionally, you can request that the image be deleted.
disk|dvd|floppy
Specifies the type of medium. Valid values are disk (hard drive), dvd, or floppy.
uuid|filename
Specifies the Universally Unique Identifier (UUID) or absolute path name of the medium
or image.
--delete
Deletes the image file.
Examples
The following command removes the disk image file called disk01.vdi from the registry.
$ VBoxManage closemedium disk01.vdi
The following command removes the disk image file called disk01.vdi from the registry and
deletes the image file.
$ VBoxManage closemedium disk01.vdi --delete
8.26 VBoxManage storageattach
Attach, remove, and modify storage media used by a virtual machine.
250](https://image.slidesharecdn.com/vboxusermanual-230728224837-47de127d/85/VBoxUserManual-pdf-265-320.jpg)
![8 VBoxManage
Synopsis
VBoxManage storageattach <uuid | vmname> <--storagectl=name>
[--bandwidthgroup= name | none ] [--comment=text] [--device=number]
[--discard= on | off ] [--encodedlun=lun] [--forceunmount]
[--hotpluggable= on | off ] [--initiator=initiator] [--intnet] [--lun=lun]
[--medium= none | emptydrive | additions | uuid | filename | host:drive
| iscsi ] [--mtype= normal | writethrough | immutable | shareable | readonly
| multiattach ] [--nonrotational= on | off ] [--passthrough= on | off ]
[--passwordfile=file] [--password=password] [--port=number] [--server=
name | ip ] [--setparentuuid=uuid] [--setuuid=uuid] [--target=target]
[--tempeject= on | off ] [--tport=port] [--type= dvddrive | fdd | hdd ]
[--username=username]
Description
The VBoxManage storageattach command enables you to manage a storage medium that you
connected to a storage controller by using the VBoxManage storagectl command.
uuid | vmname
Specifies the Universally Unique Identifier (UUID) or the name of the virtual machine (VM).
--storagectl=<name>
Specifies the name of the storage controller. Use the VBoxManage showvminfo command
to list the storage controllers that are attached to the VM.
--port=<number>
Specifies the port number of the storage controller to modify. You must specify this option
unless the storage controller has only a single port.
--device=<number>
Specifies the port’s device number to modify. You must specify this option unless the storage
controller has only one device per port.
--type=dvddrive | fdd | hdd
Specifies the drive type to which the medium is associated. Only omit this option if the
medium type can be determined by using the --medium option or by information provided
by an earlier medium attachment command.
--medium=none | emptydrive | additions | <uuid> | <filename> |
host:<drive> | iscsi
Specifies one of the following values:
none
Removes any existing device from the specified slot.
emptydrive
For a virtual DVD or floppy drive only.
Makes the device slot behave like a removeable drive into which no media has been
inserted.
additions
For a virtual DVD drive only.
Attaches the VirtualBox Guest Additions image to the specified device slot.
uuid
Specifies the UUID of a storage medium to attach to the specified device slot. The
storage medium must already be known to Oracle VM VirtualBox, such as a storage
251](https://image.slidesharecdn.com/vboxusermanual-230728224837-47de127d/85/VBoxUserManual-pdf-266-320.jpg)
![8 VBoxManage
The following command attaches the o7-r6-dvd.iso DVD image to the specified IDE storage
controller on the ol7 VM.
$ VBoxManage storageattach ol7 --storagectl "IDE Controller" --port 0 --device 0
--type dvddrive --medium ol7-r6-dvd.iso
See Also
chapter 8.5, VBoxManage list, page 169, chapter 8.6, VBoxManage showvminfo, page 174, chapter
8.27, VBoxManage storagectl, page 255
8.27 VBoxManage storagectl
Manage a storage controller.
Synopsis
VBoxManage storagectl <uuid | vmname> <--name=controller-name> [--add=
floppy | ide | pcie | sas | sata | scsi | usb ] [--controller= BusLogic
| I82078 | ICH6 | IntelAhci | LSILogic | LSILogicSAS | NVMe | PIIX3 | PIIX4
| USB | VirtIO ] [--bootable= on | off ] [--hostiocache= on | off ]
[--portcount=count] [--remove] [--rename=new-controller-name]
Description
The VBoxManage storagectl command enables you to attach, modify, and remove
a storage controller. After you configure the storage controller, you can use the
VBoxManage storageattach command to attach virtual media to the controller.
uuid | vmname
Specifies the Universally Unique Identifier (UUID) or name of the virtual machine (VM).
--name=<controller-name>
Specifies the name of the storage controller.
--add=<system-bus-type>
Specifies the type of the system bus to which to connect the storage controller. Valid values
are floppy, ide, pcie, sas, sata, scsi, and usb.
--controller=<chipset-type>
Specifies the chipset type to emulate for the specified storage controller. Valid values are
BusLogic, I82078, ICH6, IntelAHCI, LSILogic, LSILogicSAS, NVMe, PIIX3, PIIX4, and
USB.
The default value varies, according to the type of storage controller.
--portcount=<count>
Specifies the number of ports that the storage controller supports. Valid values depend on
the type of storage controller.
--hostiocache=on|off
Specifies whether to use the host I/O cache for all disk images attached to this storage
controller. Valid values are on and off. See chapter 5.7, Host Input/Output Caching, page
122.
--bootable=on|off
Specifies whether this controller is bootable. Valid values are on and off.
255](https://image.slidesharecdn.com/vboxusermanual-230728224837-47de127d/85/VBoxUserManual-pdf-270-320.jpg)
![8 VBoxManage
--rename=<new-controller-name>
Specifies a new name for the storage controller.
--remove
Removes a storage controller from the VM configuration.
Examples
The following command creates a SATA storage controller called sata01 and adds it to the ol7
VM. The storage controller emulates the IntelAHCI chipset.
$ VBoxManage storagectl ol7 --name "sata01" --add sata --controller IntelAHCI
The following command creates an IDE storage controller called ide01 and adds it to the ol7
VM.
$ VBoxManage storagectl ol7 --name "ide01" --add ide
See Also
chapter 8.26, VBoxManage storageattach, page 250
8.28 VBoxManage bandwidthctl
Manage bandwidth groups.
Synopsis
VBoxManage bandwidthctl <uuid | vmname> add <bandwidth-group-name>
<--limit=bandwidth-limit[k|m|g|K|M|G]> <--type=disk|network>
VBoxManage bandwidthctl <uuid | vmname> list [--machinereadable]
VBoxManage bandwidthctl <uuid | vmname> remove <bandwidth-group-name>
VBoxManage bandwidthctl <uuid | vmname> set <bandwidth-group-name>
<--limit=bandwidth-limit[k|m|g|K|M|G]>
Description
The VBoxManage bandwidthctl command enables you to manage bandwidth groups for vir-
tual machines (VMs). A bandwidth group specifies the bandwidth limit for the disks or for the
network adapters of a VM.
Note that a network bandwidth limit applies only to the outbound traffic from the VM. The
inbound traffic is unlimited.
Create a Bandwidth Group
VBoxManage bandwidthctl <uuid | vmname> add <bandwidth-group-name>
<--limit=bandwidth-limit[k|m|g|K|M|G]> <--type=disk|network>
The VBoxManage bandwidthctl add command creates a bandwidth group for the specified
VM. You must specify whether the bandwidth group is for disks or for networks, and specify the
bandwidth limit.
256](https://image.slidesharecdn.com/vboxusermanual-230728224837-47de127d/85/VBoxUserManual-pdf-271-320.jpg)
![8 VBoxManage
uuid | vmname
Specifies the Universally Unique Identifier (UUID) or the name of the VM.
<bandwidth-group-name>
Specifies the name of the bandwidth group.
--type=disk|network
Specifies the type of the bandwidth group: disk and network. For more information,
see chapter 5.8, Limiting Bandwidth for Disk Images, page 122 or chapter 6.12, Limiting
Bandwidth for Network Input/Output, page 139.
--limit=<bandwidth-limit>[k|m|g|K|M|G]
Specifies the bandwidth limit for a bandwidth group. The default unit is megabytes per
second. You can modify this value while the VM is running.
You can change the unit by appending one of the following unit specifiers to the bandwidth
limit:
• k âĂŞ kilobits per second
• m âĂŞ megabits per second
• g âĂŞ gigabits per second
• K âĂŞ kilobytes per second
• M âĂŞ megabytes per second
• G âĂŞ gigabytes per second
List Bandwidth Groups
VBoxManage bandwidthctl <uuid | vmname> list [--machinereadable]
The VBoxManage bandwidthctl list command lists the all the bandwidth groups that have
been defined for the specified VM. Use the --machinereadable option to produce the output in
a machine-readable format, which uses name-value pairs.
uuid | vmname
Specifies the UUID or the name of the VM.
--machinereadable
Outputs the information about the bandwidth groups in name-value pairs.
Remove a Bandwidth Group
VBoxManage bandwidthctl <uuid | vmname> remove <bandwidth-group-name>
The VBoxManage bandwidthctl remove command removes a bandwidth group.
Note: To successfully remove a bandwidth group, ensure that it is not referenced by
any disk or adapter in the running VM.
uuid | vmname
Specifies the UUID or the name of the VM.
<bandwidth-group-name>
Specifies the name of the bandwidth group.
257](https://image.slidesharecdn.com/vboxusermanual-230728224837-47de127d/85/VBoxUserManual-pdf-272-320.jpg)
![8 VBoxManage
Modify the Bandwidth Limit of a Bandwidth Group
VBoxManage bandwidthctl <uuid | vmname> set <bandwidth-group-name>
<--limit=bandwidth-limit[k|m|g|K|M|G]>
The VBoxManage bandwidthctl set command modifies the bandwidth limit for a bandwidth
group.
uuid | vmname
Specifies the UUID or the name of the VM.
<bandwidth-group-name>
Specifies the name of the bandwidth group.
--limit=<bandwidth-limit>[k|m|g|K|M|G]
Specifies the bandwidth limit for a bandwidth group. The default unit is megabytes per
second. You can modify this value while the VM is running.
You can change the unit by appending one of the following unit specifiers to the bandwidth
limit:
• k âĂŞ kilobits per second
• m âĂŞ megabits per second
• g âĂŞ gigabits per second
• K âĂŞ kilobytes per second
• M âĂŞ megabytes per second
• G âĂŞ gigabytes per second
Examples
The following example shows how to use the VBoxManage bandwidthctl command to create
the Limit bandwidth group and set the limit to 20 Mbps. Then use the VBoxManage modifyvm
command to assign this bandwidth group to the first and second adapters of the vm1 VM.
$ VBoxManage bandwidthctl "vm1" add Limit --type network --limit 20m
$ VBoxManage modifyvm "vm1" --nicbandwidthgroup1 Limit
$ VBoxManage modifyvm "vm1" --nicbandwidthgroup2 Limit
You can dynamically modify the limit of a bandwidth group while the VM is running. The
following example shows how to modify the limit for the Limit bandwidth group from 20 Mbps
to 100 kbps:
$ VBoxManage bandwidthctl "vm1" set Limit --limit 100k
The following command disables shaping for all adapters in the Limit bandwidth group by
specifying a limit of zero (0):
$ VBoxManage bandwidthctl "vm1" set Limit --limit 0
8.29 VBoxManage showmediuminfo
Show information about a medium.
Synopsis
VBoxManage showmediuminfo [disk | dvd | floppy] <uuid | filename>
258](https://image.slidesharecdn.com/vboxusermanual-230728224837-47de127d/85/VBoxUserManual-pdf-273-320.jpg)
![8 VBoxManage
Description
The VBoxManage showmediuminfo command shows the following information about a medium:
• Size
• Size on disk
• Type
• In use by virtual machines (VMs)
The medium must be specified either by its UUID, if the medium is registered, or by its file-
name. Registered images can be listed using VBoxManage list hdds, VBoxManage list dvds,
or VBoxManage list floppies, as appropriate.
For backward compatibility, you can also use the showvdiinfo command to obtain information
about the medium.
disk | dvd | floppy
Specifies the type of medium. Valid values are disk (hard drive), dvd, or floppy.
uuid | filename
Specifies the Universally Unique Identifier (UUID) or absolute path name of the medium
or image.
If the medium is registered, you can specify the UUID. You can also list reg-
istered images by using the VBoxManage list hdds, VBoxManage list dvds, or
VBoxManage list floppies command.
Examples
The following command shows information about the disk01.vdi disk image:
$ VBoxManage showmediuminfo disk01.vdi
The following command shows information about the floppy01.img floppy disk image.
$ VBoxManage showmediuminfo floppy floppy01.img
See Also
chapter 8.5, VBoxManage list, page 169
8.30 VBoxManage createmedium
Create a new medium.
Synopsis
VBoxManage createmedium [disk | dvd | floppy] <--filename=filename>
[--size=megabytes | --sizebyte=bytes] [--diffparent= UUID | filename ]
[--format= VDI | VMDK | VHD ]
[--variant Standard,Fixed,Split2G,Stream,ESX,Formatted,RawDisk]
--property name=value. . .
--property-file name=/path/to/file/with/value. . .
259](https://image.slidesharecdn.com/vboxusermanual-230728224837-47de127d/85/VBoxUserManual-pdf-274-320.jpg)
![8 VBoxManage
Examples
The following command creates a new disk image file called disk01.vdi. The file size is 1024
megabytes.
$ VBoxManage createmedium --filename disk01.vdi --size 1024
The following command creates a new floppy disk image file called floppy01.vdi. The file
size is 1 megabyte.
$ VBoxManage createmedium floppy --filename floppy01.img --size 1
8.31 VBoxManage modifymedium
Change the characteristics of an existing disk image.
Synopsis
VBoxManage modifymedium [disk | dvd | floppy] <uuid | filename>
[--autoreset=on | off] [--compact] [--description=description]
[--move=pathname] [--property=name=[value]]
[--resize=megabytes | --resizebyte=bytes] [--setlocation=pathname]
[--type=normal | writethrough | immutable | shareable | readonly | multiattach]
Description
The VBoxManage modifymedium command enables you to change the characteristics of an ex-
isting disk image.
Note: For compatibility with earlier versions of Oracle VM VirtualBox, you can use the
modifyvdi and modifyhd commands.
disk | dvd | floppy
Specifies the media type of the image.
filename
Specifies the Universally Unique Identifier (UUID) or path name of the disk image on the
host file system. You can specify the UUID only if the medium is registered. Use the
VBoxManage list hdds command to list the registered images. You can specfy an abso-
lute or relative path to the medium.
--autoreset=on | off
Specifies whether to automatically reset an immutable hard disk on every virtual machine
(VM) startup. This option is only for immutable hard disks and the default value is on. See
chapter 5.4, Special Image Write Modes, page 118.
--compact
Compresses disk images by removing blocks that contain only zeroes. This option shrinks
a dynamically allocated image and reduces the physical size of the image without affecting
the logical size of the virtual disk.
You can use this option for base images and for differencing images that are created as part
of a snapshot.
261](https://image.slidesharecdn.com/vboxusermanual-230728224837-47de127d/85/VBoxUserManual-pdf-276-320.jpg)
![8 VBoxManage
Examples
The following command modifies the description for the disk image file called disk01.vdi.
$ VBoxManage modifymedium disk disk01.vdi --description "Oracle Linux 7 image"
The following command modifies the write mode for the disk image file called disk01.vdi.
$ VBoxManage modifymedium disk disk01.vdi --type writethrough
See Also
chapter 8.5, VBoxManage list, page 169
8.32 VBoxManage clonemedium
Create a clone of a medium.
Synopsis
VBoxManage clonemedium <uuid | source-medium> <uuid | target-medium> [disk
| dvd | floppy] [--existing] [--format= VDI | VMDK | VHD | RAW | other ]
[--variant=Standard,Fixed,Split2G,Stream,ESX]
Description
The VBoxManage clonemedium command enables you to clone an existing medium (virtual disk,
DVD, or floppy), which is typically an image file. Only the Universally Unique Identifier (UUID)
differs between the original image and the cloned image.
You can use the Virtual Media Manager to transfer the cloned image to another host system
or reimport it into Oracle VM VirtualBox. See chapter 5.3, The Virtual Media Manager, page 114
and chapter 5.6, Cloning Disk Images, page 121.
uuid | source-medium
Specifies the UUID or the absolute or relative file name of the source medium to
clone. You can specify the UUID of the medium only if it is registered. Use the
VBoxManage list hdds command to list registered images.
uuid | target-medium
Specifies the UUID or the absolute or relative file name of the target (clone) medium.
You can specify the UUID of the target medium only if it is registered. Use the
VBoxManage list hdds command to list registered images.
disk | dvd | floppy
Specifies the type of the medium to clone. Valid values are disk, dvd, and floppy. The
default value is disk.
--existing
Performs the clone operation by overwriting an existing target medium. The result is that
only the portion of the source medium that fits into the existing target medium is copied.
If the target medium is smaller than the source, only the portion of the source medium up
to the size of the target medium is copied.
If the target medium is larger than the source, the remaining part of the target medium is
unchanged.
263](https://image.slidesharecdn.com/vboxusermanual-230728224837-47de127d/85/VBoxUserManual-pdf-278-320.jpg)
![8 VBoxManage
--format
Specifies the file format of the target medium if it differs from the format of the source
medium. Valid values are VDI, VMDK, VHD, RAW, and other.
--variant=Standard,Fixed,Split2G,Stream,ESX
Specifies the file format variant for the target medium, which is a comma-separated list of
variants. Following are the valid values:
• Standard is the default disk image type, which has a dynamically allocated file size.
• Fixed uses a disk image that has a fixed file size.
• Split2G indicates that the disk image is split into 2GB segments. This value is for
VMDK only.
• Stream optimizes the disk image for downloading. This value is for VMDK only.
• ESX is used for some VMWare products. This value is for VMDK only.
Note that not all variant combinations are valid. Specifying incompatible variant values in
the list will produce an error message.
Note: For compatibility with earlier versions of Oracle VM VirtualBox, you can use the
clonevdi and clonehd commands instead of the clonemedium command.
Examples
The following command creates a clone of the disk01.vdi disk image file. The clone is called
disk02.vdi.
$ VBoxManage clonemedium disk01.vdi disk02.vdi
The following command creates a clone of the disk01.vdi disk image file. The clone is in
VMDK format and is called disk02.vmdk.
$ VBoxManage clonemedium disk01.vdi disk02.vmdk --format VMDK
See Also
chapter 8.5, VBoxManage list, page 169
8.33 VBoxManage mediumproperty
Manage medium properties.
Synopsis
VBoxManage mediumproperty [disk | dvd | floppy] set <uuid | filename>
<property-name> <property-value>
VBoxManage mediumproperty [disk | dvd | floppy] get <uuid | filename>
<property-name>
VBoxManage mediumproperty [disk | dvd | floppy] delete <uuid | filename>
<property-name>
264](https://image.slidesharecdn.com/vboxusermanual-230728224837-47de127d/85/VBoxUserManual-pdf-279-320.jpg)
![8 VBoxManage
Description
The VBoxManage mediumproperty command enables you to set, retrieve, or delete a medium
property.
Set a Medium Property
VBoxManage mediumproperty [disk | dvd | floppy] set <uuid | filename>
<property-name> <property-value>
The VBoxManage mediumproperty set command enables you to set a medium property.
disk | dvd | floppy
Specifies the type of medium. Valid values are disk (hard drive), dvd, or floppy.
uuid | filename
Specifies the Universally Unique Identifier (UUID) or absolute path name of the medium
or image.
property-name
Specifies the name of the property.
property-value
Specifies the value of the specified property.
Retrieve a Medium Property Value
VBoxManage mediumproperty [disk | dvd | floppy] get <uuid | filename>
<property-name>
The VBoxManage mediumproperty get command enables you to retrieve the value of a
medium property.
disk | dvd | floppy
Specifies the type of medium. Valid values are disk (hard drive), dvd, or floppy.
uuid | filename
Specifies the Universally Unique Identifier (UUID) or absolute path name of the medium
or image.
property-name
Specifies the name of the property.
Delete a Medium Property
VBoxManage mediumproperty [disk | dvd | floppy] delete <uuid | filename>
<property-name>
The VBoxManage mediumproperty delete command enables you to delete a medium prop-
erty.
disk | dvd | floppy
Specifies the type of medium. Valid values are disk (hard drive), dvd, or floppy.
265](https://image.slidesharecdn.com/vboxusermanual-230728224837-47de127d/85/VBoxUserManual-pdf-280-320.jpg)
![8 VBoxManage
uuid | filename
Specifies the Universally Unique Identifier (UUID) or absolute path name of the medium
or image.
property-name
Specifies the name of the property.
Examples
The following command sets the property called prop1 to val1 for the ol7.vdi disk image.
$ VBoxManage mediumproperty disk set ol7.vdi prop1 val1
The following command gets the value of the property called prop1 for the ol7.vdi disk
image.
$ VBoxManage mediumproperty disk get ol7.vdi prop1
8.34 VBoxManage encryptmedium
Manage a DEK-encrypted medium or image.
Synopsis
VBoxManage encryptmedium <uuid | filename> [--cipher=cipher-ID]
[--newpassword=password] [--newpasswordid=password-ID]
[--oldpassword=password]
Description
The VBoxManage encryptmedium command enables you to create and manage a DEK-encrypted
medium or image. You can encrypt an image, decrypt an image, and change the encryption
password of an image. See chapter 9.29.2, Encrypting Disk Images, page 375.
uuid | filename
Specifies the Universally Unique Identifier (UUID) or the absolute path name of the
medium or image to encrypt.
--newpassword=<password>
Specifies the new encryption password. password is either the absolute path name of a
password file on the host operating system or -, which prompts you for the password.
You must use the --newpasswordid option with this --newpassword option.
--oldpassword=<password>
Specifies the original encryption password. password is either the absolute path name
of a password file on the host operating system or -, which prompts you for the original
password.
This option enables you to gain access to an encrypted medium or image to do the follow-
ing:
• Decrypt an encrypted image by using this option by itself.
• Change the password of the encrypted image by using the --newpassword option.
• Change the encryption cipher of the image by using the --cipher option.
266](https://image.slidesharecdn.com/vboxusermanual-230728224837-47de127d/85/VBoxUserManual-pdf-281-320.jpg)
![8 VBoxManage
Examples
The following example checks the encryption password for the ol7u4-1.vdi disk image. The
password is contained in a file called pwfile.
The command returns a message indicating that the specified password is correct.
$ VBoxManage checkmediumpwd "$HOME/VirtualBox VMs/ol7u4/ol7u4-1.vdi" /home/user/pwfile
The given password is correct
See Also
chapter 8.34, VBoxManage encryptmedium, page 266
8.36 VBoxManage convertfromraw
Convert a raw disk image to a virtual disk image.
Synopsis
VBoxManage convertfromraw <inputfile> <outputfile> [--format= VDI | VMDK
| VHD ] [--uuid=uuid] [--variant=Standard,Fixed,Split2G,Stream,ESX]
VBoxManage convertfromraw stdin <outputfile> [--format= VDI | VMDK | VHD ]
[--uuid=uuid] [--variant=Standard,Fixed,Split2G,Stream,ESX]
Description
The VBoxManage convertfromraw command enables you to convert a raw disk image to an
Oracle VM VirtualBox virtual disk image (VDI).
Note: For compatibility with earlier versions of Oracle VM VirtualBox, you can use
the VBoxManage convertdd command instead of the VBoxManage convertfromraw
command.
Convert a Raw Disk File to a Virtual Disk Image File
VBoxManage convertfromraw <inputfile> <outputfile> [--format= VDI | VMDK
| VHD ] [--uuid=uuid] [--variant=Standard,Fixed,Split2G,Stream,ESX]
The VBoxManage convertfromraw command converts the specified raw disk image input file
to an Oracle VM VirtualBox VDI file.
inputfile
Specifies the name of the raw disk image file to convert.
outputfile
Specifies the name of the file in which to write the VDI output.
--format=VDI | VMDK | VHD
Specifies the format of the disk image to create. Valid values are VDI, VMDK, and VHD. The
default format is VDI.
268](https://image.slidesharecdn.com/vboxusermanual-230728224837-47de127d/85/VBoxUserManual-pdf-283-320.jpg)
![8 VBoxManage
--uuid=<uuid>
Specifies the Universally Unique Identifier (UUID) of the output file.
--variant=Standard,Fixed,Split2G,Stream,ESX
Specifies any required file format variants for the output file. This is a comma-separated
list of variant values. Following are the valid values:
• Standard is the default disk image type, which has a dynamically allocated file size.
• Fixed uses a disk image that has a fixed file size.
• Split2G indicates that the disk image is split into 2GB segments. This value is for
VMDK only.
• Stream optimizes the disk image for downloading. This value is for VMDK only.
• ESX is used for some VMWare products. This value is for VMDK only.
Note that not all variant combinations are valid. Specifying incompatible variant values in
the list will produce an error message.
Convert Raw Data From Standard Input to a Virtual Disk Image File
VBoxManage convertfromraw stdin <outputfile> [--format= VDI | VMDK | VHD ]
[--uuid=uuid] [--variant=Standard,Fixed,Split2G,Stream,ESX]
The VBoxManage convertfromraw stdin command reads the content of the disk image from
standard input. Consider using this form of the command in a pipe sequence.
outputfile
Specifies the name of the file in which to write the VDI output.
--format=VDI | VMDK | VHD
Specifies the format of the disk image to create. Valid values are VDI, VMDK, and VHD. The
default format is VDI.
--uuid=<uuid>
Specifies the UUID of the output file.
--variant=Standard,Fixed,Split2G,Stream,ESX
Specifies any required file format variants for the output file. This is a comma-separated
list of variant values. Following are the valid values:
• Standard is the default disk image type, which has a dynamically allocated file size.
• Fixed uses a disk image that has a fixed file size.
• Split2G indicates that the disk image is split into 2GB segments. This value is for
VMDK only.
• Stream optimizes the disk image for downloading. This value is for VMDK only.
• ESX is used for some VMWare products. This value is for VMDK only.
Note that not all variant combinations are valid. Specifying incompatible variant values in
the list will produce an error message.
269](https://image.slidesharecdn.com/vboxusermanual-230728224837-47de127d/85/VBoxUserManual-pdf-284-320.jpg)
![8 VBoxManage
Examples
The following command converts the raw disk image input file disk01.raw. The output file is a
VDI disk image called disk02.vdi.
$ VBoxManage convertfromraw disk01.raw disk02.vdi
The following command converts the raw disk image input file disk01.raw. The output file is
a VMDK disk image called disk02.vmdk.
$ VBoxManage convertfromraw disk01.raw disk02.vmdk --format VMDK
8.37 VBoxManage mediumio
Medium content access.
Synopsis
VBoxManage mediumio <--disk=uuid|filename | --dvd=uuid|filename
| --floppy=uuid|filename> [--password-file=-|filename] formatfat
[--quick]
VBoxManage mediumio <--disk=uuid|filename | --dvd=uuid|filename
| --floppy=uuid|filename> [--password-file=-|filename] cat [--hex]
[--offset=byte-offset] [--size=bytes] [--output=-|filename]
VBoxManage mediumio <--disk=uuid|filename | --dvd=uuid|filename
| --floppy=uuid|filename> [--password-file=-|filename] stream
[--format=image-format] [--variant=image-variant] [--output=-|filename]
Description
Common options
The subcommands of mediumio all operate on a medium which need to be specified, optionally
with an encryption password. The following common options can be placed before or after the
sub-command:
–disk=uuid|filename
Either the UUID or filename of a harddisk image, e.g. VDI, VMDK, VHD, ++.
–dvd=uuid|filename
Either the UUID or filename of a DVD image, e.g. ISO, DMG, CUE.
–floppy=uuid|filename
Either the UUID or filename of a floppy image, e.g. IMG.
–password-file=-|filename
The name of a file containing the medium encryption password. If - is specified, the
password will be read from stdin.
270](https://image.slidesharecdn.com/vboxusermanual-230728224837-47de127d/85/VBoxUserManual-pdf-285-320.jpg)
![8 VBoxManage
mediumio formatfat
VBoxManage mediumio <--disk=uuid|filename | --dvd=uuid|filename
| --floppy=uuid|filename> [--password-file=-|filename] formatfat
[--quick]
Formats a floppy medium with the FAT file system. This will erase the content of the medium.
--quick
Quickformat the medium.
mediumio cat
VBoxManage mediumio <--disk=uuid|filename | --dvd=uuid|filename
| --floppy=uuid|filename> [--password-file=-|filename] cat [--hex]
[--offset=byte-offset] [--size=bytes] [--output=-|filename]
Dumps the medium content to stdout or the specified file.
--hex
Dump as hex bytes.
--offset
The byte offset in the medium to start.
--size
The number of bytes to dump.
--output
The output filename. As usual - is take to mean stdout.
mediumio stream
VBoxManage mediumio <--disk=uuid|filename | --dvd=uuid|filename
| --floppy=uuid|filename> [--password-file=-|filename] stream
[--format=image-format] [--variant=image-variant] [--output=-|filename]
Converts the medium to a streamable format and dumps it to the given output.
--format
The format of the destination image.
--variant
The medium variant for the destination.
--output
The output filename. As usual - is take to mean stdout.
8.38 VBoxManage setextradata
Set a keyword value that is associated with a virtual machine or configuration.
271](https://image.slidesharecdn.com/vboxusermanual-230728224837-47de127d/85/VBoxUserManual-pdf-286-320.jpg)
![8 VBoxManage
Synopsis
VBoxManage setextradata <global | uuid | vmname> <keyword> [value]
Description
The VBoxManage setextradata command enables you to set a keyword value that is associated
with a virtual machine (VM) or with an Oracle VM VirtualBox configuration.
global
Sets information about the configuration rather than a VM.
uuid|vmname
Specifies the Universally Unique Identifier (UUID) or name of the VM.
keyword
Specifies the keyword for which to set its value.
value
Specifies the keyword value. Specifying no value removes the keyword.
Examples
The following command sets the installdate keyword value for the Fedora5 VM to
2019.01.01:
$ VBoxManage setextradata Fedora5 installdate 2019.01.01
The following command unsets the value of the installdate keyword for the Fedora5 VM:
$ VBoxManage setextradata Fedora5 installdate
See Also
chapter 8.39, VBoxManage getextradata, page 272
8.39 VBoxManage getextradata
View keyword values that are associated with a virtual machine or configuration.
Synopsis
VBoxManage getextradata <global | uuid | vmname> <keyword> | [enumerate]
Description
The VBoxManage getextradata command enables you to retrieve keyword data that is associ-
ated with a virtual machine (VM) or with an Oracle VM VirtualBox configuration.
global
Specifies to retrieve information about the configuration rather than a VM.
uuid | vmname
Specifies the Universally Unique Identifier (UUID) or name of the VM.
enumerate
Shows all keyword values for the specified VM or configuration.
keyword
Specifies the keyword for which to retrieve its value.
272](https://image.slidesharecdn.com/vboxusermanual-230728224837-47de127d/85/VBoxUserManual-pdf-287-320.jpg)

![8 VBoxManage
websrvauthlibrary
Specifies which library the web service uses to authenticate users. Valid values are
default, which specifies the default library, null, which disables authentication, or the
name of the library to use. For information about the Oracle VM VirtualBox web service,
see chapter 11, Oracle VM VirtualBox Programming Interfaces, page 396.
Examples
The following command configures Oracle VM VirtualBox to use the specified HTTP proxy server.
$ VBoxManage setproperty proxymode manual
$ VBoxManage setproperty proxyurl "http://myproxy.com:8080"
See Also
chapter 8.19, VBoxManage startvm, page 223
8.41 VBoxManage usbfilter
Manage USB filters.
Synopsis
VBoxManage usbfilter add <index,0-N> <--target= <uuid | vmname | global> >
<--name=string> <--action=ignore | hold> [--active=yes | no]
[--vendorid=XXXX] [--productid=XXXX] [--revision=IIFF]
[--manufacturer=string] [--product=string] [--remote=yes | no]
[--serialnumber=string] [--maskedinterfaces=XXXXXXXX]
VBoxManage usbfilter modify <index,0-N> <--target= <uuid | vmname
| global> > [--name=string] [--action=ignore | hold] [--active=yes | no]
[--vendorid=XXXX | ""] [--productid=XXXX | ""] [--revision=IIFF | ""]
[--manufacturer=string | ""] [--product=string | ""] [--remote=yes | no]
[--serialnumber=string | ""] [--maskedinterfaces=XXXXXXXX]
VBoxManage usbfilter remove <index,0-N> <--target= <uuid | vmname
| global> >
Description
The VBoxManage usbfilter command enables you to manage USB filters for a specific virtual
machine (VM), or global USB filters that affect the entire Oracle VM VirtualBox configuration.
Global filters are applied before VM-specific filters. This means that you can use a global filter
to prevent devices from being captured by any VM.
Global filters are applied in a particular order. Only the first filter that fits a device is applied.
For example, the first global filter makes a specific Kingston memory stick device available while
the second filter ignores all Kingston devices. The result of applying these filters is that the
specific Kingston memory stick is made available to any machine that has the appropriate filter,
but no other Kingston devices are made available.
275](https://image.slidesharecdn.com/vboxusermanual-230728224837-47de127d/85/VBoxUserManual-pdf-290-320.jpg)
![8 VBoxManage
--vendorid=<XXXX>
Specifies a vendor ID filter, which is a string representation of a four-digit hexadecimal
number. X is the hexadecimal digit including leading zeroes. The default value is an empty
string ("").
Add a USB Filter or a Global Filter
VBoxManage usbfilter add <index,0-N> <--target= <uuid | vmname | global> >
<--name=string> <--action=ignore | hold> [--active=yes | no]
[--vendorid=XXXX] [--productid=XXXX] [--revision=IIFF]
[--manufacturer=string] [--product=string] [--remote=yes | no]
[--serialnumber=string] [--maskedinterfaces=XXXXXXXX]
Use the VBoxManage usbfilter add command to create a new USB filter.
In addition, specify parameters by which to filter. You can use the VBoxManage list usbhost
command to view the parameters for devices that are attached to your system.
Modify a USB Filter or a Global Filter
VBoxManage usbfilter modify <index,0-N> <--target= <uuid | vmname
| global> > [--name=string] [--action=ignore | hold] [--active=yes | no]
[--vendorid=XXXX | ""] [--productid=XXXX | ""] [--revision=IIFF | ""]
[--manufacturer=string | ""] [--product=string | ""] [--remote=yes | no]
[--serialnumber=string | ""] [--maskedinterfaces=XXXXXXXX]
Use the VBoxManage usbfilter modify command to modify a USB filter. You can
use the VBoxManage list usbfilters command to list global filter indexes and the
VBoxManage showvminfo command to list indexes for a specific machine.
Remove a USB Filter or a Global Filter
VBoxManage usbfilter remove <index,0-N> <--target= <uuid | vmname
| global> >
Use the VBoxManage usbfilter remove command to remove a USB filter entry.
Examples
The following command lists the available USB devices on the host system.
$ VBoxManage list usbhost
The following command adds a USB filter called filter01 to the ol7 VM. The filter specifies
a Kingston DataTraveler memory stick and is placed first in the list of USB filters for the VM.
$ VBoxManage usbfilter add 0 --target ol7 --name filter01 --vendorid 0x0930 --productid 0x6545
The following command removes the USB filter that is second in the list for the ol7 VM.
$ VBoxManage usbfilter remove 1 --target ol7
8.42 VBoxManage sharedfolder
Add and remove shared folders.
277](https://image.slidesharecdn.com/vboxusermanual-230728224837-47de127d/85/VBoxUserManual-pdf-292-320.jpg)
![8 VBoxManage
Synopsis
VBoxManage sharedfolder add <uuid | vmname> <--name=name>
<--hostpath=hostpath> [--readonly] [--transient] [--automount]
[--auto-mount-point=path]
VBoxManage sharedfolder remove <uuid | vmname> <--name=name> [--transient]
Description
Shared folders enable you to share data between the host system and guests. To use shared
folders, you must first install the Oracle VM VirtualBox Guest Additions software on the guest
OS.
The shared folder is associated with a share name and the full path name of the folder or
directory on the host system. The share name is a unique name within the namespace of the host
OS.
Add a Shared Folder
VBoxManage sharedfolder add <uuid | vmname> <--name=name>
<--hostpath=hostpath> [--readonly] [--transient] [--automount]
[--auto-mount-point=path]
The VBoxManage sharedfolder add command creates a shared folder. The folder you spec-
ify is on the host computer. When configured, the contents of the folder on the host system can
be shared with the guest OS.
uuid|vmname
Specifies the name or UUID of the guest VM that shares a folder with the host system.
–name=name
Specifies the name of the share, which is a unique name within the namespace of the host
OS.
–hostpath=hostpath
Specifies the absolute path of the folder or directory on the host OS to share with the guest
OS.
–readonly
Specifies that the share has only read-only access to files at the host path.
By default, shared folders have read-write access to the files at the host path. However on
Linux distributions, shared folders are mounted with 770 file permissions with the root
user and the vboxsf group. By using this option, the file permissions become 700.
–transient
Specifies that the share is transient, which means that it can be added and removed at
runtime and does not persist after the VM stops.
–automount
Specifies that the share is automatically mounted.
–auto-mount-point=path
Specifies the mount point of the share. This guest OS specific.
For Windows and OS/2 guest this must be an unused drive letter. If left blank (or if the
drive letter is already in use), the last unused drive letter is used instead (i.e. searching
from Z: thru A:).
278](https://image.slidesharecdn.com/vboxusermanual-230728224837-47de127d/85/VBoxUserManual-pdf-293-320.jpg)
![8 VBoxManage
For Linux, Solaris and other unix guest, it must be an absolute path like
/mnt/mysharedfolder. If left empty the default location is /media/sf_sharename.
Remove a Shared Folder
VBoxManage sharedfolder remove <uuid | vmname> <--name=name> [--transient]
The VBoxManage sharedfolder remove command removes a shared folder.
uuid|vmname
Specifies the name or UUID of the guest VM that shares a folder with the host system.
–name=name
Specifies the name of the share to remove.
–transient
Specifies that the share is transient, which means that it can be added and removed at
runtime and does not persist after the VM stops.
Examples
The following command creates a shared folder called o7share for the ol7 VM. The share is
mounted automatically when the VM is started.
$ VBoxManage sharedfolder add ol7 --name ol7share --hostpath "/home/user/ol7share" --automount
The following command removes the shared folder called o7share for the ol7 VM.
$ VBoxManage sharedfolder remove ol7 --name ol7share
8.43 VBoxManage guestproperty
Manage virtual machine guest properties.
Synopsis
VBoxManage guestproperty get <uuid | vmname> <property-name> [--verbose]
VBoxManage guestproperty enumerate <uuid | vmname> [--no-timestamp]
[--no-flags] [--relative] [--old-format] [patterns. . . ]
VBoxManage guestproperty set <uuid | vmname> <property-name>
[property-value [--flags=flags] ]
VBoxManage guestproperty unset <uuid | vmname> <property-name>
VBoxManage guestproperty wait <uuid | vmname> <patterns> [--timeout=msec]
[--fail-on-timeout]
Description
The VBoxManage guestproperty command enables you to set or retrieve the properties of a
running virtual machine (VM). See chapter 4.7, Guest Properties, page 103. Guest properties are
arbitrary name-value string pairs that can be written to and read from by either the guest or the
host. As a result, these properties can be used as a low-volume communication channel for strings
provided that a guest is running and has the Guest Additions installed. In addition, the Guest
Additions automatically set and maintain values whose keywords begin with /VirtualBox/.
279](https://image.slidesharecdn.com/vboxusermanual-230728224837-47de127d/85/VBoxUserManual-pdf-294-320.jpg)
![8 VBoxManage
General Command Operand
uuid|vmname
Specifies the Universally Unique Identifier (UUID) or name of the VM.
List All Properties for a Virtual Machine
VBoxManage guestproperty enumerate <uuid | vmname> [--no-timestamp]
[--no-flags] [--relative] [--old-format] [patterns. . . ]
The VBoxManage guestproperty enumerate command lists each guest property and value
for the specified VM. Note that the output is limited if the guest’s service is not updating the
properties, for example because the VM is not running or because the Guest Additions are not
installed.
--relative
Display the timestamp relative to current time.
--no-timestamp
Do not display the timestamp of the last update.
--no-flags
Do not display the flags.
--old-format
Use the output format from VirtualBox 6.1 and earlier.
<pattern>
Filters the list of properties based on the specified pattern, which can contain the following
wildcard characters:
* (asterisk)
Represents any number of characters. For example, the /VirtualBox* pattern
matches all properties that begin with /VirtualBox.
? (question mark)
Represents a single arbitrary character. For example, the fo? pattern matches both
foo and for.
| (pipe)
Specifies multiple alternative patterns. For example, the s*|t* pattern matches any
property that begins with s or t.
Retrieve a Property Value for a Virtual Machine
VBoxManage guestproperty get <uuid | vmname> <property-name> [--verbose]
The VBoxManage guestproperty get command retrieves the value of the specified property.
If the property cannot be found, for example because the guest is not running, the command
issues the following message:
No value set!
property-name
Specifies the name of the property.
--verbose
Provides the property value, timestamp, and any specified value attributes.
280](https://image.slidesharecdn.com/vboxusermanual-230728224837-47de127d/85/VBoxUserManual-pdf-295-320.jpg)
![8 VBoxManage
Set a Property Value for a Virtual Machine
VBoxManage guestproperty set <uuid | vmname> <property-name>
[property-value [--flags=flags] ]
The VBoxManage guestproperty set command enables you to set a guest property by spec-
ifying the property and its value. If you omit the value, the property is deleted.
property-name
Specifies the name of the property.
property-value
Specifies the value of the property. If no value is specified, any existing value is removed.
--flags=<flags>
Specify the additional attributes of the value. The following attributes can be specified as
a comma-separated list:
TRANSIENT
Removes the value with the VM data when the VM exits.
TRANSRESET
Removes the value when the VM restarts or exits.
RDONLYGUEST
Specifies that the value can be changed only by the host and that the guest can read
the value.
RDONLYHOST
Specifies that the value can be changed only by the guest and that the host can read
the value.
READONLY
Specifies that the value cannot be changed.
Wait for a Property Value to Be Created, Deleted, or Changed
VBoxManage guestproperty wait <uuid | vmname> <patterns> [--timeout=msec]
[--fail-on-timeout]
The VBoxManage guestproperty wait command waits for a particular value that is de-
scribed by the pattern string to change, to be deleted, or to be created.
patterns
Specifies a pattern that matches the properties on which you want to wait. For information
about the pattern wildcards, see the description of the --patterns option.
--timeout<msec>
Specifies the number of microseconds to wait.
--fail-on-timeout
Specifies that the command fails if the timeout is reached.
281](https://image.slidesharecdn.com/vboxusermanual-230728224837-47de127d/85/VBoxUserManual-pdf-296-320.jpg)
![8 VBoxManage
Unset a Virtual Machine Property Value
VBoxManage guestproperty unset <uuid | vmname> <property-name>
The VBoxManage guestproperty unset command unsets the value of a guest property.
The alternate form of this subcommand is delete.
property-name
Specifies the name of the property.
Examples
The following command lists the guest properties and their values for the win8 VM.
$ VBoxManage guestproperty enumerate win8
The following command creates a guest property called region for the win8 VM. The value of
the property is set to west.
$ VBoxManage guestproperty set win8 region west
8.44 VBoxManage guestcontrol
Control a virtual machine from the host system.
Synopsis
VBoxManage guestcontrol <uuid | vmname> run [--domain=domainname]
[--dos2unix] [--exe=filename] [--ignore-orphaned-processes]
[--no-wait-stderr | --wait-stderr] [--no-wait-stdout | --wait-stdout]
[--passwordfile=password-file | --password=password] [--profile]
[--putenv=var-name=[value]] [--quiet] [--timeout=msec] [--unix2dos]
[--unquoted-args] [--username=username] [--verbose] <-- program/arg0
[argument. . . ] >
VBoxManage guestcontrol <uuid | vmname> start [--domain=domainname]
[--exe=filename] [--ignore-orphaned-processes]
[--passwordfile=password-file | --password=password] [--profile]
[--putenv=var-name=[value]] [--quiet] [--timeout=msec] [--unquoted-args]
[--username=username] [--verbose] <-- program/arg0 [argument. . . ] >
VBoxManage guestcontrol <uuid | vmname> copyfrom [--domain=domainname]
[--follow] [--passwordfile=password-file | --password=password] [--quiet]
[--recursive] [--username=username] [--verbose] <guest-source0>
guest-source1 [...] <host-destination>
VBoxManage guestcontrol <uuid | vmname> copyfrom [--domain=domainname]
[--follow] [--passwordfile=password-file | --password=password] [--quiet]
[--recursive] [--target-directory=host-destination-dir]
[--username=username] [--verbose] <guest-source0> guest-source1 [...]
VBoxManage guestcontrol <uuid | vmname> copyto [--domain=domainname]
[--follow] [--passwordfile=password-file | --password=password] [--quiet]
[--recursive] [--username=username] [--verbose] <host-source0>
host-source1 [...] <guest-destination>
282](https://image.slidesharecdn.com/vboxusermanual-230728224837-47de127d/85/VBoxUserManual-pdf-297-320.jpg)
![8 VBoxManage
VBoxManage guestcontrol <uuid | vmname> copyto [--domain=domainname]
[--follow] [--passwordfile=password-file | --password=password] [--quiet]
[--recursive] [--target-directory=guest-destination-dir]
[--username=username] [--verbose] <host-source0> host-source1 [...]
VBoxManage guestcontrol <uuid | vmname> mkdir [--domain=domainname]
[--mode=mode] [--parents] [--passwordfile=password-file
| --password=password] [--quiet] [--username=username] [--verbose]
<guest-directory. . . >
VBoxManage guestcontrol <uuid | vmname> rmdir [--domain=domainname]
[--passwordfile=password-file | --password=password] [--quiet]
[--recursive] [--username=username] [--verbose] <guest-directory. . . >
VBoxManage guestcontrol <uuid | vmname> rm [--domain=domainname] [--force]
[--passwordfile=password-file | --password=password] [--quiet]
[--username=username] [--verbose] <guest-directory. . . >
VBoxManage guestcontrol <uuid | vmname> mv [--domain=domainname]
[--passwordfile=password-file | --password=password] [--quiet]
[--username=username] [--verbose] <source. . . > <destination-directory>
VBoxManage guestcontrol <uuid | vmname> mktemp [--domain=domainname]
[--mode=mode] [--passwordfile=password-file | --password=password]
[--quiet] [--secure] [--tmpdir=directory-name] [--username=username]
[--verbose] <template-name>
VBoxManage guestcontrol <uuid | vmname> stat [--domain=domainname]
[--passwordfile=password-file | --password=password] [--quiet]
[--username=username] [--verbose] <filename>
VBoxManage guestcontrol <uuid | vmname> list <all | files | processes
| sessions> [--quiet] [--verbose]
VBoxManage guestcontrol <uuid | vmname> closeprocess [--session-id=ID
| --session-name=name-or-pattern] [--quiet] [--verbose] <PID. . . >
VBoxManage guestcontrol <uuid | vmname> closesession [--all
| --session-id=ID | --session-name=name-or-pattern] [--quiet] [--verbose]
VBoxManage guestcontrol <uuid | vmname> updatega [--quiet] [--verbose]
[--source=guest-additions.ISO] [--wait-start] [-- [argument. . . ] ]
VBoxManage guestcontrol <uuid | vmname> watch [--quiet] [--verbose]
Description
The VBoxManage guestcontrol command enables you to control a guest virtual machine (VM)
from the host system. See chapter 4.9, Guest Control of Applications, page 107.
Common Options and Operands
The following options can be used by any of the VBoxManage guestcontrol subcommands:
uuid|vmname
Specifies the Universally Unique Identifier (UUID) or name of the VM.
283](https://image.slidesharecdn.com/vboxusermanual-230728224837-47de127d/85/VBoxUserManual-pdf-298-320.jpg)
![8 VBoxManage
Run a Command on the Guest Virtual Machine
VBoxManage guestcontrol <uuid | vmname> run [--domain=domainname]
[--dos2unix] [--exe=filename] [--ignore-orphaned-processes]
[--no-wait-stderr | --wait-stderr] [--no-wait-stdout | --wait-stdout]
[--passwordfile=password-file | --password=password] [--profile]
[--putenv=var-name=[value]] [--quiet] [--timeout=msec] [--unix2dos]
[--unquoted-args] [--username=username] [--verbose] <-- program/arg0
[argument. . . ] >
The VBoxManage guestcontrol vmname run command enables you to execute a program
on the guest VM. Standard input, standard output, and standard error are redirected from the
VM to the host system until the program completes.
Note: The Windows OS imposes certain limitations for graphical applications. See
chapter 14, Known Limitations, page 418.
--exe=<path-to-executable>
Specifies the absolute path of the executable program to run on the guest VM. For example:
C:WindowsSystem32calc.exe.
--timeout=<msec>
Specifies the maximum amount of time, in milliseconds, that the program can run. While
the program runs, VBoxManage receives its output.
If you do not specify a timeout value, VBoxManage waits indefinitely for the process to end,
or for an error to occur.
--putenv=<NAME>=[<value>]
Sets, modifies, and unsets environment variables in the guest VM environment.
When you create a guest process, it runs with the default standard guest OS environment.
Use this option to modify environment variables in that default environment.
Use the --putenv=<NAME>=[<value>] option to set or modify the environment variable
specified by NAME.
Use the --putenv=<NAME>=[<value>] option to unset the environment variable specified
by NAME.
Ensure that any environment variable name or value that includes spaces is enclosed by
quotes.
Specify a --putenv option for each environment variable that you want to modify.
The short form of this option is -E.
--unquoted-args
Disables the escaped double quoting of arguments that you pass to the program. For ex-
ample, "fred".
--ignore-orphaned-processes
Ignores orphaned processes. Not yet implemented.
--profile
Uses a shell profile to specify the environment to use. Not yet implemented.
--no-wait-stdout
Does not wait for the guest process to end or receive its exit code and any failure explana-
tion.
285](https://image.slidesharecdn.com/vboxusermanual-230728224837-47de127d/85/VBoxUserManual-pdf-300-320.jpg)
![8 VBoxManage
--wait-stdout
Waits for the guest process to end to receive its exit code and any failure explanation. The
VBoxManage command receives the standard output of the guest process while the process
runs.
--no-wait-stderr
Does not wait for the guest process to end to receive its exit code, error messages, and
flags.
--wait-stderr
Waits for the guest process to end to receive its exit code, error messages, and flags. The
VBoxManage command receives the standard error of the guest process while the process
runs.
--dos2unix
Transform DOS or Windows guest output to UNIX or Linux output. This transformation
changes CR + LF line endings to LF. Not yet implemented.
--unix2dos
Transform UNIX or Linux guest output to DOS or Windows output. This transformation
changes LF line endings to CR + LF.
-- <program/arg0> [<argument>...]
Specifies the name of the program and any arguments to pass to the program.
Ensure that any command argument that includes spaces is enclosed by quotes.
Start a Command on the Guest Virtual Machine
VBoxManage guestcontrol <uuid | vmname> start [--domain=domainname]
[--exe=filename] [--ignore-orphaned-processes]
[--passwordfile=password-file | --password=password] [--profile]
[--putenv=var-name=[value]] [--quiet] [--timeout=msec] [--unquoted-args]
[--username=username] [--verbose] <-- program/arg0 [argument. . . ] >
The VBoxManage guestcontrol vmname start command enables you to execute a guest
program until it completes.
Note: The Windows OS imposes certain limitations for graphical applications. See
chapter 14, Known Limitations, page 418.
Copy a File From the Guest Virtual Machine to the Host System
VBoxManage guestcontrol <uuid | vmname> copyfrom [--domain=domainname]
[--follow] [--passwordfile=password-file | --password=password] [--quiet]
[--recursive] [--username=username] [--verbose] <guest-source0>
guest-source1 [...] <host-destination>
The VBoxManage guestcontrol vmname copyfrom command enables you to copy a file from
the guest VM to the host system.
--follow
Enables following of symbolic links on the guest file system.
286](https://image.slidesharecdn.com/vboxusermanual-230728224837-47de127d/85/VBoxUserManual-pdf-301-320.jpg)
![8 VBoxManage
--recursive
Recursively copies files and directories from the specified directory on the guest VM.
The short form of this option is -R.
guest-source0 [guest-source1 [...]]
Specifies the absolute path of one or more files to copy from the guest VM. For example,
C:WindowsSystem32calc.exe. You can use wildcards to specify multiple files. For
example, C:WindowsSystem**.dll.
Copy a File From the Guest Virtual Machine to a Directory on the Host System
VBoxManage guestcontrol <uuid | vmname> copyfrom [--domain=domainname]
[--follow] [--passwordfile=password-file | --password=password] [--quiet]
[--recursive] [--target-directory=host-destination-dir]
[--username=username] [--verbose] <guest-source0> guest-source1 [...]
The VBoxManage guestcontrol vmname copyfrom command enables you to copy a file from
the guest VM to the host system.
--follow
Enables following of symbolic links on the guest file system.
--recursive
Recursively copies files and directories from the specified directory on the guest VM.
The short form of this option is -R.
--target-directory=<host-dst-dir>
Specifies the absolute path of the destination directory on the host system. For example,
C:Temp.
guest-source0 [guest-source1 [...]]
Specifies the absolute path of one or more the files to copy from the guest VM. For example,
C:WindowsSystem32calc.exe. You can use wildcards to specify multiple files. For
example, C:WindowsSystem**.dll.
Copy a File to the Guest Virtual Machine From the Host System
VBoxManage guestcontrol <uuid | vmname> copyto [--domain=domainname]
[--follow] [--passwordfile=password-file | --password=password] [--quiet]
[--recursive] [--username=username] [--verbose] <host-source0>
host-source1 [...] <guest-destination>
The VBoxManage guestcontrol vmname copyto command enables you to copy a file from
the host system to the guest VM.
--follow
Enables following of symbolic links on the host system.
--recursive
Recursively copies files and directories from the specified directory on the host system.
The short form of this option is -R.
host-source0 [host-source1 [...]]
Specifies the absolute path of one or more the files to copy from the host system. For
example, C:WindowsSystem32calc.exe. You can use wildcards to specify multiple
files. For example, C:WindowsSystem**.dll.
287](https://image.slidesharecdn.com/vboxusermanual-230728224837-47de127d/85/VBoxUserManual-pdf-302-320.jpg)
![8 VBoxManage
Copy a File to a Directory on the Guest Virtual Machine From the Host System
VBoxManage guestcontrol <uuid | vmname> copyto [--domain=domainname]
[--follow] [--passwordfile=password-file | --password=password] [--quiet]
[--recursive] [--target-directory=guest-destination-dir]
[--username=username] [--verbose] <host-source0> host-source1 [...]
The VBoxManage guestcontrol vmname copyto command enables you to copy a file from
the host system to the guest VM.
--follow
Enables following of symbolic links on the host system.
--recursive
Recursively copies files and directories from the specified directory on the host system.
The short form of this option is -R.
--target-directory=<guest-dst-dir>
Specifies the absolute path of the destination directory on the guest VM. For example,
C:Temp.
host-source0 [host-source1 [...]]
Specifies the absolute path of one or more the files to copy from the host system. For
example, C:WindowsSystem32calc.exe. You can use wildcards to specify multiple
files. For example, C:WindowsSystem**.dll.
Create a Directory on the Guest Virtual Machine
VBoxManage guestcontrol <uuid | vmname> mkdir [--domain=domainname]
[--mode=mode] [--parents] [--passwordfile=password-file
| --password=password] [--quiet] [--username=username] [--verbose]
<guest-directory. . . >
The VBoxManage guestcontrol vmname mkdir command enables you to create one or more
directories on the guest VM.
Alternate forms of this subcommand are md, createdir, and createdirectory.
--parents
Creates any of the missing parent directories of the specified directory.
For example, if you attempt to create the D:FooBar directory and the D:Foo directory
does not exist, using the --parents creates the missing D:Foo directory. However, if you
attempt to create the D:FooBar and do not specify the --parents option, the command
fails.
--mode=<mode>
Specifies the permission mode to use for the specified directory. If you specify the
--parents option, the mode is used for the associated parent directories, as well. mode is
a four-digit octal mode such as 0755.
guest-dir [guest-dir...]
Specifies an absolute path of one or more directories to create on the guest VM. For exam-
ple, D:FooBar.
If all of the associated parent directories do not exist on the guest VM, you must specify
the --parents option.
You must have sufficient rights on the guest VM to create the specified directory and its
parent directories.
288](https://image.slidesharecdn.com/vboxusermanual-230728224837-47de127d/85/VBoxUserManual-pdf-303-320.jpg)
![8 VBoxManage
Remove a Directory From the Guest Virtual Machine
VBoxManage guestcontrol <uuid | vmname> rmdir [--domain=domainname]
[--passwordfile=password-file | --password=password] [--quiet]
[--recursive] [--username=username] [--verbose] <guest-directory. . . >
The VBoxManage guestcontrol vmname rmdir command enables you to delete the specified
directory from the guest VM.
Alternate forms of this subcommand are removedir and removedirectory.
--recursive
Recursively removes directories from the specified from the guest VM.
The short form of this option is -R.
guest-dir [guest-dir...]
Specifies an absolute path of one or more directories to remove from the guest VM. You
can use wildcards to specify the directory names. For example, D:Foo*Bar.
You must have sufficient rights on the guest VM to remove the specified directory and its
parent directories.
Remove a File From the Guest Virtual Machine
VBoxManage guestcontrol <uuid | vmname> rm [--domain=domainname] [--force]
[--passwordfile=password-file | --password=password] [--quiet]
[--username=username] [--verbose] <guest-directory. . . >
The VBoxManage guestcontrol vmname rm command enables you to delete the specified
files from the guest VM.
The alternate form of this subcommand is removefile.
--force
Forces the operation and overrides any confirmation requests.
The short form of this option is -f.
guest-file [guest-file...]
Specifies an absolute path of one or more file to remove from the guest VM. You can use
wildcards to specify the file names. For example, D:FooBartext*.txt.
You must have sufficient rights on the guest VM to remove the specified file.
Rename a File or Directory on the Guest Virtual Machine
VBoxManage guestcontrol <uuid | vmname> mv [--domain=domainname]
[--passwordfile=password-file | --password=password] [--quiet]
[--username=username] [--verbose] <source. . . > <destination-directory>
The VBoxManage guestcontrol vmname mv command enables you to rename files and di-
rectories on the guest VM.
Alternate forms of this subcommand are move, ren, and rename.
guest-source [guest-source...]
Specifies an absolute path of a file or a single directory to move or rename on the guest
VM. You can use wildcards to specify the file names.
You must have sufficient rights on the guest VM to access the specified file or directory.
289](https://image.slidesharecdn.com/vboxusermanual-230728224837-47de127d/85/VBoxUserManual-pdf-304-320.jpg)
![8 VBoxManage
dest
Specifies the absolute path of the renamed file or directory, or the destination directory
to which to move the files. If you move only one file, dest can be a file or a directory,
otherwise dest must be a directory.
You must have sufficient rights on the guest VM to access the destination file or directory.
Create a Temporary File or Directory on the Guest Virtual Machine
VBoxManage guestcontrol <uuid | vmname> mktemp [--domain=domainname]
[--mode=mode] [--passwordfile=password-file | --password=password]
[--quiet] [--secure] [--tmpdir=directory-name] [--username=username]
[--verbose] <template-name>
The VBoxManage guestcontrol vmname mktemp command enables you to create a tempo-
rary file or temporary directory on the guest VM. You can use this command to assist with the
subsequent copying of files from the host system to the guest VM. By default, this command
creates the file or directory in the guest VM’s platform-specific temp directory.
Alternate forms of this subcommand are createtemp and createtemporary.
--directory
Creates a temporary directory that is specified by the template operand.
--secure
Enforces secure file and directory creation by setting the permission mode to 0755. Any
operation that cannot be performed securely fails.
--mode=<mode>
Specifies the permission mode to use for the specified directory. mode is a four-digit octal
mode such as 0755.
--tmpdir=<directory>
Specifies the absolute path of the directory on the guest VM in which to create the specified
file or directory. If unspecified, directory is the platform-specific temp directory.
template
Specifies a template file name for the temporary file, without a directory path. The template
file name must contain at least one sequence of three consecutive X characters, or must end
in X.
Show a File or File System Status on the Guest Virtual Machine
VBoxManage guestcontrol <uuid | vmname> stat [--domain=domainname]
[--passwordfile=password-file | --password=password] [--quiet]
[--username=username] [--verbose] <filename>
The VBoxManage guestcontrol vmname stat command enables you to show the status of
files or file systems on the guest VM.
file [file ...]
Specifies an absolute path of a file or file system on the guest VM. For example,
/home/foo/a.out.
You must have sufficient rights on the guest VM to access the specified files or file systems.
290](https://image.slidesharecdn.com/vboxusermanual-230728224837-47de127d/85/VBoxUserManual-pdf-305-320.jpg)
![8 VBoxManage
List the Configuration and Status Information for a Guest Virtual Machine
VBoxManage guestcontrol <uuid | vmname> list <all | files | processes
| sessions> [--quiet] [--verbose]
The VBoxManage guestcontrol vmname list command enables you to list guest control
configuration and status information. For example, the output shows open guest sessions, guest
processes, and files.
all|sessions|processes|files
Indicates the type of information to show. all shows all available data, sessions shows
guest sessions, processes shows processes, and files shows files.
Terminate a Process in a Guest Virtual Machine Session
VBoxManage guestcontrol <uuid | vmname> closeprocess [--session-id=ID
| --session-name=name-or-pattern] [--quiet] [--verbose] <PID. . . >
The VBoxManage guestcontrol vmname closeprocess command enables you to terminate
a guest process that runs in a guest session. Specify the process by using a process identifier
(PID) and the session by using the session ID or name.
--session-id=<ID>
Specifies the ID of the guest session.
--session-name=<name>|<pattern>
Specifies the name of the guest session. Use a pattern that contains wildcards to specify
multiple sessions.
PID [PID ...]
Specifies the list of PIDs of guest processes to terminate.
Close a Guest Virtual Machine Session
VBoxManage guestcontrol <uuid | vmname> closesession [--all
| --session-id=ID | --session-name=name-or-pattern] [--quiet] [--verbose]
The VBoxManage guestcontrol vmname closesession command enables you to close a
guest session. Specify the guest session either by session ID or by name.
--session-id=<ID>
Specifies the ID of the guest session.
--session-name=<name>|<pattern>
Specifies the name of the guest session. Use a pattern that contains wildcards to specify
multiple sessions.
--all
Closes all guest sessions.
291](https://image.slidesharecdn.com/vboxusermanual-230728224837-47de127d/85/VBoxUserManual-pdf-306-320.jpg)
![8 VBoxManage
Update the Guest Additions Software on the Guest Virtual Machine
VBoxManage guestcontrol <uuid | vmname> updatega [--quiet] [--verbose]
[--source=guest-additions.ISO] [--wait-start] [-- [argument. . . ] ]
The VBoxManage guestcontrol vmname updatega command enables you to update the
Guest Additions software installed in the specified guest VM.
Alternate forms of this subcommand are updateadditions and updateguestadditions.
--source=<new-iso-path>
Specifies the absolute path of the Guest Additions update .ISO file on the guest VM.
--reboot
Automatically reboots the guest after a successful Guest Additions update.
--timeout=<ms>
Sets the timeout (in ms) to wait for the overall Guest Additions update to complete. By
default no timeout is being used.
--verify
Verifies whether the Guest Additions were updated successfully after a successful installa-
tion. A guest reboot is mandatory.
--wait-ready
Waits for the current Guest Additions being ready to handle the Guest Additions update.
--wait-start
Starts the VBoxManage update process on the guest VM and then waits for the Guest Addi-
tions update to begin before terminating the VBoxManage process.
By default, the VBoxManage command waits for the Guest Additions update to complete
before it terminates. Use this option when a running VBoxManage process affects the inter-
action between the installer and the guest OS.
-- <argument> [<argument> ...]
Specifies optional command-line arguments to pass to the Guest Additions updater. You
might use the -- option to pass the appropriate updater arguments to retrofit features that
are not yet installed.
Ensure that any command argument that includes spaces is enclosed by quotes.
Wait for a guest run level
The VBoxManage guestcontrol vmname waitrunlevel command enables you to wait for a
guest run level being reached.
--timeout=<ms>
Sets the timeout (in ms) to wait for reaching the run level. By default no timeout is being
used.
<system>|<userland>|<desktop>
Specifies the run level to wait for.
Show Current Guest Control Activity
VBoxManage guestcontrol <uuid | vmname> watch [--quiet] [--verbose]
The VBoxManage guestcontrol vmname watch command enables you to show current guest
control activity.
292](https://image.slidesharecdn.com/vboxusermanual-230728224837-47de127d/85/VBoxUserManual-pdf-307-320.jpg)
![8 VBoxManage
Examples
The following VBoxManage guestcontrol run command executes the ls -l /usr command
on the My OL VM Oracle Linux VM as the user1 user.
$ VBoxManage --nologo guestcontrol "My OL VM" run --exe "/bin/ls"
--username user1 --passwordfile pw.txt --wait-stdout -- -l /usr
The --exe option specifies the absolute path of the command to run in the guest VM, /bin/ls.
Use the -- option to pass any arguments that follow it to the ls command.
Use the --username option to specify the user name, user1 and use the --passwordfile
option to specify the name of a file that includes the password for the user1 user, pw.txt.
The --wait-stdout option waits for the ls guest process to complete before providing the
exit code and the command output. The --nologo option suppresses the output of the logo
information.
The following VBoxManage guestcontrol run command executes the ipconfig command
on the My Win VM Windows VM as the user1 user. Standard input, standard output, and stan-
dard error are redirected from the VM to the host system until the program completes.
$ VBoxManage --nologo guestcontrol "My Win VM" run
--exe "c:windowssystem32ipconfig.exe"
--username user1 --passwordfile pw.txt --wait-stdout
The --exe specifies the absolute path of command to run in the guest VM,
c:windowssystem32ipconfig.exe. The double backslashes shown in this example are re-
quired only on UNIX host systems.
Use the --username option to specify the user name, user1 and use the --passwordfile
option to specify the name of a file that includes the password for the user1 user, pw.txt.
The --wait-stdout option waits for the ls guest process to complete before providing the
exit code and the command output. The --nologo option to suppress the output of the logo
information.
The following VBoxManage guestcontrol start command executes the ls -l /usr com-
mand on the My OL VM Oracle Linux VM until the program completes.
$ VBoxManage --nologo guestcontrol "My Win VM" start
--exe "c:windowssystem32ipconfig.exe"
--username user1 --passwordfile pw.txt --wait-stdout
8.45 VBoxManage debugvm
Introspection and guest debugging.
Synopsis
VBoxManage debugvm <uuid|vmname> dumpvmcore [--filename=name]
VBoxManage debugvm <uuid|vmname> info <item> [args. . . ]
VBoxManage debugvm <uuid|vmname> injectnmi
VBoxManage debugvm <uuid|vmname> log [[--release] | [--debug]]
[group-settings. . . ]
293](https://image.slidesharecdn.com/vboxusermanual-230728224837-47de127d/85/VBoxUserManual-pdf-308-320.jpg)
![8 VBoxManage
VBoxManage debugvm <uuid|vmname> logdest [[--release] | [--debug]]
[destinations. . . ]
VBoxManage debugvm <uuid|vmname> logflags [[--release] | [--debug]]
[flags. . . ]
VBoxManage debugvm <uuid|vmname> osdetect
VBoxManage debugvm <uuid|vmname> osinfo
VBoxManage debugvm <uuid|vmname> osdmesg [--lines=lines]
VBoxManage debugvm <uuid|vmname> getregisters [--cpu=id]
[reg-set.reg-name. . . ]
VBoxManage debugvm <uuid|vmname> setregisters [--cpu=id]
[reg-set.reg-name=value. . . ]
VBoxManage debugvm <uuid|vmname> show [[--human-readable] | [--sh-export]
| [--sh-eval] | [--cmd-set]] [settings-item. . . ]
VBoxManage debugvm <uuid|vmname> stack [--cpu=id]
VBoxManage debugvm <uuid|vmname> statistics [--reset] [--descriptions]
[--pattern=pattern]
VBoxManage debugvm <uuid|vmname> guestsample [--filename=filename]
[--sample-interval-us=interval] [--sample-time-us=time]
Description
The “debugvm” commands are for experts who want to tinker with the exact details of virtual
machine execution. Like the VM debugger described in chapter 12.1.4, The Built-In VM Debugger,
page 399, these commands are only useful if you are very familiar with the details of the PC
architecture and how to debug software.
Common options
The subcommands of debugvm all operate on a running virtual machine:
uuid|vmname
Either the UUID or the name (case sensitive) of a VM.
debugvm dumpvmcore
VBoxManage debugvm <uuid|vmname> dumpvmcore [--filename=name]
Creates a system dump file of the specified VM. This file will have the standard ELF core format
(with custom sections); see chapter 12.1.5, VM Core Format, page 401.
This corresponds to the writecore command in the debugger.
--filename=<filename>
The name of the output file.
294](https://image.slidesharecdn.com/vboxusermanual-230728224837-47de127d/85/VBoxUserManual-pdf-309-320.jpg)
![8 VBoxManage
debugvm info
VBoxManage debugvm <uuid|vmname> info <item> [args. . . ]
Displays info items relating to the VMM, device emulations and associated drivers.
This corresponds to the info command in the debugger.
item
Name of the info item to display. The special name help will list all the available info items
and hints about optional arguments.
args
Optional argument string for the info item handler. Most info items does not take any extra
arguments. Arguments not recognized are generally ignored.
debugvm injectnmi
VBoxManage debugvm <uuid|vmname> injectnmi
Causes a non-maskable interrupt (NMI) to be injected into the guest. This might be useful for
certain debugging scenarios. What happens exactly is dependent on the guest operating system,
but an NMI can crash the whole guest operating system. Do not use unless you know what you’re
doing.
debugvm log
VBoxManage debugvm <uuid|vmname> log [[--release] | [--debug]]
[group-settings. . . ]
Changes the group settings for either debug (--debug) or release (--release) logger of the
VM process.
The group-settings are typically strings on the form em.e.f.l, hm=~0 and -em.f. Basic
wildcards are supported for group matching. The all group is an alias for all the groups.
Please do keep in mind that the group settings are applied as modifications to the current ones.
This corresponds to the log command in the debugger.
debugvm logdest
VBoxManage debugvm <uuid|vmname> logdest [[--release] | [--debug]]
[destinations. . . ]
Changes the destination settings for either debug (--debug) or release (--release)
logger of the VM process. For details on the destination format, the best source is
src/VBox/Runtime/common/log/log.cpp.
The destinations is one or more mnemonics, optionally prefixed by “no” to disable them.
Some of them take values after a “:“ or “=“ separator. Multiple mnemonics can be separated by
space or given as separate arguments on the command line.
List of available destination:
file[=<file>], nofile
Specifies a log file. If no filename is given, one will be generated based on the current UTC
time and VM process name and placed in the current directory of the VM process. Note
that this will currently not have any effect if the log file has already been opened.
295](https://image.slidesharecdn.com/vboxusermanual-230728224837-47de127d/85/VBoxUserManual-pdf-310-320.jpg)
![8 VBoxManage
dir=<directory>, nodir
Specifies the output directory for log files. Note that this will currently not have any effect
if the log file has already been opened.
history=<count>, nohistory
A non-zero value enables log historization, with the value specifying how many old log files
to keep.
histsize=<bytes>
The max size of a log file before it is historized. Default is infinite.
histtime=<seconds>
The max age (in seconds) of a log file before it is historized. Default is infinite.
ringbuffer, noringbuffer
Only log to the log buffer until an explicit flush (e.g. via an assertion) occurs. This is fast
and saves diskspace.
stdout, nostdout
Write the log content to standard output.
stdout, nostdout
Write the log content to standard error.
debugger, nodebugger
Write the log content to the debugger, if supported by the host OS.
com, nocom
Writes logging to the COM port. This is only applicable for raw-mode and ring-0 logging.
user, nouser
Custom destination which has no meaning to VM processes..
This corresponds to the logdest command in the debugger.
debugvm logflags
VBoxManage debugvm <uuid|vmname> logflags [[--release] | [--debug]]
[flags. . . ]
Changes the flags on either debug (--debug) or release (--release) logger of the VM process.
Please note that the modifications are applied onto the existing changes, they are not replacing
them.
The flags are a list of flag mnemonics, optionally prefixed by a “no”, “¡‘, “~“ or “-“ to negate
their meaning. The “+“ prefix can be used to undo previous negation or use as a separator,
though better use whitespace or separate arguments for that.
List of log flag mnemonics, with their counter form where applicable (asterisk indicates de-
faults):
enabled*, disabled
Enables or disables logging.
buffered, unbuffered*
Enabling buffering of log output before it hits the destinations.
writethrough(/writethru)
Whether to open the destination file with writethru buffering settings or not.
296](https://image.slidesharecdn.com/vboxusermanual-230728224837-47de127d/85/VBoxUserManual-pdf-311-320.jpg)
![8 VBoxManage
debugvm osdetect
VBoxManage debugvm <uuid|vmname> osdetect
Make the VMM’s debugger facility (re)-detect the guest operating system (OS). This will first
load all debugger plug-ins.
This corresponds to the detect command in the debugger.
debugvm osinfo
VBoxManage debugvm <uuid|vmname> osinfo
Displays information about the guest operating system (OS) previously detected by the VMM’s
debugger facility.
debugvm osdmesg
VBoxManage debugvm <uuid|vmname> osdmesg [--lines=lines]
Displays the guest OS kernel log, if detected and supported.
--lines=<lines>
Number of lines of the log to display, counting from the end. The default is infinite.
debugvm getregisters
VBoxManage debugvm <uuid|vmname> getregisters [--cpu=id]
[reg-set.reg-name. . . ]
Retrieves register values for guest CPUs and emulated devices.
reg-set.reg-name
One of more registers, each having one of the following forms:
1. register-set.register-name.sub-field
2. register-set.register-name
3. cpu-register-name.sub-field
4. cpu-register-name
5. all
The all form will cause all registers to be shown (no sub-fields). The registers names are
case-insensitive.
--cpu=<id>
Selects the CPU register set when specifying just a CPU register (3rd and 4th form). The
default is 0.
298](https://image.slidesharecdn.com/vboxusermanual-230728224837-47de127d/85/VBoxUserManual-pdf-313-320.jpg)
![8 VBoxManage
debugvm setregisters
VBoxManage debugvm <uuid|vmname> setregisters [--cpu=id]
[reg-set.reg-name=value. . . ]
Changes register values for guest CPUs and emulated devices.
reg-set.reg-name=value
One of more register assignment, each having one of the following forms:
1. register-set.register-name.sub-field=value
2. register-set.register-name=value
3. cpu-register-name.sub-field=value
4. cpu-register-name=value
The value format should be in the same style as what getregisters displays, with the
exception that both octal and decimal can be used instead of hexadecimal.
--cpu=<id>
Selects the CPU register set when specifying just a CPU register (3rd and 4th form). The
default is 0.
debugvm show
VBoxManage debugvm <uuid|vmname> show [[--human-readable] | [--sh-export]
| [--sh-eval] | [--cmd-set]] [settings-item. . . ]
Shows logging settings for the VM.
--human-readable
Selects human readable output.
--sh-export
Selects output format as bourne shell style export commands.
--sh-eval
Selects output format as bourne shell style eval command input.
--cmd-set
Selects output format as DOS style SET commands.
settings-item
What to display. One or more of the following:
• logdbg-settings - debug log settings.
• logrel-settings - release log settings.
• log-settings - alias for both debug and release log settings.
debugvm stack
VBoxManage debugvm <uuid|vmname> stack [--cpu=id]
Unwinds the guest CPU stacks to the best of our ability. It is recommended to first run the
osdetect command, as this gives both symbols and perhaps unwind information.
--cpu=<id>
Selects a single guest CPU to display the stack for. The default is all CPUs.
299](https://image.slidesharecdn.com/vboxusermanual-230728224837-47de127d/85/VBoxUserManual-pdf-314-320.jpg)
![8 VBoxManage
debugvm statistics
VBoxManage debugvm <uuid|vmname> statistics [--reset] [--descriptions]
[--pattern=pattern]
Displays or resets VMM statistics.
Retrieves register values for guest CPUs and emulated devices.
--pattern=<pattern>
DOS/NT-style wildcards patterns for selecting statistics. Multiple patterns can be specified
by using the ’|’ (pipe) character as separator.
--reset
Select reset instead of display mode.
debugvm guestsample
VBoxManage debugvm <uuid|vmname> guestsample [--filename=filename]
[--sample-interval-us=interval] [--sample-time-us=time]
Creates a sample report of the guest activity.
Retrieves the filename to dump the report to.
--filename=<filename>
The filename to dump the sample report to.
--sample-interval-us=<interval>
The interval in microseconds between guest samples.
--sample-time-us=<time>
The amount of microseconds to take guest samples.
8.46 VBoxManage metrics
Monitor system resource usage.
Synopsis
VBoxManage metrics collect [--detach] [--list] [--period=seconds]
[--samples=count] [* | host | vmname [metric-list] ]
VBoxManage metrics disable [--list] [* | host | vmname [metric-list] ]
VBoxManage metrics enable [--list] [* | host | vmname [metric-list] ]
VBoxManage metrics list [* | host | vmname [metric-list] ]
VBoxManage metrics query [* | host | vmname [metric-list] ]
VBoxManage metrics setup [--list] [--period seconds] [--samples count] [*
| host | vmname [metric-list] ]
300](https://image.slidesharecdn.com/vboxusermanual-230728224837-47de127d/85/VBoxUserManual-pdf-315-320.jpg)
![8 VBoxManage
Description
The VBoxManage metrics command enables you to monitor system resource usage for the host
system and for virtual machines (VMs). For example, you can monitor particular metrics, such
as the percentage of time CPUs spend executing in user mode (CPU/Load/User) over a specified
sampling period.
While it runs, the VBoxSVC process collects and saves the specified metric data internally.
The VBoxSVC process runs until shortly after you close all VMs and frontends. Use the
VBoxManage metrics query command to retrieve data at any time.
By default, metrics are not collected unless you run the VBoxManage metrics setup com-
mand to specify a sampling interval in seconds and the number of metrics to save.
Note that you can enable metric collection only for started VMs. Collected data and collection
settings for a VM are discarded when the VM shuts down.
Metrics
The host and VMs have different sets of associated metrics, which you can view by running the
VBoxManage metrics list command.
Each metric is represented as a string that is composed of a category and a metric. Option-
ally, the metric string can include any of the following: a submetric, a sub-submetric, and an
aggregate. The metric string has the following format:
<category>/<metric>[/<submetric>[/<sub-submetric>]][:<aggregate>]
• category is the resource type, such as CPU, RAM, FS, Net.
• metric is a measurement type that is associated with the resource category. For example,
the Load and MHz metrics are associated with the CPU resource category.
• submetric is an optional measurement type that is associated with the metric. For exam-
ple, the User, Kernel, and Idle submetrics are associated with the Load metric.
• sub-submetric is an optional measurement type that is associated with the submetric. For
example, the Rx and Tx sub-submetrics are associated with the Rate submetric of the Net
resource category. The associated metric is the network interface.
• aggregate is an optional function to provide minimum, maximum, and average measure-
ments for a resource category. For example, the RAM/Usage/Free:min metric represents
the minimum amount of available memory found in all saved data on the host system.
By default, the VBoxManage metrics commands operate on the host system and all VMs, and
report on all metrics. You can optionally limit these commands to operate on the host system or
on a particular VM, and report on a list of one or more metrics.
Common Options
* | host | vmname
Specifies the component on which to operate. By default, this command operates on the
host system and all running VMs.
If you specify host, the VBoxManage metrics command operates on the host system only.
If you specify an asterisk (*), the command operates on all VMs. If you specify the name
of a VM, the VBoxManage metrics command operates on that VM.
metric-list
Specifies a comma-separated list of one or more metrics.
The form of the metric must include the category and metric part of the metric string
separated by a slash.
301](https://image.slidesharecdn.com/vboxusermanual-230728224837-47de127d/85/VBoxUserManual-pdf-316-320.jpg)
![8 VBoxManage
Note that the VBoxManage metrics enable and VBoxManage metrics disable com-
mands require that you specify metrics as parameters. The metrics must include only the
resource category and metric part, such as CPU/Load and RAM/Usage.
Collect Data Metrics
VBoxManage metrics collect [--detach] [--list] [--period=seconds]
[--samples=count] [* | host | vmname [metric-list] ]
The VBoxManage metrics collect command collects and outputs data periodically until you
stop the process by pressing Ctrl+C.
--detach
Disables the collection of metric data, so no data is output. Using this option is the same
as running the VBoxManage metrics setup command.
--list
Shows which metrics match the specified filter.
--period=<seconds>
Specifies the number of seconds to wait between collecting metric data samples. The de-
fault value is 1.
--samples=<count>
Specifies the number of metric data samples to save. To view the saved data, use the
VBoxManage metrics query command. The default value is 1.
Disable Metric Data Collection
VBoxManage metrics disable [--list] [* | host | vmname [metric-list] ]
The VBoxManage metrics disable command suspends data collection. This action does not
affect the data collection properties or the collected data. Note that specifying a submetric in the
metric list does not disable its underlying metrics.
Note that the VBoxManage metrics disable command requires that you specify metrics
as parameters. The metrics must include only the resource category and metric part, such as
CPU/Load and RAM/Usage.
--list
Shows whether the command succeeded as expected.
Enable Metric Data Collection
VBoxManage metrics enable [--list] [* | host | vmname [metric-list] ]
The VBoxManage metrics enable command resumes data collection after it has been sus-
pended by using the VBoxManage metrics disable command. Note that specifying a submet-
ric in the metric list does not enable its underlying metrics.
Unlike the VBoxManage metrics setup command, the VBoxManage metrics enable com-
mand does not discard previously collected samples for the specified set of objects and metrics.
Note that the VBoxManage metrics enable command requires that you specify metrics as pa-
rameters. The metrics must include only the resource category and metric part, such as CPU/Load
and RAM/Usage.
--list
Shows whether the command succeeded as expected.
302](https://image.slidesharecdn.com/vboxusermanual-230728224837-47de127d/85/VBoxUserManual-pdf-317-320.jpg)
![8 VBoxManage
List Metric Values
VBoxManage metrics list [* | host | vmname [metric-list] ]
The VBoxManage metrics list command shows the metrics that are currently available.
Note that VM-specific metrics are shown only when that VM is running.
List Saved Metric Data
VBoxManage metrics query [* | host | vmname [metric-list] ]
The VBoxManage metrics query command retrieves and shows the saved metric data.
Note that the VBoxManage metrics query command does not remove or flush saved data
but older samples are replaced by newer samples over time.
Configure Metric-Gathering Properties
VBoxManage metrics setup [--list] [--period seconds] [--samples count] [*
| host | vmname [metric-list] ]
The VBoxManage metrics setup command configures metric-gathering properties.
Note that this command discards any previously collected samples for the specified set of
objects and metrics. To enable or disable metrics collection without discarding the data, use
the VBoxManage metrics enable command or the VBoxManage metrics disable command,
respectively.
--list
Shows which metrics have been modified as a result of the command execution.
--period=<seconds>
Specifies the number of seconds to wait between collecting metric data samples. The de-
fault value is 1.
--samples=<count>
Specifies the number of metric data samples to save. To view the saved data, use the
VBoxManage metrics query command. The default value is 1.
Examples
The following example command enables the collection of host processor and memory usage
metrics every second. The --samples option saves the five latest samples.
$ VBoxManage metrics setup --period 1 --samples 5 host CPU/Load,RAM/Usage
The following command lists the metrics that are available to the host system and VMs:
$ VBoxManage metrics list
Note that the host system and VMs have different sets of metrics.
The following example shows how to query metric data about the CPU time spent in user and
kernel modes for the test VM:
$ VBoxManage metrics query test CPU/Load/User,CPU/Load/Kernel
303](https://image.slidesharecdn.com/vboxusermanual-230728224837-47de127d/85/VBoxUserManual-pdf-318-320.jpg)
![8 VBoxManage
8.47 VBoxManage natnetwork
Create, modify, and manage a NAT network.
Synopsis
VBoxManage natnetwork add [--disable | --enable] <--netname=name>
<--network=network> [--dhcp=on|off] [--ipv6=on|off] [--loopback-4=rule]
[--loopback-6=rule] [--port-forward-4=rule] [--port-forward-6=rule]
VBoxManage natnetwork list [filter-pattern]
VBoxManage natnetwork modify [--dhcp=on|off] [--disable | --enable]
<--netname=name> <--network=network> [--ipv6=on|off]
[--loopback-4=rule] [--loopback-6=rule] [--port-forward-4=rule]
[--port-forward-6=rule]
VBoxManage natnetwork remove <--netname=name>
VBoxManage natnetwork start <--netname=name>
VBoxManage natnetwork stop <--netname=name>
Description
The VBoxManage natnetwork command enables you to create, modify and manage a NAT net-
work.
NAT networks use the Network Address Translation (NAT) service. The service groups systems
into a network and prevents external systems from directly accessing the systems in the network.
The service also enables the systems in the network to communicate with each other and with
external systems by means of TCP and UDP over IPv4 and IPv6.
A NAT service is attached to an internal network. For a VM to use the NAT service, you must
attach the VM to the internal network. Specify the name of the internal network when you create
the NAT service. Note that the internal network is created if it does not already exist.
Add a NAT Network Service
VBoxManage natnetwork add [--disable | --enable] <--netname=name>
<--network=network> [--dhcp=on|off] [--ipv6=on|off] [--loopback-4=rule]
[--loopback-6=rule] [--port-forward-4=rule] [--port-forward-6=rule]
The VBoxManage natnetwork add command creates a new internal network interface, and
adds a NAT network service. You must use this command before you can attach the VM to the
NAT network.
--disable
Disables the NAT network service.
--enable
Enables the NAT network service.
--netname=<name>
Specifies the name of the new internal network interface on the host OS.
304](https://image.slidesharecdn.com/vboxusermanual-230728224837-47de127d/85/VBoxUserManual-pdf-319-320.jpg)
![8 VBoxManage
List All NAT Network Services
VBoxManage natnetwork list [filter-pattern]
The VBoxManage natnetwork list command lists all NAT network services. You can use a
pattern to show a subset of the NAT network services.
filter-pattern
Specifies an optional filtering pattern.
Modify the Settings of a NAT Network Service
VBoxManage natnetwork modify [--dhcp=on|off] [--disable | --enable]
<--netname=name> <--network=network> [--ipv6=on|off]
[--loopback-4=rule] [--loopback-6=rule] [--port-forward-4=rule]
[--port-forward-6=rule]
The VBoxManage natnetwork modify command modifies the settings of an existing internal
network interface.
--disable
Disables the NAT network service.
--enable
Enables the NAT network service.
--netname=<name>
Specifies the name of the new internal network interface on the host OS.
--network
Specifies the static or DHCP network address and mask of the NAT service interface. By
default, this value specifies the static network address.
--dhcp
Enables or disables the DHCP server that you specify by using the --netname option.
--ipv6
Enables or disables IPv6. By default, IPv6 is disabled and IPv4 is enabled.
--loopback-4=<rule>
Enables an IPv4 loopback interface by using the specified rule.
--loopback-6=<rule>
Enables an IPv6 loopback interface by using the specified rule.
--port-forward-4=<rule>
Enables IPv4 port forwarding by using the rule specified by rule.
--port-forward-6=<rule>
Enables IPv6 port forwarding by using the rule specified by rule.
306](https://image.slidesharecdn.com/vboxusermanual-230728224837-47de127d/85/VBoxUserManual-pdf-321-320.jpg)
![8 VBoxManage
Examples
The following command shows how to create a NAT network for the natnet1 internal network
that uses the 192.168.15.0/24 network address and mask of the NAT service interface. In this
static configuration, the gateway is assigned the 192.168.15.1 IP address by default. Note that
this IP address is the next address after the network address that you specify with the --network
option.
$ VBoxManage natnetwork add --netname natnet1 --network "192.168.15.0/24" --enable
The following command shows how to add a DHCP server to the natnet1 NAT network after
creation:
$ VBoxManage natnetwork modify --netname natnet1 --dhcp on
8.48 VBoxManage hostonlyif
Manage host-only network interfaces.
Synopsis
VBoxManage hostonlyif ipconfig <ifname> [--dhcp | --ip=IPv4-address
[--netmask=IPv4-netmask] | --ipv6=IPv6-address
[--netmasklengthv6=length] ]
VBoxManage hostonlyif create
VBoxManage hostonlyif remove <ifname>
Description
The VBoxManage hostonlyif command enables you to change the IP configuration of a host-
only network interface. For a description of host-only networking, see chapter 6.7, Host-Only
Networking, page 135. Each host-only network interface is identified by a name and can either
use the internal DHCP server or a manual IP configuration, both IPv4 and IPv6.
Configure a Host-Only Interface
VBoxManage hostonlyif ipconfig <ifname> [--dhcp | --ip=IPv4-address
[--netmask=IPv4-netmask] | --ipv6=IPv6-address
[--netmasklengthv6=length] ]
The VBoxManage hostonlyif ipconfig command configures a host-only interface.
ifname
Specifies the name of the network interface. The name is of the form vboxnetN where N is
the interface instance.
--dhcp
Uses DHCP for the network interface.
You cannot use this option with the --ip, --ipv6, --netmask, and --netmasklengthv6
options.
307](https://image.slidesharecdn.com/vboxusermanual-230728224837-47de127d/85/VBoxUserManual-pdf-322-320.jpg)
![8 VBoxManage
Synopsis
VBoxManage hostonlynet add <--name=netname> [--id=netid] <--netmask=mask>
<--lower-ip=address> <--upper-ip=address> [--enable | --disable]
VBoxManage hostonlynet modify <--name=netname | --id=netid>
[--lower-ip=address] [--upper-ip=address] [--netmask=mask] [--enable
| --disable]
VBoxManage hostonlynet remove <--name=netname | --id=netid>
Description
The hostonlynet commands enable you to control host-only networks.
Common options
The subcommands of hostonlynet all operate on an host-only network that can be identified
via its name or uuid:
–name=netname
The host-only network name. You see it as VBoxNetworkName in the output from
VBoxManage list hostonlynets.
–id=netid
The host-only network uuid. If not specified when adding a new network, one will be
generated automatically.
hostonlynet add
VBoxManage hostonlynet add <--name=netname> [--id=netid] <--netmask=mask>
<--lower-ip=address> <--upper-ip=address> [--enable | --disable]
Adds a new host-only network.
Options configuring the host-only network:
--netmask=<mask>
The network mask. Typically 255.255.255.0.
--lower-ip=<address>, --upper-ip=<address>
The IP address range for handing out via DHCP. The upper boundrary is inclusive while
the lower one is not, so the upper address will be handed out to a client, while the lower
address will be used by the host itself.
--enable, –disable
Whether to enable the host-only network or disable it. If not specified, the network will be
created in enabled state.
hostonlynet modify
VBoxManage hostonlynet modify <--name=netname | --id=netid>
[--lower-ip=address] [--upper-ip=address] [--netmask=mask] [--enable
| --disable]
This modifies an existing host-only network configuration. It takes the same options as the
add command.
309](https://image.slidesharecdn.com/vboxusermanual-230728224837-47de127d/85/VBoxUserManual-pdf-324-320.jpg)
![8 VBoxManage
hostonlynet remove
VBoxManage hostonlynet remove <--name=netname | --id=netid>
Removes the specified host-only network.
8.50 VBoxManage dhcpserver
DHCP server management.
Synopsis
VBoxManage dhcpserver add <--network=netname | --interface=ifname>
<--server-ip=address> <--netmask=mask> <--lower-ip=address>
<--upper-ip=address> <--enable | --disable>
[[--global] | [--set-opt=dhcp-opt-no value. . . ] | [--set-opt-hex=dhcp-opt-no
hexstring. . . ] | [--force-opt=dhcp-opt-no. . . ]
| [--supress-opt=dhcp-opt-no. . . ] | [--min-lease-time=seconds]
| [--default-lease-time=seconds] | [--max-lease-time=seconds] . . . ]
[<--group=name> | [--set-opt=dhcp-opt-no value. . . ]
| [--set-opt-hex=dhcp-opt-no hexstring. . . ] | [--force-opt=dhcp-opt-no. . . ]
| [--supress-opt=dhcp-opt-no. . . ] | [--incl-mac=address. . . ]
| [--excl-mac=address. . . ] | [--incl-mac-wild=pattern. . . ]
| [--excl-mac-wild=pattern. . . ] | [--incl-vendor=string. . . ]
| [--excl-vendor=string. . . ] | [--incl-vendor-wild=pattern. . . ]
| [--excl-vendor-wild=pattern. . . ] | [--incl-user=string. . . ]
| [--excl-user=string. . . ] | [--incl-user-wild=pattern. . . ]
| [--excl-user-wild=pattern. . . ] | [--min-lease-time=seconds]
| [--default-lease-time=seconds] | [--max-lease-time=seconds] . . . ]
[<--vm=name|uuid> | [--nic=1-N] | [--set-opt=dhcp-opt-no value. . . ]
| [--set-opt-hex=dhcp-opt-no hexstring. . . ] | [--force-opt=dhcp-opt-no. . . ]
| [--supress-opt=dhcp-opt-no. . . ] | [--min-lease-time=seconds]
| [--default-lease-time=seconds] | [--max-lease-time=seconds]
| [--fixed-address=address] . . . ]
[<--mac-address=address> | [--set-opt=dhcp-opt-no value. . . ]
| [--set-opt-hex=dhcp-opt-no hexstring. . . ] | [--force-opt=dhcp-opt-no. . . ]
| [--supress-opt=dhcp-opt-no. . . ] | [--min-lease-time=seconds]
| [--default-lease-time=seconds] | [--max-lease-time=seconds]
| [--fixed-address=address] . . . ]
VBoxManage dhcpserver modify <--network=netname | --interface=ifname>
[--server-ip=address] [--lower-ip=address] [--upper-ip=address]
[--netmask=mask] [--enable | --disable]
[[--global] | [--del-opt=dhcp-opt-no. . . ] | [--set-opt=dhcp-opt-no value. . . ]
| [--set-opt-hex=dhcp-opt-no hexstring. . . ] | [--force-opt=dhcp-opt-no. . . ]
| [--unforce-opt=dhcp-opt-no. . . ] | [--supress-opt=dhcp-opt-no. . . ]
| [--unsupress-opt=dhcp-opt-no. . . ] | [--min-lease-time=seconds]
| [--default-lease-time=seconds] | [--max-lease-time=seconds]
| [--remove-config] . . . ]
[<--group=name> | [--set-opt=dhcp-opt-no value. . . ]
| [--set-opt-hex=dhcp-opt-no hexstring. . . ] | [--force-opt=dhcp-opt-no. . . ]
| [--unforce-opt=dhcp-opt-no. . . ] | [--supress-opt=dhcp-opt-no. . . ]
| [--unsupress-opt=dhcp-opt-no. . . ] | [--del-mac=address. . . ]
310](https://image.slidesharecdn.com/vboxusermanual-230728224837-47de127d/85/VBoxUserManual-pdf-325-320.jpg)
![8 VBoxManage
| [--incl-mac=address. . . ] | [--excl-mac=address. . . ]
| [--del-mac-wild=pattern. . . ] | [--incl-mac-wild=pattern. . . ]
| [--excl-mac-wild=pattern. . . ] | [--del-vendor=string. . . ]
| [--incl-vendor=string. . . ] | [--excl-vendor=string. . . ]
| [--del-vendor-wild=pattern. . . ] | [--incl-vendor-wild=pattern. . . ]
| [--excl-vendor-wild=pattern. . . ] | [--del-user=string. . . ]
| [--incl-user=string. . . ] | [--excl-user=string. . . ]
| [--del-user-wild=pattern. . . ] | [--incl-user-wild=pattern. . . ]
| [--excl-user-wild=pattern. . . ] | [--zap-conditions]
| [--min-lease-time=seconds] | [--default-lease-time=seconds]
| [--max-lease-time=seconds] | [--remove-config] . . . ]
[<--vm=name|uuid> | [--nic=1-N] | [--del-opt=dhcp-opt-no. . . ]
| [--set-opt=dhcp-opt-no value. . . ] | [--set-opt-hex=dhcp-opt-no
hexstring. . . ] | [--force-opt=dhcp-opt-no. . . ]
| [--unforce-opt=dhcp-opt-no. . . ] | [--supress-opt=dhcp-opt-no. . . ]
| [--unsupress-opt=dhcp-opt-no. . . ] | [--min-lease-time=seconds]
| [--default-lease-time=seconds] | [--max-lease-time=seconds]
| [--fixed-address=address] | [--remove-config] . . . ]
[<--mac-address=address> | [--del-opt=dhcp-opt-no. . . ]
| [--set-opt=dhcp-opt-no value. . . ] | [--set-opt-hex=dhcp-opt-no
hexstring. . . ] | [--force-opt=dhcp-opt-no. . . ]
| [--unforce-opt=dhcp-opt-no. . . ] | [--supress-opt=dhcp-opt-no. . . ]
| [--unsupress-opt=dhcp-opt-no. . . ] | [--min-lease-time=seconds]
| [--default-lease-time=seconds] | [--max-lease-time=seconds]
| [--fixed-address=address] | [--remove-config] . . . ]
VBoxManage dhcpserver remove <--network=netname | --interface=ifname>
VBoxManage dhcpserver start <--network=netname | --interface=ifname>
VBoxManage dhcpserver restart <--network=netname | --interface=ifname>
VBoxManage dhcpserver stop <--network=netname | --interface=ifname>
VBoxManage dhcpserver findlease <--network=netname | --interface=ifname>
<--mac-address=mac>
Description
The dhcpserver commands enable you to control the DHCP server that is built into VirtualBox.
You may find this useful when using internal or host-only networking. Theoretically, you can
also enable it for a bridged network, but that may cause conflicts with other DHCP servers in
your physical network.
Common options
The subcommands of dhcpserver all operate on an internal network that can be identified via
its name or in the host-only case via the host-only interface name:
–network=netname
The internal network name. This is the same as you would use as value to the
VBoxManage modifyvm --intnet option when configuring a VM for internal network-
ing. Or you see as VBoxNetworkName in the output from VBoxManage list intnets,
VBoxManage list natnets, or VBoxManage list hostonlyifs.
311](https://image.slidesharecdn.com/vboxusermanual-230728224837-47de127d/85/VBoxUserManual-pdf-326-320.jpg)
![8 VBoxManage
–interface=ifname
The host only interface name. This would be same value as you would use for
the VBoxManage modifyvm --host-only-adapter option when configuring a VM to
use a host-only network. The value can also be found in the Name row in
VBoxManage list hostonlyifs.
dhcpserver add
VBoxManage dhcpserver add <--network=netname | --interface=ifname>
<--server-ip=address> <--netmask=mask> <--lower-ip=address>
<--upper-ip=address> <--enable | --disable>
[[--global] | [--set-opt=dhcp-opt-no value. . . ] | [--set-opt-hex=dhcp-opt-no
hexstring. . . ] | [--force-opt=dhcp-opt-no. . . ]
| [--supress-opt=dhcp-opt-no. . . ] | [--min-lease-time=seconds]
| [--default-lease-time=seconds] | [--max-lease-time=seconds] . . . ]
[<--group=name> | [--set-opt=dhcp-opt-no value. . . ]
| [--set-opt-hex=dhcp-opt-no hexstring. . . ] | [--force-opt=dhcp-opt-no. . . ]
| [--supress-opt=dhcp-opt-no. . . ] | [--incl-mac=address. . . ]
| [--excl-mac=address. . . ] | [--incl-mac-wild=pattern. . . ]
| [--excl-mac-wild=pattern. . . ] | [--incl-vendor=string. . . ]
| [--excl-vendor=string. . . ] | [--incl-vendor-wild=pattern. . . ]
| [--excl-vendor-wild=pattern. . . ] | [--incl-user=string. . . ]
| [--excl-user=string. . . ] | [--incl-user-wild=pattern. . . ]
| [--excl-user-wild=pattern. . . ] | [--min-lease-time=seconds]
| [--default-lease-time=seconds] | [--max-lease-time=seconds] . . . ]
[<--vm=name|uuid> | [--nic=1-N] | [--set-opt=dhcp-opt-no value. . . ]
| [--set-opt-hex=dhcp-opt-no hexstring. . . ] | [--force-opt=dhcp-opt-no. . . ]
| [--supress-opt=dhcp-opt-no. . . ] | [--min-lease-time=seconds]
| [--default-lease-time=seconds] | [--max-lease-time=seconds]
| [--fixed-address=address] . . . ]
[<--mac-address=address> | [--set-opt=dhcp-opt-no value. . . ]
| [--set-opt-hex=dhcp-opt-no hexstring. . . ] | [--force-opt=dhcp-opt-no. . . ]
| [--supress-opt=dhcp-opt-no. . . ] | [--min-lease-time=seconds]
| [--default-lease-time=seconds] | [--max-lease-time=seconds]
| [--fixed-address=address] . . . ]
Adds a new DHCP server to a network or host-only interface.
Options configuring the DHCP server core:
--server-ip=<address>
The IP address the DHCP server should use.
--lower-ip=<address>, --upper-ip=<address>
The IP address range for the DHCP server to manage. This should not include the address
of the DHCP server itself, but it must be in the same network as it. The boundraries are
inclusive, so both the lower and upper addresses will be handed out to clients.
--netmask=<mask>
The network mask. Typically 255.255.255.0.
--enable, –disable
Whether to enable the DHCP server or disable it. If not specified, the server will be created
in disabled state and no IP addresses handed out.
Options selecting the scope:
312](https://image.slidesharecdn.com/vboxusermanual-230728224837-47de127d/85/VBoxUserManual-pdf-327-320.jpg)
![8 VBoxManage
--incl-mac-wild=<pattern>
Include the specific MAC address pattern in the group.
--excl-mac-wild=<pattern>
Exclude the specific MAC address pattern from the group.
--incl-vendor=<string>
Include the specific vendor class ID in the group.
--excl-vendor=<string>
Exclude the specific vendor class ID from the group.
--incl-vendor-wild=<pattern>
Include the specific vendor class ID pattern in the group.
--excl-vendor-wild=<pattern>
Exclude the specific vendor class ID pattern from the group.
--incl-user=<string>
Include the specific user class ID in the group.
--excl-user=<string>
Exclude the specific user class ID from the group.
--incl-user-wild=<pattern>
Include the specific user class ID pattern in the group.
--excl-user-wild=<pattern>
Exclude the specific user class ID pattern from the group.
dhcpserver modify
VBoxManage dhcpserver modify <--network=netname | --interface=ifname>
[--server-ip=address] [--lower-ip=address] [--upper-ip=address]
[--netmask=mask] [--enable | --disable]
[[--global] | [--del-opt=dhcp-opt-no. . . ] | [--set-opt=dhcp-opt-no value. . . ]
| [--set-opt-hex=dhcp-opt-no hexstring. . . ] | [--force-opt=dhcp-opt-no. . . ]
| [--unforce-opt=dhcp-opt-no. . . ] | [--supress-opt=dhcp-opt-no. . . ]
| [--unsupress-opt=dhcp-opt-no. . . ] | [--min-lease-time=seconds]
| [--default-lease-time=seconds] | [--max-lease-time=seconds]
| [--remove-config] . . . ]
[<--group=name> | [--set-opt=dhcp-opt-no value. . . ]
| [--set-opt-hex=dhcp-opt-no hexstring. . . ] | [--force-opt=dhcp-opt-no. . . ]
| [--unforce-opt=dhcp-opt-no. . . ] | [--supress-opt=dhcp-opt-no. . . ]
| [--unsupress-opt=dhcp-opt-no. . . ] | [--del-mac=address. . . ]
| [--incl-mac=address. . . ] | [--excl-mac=address. . . ]
| [--del-mac-wild=pattern. . . ] | [--incl-mac-wild=pattern. . . ]
| [--excl-mac-wild=pattern. . . ] | [--del-vendor=string. . . ]
| [--incl-vendor=string. . . ] | [--excl-vendor=string. . . ]
| [--del-vendor-wild=pattern. . . ] | [--incl-vendor-wild=pattern. . . ]
| [--excl-vendor-wild=pattern. . . ] | [--del-user=string. . . ]
| [--incl-user=string. . . ] | [--excl-user=string. . . ]
| [--del-user-wild=pattern. . . ] | [--incl-user-wild=pattern. . . ]
| [--excl-user-wild=pattern. . . ] | [--zap-conditions]
| [--min-lease-time=seconds] | [--default-lease-time=seconds]
| [--max-lease-time=seconds] | [--remove-config] . . . ]
[<--vm=name|uuid> | [--nic=1-N] | [--del-opt=dhcp-opt-no. . . ]
314](https://image.slidesharecdn.com/vboxusermanual-230728224837-47de127d/85/VBoxUserManual-pdf-329-320.jpg)
![8 VBoxManage
| [--set-opt=dhcp-opt-no value. . . ] | [--set-opt-hex=dhcp-opt-no
hexstring. . . ] | [--force-opt=dhcp-opt-no. . . ]
| [--unforce-opt=dhcp-opt-no. . . ] | [--supress-opt=dhcp-opt-no. . . ]
| [--unsupress-opt=dhcp-opt-no. . . ] | [--min-lease-time=seconds]
| [--default-lease-time=seconds] | [--max-lease-time=seconds]
| [--fixed-address=address] | [--remove-config] . . . ]
[<--mac-address=address> | [--del-opt=dhcp-opt-no. . . ]
| [--set-opt=dhcp-opt-no value. . . ] | [--set-opt-hex=dhcp-opt-no
hexstring. . . ] | [--force-opt=dhcp-opt-no. . . ]
| [--unforce-opt=dhcp-opt-no. . . ] | [--supress-opt=dhcp-opt-no. . . ]
| [--unsupress-opt=dhcp-opt-no. . . ] | [--min-lease-time=seconds]
| [--default-lease-time=seconds] | [--max-lease-time=seconds]
| [--fixed-address=address] | [--remove-config] . . . ]
This modifies an existing DHCP server configuration. It takes the same options as the add
command with the addition of the following on scope configuration:
--del-opt=<dhcp-opt-no>
Counterpart to --set-opt that will cause the specified DHCP option number (0-255) to be
deleted from the server settings. Like with --set-opt the scope of the deletion is governed
by the --global, --vm, --mac-address and --group options.
--unforce-opt=<dhcp-opt-no>
Removes the specified DHCP option number (0-255) from the forced option list (i.e. the
reverse of --force-opt). Like with --set-opt the scope of the deletion is governed by
the --global, --vm, --mac-address and --group options.
--unsuppress-opt=<dhcp-opt-no>
Removes the specified DHCP option number (0-255) from the supressed option list (i.e. the
reverse of --suppress-opt). Like with --set-opt the scope of the deletion is governed
by the --global, --vm, --mac-address and --group options.
--remove-config
Removes the configuration currently being scoped. The --global scope is not removable.
The configuration scope will change to --global after this option.
And the addition of these group membership condition options:
--del-mac=<address>
Delete the specific MAC address from the group conditions.
--del-mac-wild=<pattern>
Delete the specific MAC address pattern from the group conditions.
--del-vendor=<string>
Delete the specific vendor class ID from the group conditions.
--del-vendor-wild=<pattern>
Delete the specific vendor class ID pattern from the group conditions.
--del-user=<string>
Delete the specific user class ID from the group conditions.
--del-user-wild=<pattern>
Delete the specific user class ID pattern from the group conditions.
--zap-conditions
Deletes all the group conditions.
315](https://image.slidesharecdn.com/vboxusermanual-230728224837-47de127d/85/VBoxUserManual-pdf-330-320.jpg)
![8 VBoxManage
Examples
The following command adds a USB device server called hostusb01.
$ VBoxManage usbdevsource add hostusb01 --backend USBIP --address 10.0.1.16
8.52 VBoxManage extpack
Extension package management.
Synopsis
VBoxManage extpack install [--replace] [--accept-license=sha256] <tarball>
VBoxManage extpack uninstall [--force] <name>
VBoxManage extpack cleanup
Description
extpack install
VBoxManage extpack install [--replace] [--accept-license=sha256] <tarball>
Installs a new extension pack on the system. This command will fail if an older version of the
same extension pack is already installed. The --replace option can be used to uninstall any old
package before the new one is installed.
--replace
Uninstall existing extension pack version.
--accept-license=<sha256>
Accept the license text with the given SHA-256 hash value.
VBoxManage will display the SHA-256 value when performing a manual installation. The
hash can of course be calculated by looking inside the extension pack and using sha256sum
or similar on the license file.
tarball
The file containing the extension pack to be installed.
extpack uninstall
VBoxManage extpack uninstall [--force] <name>
Uninstalls an extension pack from the system. The subcommand will also succeed in the case
where the specified extension pack is not present on the system. You can use VBoxManage list
extpacks to show the names of the extension packs which are currently installed.
--force
Overrides most refusals to uninstall an extension pack
name
The name of the extension pack to be uninstalled.
321](https://image.slidesharecdn.com/vboxusermanual-230728224837-47de127d/85/VBoxUserManual-pdf-336-320.jpg)
![8 VBoxManage
extpack cleanup
VBoxManage extpack cleanup
Used to remove temporary files and directories that may have been left behind if a previous
install or uninstall command failed.
Examples
How to list extension packs:
$ VBoxManage list extpacks
Extension Packs: 1
Pack no. 0: Oracle VM VirtualBox Extension Pack
Version: 4.1.12
Revision: 77218
Edition:
Description: USB 2.0 Host Controller, VirtualBox RDP, PXE ROM with E1000 support.
VRDE Module: VBoxVRDP
Usable: true
Why unusable:
How to remove an extension pack:
$ VBoxManage extpack uninstall "Oracle VM VirtualBox Extension Pack"
0%...10%...20%...30%...40%...50%...60%...70%...80%...90%...100%
Successfully uninstalled "Oracle VM VirtualBox Extension Pack".
8.53 VBoxManage updatecheck
Checks for a newer version of VirtualBox.
Synopsis
VBoxManage updatecheck perform [--machine-readable]
VBoxManage updatecheck list [--machine-readable]
VBoxManage updatecheck modify [--disable | --enable] [--channel=stable |
withbetas | all] [--frequency=days]
Description
The updatecheck subcommand is used to check if a newer version of VirtualBox is available.
The two subcommand options of updatecheck are used for modifying or viewing the settings
associated with checking for a newer version of VirtualBox.
updatecheck perform
VBoxManage updatecheck perform [--machine-readable]
Checks if a newer version of VirtualBox is available.
--machine-readable
Machine readable output.
322](https://image.slidesharecdn.com/vboxusermanual-230728224837-47de127d/85/VBoxUserManual-pdf-337-320.jpg)
![8 VBoxManage
updatecheck list
VBoxManage updatecheck list [--machine-readable]
Displays the current settings used for specifying when to check for a newer version of
VirtualBox.
--machine-readable
Machine readable output.
updatecheck modify
VBoxManage updatecheck modify [--disable | --enable] [--channel=stable |
withbetas | all] [--frequency=days]
Modifies the settings used for specifying when to check for a newer version of VirtualBox.
--enable
Enable the update check service.
--disable
Disable the update check service.
--channel=stable | withbetas | all
The preferred release type used for determining whether a newer version of VirtualBox is
available. The default is ’stable’.
stable
Checks for newer stable releases (maintenance and minor releases within the same
major release) of VirtualBox.
all
Checks for newer stable releases (maintenance and minor releases within the same
major release) and major releases of VirtualBox.
withbetas
Checks for newer stable releases (maintenance and minor releases within the same
major release), major releases, and beta releases of VirtualBox.
--frequency=days
Specifies how often in days to check for a newer version of VirtualBox.
--proxy-mode=system | manual | none
Specifies the proxy mode to use.
--proxy-url=<address>
Specifies the proxy address to use. Set to empty string to clear proxy address.
8.54 VBoxManage modifynvram
List and modify the NVRAM content of a virtual machine.
323](https://image.slidesharecdn.com/vboxusermanual-230728224837-47de127d/85/VBoxUserManual-pdf-338-320.jpg)
![8 VBoxManage
Synopsis
VBoxManage modifynvram <uuid|vmname> inituefivarstore
VBoxManage modifynvram <uuid|vmname> enrollmssignatures
VBoxManage modifynvram <uuid|vmname> enrollorclpk
VBoxManage modifynvram <uuid|vmname> enrollpk [--platform-key=filename]
[--owner-uuid=uuid]
VBoxManage modifynvram <uuid|vmname> listvars
VBoxManage modifynvram <uuid|vmname> queryvar [--name=name]
[--filename=filename]
VBoxManage modifynvram <uuid|vmname> deletevar [--name=name]
[--owner-uuid=uuid]
VBoxManage modifynvram <uuid|vmname> changevar [--name=name]
[--filename=filename]
Description
The “modifynvram” commands are for experts who want to inspect and modify the UEFI variable
store of a virtual machine. Any mistakes done here can bring the virtual machine in a non
working state.
Common options
The subcommands of modifynvram all operate on a running virtual machine:
uuid|vmname
Either the UUID or the name (case sensitive) of a VM.
modifynvram inituefivarstore
VBoxManage modifynvram <uuid|vmname> inituefivarstore
Iniitalizes the UEFI variable store to a default state. Any previous existing variable store is
deleted. Use with extreme caution!
modifynvram enrollmssignatures
VBoxManage modifynvram <uuid|vmname> enrollmssignatures
Enrolls the default Microsoft KEK and DB signatures required for UEFI secure boot.
modifynvram enrollorclpk
VBoxManage modifynvram <uuid|vmname> enrollorclpk
Enrolls the default platform key provided by Oracle required for UEFI secure boot.
324](https://image.slidesharecdn.com/vboxusermanual-230728224837-47de127d/85/VBoxUserManual-pdf-339-320.jpg)
![8 VBoxManage
modifynvram enrollpk
VBoxManage modifynvram <uuid|vmname> enrollpk [--platform-key=filename]
[--owner-uuid=uuid]
Enrolls a custom platform key provided by the user required for UEFI secure boot. The follow-
ing commands use openssl to generate a new platform key:
$ openssl req -new -x509 -newkey rsa:2048 -keyout PK.key -out PK.crt
$ openssl x509 -in PK.crt -out PK.cer -outform DER
--platform-key=<filename>
The platform key provided as a DER encoded X.509 signature.
--owner-uuid=<uuid>
The UUID identifying the owner of the platform key.
modifynvram listvars
VBoxManage modifynvram <uuid|vmname> listvars
Lists all UEFI variables in the virtual machines’s store along with their owner UUID.
modifynvram queryvar
VBoxManage modifynvram <uuid|vmname> queryvar [--name=name]
[--filename=filename]
Queries the content of a given UEFI variable identified by its name.
--name=<name>
UEFI variable name to query.
--filename=<filename>
Where to store the content of the variable upon success. This is optional, if omitted the
content will be dumped to the terminal as a hex dump.
modifynvram deletevar
VBoxManage modifynvram <uuid|vmname> deletevar [--name=name]
[--owner-uuid=uuid]
Deletes the given variable identified by its name and owner UUID.
--name=<name>
UEFI variable name to delete.
--owner-uuid=<uuid>
The UUID identifying the owner of the variable to delete.
325](https://image.slidesharecdn.com/vboxusermanual-230728224837-47de127d/85/VBoxUserManual-pdf-340-320.jpg)
![8 VBoxManage
modifynvram changevar
VBoxManage modifynvram <uuid|vmname> changevar [--name=name]
[--filename=filename]
Changes the UEFI variable content to the one form the given file.
--name=<name>
UEFI variable name to change the data for.
--filename=<filename>
The file to read the data from.
8.55 vboximg-mount
FUSE mount a virtual disk image for Mac OS and Linux hosts.
Synopsis
vboximg-mount <-? | -h | --help>
vboximg-mount <--image=image-UUID> [--guest-filesystem]
[-o=FUSE-option[,FUSE-option]] [--root] [--rw] <mountpoint>
vboximg-mount <--list> [--image=image-UUID] [--guest-filesystem]
[--verbose] [--vm=vm-UUID] [--wide]
Description
The vboximg-mount command enables you to make Oracle VM VirtualBox disk images available
to a Mac OS or Linux host operating system (OS) for privileged or non-priviliged access. You
can mount any version of the disk from its available history of snapshots. Use this command to
mount, view, and optionally modify the contents of an Oracle VM VirtualBox virtual disk image,
and you can also use this command to view information about registered virtual machines (VMs).
This command uses the Filesystem in Userspace (FUSE) technology to provide raw access to
an Oracle VM VirtualBox virtual disk image.
When you use the --image option to specify a base image identifier, only the base image is
mounted. Any related snapshots are disregarded. Alternatively, if you use the --image option
to specify a snapshot, the state of the FUSE-mounted virtual disk is synthesized from the implied
chain of snapshots, including the base image.
The vboximg-mount command includes experimental read-only access to file systems inside a
VM disk image. This feature enables you to extract some files from the VM disk image without
starting the VM and without requiring third-party file system drivers on the host system. Oracle
VM VirtualBox supports the FAT, NTFS, ext2, ext3, and ext4 file systems.
The virtual disk is exposed as a device node within a FUSE-based file system that overlays the
specified mount point.
The FUSE file system includes a directory that contains a number of files. The file system
can also contain a directory that includes a symbolic link that has the same base name (see the
basename(1) man page) as the virtual disk base image and points to the location of the virtual
disk base image. The directory can be of the following types:
• vhdd provides access to the raw disk image data as a flat image
• volID provides access to an individual volume on the specified disk image
• fsID provides access to a supported file system without requiring a host file system driver
326](https://image.slidesharecdn.com/vboxusermanual-230728224837-47de127d/85/VBoxUserManual-pdf-341-320.jpg)
![8 VBoxManage
General Command Options
vboximg-mount <-? | -h | --help>
Use the following options to obtain information about the vboximg-mount command and its
options.
--help, --h, or--?
Shows usage information.
Mounting an Oracle VM VirtualBox Disk Image
vboximg-mount <--image=image-UUID> [--guest-filesystem]
[-o=FUSE-option[,FUSE-option]] [--root] [--rw] <mountpoint>
Use the vboximg-mount command to mount an Oracle VM VirtualBox virtual disk image on a
Mac OS or Linux host system. When mounted, you can view the contents of the disk image or
modify the contents of the disk image.
You can use the vboximg-mount command to restrict FUSE-based access to a subsection of the
virtual disk.
--image=<disk-image>
Specifies the Universally Unique Identifier (UUID), name, or path of the Oracle VM
VirtualBox disk image.
The short form of the --image option is -i.
--guest-filesystem
Enables experimental read-only support for guest file systems. When you specify this op-
tion, all known file systems are made available to access.
The short form of the --guest-filesystem option is -g.
-o=<FUSE-option>[,<FUSE-option>...]
Specifies FUSE mount options.
The vboximg-mount command enables you to use the FUSE mount options that are de-
scribed in the mount.fuse(8) man page.
--root
Overrides the security measure that restricts file access to the file system owner by also
granting file access to the root user.
Same as the -o allow_root option. See the -o option description.
This option is incompatible with the -o allow_other option.
--rw
Mounts the specified image as read-write, which is required if you want to modify its
contents. By default, images are mounted as read-only.
mount-point
Specifies the path name of a directory on which to mount the Oracle VM VirtualBox disk
image.
327](https://image.slidesharecdn.com/vboxusermanual-230728224837-47de127d/85/VBoxUserManual-pdf-342-320.jpg)
![8 VBoxManage
Viewing Oracle VM VirtualBox Disk Image Information
vboximg-mount <--list> [--image=image-UUID] [--guest-filesystem]
[--verbose] [--vm=vm-UUID] [--wide]
Use the vboximg-mount command to view information about registered VMs or an Oracle VM
VirtualBox virtual disk image.
--image=<disk-image>
Specifies the UUID, name, or path of the Oracle VM VirtualBox disk image.
The short form of the --image option is -i.
--guest-filesystem
Enables experimental read-only support for guest file systems. When you specify this op-
tion, all known file systems are made available to access.
The short form of the --guest-filesystem option is -g.
--list
Shows information about the disks that are associated with the registered VMs. If you
specify a disk image, this option shows information about the partitions of the specified
image.
When you specify the --verbose option, the output includes detailed information about
the VMs and media, including snapshot images and file paths.
The short form of the --list option is -l.
--verbose
Shows or logs detailed information.
The short form of the --verbose option is -v.
--vm=<vm-UUID>
Outputs information about the VM that is associated with the specified UUID.
--wide
Outputs information in a wide format. This output includes the lock state information of
running VMs. For VMs that are not running, the state is created.
The wide output uses a tree-like structure in the VM column to show the relationship
between a VM base image and its snapshots.
Examples
The following example shows how to mount a virtual disk image on the host operating system
(OS).
$ mkdir fuse_mount_point
$ vboximg-mount --image=b490e578-08be-4f7d-98e9-4c0ef0952377 fuse_mount_point
$ ls fuse_mount_point
ubu.vdi[32256:2053029880] vhdd
$ sudo mount fuse_mount_point/vhdd /mnt
The mkdir command creates a mount point called fuse_mount_point on the host OS.
The vboximg-mount command is then used to mount the specified disk image on the
fuse_mount_point mount point. The mount includes all snapshots for the disk image.
The ls command shows the contents of fuse_mount_point. The mount command is then
used to mount the FUSE-mounted device node, vhdd, on the /mnt mount point. The vhdd device
node represents the virtual disk image.
328](https://image.slidesharecdn.com/vboxusermanual-230728224837-47de127d/85/VBoxUserManual-pdf-343-320.jpg)
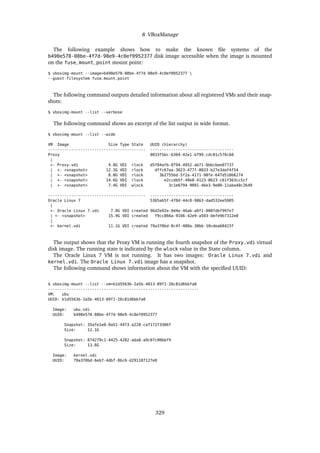
![9 Advanced Topics
• CredsWaitTimeout: Timeout, in seconds, to let pam_vbox wait for credentials to arrive.
When no credentials arrive within this timeout, authentication of pam_vbox will be set to
failed and the next PAM module in chain will be asked. If this property is not specified,
set to 0 or an invalid value, an infinite timeout will be used. This property must be set
read-only for the guest (RDONLYGUEST).
To customize pam_vbox further there are the following guest properties:
• CredsMsgWaiting: Custom message showed while pam_vbox is waiting for credentials
from the host. This property must be set read-only for the guest (RDONLYGUEST).
• CredsMsgWaitTimeout: Custom message showed when waiting for credentials by
pam_vbox has timed out. For example, they did not arrive within time. This property
must be set read-only for the guest (RDONLYGUEST).
Note: If a pam_vbox guest property does not have the correct flag set (RDONLYGUEST)
the property is ignored and, depending on the property, a default value will be used.
This can result in pam_vbox not waiting for credentials. Consult the appropriate syslog
file for more information and use the debug option.
9.1.2.1 Oracle VM VirtualBox Greeter for Ubuntu/LightDM
Oracle VM VirtualBox comes with a greeter module, named vbox-greeter, that can be used
with LightDM. LightDM is the default display manager for Ubuntu Linux and therefore can also
be used for automated guest logins.
vbox-greeter does not need the pam_vbox module described in chapter 9.1.2, Automated
Linux and UNIX Guest Logins, page 331in order to function. It comes with its own authentication
mechanism provided by LightDM. However, to provide maximum flexibility both modules can be
used together on the same guest.
As with the pam_vbox module, vbox-greeter is shipped as part of the Guest Additions but
it is not installed or activated on the guest OS by default. To install vbox-greeter automat-
ically upon Guest Additions installation, use the --with-autologon option when starting the
VBoxLinuxAdditions.run file:
# ./VBoxLinuxAdditions.run -- --with-autologon
For manual or postponed installation, copy the vbox-greeter.desktop file from
/opt/VBoxGuestAdditions-<version>/other/ to the xgreeters directory, which is usually
/usr/share/xgreeters/. See your guest OS documentation for the name of the correct
LightDM greeter directory.
The vbox-greeter module is installed by the Oracle VM VirtualBox Guest Additions installer
and is located in /usr/sbin/. To enable vbox-greeter as the standard greeter module, edit the
file /etc/lightdm/lightdm.conf as follows:
[SeatDefaults]
greeter-session=vbox-greeter
Note:
• The LightDM server must be fully restarted in order for vbox-greeter
to be used as the default greeter. As root on Ubuntu, run
service lightdm --full-restart or restart the guest.
• vbox-greeter is independent of the graphical session you choose, such as
Gnome, KDE, or Unity. However, vbox-greeter does require FLTK 1.3 or later
to implement its own user interface.
333](https://image.slidesharecdn.com/vboxusermanual-230728224837-47de127d/85/VBoxUserManual-pdf-348-320.jpg)
![9 Advanced Topics
To prevent ejection while the CPU is still used it has to be ejected from within the guest before.
The Linux Guest Additions contain a service which receives hot-remove events and ejects the
CPU. Also, after a CPU is added to the VM it is not automatically used by Linux. The Linux Guest
Additions service will take care of that if installed. If not a CPU can be started with the following
command:
$ echo 1 > /sys/devices/system/cpu/cpu<id>/online
9.5 Webcam Passthrough
9.5.1 Using a Host Webcam in the Guest
Oracle VM VirtualBox includes a feature called webcam passthrough, which enables a guest to use
a host webcam. This complements the general USB passthrough support which was the typical
way of using host webcams in legacy releases. The webcam passthrough support can handle
non-USB video sources in theory, but this is completely untested.
Note: The webcam passthrough module is shipped as part of the Oracle VM VirtualBox
extension pack, which must be installed separately. See chapter 1.5, Installing Oracle
VM VirtualBox and Extension Packs, page 6.
The host webcam can be attached to the VM using the Devices menu in the VM menu bar.
The Webcams menu contains a list of available video input devices on the host. Clicking on a
webcam name attaches or detaches the corresponding host device.
The VBoxManage command line tool can be used to enable webcam passthrough. Please see
the host-specific sections below for additional details. The following commands are available:
• Get a list of host webcams, or other video input devices:
$ VBoxManage list webcams
The output format is as follows:
alias "user friendly name"
host path or identifier
The alias can be used as a shortcut in other commands. Alias ’.0’ means the default video
input device on the host. Alias ’.1’, ’.2’means first, second video input device, and so on.
The device order is host-specific.
• Attach a webcam to a running VM, as follows:
VBoxManage controlvm <VM name> webcam attach [<host_path>|<alias> [<settings>]]
This attaches a USB webcam device to the guest.
The settings parameter is a string Setting1=Value1;Setting2=Value2, which enables
you to configure the emulated webcam device. The following settings are supported:
– MaxFramerate: The highest rate at which video frames are sent to the guest. A higher
frame rate requires more CPU power. Therefore sometimes it is useful to set a lower
limit. Default is no limit and allow the guest to use all frame rates supported by the
host webcam.
337](https://image.slidesharecdn.com/vboxusermanual-230728224837-47de127d/85/VBoxUserManual-pdf-352-320.jpg)
![9 Advanced Topics
– MaxPayloadTransferSize: How many bytes the emulated webcam can send to the
guest at a time. Default value is 3060 bytes, which is used by some webcams. Higher
values can slightly reduce CPU load, if the guest is able to use larger buffers. However,
a high MaxPayloadTransferSize might be not supported by some guests.
• Detach a webcam from a running VM, as follows:
VBoxManage controlvm <VM-name> webcam detach [<host_path>|<alias>]
• List the webcams attached to a running VM, as follows:
VBoxManage controlvm <VM-name> webcam list
The output contains the path or alias which was used in the webcam attach command for
each attached webcam.
9.5.2 Windows Hosts
When the webcam device is detached from the host, the emulated webcam device is automati-
cally detached from the guest.
9.5.3 macOS Hosts
When the webcam device is detached from the host, the emulated webcam de-
vice remains attached to the guest and must be manually detached using the
VBoxManage controlvm VM-name webcam detach command.
9.5.4 Linux and Oracle Solaris Hosts
When the webcam is detached from the host the emulated webcam device is automatically de-
tached from the guest only if the webcam is streaming video. If the emulated webcam is inactive
it should be manually detached using the VBoxManage controlvm VM-name webcam detach
command.
Aliases .0 and .1 are mapped to /dev/video0, alias .2 is mapped to /dev/video1 and so
forth.
9.6 Advanced Display Configuration
9.6.1 Custom VESA Resolutions
Apart from the standard VESA resolutions, the Oracle VM VirtualBox VESA BIOS enables you to
add up to 16 custom video modes which will be reported to the guest operating system. When
using Windows guests with the Oracle VM VirtualBox Guest Additions, a custom graphics driver
will be used instead of the fallback VESA solution so this information does not apply.
Additional video modes can be configured for each VM using the extra data facility. The extra
data key is called CustomVideoModex with x being a number from 1 to 16. Please note that
modes will be read from 1 until either the following number is not defined or 16 is reached. The
following example adds a video mode that corresponds to the native display resolution of many
notebook computers:
$ VBoxManage setextradata <VM-name> "CustomVideoMode1" "1400x1050x16"
The VESA mode IDs for custom video modes start at 0x160. In order to use the above defined
custom video mode, the following command line has to be supplied to Linux:
338](https://image.slidesharecdn.com/vboxusermanual-230728224837-47de127d/85/VBoxUserManual-pdf-353-320.jpg)

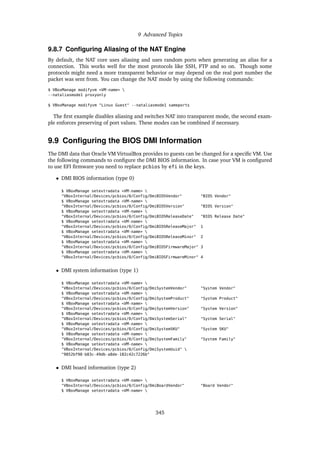
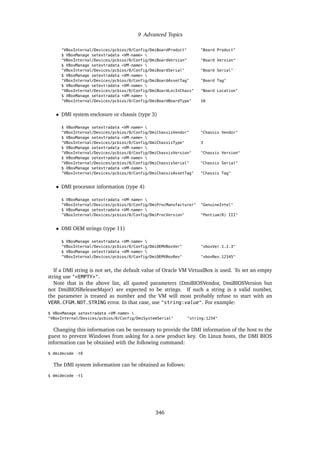
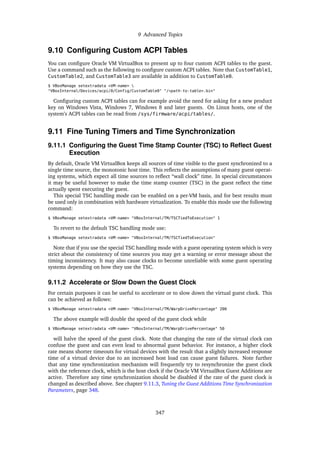

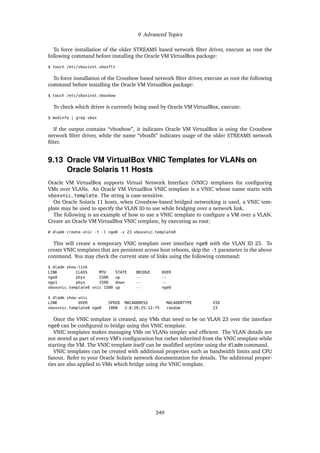

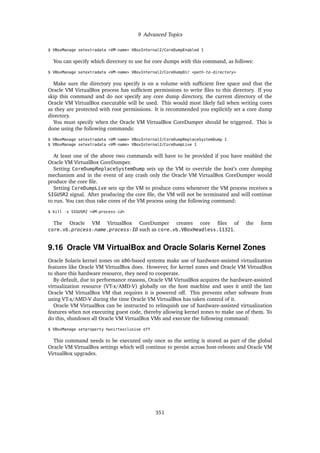
![9 Advanced Topics
9.17 Locking Down VirtualBox Manager
9.17.1 Customizing VirtualBox Manager
There are several advanced customization settings for locking down VirtualBox Manager. Locking
down means removing some features that the user should not see.
VBoxManage setextradata global GUI/Customizations <property>[,<property> ...]
property is one of the following properties:
noSelector
Do not allow users to start VirtualBox Manager. Trying to do so will show a window
containing a proper error message.
noMenuBar
VM windows will not contain a menu bar.
noStatusBar
VM windows will not contain a status bar.
To disable any of these VirtualBox Manager customizations use the following command:
$ VBoxManage setextradata global GUI/Customizations
9.17.2 VM Selector Customization
The following per-machine VM extradata settings can be used to change the behavior of the VM
selector window in respect of certain VMs:
$ VBoxManage setextradata <VM-name><property> true
property can be any of the following:
GUI/HideDetails
Do not show the VM configuration of a certain VM. The details window will remain just
empty if this VM is selected.
GUI/PreventReconfiguration
Do not allow the user to open the Settings dialog for a certain VM.
GUI/PreventSnapshotOperations
Prevent snapshot operations for a VM from the GUI, either at runtime or when the VM is
powered off.
GUI/HideFromManager
Hide a certain VM in the VM selector window.
GUI/PreventApplicationUpdate
Disable the automatic update check and hide the corresponding menu item.
Note that these settings do not prevent the user from reconfiguring the VM by using the
VBoxManage modifyvm command.
352](https://image.slidesharecdn.com/vboxusermanual-230728224837-47de127d/85/VBoxUserManual-pdf-367-320.jpg)
![9 Advanced Topics
9.17.3 Configure VM Selector Menu Entries
You can disable certain entries in the global settings page of the VM selector:
$ VBoxManage setextradata global GUI/RestrictedGlobalSettingsPages <property>[,<property>...]
property is one of the following:
General
Do not show the General settings pane.
Input
Do not show the Input settings pane.
Update
Do not show the Update settings pane.
Language
Do not show the Language settings pane.
Display
Do not show the Display settings pane.
Network
Do not show the Network settings pane.
Extensions
Do not show the Extensions settings pane.
Proxy
Do not show the Proxy settings pane.
This is a global setting. You can specify any combination of properties. To restore the default
behavior, use the following command:
$ VBoxManage setextradata global GUI/RestrictedGlobalSettingsPages
9.17.4 Configure VM Window Menu Entries
You can disable certain menu actions in the VM window:
VBoxManage setextradata "VM name"|global GUI/RestrictedRuntimeMenus OPTION[,OPTION...]
where OPTION is one of the following keywords:
All
Do not show any menu in the VM window.
Application
Do not show Application/File menu in the VM window.
Machine
Do not show the Machine menu in the VM window.
View
Do not show the View menu in the VM window.
Input
Do not show Input menu in the VM window.
353](https://image.slidesharecdn.com/vboxusermanual-230728224837-47de127d/85/VBoxUserManual-pdf-368-320.jpg)
![9 Advanced Topics
Devices
Do not show the Devices menu in the VM window.
Help
Do not show the Help menu in the VM window.
Debug
Do not show the Debug menu in the VM window. The Debug menu is only visible if the
GUI was started with special command line parameters or environment variable settings.
This is a per-VM or global setting. Any combination of the above is allowed. To restore the
default behavior, use the following command:
VBoxManage setextradata "VM name"|global GUI/RestrictedRuntimeMenus
You can also disable certain menu actions of certain menus. Use the following command to
disable certain actions of the Application menu. This is only available on macOS hosts.
VBoxManage setextradata "VM name"|global GUI/RestrictedRuntimeApplicationMenuActions OPTION[,OPTION...]
where OPTION is one of the following keywords:
All
Do not show any menu item in this menu.
About
Do not show the About menu item in this menu.
Preferences
Do not show the Preferences menu item in this menu.
NetworkAccessManager
Do not show the Network Operations Manager menu item in this menu.
ResetWarnings
Do not show the Reset All Warnings menu item in this menu.
Close
Do not show the Close menu item in this menu.
This is a per-VM or global setting. Any combination of the above is allowed. To restore the
default behavior, use the following command:
VBoxManage setextradata "VM name"|global GUI/RestrictedRuntimeMenus
Use the following command to disable certain actions of the Machine menu:
VBoxManage setextradata "VM name"|global GUI/RestrictedRuntimeMachineMenuActions OPTION[,OPTION...]
where OPTION is one of the following keywords:
All
Do not show any menu item in this menu.
SettingsDialog
Do not show the Settings menu item in this menu.
TakeSnapshot
Do not show the Take Snapshot... menu item in this menu.
354](https://image.slidesharecdn.com/vboxusermanual-230728224837-47de127d/85/VBoxUserManual-pdf-369-320.jpg)
![9 Advanced Topics
InformationDialog
Do not show the Session Information... menu item in this menu.
FileManagerDialog
Do not show the File Manager... menu item in this menu.
Pause
Do not show the Pause menu item in this menu.
Reset
Do not show the Reset menu item in this menu.
Shutdown
Do not show the ACPI Shutdown menu item in this menu.
This is a per-VM or global setting. Any combination of the above is allowed. To restore the
default behavior, use
VBoxManage setextradata "VM name"|global GUI/RestrictedRuntimeMachineMenuActions
Use the following command to disable certain actions of the View menu:
VBoxManage setextradata "VM name"|global GUI/RestrictedRuntimeViewMenuActions OPTION[,OPTION...]
where OPTION is one of the following keywords:
All
Do not show any menu item in this menu.
Fullscreen
Do not show the Full-screen Mode menu item in this menu.
Seamless
Do not show the Seamless Mode menu item in this menu.
Scale
Do not show the Scaled Mode menu item in this menu.
GuestAutoresize
Do not show the Auto-resize Guest Display menu item in this menu.
AdjustWindow
Do not show the Adjust Window Size menu item in this menu.
TakeScreenshot
Do not show the Take Screenshot... menu item in this menu.
Recording
Do not show the Recording menu item in this menu.
VRDEServer
Do not show the Remote Display menu item in this menu.
MenuBar
Do not show the Menu Bar menu item in this menu.
MenuBarSettings
Do not show the Menu Bar Settings... menu item in this menu.
StatusBar
Do not show the Status Bar menu item in this menu.
355](https://image.slidesharecdn.com/vboxusermanual-230728224837-47de127d/85/VBoxUserManual-pdf-370-320.jpg)
![9 Advanced Topics
StatusbarSettings
Do not show the Statusbar Settings... menu item in this menu.
This is a per-VM or global setting. Any combination of the above is allowed. To restore the
default behavior, use
VBoxManage setextradata "VM name"|global GUI/RestrictedRuntimeViewMenuActions
Use the following command to disable certain actions of the Input menu:
VBoxManage setextradata "VM name"|global GUI/RestrictedRuntimeInputMenuActions OPTION[,OPTION...]
where OPTION is one of the following keywords:
All
Do not show any menu item in this menu.
Keyboard
Do not show the Keyboard menu item in this menu.
KeyboardSettings
Do not show the Keyboard Settings... menu item in this menu.
SoftKeyboard
Do not show the Soft Keyboard... menu item in this menu.
TypeCAD
Do not show the Insert Ctrl-Alt-Del menu item in this menu.
TypeCABS
Do not show the Insert Ctrl-Alt-Backspace menu item in this menu.
TypeCtrlBreak
Do not show the Insert Ctrl-Break menu item in this menu.
TypeInsert
Do not show the Insert Insert menu item in this menu.
TypePrintScreen
Do not show the Insert Print Screen menu item in this menu.
TypeAltPrintScreen
Do not show the Insert Alt Print Screen menu item in this menu.
TypeHostKeyCombo
Do not show the Insert Host Key Combo menu item in this menu.
MouseIntegration
Do not show the MouseIntegration menu item in this menu.
This is a per-VM or global setting. Any combination of the above is allowed. To restore the
default behavior, use
VBoxManage setextradata "VM name"|global GUI/RestrictedRuntimeInputMenuActions
Use the following command to disable certain actions of the Devices menu:
VBoxManage setextradata "VM name"|global GUI/RestrictedRuntimeDevicesMenuActions OPTION[,OPTION...]
where OPTION is one of the following keywords to disable actions in the Devices menu:
356](https://image.slidesharecdn.com/vboxusermanual-230728224837-47de127d/85/VBoxUserManual-pdf-371-320.jpg)
![9 Advanced Topics
All
Do not show any menu item in this menu.
HardDrives
Do not show the Hard Disks menu item in this menu.
OpticalDevices
Do not show the Optical Devices menu item in this menu.
FloppyDevices
Do not show the Floppy Drives menu item in this menu.
Audio
Do not show the Audio menu item in this menu.
Network
Do not show the Network menu item in this menu.
NetworkSettings
Do not show the Network Settings menu item in this menu.
USBDevices
Do not show the USB menu item in this menu.
WebCams
Do not show the WebCams menu item in this menu.
SharedFolders
Do not show the Shared Folders menu item in this menu.
SharedFoldersSettings
Do not show the Shared Folders Settings... menu item in this menu.
SharedClipboard
Do not show the Shared Clipboard menu item in this menu.
DragAndDrop
Do not show the Drag and Drop menu item in this menu.
InstallGuestTools
Do not show the Insert Guest Additions CD image... menu item in this menu.
This is a per-VM or global or global setting. Any combination of the above is allowed. To
restore the default behavior, use
VBoxManage setextradata "VM name"|global GUI/RestrictedRuntimeDevicesMenuActions
Use the following command to disable certain actions of the Debug menu:
VBoxManage setextradata "VM name"|global GUI/RestrictedRuntimeDebuggerMenuActions OPTION[,OPTION...]
where OPTION is one of the following keywords to disable actions in the Debug menu, which is
normally completely disabled:
All
Do not show any menu item in this menu.
Statistics
Do not show the Statistics... menu item in this menu.
357](https://image.slidesharecdn.com/vboxusermanual-230728224837-47de127d/85/VBoxUserManual-pdf-372-320.jpg)
![9 Advanced Topics
CommandLine
Do not show the Command Line... menu item in this menu.
Logging
Do not show the Logging... menu item in this menu.
LogDialog
Do not show the Show Log... menu item in this menu.
GuestControlConsole
Do not show the Guest Control Terminal... menu item in this menu.
This is a per-VM or global setting. Any combination of the above is allowed. To restore the
default behavior, use
VBoxManage setextradata "VM name"|global GUI/RestrictedRuntimeDebuggerMenuActions
Use the following command to disable certain actions of the View menu:
VBoxManage setextradata "VM name"|global GUI/RestrictedRuntimeHelpMenuActions OPTION[,OPTION...]
where OPTION is one of the following keywords to disable actions in the Help menu, which is
normally completely disabled:
All
Do not show any menu item in this menu.
Contents
Do not show the Contents... menu item in this menu.
WebSite
Do not show the VirtualBox Web Site... menu item in this menu.
BugTracker
Do not show the VirtualBox Bug Tracker... menu item in this menu.
Forums
Do not show the VirtualBox Forums... menu item in this menu.
Oracle
Do not show the Oracle Web Site... menu item in this menu.
About
Do not show the About VirtualBox... menu item in this menu. Only for non-macOS hosts.
This is a per-VM or global setting. Any combination of the above is allowed. To restore the
default behavior, use
VBoxManage setextradata "VM name"|global GUI/RestrictedRuntimeHelpMenuActions
9.17.5 Configure VM Window Status Bar Entries
You can disable certain status bar items:
VBoxManage setextradata "VM name"|global GUI/RestrictedStatusBarIndicators OPTION[,OPTION...]
where OPTION is one of the following keywords:
HardDisks
Do not show the hard disk icon in the VM window status bar. By default the hard disk icon
is only shown if the VM configuration contains one or more hard disks.
358](https://image.slidesharecdn.com/vboxusermanual-230728224837-47de127d/85/VBoxUserManual-pdf-373-320.jpg)
![9 Advanced Topics
OpticalDisks
Do not show the CD icon in the VM window status bar. By default the CD icon is only
shown if the VM configuration contains one or more CD drives.
FloppyDisks
Do not show the floppy icon in the VM window status bar. By default the floppy icon is
only shown if the VM configuration contains one or more floppy drives.
Network
Do not show the network icon in the VM window status bar. By default the network icon is
only shown if the VM configuration contains one or more active network adapters.
USB
Do not show the USB icon in the status bar.
SharedFolders
Do not show the shared folders icon in the status bar.
Capture
Do not show the capture icon in the status bar.
Features
Do not show the CPU features icon in the status bar.
Mouse
Do not show the mouse icon in the status bar.
Keyboard
Do not show the keyboard icon in the status bar.
This is a per-VM or global setting. Any combination of the above is allowed. If all options
are specified, no icons are displayed in the status bar of the VM window. To restore the default
behavior, use
VBoxManage setextradata "VM name"|global GUI/RestrictedStatusBarIndicators
9.17.6 Configure VM Window Visual Modes
You can disable certain VM visual modes:
$ VBoxManage setextradata <VM-name> GUI/RestrictedVisualStates <property>[,<property>...]
property is one of the following:
Fullscreen
Do not allow to switch the VM into full screen mode.
Seamless
Do not allow to switch the VM into seamless mode.
Scale
Do not allow to switch the VM into scale mode.
This is a per-VM setting. You can specify any combination of properties. To restore the default
behavior, use the following command:
$ VBoxManage setextradata <VM-name> GUI/RestrictedVisualStates
359](https://image.slidesharecdn.com/vboxusermanual-230728224837-47de127d/85/VBoxUserManual-pdf-374-320.jpg)
![9 Advanced Topics
9.17.7 Host Key Customization
To disable all Host key combinations, open the preferences and change the Host key to None.
This might be useful when using Oracle VM VirtualBox in a kiosk mode.
To redefine or disable certain Host key actions, use the following command:
$ VBoxManage setextradata global GUI/Input/MachineShortcuts "FullscreenMode=F,...."
The following table shows the possible Host key actions, together with their default Host key
shortcut. Setting an action to None will disable that Host key action.
Action Default
Key
Action
TakeSnapshot T Take a snapshot
TakeScreenshot E Take a screenshot
MouseIntegration I Toggle mouse integration
TypeCAD Del Inject Ctrl+Alt+Del
TypeCABS Backspace Inject Ctrl+Alt+Backspace
Pause P Pause the VM
Reset R Hard reset the guest
SaveState Save the VM state and terminate the VM
Shutdown H Press the virtual ACPI power button
PowerOff Power off the VM without saving the state
Close Q Show the Close VM dialog
FullscreenMode F Switch the VM into full screen mode
SeamlessMode L Switch the VM into seamless mode
ScaleMode C Switch the VM into scaled mode
GuestAutoResize G Automatically resize the guest window
WindowAdjust A Immediately resize the guest window
PopupMenu Home Show the popup menu in full screen mode and
seamless mode
SettingsDialog S Open the VM Settings dialog
InformationDialog N Show the VM Session Information window
NetworkAdaptersDialog Show the VM Network Adapters dialog
SharedFoldersDialog Show the VM Shared Folders dialog
InstallGuestAdditions
D Mount the ISO containing the Guest Additions
To disable full screen mode and seamless mode, use the following command:
$ VBoxManage setextradata global GUI/Input/MachineShortcuts "FullscreenMode=None,SeamlessMode=None"
9.17.8 Action when Terminating the VM
You can disallow certain actions when terminating a VM. To disallow specific actions, use the
following command:
$ VBoxManage setextradata <VM-name> GUI/RestrictedCloseActions <property>[,<property>...]
property is one of the following:
SaveState
Do not allow the user to save the VM state when terminating the VM.
Shutdown
Do not allow the user to shutdown the VM by sending the ACPI power-off event to the
guest.
PowerOff
Do not allow the user to power off the VM.
360](https://image.slidesharecdn.com/vboxusermanual-230728224837-47de127d/85/VBoxUserManual-pdf-375-320.jpg)
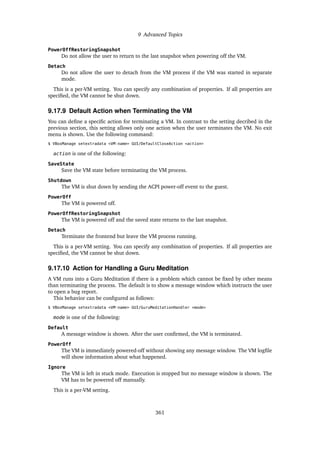
![9 Advanced Topics
9.17.11 Configuring Automatic Mouse Capturing
By default, the mouse is captured if the user clicks on the guest window and the guest expects
relative mouse coordinates at this time. This happens if the pointing device is configured as
PS/2 mouse and the guest has not yet started the Oracle VM VirtualBox Guest Additions. For
instance, the guest is booting or the Guest Additions are not installed, or if the pointing device is
configured as a USB tablet but the guest has no USB driver loaded yet. Once the Guest Additions
become active or the USB guest driver is started, the mouse capture is automatically released.
The default behavior is sometimes not desired. Therefore it can be configured as follows:
VBoxManage setextradata <VM-name> GUI/MouseCapturePolicy <mode>
mode is one of the following:
Default
The default behavior as described above.
HostComboOnly
The mouse is only captured if the Host Key is toggled.
Disabled
The mouse is never captured, also not by toggling the Host Key
This is a per-VM setting.
9.17.12 Requesting Legacy Full-Screen Mode
Oracle VM VirtualBox uses special window manager facilities to switch a multi-screen machine
to full-screen on a multi-monitor host system. However, not all window managers provide these
facilities correctly. Oracle VM VirtualBox can be configured to use a legacy method of switching
to full-screen mode instead, by using the command:
VBoxManage setextradata global GUI/Fullscreen/LegacyMode true
You can go back to the default method by using the following command:
VBoxManage setextradata global GUI/Fullscreen/LegacyMode
This is a global setting.
9.17.13 Removing Certain Modes of Networking From the GUI
It is possible to remove networking modes from Oracle VM VirtualBox GUI. To do this, use the
following command:
VBoxManage setextradata global GUI/RestrictedNetworkAttachmentTypes <property>[,<property>...]
property is one of the following:
NAT
Remove the NAT option from the GUI.
NATNetwork
Remove the NAT network option from the GUI.
BridgedAdapter
Remove the Bridged networking option from the GUI.
362](https://image.slidesharecdn.com/vboxusermanual-230728224837-47de127d/85/VBoxUserManual-pdf-377-320.jpg)
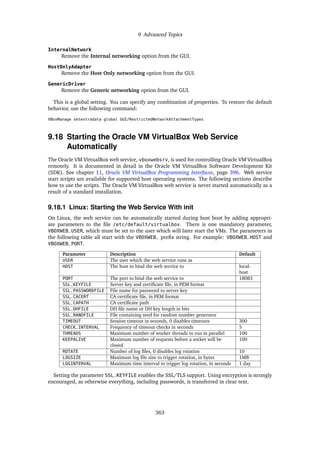

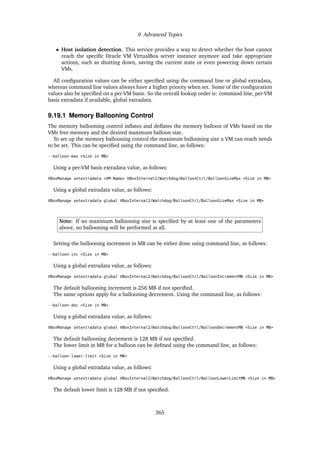
![9 Advanced Topics
9.19.2 Host Isolation Detection
To detect whether a host is being isolated, that is, the host cannot reach the Oracle VM VirtualBox
server instance anymore, the host needs to set an alternating value to a global extradata value
within a time period. If this value is not set within that time period a timeout occurred and the
so-called host isolation response will be performed to the VMs handled. Which VMs are handled
can be controlled by defining VM groups and assigning VMs to those groups. By default no
groups are set, meaning that all VMs on the server will be handled when no host response is
received within 30 seconds.
Set the groups handled by the host isolation detection using the following command line:
--apimon-groups=<string[,stringN]>
Using a global extradata value, as follows:
VBoxManage setextradata global VBoxInternal2/Watchdog/APIMonitor/Groups <string[,stringN]>
Set the host isolation timeout using the following command line:
--apimon-isln-timeout=<ms>
Using a global extradata value, as follows:
VBoxManage setextradata global VBoxInternal2/Watchdog/APIMonitor/IsolationTimeoutMS <ms>
Set the actual host isolation response using the following command line:
--apimon-isln-response=<cmd>
Using a global extradata value, as follows:
VBoxManage setextradata global VBoxInternal2/Watchdog/APIMonitor/IsolationResponse <cmd>
The following response commands are available:
• none. This has no effect.
• pause. Pauses the execution of a VM.
• poweroff. Shuts down the VM by pressing the virtual power button. The VM will not have
the chance of saving any data or veto the shutdown process.
• save. Saves the current machine state and powers off the VM afterwards. If saving the
machine state fails the VM will be paused.
• shutdown. Shuts down the VM in a gentle way by sending an ACPI shutdown event to the
VM’s operating system. The OS then has the chance of doing a clean shutdown.
9.19.3 More Information
For more advanced options and parameters like verbose logging check the built-in command line
help accessible with --help.
366](https://image.slidesharecdn.com/vboxusermanual-230728224837-47de127d/85/VBoxUserManual-pdf-381-320.jpg)
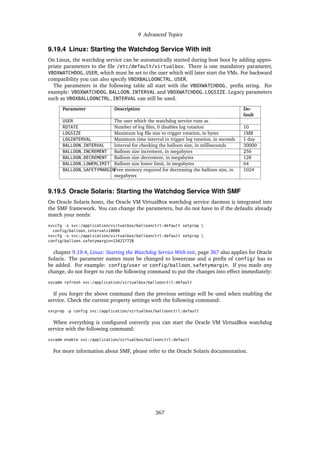
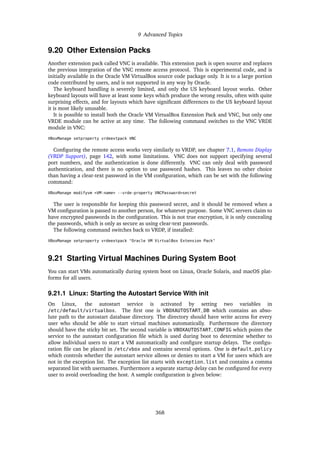
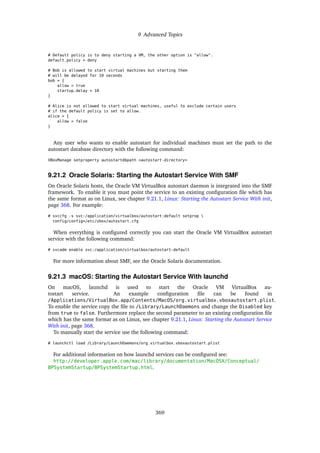
![9 Advanced Topics
9.21.4 Windows: Starting the Autostart Service
On Windows, autostart functionality consist of two components. The first component is a con-
figuration file where the administrator can both set a delayed start for the VMs and temporarily
disable autostarting for a particular user. The configuration file should be located in a folder ac-
cessible by all required users but it should have permissions allowing only reading by everyone
but administrators. The configuration file contains several options. The default_policy con-
trols whether the autostart service allows or denies starting of a VM for users that are not in the
exception list. The exception list starts with exception_list and contains a comma separated
list with usernames. Furthermore, a separate startup delay can be configured for every user to
avoid overloading the host. A sample configuration is given below:
# Default policy is to deny starting a VM, the other option is "allow".
default_policy = deny
# Bob is allowed to start virtual machines but starting them
# will be delayed for 10 seconds
bob = {
allow = true
startup_delay = 10
}
# Alice is not allowed to start virtual machines, useful to exclude certain users
# if the default policy is set to allow.
alice = {
allow = false
}
The user name can be specified using the following forms: “user”, “domainuser”, “.user”
and “user@domain”. An administrator must add the VBOXAUTOSTART_CONFIG environment vari-
able into system variables containing the path to the configuration file described above. The
environment variable tells the autostart services which configuration file is used.
The second component of autostart functionality is a Windows service. Every instance of this
works on behalf of a particular user using their credentials.
To enable autostarting for a particular user, a member of the administrators group must run
the following command:
VBoxAutostartSvc install --user=<user> [--password-file=<password_file>]
The password file should contain the password followed by a line break. The rest of the file is
ignored. The user will be asked for a password if the password file is not specified.
To disable autostarting for particular user, a member of the administrators group must run the
following command:
VBoxAutostartSvc delete --user=<user>
If a user has changed their password then a member of the administrators group must either
reinstall the service or change the service credentials using Windows Service Manager. Due to
Windows security policies, the autostart service cannot be installed for users with empty pass-
words.
Finally, the user should define which VMs should be started at boot. The user should run the
following command for every VM they wish to start at boot:
VBoxManage modifyvm <VM name or UUID> --autostart-enabled on
The user can remove a particular VM from the VMs starting at boot by running the following
command:
VBoxManage modifyvm <VM name or UUID> --autostart-enabled off
370](https://image.slidesharecdn.com/vboxusermanual-230728224837-47de127d/85/VBoxUserManual-pdf-385-320.jpg)
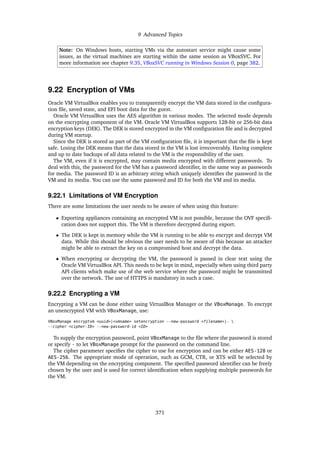
![9 Advanced Topics
VBoxManage controlvm <uuid>|<vmname> addencpassword <ID><password> [--removeonsuspend yes|no]
ID must be the same as the password identifier supplied when encrypting the images.
password is the password used when encrypting the images. Optionally, you can specify
--removeonsuspend yes|no to specify whether to remove the password from VM memory
when the VM is suspended. Before the VM can be resumed, the user needs to supply the pass-
words again. This is useful when a VM is suspended by a host suspend event and the user does
not want the password to remain in memory.
9.29.4 Decrypting Encrypted Images
In some circumstances it might be required to decrypt previously encrypted images. This can
be done in VirtualBox Manager for a complete VM or using VBoxManage with the following
command:
VBoxManage encryptmedium <uuid>|<filename> --oldpassword <file>|-
The only required parameter is the password the image was encrypted with. The options are
the same as for encrypting images.
9.30 Paravirtualized Debugging
This section covers debugging of guest operating systems using interfaces supported by paravir-
tualization providers.
Note: Paravirtualized debugging significantly alter guest operating system behaviour
and should only be used by expert users for debugging and diagnostics.
These debug options are specified as a string of key-value pairs separated by commas. An
empty string disables paravirtualized debugging.
9.30.1 Hyper-V Debug Options
All of the options listed below are optional, and thus the default value specified will be used
when the corresponding key-value pair is not specified.
• Key: enabled
Value: 0 or 1
Default: 0
Specify 1 to enable the Hyper-V debug interface. If this key-value pair is not specified or
the value is not 1, the Hyper-V debug interface is disabled regardless of other key-value
pairs being present.
• Key: address
Value: IPv4 address
Default: 127.0.0.1
Specify the IPv4 address where the remote debugger is connected.
• Key: port
Value: UDP port number
Default: 50000
Specify the UDP port number where the remote debugger is connected.
376](https://image.slidesharecdn.com/vboxusermanual-230728224837-47de127d/85/VBoxUserManual-pdf-391-320.jpg)
![9 Advanced Topics
If you have trouble getting any beeps even if the device permissions are set up and VBox.log
confirms that it uses evdev or console for the PC speaker control, check if your system has a PC
speaker. Some systems do not have one. Other complications can arise from Linux rerouting the
PC speaker output to a sound card. Check if the beeps are audible if you connect speakers to
your sound card. Today almost all systems have one. Finally, check if the audio mixer control has
a channel named “beep”, which could be hidden in the mixer settings, and that it is not muted.
9.32 Accessing USB devices Exposed Over the Network with
USB/IP
Oracle VM VirtualBox supports passing through USB devices which are exposed over the network
using the USB over IP protocol without the need to configure the client side provided by the
kernel and usbip tools. Furthermore, this feature works with Oracle VM VirtualBox running on
any supported host, rather than just Linux alone, as is the case with the official client.
To enable support for passing through USB/IP devices, use the following command to add the
device server that exports the devices:
VBoxManage usbdevsource add <unique-name> --backend <USBIP> --address <device-server>[:<port>]
USB devices exported on the device server are then accessible through VirtualBox Manager or
VBoxManage, like any USB devices attached locally. This can be used multiple times to access
different device servers.
To remove a device server, the following command can be used:
$ VBoxManage usbdevsource remove <unique-name>
9.32.1 Setting up USB/IP Support on a Linux System
This section gives a brief overview on how to set up a Linux based system to act as a USB device
server. The system on the server requires that the usbip-core.ko and usbip-host.ko kernel
drivers are available, and that the USB/IP tools package is installed. The particular installation
method for the necessary tools depends on which distribution is used. For example, for Debian
based systems, use the following command to install the required tools:
$ apt-get install usbip-utils
To check whether the necessary tools are already installed use the following command:
$ usbip list -l
This should produce output similar to that shown in the example below:
- busid 4-2 (0bda:0301)
Realtek Semiconductor Corp. : multicard reader (0bda:0301)
- busid 5-1 (046d:c52b)
Logitech, Inc. : Unifying Receiver (046d:c52b)
If everything is installed, the USB/IP server needs to be started as root using the following
command:
# usbipd -D
380](https://image.slidesharecdn.com/vboxusermanual-230728224837-47de127d/85/VBoxUserManual-pdf-395-320.jpg)
![9 Advanced Topics
9.35 VBoxSVC running in Windows Session 0
Oracle VM VirtualBox supports executing the VBoxSVC in Windows session 0. This allows
VBoxSVC to run like a regular Windows service, which in turn enables headless VMs to con-
tinue running even if the user logs out.
Note: This is currently an experimental feature.
The feature is disabled by default and can be enabled by creating a REG_DWORD value
ServerSession0 in the key HKEY_LOCAL_MACHINESoftwareOracleVirtualBoxVBoxSDS
of the Windows registry. Specify 1 as the value’s data to enable the feature, or 0 to disable
the feature. A host reboot is needed in order to make the change effective.
9.35.1 Known Issues
• Due to different Windows sessions having their own set of resources, there might be some
issues with accessing network shares created in the interactive user session when at least
one of the Oracle VM VirtualBox processes are running in session 0.
For accessing network shares within session 0, a possible workaround is to establish per-
manent access to the share and then restart the host.
9.36 VISO file format / RTIsoMaker
ISO image maker.
Synopsis
RTIsoMaker [options] [@commands.rsp] <filespec. . . >
Description
Construct a virtual ISO 9660 / Joliet / UDF / HFS hybrid image and either write it to a file
(RTIsoMaker) or serve it as a virtual image (VISO).
VISO file format
A VISO file is a virtual ISO image, i.e. constructed in memory from a bunch of files on the host. A
VISO is just the recipe describing how to go about this using a syntax vaguely similar to mkisofs
and genisoimage.
One requirement is that the VISO file must start with one of the
--iprt-iso-maker-file-marker options. Which of the options you use will dictate the
quoting and escaping rules used when reading the file. The option takes the image UUID as an
argument.
The VISO files are treated as UTF-8 and must not contain any byte order marker (BOM). There
is currently no way to comment out lines in a VISO file.
File specifications and –name-setup
All non-options that does not start with ’@’ are taken to indicate a file, directory, or similar that
is should be added to the ISO image. Directories are added recursively and content is subject to
filtering options.
382](https://image.slidesharecdn.com/vboxusermanual-230728224837-47de127d/85/VBoxUserManual-pdf-397-320.jpg)


![12 Troubleshooting
Note that the kallsyms file contains the symbols for the currently loaded modules. If the guest’s
configuration changes, the symbols will change as well and must be updated.
For all guests, a simple way to verify that the correct symbols are loaded is the k command.
The guest is normally idling and it should be clear from the symbolic information that the guest
operating system’s idle loop is being executed.
Another group of debugger commands is the set of info commands. Running info help
provides complete usage information. The information commands provide ad-hoc data pertinent
to various emulated devices and aspects of the VMM. There is no general guideline for using the
info commands, the right command to use depends entirely on the problem being investigated.
Some of the info commands are as follows:
• cfgm: Print a branch of the configuration tree
• cpuid: Display the guest CPUID leaves
• ioport: Print registered I/O port ranges
• mmio: Print registered MMIO ranges
• mode: Print the current paging mode
• pit: Print the i8254 PIT state
• pic: Print the i8259A PIC state
• ohci, ehci, xhci: Print a subset of the OHCI, EHCI, and xHCI USB controller state
• pcnet0: Print the PCnet state
• vgatext: Print the contents of the VGA framebuffer formatted as standard text mode
• timers: Print all VM timers
The output of the info commands generally requires in-depth knowledge of the emulated
device or Oracle VM VirtualBox VMM internals. However, when used properly, the information
provided can be invaluable.
12.1.5 VM Core Format
Oracle VM VirtualBox uses the 64-bit ELF format for its VM core files created by
VBoxManage debugvm, see chapter 8.45, VBoxManage debugvm, page 293. The VM core file
contain the memory and CPU dumps of the VM and can be useful for debugging your guest OS.
The 64-bit ELF object format specification can be obtained at:
http://downloads.openwatcom.org/ftp/devel/docs/elf-64-gen.pdf.
The overall layout of the VM core format is as follows:
[ ELF 64 Header]
[ Program Header, type PT_NOTE ]
→ offset to COREDESCRIPTOR
[ Program Header, type PT_LOAD ] - one for each contiguous physical memory range
→ Memory offset of range
→ File offset
[ Note Header, type NT_VBOXCORE ]
[ COREDESCRIPTOR ]
→ Magic
→ VM core file version
→ VBox version
→ Number of vCPUs etc.
[ Note Header, type NT_VBOXCPU ] - one for each vCPU
[ vCPU 1 Note Header ]
[ DBGFCORECPU - vCPU 1 dump ]
[ Additional Notes + Data ] - currently unused
[ Memory dump ]
401](https://image.slidesharecdn.com/vboxusermanual-230728224837-47de127d/85/VBoxUserManual-pdf-416-320.jpg)
![12 Troubleshooting
The memory descriptors contain physical addresses relative to the guest and not virtual ad-
dresses. Regions of memory such as MMIO regions are not included in the core file.
The relevant data structures and definitions can be found in the Oracle VM VirtualBox sources
under the following header files: include/VBox/dbgfcorefmt.h, include/iprt/x86.h and
src/VBox/Runtime/include/internal/ldrELFCommon.h.
The VM core file can be inspected using elfdump and GNU readelf or other similar utilities.
12.2 General Troubleshooting
12.2.1 Guest Shows IDE/SATA Errors for File-Based Images on Slow Host
File System
Occasionally, some host file systems provide very poor writing performance and as a consequence
cause the guest to time out IDE/SATA commands. This is normal behavior and should normally
cause no real problems, as the guest should repeat commands that have timed out. However,
guests such as some Linux versions have severe problems if a write to an image file takes longer
than about 15 seconds. Some file systems however require more than a minute to complete a
single write, if the host cache contains a large amount of data that needs to be written.
The symptom for this problem is that the guest can no longer access its files during large write
or copying operations, usually leading to an immediate hang of the guest.
In order to work around this problem, the true fix is to use a faster file system that does
not exhibit such unacceptable write performance, it is possible to flush the image file after a
certain amount of data has been written. This interval is normally infinite, but can be configured
individually for each disk of a VM.
For IDE disks use the following command:
VBoxManage setextradata <VM-name>
"VBoxInternal/Devices/piix3ide/0/LUN#[<x>]/Config/FlushInterval" [<b>]
For SATA disks use the following command:
VBoxManage setextradata <VM-name>
"VBoxInternal/Devices/ahci/0/LUN#[<x>]/Config/FlushInterval" [<b>]
[x] specifies the disk. For IDE, 0 represents device 0 on the primary channel, 1 represents de-
vice 1 on the primary channel, 2 represents device 0 on the secondary channel, and 3 represents
device 1 on the secondary channel. For SATA, use values between 0 and 29. This configuration
option applies to disks only. Do not use this option for CD or DVD drives.
The unit of the interval ([b]) is the number of bytes written since the last flush. The value
for it must be selected so that the occasional long write delays do not occur. Since the proper
flush interval depends on the performance of the host and the host filesystem, finding the op-
timal value that makes the problem disappear requires some experimentation. Values between
1000000 and 10000000 (1 to 10 megabytes) are a good starting point. Decreasing the interval
both decreases the probability of the problem and the write performance of the guest. Setting
the value unnecessarily low will cost performance without providing any benefits. An interval of
1 will cause a flush for each write operation and should solve the problem in any case, but has a
severe write performance penalty.
Providing a value of 0 for [b] is treated as an infinite flush interval, effectively disabling this
workaround. Removing the extra data key by specifying no value for [b] has the same effect.
12.2.2 Responding to Guest IDE/SATA Flush Requests
If desired, the virtual disk images can be flushed when the guest issues the IDE FLUSH CACHE
command. Normally these requests are ignored for improved performance. The parameters
below are only accepted for disk drives. They must not be set for DVD drives.
To enable flushing for IDE disks, issue the following command:
402](https://image.slidesharecdn.com/vboxusermanual-230728224837-47de127d/85/VBoxUserManual-pdf-417-320.jpg)
![12 Troubleshooting
$ VBoxManage setextradata <VM-name> "VBoxInternal/Devices/piix3ide/0/LUN#[<x>]/Config/IgnoreFlush" 0
[x] specifies the disk. Enter 0 for device 0 on the primary channel, 1 for device 1 on the
primary channel, 2 for device 0 on the secondary channel, or 3 for device 1 on the secondary
channel.
To enable flushing for SATA disks, issue the following command:
$ VBoxManage setextradata <VM-name> "VBoxInternal/Devices/ahci/0/LUN#[x]/Config/IgnoreFlush" 0
The value [x] that selects the disk can be a value between 0 and 29.
Note that this does not affect the flushes performed according to the configuration described
in chapter 12.2.1, Guest Shows IDE/SATA Errors for File-Based Images on Slow Host File System,
page 402. Restoring the default of ignoring flush commands is possible by setting the value to 1
or by removing the key.
12.2.3 Performance Variation with Frequency Boosting
Many multicore processors support some form of frequency boosting, which means that if only
one core is utilized, it can run possibly 50% faster or even more than the rated CPU frequency.
This causes measured performance to vary somewhat as a function of the momentary overall
system load. The exact behavior depends strongly on the specific processor model.
As a consequence, benchmarking on systems which utilize frequency boosting may produce
unstable and non-repeatable results. This is especially true if benchmark runs are short, of the
order of seconds. To obtain stable results, benchmarks must be run over longer periods of time
and with a constant system load apart from the VM being tested.
12.2.4 Frequency Scaling Effect on CPU Usage
On some hardware platforms and operating systems, CPU frequency scaling may cause CPU
usage reporting to be highly misleading. This happens in situations when the host CPU load is
significant but not heavy, such as between 15% to 30% of the maximum.
Most operating systems determine CPU usage in terms of time spent, measuring for example
how many nanoseconds the systems or a process was active within one second. However, in
order to save energy, systems can significantly scale down CPU speed when the system is not
fully loaded. When the CPU is running at for example one half of its maximum speed, the same
number of instructions will take roughly twice as long to execute compared to running at full
speed.
Depending on the specific hardware and host OS, this effect can very significantly skew the
CPU usage reported by the OS. The reported CPU usage can be several times higher than what
it would have been had the CPU been running at full speed. The effect can be observed both on
the host OS and in a guest OS.
12.2.5 Inaccurate Windows CPU Usage Reporting
CPU usage reporting tools which come with Windows, such as Task Manager or Resource Moni-
tor, do not take the time spent processing hardware interrupts into account. If the interrupt load
is heavy, with thousands of interrupts per second, CPU usage may be significantly underreported.
This problem affects Windows as both host and guest OS. Sysinternals tools, such as Process
Explorer, do not suffer from this problem.
12.2.6 Poor Performance Caused by Host Power Management
On some hardware platforms and operating systems, virtualization performance is negatively
affected by host CPU power management. The symptoms may be choppy audio in the guest or
erratic guest clock behavior.
403](https://image.slidesharecdn.com/vboxusermanual-230728224837-47de127d/85/VBoxUserManual-pdf-418-320.jpg)