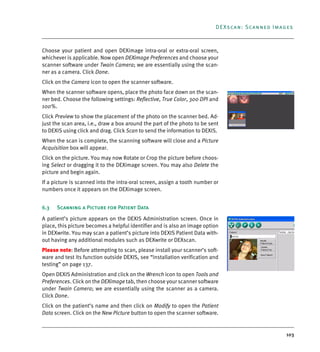
SlideShare a Scribd company logo
Software Manual
PLU824-EN Rev 2 2010 September 15
Copyright © DEXIS, LLC 1994-2010
This manual and the software described herein are protected by copyright
laws and international copyright treaties, as well as other intellectual prop-
erty laws and treaties.
This manual contains original instructions by DEXIS, LLC. DEXIS, LLC re-
serves the right at any time to revise this manual and the software de-
scribed herein, and assumes no obligation to notify any person or entity of
such revisions.
Many of the designations used by manufacturers and sellers to distinguish
their products are claimed as trademarks. Where those designations ap-
pear in this manual, and DEXIS, LLC was aware of a trademark claim, such
designations have been printed in capital or initial capital letters.
The DEXIS software includes the following parts copyrighted by other
parties:
• The components reading and writing JPEG files are based on the work of
the Independent JPEG Group.
• Interfaces to non-DEXIS sensors and to panoramic X-ray equipment are
based on work licensed from the respective manufacturers of the
equipment.
• The software includes software libraries copyrighted by Microsoft, Inc.
The CE symbol ensures that the product herein specified
meets the provisions of European Council Directive 93/42
EEC concerning medical devices.
DEXIS_9_EN.book Page 2 Tuesday, October 5, 2010 12:58 PM
CONTENTS
Contents
1 Introduction . . . . . . . . . . . . . . . . . . . . . . . . . . . . . . . . . . . . . . . . . . . . . . . . . . . . 1
1.1 Welcome to DEXIS . . . . . . . . . . . . . . . . . . . . . . . . . . . . . . . . . . . . . . . . . . . . . . . . . . . . . . . . . . . . 1
1.2 Intended Use of the DEXIS Software . . . . . . . . . . . . . . . . . . . . . . . . . . . . . . . . . . . . . . . . . . . . 2
1.3 Conventions Used in the Manual . . . . . . . . . . . . . . . . . . . . . . . . . . . . . . . . . . . . . . . . . . . . . . . 2
1.4 What’s New in Release 9 . . . . . . . . . . . . . . . . . . . . . . . . . . . . . . . . . . . . . . . . . . . . . . . . . . . . . . . 3
2 Installation, Care, and Maintenance . . . . . . . . . . . . . . . . . . . . . . . . . . . . . . . . 7
2.1 Hardware Requirements . . . . . . . . . . . . . . . . . . . . . . . . . . . . . . . . . . . . . . . . . . . . . . . . . . . . . . 7
2.1.1 Operating System Platform . . . . . . . . . . . . . . . . . . . . . . . . . . . . . . . . . . . . . . . . . . . . . . . . . . . 8
2.1.2 Caution: Hardware & Software Upgrades . . . . . . . . . . . . . . . . . . . . . . . . . . . . . . . . . . . . . . . . 8
2.1.3 Diagnostic Imaging . . . . . . . . . . . . . . . . . . . . . . . . . . . . . . . . . . . . . . . . . . . . . . . . . . . . . . . . . . 9
2.1.4 Special Hardware Requirements . . . . . . . . . . . . . . . . . . . . . . . . . . . . . . . . . . . . . . . . . . . . . . 10
2.2 Hardware Installation . . . . . . . . . . . . . . . . . . . . . . . . . . . . . . . . . . . . . . . . . . . . . . . . . . . . . . . .11
2.3 Display Settings Changes . . . . . . . . . . . . . . . . . . . . . . . . . . . . . . . . . . . . . . . . . . . . . . . . . . . . 13
2.4 Software Installation . . . . . . . . . . . . . . . . . . . . . . . . . . . . . . . . . . . . . . . . . . . . . . . . . . . . . . . 14
2.4.1 Installation Planning . . . . . . . . . . . . . . . . . . . . . . . . . . . . . . . . . . . . . . . . . . . . . . . . . . . . . . . 14
2.4.2 Running the Installation Program . . . . . . . . . . . . . . . . . . . . . . . . . . . . . . . . . . . . . . . . . . . . 15
2.4.3 Sharing Data Between Disconnected Systems . . . . . . . . . . . . . . . . . . . . . . . . . . . . . . . . . . . 17
2.4.4 Adding Initial Information . . . . . . . . . . . . . . . . . . . . . . . . . . . . . . . . . . . . . . . . . . . . . . . . . . . 17
2.4.5 Obtain Registration Codes . . . . . . . . . . . . . . . . . . . . . . . . . . . . . . . . . . . . . . . . . . . . . . . . . . . 18
2.5 Regular Backups of Image Files . . . . . . . . . . . . . . . . . . . . . . . . . . . . . . . . . . . . . . . . . . . . . . . 19
3 The DEXIS Administration Program . . . . . . . . . . . . . . . . . . . . . . . . . . . . . . . . 21
3.1 DEXIS Administration Screen Overview . . . . . . . . . . . . . . . . . . . . . . . . . . . . . . . . . . . . . . . . . 21
3.2 Setting General Preferences . . . . . . . . . . . . . . . . . . . . . . . . . . . . . . . . . . . . . . . . . . . . . . . . . 22
3.3 Setting Administration Preferences . . . . . . . . . . . . . . . . . . . . . . . . . . . . . . . . . . . . . . . . . . . 26
3.4 Entering Patient Data . . . . . . . . . . . . . . . . . . . . . . . . . . . . . . . . . . . . . . . . . . . . . . . . . . . . . . . . 29
3.5 Administrative Tools . . . . . . . . . . . . . . . . . . . . . . . . . . . . . . . . . . . . . . . . . . . . . . . . . . . . . . . . 31
3.6 Interfacing with Practice Management Programs . . . . . . . . . . . . . . . . . . . . . . . . . . . . . . . 34
DEXIS_9_EN.book Page 1 Tuesday, October 5, 2010 12:58 PM
CONTENTS
4 DEXray: X-ray Images . . . . . . . . . . . . . . . . . . . . . . . . . . . . . . . . . . . . . . . . . . . .35
4.1 DEXray Screen Overview . . . . . . . . . . . . . . . . . . . . . . . . . . . . . . . . . . . . . . . . . . . . . . . . . . . . . .35
4.2 Taking Your First Digital X-ray . . . . . . . . . . . . . . . . . . . . . . . . . . . . . . . . . . . . . . . . . . . . . . . .37
4.3 Setting DEXray Preferences . . . . . . . . . . . . . . . . . . . . . . . . . . . . . . . . . . . . . . . . . . . . . . . . . . 38
4.4 Taking X-ray Images with Intra-oral Sensors . . . . . . . . . . . . . . . . . . . . . . . . . . . . . . . . . . . .41
4.4.1 Taking an Individual Image . . . . . . . . . . . . . . . . . . . . . . . . . . . . . . . . . . . . . . . . . . . . . . . . . . . .41
4.4.2 Repeating an X-ray . . . . . . . . . . . . . . . . . . . . . . . . . . . . . . . . . . . . . . . . . . . . . . . . . . . . . . . . . . 42
4.4.3 Taking a Series of Images . . . . . . . . . . . . . . . . . . . . . . . . . . . . . . . . . . . . . . . . . . . . . . . . . . . . 42
4.4.4 One Tooth Series . . . . . . . . . . . . . . . . . . . . . . . . . . . . . . . . . . . . . . . . . . . . . . . . . . . . . . . . . . . 43
4.5 Image Management Tools . . . . . . . . . . . . . . . . . . . . . . . . . . . . . . . . . . . . . . . . . . . . . . . . . . . . 43
4.5.1 Selection and Navigation . . . . . . . . . . . . . . . . . . . . . . . . . . . . . . . . . . . . . . . . . . . . . . . . . . . . 43
4.5.2 DEXray Screen Icons . . . . . . . . . . . . . . . . . . . . . . . . . . . . . . . . . . . . . . . . . . . . . . . . . . . . . . . . 48
4.5.3 Image Enhancement . . . . . . . . . . . . . . . . . . . . . . . . . . . . . . . . . . . . . . . . . . . . . . . . . . . . . . . . . .55
4.5.4 Measurement on Images . . . . . . . . . . . . . . . . . . . . . . . . . . . . . . . . . . . . . . . . . . . . . . . . . . . . . .57
4.5.5 Image Annotations . . . . . . . . . . . . . . . . . . . . . . . . . . . . . . . . . . . . . . . . . . . . . . . . . . . . . . . . . . 65
4.5.6 The Image Archive . . . . . . . . . . . . . . . . . . . . . . . . . . . . . . . . . . . . . . . . . . . . . . . . . . . . . . . . . . . 68
4.5.7 Communications: Printing from DEXray or DEXimage . . . . . . . . . . . . . . . . . . . . . . . . . . . . 69
4.5.8 Communications: Export and E-mail . . . . . . . . . . . . . . . . . . . . . . . . . . . . . . . . . . . . . . . . . . . .71
4.5.9 More on Exporting . . . . . . . . . . . . . . . . . . . . . . . . . . . . . . . . . . . . . . . . . . . . . . . . . . . . . . . . . .73
4.5.10 Communications: Import . . . . . . . . . . . . . . . . . . . . . . . . . . . . . . . . . . . . . . . . . . . . . . . . . . . . .75
4.5.11 More on Importing . . . . . . . . . . . . . . . . . . . . . . . . . . . . . . . . . . . . . . . . . . . . . . . . . . . . . . . . . .77
4.5.12 The Compare Function . . . . . . . . . . . . . . . . . . . . . . . . . . . . . . . . . . . . . . . . . . . . . . . . . . . . . . . 78
4.6 X-ray Image Security . . . . . . . . . . . . . . . . . . . . . . . . . . . . . . . . . . . . . . . . . . . . . . . . . . . . . . . . 80
4.7 Working with Panoramic and Cephalometric Images . . . . . . . . . . . . . . . . . . . . . . . . . . . . . .81
5 DEXimage: Photographic Images . . . . . . . . . . . . . . . . . . . . . . . . . . . . . . . . . . 83
5.1 DEXimage Screen Overview . . . . . . . . . . . . . . . . . . . . . . . . . . . . . . . . . . . . . . . . . . . . . . . . . . . 83
5.2 Setting DEXimage Preferences . . . . . . . . . . . . . . . . . . . . . . . . . . . . . . . . . . . . . . . . . . . . . . . . 85
5.3 Taking Digital Photographs . . . . . . . . . . . . . . . . . . . . . . . . . . . . . . . . . . . . . . . . . . . . . . . . . . 87
5.3.1 Memory Card with Card Reader . . . . . . . . . . . . . . . . . . . . . . . . . . . . . . . . . . . . . . . . . . . . . . . 87
5.3.2 Twain Interface . . . . . . . . . . . . . . . . . . . . . . . . . . . . . . . . . . . . . . . . . . . . . . . . . . . . . . . . . . . . . 88
5.3.3 Patient Picture . . . . . . . . . . . . . . . . . . . . . . . . . . . . . . . . . . . . . . . . . . . . . . . . . . . . . . . . . . . . . 89
5.4 Taking Intra-oral Video Images using DEXvideo . . . . . . . . . . . . . . . . . . . . . . . . . . . . . . . . . 89
5.4.1 Additional Settings . . . . . . . . . . . . . . . . . . . . . . . . . . . . . . . . . . . . . . . . . . . . . . . . . . . . . . . . . 90
DEXIS_9_EN.book Page 2 Tuesday, October 5, 2010 12:58 PM
CONTENTS
5.4.2 Capturing Images . . . . . . . . . . . . . . . . . . . . . . . . . . . . . . . . . . . . . . . . . . . . . . . . . . . . . . . . . . . 91
5.4.3 Simulation Mode . . . . . . . . . . . . . . . . . . . . . . . . . . . . . . . . . . . . . . . . . . . . . . . . . . . . . . . . . . . . 92
5.4.4 Foot Pedal or Wand Capture . . . . . . . . . . . . . . . . . . . . . . . . . . . . . . . . . . . . . . . . . . . . . . . . . . 93
5.5 Image Management Tools . . . . . . . . . . . . . . . . . . . . . . . . . . . . . . . . . . . . . . . . . . . . . . . . . . . . 93
5.5.1 Selection and Navigation . . . . . . . . . . . . . . . . . . . . . . . . . . . . . . . . . . . . . . . . . . . . . . . . . . . . 94
5.5.2 DEXimage Screen Icons . . . . . . . . . . . . . . . . . . . . . . . . . . . . . . . . . . . . . . . . . . . . . . . . . . . . . . 94
6 DEXscan: Scanned Images . . . . . . . . . . . . . . . . . . . . . . . . . . . . . . . . . . . . . . . 99
6.1 Scanning X-ray Films . . . . . . . . . . . . . . . . . . . . . . . . . . . . . . . . . . . . . . . . . . . . . . . . . . . . . . . . 99
6.1.1 Intra-oral with Flatbed Scanner . . . . . . . . . . . . . . . . . . . . . . . . . . . . . . . . . . . . . . . . . . . . . 100
6.1.2 Intra-oral with Single-Film Scanner . . . . . . . . . . . . . . . . . . . . . . . . . . . . . . . . . . . . . . . . . . 101
6.1.3 Extra-oral . . . . . . . . . . . . . . . . . . . . . . . . . . . . . . . . . . . . . . . . . . . . . . . . . . . . . . . . . . . . . . . . 102
6.2 Scanning a Photograph . . . . . . . . . . . . . . . . . . . . . . . . . . . . . . . . . . . . . . . . . . . . . . . . . . . . . 102
6.2.1 Scan a Photo into DEXimage . . . . . . . . . . . . . . . . . . . . . . . . . . . . . . . . . . . . . . . . . . . . . . . . . 102
6.3 Scanning a Picture for Patient Data . . . . . . . . . . . . . . . . . . . . . . . . . . . . . . . . . . . . . . . . . . 103
6.4 Scanning a Signature or Logo . . . . . . . . . . . . . . . . . . . . . . . . . . . . . . . . . . . . . . . . . . . . . . . 104
7 DEXimplant: Implant Planning and Monitoring . . . . . . . . . . . . . . . . . . . . . . 107
7.1 Introduction . . . . . . . . . . . . . . . . . . . . . . . . . . . . . . . . . . . . . . . . . . . . . . . . . . . . . . . . . . . . . . 107
7.2 Accessing DEXimplant . . . . . . . . . . . . . . . . . . . . . . . . . . . . . . . . . . . . . . . . . . . . . . . . . . . . . . 108
7.3 Implant Planning with DEXimplant . . . . . . . . . . . . . . . . . . . . . . . . . . . . . . . . . . . . . . . . . . . . 108
7.3.1 Calibration with Radiographic Balls . . . . . . . . . . . . . . . . . . . . . . . . . . . . . . . . . . . . . . . . . 109
7.3.2 The Implant Library . . . . . . . . . . . . . . . . . . . . . . . . . . . . . . . . . . . . . . . . . . . . . . . . . . . . . . . . . 109
7.3.3 Placing Implants . . . . . . . . . . . . . . . . . . . . . . . . . . . . . . . . . . . . . . . . . . . . . . . . . . . . . . . . . . . 109
7.3.4 Printing the Plan . . . . . . . . . . . . . . . . . . . . . . . . . . . . . . . . . . . . . . . . . . . . . . . . . . . . . . . . . . 110
7.3.5 Communication with Colleagues . . . . . . . . . . . . . . . . . . . . . . . . . . . . . . . . . . . . . . . . . . . . . .111
7.4 Osseointegration Monitoring with DEXbone . . . . . . . . . . . . . . . . . . . . . . . . . . . . . . . . . . . .111
7.4.1 Selecting the Region to be Examined . . . . . . . . . . . . . . . . . . . . . . . . . . . . . . . . . . . . . . . . . . .111
7.4.2 Reading the DEXbone Information . . . . . . . . . . . . . . . . . . . . . . . . . . . . . . . . . . . . . . . . . . . . 112
7.4.3 Looking into Detail . . . . . . . . . . . . . . . . . . . . . . . . . . . . . . . . . . . . . . . . . . . . . . . . . . . . . . . . 112
8 DEXwrite: Chairside Report Generator . . . . . . . . . . . . . . . . . . . . . . . . . . . . . .113
8.1 DEXwrite Screen Overview . . . . . . . . . . . . . . . . . . . . . . . . . . . . . . . . . . . . . . . . . . . . . . . . . . . .113
8.2 Setting DEXwrite Preferences . . . . . . . . . . . . . . . . . . . . . . . . . . . . . . . . . . . . . . . . . . . . . . . .114
DEXIS_9_EN.book Page 3 Tuesday, October 5, 2010 12:58 PM
CONTENTS
8.3 Generating Your First DEXwrite Report . . . . . . . . . . . . . . . . . . . . . . . . . . . . . . . . . . . . . . . 115
8.4 Report Management Tools . . . . . . . . . . . . . . . . . . . . . . . . . . . . . . . . . . . . . . . . . . . . . . . . . . 116
8.4.1 Default Report . . . . . . . . . . . . . . . . . . . . . . . . . . . . . . . . . . . . . . . . . . . . . . . . . . . . . . . . . . . . 116
8.4.2 Report Library . . . . . . . . . . . . . . . . . . . . . . . . . . . . . . . . . . . . . . . . . . . . . . . . . . . . . . . . . . . . . 116
8.4.3 Frames . . . . . . . . . . . . . . . . . . . . . . . . . . . . . . . . . . . . . . . . . . . . . . . . . . . . . . . . . . . . . . . . . . . 116
8.4.4 Image Selection Box . . . . . . . . . . . . . . . . . . . . . . . . . . . . . . . . . . . . . . . . . . . . . . . . . . . . . . . . .117
8.4.5 Function Buttons . . . . . . . . . . . . . . . . . . . . . . . . . . . . . . . . . . . . . . . . . . . . . . . . . . . . . . . . . . 118
8.4.6 Reusable Text Blocks . . . . . . . . . . . . . . . . . . . . . . . . . . . . . . . . . . . . . . . . . . . . . . . . . . . . . . . 120
8.4.7 Generating DEXwrite Reports . . . . . . . . . . . . . . . . . . . . . . . . . . . . . . . . . . . . . . . . . . . . . . . . 121
8.5 Designing Custom Report Templates . . . . . . . . . . . . . . . . . . . . . . . . . . . . . . . . . . . . . . . . . . 122
8.5.1 Components of the Templates Management Screen . . . . . . . . . . . . . . . . . . . . . . . . . . . . . . 122
8.5.2 Selecting the Templates For Your Personal Report Library . . . . . . . . . . . . . . . . . . . . . . 123
8.5.3 Components of a Template . . . . . . . . . . . . . . . . . . . . . . . . . . . . . . . . . . . . . . . . . . . . . . . . . . . 124
8.5.4 Parameters . . . . . . . . . . . . . . . . . . . . . . . . . . . . . . . . . . . . . . . . . . . . . . . . . . . . . . . . . . . . . . . 126
8.5.5 Saving the Template . . . . . . . . . . . . . . . . . . . . . . . . . . . . . . . . . . . . . . . . . . . . . . . . . . . . . . . . 128
8.5.6 Constructing your Own Template . . . . . . . . . . . . . . . . . . . . . . . . . . . . . . . . . . . . . . . . . . . . 129
9 DEXclaim: Images as Claim Attachments . . . . . . . . . . . . . . . . . . . . . . . . . . . 131
9.1 Registration . . . . . . . . . . . . . . . . . . . . . . . . . . . . . . . . . . . . . . . . . . . . . . . . . . . . . . . . . . . . . . 132
9.2 Sending Images as Attachments with DEXclaim . . . . . . . . . . . . . . . . . . . . . . . . . . . . . . . . . 133
9.3 Assistance . . . . . . . . . . . . . . . . . . . . . . . . . . . . . . . . . . . . . . . . . . . . . . . . . . . . . . . . . . . . . . . . 136
9.4 Demo Mode . . . . . . . . . . . . . . . . . . . . . . . . . . . . . . . . . . . . . . . . . . . . . . . . . . . . . . . . . . . . . . . . 136
10 Hardware and Testing . . . . . . . . . . . . . . . . . . . . . . . . . . . . . . . . . . . . . . . . . . 137
J.1 recommended hardware specifications . . . . . . . . . . . . . . . . . . . . . . . . . . . . . . . . . . . . . . . 137
J.2 installation verification and testing . . . . . . . . . . . . . . . . . . . . . . . . . . . . . . . . . . . . . . . . . 137
11 Keyboard Use and Shortcuts . . . . . . . . . . . . . . . . . . . . . . . . . . . . . . . . . . . . . 143
12 Interfaces, Bridges, and Links . . . . . . . . . . . . . . . . . . . . . . . . . . . . . . . . . . . . 149
L.1 DEXpsp-ScanX and DEXpsp-Optime . . . . . . . . . . . . . . . . . . . . . . . . . . . . . . . . . . . . . . . . . . . . 149
L.2 DEXpan . . . . . . . . . . . . . . . . . . . . . . . . . . . . . . . . . . . . . . . . . . . . . . . . . . . . . . . . . . . . . . . . . . . 151
L.3 The Integrator . . . . . . . . . . . . . . . . . . . . . . . . . . . . . . . . . . . . . . . . . . . . . . . . . . . . . . . . . . . . . 152
DEXIS_9_EN.book Page 4 Tuesday, October 5, 2010 12:58 PM
CONTENTS
13 Administrator Functions . . . . . . . . . . . . . . . . . . . . . . . . . . . . . . . . . . . . . . . . 157
M.1 Backing Up Your Image Files with DEXsafe . . . . . . . . . . . . . . . . . . . . . . . . . . . . . . . . . . . . . 157
M.2 Control Access Permissions with DEXsecurity . . . . . . . . . . . . . . . . . . . . . . . . . . . . . . . . . 158
14 Specifications and Standards . . . . . . . . . . . . . . . . . . . . . . . . . . . . . . . . . . . . 161
15 Frequently Asked Questions . . . . . . . . . . . . . . . . . . . . . . . . . . . . . . . . . . . . . 163
16 Additional Help and Support . . . . . . . . . . . . . . . . . . . . . . . . . . . . . . . . . . . . 165
17 Index . . . . . . . . . . . . . . . . . . . . . . . . . . . . . . . . . . . . . . . . . . . . . . . . . . . . . . . . . . 1
Index
DEXIS_9_EN.book Page 5 Tuesday, October 5, 2010 12:58 PM
CONTENTS
DEXIS_9_EN.book Page 6 Tuesday, October 5, 2010 12:58 PM
1
Introduction
Chapter 1
Introduction
1.1 Welcome to DEXIS
Welcome to the exciting world of DEXIS! And thank you for your recent in-
vestment in the DEXIS Software. We hope you will have an extraordinary ex-
perience with our products and services.
Our mission at DEXIS is to develop and support the Digital Radiography
community around the world. We seek to build strong partnerships with our
doctors and their teams based on long-term, interactive relationships.
Your new DEXIS Software was designed from the outset with you, the clini-
cian, in mind. This is your tool. Learn to use it well and it will become an ef-
fective aid in your diagnosis, treatment and treatment planning process.
As with all new clinical tools, it is necessary to invest a certain amount of
time for practice in order to become proficient with the DEXIS Software.
We highly recommend that you register for in-office training with a certified
DEXIS instructor and that you and all of your clinical team set aside 4 to 6
hours to learn the system together. This manual is not intended to serve as
a substitute for this training. However, as preparation for the training, we
do encourage you to read the manual thoroughly and practice with your
equipment safely and carefully for at least one week prior to your training
date.
DEXIS_9_EN.book Page 1 Tuesday, October 5, 2010 12:58 PM
Chapter 1
2
Please note that this manual assumes that new users possess basic com-
puter skills and an understanding of the Windows® operating system. Ab-
sent this experience, we highly recommend that you obtain these skills
through a computer course, video, or textbook. Your DEXIS representative
may be able to suggest (although not endorse) one or more of these com-
puter learning resources.
Unless otherwise stated, in this manual Click refers to a single left mouse-
click. Most functions in the DEXIS software require a single left click. Erro-
neous or impatient double-clicking may cause the program to function
improperly. Also, as a general request, please give the program time to
start and complete each function before clicking again.
Let’s start your journey into the world of DEXIS Digital X-ray!
1.2 Intended Use of the DEXIS Software
The DEXIS software is a software program for general dental and maxillofa-
cial diagnostic imaging. It controls capture, display, enhancement and sav-
ing of X-ray digital images from digital imaging systems. It can also handle
other types of images acquired by digitizing film with a flat bed scanner, or
color images from intra-oral and extra-oral dental cameras.
1.3 Conventions Used in the Manual
The following conventions are used to bring the operator’s attention to im-
portant information:
Alerts the operator that failure to follow the pro-
cedure could cause bodily injury or death.
CAUTION
Alerts the operator that failure to follow the pro-
cedure could cause damage to the equipment
or cause loss of data.
Important: Provides advice for the operator regarding use
of the device or a process.
Please note: Highlights important or unusual points.
WARNING
DEXIS_9_EN.book Page 2 Tuesday, October 5, 2010 12:58 PM
3
Introduction
1.4 What’s New in Release 9
DEXvideo Video Acquisition
A new video application, DEXvideo, replaces the Live Video Screen in DEX-
image. When installed, DEXvideo starts automatically when you start the
computer. You do not have to select a patient before opening the DEXvideo
screen.
Enhanced User Interface
All text fields are now enabled to use the standard Windows functions for
Insert Mode, Copy, Cut, Paste, Home and End. Sub-dialogs have close (X)
buttons in the title bars to close the dialog and cancel the operation. Mul-
tiple file selection has been enabled on the Import Images dialog.
Improved DEXray Intra-oral Image Acquisition
Sensor model selection is available from the intra-oral X-ray acquisition di-
alog for convenience when multiple types of sensors are used. DEXray now
supports Dentrix ImageRayi sensors.
Easier TWAIN Device Acquisition
Digital pans that are supported through TWAIN, can now be integrated into
DEXray so that they are accessed through the X-ray button instead of the
Scan button. Pans accessed through the X-ray button need a DEXpan li-
cense, and do not need a DEXscan license anymore.
DEXpsp Modules for Phosphor Plate Scanners
Two new modules, DEXpsp-ScanX, for use with ScanX/VistaScan phosphor
plate scanners and DEXpsp-Optime, for use with Soredex Optime phosphor
plate scanners allow easier scanning for these models. These modules are
separate programs, which are started from DEXray.
Simplified Tooth Number Assignment
The tooth number assignment has been simplified and has been made
more intuitive to better support customers who use software plate scan-
ners and for those who have converted image databases.
DEXIS_9_EN.book Page 3 Tuesday, October 5, 2010 12:58 PM
Chapter 1
4
Angle Measurement in DEXray
An angle measurement option has been added to DEXray to calculate the
angle, or angles, when three or more points are selected on an image. The
angle measurements can be stored as part of the image.
Export Patient List
The patient list can now be exported into a text file.
DEXimplant Implant Library Expanded
The DEXimplant Implant Library has the following additions:
• Atlas: Submerged, Internal, External
• Bicon: additional sizes
• Biohorizons: External, Internal, Single Stage, Tapered Internal, One
Piece, Overdenture.
• Imtec MDI Hybrid
• M&K Dental: ixx2
• Nobel Biocare: NobelPerfect Groovy, NobelActive
• SybronPRO™ XRT
• SybronPRO™ TL
• Tiologic
Security and Privacy Features
The patient list in DEXIS Patient Administration can be hidden from view us-
ing a preference.
Recycle bin enhancements enable the setting of periodic deletions of imag-
es in the recycle bin and ad hoc emptying of the recycle bin for users with
administrator rights.
If installed, DEXsecurity allows function execution control. The right to use
DEXIS functions can be granted or denied by the administrator to individual
users or to groups of users using the Windows “Access Control List” mech-
anism.
DEXIS_9_EN.book Page 4 Tuesday, October 5, 2010 12:58 PM
5
Introduction
DEXbox Management Enhancements
The limit for the number of DEXboxes has been increased to 200 and a
scroll bar has been added to the DEXbox management dialog if more than
20 DEXboxes are present.
Resolution Modes for DEXIS Platinum Sensor
The DEXIS Platinum Sensor operates in two modes — “High Resolution”
and “Ultra Resolution.” By default, the sensor captures X-rays in High Res-
olution mode, resulting in crisp clinical radiographs at a small file size
(~100KB with DEXIS’ proprietary compression).
When desired, the option to switch to Ultra Resolution mode is readily
available by clicking the sensor button to open the Sensor Settings dialog,
then clicking the appropriate button. Capturing X-rays in Ultra Resolution
produces larger file sizes (~400KB), but can be beneficial when looking for
very fine detail by magnifying areas of concern.
DEXIS_9_EN.book Page 5 Tuesday, October 5, 2010 12:58 PM
Chapter 1
6
DEXIS_9_EN.book Page 6 Tuesday, October 5, 2010 12:58 PM
7
Installation, Care, and Maintenance
Chapter 2
Installation, Care, and Maintenance
Most telephone calls for assistance received by the DEXIS Customer Care
specialists stem from inadequate attention to hardware and software in-
stallation.
We recommend that you engage a qualified computer specialist or network
technician and develop a permanent relationship for your ongoing comput-
er needs. We understand the prospective of “saving money” by implement-
ing a seemingly more cost-effective solution; however, it is our experience
that while this may be true in the short term, such decisions are consider-
ably more expensive in the long run.
After installing and testing your software, hardware and components, we
suggest that you take the time to explore the software and read the on-
screen manual.
When calling Technical Support for assistance, please make sure that you
have access to the computer on which the DEXIS software is used and on
which the manual may be displayed. You will be instructed where to find
answers and solutions for your particular questions. This allows optimal
“over the phone” assistance.
2.1 Hardware Requirements
Our current hardware system requirements are available in the support sec-
tion on our web site www.dexis.com, from your representative, and from
our Customer Care Center. As technology changes, our requirements are
updated to reflect such changes. Please consult current DEXIS systems re-
quirements before the purchase of any hardware.
Note that systems meeting only the minimum requirements may fail to de-
liver a satisfactory experience. Systems with faster processors, more mem-
ory, and bigger, faster hard drives will significantly enhance performance.
DEXIS_9_EN.book Page 7 Tuesday, October 5, 2010 12:58 PM
Chapter 2
8
2.1.1 Operating System Platform
This software has been validated for use on the following members of the
Microsoft Windows product family of operating systems:
• Windows XP Professional (SP3)
• Windows Vista Business (SP1)
• Windows 7, 32-bit and 64-bit
Please note: For Windows 7, the 64-bit option is only available with DEXIS
software, DEXIS Platinum sensor, and DEXcam3 camera.
Do not use this software with other versions of Microsoft Windows or on
other operating systems that emulate the Windows operating system un-
less the software has been validated for use on that platform by DEXIS.
2.1.2 Caution: Hardware & Software Upgrades
Every change in hardware or software exposes your business to risk. Com-
puters containing patient records are “mission critical.” Careful consider-
ation is required in order to minimize risk before changes are made to any
system that is currently in use. Whether the change is to be made to hard-
ware, to the operating system, or to the DEXIS software, you should be pre-
pared to deal with an unexpected outcome including a catastrophic loss of
data. For this reason, we offer the following suggestions for use with mis-
sion-critical systems:
Instead of upgrading hardware or the operating system, consider purchas-
ing a new pre-configured system. Computers are amazingly inexpensive to-
day; bringing-up a new system in parallel with an existing system is a good
way to avoid placing the existing system at risk. The existing system will re-
main productive while the new system is qualified and readied for full ser-
vice. Consider the new computer as cheap insurance, but it’s even better
than insurance because you get to keep it.
If you must upgrade your existing system, consider purchasing an addition-
al hard drive and making a bootable, literal copy of the existing hard drive.
Remove the original hard drive and make the changes to the newer (and
probably larger) hard drive. With the original hard drive removed from the
computer, it is not at risk and all of your data will be safeguarded. If the new
DEXIS_9_EN.book Page 8 Tuesday, October 5, 2010 12:58 PM
9
Installation, Care, and Maintenance
changes are found to be unsatisfactory after a suitable evaluation period,
you can always re-install the old hard drive and fully restore your previous
environment.
CAUTION
Always back-up your data and store it off site. Before assum-
ing that your back-up efforts have been successful, make
sure that you understand the backup process and practice
the restore process at least once on a test system. Verify that
both the operating system and data have been preserved.
2.1.3 Diagnostic Imaging
It is in the display of images on the screen that your needs dramatically de-
part from the needs of ordinary computer users. The quality of image pre-
sentation will be important in your selection of a monitor and video card.
Carefully evaluate your selection prior to purchase. DEXIS provides the DEX-
screen program for this purpose. DEXscreen leads you through a variety of
tests that evaluate the quality and setting of the monitor. DEXscreen can be
accessed from the installation CD-ROM by clicking Test your Monitor with
DEXscreen. You can also access it from the Tools icon in DEXIS Administra-
tion.
DEXscreen is self-explaining and guides you through its menus.
Here are a few things that we have learned after many years of experience:
• Premium monitors are highly recommended. Your needs are similar to
those of a professional image scientist or a commercial photographer, so
treat yourself to the best quality.
• If cost is a concern, choose a premium CRT monitor over a low-cost LCD
monitor.
• LCD monitors must have a contrast ratio of 400:1 or better. Before pur-
chasing an LCD monitor, test its capability to display all 256 shades of
gray accurately.
• When selecting a laptop computer, choose models with LCD screens rec-
ommended for use with photographic imaging.
DEXIS_9_EN.book Page 9 Tuesday, October 5, 2010 12:58 PM
Chapter 2
10
• LCD monitors must be used in native (highest offered) resolution. Since
high screen resolution makes text and icons appear small, monitors with
high native resolution are often not the best choice.
CAUTION
LCD monitors display images accurately only when used in
native resolution; therefore do not attempt to enlarge dis-
played text and icons by lowering the resolution setting.
2.1.4 Special Hardware Requirements
DEXray
To acquire images using the DEXray software, the PC on which DEXray is in-
stalled must be connected to a sensor that has the applicable driver.
DEXimage
DEXimage requires an image source and a capture device. The quality of
the result cannot be better than the quality of the source. Expensive cam-
eras may offer higher resolution still images at low frame rates, while full-
motion video cameras may capture dozens of frames per second, but none
of them high resolution enough to allow enlargements.
Capture devices may be interfaced directly to boards installed in the back
of the computer or to interfaces such as USB. The interface you choose may
affect the performance or usability of the result. Ease of use is also impor-
tant. A product that requires the user to transfer images from camera to
computer in order to send images may be less usable than a product that
transfers images in a “hands free” fashion.
Always test your camera installation as a stand-alone device before inter-
facing to DEXimage.
A foot pedal can be used in DEXimage to start and stop the live video and
to capture still pictures. DEXimage can handle foot pedals connected to a
serial port and pedals connected to a game port. Some cameras have a
capture button that can be used instead of a serial port foot pedal.
DEXIS_9_EN.book Page 10 Tuesday, October 5, 2010 12:58 PM
11
Installation, Care, and Maintenance
DEXscan
DEXscan requires a scanner. To scan ordinary paper images, such as your
signature or office logo, a standard scanner may be used. If you intend to
scan X-ray images, a scanner with a transparency adapter is required. Be
sure to select a scanner that has an interface that is appropriate for your in-
stallation.
2.2 Hardware Installation
Please refer to the specific owner’s manuals for information on your com-
puters, printers, scanners, card readers, foot pedals, monitors, and camer-
as for installation and use. Should you need technical assistance with any
of these items, please consult the manufacturer of each specific item.
Again, we highly recommend employing the services of a factory-trained
DEXIS engineer or experienced DEXIS installer. We also recommend that
you engage a qualified computer specialist or (preferably) a network tech-
nician and create a sustainable relationship for your ongoing computer
needs.
The following hardware has been qualified with the DEXIS 9 software:
Intra-oral Sensors:
• DEXIS sensor with PC card
• DEXIS sensor with DEXusb
• DEXIS sensor with DEXbox
• DEXIS Platinum sensor
• Dentrix ImageRayi
• Gendex Visualix Gx-S/HDI
• Gendex Visualix eHD
• KaVo Dig eXam
• Schick CDR
• Kodak RVG 6000 (via Kodak Imaging)
• Kodak Trophy RVG, type 4/5
DEXIS_9_EN.book Page 11 Tuesday, October 5, 2010 12:58 PM
Chapter 2
12
Digital Pans
• Gendex Orhoralix 8500 DDE
• Gendex Orthoralix 9200 DDE
• Sirona (via JWSDX interface)
• Kodak 8000/9000 (via Kodak Imaging)
• Planmeca (via DIDAPI interface)
• Pans supporting TWAIN interface
Phosphor Plate Scanners
• Gendex DenOptix USB
• Gendex DenOptix QST
• Soredex Optime
• Air Techniques ScanX
• Dürr VistaScan
Intra-oral Cameras
• DEXIS DEXcam USB1 (DEXcam1)
• DEXIS DEXcam USB2 (DEXcam2)
• DEXIS DEXcam3
• Dentrix ImagecamHD
• Gendex eZ1
• Gendex dCam
• Gendex AcuCam Concept IV FWT (pedal needs game port adapter)
• Gendex GXC-300
• Sopro 595 USB
• Vipercard video capture card
DEXIS_9_EN.book Page 12 Tuesday, October 5, 2010 12:58 PM
13
Installation, Care, and Maintenance
2.3 Display Settings Changes
Before installing your DEXIS software, please change your display settings
to best view the DEXIS screens.
For Windows XP:
1. Go to Start, then Settings and click on Control Panel; double-click on the
Display icon to open the Display Properties screen; click on the Settings
tab at the top.
2. Under Colors: Choose True Color (24-bit or 32-bit) if available, otherwise
choose High Color (16-bit). Some older, rather slow computers with out-
dated video capture cards may limit you to 16-bit color.
3. Under Screen Area: Always choose the native (the highest offered) res-
olution. This is especially important for LCD monitors.
4. Click on Apply to apply these settings.
For Windows Vista:
1. Go to Start, click on Control Panel; click on Appearance and Personal-
ization, click on Personalization, then click on Display Settings.
2. Under Resolution: Always choose the native (the highest offered) reso-
lution. This is especially important for LCD monitors.
3. Under Colors: Choose Highest (32-bit).
4. Click on OK to apply these settings.
For Windows 7:
1. Go to Start, click on Control Panel; click on Appearance and Personal-
ization, click on Adjust Screen Resolution.
2. Under Resolution: Always choose the native (the highest offered) reso-
lution. This is especially important for LCD monitors.
3. Click on Advanced Settings, then click on the Monitor tab. Under Colors:
choose True Color (32-bit).
4. Click on OK to apply these settings.
DEXIS_9_EN.book Page 13 Tuesday, October 5, 2010 12:58 PM
Chapter 2
14
CAUTION
LCD monitors display images accurately only when used in
native resolution; therefore do not attempt to enlarge dis-
played text and icons by lowering the resolution setting.
2.4 Software Installation
Please note: If you purchased your computer through DEXIS, it will be de-
livered to you pre-loaded with software and initial information. Please go
directly to “installation verification and testing” on page 137.
Otherwise, please use the following instructions to install your new DEXIS
Digital X-ray System software, then use the verification and testing instruc-
tions in “installation verification and testing” on page 137. Following all the
instructions will ensure that your system is fully functional. The system will
be taught in the Simulation mode for all hardware not functioning at the
time of training.
Please note: Your DEXIS system must be completely installed before train-
ing can begin.
2.4.1 Installation Planning
If you plan to run DEXIS on a stand-alone computer, there is not much to
plan and you may proceed to the next section.
If you have a local area network, you need to designate a hard disk of one
of the computers to hold the DEXIS data (images and patient data). This
server disk needs to be shared so that it can be accessed (with read and
write access) from all of the computers that will be running DEXIS software
and will thus need to access the data. It has to be given a drive letter on all
participating computers. We suggest the drive letter “X” (for X-ray), and will
use this letter in subsequent examples, although any other drive letter
would be fine.
Important: If these terms are unfamiliar to you, please STOP. DEXIS highly
recommends that you contact your network professional before proceed-
ing further.
DEXIS_9_EN.book Page 14 Tuesday, October 5, 2010 12:58 PM
15
Installation, Care, and Maintenance
For a network installation, the following steps have to be performed on all
computers on which DEXIS software is to be used. Start with the server,
where the DEXIS data will be stored.
2.4.2 Running the Installation Program
To begin the installation, insert the DEXIS installation CD into your CD-ROM
drive. The CD is equipped with an Autorun feature and will start on its own.
Should the Autorun feature not work with the CD-ROM drive in your comput-
er, you can launch the installation menu manually: Double-click on the My
Computer icon on your desktop, then open the CD-ROM drive by double-
clicking on its icon, then double-click on the DEXmenu icon.
Please note: You need Administrator rights to install software. If user ac-
counts with different rights are installed on your system, please log into an
account with Administrator rights before continuing.
Select Language
If your CD offers the choice, choose English-US, if you reside in the US. All
other versions give international tooth numbers that differ from those used
in the United States. The Software Installation CD for distribution in the
United States does not offer this choice. You may select other versions on
this CD by clicking on International Versions.
Select Software
Click on Install DEXIS Software to install all the major components of the
DEXIS software.
Choose Destination Location
During the installation process you will be asked for the folder into which
the software should be installed. Typically you should accept the default
folder, which is C:DEXIS. In any event, this must be a folder on a local hard
disk, not on a network drive.
CAUTION
If this is an upgrade, please make sure to install the new soft-
ware into the same folder as the older DEXIS version. It will
DEXIS_9_EN.book Page 15 Tuesday, October 5, 2010 12:58 PM
Chapter 2
16
overwrite the existing program and will not destroy your da-
ta. Do not uninstall the older version unless requested to do
so by DEXIS Technical Support.
Select Data Directory
Next, you will be asked where you would like to store DEXIS data. Typically,
this will be C:DEXISData for a non-networked computer. On a network,
this will be C:DEXISData on the server and X:DEXISData (or DEXISData
on any other drive) on the client workstations.
Please note: If you installed DEXIS on the server first and mapped the drive
properly, the correct shared data folder will be automatically suggested by
the installation program.
Follow the on-screen directions until DEXIS is successfully installed.
During the installation you might receive a message telling you that the
software being installed did not pass Windows Logo test. In this case,
please choose the option Continue Anyway.
Install DEXvideo - Intra-0ral Camera
DEXvideo works with your intra-oral camera. When installed, it starts when
your computer is started so that the intra-oral camera is always ready for
use without the need to select a patient.
Click on DEXvideo — Intra-oral Camera to install the DEXvideo software.
During the installation process you will be asked for the folder into which
the software should be installed. Typically you should accept the default
folder, which is C:DEXIS. In any event, this must be a folder on a local hard
disk, not on a network drive.
Install Additional Software
Install other software only as it applies to your practice and purchased
modules. Please call DEXIS Technical Support for assistance.
If this is an upgrade from a previous version, the installation program will
automatically upgrade all installed DEXIS components.
DEXIS_9_EN.book Page 16 Tuesday, October 5, 2010 12:58 PM
17
Installation, Care, and Maintenance
2.4.3 Sharing Data Between Disconnected Systems
In some cases two image databases on separate systems need to be main-
tained, that should contain the same data. For these cases DEXIS provides
DEXsync, a program that allows for the synchronization of two image data-
bases. Use DEXsync for the following configurations:
• Two stand-alone laptop computers are used for acquiring X-rays; no of-
fice network is installed. You want to look at all X-rays on both laptops.
• A laptop computer is used for acquiring images while it is not connected
to the office network.
• You have two separate office networks which should both hold the data
of all patients.
CAUTION
Please contact DEXIS Technical Support for assistance with
the installation of DEXsync. This is especially important if
you have existing image databases that need to be restruc-
tured. Always back up your image data before starting any re-
structuring or merging operation.
2.4.4 Adding Initial Information
Once DEXIS is installed you will find a DEXIS icon on your desktop.
Please note: The Specialty Preference Setting is only applicable for the
USA version of DEXIS.
To initiate the DEXIS Administration program, double-click on this icon. A
Preference Setting window will appear asking you to select your specialty.
Click on the appropriate button. You can change this selection later on the
General Preferences tab, see “Speciality” on page 25.
Next, a window will appear asking for your practice name. This information
must be entered carefully and accurately as it will appear on all printed
items. Click OK when done.
Next, you will be asked to enter your telephone number. Type it in and click
OK.
DEXIS_9_EN.book Page 17 Tuesday, October 5, 2010 12:58 PM
Chapter 2
18
Now, you will be asked to enter a new patient. For setup and test purposes,
enter a test patient. Type in a number (such as “1”), a last name (such as
“Test”), and a first name (such as “Tim”). Click Done. You will now have full
view of the DEXIS Administration screen, and patient’s name, Tim Test, will
appear on the screen.
For network systems, this initial information should now be accessible
across the network and will not need to be added to each workstation.
Please note: If linked to a practice management program, all patients must
be added through your practice management program. However, you may
add a test patient directly into DEXIS Administration (see above) to be de-
leted after testing. Alternatively, you may add a test patient within your
practice management program or choose to use an existing patient’s file
with which to practice. For systems where the DEXIS Integrator software is
an option, instructions for the use of DEXIS-provided links is provided in
the appendix.
2.4.5 Obtain Registration Codes
From the DEXIS Administration screen, click on the Wrench icon and then
click on Component Licensing. Call DEXIS Technical Support for registration
codes for your purchased modules. One of our technical representatives
will walk you through the process.
When you click on the button next to the component name or upon opening
a DEXIS module that needs a separate license, you will be asked to register.
You may choose Later and this way try the module for 30 days. For a preview
of non-registered modules, click on the Show Introduction to... button.
Please note: Introductions are not present for all modules. If there is no in-
troduction for the module you are trying to register, the button is not shown.
For network systems, you may obtain registration codes on any one work-
station for the entire network.
Should you wish to make changes to your practice name or telephone num-
ber you will need to re-register your programs.
Your DEXIS installation is now complete.
DEXIS_9_EN.book Page 18 Tuesday, October 5, 2010 12:58 PM
19
Installation, Care, and Maintenance
2.5 Regular Backups of Image Files
It is extremely important to back up your data on a regular basis as a matter
of routine maintenance. DEXIS offers DEXsafe, a one-step feature to copy
all or part of your DEXIS data to a specific backup drive. Please see our sys-
tem requirements for recommendations on devices. Instructions for using
DEXsafe are found in “Administrator Functions” on page 157.
DEXIS_9_EN.book Page 19 Tuesday, October 5, 2010 12:58 PM
Chapter 2
20
DEXIS_9_EN.book Page 20 Tuesday, October 5, 2010 12:58 PM
21
The DEXIS Administration Program
Chapter 3
The DEXIS Administration Program
The DEXIS Administration program is the starting point for all stand-alone
versions of the DEXIS Digital X-ray System. All other DEXIS programs (in-
cluding DEXray, DEXimage, DEXwrite, etc.) are accessed through this pro-
gram after first selecting a patient or creating a new patient.
In addition, this program is the starting point for setting up various global
Preferences or default settings with regard to your office and clinical team
members (Providers). Other preferences control the look and feel of the
DEXIS program and automate certain frequently used functions.
DEXIS owners who choose to set up their DEXIS programs to interface di-
rectly with their practice management programs will use the DEXIS Admin-
istration program much less frequently (primarily to set global preferences)
as they will select their patients from the equivalent screen in the practice
management program.
3.1 DEXIS Administration Screen Overview
To open the DEXIS Administration screen, double-click on the DEXIS icon on
your desktop.
You may apply certain Windows functions to this screen. You may size the
screen using click-and-drag. You may also use the three buttons in the up-
per right to minimize the screen (thus sending it to the task bar — click the
tab to bring it back up), maximize or restore a screen, or close a screen.
You may also use the following standard Windows functions in any field
where text can be entered:
• Toggle between insert and replace modes using the Insert key on the key-
board. Insert mode is the default.
• Move the cursor to the beginning of the line (Home key) and end of the
line (End key).
DEXIS_9_EN.book Page 21 Tuesday, October 5, 2010 12:58 PM
Chapter 3
22
• Copy (Ctrl-C), Cut (Ctrl-X), and Paste (Ctrl-V) text.
There are icons across the top of the screen for various functions. When en-
tered, a list of patients will appear on the right side of the DEXIS Adminis-
tration screen. A patient search field, alphabet keys, buttons to access
patient information, and Referring Dentists are on the left side of the
screen. If entered, patient pictures are visible in this area.
Place your cursor over any of the icons and buttons and a help bubble,
called a Tooltip, will appear with information about the function. Often,
there is also a keystroke that will execute the function. The Tooltip help fea-
ture is available throughout the DEXIS system.
There are up to five program icons that appear on the upper left area of the
DEXIS Administration screen: The first leads to the DEXray X-ray screen, the
second to the DEXimage screen, the third leads to DEXwrite, the fourth
leads to DEXclaim, and the fifth closes DEXIS Administration. It is possible
for you to choose to hide certain icons. See “Component Licensing” on
page 23 for details.
Click on the DEXIS logo icon on the far right to open the Program Informa-
tion screen. This screen offers program information and will allow you to ac-
cess the Context Sensitive Help feature and the DEXIS web site.
The Help Feature
Click on the Help button and your cursor gains a “?” symbol. Now, click on
a feature or icon and the DEXIS on-screen manual will open in an Acrobat
Reader screen to the page where the use of the function is described. You
may zoom in on the screen shots to see more detail.
Click on DEXIS Web Site to open the site in your browser if you are online.
Click OK to close the Program Information screen.
3.2 Setting General Preferences
The Wrench icon opens Tools and Preferences where a variety of informa-
tion is entered, accessed, and/or changed.
Click on the General tab to access and set the following:
DEXIS_9_EN.book Page 22 Tuesday, October 5, 2010 12:58 PM
23
The DEXIS Administration Program
Component Licensing
Click on the Component Licensing button to open the Component Licensing
screen: This area shows your practice name and phone number and is the
information with which you license the use of DEXIS. You must obtain a reg-
istration code for each of your purchased modules. To obtain a code, go to
this screen and call Technical Support. Should you decide to change your
practice name or phone number, you will need to re-register. To hide icons
for non-purchased modules, you may choose the Hide button next to each
component.
Format
DEXIS stores the images in one of three image file formats: the proprietary
DEXIS format, a compressed format; uncompressed TIFF, helpful if your
practice management program is to directly access the images; DICOM, a
universal digital format for medical and dental imaging being standard in
hospital environments. The default and recommended format is DEXIS.
When exporting images you still can choose a different format, the DEXIS
software will convert the images for you.
Intra-oral X-ray Size, Panorama X-ray Size, Color Image Size
You can set the sizes of enlarged intra-oral X-rays, panorama X-rays, and
color images in percent of the screen width. The defaults are 50% for intra-
oral X-rays, 100% for panorama X-rays, 70% for color images.
Address Text, Report Text
Place the practice address in Address Text, up to 5 lines. Choose Done to
save or Cancel to cancel changes. This information appears on your print-
outs.
Report Text offers a basic letter. Change the letter here for the default — it
can be adapted for each printout. The referrer (w/o address), patient, date
and provider will merge — no other information is available for merging.
The letters created from DEXray, unlike DEXwrite, are not saved and there-
fore not editable.
DEXIS_9_EN.book Page 23 Tuesday, October 5, 2010 12:58 PM
Chapter 3
24
Navigator
Check the selection box to show the Navigator when an X-ray is enlarged.
Folders
Click on the arrow button to have DEXIS search for possible DEXIS database
folders and to select from the list.
Initials
You may place initials into this field, which are then proposed when delet-
ing X-rays. This is useful if the system is always being used by the same per-
son. She/he then need not put in the initials each time she/he deletes an
X-ray.
Tooltip Delay
The number in the box is the delay in milliseconds before the Tooltip bub-
ble appears. Choose between 0 and 9999. By choosing 0, Tooltip will not
appear.
Hide Images Exceeding
You may enter the number of images to be displayed on the DEXray and
DEXimage screens. When the number of images exceeds the entered num-
ber, images are hidden by consultation from oldest to newest. In other
words, all images from a consultation will be shown even if the total num-
ber of images from that consultation exceeds the number specified. For ex-
ample, given the following sets of images:
4 X-rays from 13 April 2009
12 X-rays from 30 September 2008
8 X-rays from 1 January 2008
If the Hide Images Exceeding field is set to 1, all images will be hidden ex-
cept those from the 13 April 2009 consult.
If the Hide Images Exceeding field is set to 10, all images will be shown ex-
cept those from the 1 January 2008 consult.
DEXIS_9_EN.book Page 24 Tuesday, October 5, 2010 12:58 PM
25
The DEXIS Administration Program
To unhide images, click on the Archive button in either the DEXray or DEX-
image screen, and select the images to be made visible. See “The Image Ar-
chive” on page 68.
Print/Export System Info
Should you have technical issues, DEXIS Technical Support may ask you to
send information about your computer and the DEXIS installation.
These two buttons issue this information. It is either printed or written to a
text file on your desktop. The file can be viewed, printed, or sent by e-mail.
Comm Folder
This is the default folder for importing and exporting images. The DEXIS Set-
up sets it to the subfolder Comm of your data folder. You may want to
change it if you frequently exchange images with another program that ex-
pects them in a different location.
Speciality
Selecting one of the specialties will initialize preference settings as mostly
used by dentists of the selected specialty. Of course, you may change the
individual settings one by one according to your needs, see also “Setting
DEXray Preferences” on page 38.
• General: Set Startup View to Mouth.
• Perio: Set Startup View to Mouth.
• Endo: Set Startup View to History.
DEXscreen Monitor Test
Monitors are crucial system components, see “Diagnostic Imaging” on
page 9. By clicking this button you open DEXscreen, the DEXIS monitor test
program, that displays various test patterns to help you evaluate the suit-
ability of your monitor and monitor settings.
DEXIS_9_EN.book Page 25 Tuesday, October 5, 2010 12:58 PM
Chapter 3
26
On 2nd Monitor
This button is for two monitor setups that allow you to move windows be-
tween the two monitors (needs a special display adapter). If the button is
checked, the DEXray and DEXimage screens will be shown on the second
monitor, and the DEXIS Administration screen can be moved to either mon-
itor. The DEXIS Administration will remember its position and will show up
on the monitor where it has been left.
3.3 Setting Administration Preferences
In Tools and Preferences, click on the Administration tab to access and set
the following:
Patient IDs
Should you wish to give your patients specific numbers, choose Manual.
DEXIS will automatically assign a unique number to each patient if you
choose Automatic. If you use a practice management program we recom-
mend using manual numbering and entering the IDs issued by that soft-
ware. If your practice management program is linked to DEXIS, Manual
must be selected.
DEXIS defaults to Manual upon installation.
DEXIS_9_EN.book Page 26 Tuesday, October 5, 2010 12:58 PM
27
The DEXIS Administration Program
Providers
Click the Providers arrow to open the Provider Selection screen and view
the list of providers for the practice. A search field is located at the top of
the screen. To use the search function, type the first few letters of the pro-
vider’s name until the name appears.
To add a new provider, click New to open a blank Provider Data screen. Type
the last name; DEXIS will capitalize the first letter. Use the tab or arrow key
to go to the next line and add a first name. Again, DEXIS will capitalize the
first letter. Add any other information as desired, including the provider’s
practice management number or letters under Ref.#/Initials. Individual pro-
vider logos for use with DEXwrite can be captured with a scanner using the
Acquire Logo button. See “DEXscan: Scanned Images” on page 99 for scan-
ning instructions. Delete the current logo for this provider by clicking the
Delete Logo button.
Click Done to save or Cancel to cancel.
To modify information for an existing provider, search for the name, click on
the name to highlight the line, and then click Modify to open the Provider
Data screen for that particular provider. Alternatively, you may double-click
on the name to open this screen. Tab or arrow down to make changes.
To delete a provider, click on the name to highlight the line, then click De-
lete. The provider will no longer show on the list; however, patients at-
tached to this provider will still show the providers name on their Patient
Data screens until another one is selected.
Signatures and Logos
These items are used to scan signatures and the practice logo for use with
DEXwrite. You may also access these functions from DEXwrite Preferences;
see “Setting DEXwrite Preferences” on page 114. See also “Scanning a Sig-
nature or Logo” on page 104.
Single Patient on Screen
If this option is chosen, all DEXray and DEXimage screens are automatically
closed when a new one is opened. Selecting this option is recommended
so that images are not entered by mistake into the wrong patient’s file.
DEXIS_9_EN.book Page 27 Tuesday, October 5, 2010 12:58 PM
Chapter 3
28
Larger Font
Select the Larger Font box to increase the size of the font on the patient list.
This change takes effect after first closing and then reopening DEXIS. Upon
installation, the font defaults to the larger size.
Patient List Hidden
If this option is chosen, the patient list is hidden on the DEXIS Administra-
tion screen. The patient list will only show when characters are typed into
the Patient text field. You are prompted to exit and restart the DEXIS pro-
gram for the preference to take effect. Click OK on the dialog. Close and re-
start DEXIS.
Delete Image Automatically from Recycle Bin
When images are deleted, they are kept in a recycle bin. You can select this
option to automatically delete images in the recycle bin and specify the
number of days before they are deleted (30 days is the default).
Empty Recycle Bin
This option is only available to an administrator.
Rebuild Index
If you experience a loss of database information, DEXIS Technical Support
will use this feature to help you rebuild the database. Please do not use this
feature without assistance.
DEXray and DEXimage Preferences
Each screen has its own preferences and defaults. You may access the pro-
grams’ preferences here or from their actual screens. Please see “Setting
DEXray Preferences” on page 38 and “Setting DEXimage Preferences” on
page 85.
DEXIS_9_EN.book Page 28 Tuesday, October 5, 2010 12:58 PM
29
The DEXIS Administration Program
3.4 Entering Patient Data
The patient list is shown on the main DEXIS Administration screen. You may
use the scroll bar to the right to search for a patient. The search field for pa-
tients is located in the top left side of the main screen. Type the first few let-
ters on the patient’s name until the name is visible. Instead of typing, you
may click on the letter buttons. To select a patient, click on the name; the
line then becomes highlighted.
To add a new patient, click the New Patient button to open a blank Patient
Data screen. Type a number, if applicable. Tab or arrow down to the next
line. Type the last name; DEXIS will capitalize the first letter. Tab or arrow to
the next line and add a first name. Again, DEXIS will capitalize the first let-
ter. Add any other information as desired. The Date of Birth may be entered
in different formats: with slashes (M/D/YYYY), with dashes (D-M-YYYY), or
6-digit no dashes, spaces or slashes (MMDDYY).
Choose a provider by clicking on the arrow button next to Provider. This will
bring up the Provider Selection screen. Click on the name to highlight the
desired provider, and then click Select.
Choose a referring doctor by clicking on the arrow button next to Referrer.
This will bring up the Referrer Selection screen. Click on the name to high-
light the desired name and then click Select.
Use New Picture to insert a patient’s picture via scanner or digital camera.
This is covered in detail in “Scanning a Picture for Patient Data” on
page 103 and “Taking Digital Photographs” on page 87. Delete the current
picture for this patient by clicking the Delete Picture arrow button. Click
Done to save or Cancel to cancel.
To modify information for an existing patient, search for the name and then
click on the name to highlight the line. Click Modify to open the Patient Data
screen for that particular patient. Tab or arrow down to make changes.
Modification of the patient number is a special case: you may freely change
the number to one that is not yet given to another patient. You may change
DEXIS_9_EN.book Page 29 Tuesday, October 5, 2010 12:58 PM
Chapter 3
30
the patient number to a number already in use only if the names of both pa-
tients are the same.
To delete a patient file, click on the name to highlight the line and then click
Delete. As a security feature, all images must be deleted before the patient
file can be deleted.
Once a patient is added or selected (the line will be highlighted), click the
appropriate icon to proceed to his or her DEXray, DEXimage, DEXwrite, or
DEXclaim screen. A light appears under the DEXray and DEXimage icons if
there are images in the programs for this patient. Alternatively, you may
double-click on the patient’s name to open a screen. However, since DEXIS
remembers the last screen opened (DEXray, DEXimage or DEXwrite) for the
last patient, this is the screen that will open for your newly chosen patient.
Please note: If you are using a DEXIS/practice management link, enter all
new patients through your practice management program and NOT on the
DEXIS Administration screen. See “The Integrator” on page 152 for more in-
formation.
DEXIS_9_EN.book Page 30 Tuesday, October 5, 2010 12:58 PM
31
The DEXIS Administration Program
3.5 Administrative Tools
Referring Dentists
Referring dentists need to be entered and matched to patients if DEXwrite
is used to write letters to them. Click on the Referring Dentist button to see
the list of referring dentists. This opens the Referrer Selection screen. A
search field is located at the top of the screen. To use the search function,
type the first few letters on the referrer’s name until the name is visible.
To add a new referring doctor (or a doctor or company to whom you refer or
correspond), click New to open a blank Referrer Data screen. Type the last
name; DEXIS will capitalize the first letter. Tab or arrow to the next line and
add a first name. Again, DEXIS will capitalize the first letter. Add any other
information as desired.
Click Done to save or Cancel to cancel.
To modify information for an existing Referring Dentist, search for the
name, click on the name to highlight the line. Click Modify to open the Re-
ferrer Data screen for this particular individual. Alternatively, you may dou-
ble-click on the name to open this screen. Tab or arrow down to make
changes.
Again, click Done to save or Cancel to cancel.
To delete a Referring Dentist, click on the name to highlight the line, then
click Delete. The referrer will no longer show on the list, however, patients
attached to this referrer will still show the name on their Patient Data
screens until another one is selected.
Print Reports
The Print Icon allows to print and export reports containing various data:
Print Patient List
This feature prints a list of patients in alphabetical order with patient num-
ber, date of birth, gender, and provider number.
DEXIS_9_EN.book Page 31 Tuesday, October 5, 2010 12:58 PM
Chapter 3
32
Export Patient List
This feature exports the patient list into a text file. The text file contains one
line per patient, with the following tab-separated fields: ID, last name, first
name, middle initial, date of birth, gender, and provider.
Print Provider List
This feature prints a list of providers showing the provider name, DEXIS
number, and practice management number.
Print Referring Dentists
This feature prints a list of referring dentists showing each doctor’s name,
address, phone number, and DEXIS number.
Print Activity Report
This feature prints a list of patients and images taken for them over a se-
lected time period. This list also shows deletions plus initials used for each
deletion. Additionally, it shows the source of each image (i.e., imported,
scanned, etc.).
Export Activity Report
You may also choose to export activity information to a file. This file has one
line per activity. The lines contain fields separated by tabulator characters.
The format is suited for import into other software such as spreadsheet pro-
grams.
Print Queued Letters
When you chose to put a DEXwrite letter into the queue for later printing
(see “Queue” on page 118), this button will appear on the DEXIS Adminis-
tration screen. The function shows a list of all letters in the queue and en-
ables you to print all letters, to print just selected letters, or to delete letters
from the queue.
DEXIS_9_EN.book Page 32 Tuesday, October 5, 2010 12:58 PM
33
The DEXIS Administration Program
Import from Communication Folder or from Temporary Folder
An additional Import icon will appear in the tool bar in two cases:
• The communication folder (set in Tools & Preferences, see “Comm Fold-
er” on page 25) contains images.
• Images are present in the folder used for temporary storage on the local
hard disk of newly acquired images.
If you click on that icon, a list with information about each image will be
shown: file name, date, patient name, and tooth number.
If you double-click on an image entry, the respective patient file will be se-
lected. If the patient file does not yet exist, the New Patient screen will ap-
pear with all known information already entered. When you now open the
DEXray or DEXimage screen for this patient, the Import dialog will show up
automatically.
This mechanism allows for the easy transfer of images between locations if
the sending dentist A and the receiving dentist B both have a DEXIS system:
1. Dentist A sends X-rays of patient P by e-mail or on a disk to dentist B.
2. Dentist B opens the X-rays with DEXview and selects Export to DEXIS.
This will put the X-ray into the communication folder of his DEXIS instal-
lation.
3. Dentist B selects patient P either manually or by clicking on the Import
button in DEXIS Administration.
4. Dentist B opens the DEXray screen for patient P; the Import dialog
shows up automatically and allows him to import the X-ray.
The mechanism also allows for convenient transfer of images between two
DEXIS databases on the same network. In this case, the Communication
Folder entries of both installations should point to the same folder. X-rays
can then be exported from one database, and semi-automatically imported
to the same patient in the other database.
DEXIS_9_EN.book Page 33 Tuesday, October 5, 2010 12:58 PM
Chapter 3
34
3.6 Interfacing with Practice Management Programs
Links are available between DEXIS and most practice management pro-
grams (PMP) on the market that contain chairside modules. These links are
in some cases provided by the PMP company based on information from
and in cooperation with DEXIS. For other PMPs, DEXIS has programmed
links based on information from the PMP company. Please ask your DEXIS
representative what is applicable in your case.
The innovative Integrator™ software represents the next generation in the
seamless integration of DEXIS digital imaging software with practice man-
agement programs. It is available for all DEXIS provided links. The Integra-
tor™ displays preview thumbnails of all available radiographic and
photographic images in a floating window that is automatically synchro-
nized with the record of the selected patient for immediate one-click ac-
cess, see “The Integrator” on page 152.
If your PMP does not yet interface with DEXIS, we will be happy to provide
the necessary information. It is usually a minor task to implement the link.
If you have a PMP in your office but plan to implement the link only later,
you should use Manual Numbering in the DEXIS Administration and use the
chart numbers of your PMP as DEXIS patient IDs. This makes a link easier to
implement later on.
DEXIS_9_EN.book Page 34 Tuesday, October 5, 2010 12:58 PM
35
DEXray: X-ray Images
Chapter 4
DEXray: X-ray Images
The DEXray program is the main software application for acquiring, storing,
displaying and sharing Digital X-ray images. It is accessed via the DEXIS Ad-
ministration program, directly from all the major practice management pro-
grams, or from any of the other main DEXIS programs.
DEXray is a sophisticated piece of software that has been carefully de-
signed and developed to be simple and quick to learn and intuitively easy
to use. It is possible to shoot your first X-ray within minutes of initial setup.
All unnecessary keystrokes have been eliminated to ensure that attention
is focused on the patient, not on the computer, while an X-ray image is be-
ing taken. Information about the patient, provider, tooth number, date and
exposure settings are automatically captured at the click of the radiation
button.
Despite its ease of use, DEXray is enormously powerful in its capabilities.
Icons and function buttons enable the user to move, size, enhance, mea-
sure, save, and compare images with just a click and/or drag of the mouse.
There are many shortcuts and timesaving tools in DEXray, more than ap-
pear in this manual. Typically, there are 2–3 methods for achieving any de-
sired outcome. For users who invest enough time in learning or discovering
the shortcuts, tricks, and tools, DEXray will become an invaluable and high-
ly productive addition to the dental practice.
4.1 DEXray Screen Overview
To open the DEXray screen, select a patient on the DEXIS Administration
screen and click on the DEXray icon. If you use a link to a practice manage-
ment program, the method for opening the DEXray screen depends on the
program in use.
You may apply certain Windows functions to this screen. You may size and
move the screen using click-and-drag.
DEXIS_9_EN.book Page 35 Tuesday, October 5, 2010 12:58 PM
Chapter 4
36
Screen size and position changes are remembered in the DEXIS system.
When the screen is changed to this size, closed and reopened for the same
or another patient, it appears in the same size and position as when last
viewed.
You may also use the three buttons in the upper right to minimize the
screen (thus sending it to the task bar — click the tab to bring it back up),
maximize or restore a screen, or close a screen.
The patient information is shown in the header bar; function icons are lo-
cated across the top of the main window. Place your cursor on any of the
icons and buttons and a help bubble, called a Tooltip, will appear with in-
formation about the function. Often, there is also a keystroke that will exe-
cute the function. The Tooltip help feature is available throughout the
DEXIS system.
The screen is divided into four quadrants. The midline’s teeth numbers ap-
pear in the center of the screen distinguishing the location of each quad-
rant.
The DEXIS Logo icon gives access to program information, DEXray Prefer-
ences, Help, and DEXIS web site, see “DEXIS Logo Icon” on page 54.
On the right of the DEXray screen is the Presentation Panel, see “Presenta-
tion Panel” on page 47.
DEXIS_9_EN.book Page 36 Tuesday, October 5, 2010 12:58 PM
37
DEXray: X-ray Images
4.2 Taking Your First Digital X-ray
Click on your test patient in DEXIS Administration and click on the DEXray
icon: the intra-oral screen of the DEXray program will open. You are now
ready to take your first digital X-ray image!
WARNING
Please do not take your first X-ray on a person! Instead, put
the sensor on a counter or table, flat side up; put a metal ob-
ject on top of it — a key, coin, or your favorite dental instru-
ment; aim the X-ray tube over the object, pointing down and
about an inch (2 cm) away.
Type “X” on your keyboard to open the Intra-oral X-ray Acquisition screen —
it looks like a tooth chart!
Select a tooth from the chart. Yellow, then green bands will appear on the
tooth chart.
Leave the room, lower the setting by 50%, and trigger the tube.
Your first digital X-ray will appear on the screen after a few seconds!
DEXIS_9_EN.book Page 37 Tuesday, October 5, 2010 12:58 PM
Chapter 4
38
4.3 Setting DEXray Preferences
You may access the DEXray preferences in two ways:
From DEXIS Administration, click on the Wrench icon to open Tools and
Preferences; click on the DEXray tab.
From a patient’s DEXray screen, click on the DEXIS logo to open the Pro-
gram Information screen; select Preferences; click on the DEXray tab.
Sensor
Select No Sensor for workstations where X-rays will NOT be taken, DEXIS for
workstations where X-rays are taken, and Simulation to have DEXIS simu-
late taking intra-oral X-ray images. Other choices may be available for addi-
tionally purchased modules.
X-ray Series
When taking a series of X-rays, DEXIS automatically advances from one po-
sition to the next once radiation is detected. This method lets you take a se-
ries without having to touch the computer in between.
You can use the sequences already in the system or set up your own se-
quence, up to four in total per computer. To see the three sequences al-
ready placed into DEXIS, click on X-ray Series. Please note: For a Full Mouth
series, DEXIS uses a sequence that affords the fewest changes of the hold-
ers.
You may edit or overwrite the existing series. However, each group of tooth
numbers, such as seen under Full Mouth 1–3 3–5…, refers to a certain po-
sition on the screen. Click on the boxes showing the tooth numbers for
each existing series. Use the arrow keys to move through this box and take
note of these groups of numbers. It is highly suggested that you use the
same groups of tooth numbers to set up your own series sequence to keep
your images from overlapping on the screen.
To set up your own series, click in a box under Name and give your series a
name. Next, under Teeth, type a beginning tooth number for each image in
your series, then a hyphen, then the ending tooth number, then a space,
and so on. The space lets DEXIS know that you are moving to the next image
of your series.
Choose Done to save or Cancel to cancel.
DEXIS_9_EN.book Page 38 Tuesday, October 5, 2010 12:58 PM
39
DEXray: X-ray Images
Sensor Settings
You may assign a certain color to a specific sensor by first choosing the sen-
sor’s number from the drop down box under Current Sensor, and then click-
ing on the desired color in Color Coding. This is helpful if you have multiple
sensors in your office: Mark the sensors with different colors and enter the
colors here. The sensor selection buttons on the Intra-oral X-ray Capture
screen will then show the same colors.
The following settings are for the DEXIS Platinum sensor only:
• High Resolution (default): produces diagnostic radiographs with a small
file size (~100KB with DEXIS’ proprietary compression)
• Ultra Resolution: produces maximum resolution diagnostic radiographs
with a larger file size (~400KB), which can be beneficial when looking for
very fine detail by magnifying areas of concern
You may remove a sensor from the list by choosing the number in Current
Sensor and clicking Remove Sensor.
Please call DEXIS Technical Support before changing Integration Time or
Trigger Method.
Click Done to save changes and Cancel to cancel.
Digital Panorama
Click on the down arrow to display a list of installed digital panorama
equipment. Select the brand to be used; “--” for no pan, or Simulation for
simulation mode. If “--” is selected, the acquisition button will not be
shown.
Scanner
Click on the down arrow to display a list of installed scanner drivers. Select
the brand to be used; “--” for no scanner, or Simulation for simulation
mode. If “--” is selected, the scan button will not be shown.
Frame Removal
This feature controls how scanned X-rays are to be handled: set to 0 for nor-
mal flat bed scanners to enable automatic cropping of intra-oral X-rays; set
to 1 for single-film scanners — automatic cropping is then disabled; set to
some value between 2 and 7, if the single-film scanner produces black edg-
DEXIS_9_EN.book Page 39 Tuesday, October 5, 2010 12:58 PM
Chapter 4
40
es or frames. Start with 2, scan a test X-ray, and increase the value if the
frame is not reliably removed. You need to select the scanner before setting
this value.
Background Color
Click on the down arrow to choose a background color for the main window.
Startup View
Choose the Startup View, to select the view you initially want to be visible
when DEXray opens for a new patient. Mouth refers to intra-oral images in
the mounted view; History refers to intra-oral images in chronological or-
der; Pano refers to panoramic or cephalometric images. The Startup View
selected will be the initial view for all new patients; to change the view for
an individual patient, see “The Image Archive” on page 68.
5 Anterior FMS
Choose 5 Anterior FMS to have the screen accommodate 5 anterior images
instead of 3 per arch.
Shown BW Series
Choose the number of bitewing series that you want the software to show
non-overlapping. Leave the field empty if you want to see as many bitewing
series as fit. See “Selection and Navigation” on page 43.
Flipped View
Choose Flipped View to have the patient’s X-rays shown in inside-out view,
so that the right images appear on the right side of the screen.
ClearVu Mode
Select which mode of the ClearVu image enhancement you prefer. Ad-
vanced is usually best suited for all cases: detecting caries and fractures as
well as examining bone structures and ligatures. Classic is still mentioned
for compatibility reasons.
DEXIS_9_EN.book Page 40 Tuesday, October 5, 2010 12:58 PM
41
DEXray: X-ray Images
Auto-Contrast
Check the selection box to have all X-rays appear in contrast mode when
initially shown.
Record Measurement
Select the results of which type of measurements you want to record as im-
age notes: all types of measurements, canal measurements only, or no
measurements at all. Whenever you carry out one of the selected measure-
ments, you will be asked whether to transfer the result to notes, see “Mea-
surement on Images” on page 57.
Length of RC File
Set the proposed length of the file to be displayed in Canal Measurement,
see “Endodontic Measurement” on page 59.
Once you added to or changed items in DEXray Preferences, choose Done
to save changes, Cancel to cancel changes.
4.4 Taking X-ray Images with Intra-oral Sensors
Please note: This section applies to the acquisition of images with an intra-
oral sensor. If you use a phosphor plate scanner, see “DEXpsp-ScanX and
DEXpsp-Optime” on page 149.
Click on the X-ray capture icon or type “X” on your keyboard. This will open
the Intra-oral X-ray screen. If applicable, choose the appropriate sensor
from the sensor selection list. This list contains all applicable sensors that
are installed on the workstation. The sensor selected remains the default
setting until you change it.
Please note: You need to be in the patient’s intra-oral X-ray screen to ac-
quire intra-oral X-rays. If the extra-oral X-ray screen is your current screen,
the X-ray capture icon will start acquisition of a pan or ceph instead.
4.4.1 Taking an Individual Image
Click on the desired tooth or range of teeth on the chart, or type the tooth
number and press the Enter key. The tooth will be highlighted in gold and
DEXIS_9_EN.book Page 41 Tuesday, October 5, 2010 12:58 PM
Chapter 4
42
green bands will appear (think of this as “green means go”). Also, a mes-
sage will display, Trigger the X-ray tube.... You have up to 10 minutes to
take your image. After 10 minutes, you will receive a timed-out message. If
this happens, you need to bring up the Intra-oral X-ray screen again as de-
scribed above to restart the process. When you re-enter this screen, DEXray
remembers the tooth number last chosen. Click Start or press the Enter key
to receive your green bands.
Now, position the sensor in the patient’s mouth, position the cone close to
the face and expose the sensor as you would with film. Once radiation is
detected, the sensor will capture the X-ray and the enlarged image will ap-
pear on the screen.
4.4.2 Repeating an X-ray
If you want to take an X-ray of a tooth (or range of teeth) for which you al-
ready have an X-ray, enlarge the existing X-ray then click on Repeat X-ray in
the Navigator box or type “Y” on your keyboard. This will open the Intra-oral
X-ray screen with the tooth selected and automatically prepared to take an-
other X-ray.
4.4.3 Taking a Series of Images
From the Intra-oral X-ray screen, choose the desired series. The first range
of teeth programmed into the series will be highlighted. Now, position the
sensor in the patient’s mouth to X-ray the highlighted teeth and expose the
sensor. Once radiation is detected, a thumbnail (preview) of the image will
appear on the Intra-oral X-ray screen. DEXray will highlight the next image
area and will show green; your computer is ready to receive the next X-ray
of the series.
Please note: It is not uncommon for the thumbnail to appear upside down.
Remember, it is only a preview.
If you are not satisfied with your image you can use the Back button on the
lower right of the screen to retake the image. If you want to skip forward to
a different image area, use the Next button. Please note: You will not need
to return to the computer for the duration of the series unless you want to
retake or skip areas.
DEXIS_9_EN.book Page 42 Tuesday, October 5, 2010 12:58 PM
43
DEXray: X-ray Images
When the series is complete, the X-rays will appear as if in a mount. That is,
DEXray will automatically mount your images for you.
For programming your own series, see “X-ray Series” on page 38.
4.4.4 One Tooth Series
Endodontists often have the need to take several X-rays of the same tooth.
You can do that without touching the computer in between by selecting One
Tooth Series when taking the first X-ray. If this button is selected the soft-
ware will automatically prepare the sensor to take the next X-ray as soon as
one has been taken and is shown on the screen. You cancel out of this loop
by clicking Cancel or by closing the DEXray program.
Please note: Since the sensor is always prepared to take the next X-ray, do
not remove the sensor while in One Tooth Series mode.
4.5 Image Management Tools
You may control all functions in the DEXIS software by mouse-click or key-
board, whatever is more convenient for you. The Tooltip bubbles will give a
short description and keystroke for each item. There is a complete listing of
keystrokes in “Keyboard Use and Shortcuts” on page 143.
4.5.1 Selection and Navigation
All X-ray images have a tooth number, date, and close button in a band at
the top (title bar) of the image. To select a specific image, click on the body
of the image (the actual X-ray part of the image). The title bar turns from
gray to white. To select a different image, click on that image. You may also
navigate between images with the arrow keys.
You can move the small images by clicking on the title bar (the mouse cur-
sor will become a hook) and dragging to the desired location. This location
will be remembered and the image will come up in the same spot the next
time you open DEXray. But there is always a “home” position determined
by the tooth number, see “Home Icon” on page 52.
You may also move dialog boxes, such as the Navigator, on the screen us-
ing this function.
DEXIS_9_EN.book Page 43 Tuesday, October 5, 2010 12:58 PM
Chapter 4
44
If you have images with the same tooth number, the newest image will be
“mounted” on top of the previous image with the image’s title bar visible.
Click on the title bar to bring the previous image forward.
If you have multiple series of bitewing X-rays of different consultation
dates, these series will be laid out on the screen without overlapping as
long as they fit between the periapical X-rays. With the usual screen format,
three horizontal bitewing series or two vertical bitewing series are laid out
this way. If you want more series to be visible, you can resize the main win-
dow to give it a higher and narrower format. You may limit the number of
bitewing series spread out this way in DEXray Preferences. See “Setting
DEXray Preferences” on page 38.
Enlarging an Image
To enlarge the selected image, click once on the body of the image or press
the Enter key. The title bar on an enlarged image contains the following in-
formation and functions: Image tooth number, Image date, Image parame-
ters, and Clean, Tack, Maximize and Close buttons.
To reduce the image, click on the “x” in the upper right corner of the title bar
or press the Enter key. Once an image is enlarged, you may click on another
image to have it appear enlarged. There is no need to reduce the first im-
age.
The enlarged image may be moved by clicking on the title bar and dragging
to the desired location. It may be resized by dragging at a side or corner; the
aspect ratio will be maintained.
Full Screen View
Double-click on any selected standard-sized or enlarged image to initiate a
full screen view of the image. You may also click on the Maximize button on
the enlarged image’s title bar. Non-visible portions are scrolled into the
screen when you move the mouse to the edge. Double-click again or press
Enter to return to the enlarged image.
Image Parameters
A bar appears at the bottom of all enlarged images. In this bar the image’s
security status shows in a footnote:
DEXIS_9_EN.book Page 44 Tuesday, October 5, 2010 12:58 PM
45
DEXray: X-ray Images
• DEXray by DEXIS: Original DEXIS image, not modified.
• Original: Other original, unmodified image.
• DEXray by DEXIS — Enhanced: Original DEXIS image, contrast and bright-
ness are adjusted or a filter is active.
• Enhanced: Other original image, contrast and brightness are adjusted or
a filter is active.
• Scanned: Image scanned into DEXIS software; alteration of the scanned
original cannot be excluded.
• Derived: Image has been computed, e.g. by subtracting two images.
• Imported: Image coming from non-DEXIS software; alteration cannot be
excluded.
See also “X-ray Image Security” on page 80.
More image parameters, which may be helpful for technical support, are
displayed if you click on the space between the date and the tack of an en-
larged image.
Changing Brightness and Contrast
To change the brightness and contrast of an enlarged image, click and drag
on the body of the image. Up for lighter, down for darker, left for less con-
trast and right for more contrast. You may also use the arrow keys to change
contrast and brightness. The changed setting will be visible until changed
again; however, you may always return an image to its original settings us-
ing the Home icon, see “Home Icon” on page 52.
Changing Tooth Number and Date, Mirroring
You may change the tooth number or numbers of an image by enlarging the
image and clicking on the current tooth numbers. The Tooth box (a tooth
chart) appears. Click on the tooth or teeth highlighted in gold. This will de-
select the unwanted numbers. Now, click on the appropriate tooth or teeth.
You may also choose primary tooth numbers. The new number(s) will ap-
pear in a box in the lower left.
Click Done to save.
DEXIS_9_EN.book Page 45 Tuesday, October 5, 2010 12:58 PM
Chapter 4
46
The image will be repositioned on the screen and show the new numbers in
the upper left.
You cannot change the date of a captured X-ray image. The date showing
on your computer when the image is captured becomes the date encrypted
into the image, see “X-ray Image Security” on page 80. To change the date
of a scanned or imported image, click on the tooth number to bring up the
Tooth box. It bears an additional date field, which can be edited.
If an X-ray has been inadvertently scanned from the wrong side, or if some
external equipment delivered a mirrored image, you may flip it back by
clicking the Mirror button in the Tooth Number box. Images mirrored this
way are marked Mirrored to avoid confusion.
Tacking an Image
An enlarged image may be tacked to the screen by clicking on the tack but-
ton located on the right side of the title bar. An image tacked to the screen
will remain in position when you enlarge another image or when you switch
from intra-oral to extra-oral screen or vice versa. You may move a tacked im-
age as you would any other image. When you have multiple images tacked
or enlarged, the Home function will arrange them proportionally on the
screen without overlapping, see “Home Icon” on page 52.
Clean Button
Click on the box to the left of the tack to hide objects placed on the images,
such as drawn lines and implant models.
The Navigator
When an image is enlarged, a dialog box opens to the right of the image. If
in mouth view, this Navigator box shows all images taken on the same date
as thumbnails relative to their position on the DEXray screen. If in history
view, it shows all visible images as thumbnails. You may click on a thumb-
nail to display the enlarged image.
Check the box to the left of Next after and DEXray will automatically ad-
vance through the images for this date. To turn this slide show feature off,
deselect the box. The slide show feature allows an interval of 3 to 30 sec-
DEXIS_9_EN.book Page 46 Tuesday, October 5, 2010 12:58 PM
47
DEXray: X-ray Images
onds between images, i.e., the amount of time before the next image ap-
pears. You may use the space bar to pause and restart the slide show.
You may take another X-ray of the area shown on the enlarged image by
clicking Repeat X-ray or by typing “Y” on your keyboard, see “Repeating an
X-ray” on page 42.
If the Add ClearVu button is selected, enlarged images are shown side by
side in two modes: standard mode and ClearVu, see “ClearVu Icon” on
page 52.
You may choose to clear the screen of all but the selected image by clicking
on Clean or typing “L” on your keyboard. Click on the button or type “L”
again to deselect the function.
You may move among the images using the Prev (for previous) button, or
Backspace on your keyboard, and the Next button, or Space on your key-
board.
Click on the Compare button to compare two images. See “The Compare
Function” on page 78 for a full description of this tool.
You may hide the Navigator for an image by clicking Done. Turn off Naviga-
tor entirely in Preferences, see “The Navigator” on page 46.
Presentation Panel
The Presentation Panel is located on the right side of the screen. You can
drag images into this area from the any DEXray or DEXimage screen whether
displayed singly or in Overview mode (see “Overview Icon” on page 49).
This action allows you to choose images for presentation to patients or
compiling to export images for communications with colleagues, study
clubs, or insurance.
DEXIS_9_EN.book Page 47 Tuesday, October 5, 2010 12:58 PM
Chapter 4
48
The Presentation Panel can be resized and closed by shifting its left edge.
When closed, this edge shows a button; clicking the button opens the Pre-
sentation Panel in standard size.
When you click onto the Presentation Panel, it becomes active denoted by
a yellow outline. The function icons then relate to the Presentation Panel in-
stead of the main screen, and the DEXIS Toolbar shows only the icons avail-
able for use with the images on the panel. The Navigator also functions with
these selected images. When you enlarge an image of the Presentation
Panel all images not on the Presentation Panel are hidden.
When you close the patient while images are on the Presentation Panel, a
popup dialog asks whether you want to keep the contents of the panel for
later use.
4.5.2 DEXray Screen Icons
An icon will turn gold when initiated. For example, when on the intra-oral
screen the Tooth icon is highlighted. When a function icon is chosen or an
appropriate key is typed on the keyboard, the selected image will automat-
ically enlarge and the function box will open next to the image. In addition,
many icons will allow you to drag an image to them thereby opening their
function. Click again on the icon or corresponding keystroke to terminate
its function.
DEXIS_9_EN.book Page 48 Tuesday, October 5, 2010 12:58 PM
49
DEXray: X-ray Images
In addition, DEXIS will apply the current function to another image once you
click on that image. There is no need to close the current function and im-
age to work on a newly chosen image.
Please remember, the Tooltip is available for help. The corresponding key-
stroke will show in the help bubble.
DEXimage Icon
The Wand icon leads DEXimage to where images from intra-oral or digital
cameras or scanned photos are captured, stored and managed. Click on
the icon or type “V” (for video) to initiate its function.
A light under the icon signals that there are images for this patient in DEX-
image.
Intra-oral and Extra-oral Icons
By clicking on the Intra-oral or Tooth icon, you switch to the intra-oral
screen.
The Extra-oral or Head icon leads to this patient’s extra-oral X-ray screen
where digitally captured or scanned panoramic or cephalometric images
are stored and managed. Click on this icon or type “F” (for facial) to move
to this screen.
A light under the icon signals that there are images for this patient in the
intra-oral or extra-oral screen respectively.
Please note: By dragging an image to one of these icons, it will be moved
to the corresponding screen.
Overview Icon
Click on this icon to see all four DEXIS screens (DEXray intra-oral and extra-
oral, DEXimage intra-oral and extra-oral) for this patient. You may also acti-
vate the Overview mode by deselecting the icon of a single screen (intra-
oral or extra-oral).
You can shift the divider bars thus resizing or closing departmental
screens. When closed, the departmental screen becomes a button. Clicking
the button opens the screen in standard size. Changes to the divider bars
are remembered between sessions.
DEXIS_9_EN.book Page 49 Tuesday, October 5, 2010 12:58 PM
Chapter 4
50
A screen is considered active when outlined in yellow. The thumbnail imag-
es on any screen may be enlarged. Navigator’s Clean function hides all oth-
er thumbnails on the departmental screens. You may apply the Toolbar’s
image enhancement tools to any enlarged image.
You may drag and drop thumbnail images from one screen to another.
Deselecting the Overview icon will return you to the original single screen.
Double-clicking on any of the four departmental screens will close the Over-
view mode and open that single screen.
Zoom Icon
Use the Zoom or Magnifier Icon to magnify a portion of the selected image.
You may also type “Z” (for zoom) to initiate its function.
The portion visible in the ‘bird’s eye frame’ can be changed by clicking to a
different spot or by holding down the left mouse button and moving to an-
other area on the image. The ‘bird’s eye frame’ is closed when the Magnifier
function or the selected image is closed.
DEXIS_9_EN.book Page 50 Tuesday, October 5, 2010 12:58 PM
51
DEXray: X-ray Images
To magnify the entire image, see “Full Screen View” on page 44. Once in
Full Screen mode, the ‘bird’s eye frame’ remains in function, magnifying the
already magnified image by another step.
Spotlight Icon
This icon allows you to show an area of the image in maximized contrast.
Using the Spotlight cursor, click on the desired area and hold the left
mouse button to view the desired section of the image.
Measurement Icon
The Measurement tool is primarily used for endodontic and implant mea-
suring on X-rays, although distances on photographic images may be mea-
sured if the image shows objects of known size which may be used for
calibration. See “Measurement on Images” on page 57.
Notes Icon
This Annotation icon will allow you attach text, alerts, and voice notes to im-
ages. It will also allow you to draw on an image. To initiate the function,
click on the icon or type “T” (for text) or drag an image to the icon. You may
also access notes by right-clicking on the screen, and then choosing an an-
notation function. See “Image Annotations” on page 65.
DEXIS_9_EN.book Page 51 Tuesday, October 5, 2010 12:58 PM
Chapter 4
52
Enhancement Icon
Click on the Enhancement icon or type “E” to open the Image Enhancement
box to adjust brightness and contrast of the selected image and to apply
different filters. See “Image Enhancement” on page 55.
ClearVu Icon
The ClearVu or Eye icon is a shortcut to the ClearVu mode. Two modes are
available and can be selected in Preferences: Advanced and Classic, see
“Setting DEXray Preferences” on page 38. As discussed under Enhance-
ments, click on ClearVu or type “U” on your keyboard to use the ClearVu
function. This mode clarifies and sharpens the image. Click and drag in the
center of the image or use the arrow keys to change brightness and con-
trast. Click again on ClearVu or type “U” to turn the feature off.
Rotate Icon
Although DEXIS software orients captured X-rays automatically, occasion-
ally the proper orientation cannot be recognized. In this case the image
(standard and enlarged) may be rotated using the Rotate icon. You can also
type “R” on your keyboard or drag the image to the icon to rotate it in 90-
degree increments.
Home Icon
The Home function is activated by clicking on the Home icon, by typing “B”
(for back) on your keyboard, or by dragging the image to the icon.
There are 3 sub-functions of the Home icon:
1. Return the contrast of an enlarged image to standard settings. The func-
tion toggles between neutral setting and contrast setting.
2. Standard images that have been moved from their original position are
placed back by clicking the Home icon when no image is enlarged.
3. Tack one or more images to the screen using the Tack in the upper right
corner of an enlarged image. Click on the Home icon. The images ap-
pear enlarged and proportionately sized without overlapping.
DEXIS_9_EN.book Page 52 Tuesday, October 5, 2010 12:58 PM
Dexis 9 user manual
Dexis 9 user manual
Dexis 9 user manual
Dexis 9 user manual
Dexis 9 user manual
Dexis 9 user manual
Dexis 9 user manual
Dexis 9 user manual
Dexis 9 user manual
Dexis 9 user manual
Dexis 9 user manual
Dexis 9 user manual
Dexis 9 user manual
Dexis 9 user manual
Dexis 9 user manual
Dexis 9 user manual
Dexis 9 user manual
Dexis 9 user manual
Dexis 9 user manual
Dexis 9 user manual
Dexis 9 user manual
Dexis 9 user manual
Dexis 9 user manual
Dexis 9 user manual
Dexis 9 user manual
Dexis 9 user manual
Dexis 9 user manual
Dexis 9 user manual
Dexis 9 user manual
Dexis 9 user manual
Dexis 9 user manual
Dexis 9 user manual
Dexis 9 user manual
Dexis 9 user manual
Dexis 9 user manual
Dexis 9 user manual
Dexis 9 user manual
Dexis 9 user manual
Dexis 9 user manual
Dexis 9 user manual
Dexis 9 user manual
Dexis 9 user manual
Dexis 9 user manual
Dexis 9 user manual
Dexis 9 user manual
Dexis 9 user manual
Dexis 9 user manual
Dexis 9 user manual
Dexis 9 user manual
Dexis 9 user manual
Dexis 9 user manual
Dexis 9 user manual
Dexis 9 user manual
Dexis 9 user manual
Dexis 9 user manual
Dexis 9 user manual
Dexis 9 user manual
Dexis 9 user manual
Dexis 9 user manual
Dexis 9 user manual
Dexis 9 user manual
Dexis 9 user manual
Dexis 9 user manual
Dexis 9 user manual
Dexis 9 user manual
Dexis 9 user manual
Dexis 9 user manual
Dexis 9 user manual
Dexis 9 user manual
Dexis 9 user manual
Dexis 9 user manual
Dexis 9 user manual
Dexis 9 user manual
Dexis 9 user manual
Dexis 9 user manual
Dexis 9 user manual
Dexis 9 user manual
Dexis 9 user manual
Dexis 9 user manual
Dexis 9 user manual
Dexis 9 user manual
Dexis 9 user manual
Dexis 9 user manual
Dexis 9 user manual
Dexis 9 user manual
Dexis 9 user manual
Dexis 9 user manual
Dexis 9 user manual
Dexis 9 user manual
Dexis 9 user manual
Dexis 9 user manual
Dexis 9 user manual
Dexis 9 user manual
Dexis 9 user manual
Dexis 9 user manual
Dexis 9 user manual
Dexis 9 user manual
Dexis 9 user manual
Dexis 9 user manual
Dexis 9 user manual
Dexis 9 user manual
Dexis 9 user manual
Dexis 9 user manual
Dexis 9 user manual
Dexis 9 user manual
Dexis 9 user manual
Dexis 9 user manual
Dexis 9 user manual
Dexis 9 user manual
Dexis 9 user manual
Dexis 9 user manual
Dexis 9 user manual
Dexis 9 user manual
Dexis 9 user manual
Dexis 9 user manual
Dexis 9 user manual
Dexis 9 user manual
Dexis 9 user manual
Dexis 9 user manual
Dexis 9 user manual

More Related Content

What's hot

Shade selection for FPD
Shade selection for FPDShade selection for FPD
Shade selection for FPD
Sk Aziz Ikbal
 
Regenerative osseous surgery
Regenerative osseous surgeryRegenerative osseous surgery
Regenerative osseous surgery
Albert Augustinè
 
Benefits of cbct in implant planning
Benefits of cbct in implant planningBenefits of cbct in implant planning
Benefits of cbct in implant planning
UE
 
Classification of rpd (lecture)
Classification of rpd (lecture)Classification of rpd (lecture)
Classification of rpd (lecture)
Hiba Hamid
 
CBCT in Dentistry
CBCT in DentistryCBCT in Dentistry
CBCT in Dentistry
Dr. Jasmine Singh
 
4.n periodontal aspects
4.n periodontal aspects4.n periodontal aspects
4.n periodontal aspects
Maged El-Gendy
 
Radiograph techniques & landmarks
Radiograph techniques & landmarksRadiograph techniques & landmarks
Radiograph techniques & landmarks
Indian dental academy
 
Diagnostic Aids in Endodontics
Diagnostic Aids in EndodonticsDiagnostic Aids in Endodontics
Diagnostic Aids in Endodontics
Dr. Ishaan Adhaulia
 
Tmj imaging techniques
Tmj imaging techniquesTmj imaging techniques
Tmj imaging techniquesSara Wasfy
 
radiographic of interpretation of dental caries
radiographic of interpretation of dental cariesradiographic of interpretation of dental caries
radiographic of interpretation of dental caries
maral gh
 
Direct retainers in removable partial dentures
Direct retainers in removable partial denturesDirect retainers in removable partial dentures
Direct retainers in removable partial dentures
Shebin Abraham
 
use of Cbct in dental implant
use of Cbct  in dental implantuse of Cbct  in dental implant
use of Cbct in dental implant
Stephanie Chahrouk
 
3 basic principles for designing class ii and iii and iv
3  basic principles for designing  class ii and iii and iv3  basic principles for designing  class ii and iii and iv
3 basic principles for designing class ii and iii and iv
Amal Kaddah
 
Gingivectomy
GingivectomyGingivectomy
Gingivectomy
Enas Elgendy
 
Implant related periodontal disease
Implant related periodontal diseaseImplant related periodontal disease
Implant related periodontal disease
Navneet Randhawa
 
Impression techniques in complete denture
Impression techniques in complete dentureImpression techniques in complete denture
Impression techniques in complete denture
NikitaChhabariya
 
biomechanics in rpd
 biomechanics in rpd biomechanics in rpd
biomechanics in rpd
Mohammed Ashiq
 
Periodontal probe
Periodontal probePeriodontal probe
Periodontal probe
debasismitra
 
Retention and Relapse
Retention and RelapseRetention and Relapse
Retention and Relapse
Deeksha Bhanotia
 

What's hot (20)

Shade selection for FPD
Shade selection for FPDShade selection for FPD
Shade selection for FPD
 
Regenerative osseous surgery
Regenerative osseous surgeryRegenerative osseous surgery
Regenerative osseous surgery
 
Benefits of cbct in implant planning
Benefits of cbct in implant planningBenefits of cbct in implant planning
Benefits of cbct in implant planning
 
Classification of rpd (lecture)
Classification of rpd (lecture)Classification of rpd (lecture)
Classification of rpd (lecture)
 
CBCT in Dentistry
CBCT in DentistryCBCT in Dentistry
CBCT in Dentistry
 
4.n periodontal aspects
4.n periodontal aspects4.n periodontal aspects
4.n periodontal aspects
 
Radiograph techniques & landmarks
Radiograph techniques & landmarksRadiograph techniques & landmarks
Radiograph techniques & landmarks
 
anchorage
anchorageanchorage
anchorage
 
Diagnostic Aids in Endodontics
Diagnostic Aids in EndodonticsDiagnostic Aids in Endodontics
Diagnostic Aids in Endodontics
 
Tmj imaging techniques
Tmj imaging techniquesTmj imaging techniques
Tmj imaging techniques
 
radiographic of interpretation of dental caries
radiographic of interpretation of dental cariesradiographic of interpretation of dental caries
radiographic of interpretation of dental caries
 
Direct retainers in removable partial dentures
Direct retainers in removable partial denturesDirect retainers in removable partial dentures
Direct retainers in removable partial dentures
 
use of Cbct in dental implant
use of Cbct  in dental implantuse of Cbct  in dental implant
use of Cbct in dental implant
 
3 basic principles for designing class ii and iii and iv
3  basic principles for designing  class ii and iii and iv3  basic principles for designing  class ii and iii and iv
3 basic principles for designing class ii and iii and iv
 
Gingivectomy
GingivectomyGingivectomy
Gingivectomy
 
Implant related periodontal disease
Implant related periodontal diseaseImplant related periodontal disease
Implant related periodontal disease
 
Impression techniques in complete denture
Impression techniques in complete dentureImpression techniques in complete denture
Impression techniques in complete denture
 
biomechanics in rpd
 biomechanics in rpd biomechanics in rpd
biomechanics in rpd
 
Periodontal probe
Periodontal probePeriodontal probe
Periodontal probe
 
Retention and Relapse
Retention and RelapseRetention and Relapse
Retention and Relapse
 

Similar to Dexis 9 user manual

Deployment guide series ibm tivoli composite application manager for web reso...
Deployment guide series ibm tivoli composite application manager for web reso...Deployment guide series ibm tivoli composite application manager for web reso...
Deployment guide series ibm tivoli composite application manager for web reso...Banking at Ho Chi Minh city
 
IBM Streams - Redbook
IBM Streams - RedbookIBM Streams - Redbook
IBM Streams - Redbook
Pesta Ria Henny Beatrice
 
Ibm tivoli intelligent think dynamic orchestrator pre proof of-concept cookbo...
Ibm tivoli intelligent think dynamic orchestrator pre proof of-concept cookbo...Ibm tivoli intelligent think dynamic orchestrator pre proof of-concept cookbo...
Ibm tivoli intelligent think dynamic orchestrator pre proof of-concept cookbo...Banking at Ho Chi Minh city
 
Deployment guide series ibm total storage productivity center for data sg247140
Deployment guide series ibm total storage productivity center for data sg247140Deployment guide series ibm total storage productivity center for data sg247140
Deployment guide series ibm total storage productivity center for data sg247140Banking at Ho Chi Minh city
 
Sg247692 Websphere Accounting Chargeback For Tuam Guide
Sg247692 Websphere Accounting Chargeback For Tuam GuideSg247692 Websphere Accounting Chargeback For Tuam Guide
Sg247692 Websphere Accounting Chargeback For Tuam Guide
brzaaap
 
Deployment guide series ibm tivoli provisioning manager express v4.1 for soft...
Deployment guide series ibm tivoli provisioning manager express v4.1 for soft...Deployment guide series ibm tivoli provisioning manager express v4.1 for soft...
Deployment guide series ibm tivoli provisioning manager express v4.1 for soft...Banking at Ho Chi Minh city
 
Certification guide series ibm tivoli netcool impact v4.0 implementation sg24...
Certification guide series ibm tivoli netcool impact v4.0 implementation sg24...Certification guide series ibm tivoli netcool impact v4.0 implementation sg24...
Certification guide series ibm tivoli netcool impact v4.0 implementation sg24...Banking at Ho Chi Minh city
 
Solution deployment guide for ibm tivoli composite application manager for we...
Solution deployment guide for ibm tivoli composite application manager for we...Solution deployment guide for ibm tivoli composite application manager for we...
Solution deployment guide for ibm tivoli composite application manager for we...Banking at Ho Chi Minh city
 
Erpi admin 11123510[1] by иссам неязын issam hejazin
Erpi admin 11123510[1] by иссам неязын issam hejazinErpi admin 11123510[1] by иссам неязын issam hejazin
Erpi admin 11123510[1] by иссам неязын issam hejazin
Issam Hejazin
 
Selenium python
Selenium pythonSelenium python
Selenium python
Firdos jahan
 
Certification guide series ibm tivoli usage and accounting manager v7.1 imple...
Certification guide series ibm tivoli usage and accounting manager v7.1 imple...Certification guide series ibm tivoli usage and accounting manager v7.1 imple...
Certification guide series ibm tivoli usage and accounting manager v7.1 imple...Banking at Ho Chi Minh city
 
Os linux complete notes
Os linux complete notesOs linux complete notes
Os linux complete notes
Dreams Design
 
eclipse.pdf
eclipse.pdfeclipse.pdf
eclipse.pdf
PerPerso
 
Qgis 1.7.0 user-guide_en
Qgis 1.7.0 user-guide_enQgis 1.7.0 user-guide_en
Qgis 1.7.0 user-guide_en
xp5000
 
Bayanihan linux 5_manual
Bayanihan linux 5_manualBayanihan linux 5_manual
Bayanihan linux 5_manualRoderick Milan
 
Virtual box usermanual
Virtual box usermanualVirtual box usermanual
Virtual box usermanualfmartins_esas
 

Similar to Dexis 9 user manual (20)

Hdclone
HdcloneHdclone
Hdclone
 
Deployment guide series ibm tivoli composite application manager for web reso...
Deployment guide series ibm tivoli composite application manager for web reso...Deployment guide series ibm tivoli composite application manager for web reso...
Deployment guide series ibm tivoli composite application manager for web reso...
 
Deployment guide series ibm tivoli composite application manager for web reso...
Deployment guide series ibm tivoli composite application manager for web reso...Deployment guide series ibm tivoli composite application manager for web reso...
Deployment guide series ibm tivoli composite application manager for web reso...
 
IBM Streams - Redbook
IBM Streams - RedbookIBM Streams - Redbook
IBM Streams - Redbook
 
Ibm tivoli intelligent think dynamic orchestrator pre proof of-concept cookbo...
Ibm tivoli intelligent think dynamic orchestrator pre proof of-concept cookbo...Ibm tivoli intelligent think dynamic orchestrator pre proof of-concept cookbo...
Ibm tivoli intelligent think dynamic orchestrator pre proof of-concept cookbo...
 
Deployment guide series ibm total storage productivity center for data sg247140
Deployment guide series ibm total storage productivity center for data sg247140Deployment guide series ibm total storage productivity center for data sg247140
Deployment guide series ibm total storage productivity center for data sg247140
 
Sg247692 Websphere Accounting Chargeback For Tuam Guide
Sg247692 Websphere Accounting Chargeback For Tuam GuideSg247692 Websphere Accounting Chargeback For Tuam Guide
Sg247692 Websphere Accounting Chargeback For Tuam Guide
 
Deployment guide series ibm tivoli provisioning manager express v4.1 for soft...
Deployment guide series ibm tivoli provisioning manager express v4.1 for soft...Deployment guide series ibm tivoli provisioning manager express v4.1 for soft...
Deployment guide series ibm tivoli provisioning manager express v4.1 for soft...
 
Deployment guide series ibm tivoli provisioning manager express v4.1 for soft...
Deployment guide series ibm tivoli provisioning manager express v4.1 for soft...Deployment guide series ibm tivoli provisioning manager express v4.1 for soft...
Deployment guide series ibm tivoli provisioning manager express v4.1 for soft...
 
Certification guide series ibm tivoli netcool impact v4.0 implementation sg24...
Certification guide series ibm tivoli netcool impact v4.0 implementation sg24...Certification guide series ibm tivoli netcool impact v4.0 implementation sg24...
Certification guide series ibm tivoli netcool impact v4.0 implementation sg24...
 
Solution deployment guide for ibm tivoli composite application manager for we...
Solution deployment guide for ibm tivoli composite application manager for we...Solution deployment guide for ibm tivoli composite application manager for we...
Solution deployment guide for ibm tivoli composite application manager for we...
 
Erpi admin 11123510[1] by иссам неязын issam hejazin
Erpi admin 11123510[1] by иссам неязын issam hejazinErpi admin 11123510[1] by иссам неязын issam hejazin
Erpi admin 11123510[1] by иссам неязын issam hejazin
 
Administrator manual-e2
Administrator manual-e2Administrator manual-e2
Administrator manual-e2
 
Selenium python
Selenium pythonSelenium python
Selenium python
 
Certification guide series ibm tivoli usage and accounting manager v7.1 imple...
Certification guide series ibm tivoli usage and accounting manager v7.1 imple...Certification guide series ibm tivoli usage and accounting manager v7.1 imple...
Certification guide series ibm tivoli usage and accounting manager v7.1 imple...
 
Os linux complete notes
Os linux complete notesOs linux complete notes
Os linux complete notes
 
eclipse.pdf
eclipse.pdfeclipse.pdf
eclipse.pdf
 
Qgis 1.7.0 user-guide_en
Qgis 1.7.0 user-guide_enQgis 1.7.0 user-guide_en
Qgis 1.7.0 user-guide_en
 
Bayanihan linux 5_manual
Bayanihan linux 5_manualBayanihan linux 5_manual
Bayanihan linux 5_manual
 
Virtual box usermanual
Virtual box usermanualVirtual box usermanual
Virtual box usermanual
 

Recently uploaded

10 Ideas for Enhancing Your Meeting Experience
10 Ideas for Enhancing Your Meeting Experience10 Ideas for Enhancing Your Meeting Experience
10 Ideas for Enhancing Your Meeting Experience
ranishasharma67
 
Trauma Outpatient Center .
Trauma Outpatient Center                       .Trauma Outpatient Center                       .
Trauma Outpatient Center .
TraumaOutpatientCent
 
ICH Guidelines for Pharmacovigilance.pdf
ICH Guidelines for Pharmacovigilance.pdfICH Guidelines for Pharmacovigilance.pdf
ICH Guidelines for Pharmacovigilance.pdf
NEHA GUPTA
 
TOP AND BEST GLUTE BUILDER A 606 | Fitking Fitness
TOP AND BEST GLUTE BUILDER A 606 | Fitking FitnessTOP AND BEST GLUTE BUILDER A 606 | Fitking Fitness
TOP AND BEST GLUTE BUILDER A 606 | Fitking Fitness
Fitking Fitness
 
Haridwar ❤CALL Girls 🔝 89011★83002 🔝 ❤ℂall Girls IN Haridwar ESCORT SERVICE❤
Haridwar ❤CALL Girls 🔝 89011★83002 🔝 ❤ℂall Girls IN Haridwar ESCORT SERVICE❤Haridwar ❤CALL Girls 🔝 89011★83002 🔝 ❤ℂall Girls IN Haridwar ESCORT SERVICE❤
Haridwar ❤CALL Girls 🔝 89011★83002 🔝 ❤ℂall Girls IN Haridwar ESCORT SERVICE❤
ranishasharma67
 
VVIP Dehradun Girls 9719300533 Heat-bake { Dehradun } Genteel ℂall Serviℂe By...
VVIP Dehradun Girls 9719300533 Heat-bake { Dehradun } Genteel ℂall Serviℂe By...VVIP Dehradun Girls 9719300533 Heat-bake { Dehradun } Genteel ℂall Serviℂe By...
VVIP Dehradun Girls 9719300533 Heat-bake { Dehradun } Genteel ℂall Serviℂe By...
rajkumar669520
 
the IUA Administrative Board and General Assembly meeting
the IUA Administrative Board and General Assembly meetingthe IUA Administrative Board and General Assembly meeting
the IUA Administrative Board and General Assembly meeting
ssuser787e5c1
 
Dimensions of Healthcare Quality
Dimensions of Healthcare QualityDimensions of Healthcare Quality
Dimensions of Healthcare Quality
Naeemshahzad51
 
Health Education on prevention of hypertension
Health Education on prevention of hypertensionHealth Education on prevention of hypertension
Health Education on prevention of hypertension
Radhika kulvi
 
GLOBAL WARMING BY PRIYA BHOJWANI @..pptx
GLOBAL WARMING BY PRIYA BHOJWANI @..pptxGLOBAL WARMING BY PRIYA BHOJWANI @..pptx
GLOBAL WARMING BY PRIYA BHOJWANI @..pptx
priyabhojwani1200
 
When a patient should have kidney Transplant ?
When a patient should have kidney Transplant ?When a patient should have kidney Transplant ?
When a patient should have kidney Transplant ?
Dr. Sujit Chatterjee CEO Hiranandani Hospital
 
Nursing Care of Client With Acute And Chronic Renal Failure.ppt
Nursing Care of Client With Acute And Chronic Renal Failure.pptNursing Care of Client With Acute And Chronic Renal Failure.ppt
Nursing Care of Client With Acute And Chronic Renal Failure.ppt
Rommel Luis III Israel
 
POLYCYSTIC OVARIAN SYNDROME (PCOS)......
POLYCYSTIC OVARIAN SYNDROME (PCOS)......POLYCYSTIC OVARIAN SYNDROME (PCOS)......
POLYCYSTIC OVARIAN SYNDROME (PCOS)......
Ameena Kadar
 
India Clinical Trials Market: Industry Size and Growth Trends [2030] Analyzed...
India Clinical Trials Market: Industry Size and Growth Trends [2030] Analyzed...India Clinical Trials Market: Industry Size and Growth Trends [2030] Analyzed...
India Clinical Trials Market: Industry Size and Growth Trends [2030] Analyzed...
Kumar Satyam
 
Contact ME {89011**83002} Haridwar ℂall Girls By Full Service Call Girl In Ha...
Contact ME {89011**83002} Haridwar ℂall Girls By Full Service Call Girl In Ha...Contact ME {89011**83002} Haridwar ℂall Girls By Full Service Call Girl In Ha...
Contact ME {89011**83002} Haridwar ℂall Girls By Full Service Call Girl In Ha...
ranishasharma67
 
Navigating Women's Health: Understanding Prenatal Care and Beyond
Navigating Women's Health: Understanding Prenatal Care and BeyondNavigating Women's Health: Understanding Prenatal Care and Beyond
Navigating Women's Health: Understanding Prenatal Care and Beyond
Aboud Health Group
 
ABDOMINAL COMPARTMENT SYSNDROME
ABDOMINAL COMPARTMENT SYSNDROMEABDOMINAL COMPARTMENT SYSNDROME
ABDOMINAL COMPARTMENT SYSNDROME
Rommel Luis III Israel
 
Deep Leg Vein Thrombosis (DVT): Meaning, Causes, Symptoms, Treatment, and Mor...
Deep Leg Vein Thrombosis (DVT): Meaning, Causes, Symptoms, Treatment, and Mor...Deep Leg Vein Thrombosis (DVT): Meaning, Causes, Symptoms, Treatment, and Mor...
Deep Leg Vein Thrombosis (DVT): Meaning, Causes, Symptoms, Treatment, and Mor...
The Lifesciences Magazine
 
How many patients does case series should have In comparison to case reports.pdf
How many patients does case series should have In comparison to case reports.pdfHow many patients does case series should have In comparison to case reports.pdf
How many patients does case series should have In comparison to case reports.pdf
pubrica101
 
LGBTQ+ Adults: Unique Opportunities and Inclusive Approaches to Care
LGBTQ+ Adults: Unique Opportunities and Inclusive Approaches to CareLGBTQ+ Adults: Unique Opportunities and Inclusive Approaches to Care
LGBTQ+ Adults: Unique Opportunities and Inclusive Approaches to Care
VITASAuthor
 

Recently uploaded (20)

10 Ideas for Enhancing Your Meeting Experience
10 Ideas for Enhancing Your Meeting Experience10 Ideas for Enhancing Your Meeting Experience
10 Ideas for Enhancing Your Meeting Experience
 
Trauma Outpatient Center .
Trauma Outpatient Center                       .Trauma Outpatient Center                       .
Trauma Outpatient Center .
 
ICH Guidelines for Pharmacovigilance.pdf
ICH Guidelines for Pharmacovigilance.pdfICH Guidelines for Pharmacovigilance.pdf
ICH Guidelines for Pharmacovigilance.pdf
 
TOP AND BEST GLUTE BUILDER A 606 | Fitking Fitness
TOP AND BEST GLUTE BUILDER A 606 | Fitking FitnessTOP AND BEST GLUTE BUILDER A 606 | Fitking Fitness
TOP AND BEST GLUTE BUILDER A 606 | Fitking Fitness
 
Haridwar ❤CALL Girls 🔝 89011★83002 🔝 ❤ℂall Girls IN Haridwar ESCORT SERVICE❤
Haridwar ❤CALL Girls 🔝 89011★83002 🔝 ❤ℂall Girls IN Haridwar ESCORT SERVICE❤Haridwar ❤CALL Girls 🔝 89011★83002 🔝 ❤ℂall Girls IN Haridwar ESCORT SERVICE❤
Haridwar ❤CALL Girls 🔝 89011★83002 🔝 ❤ℂall Girls IN Haridwar ESCORT SERVICE❤
 
VVIP Dehradun Girls 9719300533 Heat-bake { Dehradun } Genteel ℂall Serviℂe By...
VVIP Dehradun Girls 9719300533 Heat-bake { Dehradun } Genteel ℂall Serviℂe By...VVIP Dehradun Girls 9719300533 Heat-bake { Dehradun } Genteel ℂall Serviℂe By...
VVIP Dehradun Girls 9719300533 Heat-bake { Dehradun } Genteel ℂall Serviℂe By...
 
the IUA Administrative Board and General Assembly meeting
the IUA Administrative Board and General Assembly meetingthe IUA Administrative Board and General Assembly meeting
the IUA Administrative Board and General Assembly meeting
 
Dimensions of Healthcare Quality
Dimensions of Healthcare QualityDimensions of Healthcare Quality
Dimensions of Healthcare Quality
 
Health Education on prevention of hypertension
Health Education on prevention of hypertensionHealth Education on prevention of hypertension
Health Education on prevention of hypertension
 
GLOBAL WARMING BY PRIYA BHOJWANI @..pptx
GLOBAL WARMING BY PRIYA BHOJWANI @..pptxGLOBAL WARMING BY PRIYA BHOJWANI @..pptx
GLOBAL WARMING BY PRIYA BHOJWANI @..pptx
 
When a patient should have kidney Transplant ?
When a patient should have kidney Transplant ?When a patient should have kidney Transplant ?
When a patient should have kidney Transplant ?
 
Nursing Care of Client With Acute And Chronic Renal Failure.ppt
Nursing Care of Client With Acute And Chronic Renal Failure.pptNursing Care of Client With Acute And Chronic Renal Failure.ppt
Nursing Care of Client With Acute And Chronic Renal Failure.ppt
 
POLYCYSTIC OVARIAN SYNDROME (PCOS)......
POLYCYSTIC OVARIAN SYNDROME (PCOS)......POLYCYSTIC OVARIAN SYNDROME (PCOS)......
POLYCYSTIC OVARIAN SYNDROME (PCOS)......
 
India Clinical Trials Market: Industry Size and Growth Trends [2030] Analyzed...
India Clinical Trials Market: Industry Size and Growth Trends [2030] Analyzed...India Clinical Trials Market: Industry Size and Growth Trends [2030] Analyzed...
India Clinical Trials Market: Industry Size and Growth Trends [2030] Analyzed...
 
Contact ME {89011**83002} Haridwar ℂall Girls By Full Service Call Girl In Ha...
Contact ME {89011**83002} Haridwar ℂall Girls By Full Service Call Girl In Ha...Contact ME {89011**83002} Haridwar ℂall Girls By Full Service Call Girl In Ha...
Contact ME {89011**83002} Haridwar ℂall Girls By Full Service Call Girl In Ha...
 
Navigating Women's Health: Understanding Prenatal Care and Beyond
Navigating Women's Health: Understanding Prenatal Care and BeyondNavigating Women's Health: Understanding Prenatal Care and Beyond
Navigating Women's Health: Understanding Prenatal Care and Beyond
 
ABDOMINAL COMPARTMENT SYSNDROME
ABDOMINAL COMPARTMENT SYSNDROMEABDOMINAL COMPARTMENT SYSNDROME
ABDOMINAL COMPARTMENT SYSNDROME
 
Deep Leg Vein Thrombosis (DVT): Meaning, Causes, Symptoms, Treatment, and Mor...
Deep Leg Vein Thrombosis (DVT): Meaning, Causes, Symptoms, Treatment, and Mor...Deep Leg Vein Thrombosis (DVT): Meaning, Causes, Symptoms, Treatment, and Mor...
Deep Leg Vein Thrombosis (DVT): Meaning, Causes, Symptoms, Treatment, and Mor...
 
How many patients does case series should have In comparison to case reports.pdf
How many patients does case series should have In comparison to case reports.pdfHow many patients does case series should have In comparison to case reports.pdf
How many patients does case series should have In comparison to case reports.pdf
 
LGBTQ+ Adults: Unique Opportunities and Inclusive Approaches to Care
LGBTQ+ Adults: Unique Opportunities and Inclusive Approaches to CareLGBTQ+ Adults: Unique Opportunities and Inclusive Approaches to Care
LGBTQ+ Adults: Unique Opportunities and Inclusive Approaches to Care
 

Dexis 9 user manual

  • 2. PLU824-EN Rev 2 2010 September 15 Copyright © DEXIS, LLC 1994-2010 This manual and the software described herein are protected by copyright laws and international copyright treaties, as well as other intellectual prop- erty laws and treaties. This manual contains original instructions by DEXIS, LLC. DEXIS, LLC re- serves the right at any time to revise this manual and the software de- scribed herein, and assumes no obligation to notify any person or entity of such revisions. Many of the designations used by manufacturers and sellers to distinguish their products are claimed as trademarks. Where those designations ap- pear in this manual, and DEXIS, LLC was aware of a trademark claim, such designations have been printed in capital or initial capital letters. The DEXIS software includes the following parts copyrighted by other parties: • The components reading and writing JPEG files are based on the work of the Independent JPEG Group. • Interfaces to non-DEXIS sensors and to panoramic X-ray equipment are based on work licensed from the respective manufacturers of the equipment. • The software includes software libraries copyrighted by Microsoft, Inc. The CE symbol ensures that the product herein specified meets the provisions of European Council Directive 93/42 EEC concerning medical devices. DEXIS_9_EN.book Page 2 Tuesday, October 5, 2010 12:58 PM
  • 3. CONTENTS Contents 1 Introduction . . . . . . . . . . . . . . . . . . . . . . . . . . . . . . . . . . . . . . . . . . . . . . . . . . . . 1 1.1 Welcome to DEXIS . . . . . . . . . . . . . . . . . . . . . . . . . . . . . . . . . . . . . . . . . . . . . . . . . . . . . . . . . . . . 1 1.2 Intended Use of the DEXIS Software . . . . . . . . . . . . . . . . . . . . . . . . . . . . . . . . . . . . . . . . . . . . 2 1.3 Conventions Used in the Manual . . . . . . . . . . . . . . . . . . . . . . . . . . . . . . . . . . . . . . . . . . . . . . . 2 1.4 What’s New in Release 9 . . . . . . . . . . . . . . . . . . . . . . . . . . . . . . . . . . . . . . . . . . . . . . . . . . . . . . . 3 2 Installation, Care, and Maintenance . . . . . . . . . . . . . . . . . . . . . . . . . . . . . . . . 7 2.1 Hardware Requirements . . . . . . . . . . . . . . . . . . . . . . . . . . . . . . . . . . . . . . . . . . . . . . . . . . . . . . 7 2.1.1 Operating System Platform . . . . . . . . . . . . . . . . . . . . . . . . . . . . . . . . . . . . . . . . . . . . . . . . . . . 8 2.1.2 Caution: Hardware & Software Upgrades . . . . . . . . . . . . . . . . . . . . . . . . . . . . . . . . . . . . . . . . 8 2.1.3 Diagnostic Imaging . . . . . . . . . . . . . . . . . . . . . . . . . . . . . . . . . . . . . . . . . . . . . . . . . . . . . . . . . . 9 2.1.4 Special Hardware Requirements . . . . . . . . . . . . . . . . . . . . . . . . . . . . . . . . . . . . . . . . . . . . . . 10 2.2 Hardware Installation . . . . . . . . . . . . . . . . . . . . . . . . . . . . . . . . . . . . . . . . . . . . . . . . . . . . . . . .11 2.3 Display Settings Changes . . . . . . . . . . . . . . . . . . . . . . . . . . . . . . . . . . . . . . . . . . . . . . . . . . . . 13 2.4 Software Installation . . . . . . . . . . . . . . . . . . . . . . . . . . . . . . . . . . . . . . . . . . . . . . . . . . . . . . . 14 2.4.1 Installation Planning . . . . . . . . . . . . . . . . . . . . . . . . . . . . . . . . . . . . . . . . . . . . . . . . . . . . . . . 14 2.4.2 Running the Installation Program . . . . . . . . . . . . . . . . . . . . . . . . . . . . . . . . . . . . . . . . . . . . 15 2.4.3 Sharing Data Between Disconnected Systems . . . . . . . . . . . . . . . . . . . . . . . . . . . . . . . . . . . 17 2.4.4 Adding Initial Information . . . . . . . . . . . . . . . . . . . . . . . . . . . . . . . . . . . . . . . . . . . . . . . . . . . 17 2.4.5 Obtain Registration Codes . . . . . . . . . . . . . . . . . . . . . . . . . . . . . . . . . . . . . . . . . . . . . . . . . . . 18 2.5 Regular Backups of Image Files . . . . . . . . . . . . . . . . . . . . . . . . . . . . . . . . . . . . . . . . . . . . . . . 19 3 The DEXIS Administration Program . . . . . . . . . . . . . . . . . . . . . . . . . . . . . . . . 21 3.1 DEXIS Administration Screen Overview . . . . . . . . . . . . . . . . . . . . . . . . . . . . . . . . . . . . . . . . . 21 3.2 Setting General Preferences . . . . . . . . . . . . . . . . . . . . . . . . . . . . . . . . . . . . . . . . . . . . . . . . . 22 3.3 Setting Administration Preferences . . . . . . . . . . . . . . . . . . . . . . . . . . . . . . . . . . . . . . . . . . . 26 3.4 Entering Patient Data . . . . . . . . . . . . . . . . . . . . . . . . . . . . . . . . . . . . . . . . . . . . . . . . . . . . . . . . 29 3.5 Administrative Tools . . . . . . . . . . . . . . . . . . . . . . . . . . . . . . . . . . . . . . . . . . . . . . . . . . . . . . . . 31 3.6 Interfacing with Practice Management Programs . . . . . . . . . . . . . . . . . . . . . . . . . . . . . . . 34 DEXIS_9_EN.book Page 1 Tuesday, October 5, 2010 12:58 PM
  • 4. CONTENTS 4 DEXray: X-ray Images . . . . . . . . . . . . . . . . . . . . . . . . . . . . . . . . . . . . . . . . . . . .35 4.1 DEXray Screen Overview . . . . . . . . . . . . . . . . . . . . . . . . . . . . . . . . . . . . . . . . . . . . . . . . . . . . . .35 4.2 Taking Your First Digital X-ray . . . . . . . . . . . . . . . . . . . . . . . . . . . . . . . . . . . . . . . . . . . . . . . .37 4.3 Setting DEXray Preferences . . . . . . . . . . . . . . . . . . . . . . . . . . . . . . . . . . . . . . . . . . . . . . . . . . 38 4.4 Taking X-ray Images with Intra-oral Sensors . . . . . . . . . . . . . . . . . . . . . . . . . . . . . . . . . . . .41 4.4.1 Taking an Individual Image . . . . . . . . . . . . . . . . . . . . . . . . . . . . . . . . . . . . . . . . . . . . . . . . . . . .41 4.4.2 Repeating an X-ray . . . . . . . . . . . . . . . . . . . . . . . . . . . . . . . . . . . . . . . . . . . . . . . . . . . . . . . . . . 42 4.4.3 Taking a Series of Images . . . . . . . . . . . . . . . . . . . . . . . . . . . . . . . . . . . . . . . . . . . . . . . . . . . . 42 4.4.4 One Tooth Series . . . . . . . . . . . . . . . . . . . . . . . . . . . . . . . . . . . . . . . . . . . . . . . . . . . . . . . . . . . 43 4.5 Image Management Tools . . . . . . . . . . . . . . . . . . . . . . . . . . . . . . . . . . . . . . . . . . . . . . . . . . . . 43 4.5.1 Selection and Navigation . . . . . . . . . . . . . . . . . . . . . . . . . . . . . . . . . . . . . . . . . . . . . . . . . . . . 43 4.5.2 DEXray Screen Icons . . . . . . . . . . . . . . . . . . . . . . . . . . . . . . . . . . . . . . . . . . . . . . . . . . . . . . . . 48 4.5.3 Image Enhancement . . . . . . . . . . . . . . . . . . . . . . . . . . . . . . . . . . . . . . . . . . . . . . . . . . . . . . . . . .55 4.5.4 Measurement on Images . . . . . . . . . . . . . . . . . . . . . . . . . . . . . . . . . . . . . . . . . . . . . . . . . . . . . .57 4.5.5 Image Annotations . . . . . . . . . . . . . . . . . . . . . . . . . . . . . . . . . . . . . . . . . . . . . . . . . . . . . . . . . . 65 4.5.6 The Image Archive . . . . . . . . . . . . . . . . . . . . . . . . . . . . . . . . . . . . . . . . . . . . . . . . . . . . . . . . . . . 68 4.5.7 Communications: Printing from DEXray or DEXimage . . . . . . . . . . . . . . . . . . . . . . . . . . . . 69 4.5.8 Communications: Export and E-mail . . . . . . . . . . . . . . . . . . . . . . . . . . . . . . . . . . . . . . . . . . . .71 4.5.9 More on Exporting . . . . . . . . . . . . . . . . . . . . . . . . . . . . . . . . . . . . . . . . . . . . . . . . . . . . . . . . . .73 4.5.10 Communications: Import . . . . . . . . . . . . . . . . . . . . . . . . . . . . . . . . . . . . . . . . . . . . . . . . . . . . .75 4.5.11 More on Importing . . . . . . . . . . . . . . . . . . . . . . . . . . . . . . . . . . . . . . . . . . . . . . . . . . . . . . . . . .77 4.5.12 The Compare Function . . . . . . . . . . . . . . . . . . . . . . . . . . . . . . . . . . . . . . . . . . . . . . . . . . . . . . . 78 4.6 X-ray Image Security . . . . . . . . . . . . . . . . . . . . . . . . . . . . . . . . . . . . . . . . . . . . . . . . . . . . . . . . 80 4.7 Working with Panoramic and Cephalometric Images . . . . . . . . . . . . . . . . . . . . . . . . . . . . . .81 5 DEXimage: Photographic Images . . . . . . . . . . . . . . . . . . . . . . . . . . . . . . . . . . 83 5.1 DEXimage Screen Overview . . . . . . . . . . . . . . . . . . . . . . . . . . . . . . . . . . . . . . . . . . . . . . . . . . . 83 5.2 Setting DEXimage Preferences . . . . . . . . . . . . . . . . . . . . . . . . . . . . . . . . . . . . . . . . . . . . . . . . 85 5.3 Taking Digital Photographs . . . . . . . . . . . . . . . . . . . . . . . . . . . . . . . . . . . . . . . . . . . . . . . . . . 87 5.3.1 Memory Card with Card Reader . . . . . . . . . . . . . . . . . . . . . . . . . . . . . . . . . . . . . . . . . . . . . . . 87 5.3.2 Twain Interface . . . . . . . . . . . . . . . . . . . . . . . . . . . . . . . . . . . . . . . . . . . . . . . . . . . . . . . . . . . . . 88 5.3.3 Patient Picture . . . . . . . . . . . . . . . . . . . . . . . . . . . . . . . . . . . . . . . . . . . . . . . . . . . . . . . . . . . . . 89 5.4 Taking Intra-oral Video Images using DEXvideo . . . . . . . . . . . . . . . . . . . . . . . . . . . . . . . . . 89 5.4.1 Additional Settings . . . . . . . . . . . . . . . . . . . . . . . . . . . . . . . . . . . . . . . . . . . . . . . . . . . . . . . . . 90 DEXIS_9_EN.book Page 2 Tuesday, October 5, 2010 12:58 PM
  • 5. CONTENTS 5.4.2 Capturing Images . . . . . . . . . . . . . . . . . . . . . . . . . . . . . . . . . . . . . . . . . . . . . . . . . . . . . . . . . . . 91 5.4.3 Simulation Mode . . . . . . . . . . . . . . . . . . . . . . . . . . . . . . . . . . . . . . . . . . . . . . . . . . . . . . . . . . . . 92 5.4.4 Foot Pedal or Wand Capture . . . . . . . . . . . . . . . . . . . . . . . . . . . . . . . . . . . . . . . . . . . . . . . . . . 93 5.5 Image Management Tools . . . . . . . . . . . . . . . . . . . . . . . . . . . . . . . . . . . . . . . . . . . . . . . . . . . . 93 5.5.1 Selection and Navigation . . . . . . . . . . . . . . . . . . . . . . . . . . . . . . . . . . . . . . . . . . . . . . . . . . . . 94 5.5.2 DEXimage Screen Icons . . . . . . . . . . . . . . . . . . . . . . . . . . . . . . . . . . . . . . . . . . . . . . . . . . . . . . 94 6 DEXscan: Scanned Images . . . . . . . . . . . . . . . . . . . . . . . . . . . . . . . . . . . . . . . 99 6.1 Scanning X-ray Films . . . . . . . . . . . . . . . . . . . . . . . . . . . . . . . . . . . . . . . . . . . . . . . . . . . . . . . . 99 6.1.1 Intra-oral with Flatbed Scanner . . . . . . . . . . . . . . . . . . . . . . . . . . . . . . . . . . . . . . . . . . . . . 100 6.1.2 Intra-oral with Single-Film Scanner . . . . . . . . . . . . . . . . . . . . . . . . . . . . . . . . . . . . . . . . . . 101 6.1.3 Extra-oral . . . . . . . . . . . . . . . . . . . . . . . . . . . . . . . . . . . . . . . . . . . . . . . . . . . . . . . . . . . . . . . . 102 6.2 Scanning a Photograph . . . . . . . . . . . . . . . . . . . . . . . . . . . . . . . . . . . . . . . . . . . . . . . . . . . . . 102 6.2.1 Scan a Photo into DEXimage . . . . . . . . . . . . . . . . . . . . . . . . . . . . . . . . . . . . . . . . . . . . . . . . . 102 6.3 Scanning a Picture for Patient Data . . . . . . . . . . . . . . . . . . . . . . . . . . . . . . . . . . . . . . . . . . 103 6.4 Scanning a Signature or Logo . . . . . . . . . . . . . . . . . . . . . . . . . . . . . . . . . . . . . . . . . . . . . . . 104 7 DEXimplant: Implant Planning and Monitoring . . . . . . . . . . . . . . . . . . . . . . 107 7.1 Introduction . . . . . . . . . . . . . . . . . . . . . . . . . . . . . . . . . . . . . . . . . . . . . . . . . . . . . . . . . . . . . . 107 7.2 Accessing DEXimplant . . . . . . . . . . . . . . . . . . . . . . . . . . . . . . . . . . . . . . . . . . . . . . . . . . . . . . 108 7.3 Implant Planning with DEXimplant . . . . . . . . . . . . . . . . . . . . . . . . . . . . . . . . . . . . . . . . . . . . 108 7.3.1 Calibration with Radiographic Balls . . . . . . . . . . . . . . . . . . . . . . . . . . . . . . . . . . . . . . . . . 109 7.3.2 The Implant Library . . . . . . . . . . . . . . . . . . . . . . . . . . . . . . . . . . . . . . . . . . . . . . . . . . . . . . . . . 109 7.3.3 Placing Implants . . . . . . . . . . . . . . . . . . . . . . . . . . . . . . . . . . . . . . . . . . . . . . . . . . . . . . . . . . . 109 7.3.4 Printing the Plan . . . . . . . . . . . . . . . . . . . . . . . . . . . . . . . . . . . . . . . . . . . . . . . . . . . . . . . . . . 110 7.3.5 Communication with Colleagues . . . . . . . . . . . . . . . . . . . . . . . . . . . . . . . . . . . . . . . . . . . . . .111 7.4 Osseointegration Monitoring with DEXbone . . . . . . . . . . . . . . . . . . . . . . . . . . . . . . . . . . . .111 7.4.1 Selecting the Region to be Examined . . . . . . . . . . . . . . . . . . . . . . . . . . . . . . . . . . . . . . . . . . .111 7.4.2 Reading the DEXbone Information . . . . . . . . . . . . . . . . . . . . . . . . . . . . . . . . . . . . . . . . . . . . 112 7.4.3 Looking into Detail . . . . . . . . . . . . . . . . . . . . . . . . . . . . . . . . . . . . . . . . . . . . . . . . . . . . . . . . 112 8 DEXwrite: Chairside Report Generator . . . . . . . . . . . . . . . . . . . . . . . . . . . . . .113 8.1 DEXwrite Screen Overview . . . . . . . . . . . . . . . . . . . . . . . . . . . . . . . . . . . . . . . . . . . . . . . . . . . .113 8.2 Setting DEXwrite Preferences . . . . . . . . . . . . . . . . . . . . . . . . . . . . . . . . . . . . . . . . . . . . . . . .114 DEXIS_9_EN.book Page 3 Tuesday, October 5, 2010 12:58 PM
  • 6. CONTENTS 8.3 Generating Your First DEXwrite Report . . . . . . . . . . . . . . . . . . . . . . . . . . . . . . . . . . . . . . . 115 8.4 Report Management Tools . . . . . . . . . . . . . . . . . . . . . . . . . . . . . . . . . . . . . . . . . . . . . . . . . . 116 8.4.1 Default Report . . . . . . . . . . . . . . . . . . . . . . . . . . . . . . . . . . . . . . . . . . . . . . . . . . . . . . . . . . . . 116 8.4.2 Report Library . . . . . . . . . . . . . . . . . . . . . . . . . . . . . . . . . . . . . . . . . . . . . . . . . . . . . . . . . . . . . 116 8.4.3 Frames . . . . . . . . . . . . . . . . . . . . . . . . . . . . . . . . . . . . . . . . . . . . . . . . . . . . . . . . . . . . . . . . . . . 116 8.4.4 Image Selection Box . . . . . . . . . . . . . . . . . . . . . . . . . . . . . . . . . . . . . . . . . . . . . . . . . . . . . . . . .117 8.4.5 Function Buttons . . . . . . . . . . . . . . . . . . . . . . . . . . . . . . . . . . . . . . . . . . . . . . . . . . . . . . . . . . 118 8.4.6 Reusable Text Blocks . . . . . . . . . . . . . . . . . . . . . . . . . . . . . . . . . . . . . . . . . . . . . . . . . . . . . . . 120 8.4.7 Generating DEXwrite Reports . . . . . . . . . . . . . . . . . . . . . . . . . . . . . . . . . . . . . . . . . . . . . . . . 121 8.5 Designing Custom Report Templates . . . . . . . . . . . . . . . . . . . . . . . . . . . . . . . . . . . . . . . . . . 122 8.5.1 Components of the Templates Management Screen . . . . . . . . . . . . . . . . . . . . . . . . . . . . . . 122 8.5.2 Selecting the Templates For Your Personal Report Library . . . . . . . . . . . . . . . . . . . . . . 123 8.5.3 Components of a Template . . . . . . . . . . . . . . . . . . . . . . . . . . . . . . . . . . . . . . . . . . . . . . . . . . . 124 8.5.4 Parameters . . . . . . . . . . . . . . . . . . . . . . . . . . . . . . . . . . . . . . . . . . . . . . . . . . . . . . . . . . . . . . . 126 8.5.5 Saving the Template . . . . . . . . . . . . . . . . . . . . . . . . . . . . . . . . . . . . . . . . . . . . . . . . . . . . . . . . 128 8.5.6 Constructing your Own Template . . . . . . . . . . . . . . . . . . . . . . . . . . . . . . . . . . . . . . . . . . . . 129 9 DEXclaim: Images as Claim Attachments . . . . . . . . . . . . . . . . . . . . . . . . . . . 131 9.1 Registration . . . . . . . . . . . . . . . . . . . . . . . . . . . . . . . . . . . . . . . . . . . . . . . . . . . . . . . . . . . . . . 132 9.2 Sending Images as Attachments with DEXclaim . . . . . . . . . . . . . . . . . . . . . . . . . . . . . . . . . 133 9.3 Assistance . . . . . . . . . . . . . . . . . . . . . . . . . . . . . . . . . . . . . . . . . . . . . . . . . . . . . . . . . . . . . . . . 136 9.4 Demo Mode . . . . . . . . . . . . . . . . . . . . . . . . . . . . . . . . . . . . . . . . . . . . . . . . . . . . . . . . . . . . . . . . 136 10 Hardware and Testing . . . . . . . . . . . . . . . . . . . . . . . . . . . . . . . . . . . . . . . . . . 137 J.1 recommended hardware specifications . . . . . . . . . . . . . . . . . . . . . . . . . . . . . . . . . . . . . . . 137 J.2 installation verification and testing . . . . . . . . . . . . . . . . . . . . . . . . . . . . . . . . . . . . . . . . . 137 11 Keyboard Use and Shortcuts . . . . . . . . . . . . . . . . . . . . . . . . . . . . . . . . . . . . . 143 12 Interfaces, Bridges, and Links . . . . . . . . . . . . . . . . . . . . . . . . . . . . . . . . . . . . 149 L.1 DEXpsp-ScanX and DEXpsp-Optime . . . . . . . . . . . . . . . . . . . . . . . . . . . . . . . . . . . . . . . . . . . . 149 L.2 DEXpan . . . . . . . . . . . . . . . . . . . . . . . . . . . . . . . . . . . . . . . . . . . . . . . . . . . . . . . . . . . . . . . . . . . 151 L.3 The Integrator . . . . . . . . . . . . . . . . . . . . . . . . . . . . . . . . . . . . . . . . . . . . . . . . . . . . . . . . . . . . . 152 DEXIS_9_EN.book Page 4 Tuesday, October 5, 2010 12:58 PM
  • 7. CONTENTS 13 Administrator Functions . . . . . . . . . . . . . . . . . . . . . . . . . . . . . . . . . . . . . . . . 157 M.1 Backing Up Your Image Files with DEXsafe . . . . . . . . . . . . . . . . . . . . . . . . . . . . . . . . . . . . . 157 M.2 Control Access Permissions with DEXsecurity . . . . . . . . . . . . . . . . . . . . . . . . . . . . . . . . . 158 14 Specifications and Standards . . . . . . . . . . . . . . . . . . . . . . . . . . . . . . . . . . . . 161 15 Frequently Asked Questions . . . . . . . . . . . . . . . . . . . . . . . . . . . . . . . . . . . . . 163 16 Additional Help and Support . . . . . . . . . . . . . . . . . . . . . . . . . . . . . . . . . . . . 165 17 Index . . . . . . . . . . . . . . . . . . . . . . . . . . . . . . . . . . . . . . . . . . . . . . . . . . . . . . . . . . 1 Index DEXIS_9_EN.book Page 5 Tuesday, October 5, 2010 12:58 PM
  • 8. CONTENTS DEXIS_9_EN.book Page 6 Tuesday, October 5, 2010 12:58 PM
  • 9. 1 Introduction Chapter 1 Introduction 1.1 Welcome to DEXIS Welcome to the exciting world of DEXIS! And thank you for your recent in- vestment in the DEXIS Software. We hope you will have an extraordinary ex- perience with our products and services. Our mission at DEXIS is to develop and support the Digital Radiography community around the world. We seek to build strong partnerships with our doctors and their teams based on long-term, interactive relationships. Your new DEXIS Software was designed from the outset with you, the clini- cian, in mind. This is your tool. Learn to use it well and it will become an ef- fective aid in your diagnosis, treatment and treatment planning process. As with all new clinical tools, it is necessary to invest a certain amount of time for practice in order to become proficient with the DEXIS Software. We highly recommend that you register for in-office training with a certified DEXIS instructor and that you and all of your clinical team set aside 4 to 6 hours to learn the system together. This manual is not intended to serve as a substitute for this training. However, as preparation for the training, we do encourage you to read the manual thoroughly and practice with your equipment safely and carefully for at least one week prior to your training date. DEXIS_9_EN.book Page 1 Tuesday, October 5, 2010 12:58 PM
  • 10. Chapter 1 2 Please note that this manual assumes that new users possess basic com- puter skills and an understanding of the Windows® operating system. Ab- sent this experience, we highly recommend that you obtain these skills through a computer course, video, or textbook. Your DEXIS representative may be able to suggest (although not endorse) one or more of these com- puter learning resources. Unless otherwise stated, in this manual Click refers to a single left mouse- click. Most functions in the DEXIS software require a single left click. Erro- neous or impatient double-clicking may cause the program to function improperly. Also, as a general request, please give the program time to start and complete each function before clicking again. Let’s start your journey into the world of DEXIS Digital X-ray! 1.2 Intended Use of the DEXIS Software The DEXIS software is a software program for general dental and maxillofa- cial diagnostic imaging. It controls capture, display, enhancement and sav- ing of X-ray digital images from digital imaging systems. It can also handle other types of images acquired by digitizing film with a flat bed scanner, or color images from intra-oral and extra-oral dental cameras. 1.3 Conventions Used in the Manual The following conventions are used to bring the operator’s attention to im- portant information: Alerts the operator that failure to follow the pro- cedure could cause bodily injury or death. CAUTION Alerts the operator that failure to follow the pro- cedure could cause damage to the equipment or cause loss of data. Important: Provides advice for the operator regarding use of the device or a process. Please note: Highlights important or unusual points. WARNING DEXIS_9_EN.book Page 2 Tuesday, October 5, 2010 12:58 PM
  • 11. 3 Introduction 1.4 What’s New in Release 9 DEXvideo Video Acquisition A new video application, DEXvideo, replaces the Live Video Screen in DEX- image. When installed, DEXvideo starts automatically when you start the computer. You do not have to select a patient before opening the DEXvideo screen. Enhanced User Interface All text fields are now enabled to use the standard Windows functions for Insert Mode, Copy, Cut, Paste, Home and End. Sub-dialogs have close (X) buttons in the title bars to close the dialog and cancel the operation. Mul- tiple file selection has been enabled on the Import Images dialog. Improved DEXray Intra-oral Image Acquisition Sensor model selection is available from the intra-oral X-ray acquisition di- alog for convenience when multiple types of sensors are used. DEXray now supports Dentrix ImageRayi sensors. Easier TWAIN Device Acquisition Digital pans that are supported through TWAIN, can now be integrated into DEXray so that they are accessed through the X-ray button instead of the Scan button. Pans accessed through the X-ray button need a DEXpan li- cense, and do not need a DEXscan license anymore. DEXpsp Modules for Phosphor Plate Scanners Two new modules, DEXpsp-ScanX, for use with ScanX/VistaScan phosphor plate scanners and DEXpsp-Optime, for use with Soredex Optime phosphor plate scanners allow easier scanning for these models. These modules are separate programs, which are started from DEXray. Simplified Tooth Number Assignment The tooth number assignment has been simplified and has been made more intuitive to better support customers who use software plate scan- ners and for those who have converted image databases. DEXIS_9_EN.book Page 3 Tuesday, October 5, 2010 12:58 PM
  • 12. Chapter 1 4 Angle Measurement in DEXray An angle measurement option has been added to DEXray to calculate the angle, or angles, when three or more points are selected on an image. The angle measurements can be stored as part of the image. Export Patient List The patient list can now be exported into a text file. DEXimplant Implant Library Expanded The DEXimplant Implant Library has the following additions: • Atlas: Submerged, Internal, External • Bicon: additional sizes • Biohorizons: External, Internal, Single Stage, Tapered Internal, One Piece, Overdenture. • Imtec MDI Hybrid • M&K Dental: ixx2 • Nobel Biocare: NobelPerfect Groovy, NobelActive • SybronPRO™ XRT • SybronPRO™ TL • Tiologic Security and Privacy Features The patient list in DEXIS Patient Administration can be hidden from view us- ing a preference. Recycle bin enhancements enable the setting of periodic deletions of imag- es in the recycle bin and ad hoc emptying of the recycle bin for users with administrator rights. If installed, DEXsecurity allows function execution control. The right to use DEXIS functions can be granted or denied by the administrator to individual users or to groups of users using the Windows “Access Control List” mech- anism. DEXIS_9_EN.book Page 4 Tuesday, October 5, 2010 12:58 PM
  • 13. 5 Introduction DEXbox Management Enhancements The limit for the number of DEXboxes has been increased to 200 and a scroll bar has been added to the DEXbox management dialog if more than 20 DEXboxes are present. Resolution Modes for DEXIS Platinum Sensor The DEXIS Platinum Sensor operates in two modes — “High Resolution” and “Ultra Resolution.” By default, the sensor captures X-rays in High Res- olution mode, resulting in crisp clinical radiographs at a small file size (~100KB with DEXIS’ proprietary compression). When desired, the option to switch to Ultra Resolution mode is readily available by clicking the sensor button to open the Sensor Settings dialog, then clicking the appropriate button. Capturing X-rays in Ultra Resolution produces larger file sizes (~400KB), but can be beneficial when looking for very fine detail by magnifying areas of concern. DEXIS_9_EN.book Page 5 Tuesday, October 5, 2010 12:58 PM
  • 14. Chapter 1 6 DEXIS_9_EN.book Page 6 Tuesday, October 5, 2010 12:58 PM
  • 15. 7 Installation, Care, and Maintenance Chapter 2 Installation, Care, and Maintenance Most telephone calls for assistance received by the DEXIS Customer Care specialists stem from inadequate attention to hardware and software in- stallation. We recommend that you engage a qualified computer specialist or network technician and develop a permanent relationship for your ongoing comput- er needs. We understand the prospective of “saving money” by implement- ing a seemingly more cost-effective solution; however, it is our experience that while this may be true in the short term, such decisions are consider- ably more expensive in the long run. After installing and testing your software, hardware and components, we suggest that you take the time to explore the software and read the on- screen manual. When calling Technical Support for assistance, please make sure that you have access to the computer on which the DEXIS software is used and on which the manual may be displayed. You will be instructed where to find answers and solutions for your particular questions. This allows optimal “over the phone” assistance. 2.1 Hardware Requirements Our current hardware system requirements are available in the support sec- tion on our web site www.dexis.com, from your representative, and from our Customer Care Center. As technology changes, our requirements are updated to reflect such changes. Please consult current DEXIS systems re- quirements before the purchase of any hardware. Note that systems meeting only the minimum requirements may fail to de- liver a satisfactory experience. Systems with faster processors, more mem- ory, and bigger, faster hard drives will significantly enhance performance. DEXIS_9_EN.book Page 7 Tuesday, October 5, 2010 12:58 PM
  • 16. Chapter 2 8 2.1.1 Operating System Platform This software has been validated for use on the following members of the Microsoft Windows product family of operating systems: • Windows XP Professional (SP3) • Windows Vista Business (SP1) • Windows 7, 32-bit and 64-bit Please note: For Windows 7, the 64-bit option is only available with DEXIS software, DEXIS Platinum sensor, and DEXcam3 camera. Do not use this software with other versions of Microsoft Windows or on other operating systems that emulate the Windows operating system un- less the software has been validated for use on that platform by DEXIS. 2.1.2 Caution: Hardware & Software Upgrades Every change in hardware or software exposes your business to risk. Com- puters containing patient records are “mission critical.” Careful consider- ation is required in order to minimize risk before changes are made to any system that is currently in use. Whether the change is to be made to hard- ware, to the operating system, or to the DEXIS software, you should be pre- pared to deal with an unexpected outcome including a catastrophic loss of data. For this reason, we offer the following suggestions for use with mis- sion-critical systems: Instead of upgrading hardware or the operating system, consider purchas- ing a new pre-configured system. Computers are amazingly inexpensive to- day; bringing-up a new system in parallel with an existing system is a good way to avoid placing the existing system at risk. The existing system will re- main productive while the new system is qualified and readied for full ser- vice. Consider the new computer as cheap insurance, but it’s even better than insurance because you get to keep it. If you must upgrade your existing system, consider purchasing an addition- al hard drive and making a bootable, literal copy of the existing hard drive. Remove the original hard drive and make the changes to the newer (and probably larger) hard drive. With the original hard drive removed from the computer, it is not at risk and all of your data will be safeguarded. If the new DEXIS_9_EN.book Page 8 Tuesday, October 5, 2010 12:58 PM
  • 17. 9 Installation, Care, and Maintenance changes are found to be unsatisfactory after a suitable evaluation period, you can always re-install the old hard drive and fully restore your previous environment. CAUTION Always back-up your data and store it off site. Before assum- ing that your back-up efforts have been successful, make sure that you understand the backup process and practice the restore process at least once on a test system. Verify that both the operating system and data have been preserved. 2.1.3 Diagnostic Imaging It is in the display of images on the screen that your needs dramatically de- part from the needs of ordinary computer users. The quality of image pre- sentation will be important in your selection of a monitor and video card. Carefully evaluate your selection prior to purchase. DEXIS provides the DEX- screen program for this purpose. DEXscreen leads you through a variety of tests that evaluate the quality and setting of the monitor. DEXscreen can be accessed from the installation CD-ROM by clicking Test your Monitor with DEXscreen. You can also access it from the Tools icon in DEXIS Administra- tion. DEXscreen is self-explaining and guides you through its menus. Here are a few things that we have learned after many years of experience: • Premium monitors are highly recommended. Your needs are similar to those of a professional image scientist or a commercial photographer, so treat yourself to the best quality. • If cost is a concern, choose a premium CRT monitor over a low-cost LCD monitor. • LCD monitors must have a contrast ratio of 400:1 or better. Before pur- chasing an LCD monitor, test its capability to display all 256 shades of gray accurately. • When selecting a laptop computer, choose models with LCD screens rec- ommended for use with photographic imaging. DEXIS_9_EN.book Page 9 Tuesday, October 5, 2010 12:58 PM
  • 18. Chapter 2 10 • LCD monitors must be used in native (highest offered) resolution. Since high screen resolution makes text and icons appear small, monitors with high native resolution are often not the best choice. CAUTION LCD monitors display images accurately only when used in native resolution; therefore do not attempt to enlarge dis- played text and icons by lowering the resolution setting. 2.1.4 Special Hardware Requirements DEXray To acquire images using the DEXray software, the PC on which DEXray is in- stalled must be connected to a sensor that has the applicable driver. DEXimage DEXimage requires an image source and a capture device. The quality of the result cannot be better than the quality of the source. Expensive cam- eras may offer higher resolution still images at low frame rates, while full- motion video cameras may capture dozens of frames per second, but none of them high resolution enough to allow enlargements. Capture devices may be interfaced directly to boards installed in the back of the computer or to interfaces such as USB. The interface you choose may affect the performance or usability of the result. Ease of use is also impor- tant. A product that requires the user to transfer images from camera to computer in order to send images may be less usable than a product that transfers images in a “hands free” fashion. Always test your camera installation as a stand-alone device before inter- facing to DEXimage. A foot pedal can be used in DEXimage to start and stop the live video and to capture still pictures. DEXimage can handle foot pedals connected to a serial port and pedals connected to a game port. Some cameras have a capture button that can be used instead of a serial port foot pedal. DEXIS_9_EN.book Page 10 Tuesday, October 5, 2010 12:58 PM
  • 19. 11 Installation, Care, and Maintenance DEXscan DEXscan requires a scanner. To scan ordinary paper images, such as your signature or office logo, a standard scanner may be used. If you intend to scan X-ray images, a scanner with a transparency adapter is required. Be sure to select a scanner that has an interface that is appropriate for your in- stallation. 2.2 Hardware Installation Please refer to the specific owner’s manuals for information on your com- puters, printers, scanners, card readers, foot pedals, monitors, and camer- as for installation and use. Should you need technical assistance with any of these items, please consult the manufacturer of each specific item. Again, we highly recommend employing the services of a factory-trained DEXIS engineer or experienced DEXIS installer. We also recommend that you engage a qualified computer specialist or (preferably) a network tech- nician and create a sustainable relationship for your ongoing computer needs. The following hardware has been qualified with the DEXIS 9 software: Intra-oral Sensors: • DEXIS sensor with PC card • DEXIS sensor with DEXusb • DEXIS sensor with DEXbox • DEXIS Platinum sensor • Dentrix ImageRayi • Gendex Visualix Gx-S/HDI • Gendex Visualix eHD • KaVo Dig eXam • Schick CDR • Kodak RVG 6000 (via Kodak Imaging) • Kodak Trophy RVG, type 4/5 DEXIS_9_EN.book Page 11 Tuesday, October 5, 2010 12:58 PM
  • 20. Chapter 2 12 Digital Pans • Gendex Orhoralix 8500 DDE • Gendex Orthoralix 9200 DDE • Sirona (via JWSDX interface) • Kodak 8000/9000 (via Kodak Imaging) • Planmeca (via DIDAPI interface) • Pans supporting TWAIN interface Phosphor Plate Scanners • Gendex DenOptix USB • Gendex DenOptix QST • Soredex Optime • Air Techniques ScanX • Dürr VistaScan Intra-oral Cameras • DEXIS DEXcam USB1 (DEXcam1) • DEXIS DEXcam USB2 (DEXcam2) • DEXIS DEXcam3 • Dentrix ImagecamHD • Gendex eZ1 • Gendex dCam • Gendex AcuCam Concept IV FWT (pedal needs game port adapter) • Gendex GXC-300 • Sopro 595 USB • Vipercard video capture card DEXIS_9_EN.book Page 12 Tuesday, October 5, 2010 12:58 PM
  • 21. 13 Installation, Care, and Maintenance 2.3 Display Settings Changes Before installing your DEXIS software, please change your display settings to best view the DEXIS screens. For Windows XP: 1. Go to Start, then Settings and click on Control Panel; double-click on the Display icon to open the Display Properties screen; click on the Settings tab at the top. 2. Under Colors: Choose True Color (24-bit or 32-bit) if available, otherwise choose High Color (16-bit). Some older, rather slow computers with out- dated video capture cards may limit you to 16-bit color. 3. Under Screen Area: Always choose the native (the highest offered) res- olution. This is especially important for LCD monitors. 4. Click on Apply to apply these settings. For Windows Vista: 1. Go to Start, click on Control Panel; click on Appearance and Personal- ization, click on Personalization, then click on Display Settings. 2. Under Resolution: Always choose the native (the highest offered) reso- lution. This is especially important for LCD monitors. 3. Under Colors: Choose Highest (32-bit). 4. Click on OK to apply these settings. For Windows 7: 1. Go to Start, click on Control Panel; click on Appearance and Personal- ization, click on Adjust Screen Resolution. 2. Under Resolution: Always choose the native (the highest offered) reso- lution. This is especially important for LCD monitors. 3. Click on Advanced Settings, then click on the Monitor tab. Under Colors: choose True Color (32-bit). 4. Click on OK to apply these settings. DEXIS_9_EN.book Page 13 Tuesday, October 5, 2010 12:58 PM
  • 22. Chapter 2 14 CAUTION LCD monitors display images accurately only when used in native resolution; therefore do not attempt to enlarge dis- played text and icons by lowering the resolution setting. 2.4 Software Installation Please note: If you purchased your computer through DEXIS, it will be de- livered to you pre-loaded with software and initial information. Please go directly to “installation verification and testing” on page 137. Otherwise, please use the following instructions to install your new DEXIS Digital X-ray System software, then use the verification and testing instruc- tions in “installation verification and testing” on page 137. Following all the instructions will ensure that your system is fully functional. The system will be taught in the Simulation mode for all hardware not functioning at the time of training. Please note: Your DEXIS system must be completely installed before train- ing can begin. 2.4.1 Installation Planning If you plan to run DEXIS on a stand-alone computer, there is not much to plan and you may proceed to the next section. If you have a local area network, you need to designate a hard disk of one of the computers to hold the DEXIS data (images and patient data). This server disk needs to be shared so that it can be accessed (with read and write access) from all of the computers that will be running DEXIS software and will thus need to access the data. It has to be given a drive letter on all participating computers. We suggest the drive letter “X” (for X-ray), and will use this letter in subsequent examples, although any other drive letter would be fine. Important: If these terms are unfamiliar to you, please STOP. DEXIS highly recommends that you contact your network professional before proceed- ing further. DEXIS_9_EN.book Page 14 Tuesday, October 5, 2010 12:58 PM
  • 23. 15 Installation, Care, and Maintenance For a network installation, the following steps have to be performed on all computers on which DEXIS software is to be used. Start with the server, where the DEXIS data will be stored. 2.4.2 Running the Installation Program To begin the installation, insert the DEXIS installation CD into your CD-ROM drive. The CD is equipped with an Autorun feature and will start on its own. Should the Autorun feature not work with the CD-ROM drive in your comput- er, you can launch the installation menu manually: Double-click on the My Computer icon on your desktop, then open the CD-ROM drive by double- clicking on its icon, then double-click on the DEXmenu icon. Please note: You need Administrator rights to install software. If user ac- counts with different rights are installed on your system, please log into an account with Administrator rights before continuing. Select Language If your CD offers the choice, choose English-US, if you reside in the US. All other versions give international tooth numbers that differ from those used in the United States. The Software Installation CD for distribution in the United States does not offer this choice. You may select other versions on this CD by clicking on International Versions. Select Software Click on Install DEXIS Software to install all the major components of the DEXIS software. Choose Destination Location During the installation process you will be asked for the folder into which the software should be installed. Typically you should accept the default folder, which is C:DEXIS. In any event, this must be a folder on a local hard disk, not on a network drive. CAUTION If this is an upgrade, please make sure to install the new soft- ware into the same folder as the older DEXIS version. It will DEXIS_9_EN.book Page 15 Tuesday, October 5, 2010 12:58 PM
  • 24. Chapter 2 16 overwrite the existing program and will not destroy your da- ta. Do not uninstall the older version unless requested to do so by DEXIS Technical Support. Select Data Directory Next, you will be asked where you would like to store DEXIS data. Typically, this will be C:DEXISData for a non-networked computer. On a network, this will be C:DEXISData on the server and X:DEXISData (or DEXISData on any other drive) on the client workstations. Please note: If you installed DEXIS on the server first and mapped the drive properly, the correct shared data folder will be automatically suggested by the installation program. Follow the on-screen directions until DEXIS is successfully installed. During the installation you might receive a message telling you that the software being installed did not pass Windows Logo test. In this case, please choose the option Continue Anyway. Install DEXvideo - Intra-0ral Camera DEXvideo works with your intra-oral camera. When installed, it starts when your computer is started so that the intra-oral camera is always ready for use without the need to select a patient. Click on DEXvideo — Intra-oral Camera to install the DEXvideo software. During the installation process you will be asked for the folder into which the software should be installed. Typically you should accept the default folder, which is C:DEXIS. In any event, this must be a folder on a local hard disk, not on a network drive. Install Additional Software Install other software only as it applies to your practice and purchased modules. Please call DEXIS Technical Support for assistance. If this is an upgrade from a previous version, the installation program will automatically upgrade all installed DEXIS components. DEXIS_9_EN.book Page 16 Tuesday, October 5, 2010 12:58 PM
  • 25. 17 Installation, Care, and Maintenance 2.4.3 Sharing Data Between Disconnected Systems In some cases two image databases on separate systems need to be main- tained, that should contain the same data. For these cases DEXIS provides DEXsync, a program that allows for the synchronization of two image data- bases. Use DEXsync for the following configurations: • Two stand-alone laptop computers are used for acquiring X-rays; no of- fice network is installed. You want to look at all X-rays on both laptops. • A laptop computer is used for acquiring images while it is not connected to the office network. • You have two separate office networks which should both hold the data of all patients. CAUTION Please contact DEXIS Technical Support for assistance with the installation of DEXsync. This is especially important if you have existing image databases that need to be restruc- tured. Always back up your image data before starting any re- structuring or merging operation. 2.4.4 Adding Initial Information Once DEXIS is installed you will find a DEXIS icon on your desktop. Please note: The Specialty Preference Setting is only applicable for the USA version of DEXIS. To initiate the DEXIS Administration program, double-click on this icon. A Preference Setting window will appear asking you to select your specialty. Click on the appropriate button. You can change this selection later on the General Preferences tab, see “Speciality” on page 25. Next, a window will appear asking for your practice name. This information must be entered carefully and accurately as it will appear on all printed items. Click OK when done. Next, you will be asked to enter your telephone number. Type it in and click OK. DEXIS_9_EN.book Page 17 Tuesday, October 5, 2010 12:58 PM
  • 26. Chapter 2 18 Now, you will be asked to enter a new patient. For setup and test purposes, enter a test patient. Type in a number (such as “1”), a last name (such as “Test”), and a first name (such as “Tim”). Click Done. You will now have full view of the DEXIS Administration screen, and patient’s name, Tim Test, will appear on the screen. For network systems, this initial information should now be accessible across the network and will not need to be added to each workstation. Please note: If linked to a practice management program, all patients must be added through your practice management program. However, you may add a test patient directly into DEXIS Administration (see above) to be de- leted after testing. Alternatively, you may add a test patient within your practice management program or choose to use an existing patient’s file with which to practice. For systems where the DEXIS Integrator software is an option, instructions for the use of DEXIS-provided links is provided in the appendix. 2.4.5 Obtain Registration Codes From the DEXIS Administration screen, click on the Wrench icon and then click on Component Licensing. Call DEXIS Technical Support for registration codes for your purchased modules. One of our technical representatives will walk you through the process. When you click on the button next to the component name or upon opening a DEXIS module that needs a separate license, you will be asked to register. You may choose Later and this way try the module for 30 days. For a preview of non-registered modules, click on the Show Introduction to... button. Please note: Introductions are not present for all modules. If there is no in- troduction for the module you are trying to register, the button is not shown. For network systems, you may obtain registration codes on any one work- station for the entire network. Should you wish to make changes to your practice name or telephone num- ber you will need to re-register your programs. Your DEXIS installation is now complete. DEXIS_9_EN.book Page 18 Tuesday, October 5, 2010 12:58 PM
  • 27. 19 Installation, Care, and Maintenance 2.5 Regular Backups of Image Files It is extremely important to back up your data on a regular basis as a matter of routine maintenance. DEXIS offers DEXsafe, a one-step feature to copy all or part of your DEXIS data to a specific backup drive. Please see our sys- tem requirements for recommendations on devices. Instructions for using DEXsafe are found in “Administrator Functions” on page 157. DEXIS_9_EN.book Page 19 Tuesday, October 5, 2010 12:58 PM
  • 28. Chapter 2 20 DEXIS_9_EN.book Page 20 Tuesday, October 5, 2010 12:58 PM
  • 29. 21 The DEXIS Administration Program Chapter 3 The DEXIS Administration Program The DEXIS Administration program is the starting point for all stand-alone versions of the DEXIS Digital X-ray System. All other DEXIS programs (in- cluding DEXray, DEXimage, DEXwrite, etc.) are accessed through this pro- gram after first selecting a patient or creating a new patient. In addition, this program is the starting point for setting up various global Preferences or default settings with regard to your office and clinical team members (Providers). Other preferences control the look and feel of the DEXIS program and automate certain frequently used functions. DEXIS owners who choose to set up their DEXIS programs to interface di- rectly with their practice management programs will use the DEXIS Admin- istration program much less frequently (primarily to set global preferences) as they will select their patients from the equivalent screen in the practice management program. 3.1 DEXIS Administration Screen Overview To open the DEXIS Administration screen, double-click on the DEXIS icon on your desktop. You may apply certain Windows functions to this screen. You may size the screen using click-and-drag. You may also use the three buttons in the up- per right to minimize the screen (thus sending it to the task bar — click the tab to bring it back up), maximize or restore a screen, or close a screen. You may also use the following standard Windows functions in any field where text can be entered: • Toggle between insert and replace modes using the Insert key on the key- board. Insert mode is the default. • Move the cursor to the beginning of the line (Home key) and end of the line (End key). DEXIS_9_EN.book Page 21 Tuesday, October 5, 2010 12:58 PM
  • 30. Chapter 3 22 • Copy (Ctrl-C), Cut (Ctrl-X), and Paste (Ctrl-V) text. There are icons across the top of the screen for various functions. When en- tered, a list of patients will appear on the right side of the DEXIS Adminis- tration screen. A patient search field, alphabet keys, buttons to access patient information, and Referring Dentists are on the left side of the screen. If entered, patient pictures are visible in this area. Place your cursor over any of the icons and buttons and a help bubble, called a Tooltip, will appear with information about the function. Often, there is also a keystroke that will execute the function. The Tooltip help fea- ture is available throughout the DEXIS system. There are up to five program icons that appear on the upper left area of the DEXIS Administration screen: The first leads to the DEXray X-ray screen, the second to the DEXimage screen, the third leads to DEXwrite, the fourth leads to DEXclaim, and the fifth closes DEXIS Administration. It is possible for you to choose to hide certain icons. See “Component Licensing” on page 23 for details. Click on the DEXIS logo icon on the far right to open the Program Informa- tion screen. This screen offers program information and will allow you to ac- cess the Context Sensitive Help feature and the DEXIS web site. The Help Feature Click on the Help button and your cursor gains a “?” symbol. Now, click on a feature or icon and the DEXIS on-screen manual will open in an Acrobat Reader screen to the page where the use of the function is described. You may zoom in on the screen shots to see more detail. Click on DEXIS Web Site to open the site in your browser if you are online. Click OK to close the Program Information screen. 3.2 Setting General Preferences The Wrench icon opens Tools and Preferences where a variety of informa- tion is entered, accessed, and/or changed. Click on the General tab to access and set the following: DEXIS_9_EN.book Page 22 Tuesday, October 5, 2010 12:58 PM
  • 31. 23 The DEXIS Administration Program Component Licensing Click on the Component Licensing button to open the Component Licensing screen: This area shows your practice name and phone number and is the information with which you license the use of DEXIS. You must obtain a reg- istration code for each of your purchased modules. To obtain a code, go to this screen and call Technical Support. Should you decide to change your practice name or phone number, you will need to re-register. To hide icons for non-purchased modules, you may choose the Hide button next to each component. Format DEXIS stores the images in one of three image file formats: the proprietary DEXIS format, a compressed format; uncompressed TIFF, helpful if your practice management program is to directly access the images; DICOM, a universal digital format for medical and dental imaging being standard in hospital environments. The default and recommended format is DEXIS. When exporting images you still can choose a different format, the DEXIS software will convert the images for you. Intra-oral X-ray Size, Panorama X-ray Size, Color Image Size You can set the sizes of enlarged intra-oral X-rays, panorama X-rays, and color images in percent of the screen width. The defaults are 50% for intra- oral X-rays, 100% for panorama X-rays, 70% for color images. Address Text, Report Text Place the practice address in Address Text, up to 5 lines. Choose Done to save or Cancel to cancel changes. This information appears on your print- outs. Report Text offers a basic letter. Change the letter here for the default — it can be adapted for each printout. The referrer (w/o address), patient, date and provider will merge — no other information is available for merging. The letters created from DEXray, unlike DEXwrite, are not saved and there- fore not editable. DEXIS_9_EN.book Page 23 Tuesday, October 5, 2010 12:58 PM
  • 32. Chapter 3 24 Navigator Check the selection box to show the Navigator when an X-ray is enlarged. Folders Click on the arrow button to have DEXIS search for possible DEXIS database folders and to select from the list. Initials You may place initials into this field, which are then proposed when delet- ing X-rays. This is useful if the system is always being used by the same per- son. She/he then need not put in the initials each time she/he deletes an X-ray. Tooltip Delay The number in the box is the delay in milliseconds before the Tooltip bub- ble appears. Choose between 0 and 9999. By choosing 0, Tooltip will not appear. Hide Images Exceeding You may enter the number of images to be displayed on the DEXray and DEXimage screens. When the number of images exceeds the entered num- ber, images are hidden by consultation from oldest to newest. In other words, all images from a consultation will be shown even if the total num- ber of images from that consultation exceeds the number specified. For ex- ample, given the following sets of images: 4 X-rays from 13 April 2009 12 X-rays from 30 September 2008 8 X-rays from 1 January 2008 If the Hide Images Exceeding field is set to 1, all images will be hidden ex- cept those from the 13 April 2009 consult. If the Hide Images Exceeding field is set to 10, all images will be shown ex- cept those from the 1 January 2008 consult. DEXIS_9_EN.book Page 24 Tuesday, October 5, 2010 12:58 PM
  • 33. 25 The DEXIS Administration Program To unhide images, click on the Archive button in either the DEXray or DEX- image screen, and select the images to be made visible. See “The Image Ar- chive” on page 68. Print/Export System Info Should you have technical issues, DEXIS Technical Support may ask you to send information about your computer and the DEXIS installation. These two buttons issue this information. It is either printed or written to a text file on your desktop. The file can be viewed, printed, or sent by e-mail. Comm Folder This is the default folder for importing and exporting images. The DEXIS Set- up sets it to the subfolder Comm of your data folder. You may want to change it if you frequently exchange images with another program that ex- pects them in a different location. Speciality Selecting one of the specialties will initialize preference settings as mostly used by dentists of the selected specialty. Of course, you may change the individual settings one by one according to your needs, see also “Setting DEXray Preferences” on page 38. • General: Set Startup View to Mouth. • Perio: Set Startup View to Mouth. • Endo: Set Startup View to History. DEXscreen Monitor Test Monitors are crucial system components, see “Diagnostic Imaging” on page 9. By clicking this button you open DEXscreen, the DEXIS monitor test program, that displays various test patterns to help you evaluate the suit- ability of your monitor and monitor settings. DEXIS_9_EN.book Page 25 Tuesday, October 5, 2010 12:58 PM
  • 34. Chapter 3 26 On 2nd Monitor This button is for two monitor setups that allow you to move windows be- tween the two monitors (needs a special display adapter). If the button is checked, the DEXray and DEXimage screens will be shown on the second monitor, and the DEXIS Administration screen can be moved to either mon- itor. The DEXIS Administration will remember its position and will show up on the monitor where it has been left. 3.3 Setting Administration Preferences In Tools and Preferences, click on the Administration tab to access and set the following: Patient IDs Should you wish to give your patients specific numbers, choose Manual. DEXIS will automatically assign a unique number to each patient if you choose Automatic. If you use a practice management program we recom- mend using manual numbering and entering the IDs issued by that soft- ware. If your practice management program is linked to DEXIS, Manual must be selected. DEXIS defaults to Manual upon installation. DEXIS_9_EN.book Page 26 Tuesday, October 5, 2010 12:58 PM
  • 35. 27 The DEXIS Administration Program Providers Click the Providers arrow to open the Provider Selection screen and view the list of providers for the practice. A search field is located at the top of the screen. To use the search function, type the first few letters of the pro- vider’s name until the name appears. To add a new provider, click New to open a blank Provider Data screen. Type the last name; DEXIS will capitalize the first letter. Use the tab or arrow key to go to the next line and add a first name. Again, DEXIS will capitalize the first letter. Add any other information as desired, including the provider’s practice management number or letters under Ref.#/Initials. Individual pro- vider logos for use with DEXwrite can be captured with a scanner using the Acquire Logo button. See “DEXscan: Scanned Images” on page 99 for scan- ning instructions. Delete the current logo for this provider by clicking the Delete Logo button. Click Done to save or Cancel to cancel. To modify information for an existing provider, search for the name, click on the name to highlight the line, and then click Modify to open the Provider Data screen for that particular provider. Alternatively, you may double-click on the name to open this screen. Tab or arrow down to make changes. To delete a provider, click on the name to highlight the line, then click De- lete. The provider will no longer show on the list; however, patients at- tached to this provider will still show the providers name on their Patient Data screens until another one is selected. Signatures and Logos These items are used to scan signatures and the practice logo for use with DEXwrite. You may also access these functions from DEXwrite Preferences; see “Setting DEXwrite Preferences” on page 114. See also “Scanning a Sig- nature or Logo” on page 104. Single Patient on Screen If this option is chosen, all DEXray and DEXimage screens are automatically closed when a new one is opened. Selecting this option is recommended so that images are not entered by mistake into the wrong patient’s file. DEXIS_9_EN.book Page 27 Tuesday, October 5, 2010 12:58 PM
  • 36. Chapter 3 28 Larger Font Select the Larger Font box to increase the size of the font on the patient list. This change takes effect after first closing and then reopening DEXIS. Upon installation, the font defaults to the larger size. Patient List Hidden If this option is chosen, the patient list is hidden on the DEXIS Administra- tion screen. The patient list will only show when characters are typed into the Patient text field. You are prompted to exit and restart the DEXIS pro- gram for the preference to take effect. Click OK on the dialog. Close and re- start DEXIS. Delete Image Automatically from Recycle Bin When images are deleted, they are kept in a recycle bin. You can select this option to automatically delete images in the recycle bin and specify the number of days before they are deleted (30 days is the default). Empty Recycle Bin This option is only available to an administrator. Rebuild Index If you experience a loss of database information, DEXIS Technical Support will use this feature to help you rebuild the database. Please do not use this feature without assistance. DEXray and DEXimage Preferences Each screen has its own preferences and defaults. You may access the pro- grams’ preferences here or from their actual screens. Please see “Setting DEXray Preferences” on page 38 and “Setting DEXimage Preferences” on page 85. DEXIS_9_EN.book Page 28 Tuesday, October 5, 2010 12:58 PM
  • 37. 29 The DEXIS Administration Program 3.4 Entering Patient Data The patient list is shown on the main DEXIS Administration screen. You may use the scroll bar to the right to search for a patient. The search field for pa- tients is located in the top left side of the main screen. Type the first few let- ters on the patient’s name until the name is visible. Instead of typing, you may click on the letter buttons. To select a patient, click on the name; the line then becomes highlighted. To add a new patient, click the New Patient button to open a blank Patient Data screen. Type a number, if applicable. Tab or arrow down to the next line. Type the last name; DEXIS will capitalize the first letter. Tab or arrow to the next line and add a first name. Again, DEXIS will capitalize the first let- ter. Add any other information as desired. The Date of Birth may be entered in different formats: with slashes (M/D/YYYY), with dashes (D-M-YYYY), or 6-digit no dashes, spaces or slashes (MMDDYY). Choose a provider by clicking on the arrow button next to Provider. This will bring up the Provider Selection screen. Click on the name to highlight the desired provider, and then click Select. Choose a referring doctor by clicking on the arrow button next to Referrer. This will bring up the Referrer Selection screen. Click on the name to high- light the desired name and then click Select. Use New Picture to insert a patient’s picture via scanner or digital camera. This is covered in detail in “Scanning a Picture for Patient Data” on page 103 and “Taking Digital Photographs” on page 87. Delete the current picture for this patient by clicking the Delete Picture arrow button. Click Done to save or Cancel to cancel. To modify information for an existing patient, search for the name and then click on the name to highlight the line. Click Modify to open the Patient Data screen for that particular patient. Tab or arrow down to make changes. Modification of the patient number is a special case: you may freely change the number to one that is not yet given to another patient. You may change DEXIS_9_EN.book Page 29 Tuesday, October 5, 2010 12:58 PM
  • 38. Chapter 3 30 the patient number to a number already in use only if the names of both pa- tients are the same. To delete a patient file, click on the name to highlight the line and then click Delete. As a security feature, all images must be deleted before the patient file can be deleted. Once a patient is added or selected (the line will be highlighted), click the appropriate icon to proceed to his or her DEXray, DEXimage, DEXwrite, or DEXclaim screen. A light appears under the DEXray and DEXimage icons if there are images in the programs for this patient. Alternatively, you may double-click on the patient’s name to open a screen. However, since DEXIS remembers the last screen opened (DEXray, DEXimage or DEXwrite) for the last patient, this is the screen that will open for your newly chosen patient. Please note: If you are using a DEXIS/practice management link, enter all new patients through your practice management program and NOT on the DEXIS Administration screen. See “The Integrator” on page 152 for more in- formation. DEXIS_9_EN.book Page 30 Tuesday, October 5, 2010 12:58 PM
  • 39. 31 The DEXIS Administration Program 3.5 Administrative Tools Referring Dentists Referring dentists need to be entered and matched to patients if DEXwrite is used to write letters to them. Click on the Referring Dentist button to see the list of referring dentists. This opens the Referrer Selection screen. A search field is located at the top of the screen. To use the search function, type the first few letters on the referrer’s name until the name is visible. To add a new referring doctor (or a doctor or company to whom you refer or correspond), click New to open a blank Referrer Data screen. Type the last name; DEXIS will capitalize the first letter. Tab or arrow to the next line and add a first name. Again, DEXIS will capitalize the first letter. Add any other information as desired. Click Done to save or Cancel to cancel. To modify information for an existing Referring Dentist, search for the name, click on the name to highlight the line. Click Modify to open the Re- ferrer Data screen for this particular individual. Alternatively, you may dou- ble-click on the name to open this screen. Tab or arrow down to make changes. Again, click Done to save or Cancel to cancel. To delete a Referring Dentist, click on the name to highlight the line, then click Delete. The referrer will no longer show on the list, however, patients attached to this referrer will still show the name on their Patient Data screens until another one is selected. Print Reports The Print Icon allows to print and export reports containing various data: Print Patient List This feature prints a list of patients in alphabetical order with patient num- ber, date of birth, gender, and provider number. DEXIS_9_EN.book Page 31 Tuesday, October 5, 2010 12:58 PM
  • 40. Chapter 3 32 Export Patient List This feature exports the patient list into a text file. The text file contains one line per patient, with the following tab-separated fields: ID, last name, first name, middle initial, date of birth, gender, and provider. Print Provider List This feature prints a list of providers showing the provider name, DEXIS number, and practice management number. Print Referring Dentists This feature prints a list of referring dentists showing each doctor’s name, address, phone number, and DEXIS number. Print Activity Report This feature prints a list of patients and images taken for them over a se- lected time period. This list also shows deletions plus initials used for each deletion. Additionally, it shows the source of each image (i.e., imported, scanned, etc.). Export Activity Report You may also choose to export activity information to a file. This file has one line per activity. The lines contain fields separated by tabulator characters. The format is suited for import into other software such as spreadsheet pro- grams. Print Queued Letters When you chose to put a DEXwrite letter into the queue for later printing (see “Queue” on page 118), this button will appear on the DEXIS Adminis- tration screen. The function shows a list of all letters in the queue and en- ables you to print all letters, to print just selected letters, or to delete letters from the queue. DEXIS_9_EN.book Page 32 Tuesday, October 5, 2010 12:58 PM
  • 41. 33 The DEXIS Administration Program Import from Communication Folder or from Temporary Folder An additional Import icon will appear in the tool bar in two cases: • The communication folder (set in Tools & Preferences, see “Comm Fold- er” on page 25) contains images. • Images are present in the folder used for temporary storage on the local hard disk of newly acquired images. If you click on that icon, a list with information about each image will be shown: file name, date, patient name, and tooth number. If you double-click on an image entry, the respective patient file will be se- lected. If the patient file does not yet exist, the New Patient screen will ap- pear with all known information already entered. When you now open the DEXray or DEXimage screen for this patient, the Import dialog will show up automatically. This mechanism allows for the easy transfer of images between locations if the sending dentist A and the receiving dentist B both have a DEXIS system: 1. Dentist A sends X-rays of patient P by e-mail or on a disk to dentist B. 2. Dentist B opens the X-rays with DEXview and selects Export to DEXIS. This will put the X-ray into the communication folder of his DEXIS instal- lation. 3. Dentist B selects patient P either manually or by clicking on the Import button in DEXIS Administration. 4. Dentist B opens the DEXray screen for patient P; the Import dialog shows up automatically and allows him to import the X-ray. The mechanism also allows for convenient transfer of images between two DEXIS databases on the same network. In this case, the Communication Folder entries of both installations should point to the same folder. X-rays can then be exported from one database, and semi-automatically imported to the same patient in the other database. DEXIS_9_EN.book Page 33 Tuesday, October 5, 2010 12:58 PM
  • 42. Chapter 3 34 3.6 Interfacing with Practice Management Programs Links are available between DEXIS and most practice management pro- grams (PMP) on the market that contain chairside modules. These links are in some cases provided by the PMP company based on information from and in cooperation with DEXIS. For other PMPs, DEXIS has programmed links based on information from the PMP company. Please ask your DEXIS representative what is applicable in your case. The innovative Integrator™ software represents the next generation in the seamless integration of DEXIS digital imaging software with practice man- agement programs. It is available for all DEXIS provided links. The Integra- tor™ displays preview thumbnails of all available radiographic and photographic images in a floating window that is automatically synchro- nized with the record of the selected patient for immediate one-click ac- cess, see “The Integrator” on page 152. If your PMP does not yet interface with DEXIS, we will be happy to provide the necessary information. It is usually a minor task to implement the link. If you have a PMP in your office but plan to implement the link only later, you should use Manual Numbering in the DEXIS Administration and use the chart numbers of your PMP as DEXIS patient IDs. This makes a link easier to implement later on. DEXIS_9_EN.book Page 34 Tuesday, October 5, 2010 12:58 PM
  • 43. 35 DEXray: X-ray Images Chapter 4 DEXray: X-ray Images The DEXray program is the main software application for acquiring, storing, displaying and sharing Digital X-ray images. It is accessed via the DEXIS Ad- ministration program, directly from all the major practice management pro- grams, or from any of the other main DEXIS programs. DEXray is a sophisticated piece of software that has been carefully de- signed and developed to be simple and quick to learn and intuitively easy to use. It is possible to shoot your first X-ray within minutes of initial setup. All unnecessary keystrokes have been eliminated to ensure that attention is focused on the patient, not on the computer, while an X-ray image is be- ing taken. Information about the patient, provider, tooth number, date and exposure settings are automatically captured at the click of the radiation button. Despite its ease of use, DEXray is enormously powerful in its capabilities. Icons and function buttons enable the user to move, size, enhance, mea- sure, save, and compare images with just a click and/or drag of the mouse. There are many shortcuts and timesaving tools in DEXray, more than ap- pear in this manual. Typically, there are 2–3 methods for achieving any de- sired outcome. For users who invest enough time in learning or discovering the shortcuts, tricks, and tools, DEXray will become an invaluable and high- ly productive addition to the dental practice. 4.1 DEXray Screen Overview To open the DEXray screen, select a patient on the DEXIS Administration screen and click on the DEXray icon. If you use a link to a practice manage- ment program, the method for opening the DEXray screen depends on the program in use. You may apply certain Windows functions to this screen. You may size and move the screen using click-and-drag. DEXIS_9_EN.book Page 35 Tuesday, October 5, 2010 12:58 PM
  • 44. Chapter 4 36 Screen size and position changes are remembered in the DEXIS system. When the screen is changed to this size, closed and reopened for the same or another patient, it appears in the same size and position as when last viewed. You may also use the three buttons in the upper right to minimize the screen (thus sending it to the task bar — click the tab to bring it back up), maximize or restore a screen, or close a screen. The patient information is shown in the header bar; function icons are lo- cated across the top of the main window. Place your cursor on any of the icons and buttons and a help bubble, called a Tooltip, will appear with in- formation about the function. Often, there is also a keystroke that will exe- cute the function. The Tooltip help feature is available throughout the DEXIS system. The screen is divided into four quadrants. The midline’s teeth numbers ap- pear in the center of the screen distinguishing the location of each quad- rant. The DEXIS Logo icon gives access to program information, DEXray Prefer- ences, Help, and DEXIS web site, see “DEXIS Logo Icon” on page 54. On the right of the DEXray screen is the Presentation Panel, see “Presenta- tion Panel” on page 47. DEXIS_9_EN.book Page 36 Tuesday, October 5, 2010 12:58 PM
  • 45. 37 DEXray: X-ray Images 4.2 Taking Your First Digital X-ray Click on your test patient in DEXIS Administration and click on the DEXray icon: the intra-oral screen of the DEXray program will open. You are now ready to take your first digital X-ray image! WARNING Please do not take your first X-ray on a person! Instead, put the sensor on a counter or table, flat side up; put a metal ob- ject on top of it — a key, coin, or your favorite dental instru- ment; aim the X-ray tube over the object, pointing down and about an inch (2 cm) away. Type “X” on your keyboard to open the Intra-oral X-ray Acquisition screen — it looks like a tooth chart! Select a tooth from the chart. Yellow, then green bands will appear on the tooth chart. Leave the room, lower the setting by 50%, and trigger the tube. Your first digital X-ray will appear on the screen after a few seconds! DEXIS_9_EN.book Page 37 Tuesday, October 5, 2010 12:58 PM
  • 46. Chapter 4 38 4.3 Setting DEXray Preferences You may access the DEXray preferences in two ways: From DEXIS Administration, click on the Wrench icon to open Tools and Preferences; click on the DEXray tab. From a patient’s DEXray screen, click on the DEXIS logo to open the Pro- gram Information screen; select Preferences; click on the DEXray tab. Sensor Select No Sensor for workstations where X-rays will NOT be taken, DEXIS for workstations where X-rays are taken, and Simulation to have DEXIS simu- late taking intra-oral X-ray images. Other choices may be available for addi- tionally purchased modules. X-ray Series When taking a series of X-rays, DEXIS automatically advances from one po- sition to the next once radiation is detected. This method lets you take a se- ries without having to touch the computer in between. You can use the sequences already in the system or set up your own se- quence, up to four in total per computer. To see the three sequences al- ready placed into DEXIS, click on X-ray Series. Please note: For a Full Mouth series, DEXIS uses a sequence that affords the fewest changes of the hold- ers. You may edit or overwrite the existing series. However, each group of tooth numbers, such as seen under Full Mouth 1–3 3–5…, refers to a certain po- sition on the screen. Click on the boxes showing the tooth numbers for each existing series. Use the arrow keys to move through this box and take note of these groups of numbers. It is highly suggested that you use the same groups of tooth numbers to set up your own series sequence to keep your images from overlapping on the screen. To set up your own series, click in a box under Name and give your series a name. Next, under Teeth, type a beginning tooth number for each image in your series, then a hyphen, then the ending tooth number, then a space, and so on. The space lets DEXIS know that you are moving to the next image of your series. Choose Done to save or Cancel to cancel. DEXIS_9_EN.book Page 38 Tuesday, October 5, 2010 12:58 PM
  • 47. 39 DEXray: X-ray Images Sensor Settings You may assign a certain color to a specific sensor by first choosing the sen- sor’s number from the drop down box under Current Sensor, and then click- ing on the desired color in Color Coding. This is helpful if you have multiple sensors in your office: Mark the sensors with different colors and enter the colors here. The sensor selection buttons on the Intra-oral X-ray Capture screen will then show the same colors. The following settings are for the DEXIS Platinum sensor only: • High Resolution (default): produces diagnostic radiographs with a small file size (~100KB with DEXIS’ proprietary compression) • Ultra Resolution: produces maximum resolution diagnostic radiographs with a larger file size (~400KB), which can be beneficial when looking for very fine detail by magnifying areas of concern You may remove a sensor from the list by choosing the number in Current Sensor and clicking Remove Sensor. Please call DEXIS Technical Support before changing Integration Time or Trigger Method. Click Done to save changes and Cancel to cancel. Digital Panorama Click on the down arrow to display a list of installed digital panorama equipment. Select the brand to be used; “--” for no pan, or Simulation for simulation mode. If “--” is selected, the acquisition button will not be shown. Scanner Click on the down arrow to display a list of installed scanner drivers. Select the brand to be used; “--” for no scanner, or Simulation for simulation mode. If “--” is selected, the scan button will not be shown. Frame Removal This feature controls how scanned X-rays are to be handled: set to 0 for nor- mal flat bed scanners to enable automatic cropping of intra-oral X-rays; set to 1 for single-film scanners — automatic cropping is then disabled; set to some value between 2 and 7, if the single-film scanner produces black edg- DEXIS_9_EN.book Page 39 Tuesday, October 5, 2010 12:58 PM
  • 48. Chapter 4 40 es or frames. Start with 2, scan a test X-ray, and increase the value if the frame is not reliably removed. You need to select the scanner before setting this value. Background Color Click on the down arrow to choose a background color for the main window. Startup View Choose the Startup View, to select the view you initially want to be visible when DEXray opens for a new patient. Mouth refers to intra-oral images in the mounted view; History refers to intra-oral images in chronological or- der; Pano refers to panoramic or cephalometric images. The Startup View selected will be the initial view for all new patients; to change the view for an individual patient, see “The Image Archive” on page 68. 5 Anterior FMS Choose 5 Anterior FMS to have the screen accommodate 5 anterior images instead of 3 per arch. Shown BW Series Choose the number of bitewing series that you want the software to show non-overlapping. Leave the field empty if you want to see as many bitewing series as fit. See “Selection and Navigation” on page 43. Flipped View Choose Flipped View to have the patient’s X-rays shown in inside-out view, so that the right images appear on the right side of the screen. ClearVu Mode Select which mode of the ClearVu image enhancement you prefer. Ad- vanced is usually best suited for all cases: detecting caries and fractures as well as examining bone structures and ligatures. Classic is still mentioned for compatibility reasons. DEXIS_9_EN.book Page 40 Tuesday, October 5, 2010 12:58 PM
  • 49. 41 DEXray: X-ray Images Auto-Contrast Check the selection box to have all X-rays appear in contrast mode when initially shown. Record Measurement Select the results of which type of measurements you want to record as im- age notes: all types of measurements, canal measurements only, or no measurements at all. Whenever you carry out one of the selected measure- ments, you will be asked whether to transfer the result to notes, see “Mea- surement on Images” on page 57. Length of RC File Set the proposed length of the file to be displayed in Canal Measurement, see “Endodontic Measurement” on page 59. Once you added to or changed items in DEXray Preferences, choose Done to save changes, Cancel to cancel changes. 4.4 Taking X-ray Images with Intra-oral Sensors Please note: This section applies to the acquisition of images with an intra- oral sensor. If you use a phosphor plate scanner, see “DEXpsp-ScanX and DEXpsp-Optime” on page 149. Click on the X-ray capture icon or type “X” on your keyboard. This will open the Intra-oral X-ray screen. If applicable, choose the appropriate sensor from the sensor selection list. This list contains all applicable sensors that are installed on the workstation. The sensor selected remains the default setting until you change it. Please note: You need to be in the patient’s intra-oral X-ray screen to ac- quire intra-oral X-rays. If the extra-oral X-ray screen is your current screen, the X-ray capture icon will start acquisition of a pan or ceph instead. 4.4.1 Taking an Individual Image Click on the desired tooth or range of teeth on the chart, or type the tooth number and press the Enter key. The tooth will be highlighted in gold and DEXIS_9_EN.book Page 41 Tuesday, October 5, 2010 12:58 PM
  • 50. Chapter 4 42 green bands will appear (think of this as “green means go”). Also, a mes- sage will display, Trigger the X-ray tube.... You have up to 10 minutes to take your image. After 10 minutes, you will receive a timed-out message. If this happens, you need to bring up the Intra-oral X-ray screen again as de- scribed above to restart the process. When you re-enter this screen, DEXray remembers the tooth number last chosen. Click Start or press the Enter key to receive your green bands. Now, position the sensor in the patient’s mouth, position the cone close to the face and expose the sensor as you would with film. Once radiation is detected, the sensor will capture the X-ray and the enlarged image will ap- pear on the screen. 4.4.2 Repeating an X-ray If you want to take an X-ray of a tooth (or range of teeth) for which you al- ready have an X-ray, enlarge the existing X-ray then click on Repeat X-ray in the Navigator box or type “Y” on your keyboard. This will open the Intra-oral X-ray screen with the tooth selected and automatically prepared to take an- other X-ray. 4.4.3 Taking a Series of Images From the Intra-oral X-ray screen, choose the desired series. The first range of teeth programmed into the series will be highlighted. Now, position the sensor in the patient’s mouth to X-ray the highlighted teeth and expose the sensor. Once radiation is detected, a thumbnail (preview) of the image will appear on the Intra-oral X-ray screen. DEXray will highlight the next image area and will show green; your computer is ready to receive the next X-ray of the series. Please note: It is not uncommon for the thumbnail to appear upside down. Remember, it is only a preview. If you are not satisfied with your image you can use the Back button on the lower right of the screen to retake the image. If you want to skip forward to a different image area, use the Next button. Please note: You will not need to return to the computer for the duration of the series unless you want to retake or skip areas. DEXIS_9_EN.book Page 42 Tuesday, October 5, 2010 12:58 PM
  • 51. 43 DEXray: X-ray Images When the series is complete, the X-rays will appear as if in a mount. That is, DEXray will automatically mount your images for you. For programming your own series, see “X-ray Series” on page 38. 4.4.4 One Tooth Series Endodontists often have the need to take several X-rays of the same tooth. You can do that without touching the computer in between by selecting One Tooth Series when taking the first X-ray. If this button is selected the soft- ware will automatically prepare the sensor to take the next X-ray as soon as one has been taken and is shown on the screen. You cancel out of this loop by clicking Cancel or by closing the DEXray program. Please note: Since the sensor is always prepared to take the next X-ray, do not remove the sensor while in One Tooth Series mode. 4.5 Image Management Tools You may control all functions in the DEXIS software by mouse-click or key- board, whatever is more convenient for you. The Tooltip bubbles will give a short description and keystroke for each item. There is a complete listing of keystrokes in “Keyboard Use and Shortcuts” on page 143. 4.5.1 Selection and Navigation All X-ray images have a tooth number, date, and close button in a band at the top (title bar) of the image. To select a specific image, click on the body of the image (the actual X-ray part of the image). The title bar turns from gray to white. To select a different image, click on that image. You may also navigate between images with the arrow keys. You can move the small images by clicking on the title bar (the mouse cur- sor will become a hook) and dragging to the desired location. This location will be remembered and the image will come up in the same spot the next time you open DEXray. But there is always a “home” position determined by the tooth number, see “Home Icon” on page 52. You may also move dialog boxes, such as the Navigator, on the screen us- ing this function. DEXIS_9_EN.book Page 43 Tuesday, October 5, 2010 12:58 PM
  • 52. Chapter 4 44 If you have images with the same tooth number, the newest image will be “mounted” on top of the previous image with the image’s title bar visible. Click on the title bar to bring the previous image forward. If you have multiple series of bitewing X-rays of different consultation dates, these series will be laid out on the screen without overlapping as long as they fit between the periapical X-rays. With the usual screen format, three horizontal bitewing series or two vertical bitewing series are laid out this way. If you want more series to be visible, you can resize the main win- dow to give it a higher and narrower format. You may limit the number of bitewing series spread out this way in DEXray Preferences. See “Setting DEXray Preferences” on page 38. Enlarging an Image To enlarge the selected image, click once on the body of the image or press the Enter key. The title bar on an enlarged image contains the following in- formation and functions: Image tooth number, Image date, Image parame- ters, and Clean, Tack, Maximize and Close buttons. To reduce the image, click on the “x” in the upper right corner of the title bar or press the Enter key. Once an image is enlarged, you may click on another image to have it appear enlarged. There is no need to reduce the first im- age. The enlarged image may be moved by clicking on the title bar and dragging to the desired location. It may be resized by dragging at a side or corner; the aspect ratio will be maintained. Full Screen View Double-click on any selected standard-sized or enlarged image to initiate a full screen view of the image. You may also click on the Maximize button on the enlarged image’s title bar. Non-visible portions are scrolled into the screen when you move the mouse to the edge. Double-click again or press Enter to return to the enlarged image. Image Parameters A bar appears at the bottom of all enlarged images. In this bar the image’s security status shows in a footnote: DEXIS_9_EN.book Page 44 Tuesday, October 5, 2010 12:58 PM
  • 53. 45 DEXray: X-ray Images • DEXray by DEXIS: Original DEXIS image, not modified. • Original: Other original, unmodified image. • DEXray by DEXIS — Enhanced: Original DEXIS image, contrast and bright- ness are adjusted or a filter is active. • Enhanced: Other original image, contrast and brightness are adjusted or a filter is active. • Scanned: Image scanned into DEXIS software; alteration of the scanned original cannot be excluded. • Derived: Image has been computed, e.g. by subtracting two images. • Imported: Image coming from non-DEXIS software; alteration cannot be excluded. See also “X-ray Image Security” on page 80. More image parameters, which may be helpful for technical support, are displayed if you click on the space between the date and the tack of an en- larged image. Changing Brightness and Contrast To change the brightness and contrast of an enlarged image, click and drag on the body of the image. Up for lighter, down for darker, left for less con- trast and right for more contrast. You may also use the arrow keys to change contrast and brightness. The changed setting will be visible until changed again; however, you may always return an image to its original settings us- ing the Home icon, see “Home Icon” on page 52. Changing Tooth Number and Date, Mirroring You may change the tooth number or numbers of an image by enlarging the image and clicking on the current tooth numbers. The Tooth box (a tooth chart) appears. Click on the tooth or teeth highlighted in gold. This will de- select the unwanted numbers. Now, click on the appropriate tooth or teeth. You may also choose primary tooth numbers. The new number(s) will ap- pear in a box in the lower left. Click Done to save. DEXIS_9_EN.book Page 45 Tuesday, October 5, 2010 12:58 PM
  • 54. Chapter 4 46 The image will be repositioned on the screen and show the new numbers in the upper left. You cannot change the date of a captured X-ray image. The date showing on your computer when the image is captured becomes the date encrypted into the image, see “X-ray Image Security” on page 80. To change the date of a scanned or imported image, click on the tooth number to bring up the Tooth box. It bears an additional date field, which can be edited. If an X-ray has been inadvertently scanned from the wrong side, or if some external equipment delivered a mirrored image, you may flip it back by clicking the Mirror button in the Tooth Number box. Images mirrored this way are marked Mirrored to avoid confusion. Tacking an Image An enlarged image may be tacked to the screen by clicking on the tack but- ton located on the right side of the title bar. An image tacked to the screen will remain in position when you enlarge another image or when you switch from intra-oral to extra-oral screen or vice versa. You may move a tacked im- age as you would any other image. When you have multiple images tacked or enlarged, the Home function will arrange them proportionally on the screen without overlapping, see “Home Icon” on page 52. Clean Button Click on the box to the left of the tack to hide objects placed on the images, such as drawn lines and implant models. The Navigator When an image is enlarged, a dialog box opens to the right of the image. If in mouth view, this Navigator box shows all images taken on the same date as thumbnails relative to their position on the DEXray screen. If in history view, it shows all visible images as thumbnails. You may click on a thumb- nail to display the enlarged image. Check the box to the left of Next after and DEXray will automatically ad- vance through the images for this date. To turn this slide show feature off, deselect the box. The slide show feature allows an interval of 3 to 30 sec- DEXIS_9_EN.book Page 46 Tuesday, October 5, 2010 12:58 PM
  • 55. 47 DEXray: X-ray Images onds between images, i.e., the amount of time before the next image ap- pears. You may use the space bar to pause and restart the slide show. You may take another X-ray of the area shown on the enlarged image by clicking Repeat X-ray or by typing “Y” on your keyboard, see “Repeating an X-ray” on page 42. If the Add ClearVu button is selected, enlarged images are shown side by side in two modes: standard mode and ClearVu, see “ClearVu Icon” on page 52. You may choose to clear the screen of all but the selected image by clicking on Clean or typing “L” on your keyboard. Click on the button or type “L” again to deselect the function. You may move among the images using the Prev (for previous) button, or Backspace on your keyboard, and the Next button, or Space on your key- board. Click on the Compare button to compare two images. See “The Compare Function” on page 78 for a full description of this tool. You may hide the Navigator for an image by clicking Done. Turn off Naviga- tor entirely in Preferences, see “The Navigator” on page 46. Presentation Panel The Presentation Panel is located on the right side of the screen. You can drag images into this area from the any DEXray or DEXimage screen whether displayed singly or in Overview mode (see “Overview Icon” on page 49). This action allows you to choose images for presentation to patients or compiling to export images for communications with colleagues, study clubs, or insurance. DEXIS_9_EN.book Page 47 Tuesday, October 5, 2010 12:58 PM
  • 56. Chapter 4 48 The Presentation Panel can be resized and closed by shifting its left edge. When closed, this edge shows a button; clicking the button opens the Pre- sentation Panel in standard size. When you click onto the Presentation Panel, it becomes active denoted by a yellow outline. The function icons then relate to the Presentation Panel in- stead of the main screen, and the DEXIS Toolbar shows only the icons avail- able for use with the images on the panel. The Navigator also functions with these selected images. When you enlarge an image of the Presentation Panel all images not on the Presentation Panel are hidden. When you close the patient while images are on the Presentation Panel, a popup dialog asks whether you want to keep the contents of the panel for later use. 4.5.2 DEXray Screen Icons An icon will turn gold when initiated. For example, when on the intra-oral screen the Tooth icon is highlighted. When a function icon is chosen or an appropriate key is typed on the keyboard, the selected image will automat- ically enlarge and the function box will open next to the image. In addition, many icons will allow you to drag an image to them thereby opening their function. Click again on the icon or corresponding keystroke to terminate its function. DEXIS_9_EN.book Page 48 Tuesday, October 5, 2010 12:58 PM
  • 57. 49 DEXray: X-ray Images In addition, DEXIS will apply the current function to another image once you click on that image. There is no need to close the current function and im- age to work on a newly chosen image. Please remember, the Tooltip is available for help. The corresponding key- stroke will show in the help bubble. DEXimage Icon The Wand icon leads DEXimage to where images from intra-oral or digital cameras or scanned photos are captured, stored and managed. Click on the icon or type “V” (for video) to initiate its function. A light under the icon signals that there are images for this patient in DEX- image. Intra-oral and Extra-oral Icons By clicking on the Intra-oral or Tooth icon, you switch to the intra-oral screen. The Extra-oral or Head icon leads to this patient’s extra-oral X-ray screen where digitally captured or scanned panoramic or cephalometric images are stored and managed. Click on this icon or type “F” (for facial) to move to this screen. A light under the icon signals that there are images for this patient in the intra-oral or extra-oral screen respectively. Please note: By dragging an image to one of these icons, it will be moved to the corresponding screen. Overview Icon Click on this icon to see all four DEXIS screens (DEXray intra-oral and extra- oral, DEXimage intra-oral and extra-oral) for this patient. You may also acti- vate the Overview mode by deselecting the icon of a single screen (intra- oral or extra-oral). You can shift the divider bars thus resizing or closing departmental screens. When closed, the departmental screen becomes a button. Clicking the button opens the screen in standard size. Changes to the divider bars are remembered between sessions. DEXIS_9_EN.book Page 49 Tuesday, October 5, 2010 12:58 PM
  • 58. Chapter 4 50 A screen is considered active when outlined in yellow. The thumbnail imag- es on any screen may be enlarged. Navigator’s Clean function hides all oth- er thumbnails on the departmental screens. You may apply the Toolbar’s image enhancement tools to any enlarged image. You may drag and drop thumbnail images from one screen to another. Deselecting the Overview icon will return you to the original single screen. Double-clicking on any of the four departmental screens will close the Over- view mode and open that single screen. Zoom Icon Use the Zoom or Magnifier Icon to magnify a portion of the selected image. You may also type “Z” (for zoom) to initiate its function. The portion visible in the ‘bird’s eye frame’ can be changed by clicking to a different spot or by holding down the left mouse button and moving to an- other area on the image. The ‘bird’s eye frame’ is closed when the Magnifier function or the selected image is closed. DEXIS_9_EN.book Page 50 Tuesday, October 5, 2010 12:58 PM
  • 59. 51 DEXray: X-ray Images To magnify the entire image, see “Full Screen View” on page 44. Once in Full Screen mode, the ‘bird’s eye frame’ remains in function, magnifying the already magnified image by another step. Spotlight Icon This icon allows you to show an area of the image in maximized contrast. Using the Spotlight cursor, click on the desired area and hold the left mouse button to view the desired section of the image. Measurement Icon The Measurement tool is primarily used for endodontic and implant mea- suring on X-rays, although distances on photographic images may be mea- sured if the image shows objects of known size which may be used for calibration. See “Measurement on Images” on page 57. Notes Icon This Annotation icon will allow you attach text, alerts, and voice notes to im- ages. It will also allow you to draw on an image. To initiate the function, click on the icon or type “T” (for text) or drag an image to the icon. You may also access notes by right-clicking on the screen, and then choosing an an- notation function. See “Image Annotations” on page 65. DEXIS_9_EN.book Page 51 Tuesday, October 5, 2010 12:58 PM
  • 60. Chapter 4 52 Enhancement Icon Click on the Enhancement icon or type “E” to open the Image Enhancement box to adjust brightness and contrast of the selected image and to apply different filters. See “Image Enhancement” on page 55. ClearVu Icon The ClearVu or Eye icon is a shortcut to the ClearVu mode. Two modes are available and can be selected in Preferences: Advanced and Classic, see “Setting DEXray Preferences” on page 38. As discussed under Enhance- ments, click on ClearVu or type “U” on your keyboard to use the ClearVu function. This mode clarifies and sharpens the image. Click and drag in the center of the image or use the arrow keys to change brightness and con- trast. Click again on ClearVu or type “U” to turn the feature off. Rotate Icon Although DEXIS software orients captured X-rays automatically, occasion- ally the proper orientation cannot be recognized. In this case the image (standard and enlarged) may be rotated using the Rotate icon. You can also type “R” on your keyboard or drag the image to the icon to rotate it in 90- degree increments. Home Icon The Home function is activated by clicking on the Home icon, by typing “B” (for back) on your keyboard, or by dragging the image to the icon. There are 3 sub-functions of the Home icon: 1. Return the contrast of an enlarged image to standard settings. The func- tion toggles between neutral setting and contrast setting. 2. Standard images that have been moved from their original position are placed back by clicking the Home icon when no image is enlarged. 3. Tack one or more images to the screen using the Tack in the upper right corner of an enlarged image. Click on the Home icon. The images ap- pear enlarged and proportionately sized without overlapping. DEXIS_9_EN.book Page 52 Tuesday, October 5, 2010 12:58 PM