1
Access 2016 Module 3
Using Forms
2
• Use the Form Wizard
• Create a split form
• Use Form Layout View
• Add fields to a form
• Modify form controls
• Create calculations
• Modify tab order
• Insert an image
Module Objectives
© 2017 Cengage Learning. All Rights Reserved. May not be copied, scanned, or duplicated, in whole or in part, except for use as permitted in a license distributed with a certain product or service or otherwise on a
password-protected website for classroom use.
3
• A form is an Access database object that allows you to arrange the fields of a
record in any layout so you can enter, edit, and delete records
• One way to create a form is by using the Form Wizard
• The wizard asks you questions to determine the information you want
• Database designer or application developer responsible for building and
maintaining tables, queries, forms, and reports
• Each item on a form is called a control
• Label control (describe data shown in other controls)
• Text box (display data)
• Combo box (combination of a text box and a list)
Use the Form Wizard (Slide 1 of 2)
© 2017 Cengage Learning. All Rights Reserved. May not be copied, scanned, or duplicated, in whole or in part, except for use as permitted in a license distributed with a certain product or service or otherwise on a
password-protected website for classroom use.
4
Form views
Use the Form Wizard (Slide 2 of 2)
© 2017 Cengage Learning. All Rights Reserved. May not be copied, scanned, or duplicated, in whole or in part, except for use as permitted in a license distributed with a certain product or service or otherwise on a
password-protected website for classroom use.
5
• Benefit of a split form
• upper pane allows you to display the fields of one record in any arrangement
• lower pane maintains a datasheet view of the first few records, which you can
navigate very quickly
Create a Split Form (Slide 1 of 3)
© 2017 Cengage Learning. All Rights Reserved. May not be copied, scanned, or duplicated, in whole or in part, except for use as permitted in a license distributed with a certain product or service or otherwise on a
password-protected website for classroom use.
6
Form creation tools
Create a Split Form (Slide 2 of 3)
© 2017 Cengage Learning. All Rights Reserved. May not be copied, scanned, or duplicated, in whole or in part, except for use as permitted in a license distributed with a certain product or service or otherwise on a
password-protected website for classroom use.
7
Table in a split form
Create a Split Form (Slide 3 of 3)
© 2017 Cengage Learning. All Rights Reserved. May not be copied, scanned, or duplicated, in whole or in part, except for use as permitted in a license distributed with a certain product or service or otherwise on a
password-protected website for classroom use.
8
• Layout View lets you make some design changes to a form while you are
browsing the data:
• Move and resize controls
• Add or delete a field on the form
• Filter and sort data
• Change formatting characteristics, such as fonts and colors
Use Form Layout View (Slide 1 of 3)
© 2017 Cengage Learning. All Rights Reserved. May not be copied, scanned, or duplicated, in whole or in part, except for use as permitted in a license distributed with a certain product or service or otherwise on a
password-protected website for classroom use.
9
Modifying controls in Form Layout View
Use Form Layout View (Slide 2 of 3)
© 2017 Cengage Learning. All Rights Reserved. May not be copied, scanned, or duplicated, in whole or in part, except for use as permitted in a license distributed with a certain product or service or otherwise on a
password-protected website for classroom use.
Text boxes
resized
10
Useful formatting commands
Use Form Layout View (Slide 3 of 3)
© 2017 Cengage Learning. All Rights Reserved. May not be copied, scanned, or duplicated, in whole or in part, except for use as permitted in a license distributed with a certain product or service or otherwise on a
password-protected website for classroom use.
11
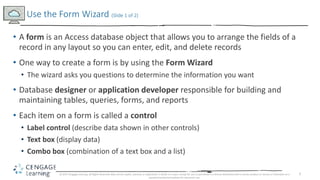
• Can do in Layout View or Design View using Field List window
• To add a field: drag it from the Field List to the location you want
• When you add a new field, two controls are created: label and text box
• To delete a field: click to select the field, then press [Delete]
Add Fields to a Form (Slide 1 of 3)
© 2017 Cengage Learning. All Rights Reserved. May not be copied, scanned, or duplicated, in whole or in part, except for use as permitted in a license distributed with a certain product or service or otherwise on a
password-protected website for classroom use.
12
Field List in Form Layout View
Add Fields to a Form (Slide 2 of 3)
© 2017 Cengage Learning. All Rights Reserved. May not be copied, scanned, or duplicated, in whole or in part, except for use as permitted in a license distributed with a certain product or service or otherwise on a
password-protected website for classroom use.
13
• Bound controls
• Display values from a field such as text boxes and combo boxes
• Unbound controls
• Do not display data
• Describe data or enhance the appearance of a form
Add Fields to a Form (Slide 3 of 3)
© 2017 Cengage Learning. All Rights Reserved. May not be copied, scanned, or duplicated, in whole or in part, except for use as permitted in a license distributed with a certain product or service or otherwise on a
password-protected website for classroom use.
14
• When you modify controls, you change their properties (characteristics)
• All of the control characteristics you can modify are stored in the control’s
Property Sheet
Modify Form Controls (Slide 1 of 3)
© 2017 Cengage Learning. All Rights Reserved. May not be copied, scanned, or duplicated, in whole or in part, except for use as permitted in a license distributed with a certain product or service or otherwise on a
password-protected website for classroom use.
15
Using the Property Sheet
Modify Form Controls (Slide 2 of 3)
© 2017 Cengage Learning. All Rights Reserved. May not be copied, scanned, or duplicated, in whole or in part, except for use as permitted in a license distributed with a certain product or service or otherwise on a
password-protected website for classroom use.
16
Common form controls
Modify Form Controls (Slide 3 of 3)
© 2017 Cengage Learning. All Rights Reserved. May not be copied, scanned, or duplicated, in whole or in part, except for use as permitted in a license distributed with a certain product or service or otherwise on a
password-protected website for classroom use.
17
• To create a calculation in a text box, you enter an expression instead of a field
name in the Control Source property
• An expression is a combination of field names, operators (such as +, –, /, and *),
and functions (such as Sum, Count, or Avg) that results in a single value
• Expression: an equal sign and a combination of symbols
• Square brackets must surround a field name in an expression
• Field name must be typed exactly as it was in Table Design View (except for
capitalization)
Create Calculations (Slide 1 of 3)
© 2017 Cengage Learning. All Rights Reserved. May not be copied, scanned, or duplicated, in whole or in part, except for use as permitted in a license distributed with a certain product or service or otherwise on a
password-protected website for classroom use.
18
Adding a text box to calculate a value
Create Calculations (Slide 2 of 3)
© 2017 Cengage Learning. All Rights Reserved. May not be copied, scanned, or duplicated, in whole or in part, except for use as permitted in a license distributed with a certain product or service or otherwise on a
password-protected website for classroom use.
19
Sample expressions
Create Calculations (Slide 3 of 3)
© 2017 Cengage Learning. All Rights Reserved. May not be copied, scanned, or duplicated, in whole or in part, except for use as permitted in a license distributed with a certain product or service or otherwise on a
password-protected website for classroom use.
20
• Tab Order: the order the focus moves as you press [Tab]
• Tab Stop: determines whether the field accepts the focus and therefore
determines where the focus moves as you press [Tab]
• All text boxes and combo boxes have a tab stop and are included in the tab
order
Modify Tab Order (Slide 1 of 2)
© 2017 Cengage Learning. All Rights Reserved. May not be copied, scanned, or duplicated, in whole or in part, except for use as permitted in a license distributed with a certain product or service or otherwise on a
password-protected website for classroom use.
21
Modify Tab Order (Slide 2 of 2)
© 2017 Cengage Learning. All Rights Reserved. May not be copied, scanned, or duplicated, in whole or in part, except for use as permitted in a license distributed with a certain product or service or otherwise on a
password-protected website for classroom use.
Setting tab properties
Tab Order Dialog Box
22
• Examples are pictures, logos, clip art
• The form section you place it in determines where it will appear on the form
• Form Header – once at top of first page
• Detail – once for every record
• Form Footer – once at the end of the last page
• Background image
• Fills the entire form or report appearing “behind” other controls
Insert an Image (Slide 1 of 2)
© 2017 Cengage Learning. All Rights Reserved. May not be copied, scanned, or duplicated, in whole or in part, except for use as permitted in a license distributed with a certain product or service or otherwise on a
password-protected website for classroom use.
23
Adding an image to Form Header section
Insert an Image (Slide 2 of 2)
© 2017 Cengage Learning. All Rights Reserved. May not be copied, scanned, or duplicated, in whole or in part, except for use as permitted in a license distributed with a certain product or service or otherwise on a
password-protected website for classroom use.

Access 2016 module 3 ppt presentation

  • 1.
    1 Access 2016 Module3 Using Forms
  • 2.
    2 • Use theForm Wizard • Create a split form • Use Form Layout View • Add fields to a form • Modify form controls • Create calculations • Modify tab order • Insert an image Module Objectives © 2017 Cengage Learning. All Rights Reserved. May not be copied, scanned, or duplicated, in whole or in part, except for use as permitted in a license distributed with a certain product or service or otherwise on a password-protected website for classroom use.
  • 3.
    3 • A formis an Access database object that allows you to arrange the fields of a record in any layout so you can enter, edit, and delete records • One way to create a form is by using the Form Wizard • The wizard asks you questions to determine the information you want • Database designer or application developer responsible for building and maintaining tables, queries, forms, and reports • Each item on a form is called a control • Label control (describe data shown in other controls) • Text box (display data) • Combo box (combination of a text box and a list) Use the Form Wizard (Slide 1 of 2) © 2017 Cengage Learning. All Rights Reserved. May not be copied, scanned, or duplicated, in whole or in part, except for use as permitted in a license distributed with a certain product or service or otherwise on a password-protected website for classroom use.
  • 4.
    4 Form views Use theForm Wizard (Slide 2 of 2) © 2017 Cengage Learning. All Rights Reserved. May not be copied, scanned, or duplicated, in whole or in part, except for use as permitted in a license distributed with a certain product or service or otherwise on a password-protected website for classroom use.
  • 5.
    5 • Benefit ofa split form • upper pane allows you to display the fields of one record in any arrangement • lower pane maintains a datasheet view of the first few records, which you can navigate very quickly Create a Split Form (Slide 1 of 3) © 2017 Cengage Learning. All Rights Reserved. May not be copied, scanned, or duplicated, in whole or in part, except for use as permitted in a license distributed with a certain product or service or otherwise on a password-protected website for classroom use.
  • 6.
    6 Form creation tools Createa Split Form (Slide 2 of 3) © 2017 Cengage Learning. All Rights Reserved. May not be copied, scanned, or duplicated, in whole or in part, except for use as permitted in a license distributed with a certain product or service or otherwise on a password-protected website for classroom use.
  • 7.
    7 Table in asplit form Create a Split Form (Slide 3 of 3) © 2017 Cengage Learning. All Rights Reserved. May not be copied, scanned, or duplicated, in whole or in part, except for use as permitted in a license distributed with a certain product or service or otherwise on a password-protected website for classroom use.
  • 8.
    8 • Layout Viewlets you make some design changes to a form while you are browsing the data: • Move and resize controls • Add or delete a field on the form • Filter and sort data • Change formatting characteristics, such as fonts and colors Use Form Layout View (Slide 1 of 3) © 2017 Cengage Learning. All Rights Reserved. May not be copied, scanned, or duplicated, in whole or in part, except for use as permitted in a license distributed with a certain product or service or otherwise on a password-protected website for classroom use.
  • 9.
    9 Modifying controls inForm Layout View Use Form Layout View (Slide 2 of 3) © 2017 Cengage Learning. All Rights Reserved. May not be copied, scanned, or duplicated, in whole or in part, except for use as permitted in a license distributed with a certain product or service or otherwise on a password-protected website for classroom use. Text boxes resized
  • 10.
    10 Useful formatting commands UseForm Layout View (Slide 3 of 3) © 2017 Cengage Learning. All Rights Reserved. May not be copied, scanned, or duplicated, in whole or in part, except for use as permitted in a license distributed with a certain product or service or otherwise on a password-protected website for classroom use.
  • 11.
    11 • Can doin Layout View or Design View using Field List window • To add a field: drag it from the Field List to the location you want • When you add a new field, two controls are created: label and text box • To delete a field: click to select the field, then press [Delete] Add Fields to a Form (Slide 1 of 3) © 2017 Cengage Learning. All Rights Reserved. May not be copied, scanned, or duplicated, in whole or in part, except for use as permitted in a license distributed with a certain product or service or otherwise on a password-protected website for classroom use.
  • 12.
    12 Field List inForm Layout View Add Fields to a Form (Slide 2 of 3) © 2017 Cengage Learning. All Rights Reserved. May not be copied, scanned, or duplicated, in whole or in part, except for use as permitted in a license distributed with a certain product or service or otherwise on a password-protected website for classroom use.
  • 13.
    13 • Bound controls •Display values from a field such as text boxes and combo boxes • Unbound controls • Do not display data • Describe data or enhance the appearance of a form Add Fields to a Form (Slide 3 of 3) © 2017 Cengage Learning. All Rights Reserved. May not be copied, scanned, or duplicated, in whole or in part, except for use as permitted in a license distributed with a certain product or service or otherwise on a password-protected website for classroom use.
  • 14.
    14 • When youmodify controls, you change their properties (characteristics) • All of the control characteristics you can modify are stored in the control’s Property Sheet Modify Form Controls (Slide 1 of 3) © 2017 Cengage Learning. All Rights Reserved. May not be copied, scanned, or duplicated, in whole or in part, except for use as permitted in a license distributed with a certain product or service or otherwise on a password-protected website for classroom use.
  • 15.
    15 Using the PropertySheet Modify Form Controls (Slide 2 of 3) © 2017 Cengage Learning. All Rights Reserved. May not be copied, scanned, or duplicated, in whole or in part, except for use as permitted in a license distributed with a certain product or service or otherwise on a password-protected website for classroom use.
  • 16.
    16 Common form controls ModifyForm Controls (Slide 3 of 3) © 2017 Cengage Learning. All Rights Reserved. May not be copied, scanned, or duplicated, in whole or in part, except for use as permitted in a license distributed with a certain product or service or otherwise on a password-protected website for classroom use.
  • 17.
    17 • To createa calculation in a text box, you enter an expression instead of a field name in the Control Source property • An expression is a combination of field names, operators (such as +, –, /, and *), and functions (such as Sum, Count, or Avg) that results in a single value • Expression: an equal sign and a combination of symbols • Square brackets must surround a field name in an expression • Field name must be typed exactly as it was in Table Design View (except for capitalization) Create Calculations (Slide 1 of 3) © 2017 Cengage Learning. All Rights Reserved. May not be copied, scanned, or duplicated, in whole or in part, except for use as permitted in a license distributed with a certain product or service or otherwise on a password-protected website for classroom use.
  • 18.
    18 Adding a textbox to calculate a value Create Calculations (Slide 2 of 3) © 2017 Cengage Learning. All Rights Reserved. May not be copied, scanned, or duplicated, in whole or in part, except for use as permitted in a license distributed with a certain product or service or otherwise on a password-protected website for classroom use.
  • 19.
    19 Sample expressions Create Calculations(Slide 3 of 3) © 2017 Cengage Learning. All Rights Reserved. May not be copied, scanned, or duplicated, in whole or in part, except for use as permitted in a license distributed with a certain product or service or otherwise on a password-protected website for classroom use.
  • 20.
    20 • Tab Order:the order the focus moves as you press [Tab] • Tab Stop: determines whether the field accepts the focus and therefore determines where the focus moves as you press [Tab] • All text boxes and combo boxes have a tab stop and are included in the tab order Modify Tab Order (Slide 1 of 2) © 2017 Cengage Learning. All Rights Reserved. May not be copied, scanned, or duplicated, in whole or in part, except for use as permitted in a license distributed with a certain product or service or otherwise on a password-protected website for classroom use.
  • 21.
    21 Modify Tab Order(Slide 2 of 2) © 2017 Cengage Learning. All Rights Reserved. May not be copied, scanned, or duplicated, in whole or in part, except for use as permitted in a license distributed with a certain product or service or otherwise on a password-protected website for classroom use. Setting tab properties Tab Order Dialog Box
  • 22.
    22 • Examples arepictures, logos, clip art • The form section you place it in determines where it will appear on the form • Form Header – once at top of first page • Detail – once for every record • Form Footer – once at the end of the last page • Background image • Fills the entire form or report appearing “behind” other controls Insert an Image (Slide 1 of 2) © 2017 Cengage Learning. All Rights Reserved. May not be copied, scanned, or duplicated, in whole or in part, except for use as permitted in a license distributed with a certain product or service or otherwise on a password-protected website for classroom use.
  • 23.
    23 Adding an imageto Form Header section Insert an Image (Slide 2 of 2) © 2017 Cengage Learning. All Rights Reserved. May not be copied, scanned, or duplicated, in whole or in part, except for use as permitted in a license distributed with a certain product or service or otherwise on a password-protected website for classroom use.