Downloaded 195 times


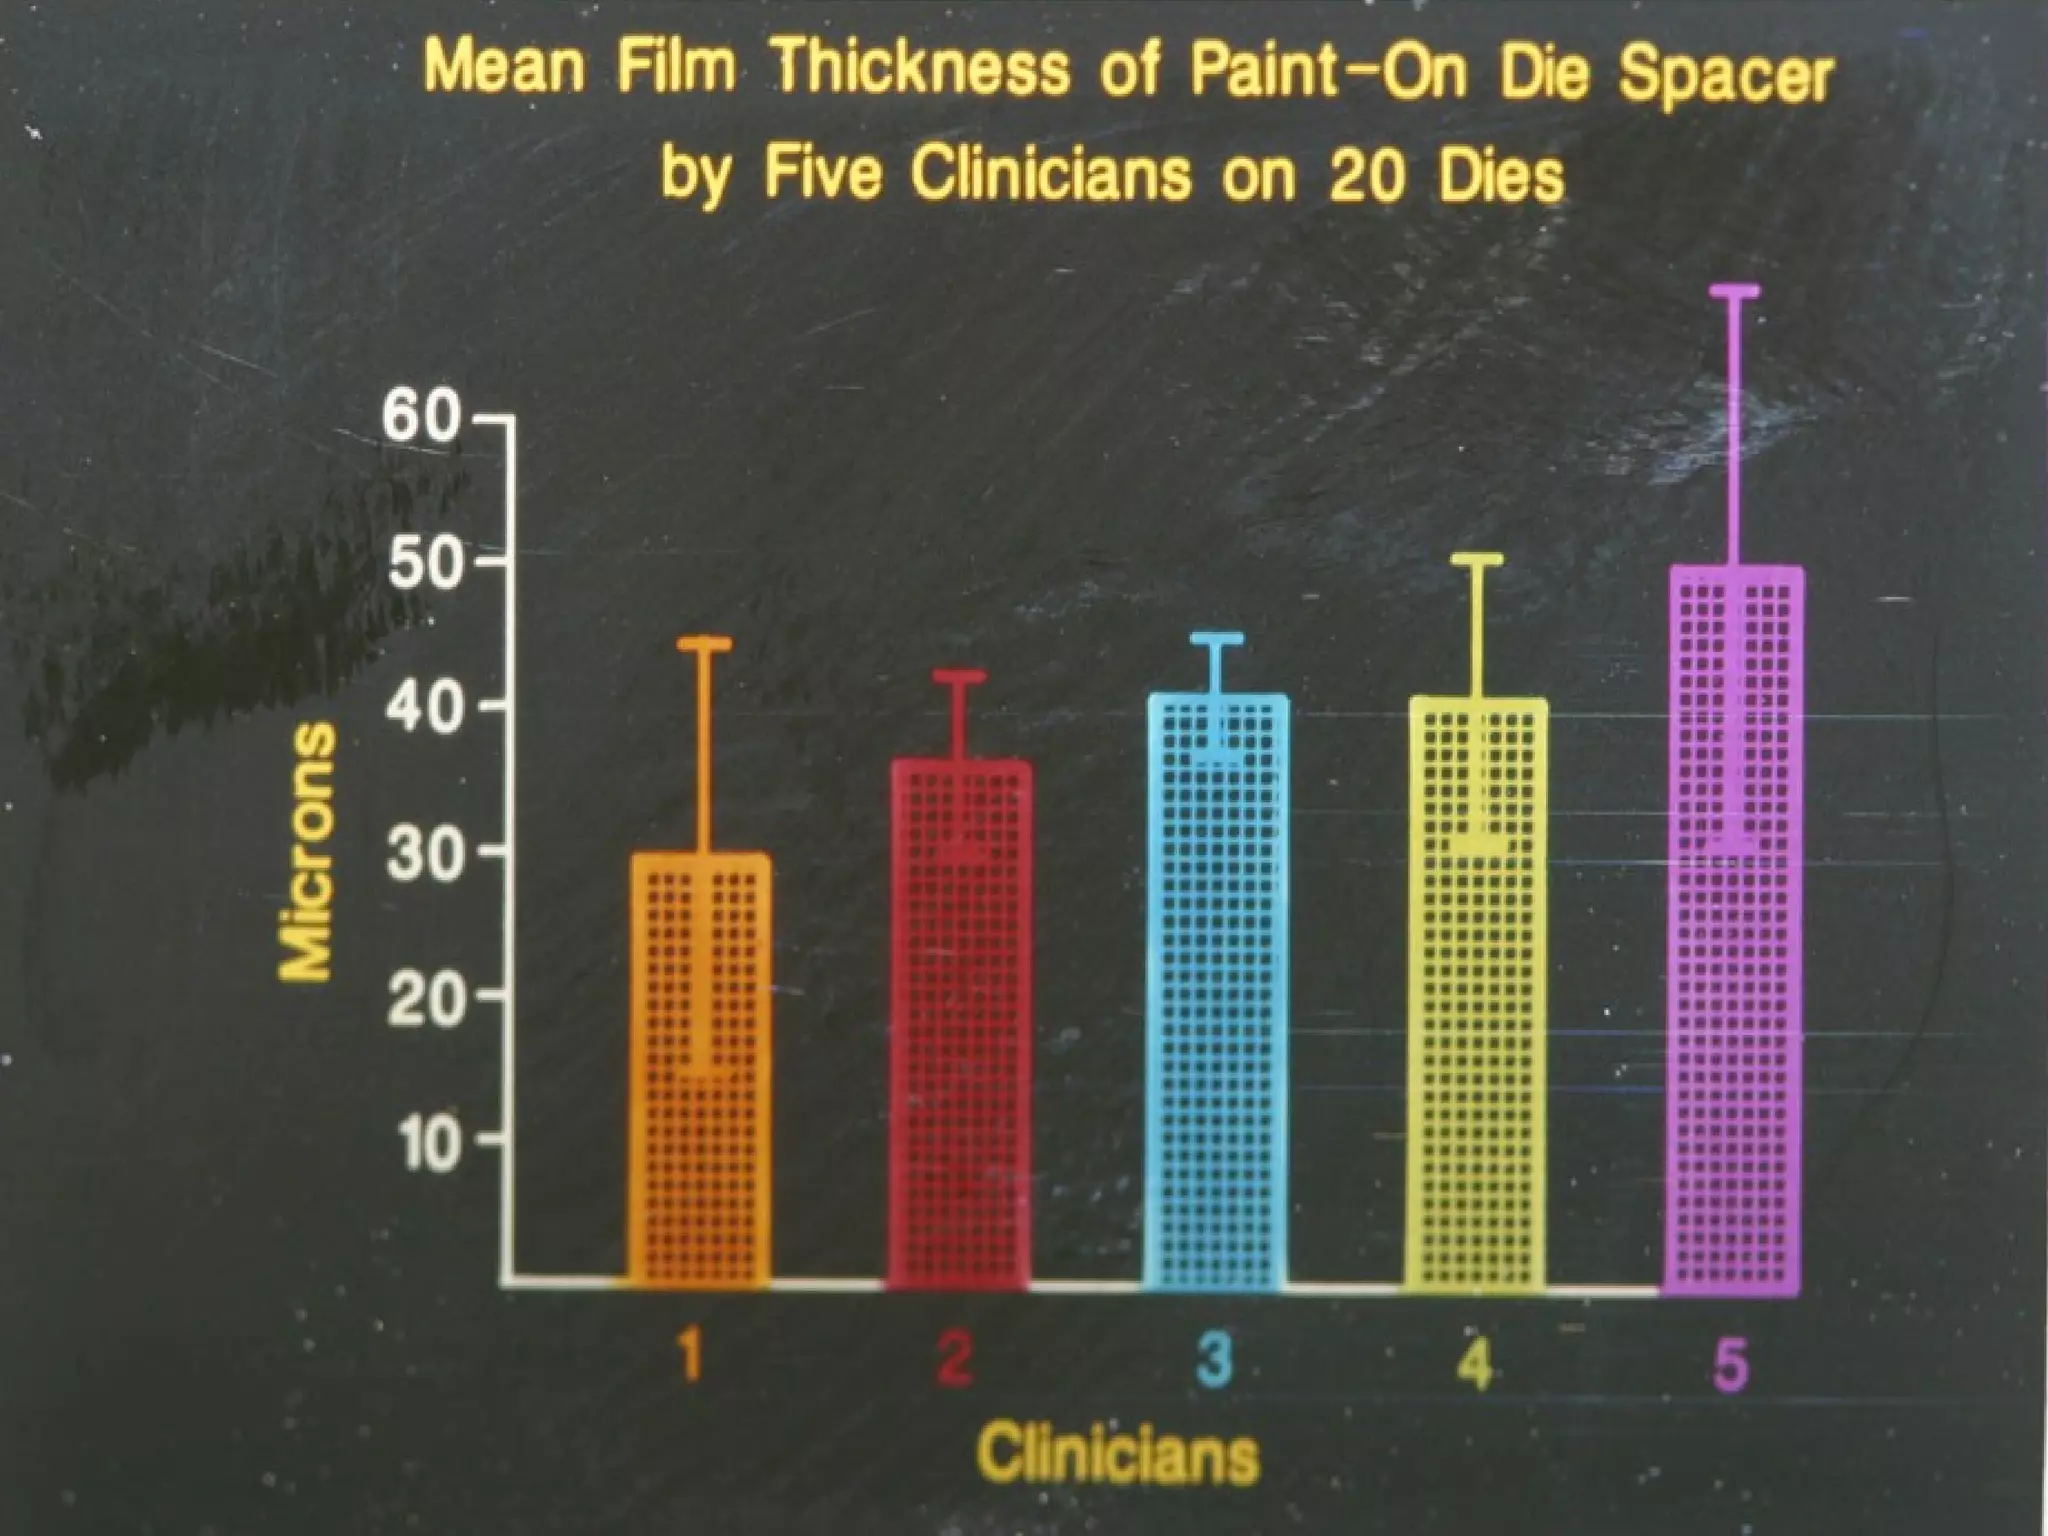


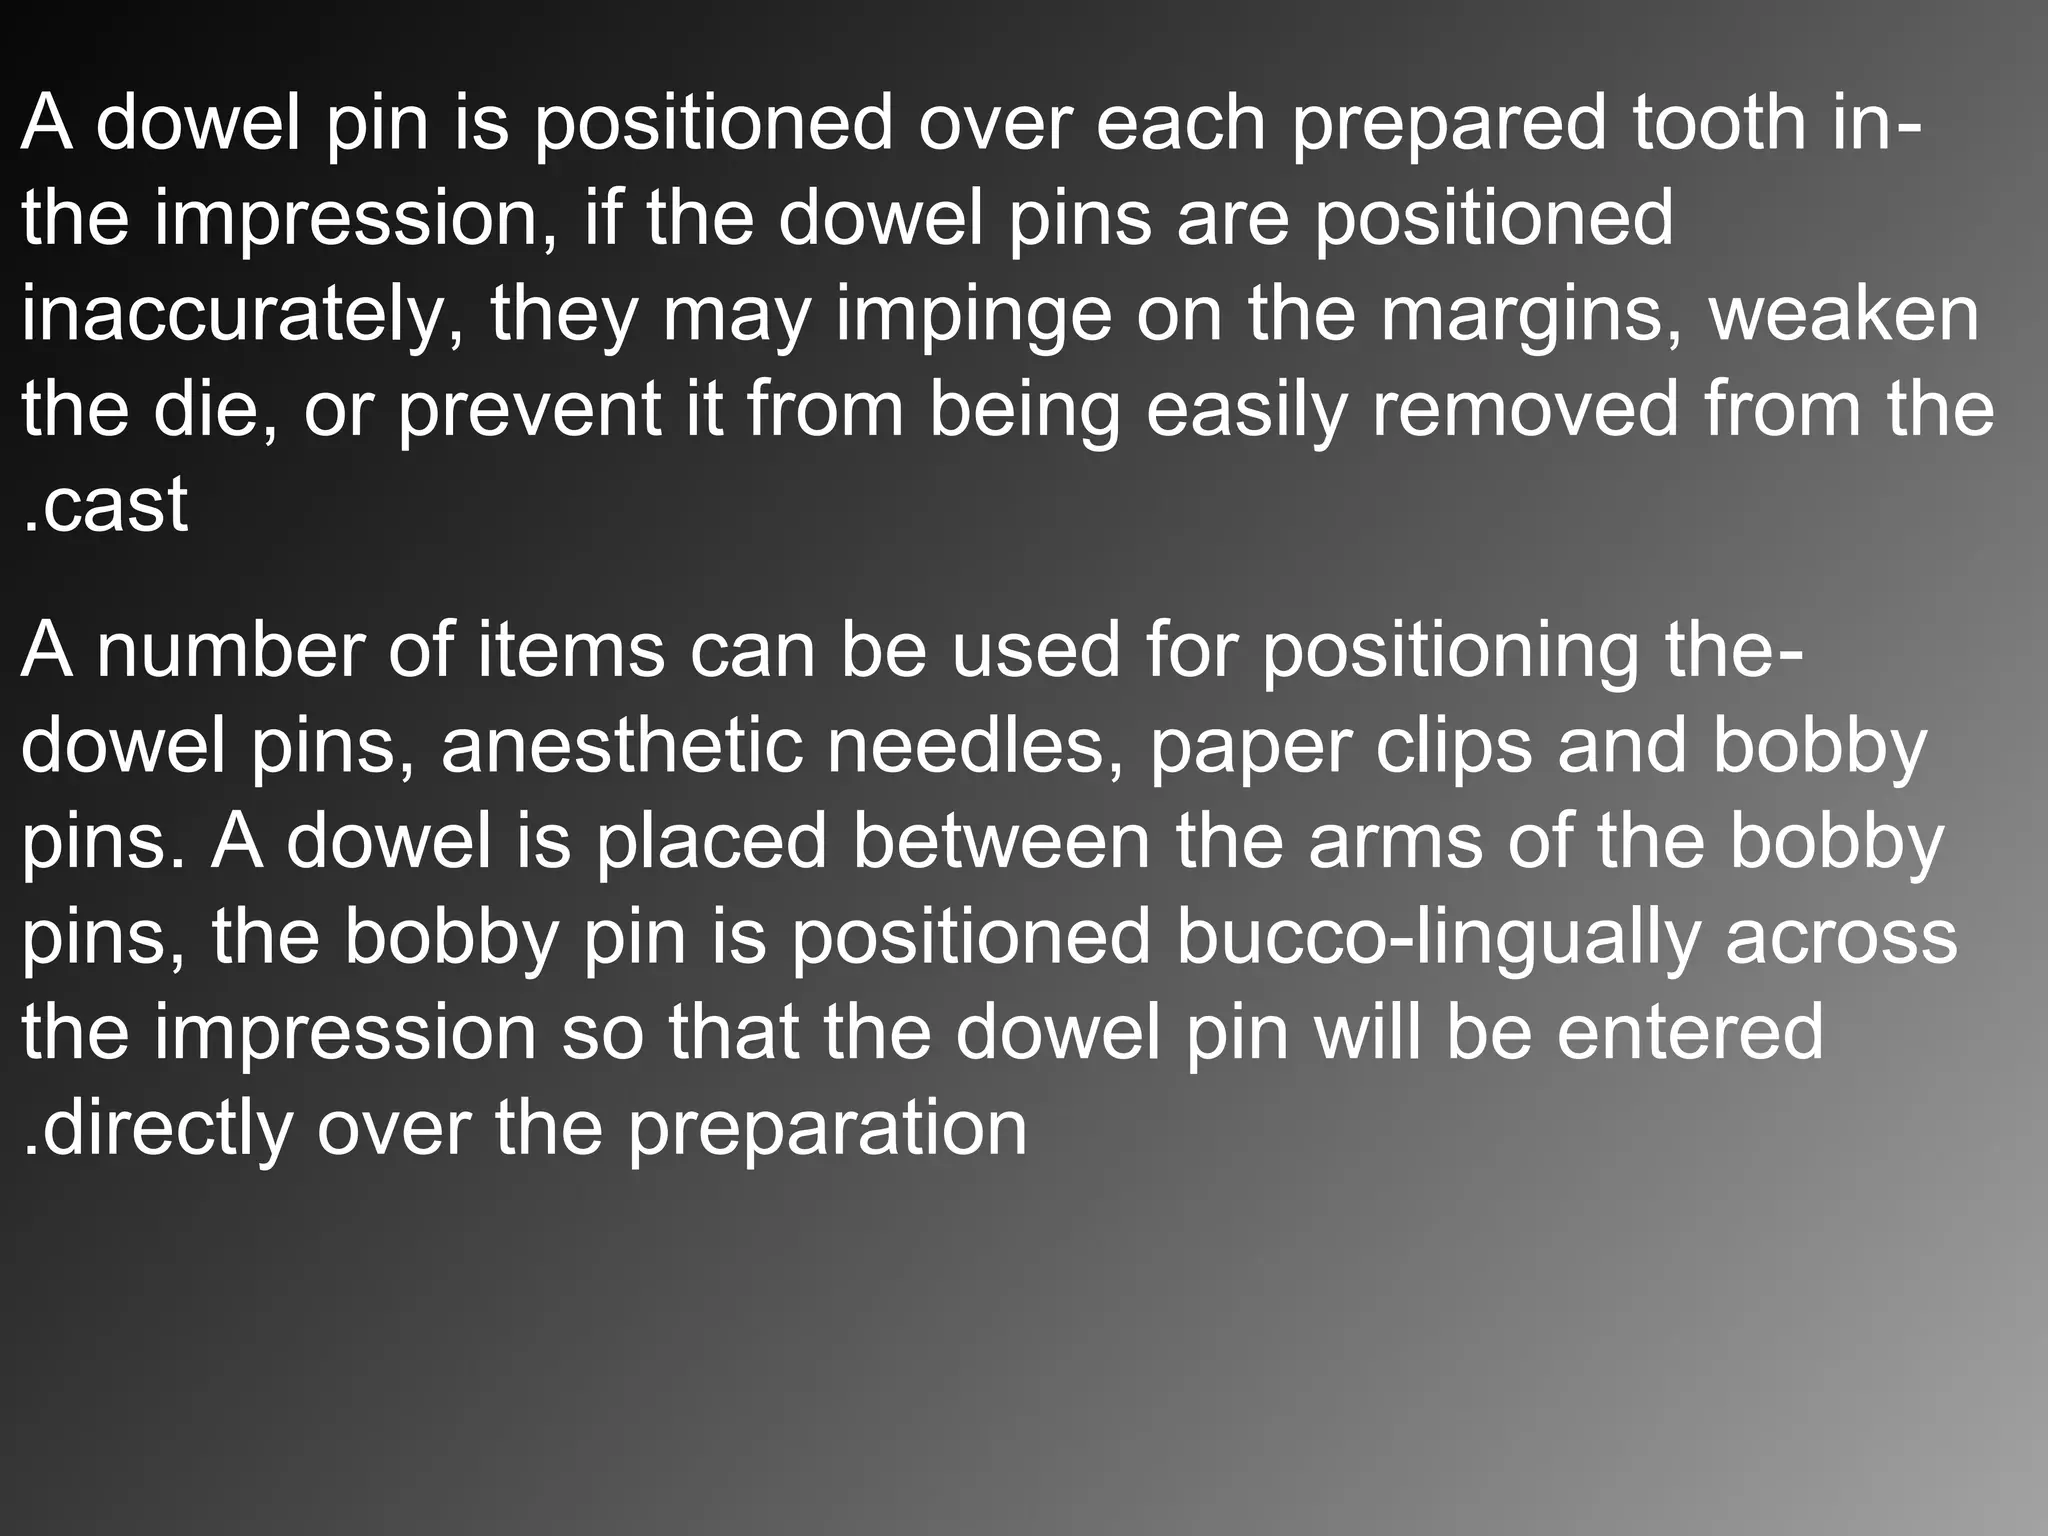


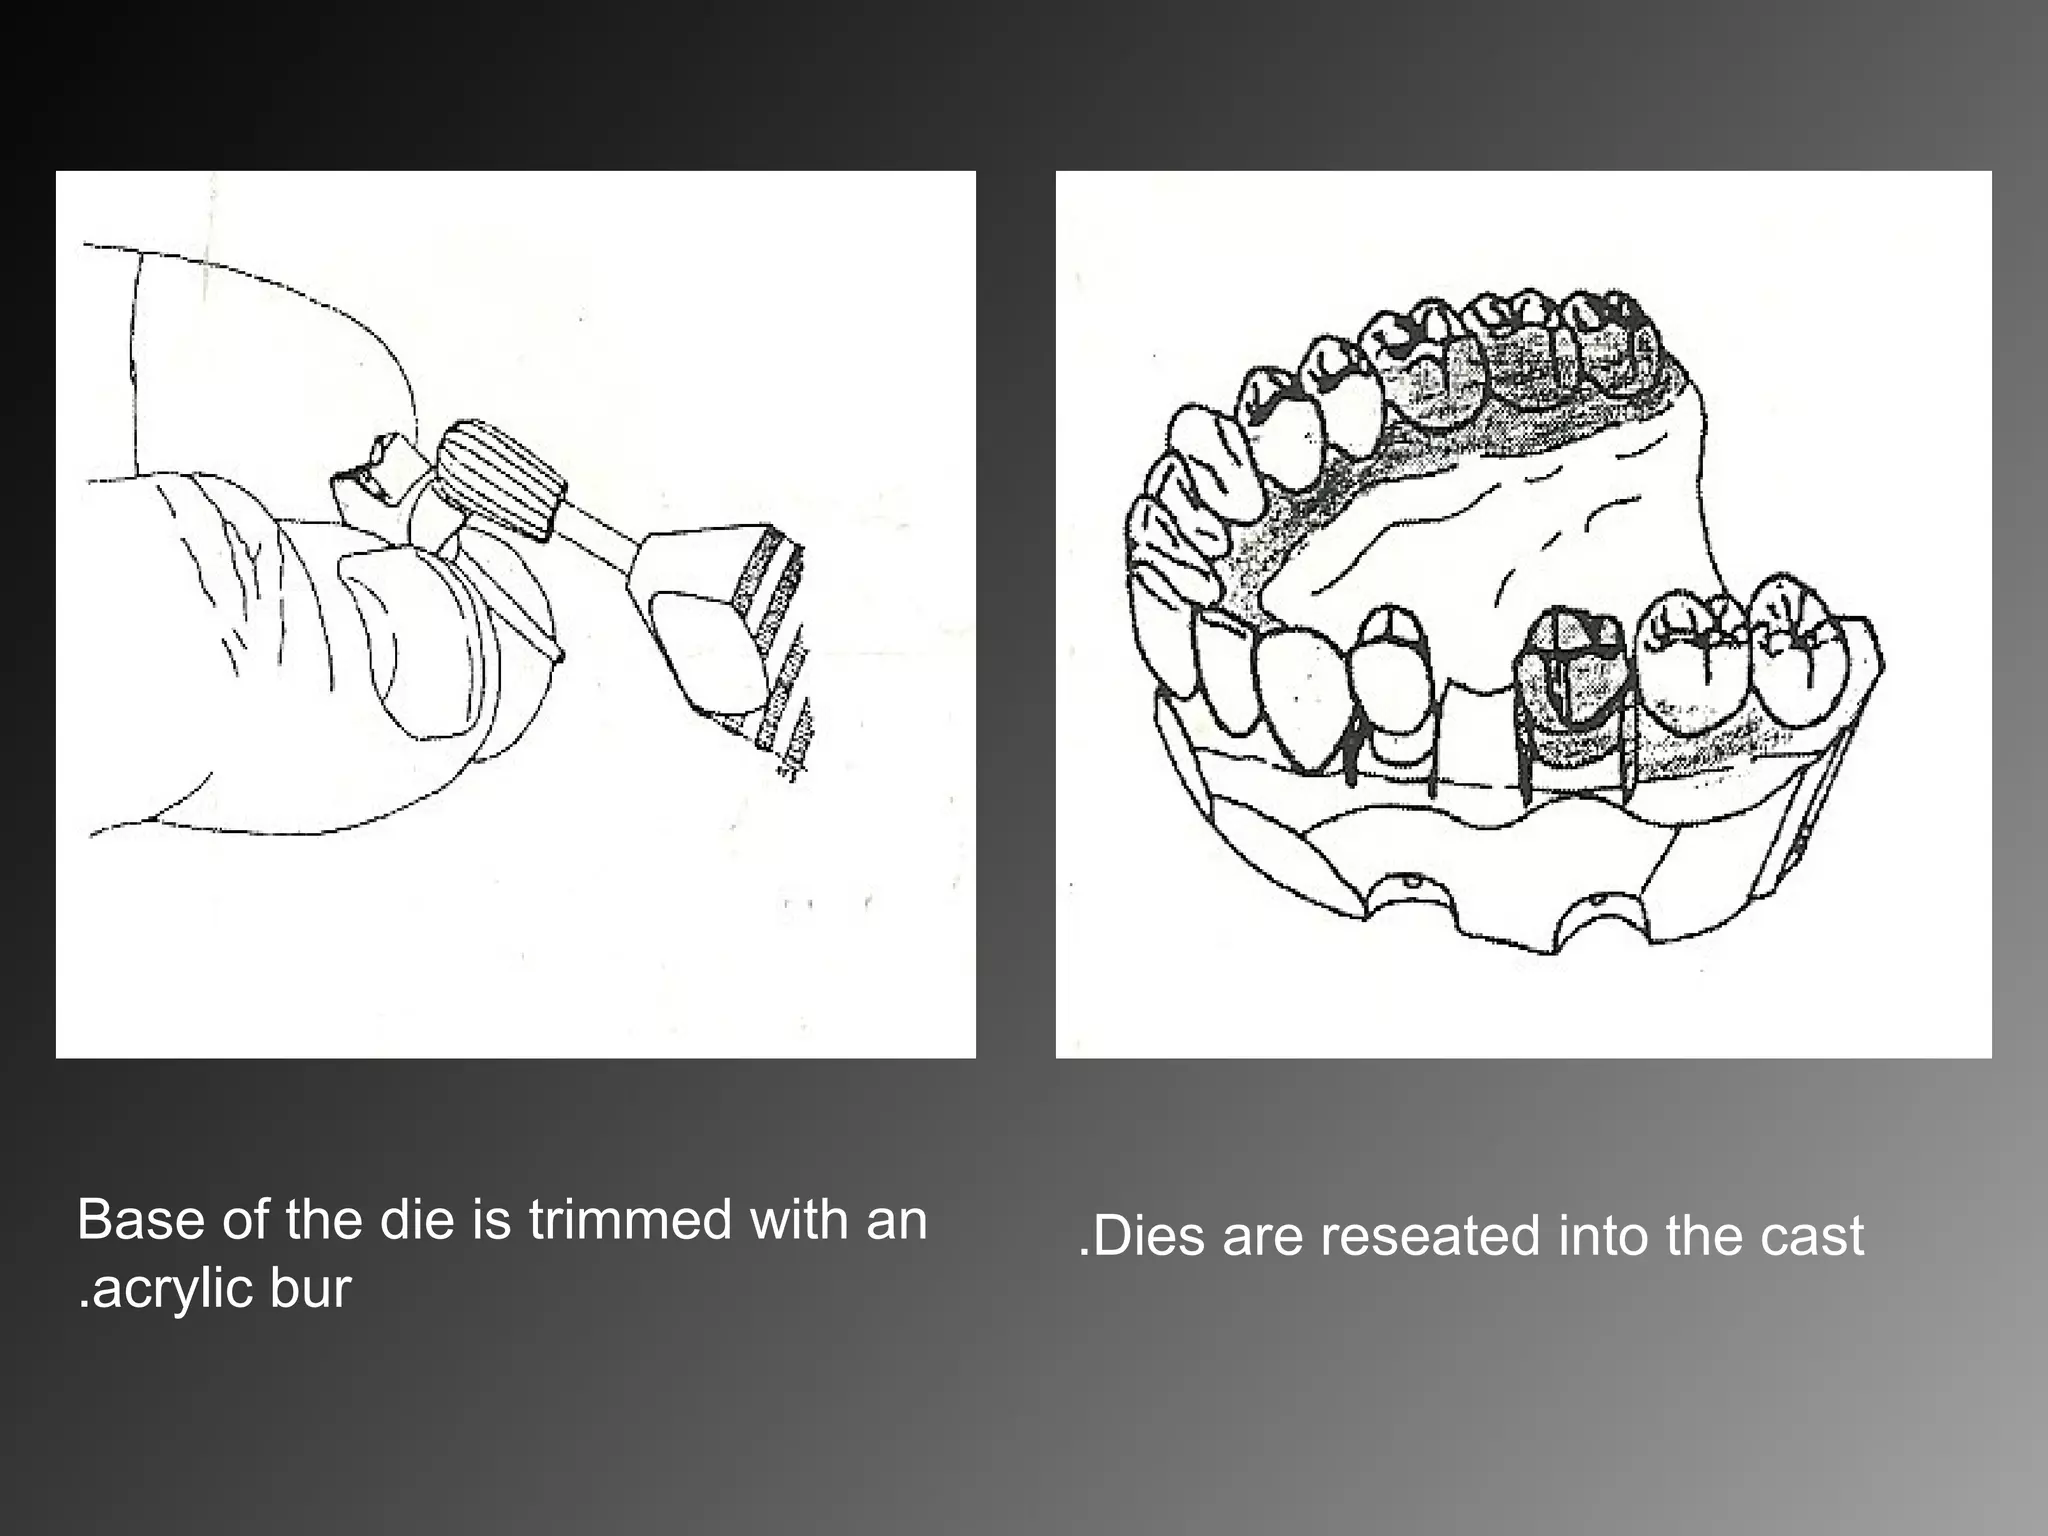
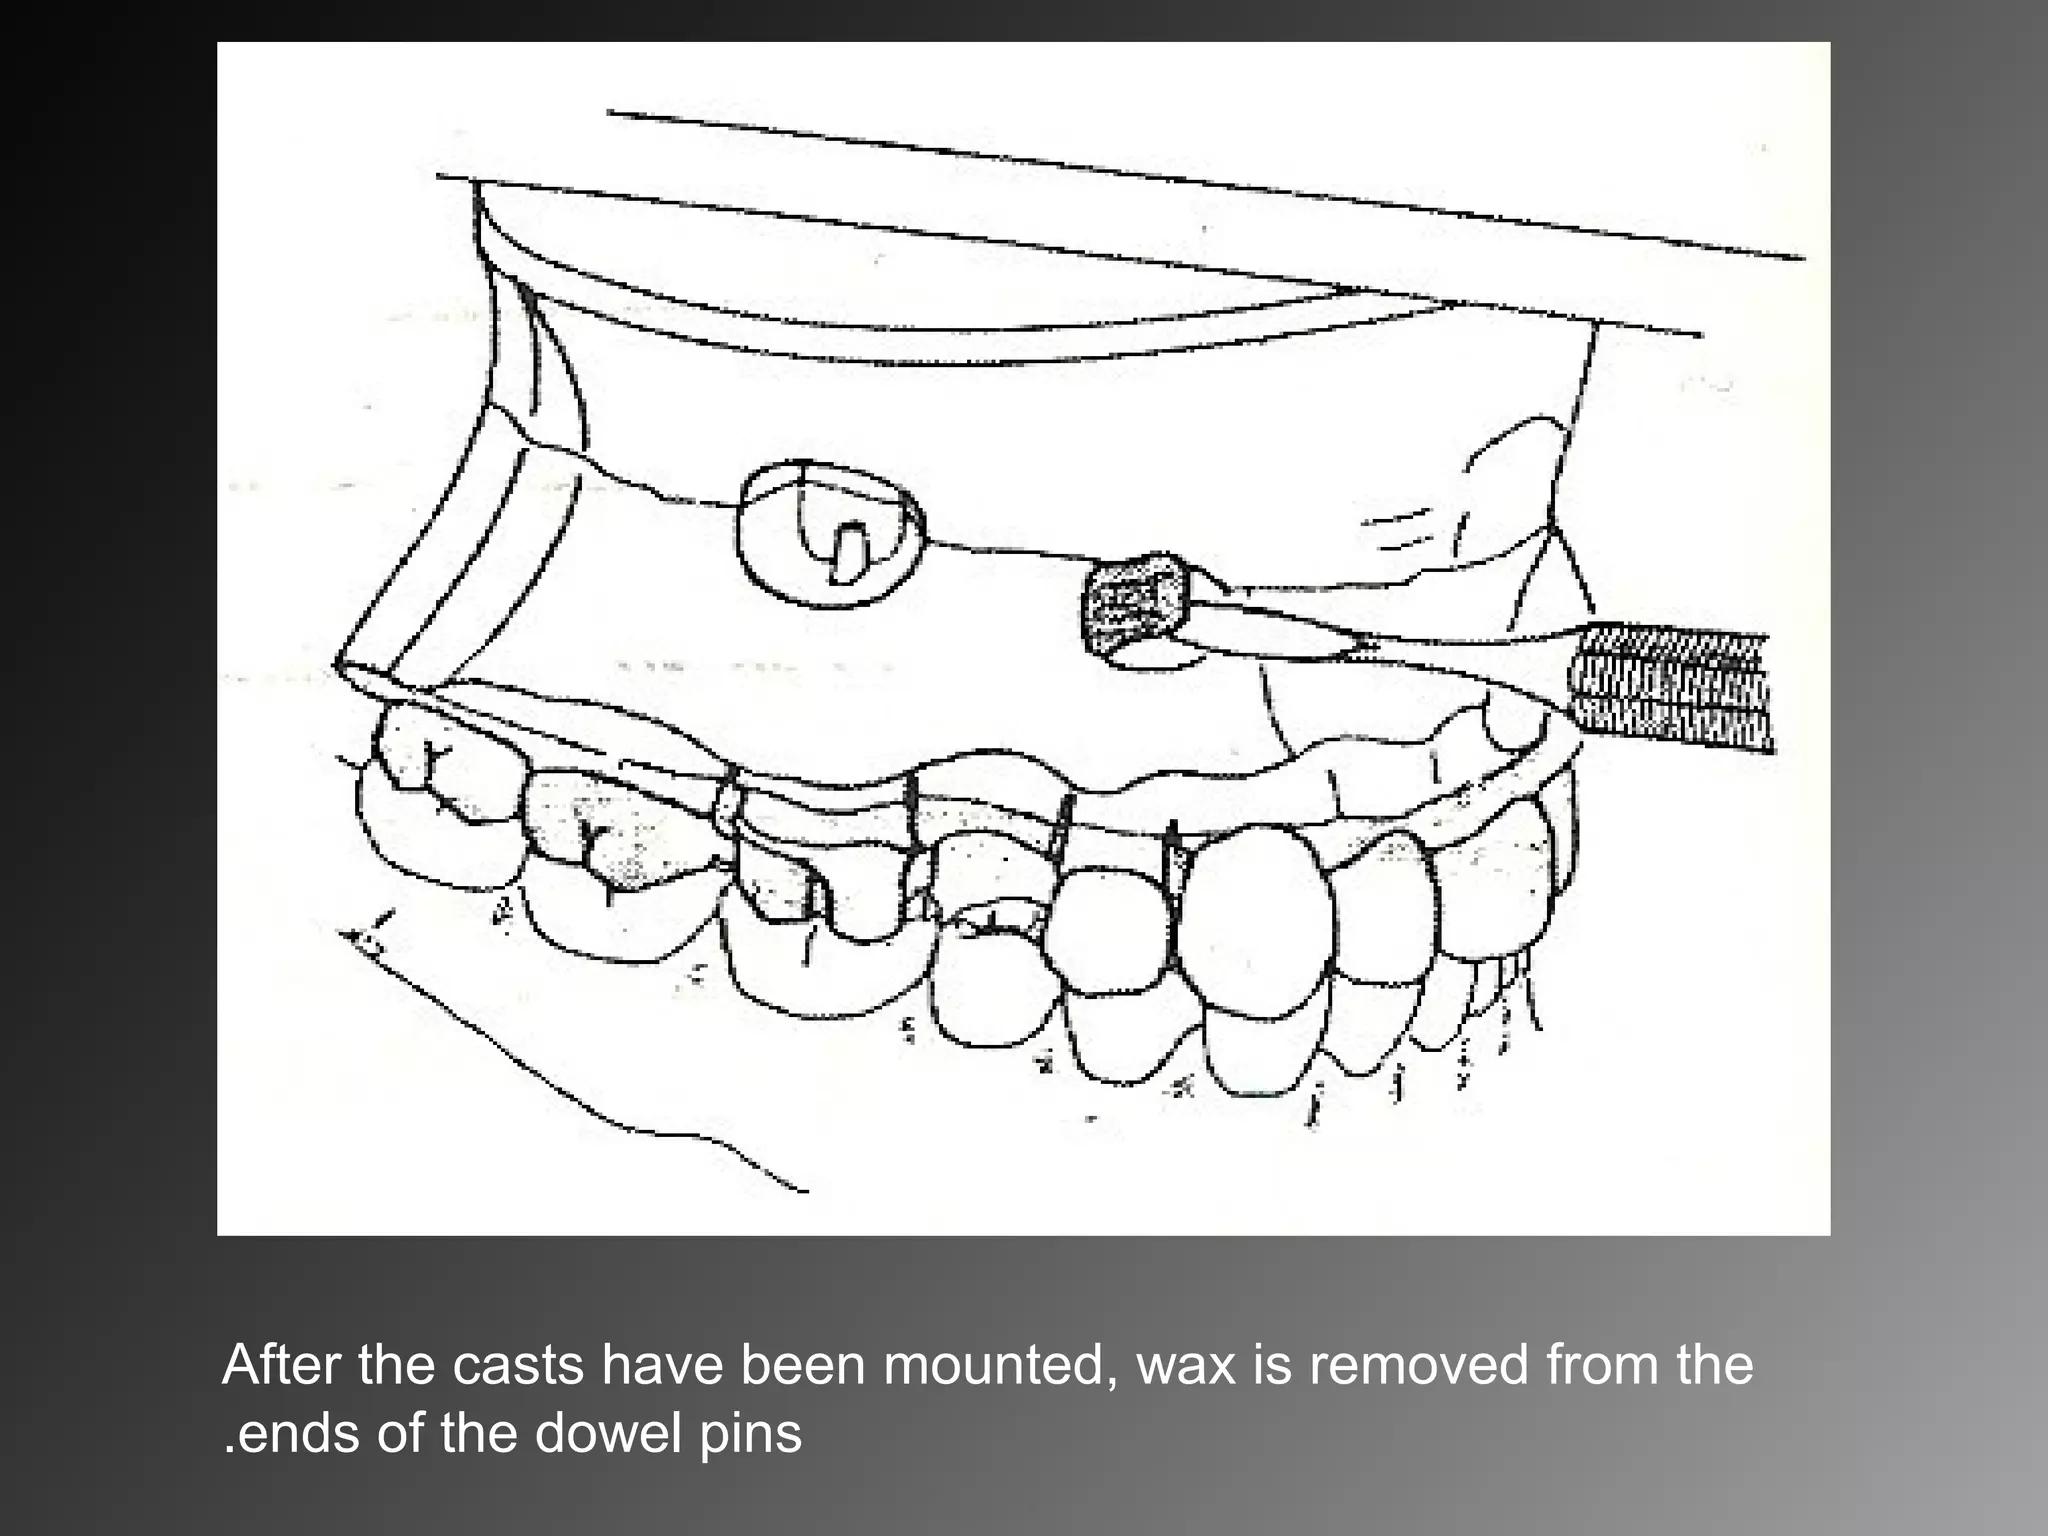


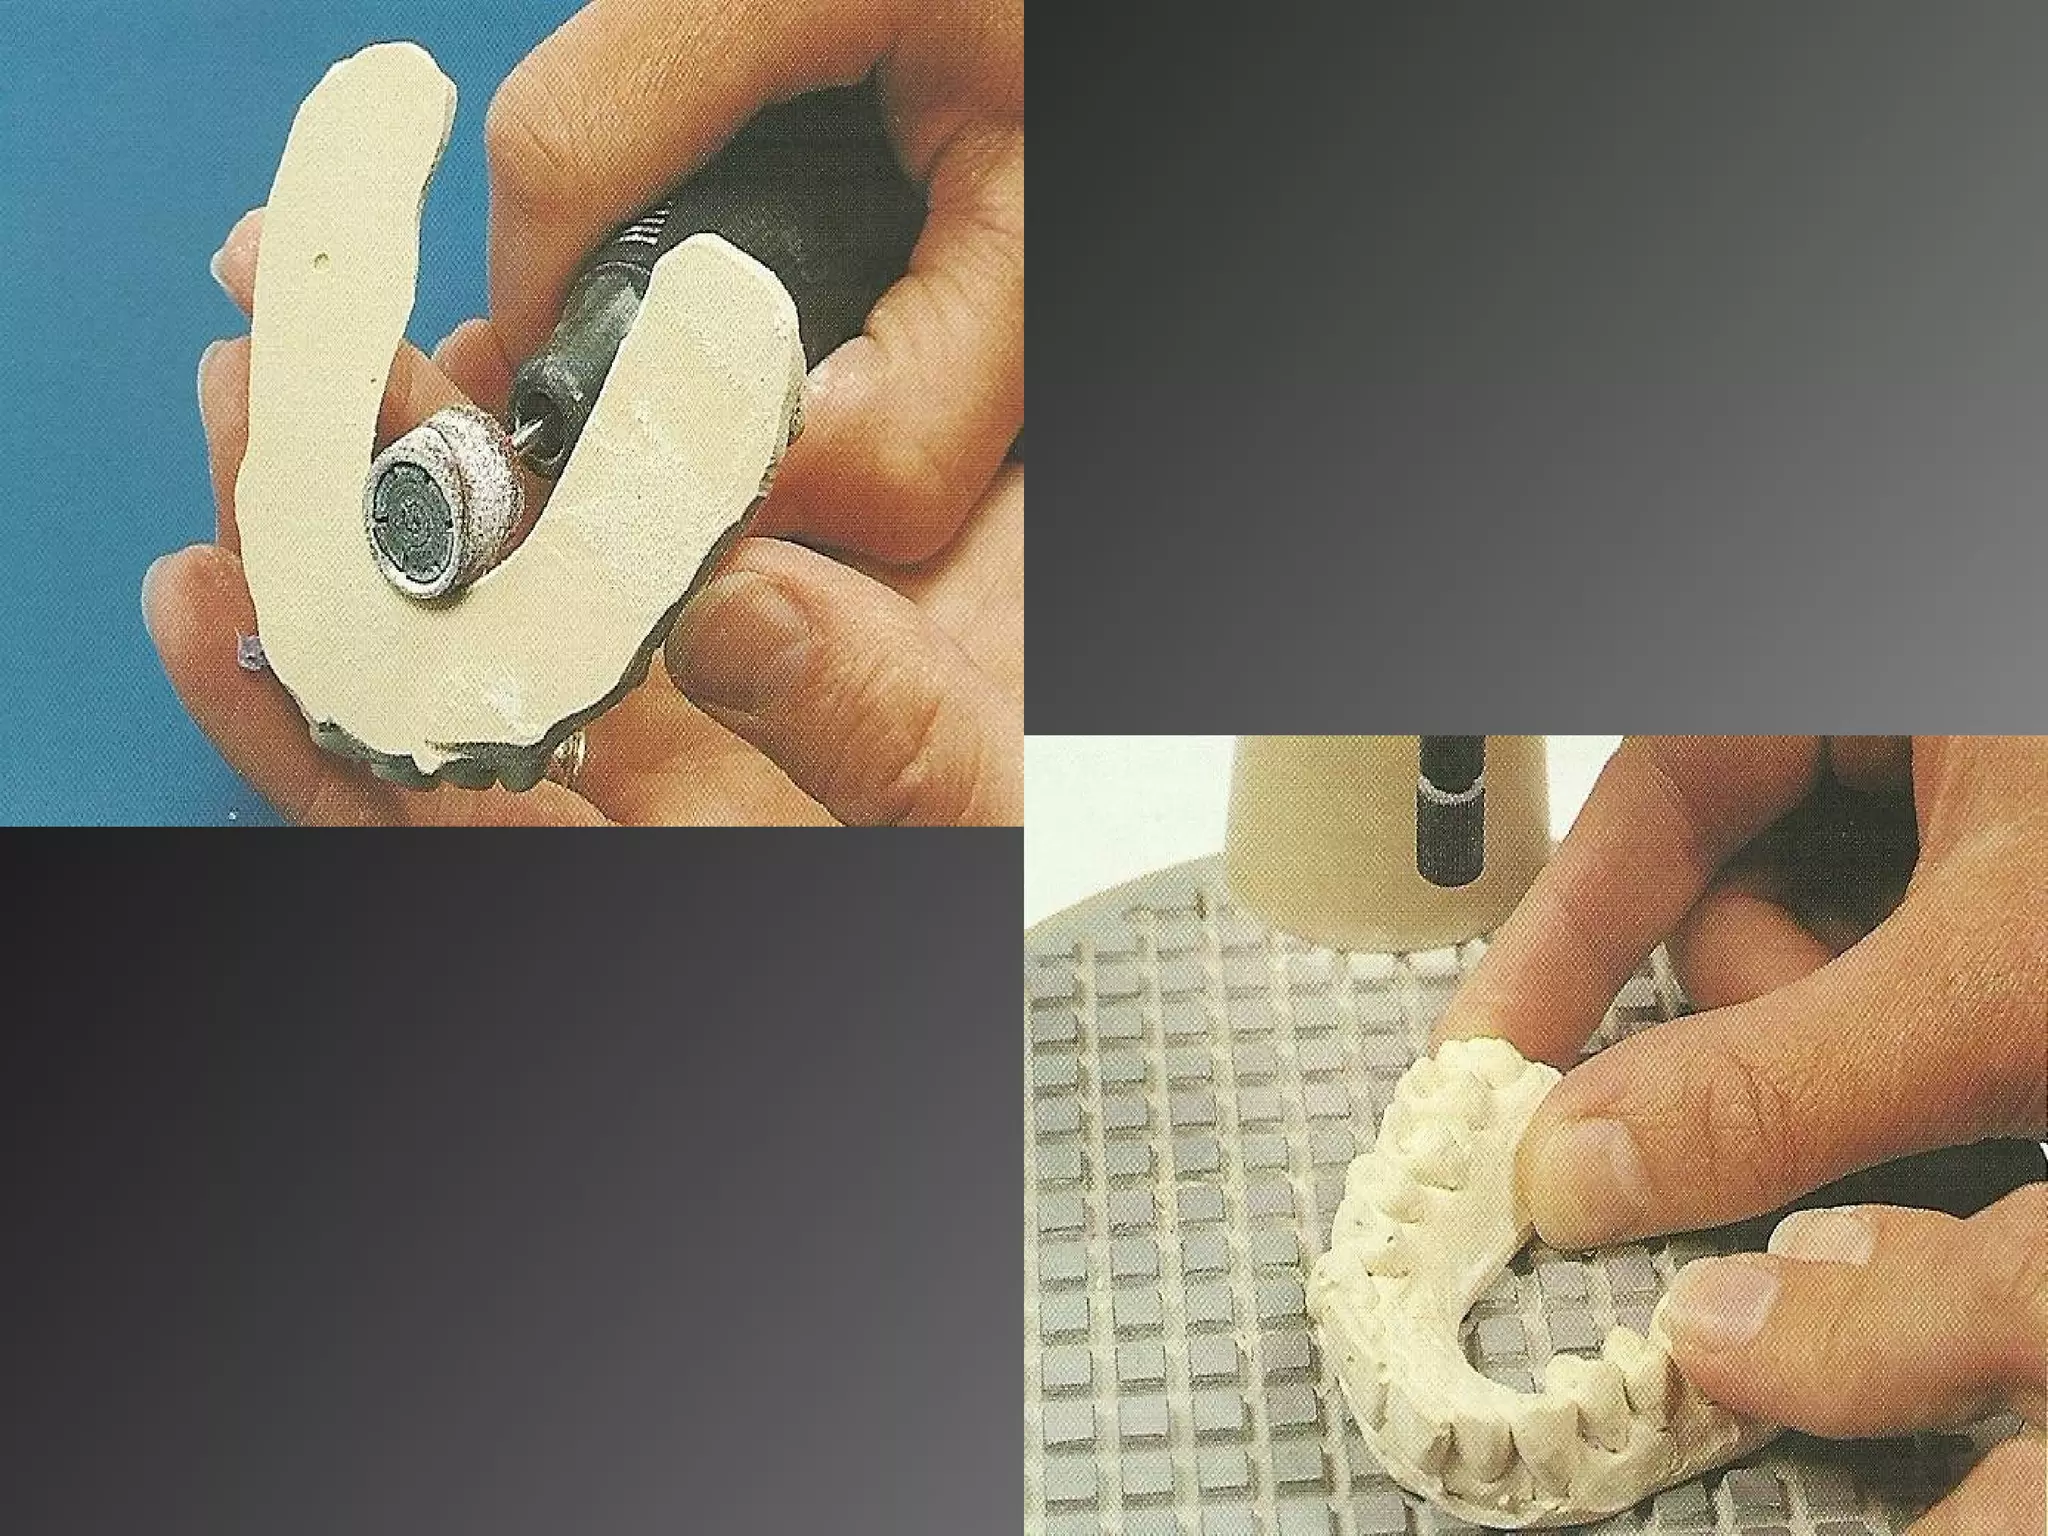
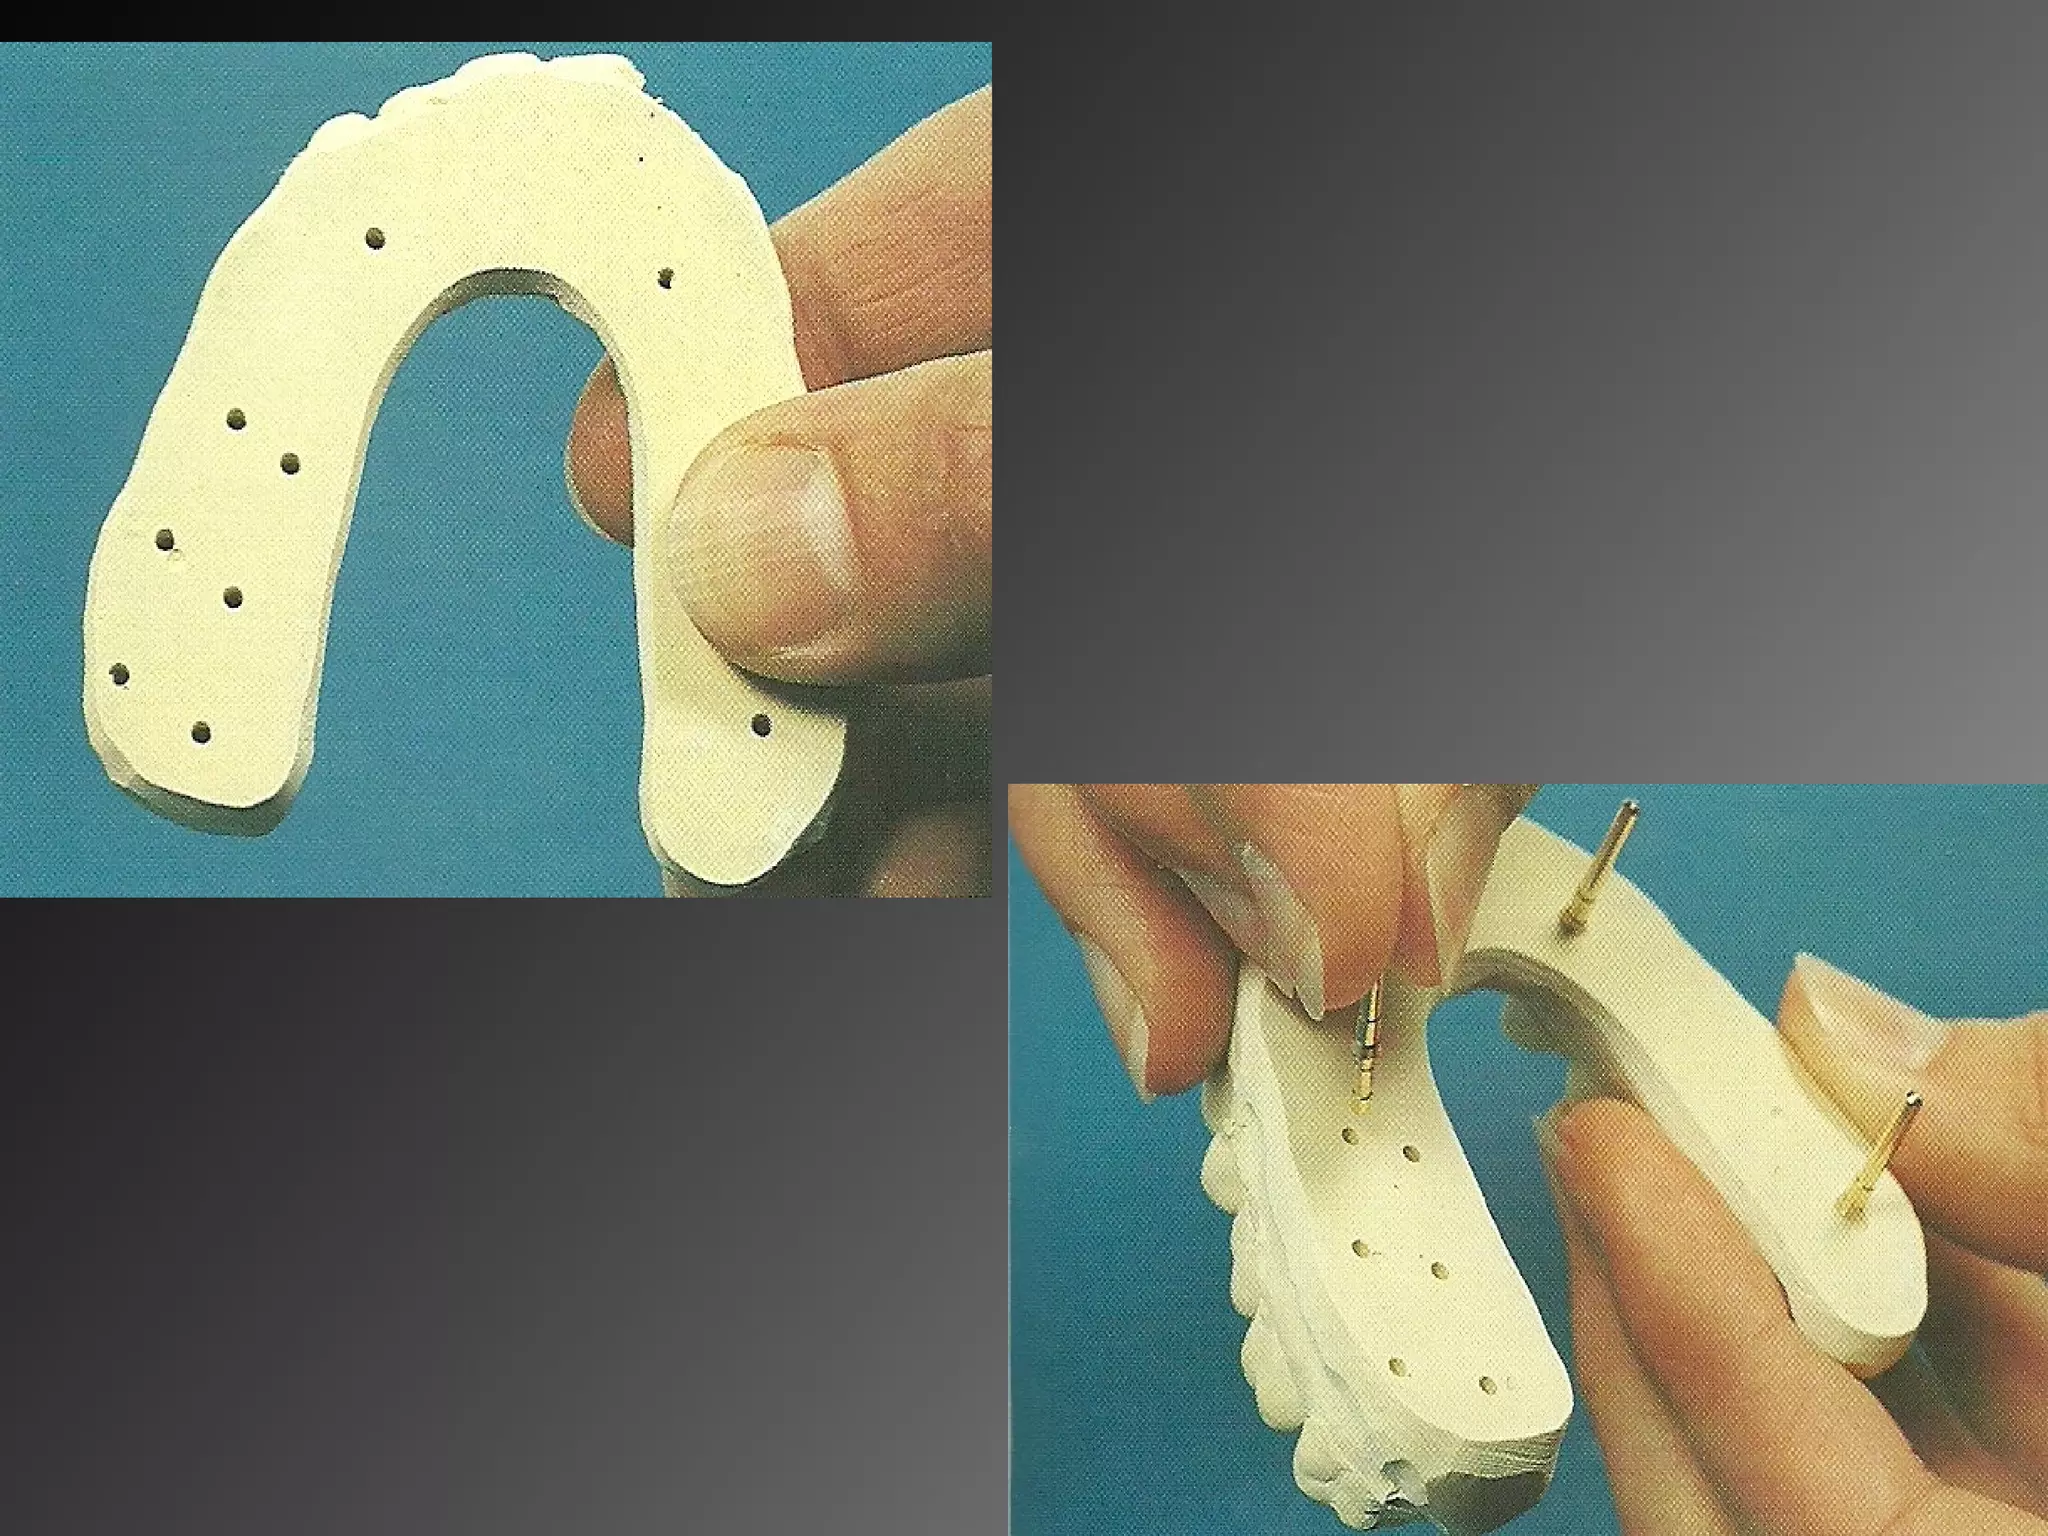
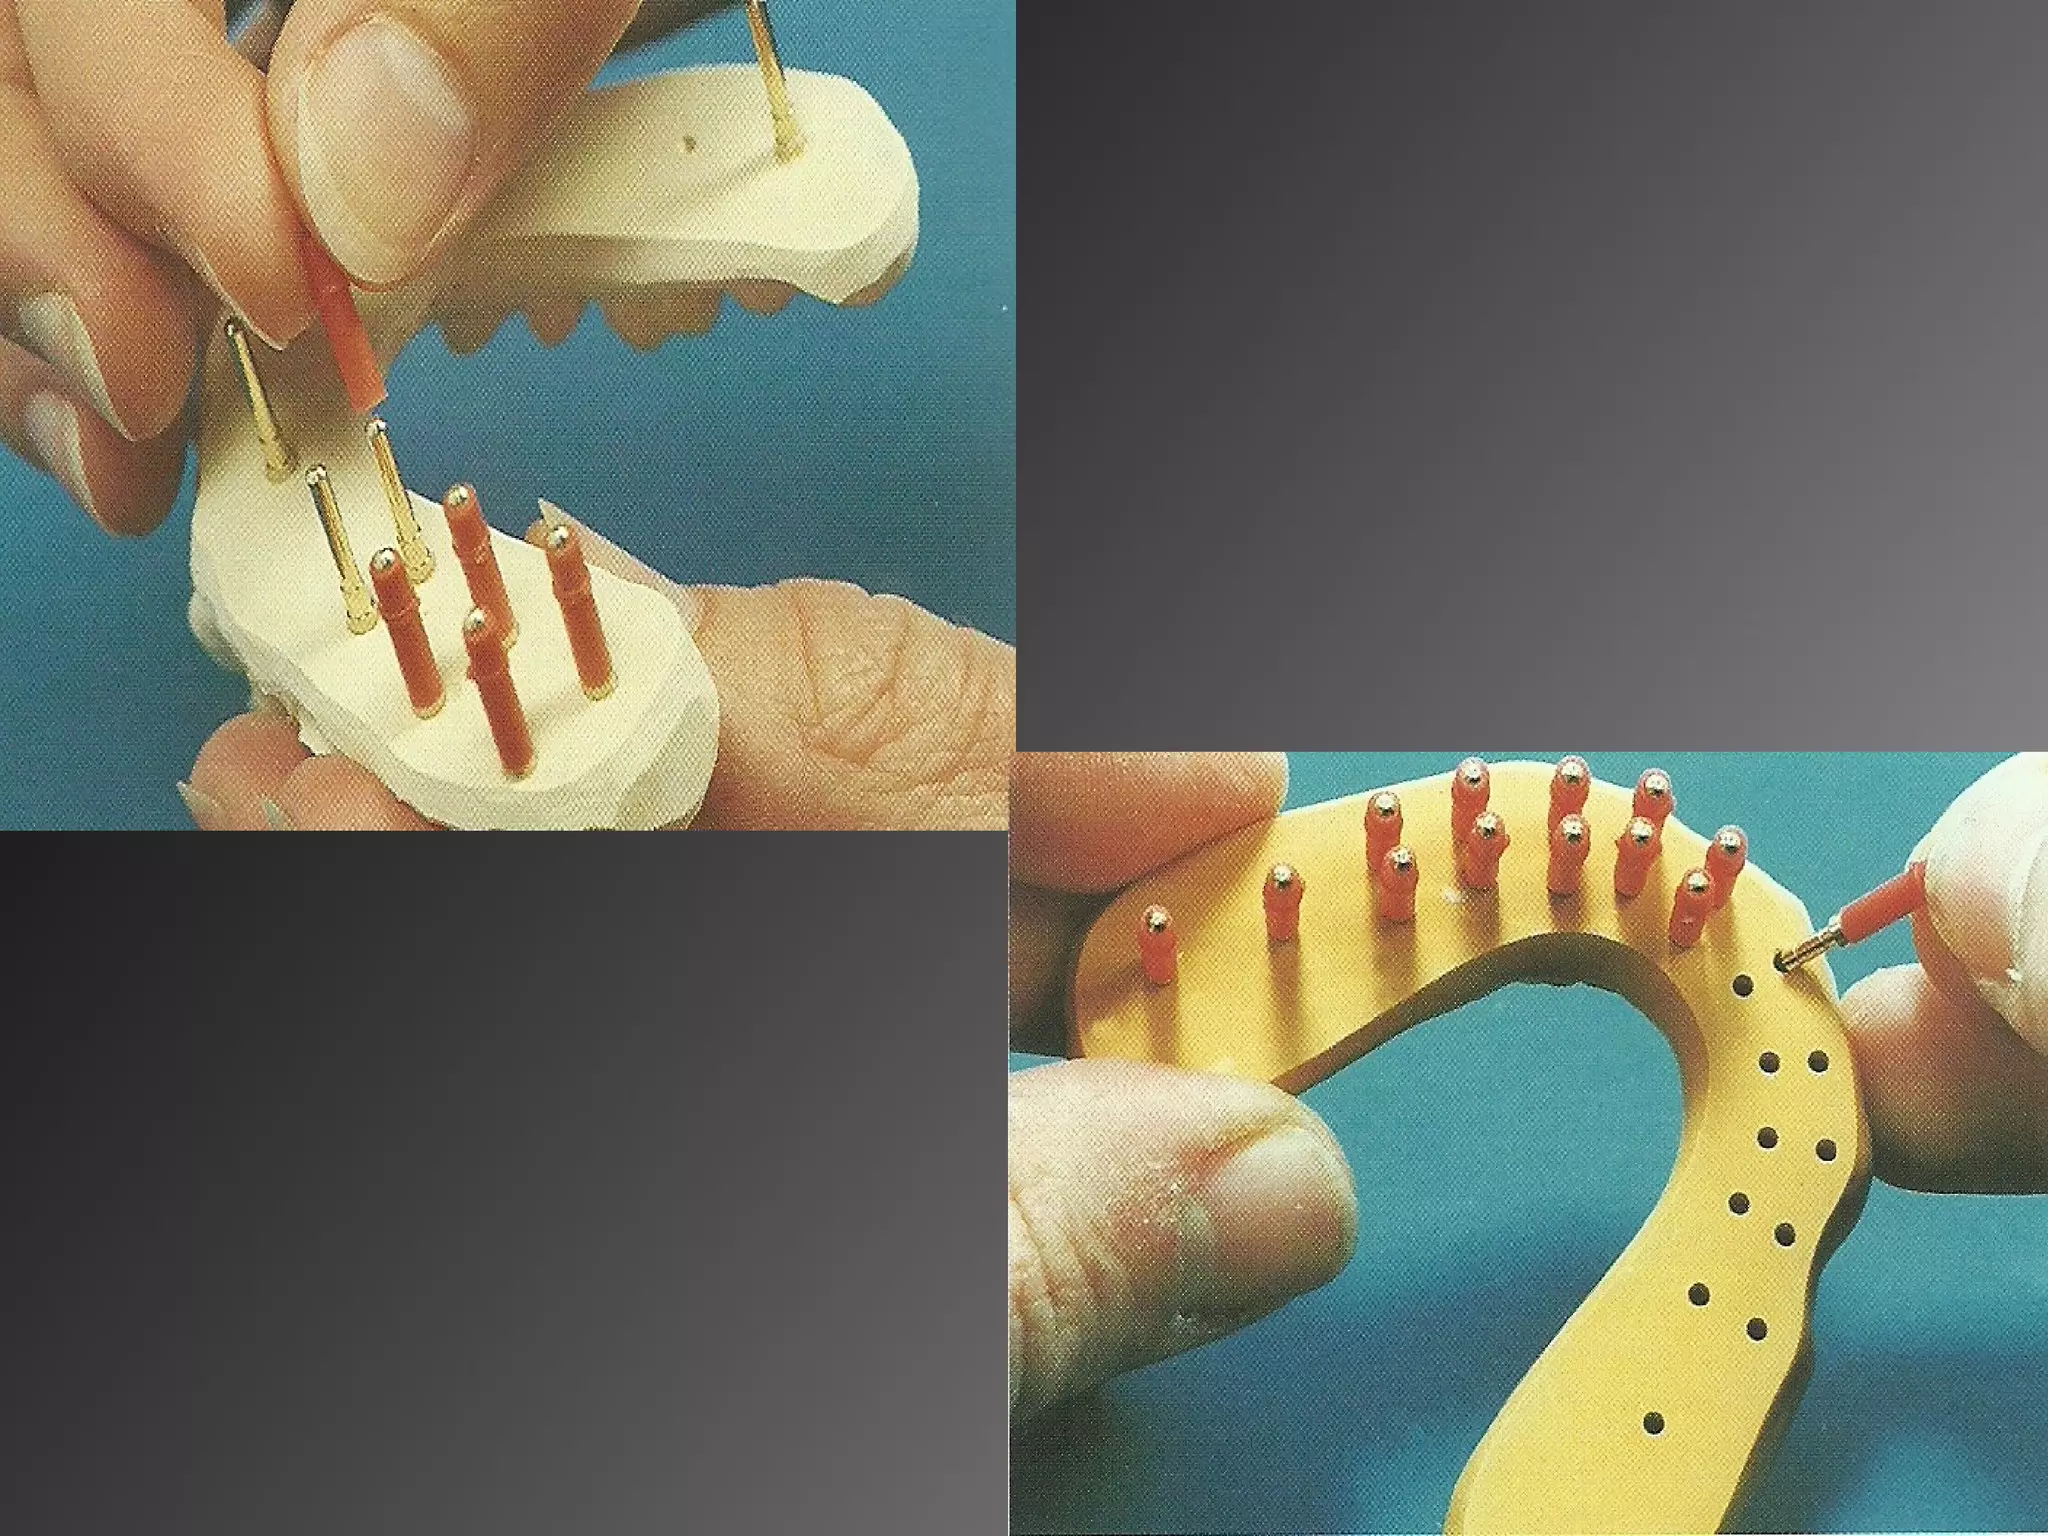
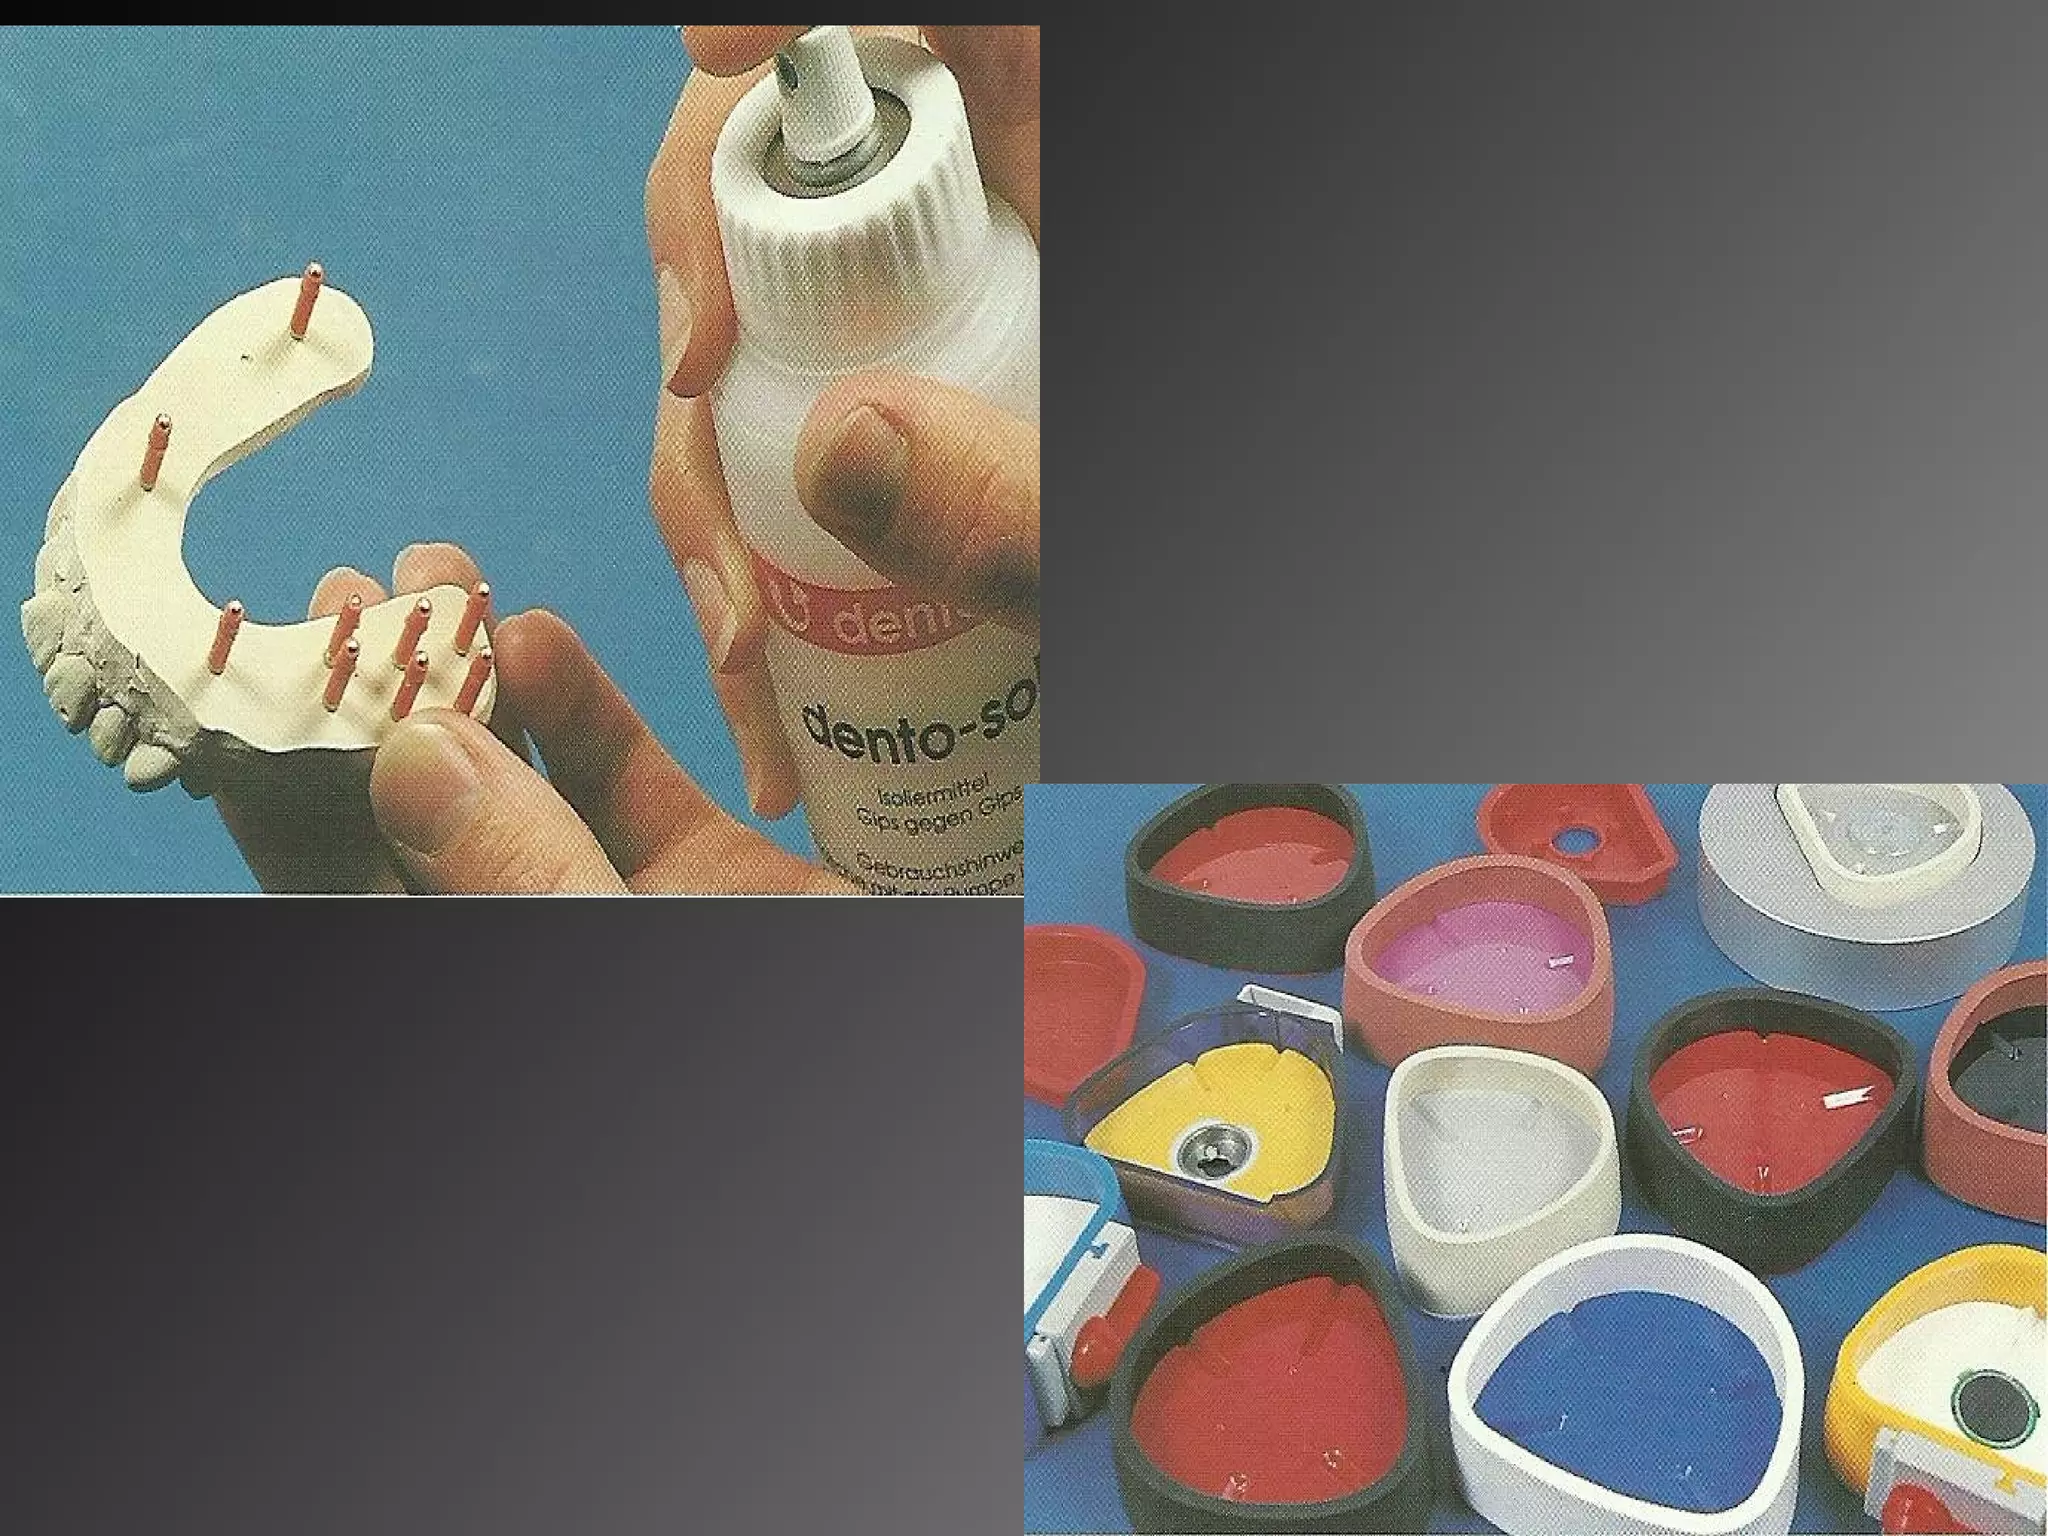
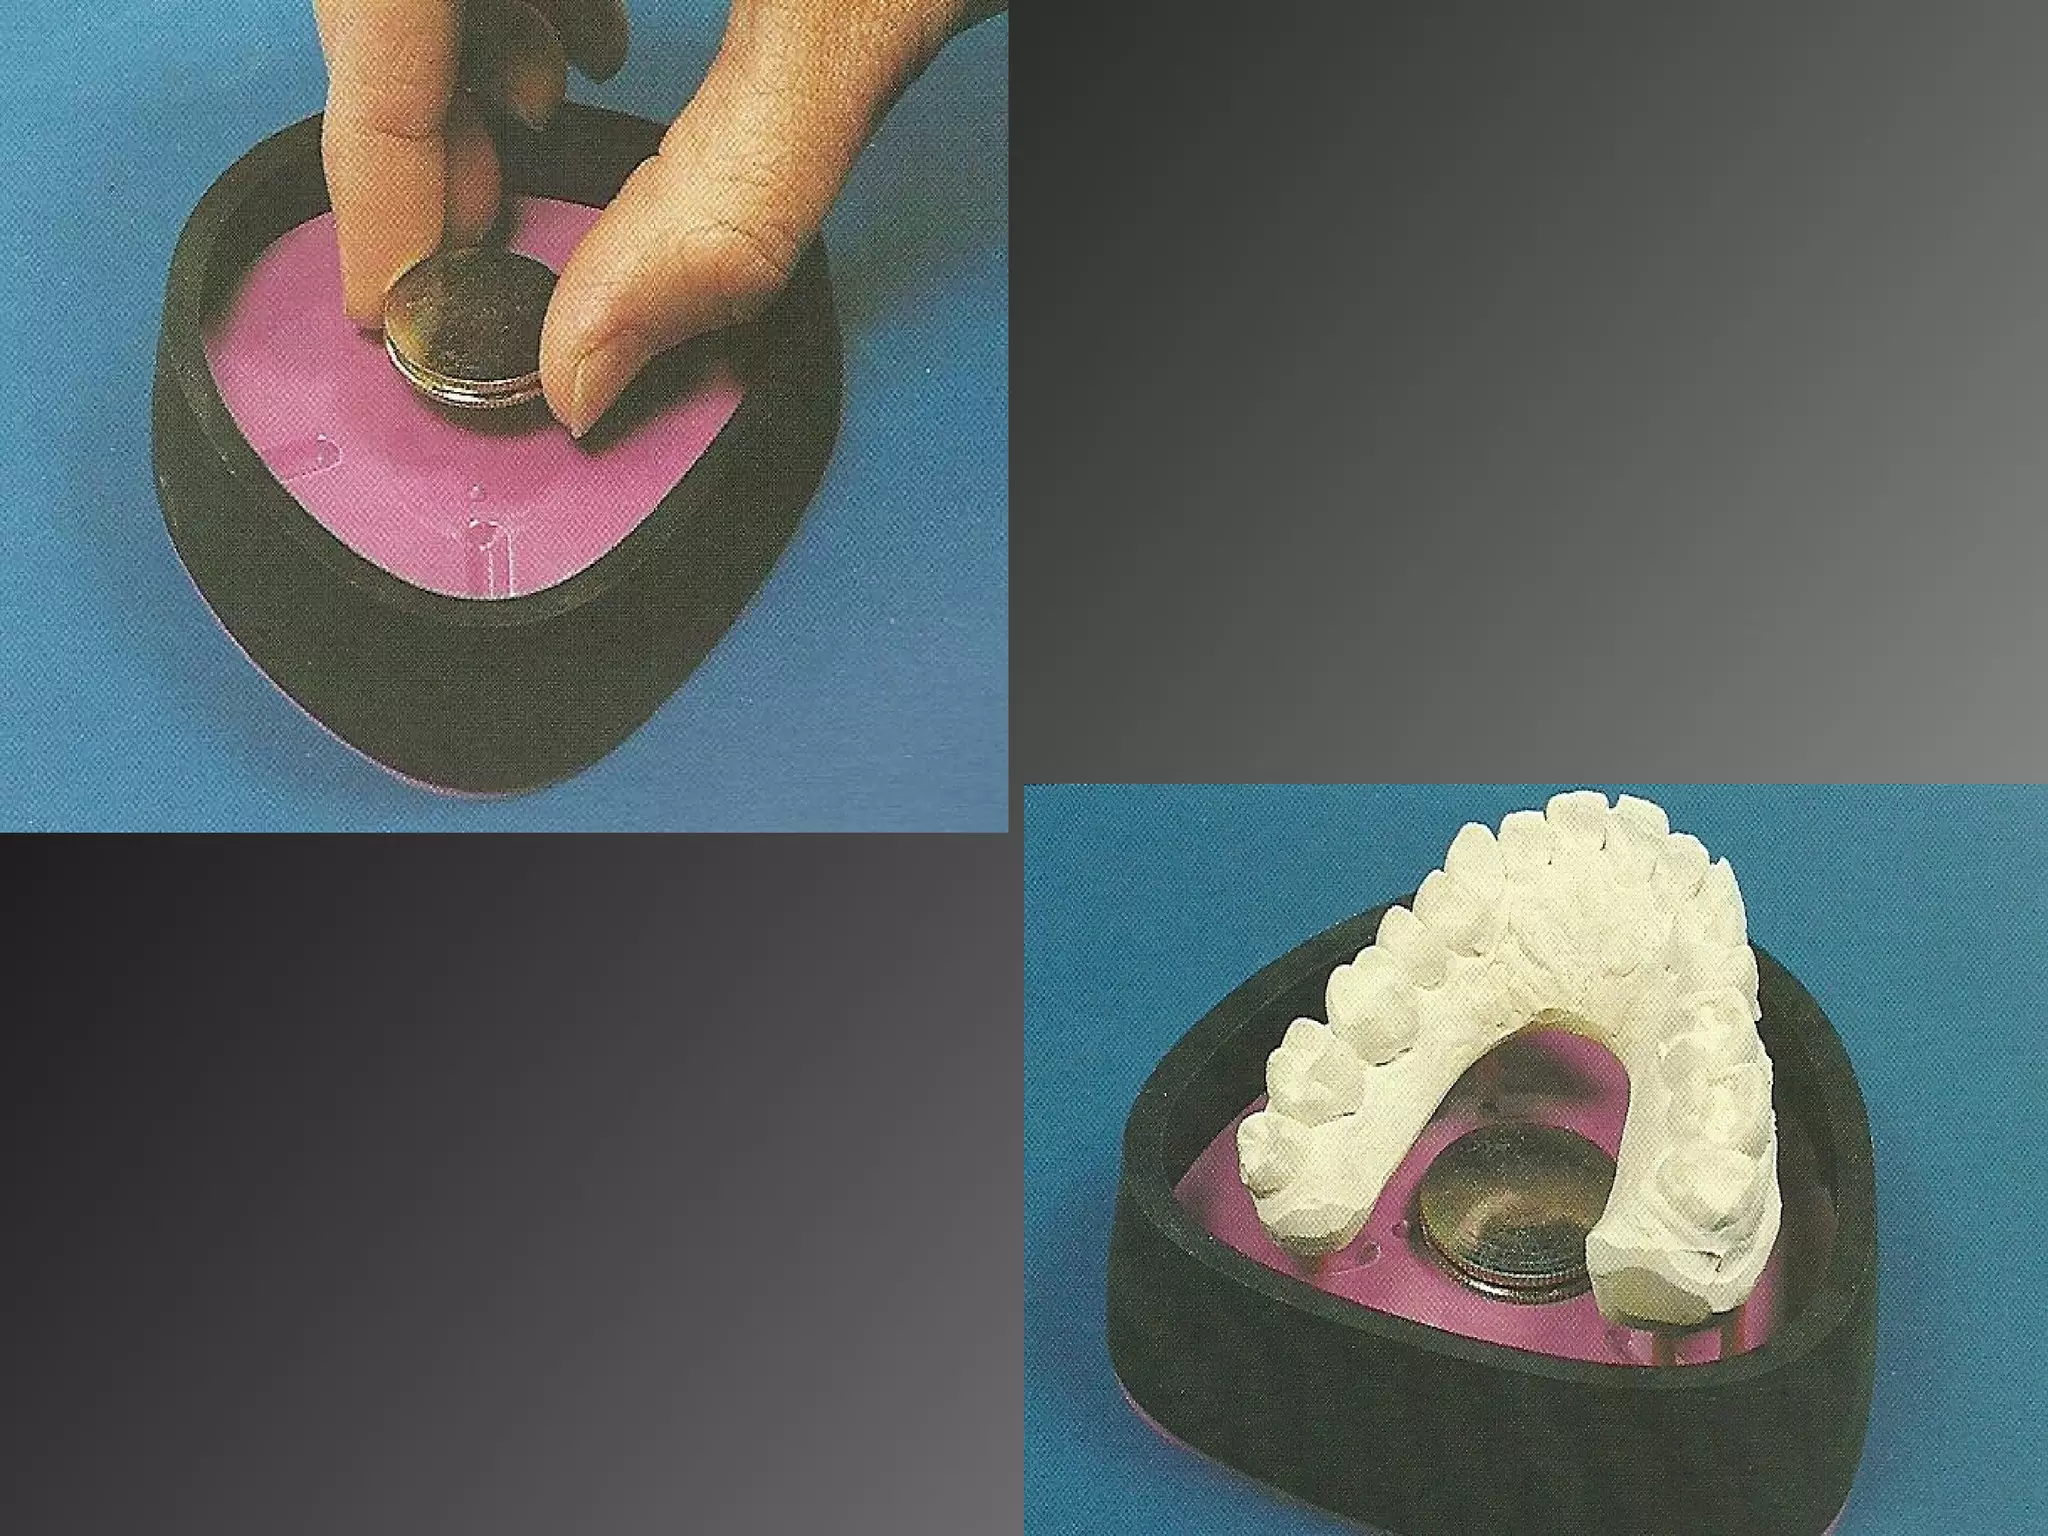


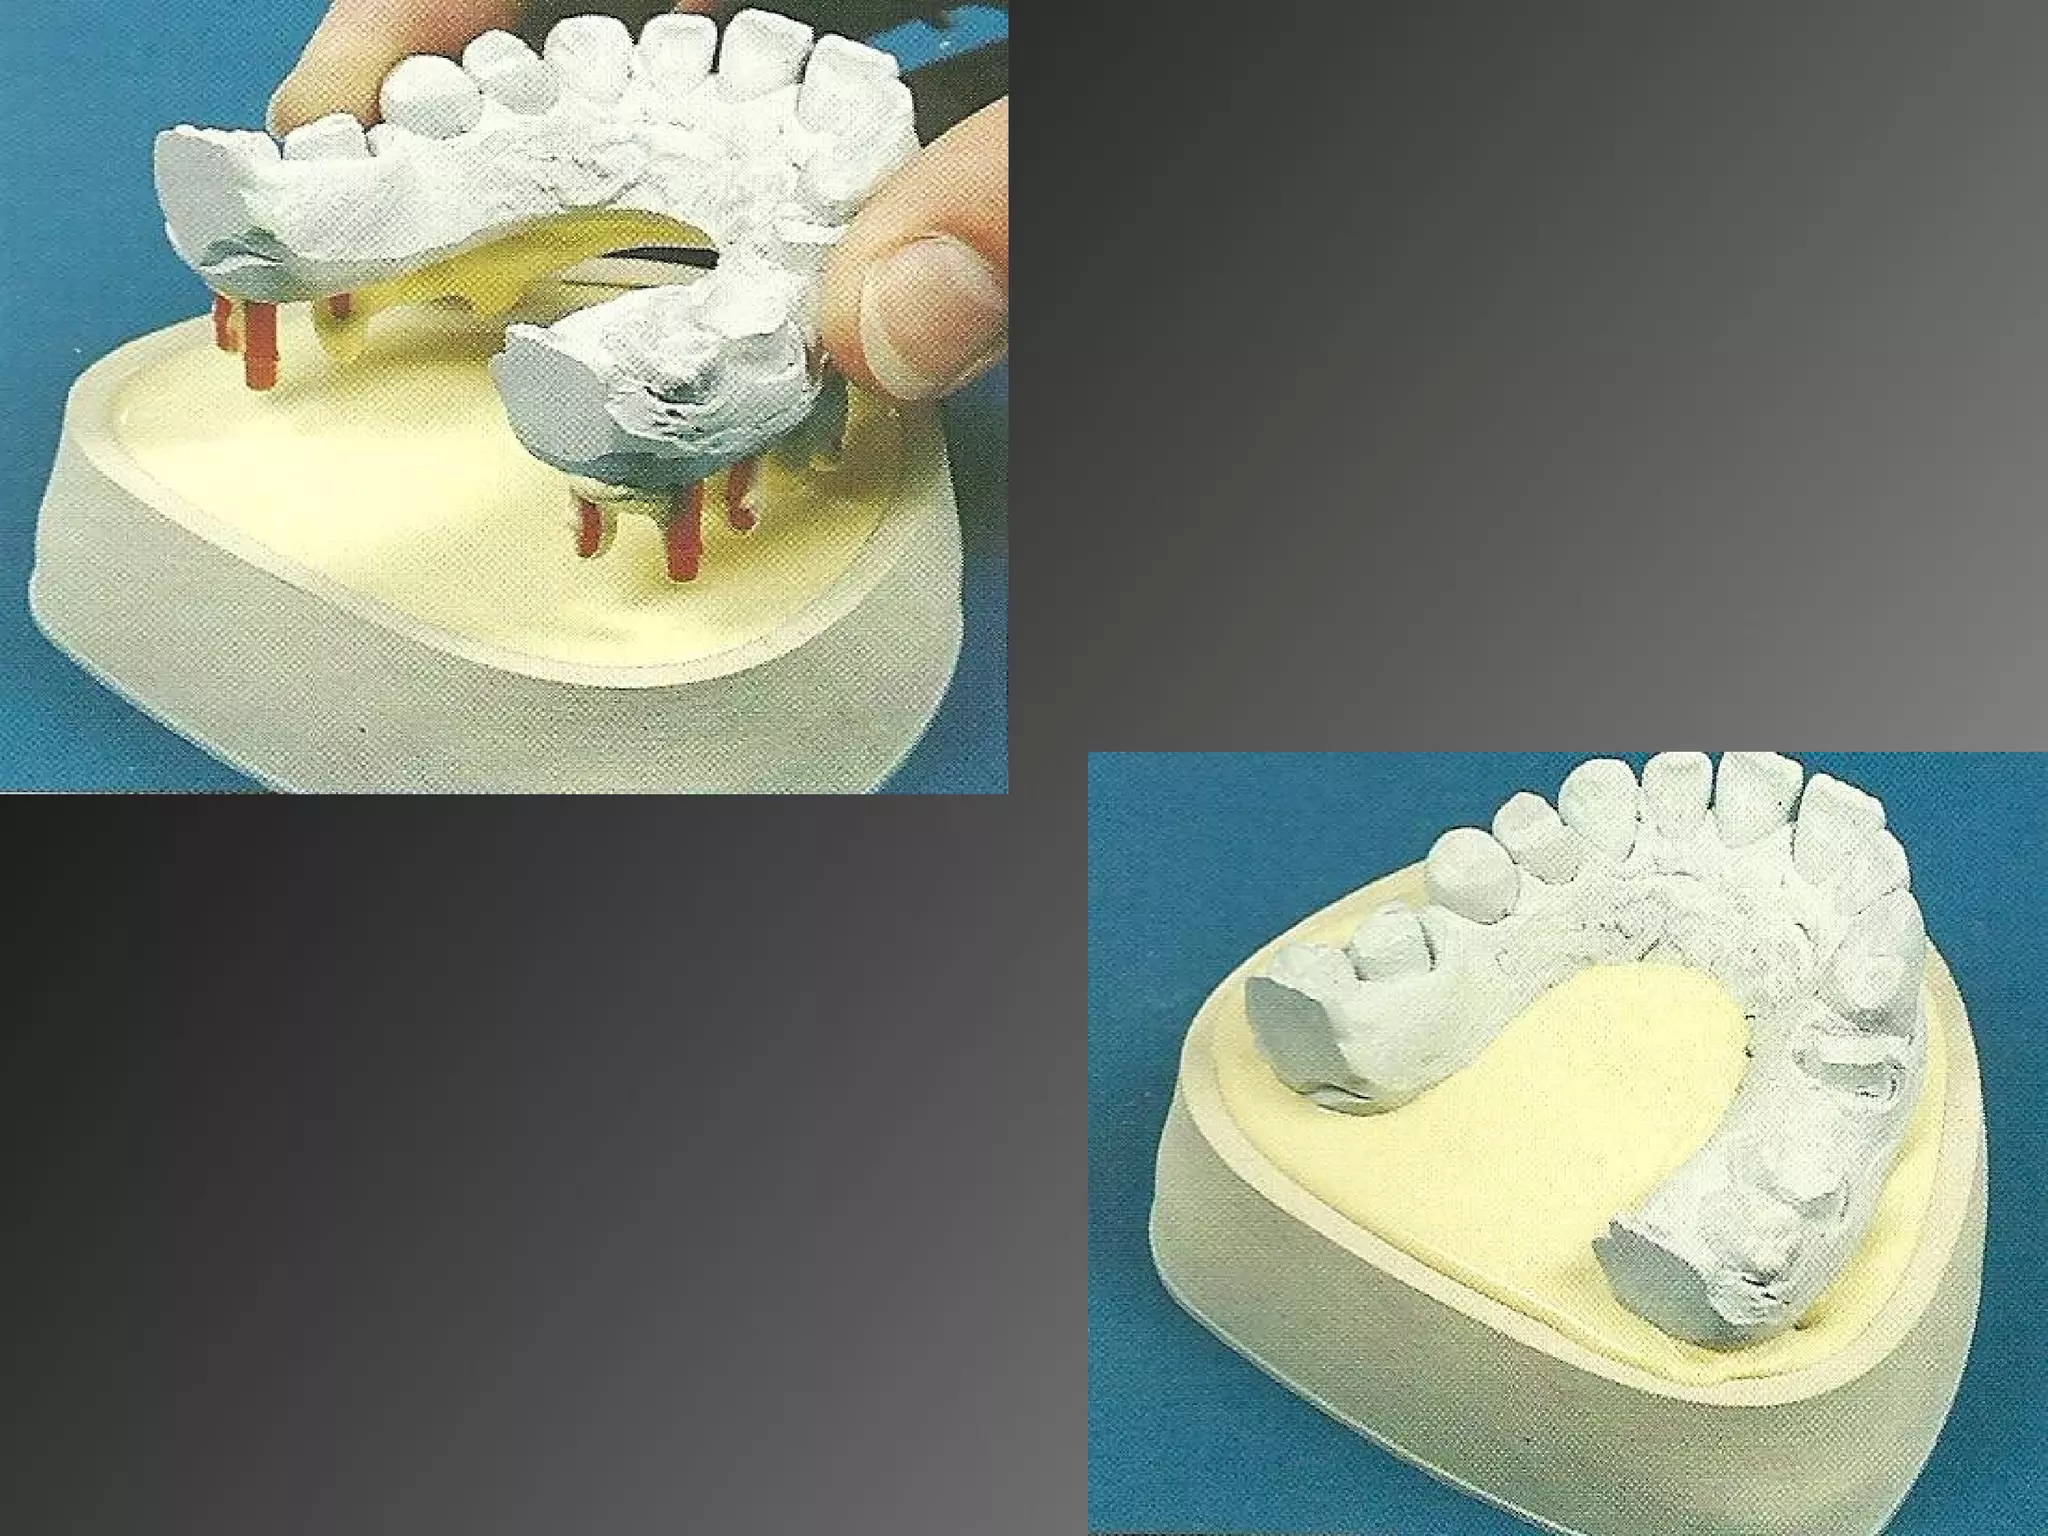


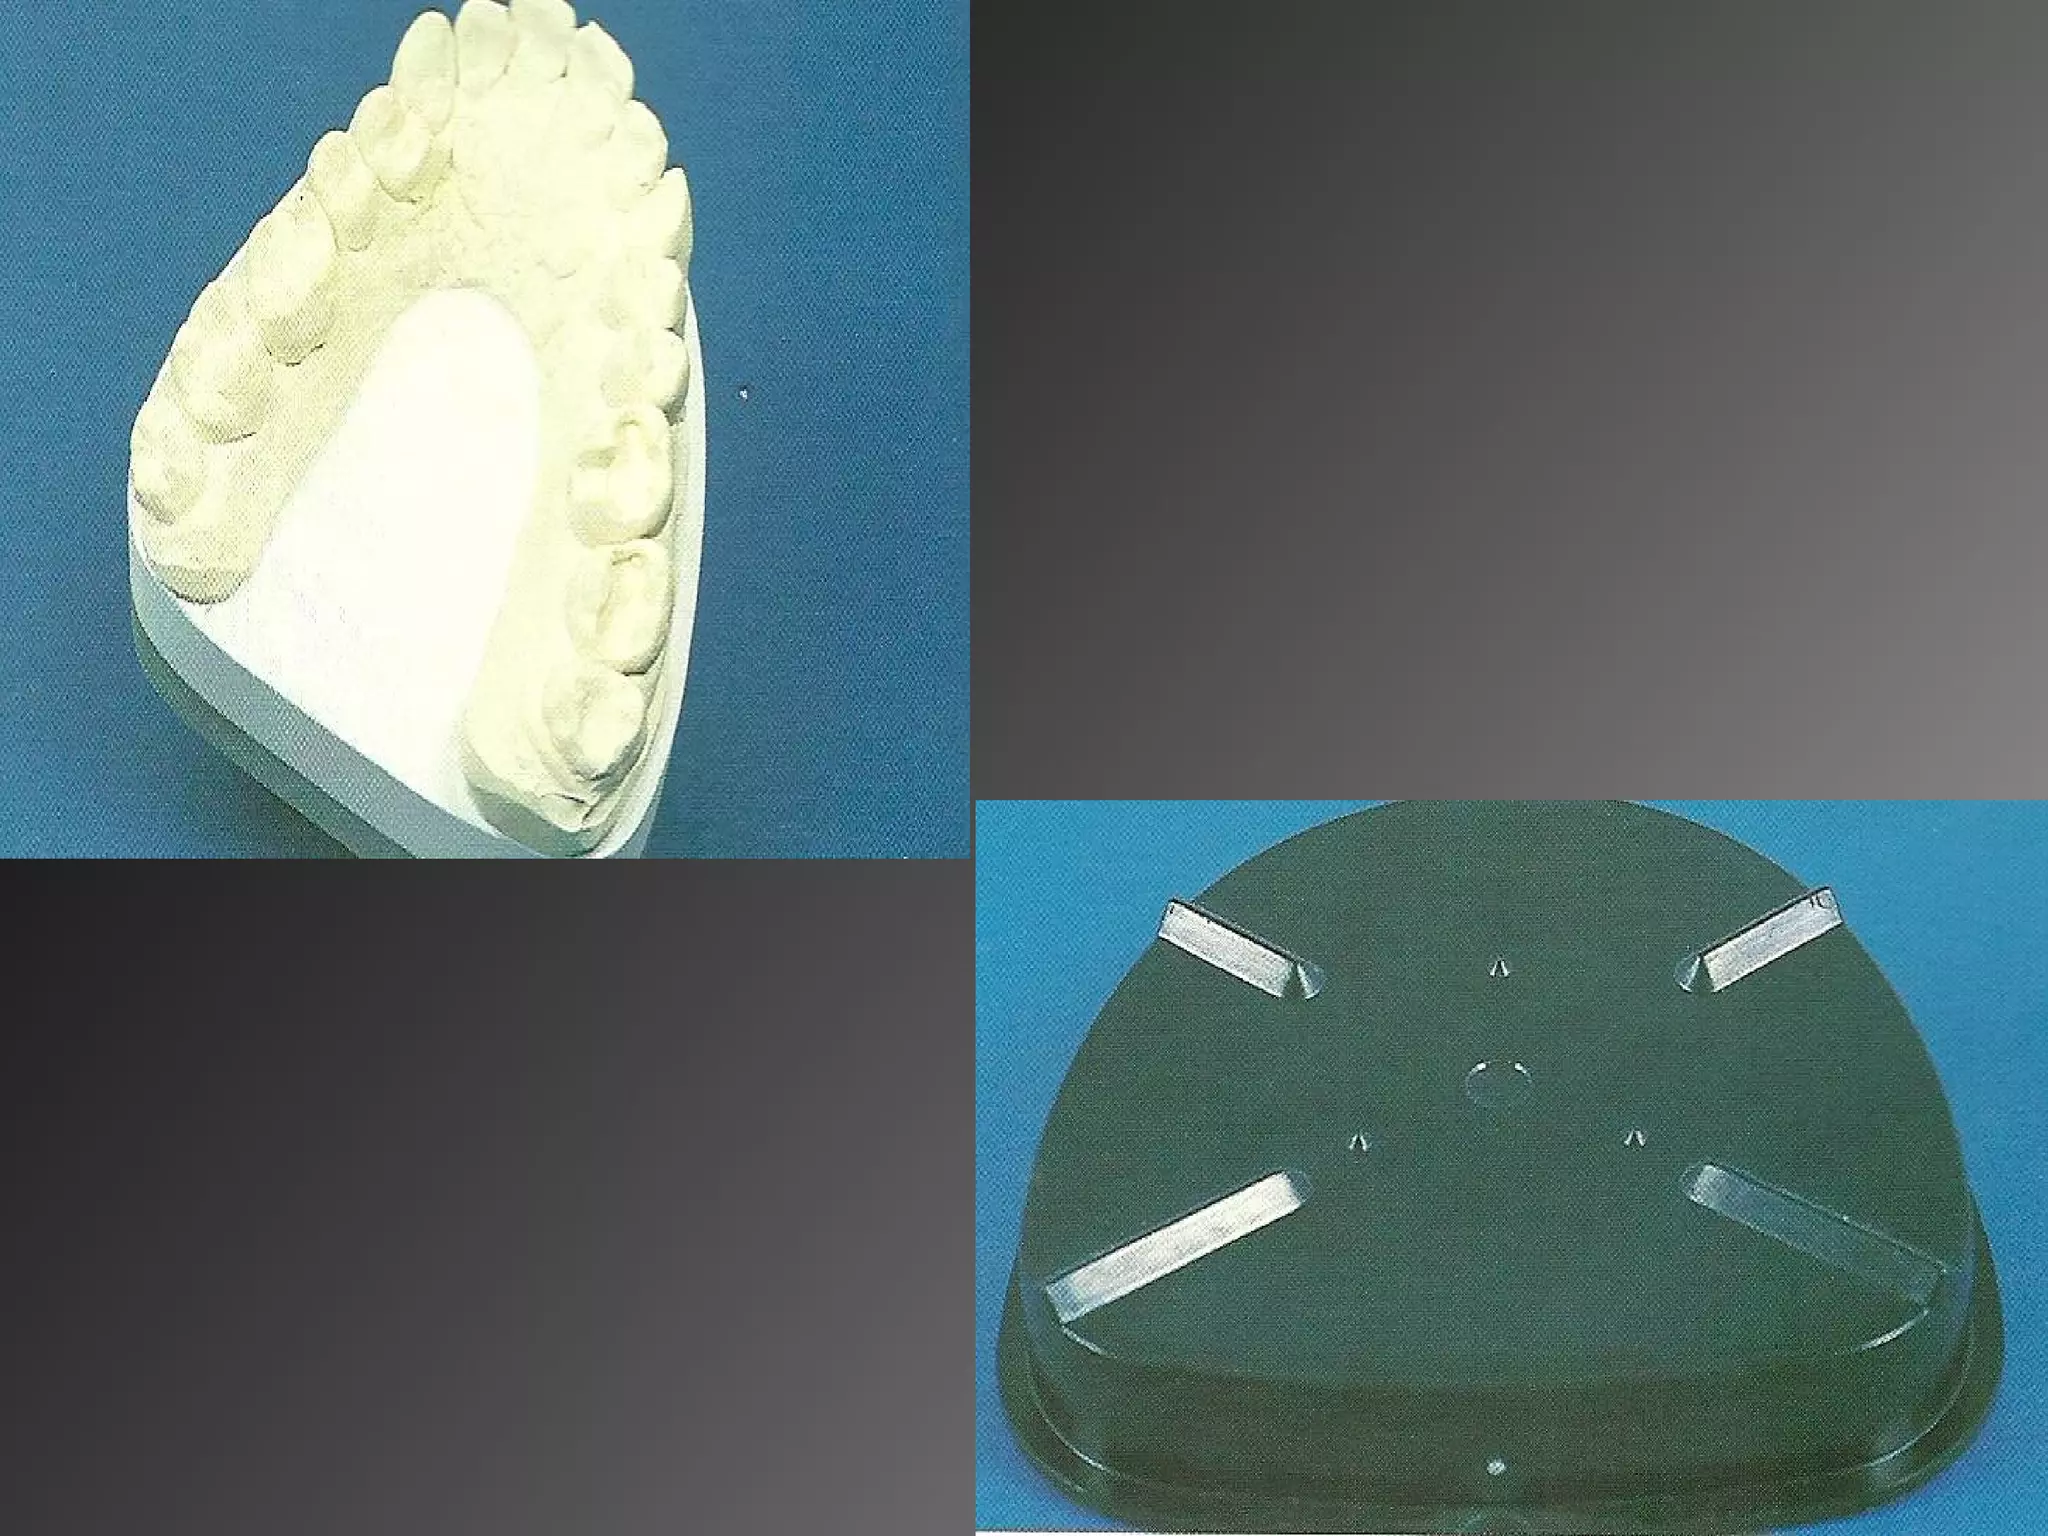
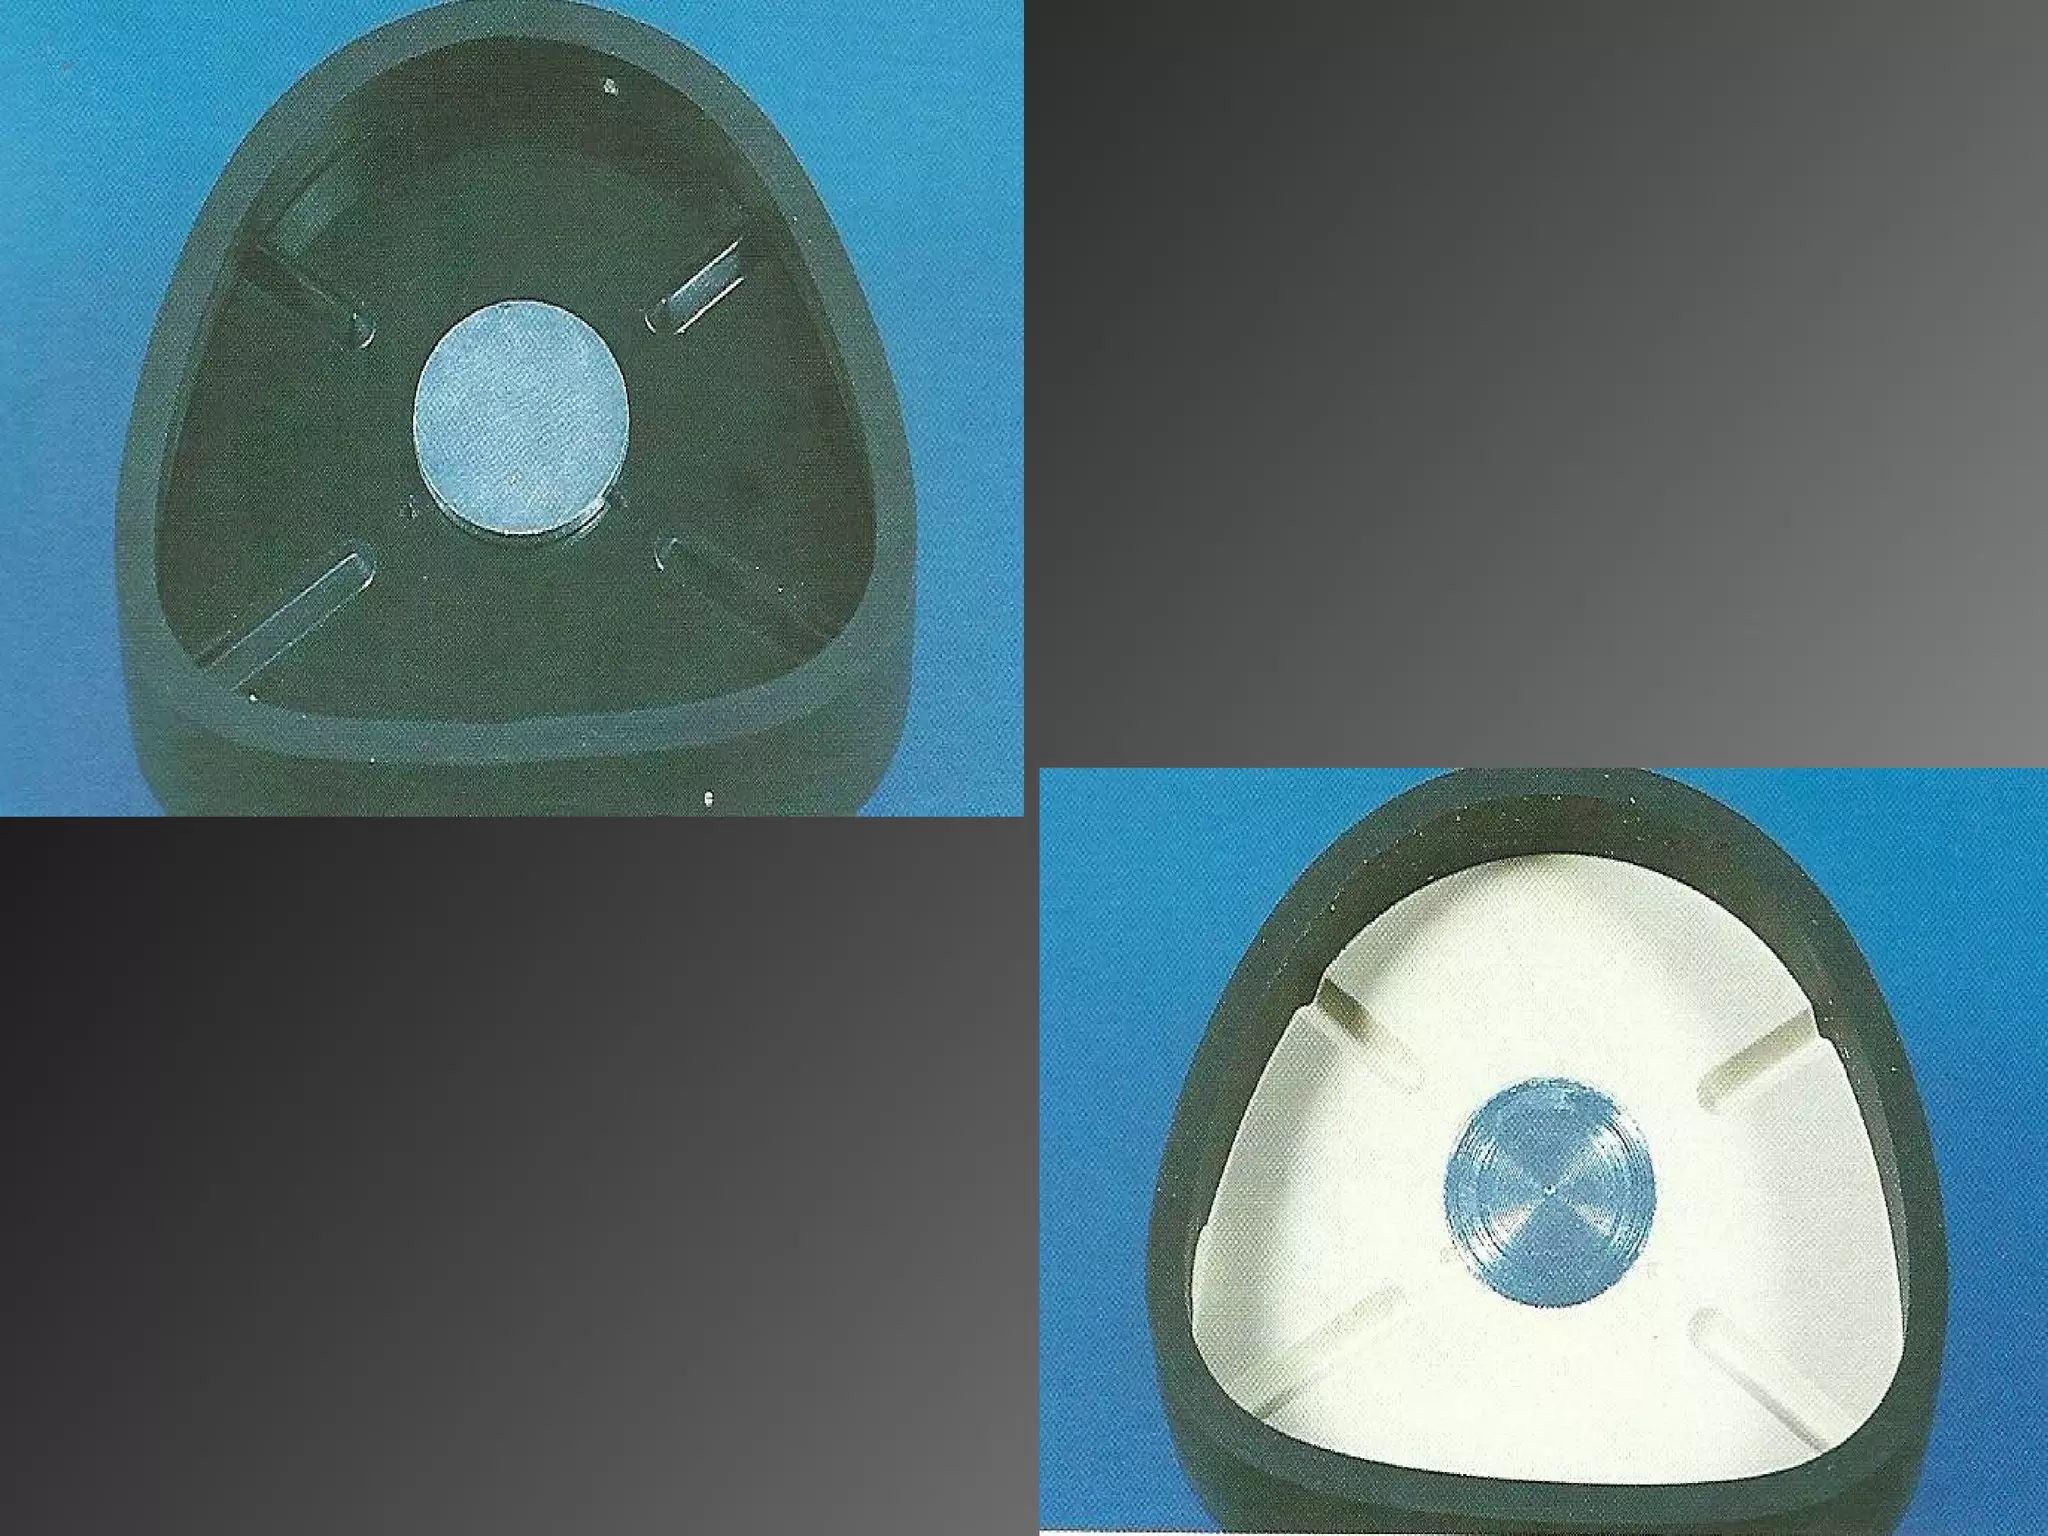


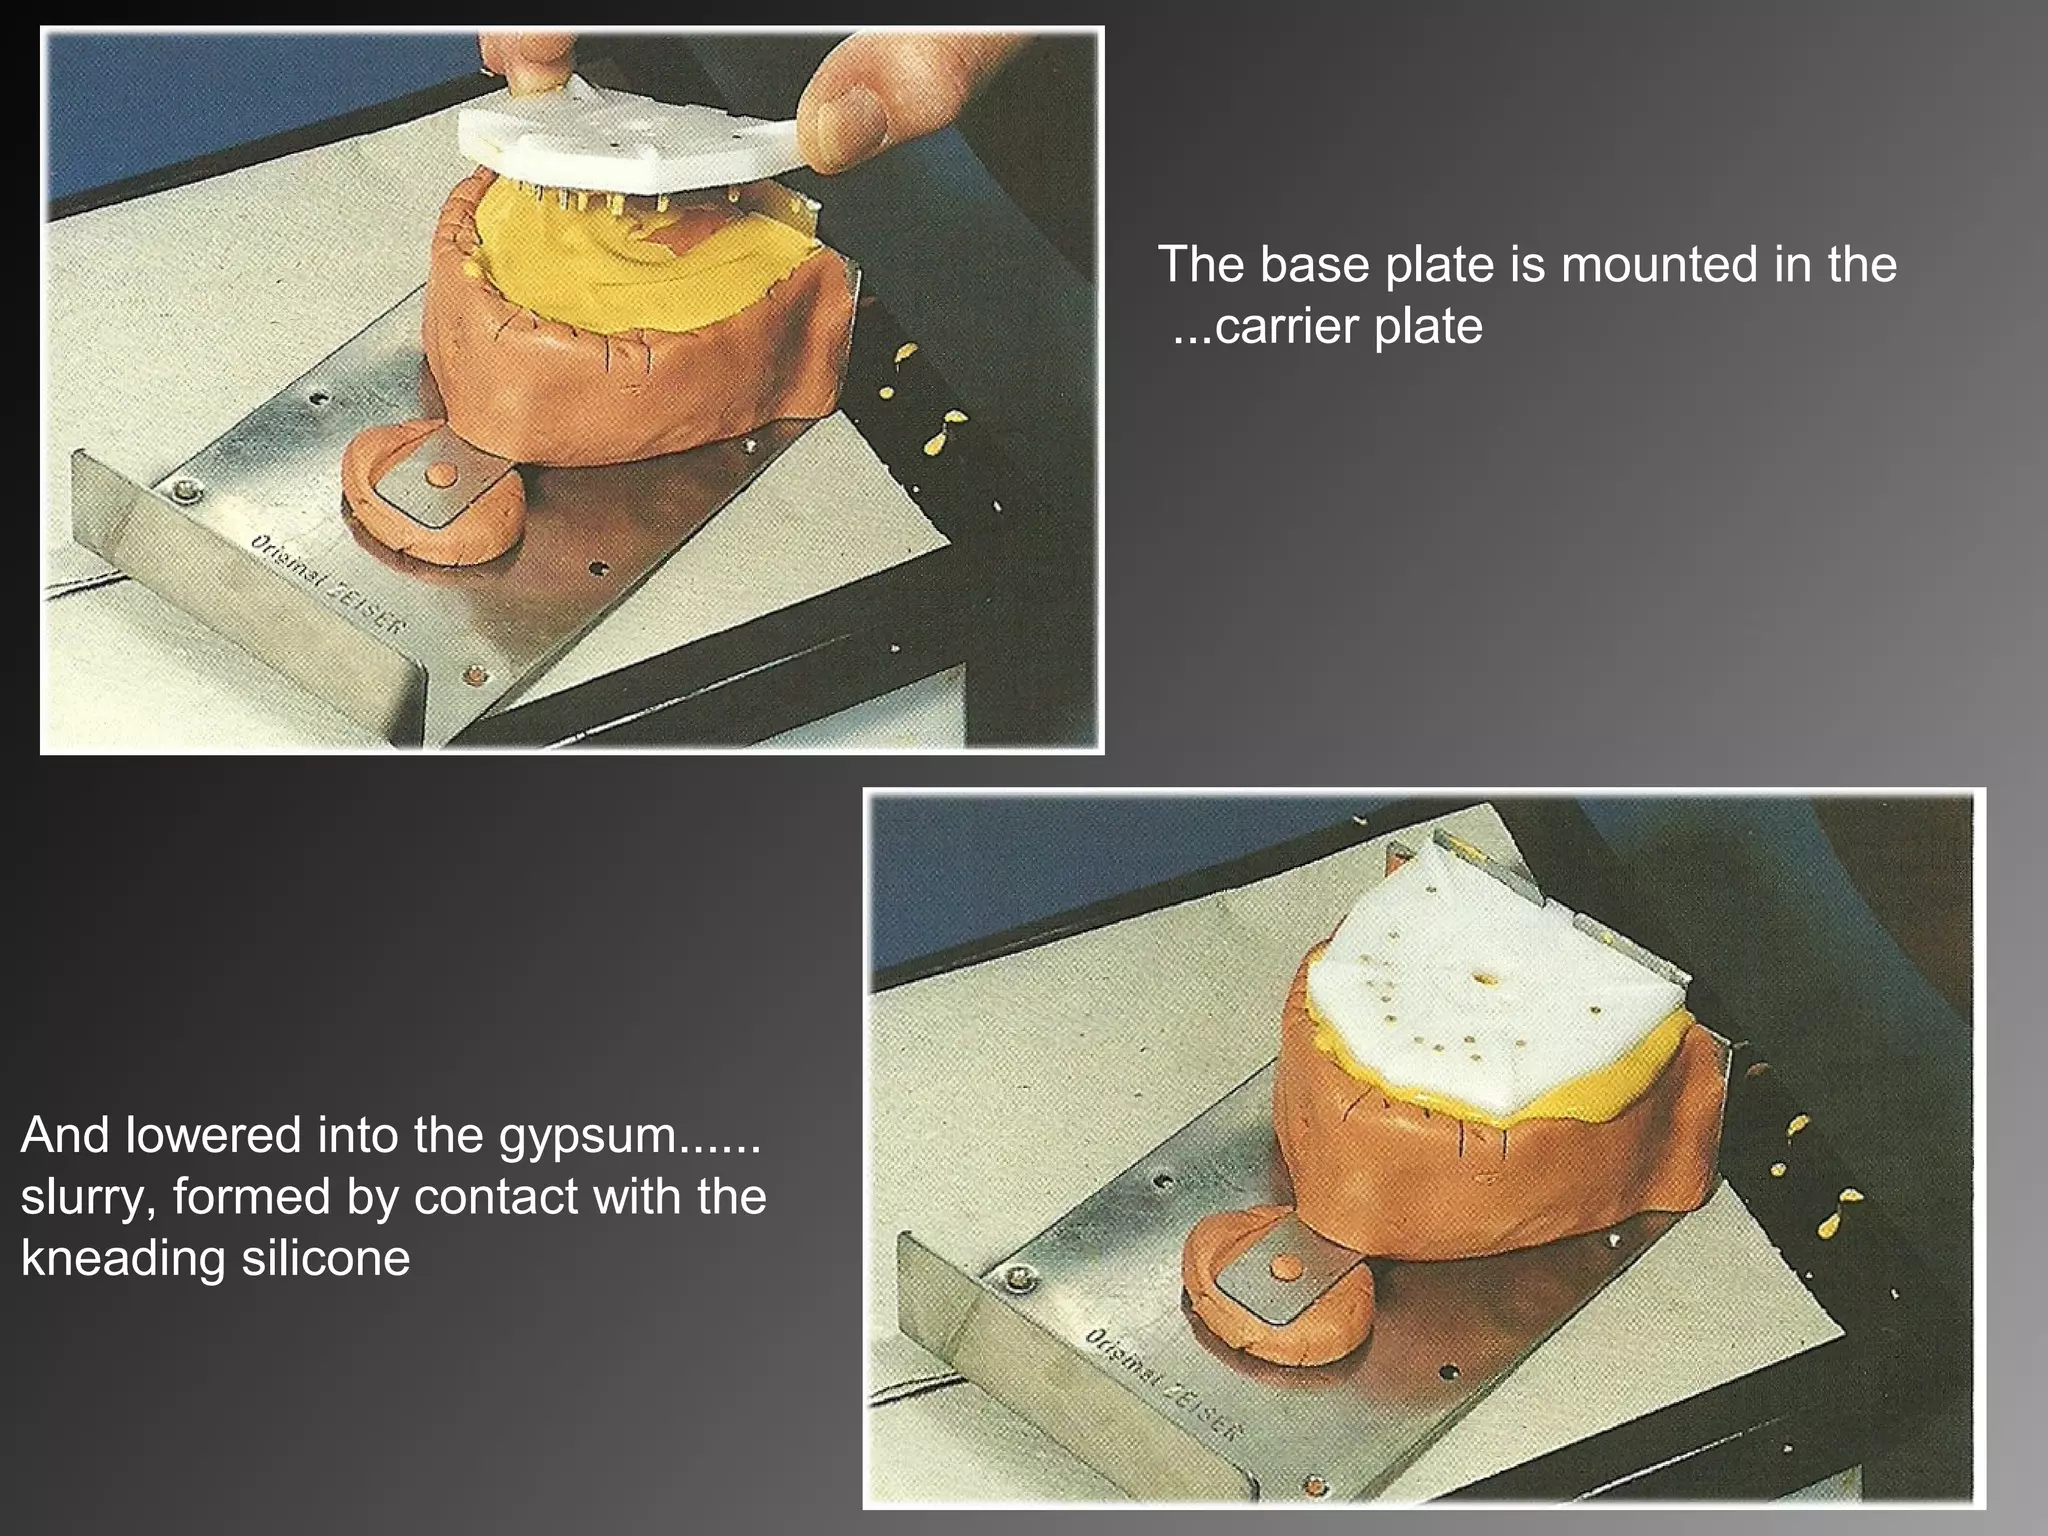
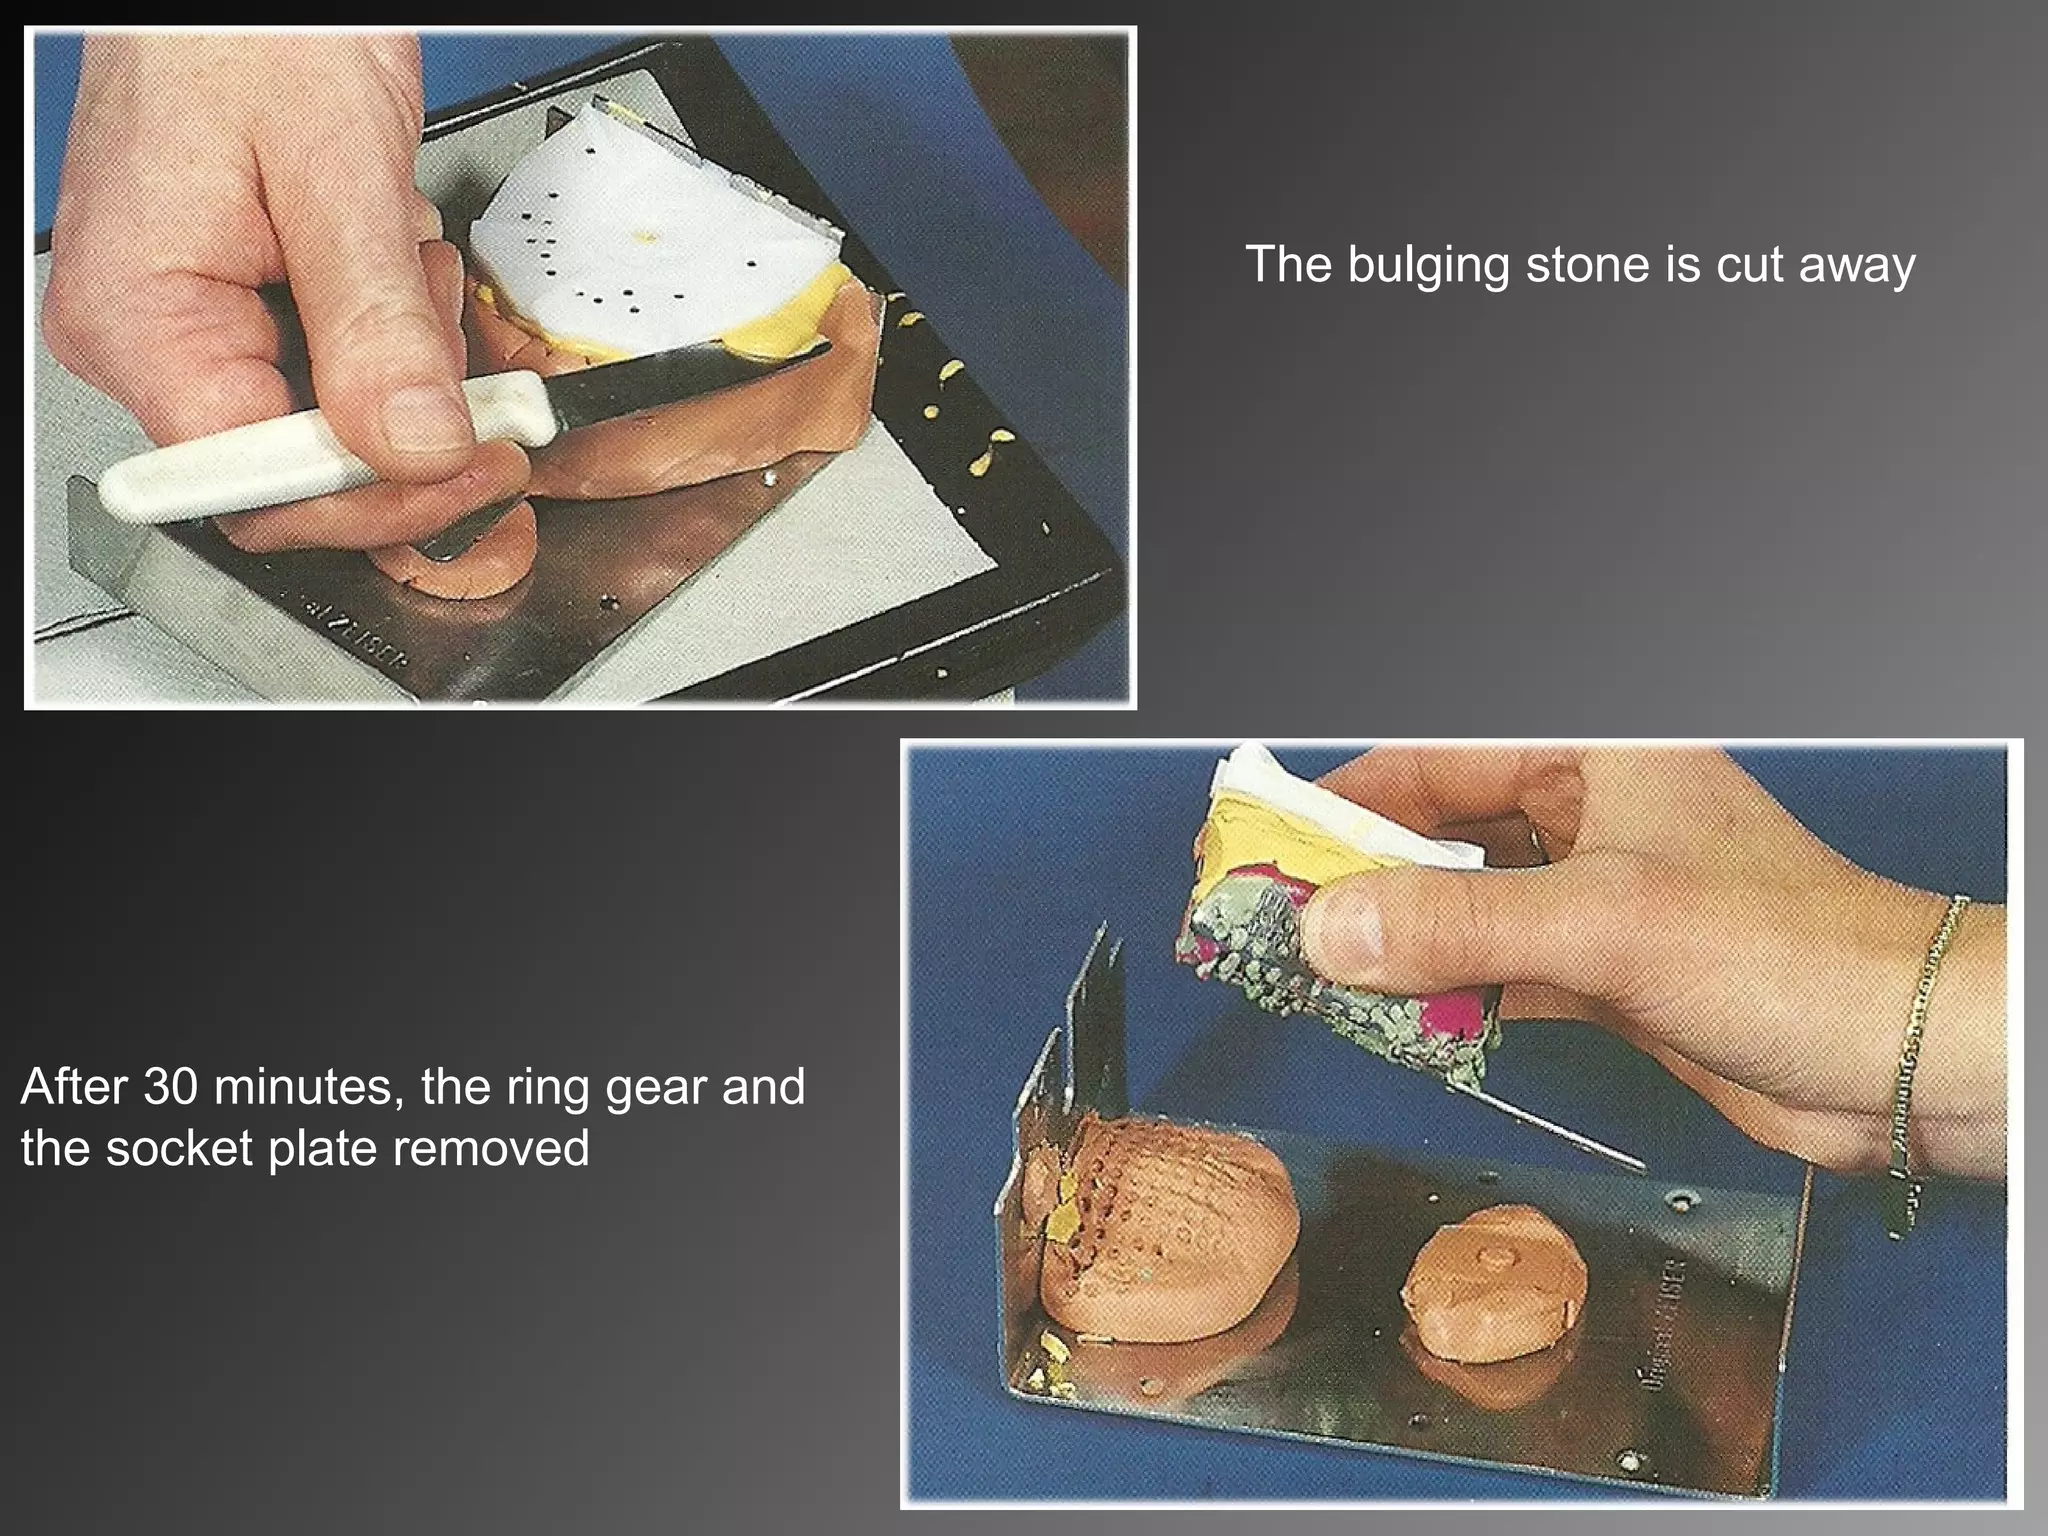
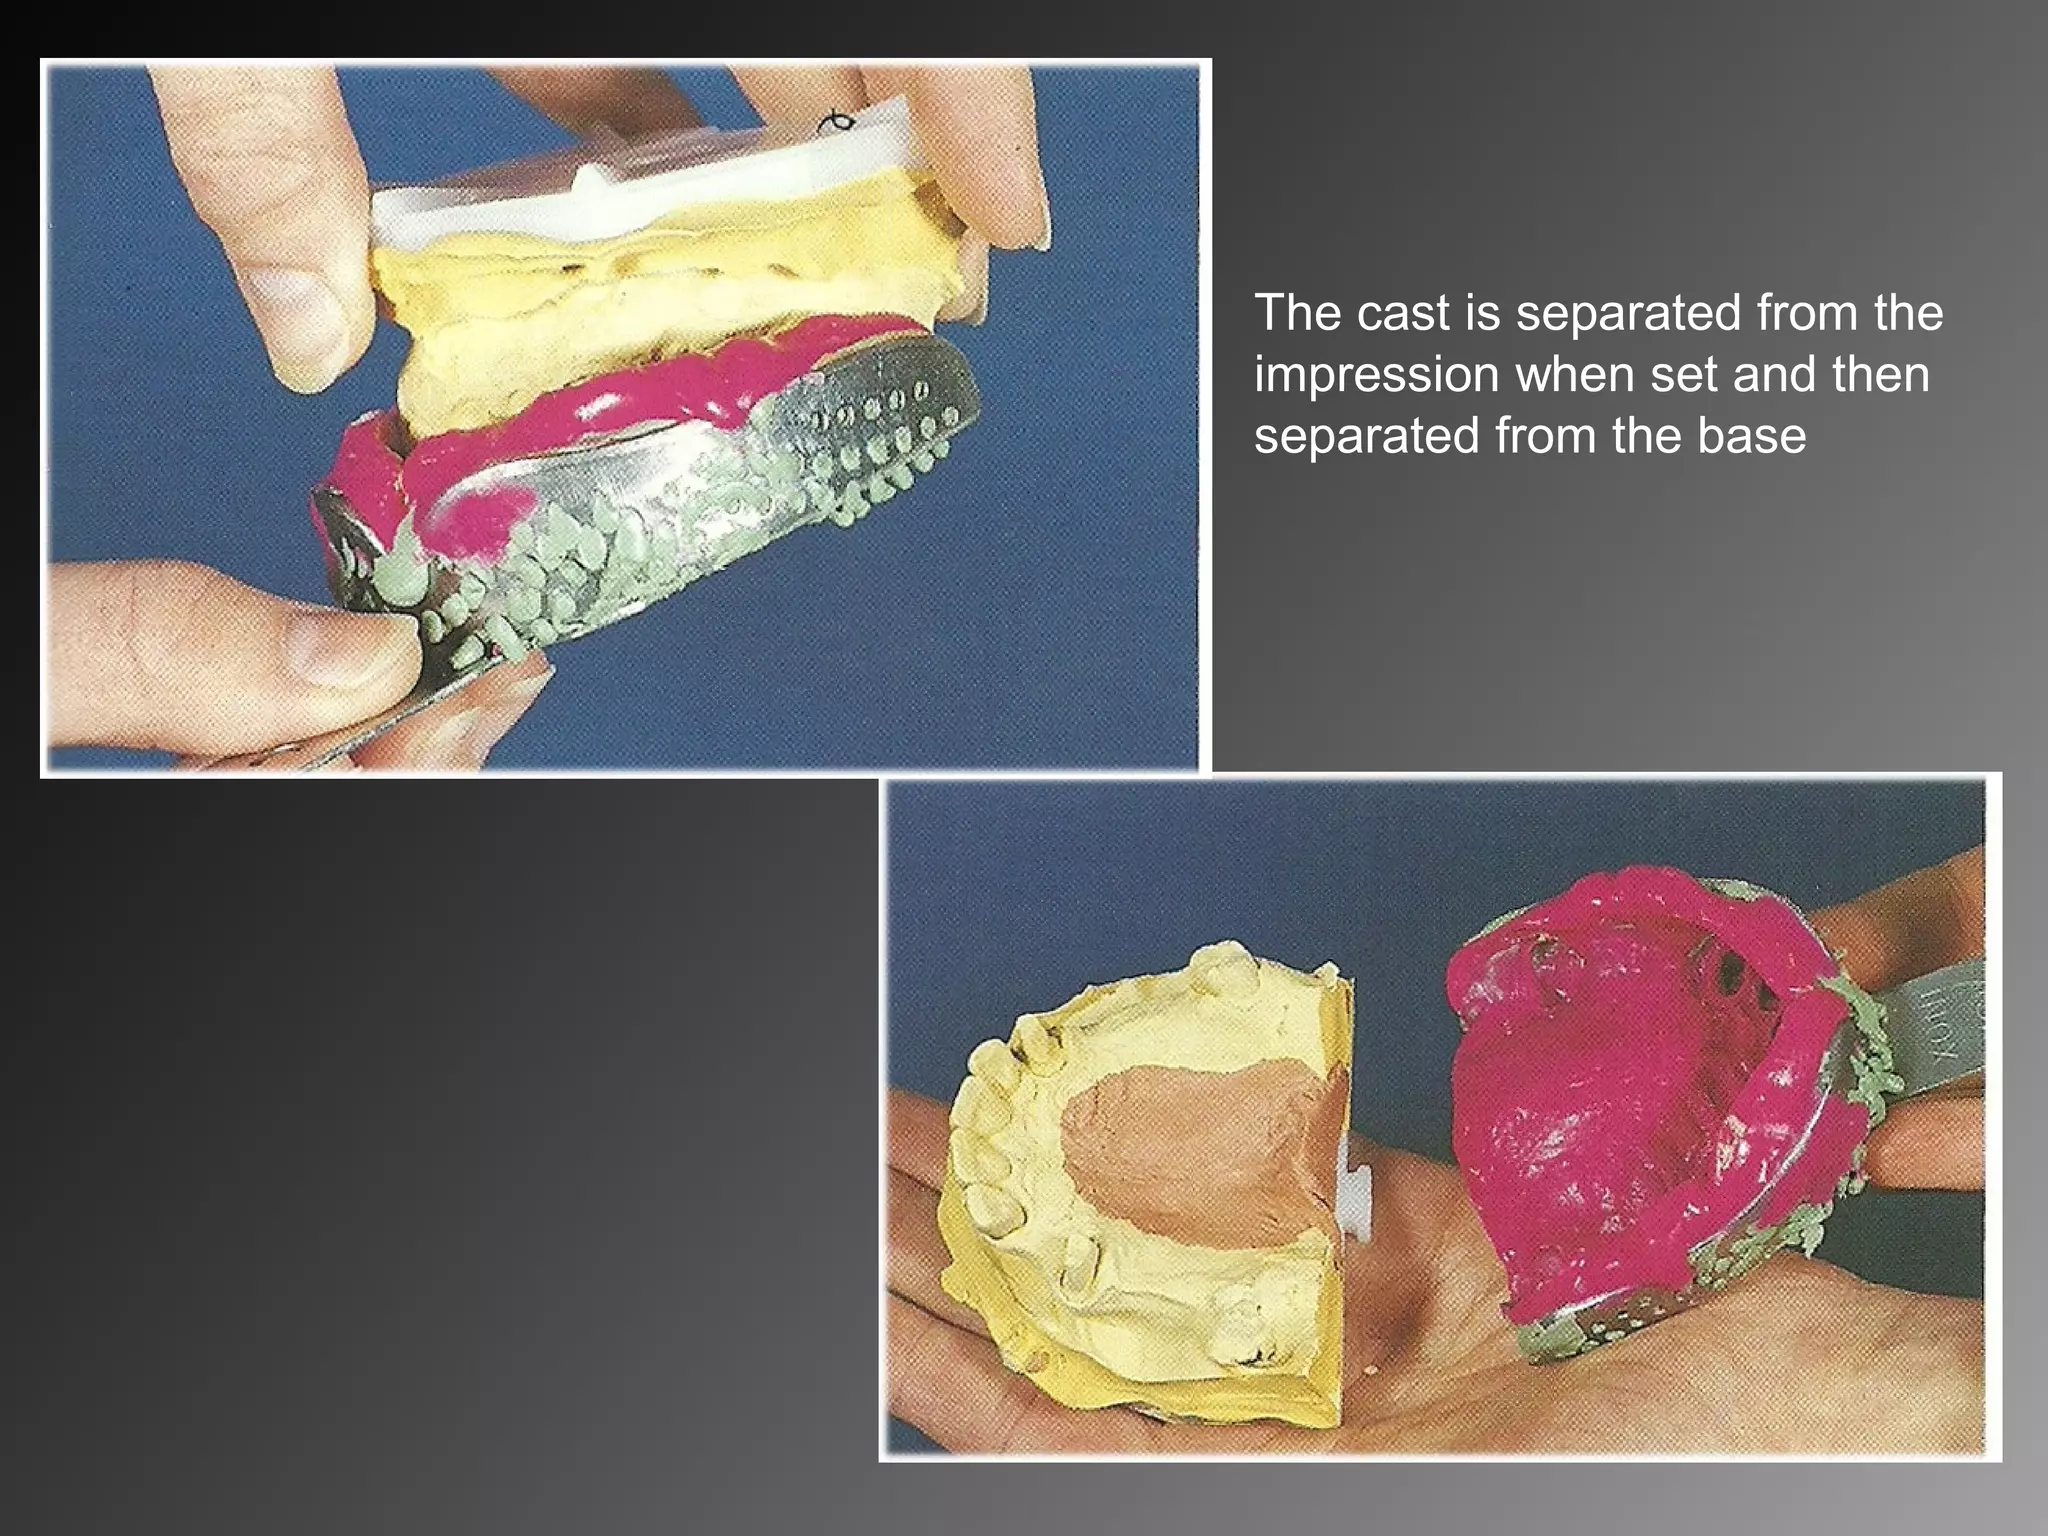
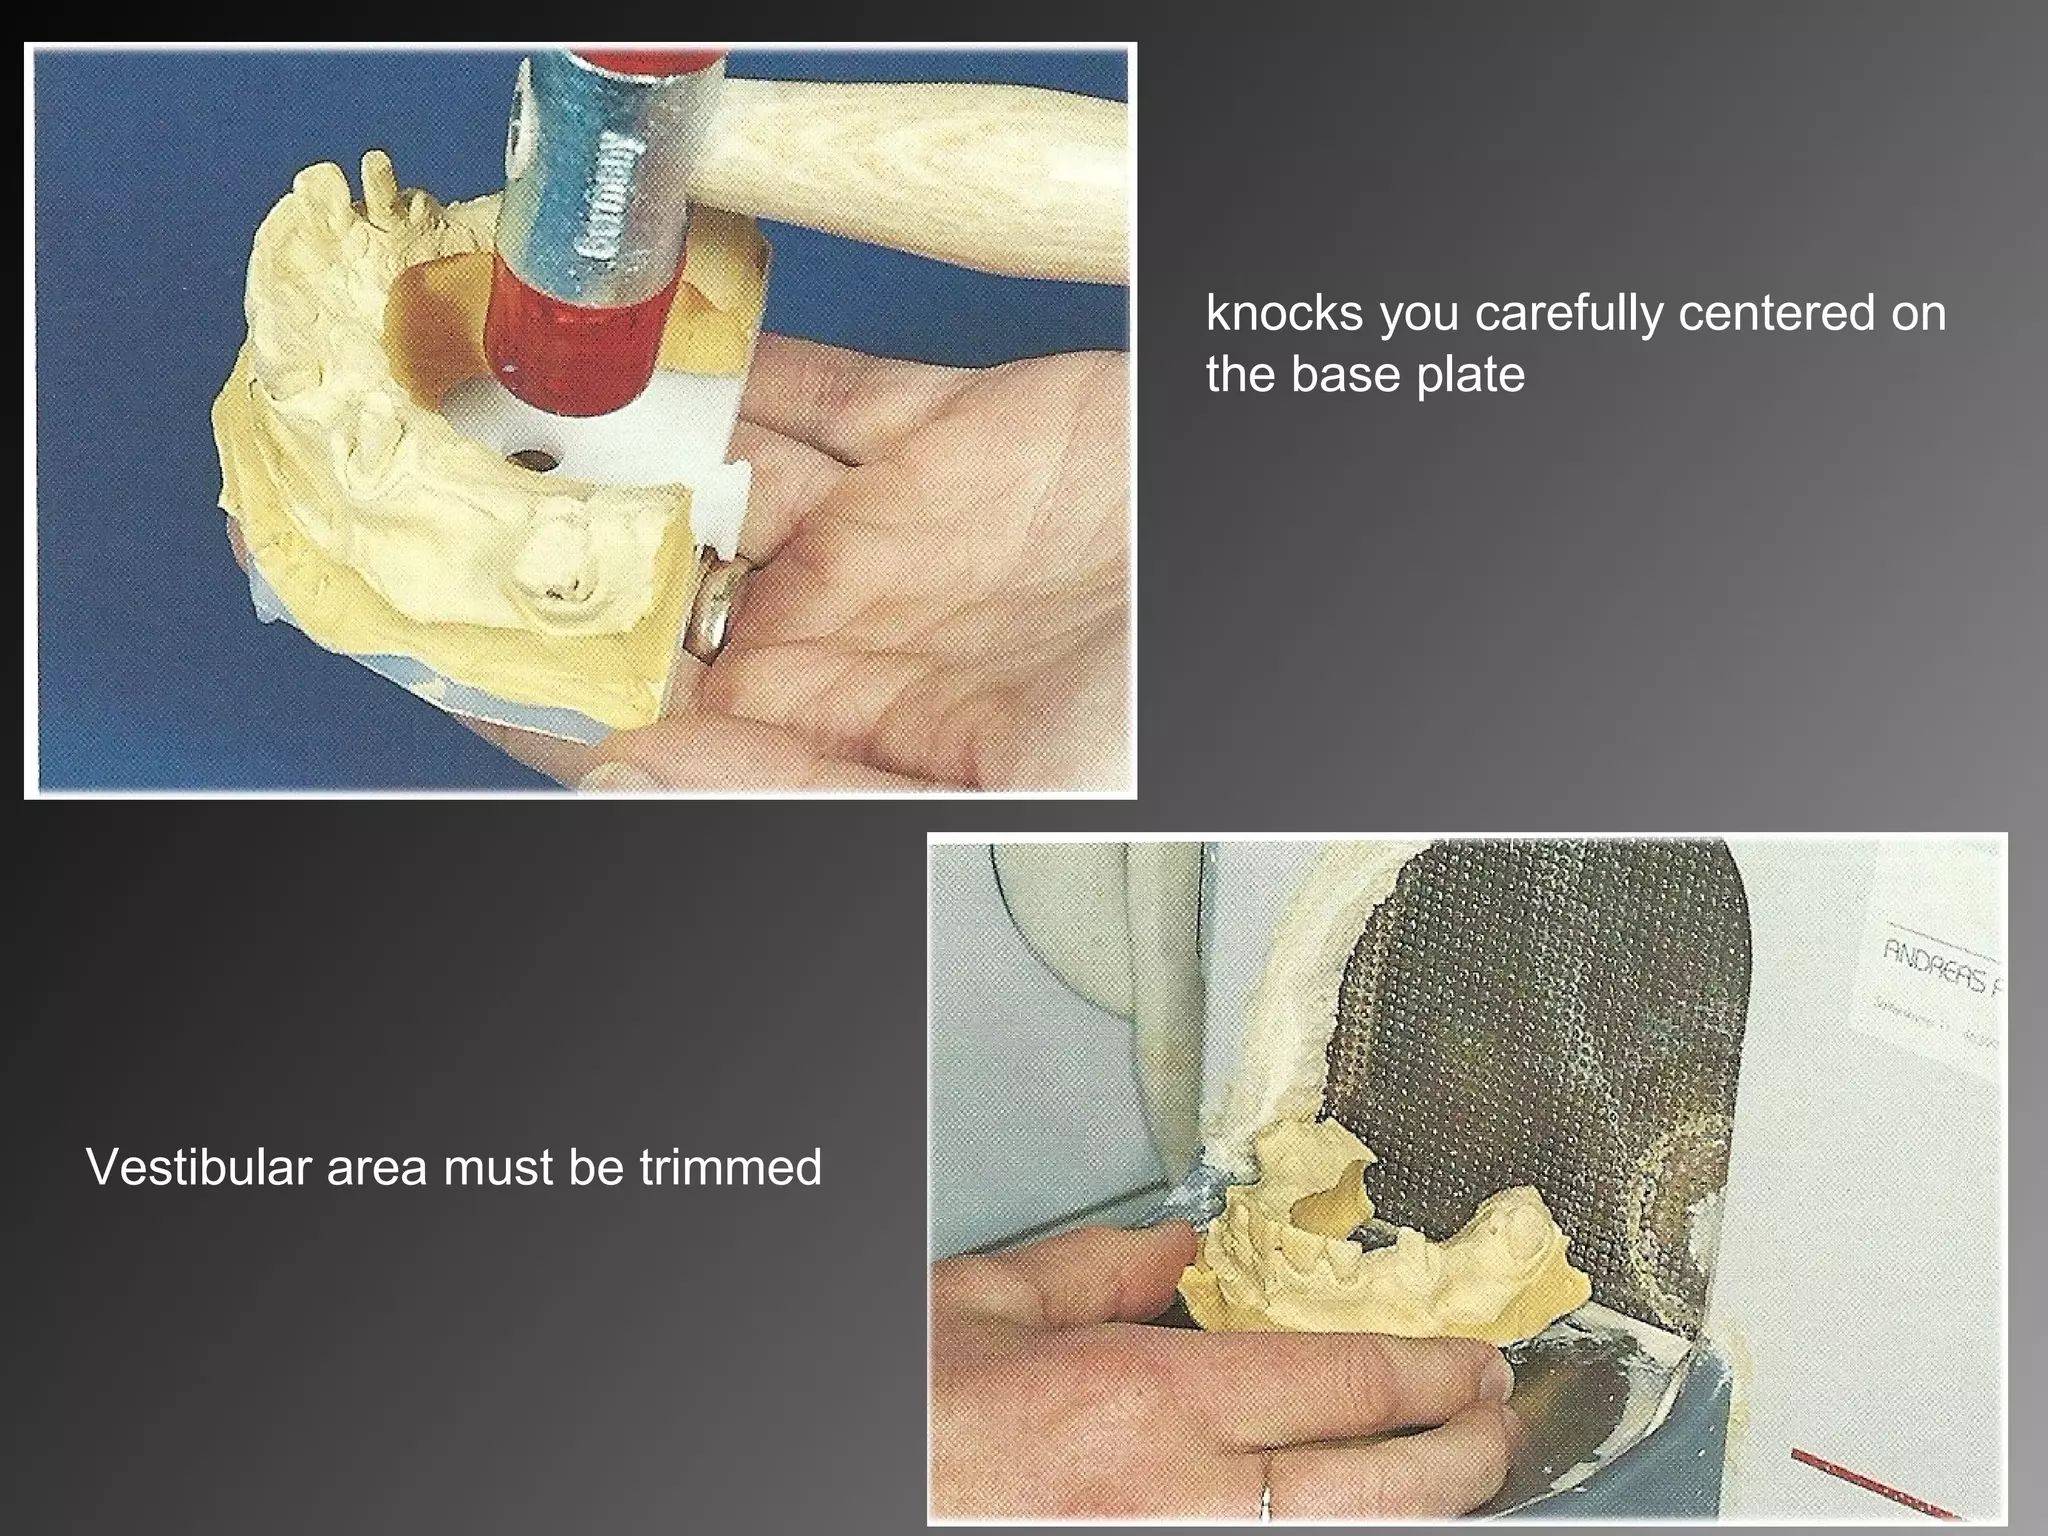

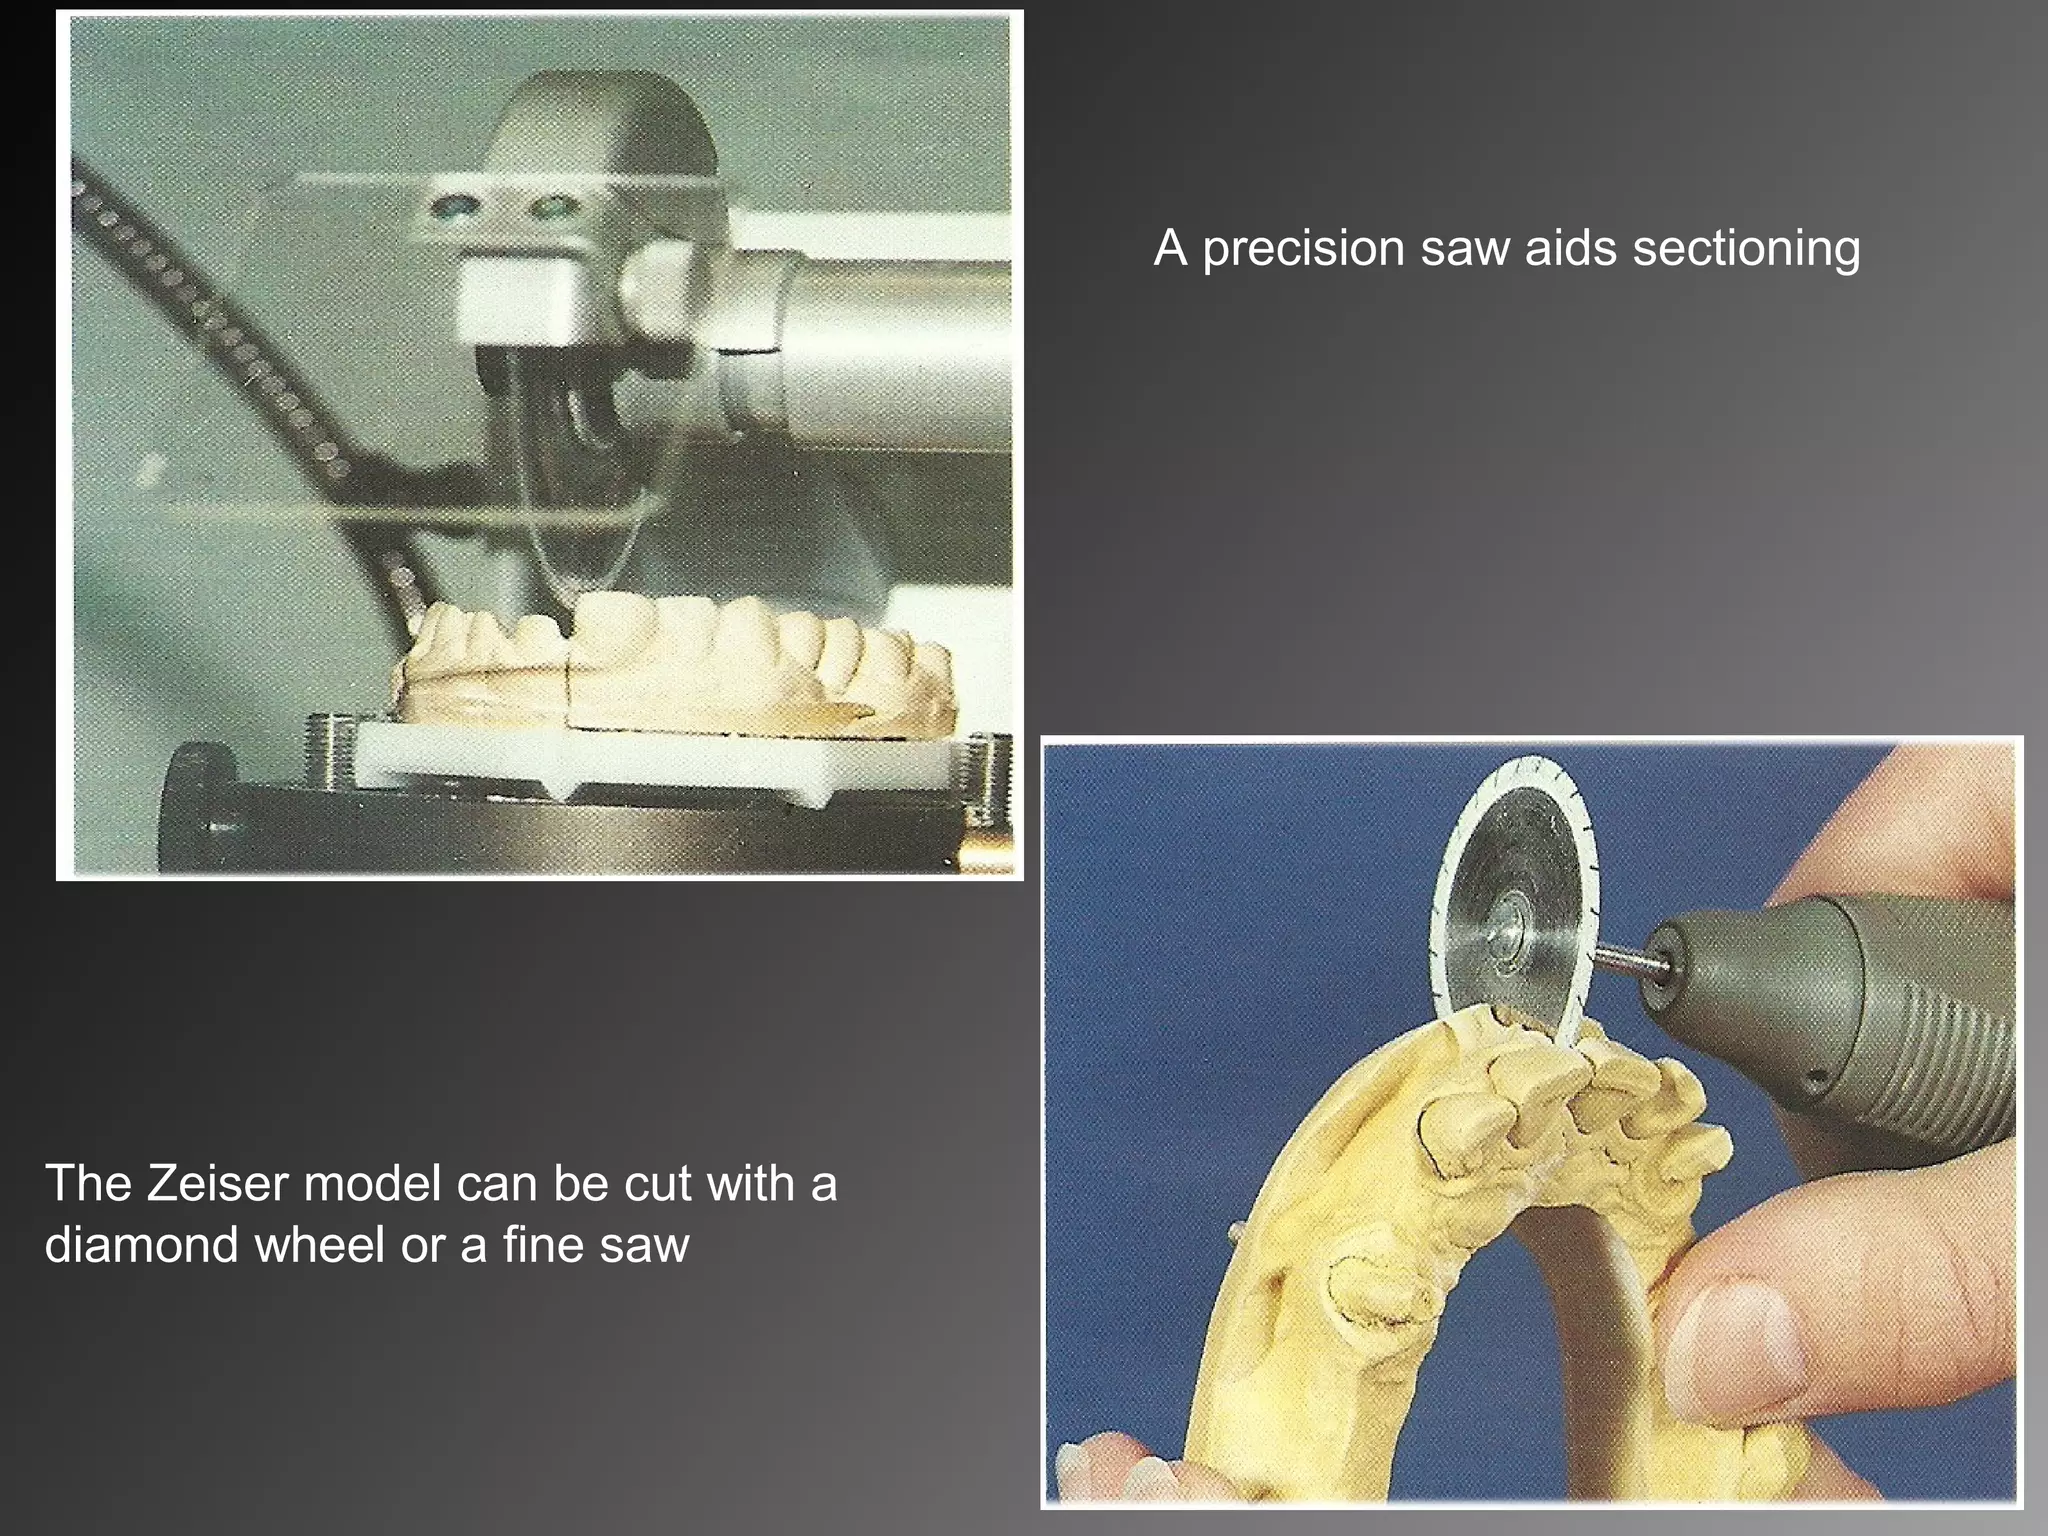

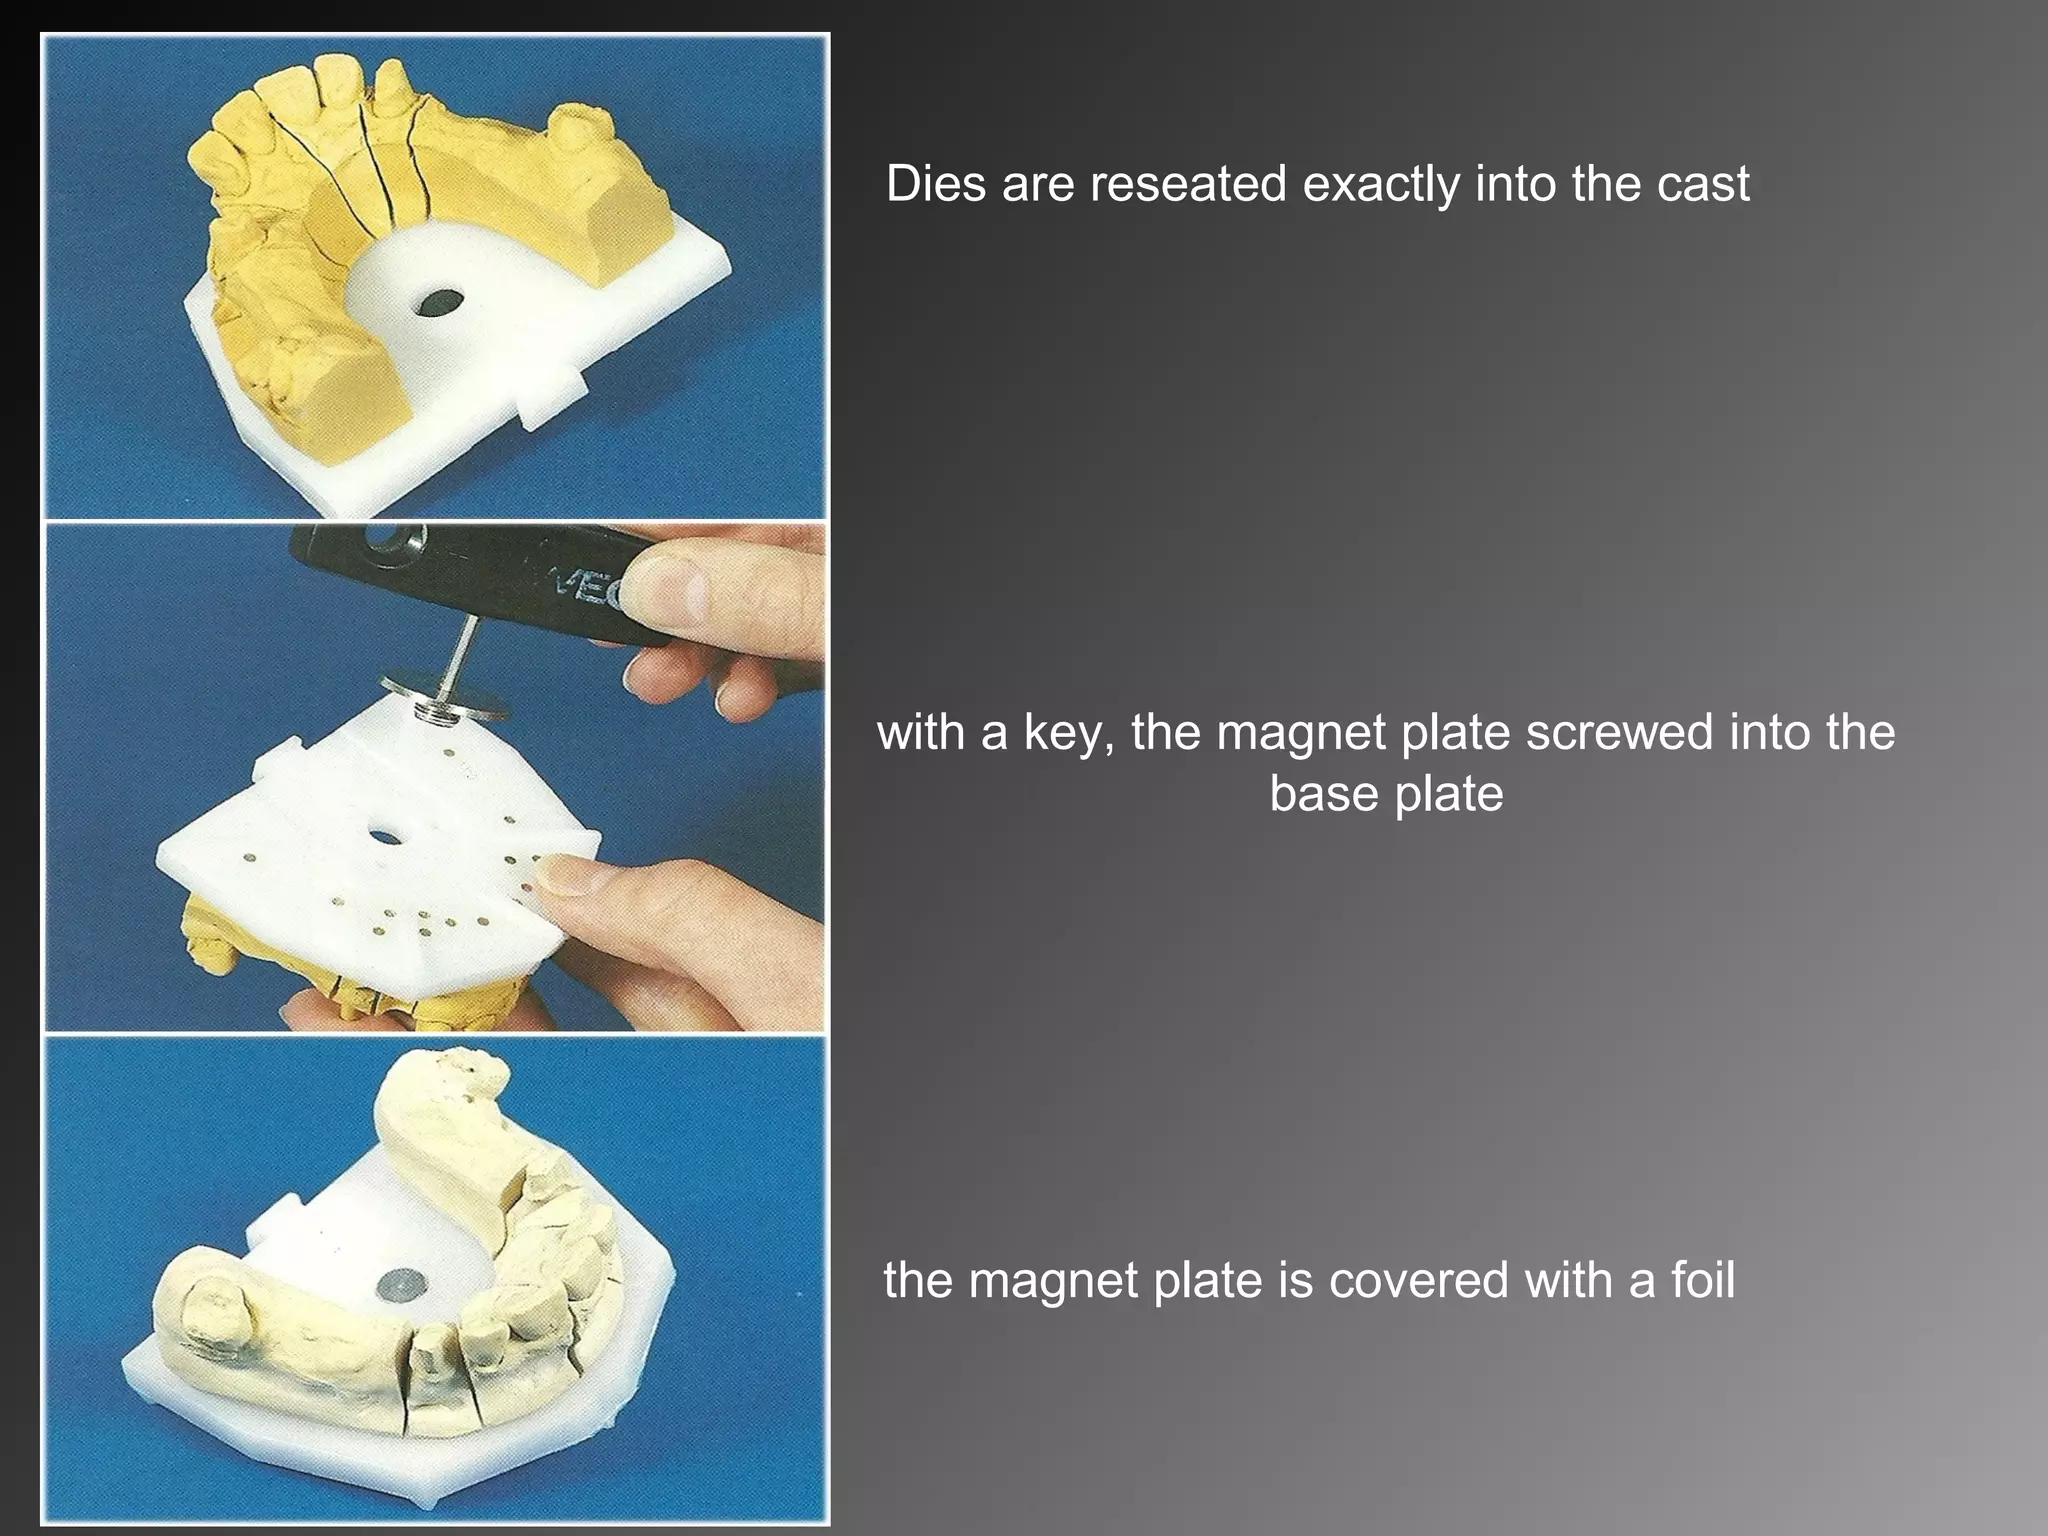
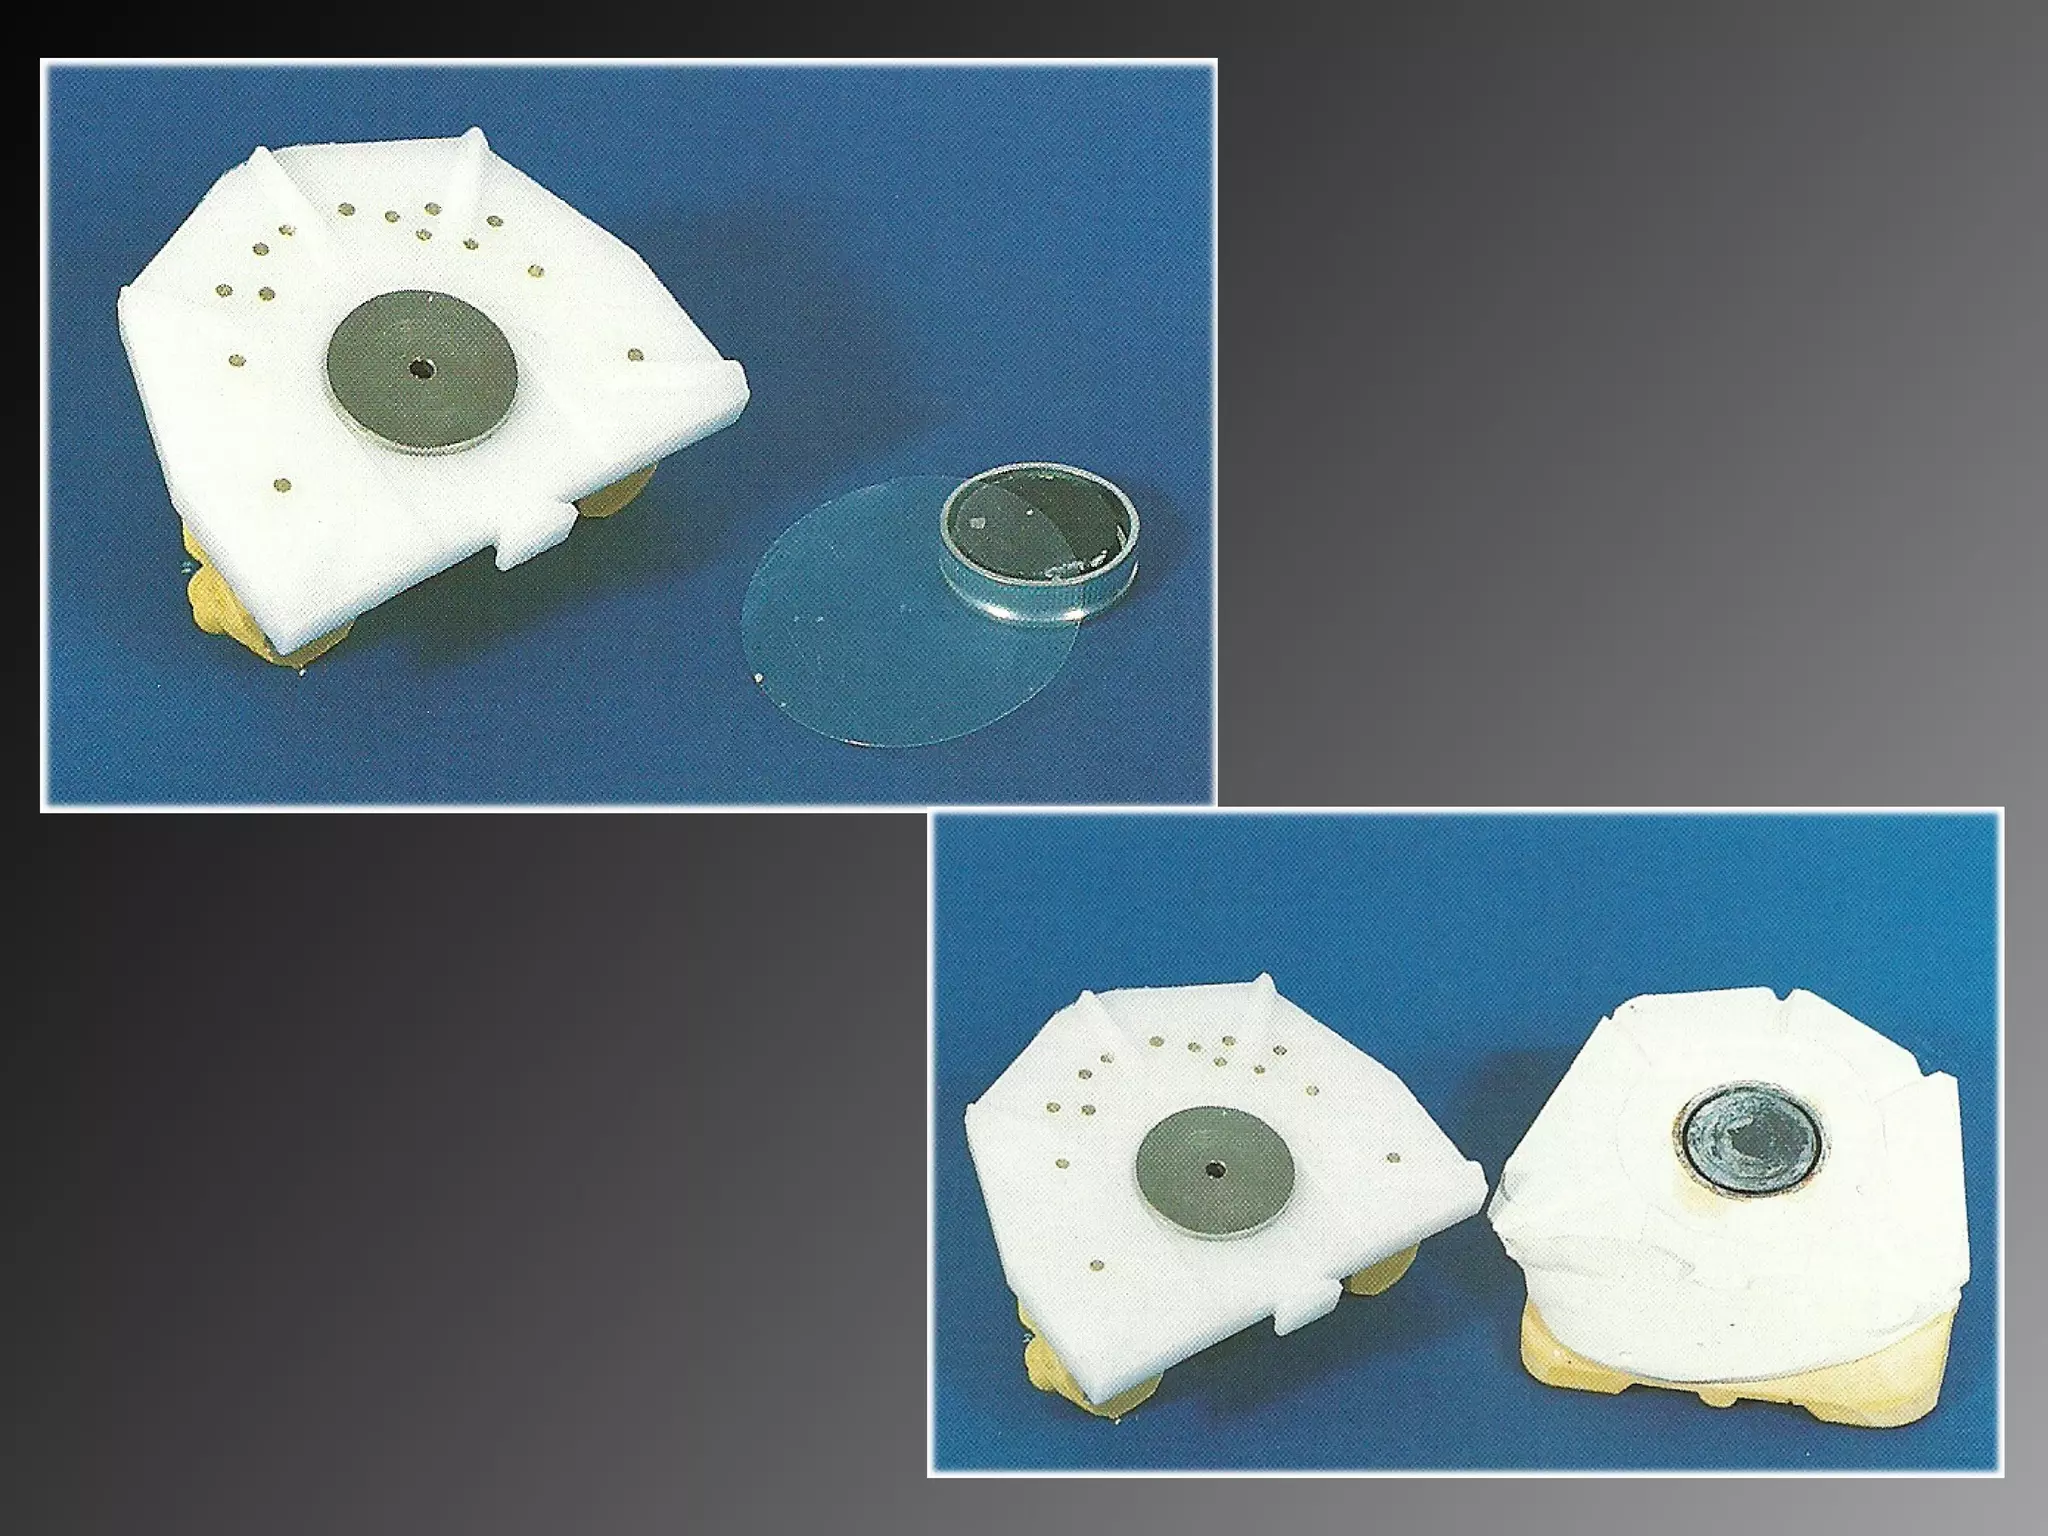

The document discusses the creation of working casts and dies in dental applications, emphasizing the requirements for accuracy and the processes involved. It outlines two basic systems: working casts with separate dies and removable dies, explaining their fabrication methods, advantages, and disadvantages. Additionally, it details the necessary materials, techniques for pouring impressions, die preparation, and various systems used for creating modular casts and dies.


![Working cast [Autosaved] - Copy.pptx](https://cdn.slidesharecdn.com/ss_thumbnails/workingcastautosaved-copy-230929103304-5d4782d0-thumbnail.jpg?width=640&height=640&fit=bounds)


