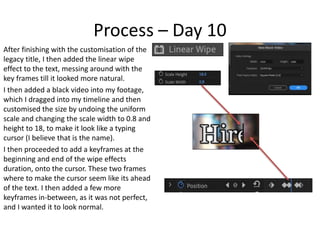
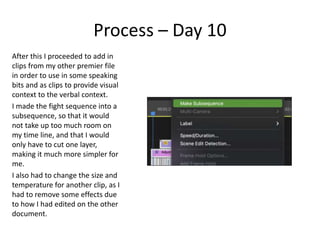
SlideShare a Scribd company logo
1 of 31
Production Reflection
Charlie Stevens
Process Day-1
Today I have gone out with the equipment that I borrowed from school (a camera), as well as my
camera stand, iPhone and iPhone gimble (in the case of the camera not working I brought this with me
as a backup).
We took a train to get to Harrogate from Knaresborough, with my actors helping me carry the
equipment.
When we first arrived at the location that I had in mind, I discovered that it was actually an area that I
could not access, so I had to go to another location as a backup.
I filmed two of my friends having a semi choreographed fight scene when we arrived. It was a quite
difficult, as we had to stop once or twice to let a car pass (the location was quite secluded, so not
many would come by), or so that I could explain how they needed to do a certain scene, like faking a
punch by being in line with the camera and crossing the plane. In the end we wrapped it up nicely. We
went to wither spoons to get refreshments, and took a train back to Knaresborough.
I uploaded the footage on to my PC and backed it up on my OneDrive.
I am feeling optimistic about my project so
far, and am looking forward to the editing
(which I am aware is a bit weird, but I like
editing).
Process Day-2
I have put my footage into premier
in order to see if the sequence
envisioned works as I intended, and
it pretty much fulfils that roll. I have
also had a go at overlaying some
flash effects to see how they look
on it. To do this I followed the same
steps that I had in my 3rd light
experiment. I used light leak videos
from online, dragged it into my
timeline and changed the blending
mode to screen. I found that it
looks good with these effects in,
and with the appropriate music I
think it would work really nicely.
Process Day-3
Last night I picked up a camera from my grandparents,
as I retuned the camera I had been borrowing to
college. The camera that I used was the same as
college, however it was the previous model camera.
Today I have filmed the part where the main character
is having a therapy session. I set up the camera on my
camera stand and filmed most of the scenes, however
since the camera ran out of storage on the SD card
half way through, I had to film the rest of it on my
iPhone. I think this is fine, as I can make the footage
look similar in post production.
Process Day-4
Today I have downloaded the rest of my
footage for the trailer, and gone through it
all, editing most of it down into smaller
clips, and arranging them into the
sequentially right order.
Process Day-4
I have gotten started on my first poster: which is a
poster of a coffee table which has a notebook
which explains bit of the plot and has doodles in it
(notebook of the therapist).
To do this I have copped some cartoons off the
internet, created a copy of their borders in black,
and filled them in with black and blank space. I
have also added in some black text with the
chalkboard font to look like handwriting and
messed around with the proportions and angles
until it looked like they where on the lines.
For all of these I changed the opacity to make it
look like it had been drawn on. I also selected
parts of the mug that needed to go above it, by
utilizing the quick selection and lasso tools to
create a copy of the areas that needed to go
above.
Process Day-4
I have also used a photo of my main character
petting the dog from the puppy therapy scene
and put it into the cup. I added an image in the
cup, by taking another one of my photos, and
shrinking it down to size, while using the select
elliptical marque tool to make the image circularly
cut out. I also changed the opacity and tried to
match it properly with the corners. I also messed
around with the colour and layer styles on this,
trying to make it look watery like. I did select the
lime beneath it using the polygonal lasso tool, so
to overlay it above and make it look nicer. I used a
layer mask so to soften the corners and make the
blend seem more natural
duplicated them all and combined and adjusted
layer with brightness, contrast, exposure,
vibrance…
Process Day-4
I also duplicated and combined it all (the duplicated stuff was combined). I messed
around with the shadows, highlights, brightness, contrast, exposure, vibrance and
saturation until I got the look I wanted.
Before:
After:
I am happy with my
progress, and like the
look of my poster so far.
Process – Day 5
I started off by removing the background
from the image, leaving behind the table
with the notepad and cup on it.
I added text with a shadow of relevant
colour using type writer font. Added a
red and blue background, to which I
added a vector mask with the black
brush tool (in order to make it look more
faded), and also added some white
highlights in the corner of the layer, to
make it look more like a light flash.
I am happy with this poster, and am
going to move onto the next one.
Process – Day 5
Create a second poster – on second
poster I took one image and removed
the background, only keeping the
person and sofa, adding in a new
office background.
I had, however, accidentally removed
the corner of the sofa. To fix this I
copped over another segment of the
sofa, used the vector mask to blend it
in more, then upped the brightness
and vibrance to make it look more
natural.
Process – Day 5
Then I created a copy of them all merged
together and made another copy, which I
messed around with the black and whites of to
make it look good in black and white.
I then changed some of the objects to be red,
copying a style from Schindler's list. I made the
hearts red by using the magic wand select and
quick select tools and changing the colour to
red. I also then added a red overlay layer and
added some smudges of red to make it look
like blood. I also added some blood splatter
effects. One on the clock, which I faded on the
area above the glass to add contrast to it.
Hand print.
Process – Day 6
I am continuing with my second poster.
I added demon eyes to my character,
using a red brush overlay with the
lighten effect, which has a brighter dot
in the centre to show where the pupil is.
Process – Day 6
I added a title on the poster with a red colour, using the chalkboard font. Using the
gradient blending option I added variety to the colour, making it dark in some areas, I
also added a darker blood shadow to make it pop more, using the multiply effect on
materialised copy of the text to blend it in. I also added a copy of some objects above
the text by selecting the areas I want and duplicating them, dragging them above the
text so to make it look more blended and as if it Is there.
Process – Day 6
I am happy with how my poster looks for now. I
might go back and remove some of the blood
off of the character, as I think I used too much
on the clothes.
Process – Day 6
I have now started a flyer for the
movie and am planning to make it
look blended with a colour thyme
of red.
I have made an image black and
white and am overlaying it with a
Hard Mix blend on a lighter
red/pink background, which is
surrounded by a brighter red
boarder. I then proceeded to add a
red brush to create a bit of variety
in the red, I then went on the pen
tool and added white dots of a
variety of sizes, and copied the title
from my 2nd poster.
I added the release date and that it
was across Europe in a new font,
and made the image more white.
Process – Day 6
I am happy with how my poster looks for now. I
do not plan to change anything about this, as I
believe it is good as it is, and any messing
around will only make it look worse.
I have also done a bit more editing, while
waiting for a large file to download.
Process – Day 7
Today I have continued with my editing, cutting down the footage I already
have, while also adding some music.
I have used key frames on opacity, scale and position to create a few effects.
For example, a zoom out fade in effect to start, another effect I have done is
create a subsequence over two clips so that I can have. More constant zoom
over both, that seems a lot smoother.
I also added in my previous edit of the fight scene into the sequence
I am happy with my progress today, as I’ve been
feeling quite sick today and spent a lot of the
time in bed, but have still done a bit of work.
Process – Day 8
I added a cooler temperature on some footage that
was too warm.
I duplicated the level of cool onto the cut up bits of
the same footage, and made another one of the bits of
footage and its clips have a different level of cool so
that it looks similar to the much warmer one with its
level of cold correction. I have made use of the opacity,
scale and location keyframes to rotated a clip and
make it fade from a drawing of a dog, to an actual dog.
I have also recorded some audio for the fight scene
with my friends today, as I wanted some grunting
sound effects.
Some problems I have encountered include audio
being too loud at certain points, to solve this I used
keyframes on audio levels so that it got quitter or
faded out when needed.
Process – Day 9
To start off toady I have downloaded all of my files from my flash drive to my home
computer, which lead to me having to relocate all the files, which did not take too long.
I then proceeded to get rid of the static background noise in the background of all my audio
(as I did not have enough people to use the audio equipment from college the audio was
recorded through the camera). I did this by using the denoise audio effect, which can
remove most of the background noise while keeping the prominent noise, speaking in this
case, still prominent. I upped the percentage to 50 percent, as the static was quite bad.
I am happy with how my project looks for now.
I’ll be it, my trailer is not the best piece of work I have ever done.
Process – Day 10
I started off today by first adding in my footage for the interview and
cutting down parts of it at the start into a tangible segment.
Then I created a legacy title with the Georgia font, white text, a black
outline and a black shadow. I then aligned this with the centre of the page
using the centre tools on the left-hand side of the screen.
Process – Day 10
After finishing with the customisation of the
legacy title, I then added the linear wipe
effect to the text, messing around with the
key frames till it looked more natural.
I then added a black video into my footage,
which I dragged into my timeline and then
customised the size by undoing the uniform
scale and changing the scale width to 0.8 and
height to 18, to make it look like a typing
cursor (I believe that is the name).
I then proceeded to add a keyframes at the
beginning and end of the wipe effects
duration, onto the cursor. These two frames
where to make the cursor seem like its ahead
of the text. I then added a few more
keyframes in-between, as it was not perfect,
and I wanted it to look normal.
Process – Day 10
After his I proceeded to add keyframes on the opacity fx, with it alternating from 100
percent to 0 percent, with 4 frames in-between each change.
After this, I then repeated the same process on some text with my character’s name,
which I positioned beneath the other text. I also changed a few other bits, like stroke
size and the height + width of the cursor for the typing effect.
Process – Day 10
After this I added an adjustment layer with a gaussian blur effect on it, which I faded out
into normal video footage after the text had disappeared. I also added a blur out effect
on the text, to make it fade out and smooth.
I then added some background music to this segment, which I cut down quite a bit,
messed with the audio levels, and then faded it out by using keyframes on the levels
segment that would lower the volume.
An effect that I used was the reverse speed on a certain clip that I ended up removing, I
reversed it as I thought it may look correct if done so. It did not.
Process – Day 10
The was a visual problem with the cursor effects, as every time I
would play the video, the smaller cursor would look like the
bigger one. I thought that it may be fixed if I added a new black
layer into the sequences and did the same things on that. It did
not work. I then tried exporting the segment just to check if it was
only popping up on Premier Pro, which turned out to be the case.
After this I just ignored how it looked on premier.
After this I proceeded to edit the bits I wanted from my footage
and remove the rest. I then added in some more background
music and lowered the volume of it, while also raising the volume
of the actual audio, which I would proceed to do multiple more
times during the day.
Process – Day 10
After this I added in some text using the
same Georgia font as the Legacy titles. I
then resized it using key frames, so that
it was above a blank gap where the was
no footage, stayed in the centre of the
screen for a bit, then changed locations
to the top left of the screen and stayed
there, before fading out. I copied the
original text with the effects for every
new question, changing the text and
approximate location, as some of them
had more text than others, and I wanted
them to all be in approximately the same
spot, so I had to do it a bit more visually,
rather than being able to conveniently
copy it every time; however, it was useful
for me not to have to completely
recreate it from scratch.
100%
Process – Day 10
After this I proceeded to add in
clips from my other premier file
in order to use in some speaking
bits and as clips to provide visual
context to the verbal context.
I made the fight sequence into a
subsequence, so that it would
not take up too much room on
my time line, and that I would
only have to cut one layer,
making it much more simpler for
me.
I also had to change the size and
temperature for another clip, as I
had to remove some effects due
to how I had edited on the other
document.
Process – Day 10
I then once again changed the volume levels of music and audio, with some of the new
clips having audio that needed to be adjusted, and the original scenes needing to be
louder.
After some contemplation, I decided to add in the flyer I Had worked on recently, as well
as some text above it to indicate that people would get a 10 percent discount when
using a certain code. I made this not quite fully opaque, with the image sitting at 80
percent and the text 50 percent, while both fading in and out with the opacity key
frames.
Process – Day 10
I added an adjustment layer to my timeline
and add my effects onto this.
The first effect I added was noise grain,
which turned up to 100 percent.
Then I used the grid effect on the
adjustment layer, which I customized by
using the two controls on the screen, which
I changed to have very frequent lines
horizontally.
I changed the feather to be 3 on the height
and set the blending mode to color dodge.
Process – Day 10
I added the turbulent displace effect, changed
the displacement to horizontal and changed
the complexity to 7.
I then added a gaussian-blur onto the effect
itself.
I then added the transform effect, turning the
skew up and then turning off uniform scale and
scaling up the height till it filled the fame.
Process – Day 10
I then changed the contrast on
the lumetric colours tab to 100
percent.
I added a push transition to the
edit point and made sure it was
going from south to north and
centered add cut, with a
duration of 6fps.
I added a 50 pixels border
between the images and
moved my adjustment layer so
that it started and finished at
the correct points.
I duplicated this effect a couple
of times over points that
started and finished clips.
Process – Day 10
I am happy with the work I have produced
today, as I have gotten a lot done today.
I have finally finished my FMP production, and
feel both relieved and better for it.
My editing skills have definitely improved, and
this whole process has taught me quite a lot.

More Related Content

Similar to 5.2 Production Reflection.pptx

Production Diary.pptx
Production Diary.pptxProduction Diary.pptx
Production Diary.pptxShaniceYates
 
Production Reflection FMP
Production Reflection FMPProduction Reflection FMP
Production Reflection FMPHarry Taylor
 
Fmp2 production reflection
Fmp2 production reflectionFmp2 production reflection
Fmp2 production reflectionbronparsons
 
6. production reflection
6. production reflection6. production reflection
6. production reflectionLeah Ellis
 
Daily Logs fmp.docx
Daily Logs fmp.docxDaily Logs fmp.docx
Daily Logs fmp.docxLily809411
 
3. Problem Solving and Experiments.pptx
3. Problem Solving and Experiments.pptx3. Problem Solving and Experiments.pptx
3. Problem Solving and Experiments.pptxSecurityPuppetProduc
 
3. Problem Solving and Experiments.pptx
3. Problem Solving and Experiments.pptx3. Problem Solving and Experiments.pptx
3. Problem Solving and Experiments.pptxSecurityPuppetProduc
 
3. Problem Solving and Experiments.pptx
3. Problem Solving and Experiments.pptx3. Problem Solving and Experiments.pptx
3. Problem Solving and Experiments.pptxSecurityPuppetProduc
 
3. Problem Solving and Experiments.pptx
3. Problem Solving and Experiments.pptx3. Problem Solving and Experiments.pptx
3. Problem Solving and Experiments.pptxSecurityPuppetProduc
 
Fmp2 production reflection
Fmp2 production reflectionFmp2 production reflection
Fmp2 production reflectionbronparsons
 
6. production reflection
6. production reflection6. production reflection
6. production reflectionLeah Ellis
 
Fmp2 production reflectionss
Fmp2 production reflectionssFmp2 production reflectionss
Fmp2 production reflectionssbronparsons
 
Fmp2 production reflection
Fmp2 production reflectionFmp2 production reflection
Fmp2 production reflectionbronparsons
 
3. Problem Solvingand Experiments.pptx
3. Problem Solvingand Experiments.pptx3. Problem Solvingand Experiments.pptx
3. Problem Solvingand Experiments.pptxSecurityPuppetProduc
 
FMP Reflection/ Progress Diary Complete
FMP Reflection/ Progress Diary CompleteFMP Reflection/ Progress Diary Complete
FMP Reflection/ Progress Diary CompleteEmmaSams3
 
Creating my doube page
Creating my doube pageCreating my doube page
Creating my doube pageamybruce
 

Similar to 5.2 Production Reflection.pptx (20)

Production Diary.pptx
Production Diary.pptxProduction Diary.pptx
Production Diary.pptx
 
Editing Process of Prototype.pptx
Editing Process of Prototype.pptxEditing Process of Prototype.pptx
Editing Process of Prototype.pptx
 
Production Reflection FMP
Production Reflection FMPProduction Reflection FMP
Production Reflection FMP
 
Fmp2 production reflection
Fmp2 production reflectionFmp2 production reflection
Fmp2 production reflection
 
Production Reflection
Production ReflectionProduction Reflection
Production Reflection
 
6. production reflection
6. production reflection6. production reflection
6. production reflection
 
Editing Process of Prototype.pptx
Editing Process of Prototype.pptxEditing Process of Prototype.pptx
Editing Process of Prototype.pptx
 
Daily Logs fmp.docx
Daily Logs fmp.docxDaily Logs fmp.docx
Daily Logs fmp.docx
 
3. Problem Solving and Experiments.pptx
3. Problem Solving and Experiments.pptx3. Problem Solving and Experiments.pptx
3. Problem Solving and Experiments.pptx
 
3. Problem Solving and Experiments.pptx
3. Problem Solving and Experiments.pptx3. Problem Solving and Experiments.pptx
3. Problem Solving and Experiments.pptx
 
Fmp reflections1
Fmp reflections1Fmp reflections1
Fmp reflections1
 
3. Problem Solving and Experiments.pptx
3. Problem Solving and Experiments.pptx3. Problem Solving and Experiments.pptx
3. Problem Solving and Experiments.pptx
 
3. Problem Solving and Experiments.pptx
3. Problem Solving and Experiments.pptx3. Problem Solving and Experiments.pptx
3. Problem Solving and Experiments.pptx
 
Fmp2 production reflection
Fmp2 production reflectionFmp2 production reflection
Fmp2 production reflection
 
6. production reflection
6. production reflection6. production reflection
6. production reflection
 
Fmp2 production reflectionss
Fmp2 production reflectionssFmp2 production reflectionss
Fmp2 production reflectionss
 
Fmp2 production reflection
Fmp2 production reflectionFmp2 production reflection
Fmp2 production reflection
 
3. Problem Solvingand Experiments.pptx
3. Problem Solvingand Experiments.pptx3. Problem Solvingand Experiments.pptx
3. Problem Solvingand Experiments.pptx
 
FMP Reflection/ Progress Diary Complete
FMP Reflection/ Progress Diary CompleteFMP Reflection/ Progress Diary Complete
FMP Reflection/ Progress Diary Complete
 
Creating my doube page
Creating my doube pageCreating my doube page
Creating my doube page
 

More from VirtualScourge2

More from VirtualScourge2 (9)

Proposal
Proposal Proposal
Proposal
 
3 - Planning
3 - Planning3 - Planning
3 - Planning
 
UAL Progression Pro-Forma 2022-23.pptx
UAL Progression Pro-Forma 2022-23.pptxUAL Progression Pro-Forma 2022-23.pptx
UAL Progression Pro-Forma 2022-23.pptx
 
Diary 2nd part.docx
Diary 2nd part.docxDiary 2nd part.docx
Diary 2nd part.docx
 
3. Pre-Production (1).pptx
3. Pre-Production (1).pptx3. Pre-Production (1).pptx
3. Pre-Production (1).pptx
 
1.1 Initial Ideas + Context.pptx
1.1 Initial Ideas + Context.pptx1.1 Initial Ideas + Context.pptx
1.1 Initial Ideas + Context.pptx
 
2. Research.pptx
2. Research.pptx2. Research.pptx
2. Research.pptx
 
2.2 Production Experiments.pptx
2.2 Production Experiments.pptx2.2 Production Experiments.pptx
2.2 Production Experiments.pptx
 
Adventure pro forma
Adventure pro formaAdventure pro forma
Adventure pro forma
 

Recently uploaded

AIM of Education-Teachers Training-2024.ppt
AIM of Education-Teachers Training-2024.pptAIM of Education-Teachers Training-2024.ppt
AIM of Education-Teachers Training-2024.pptNishitharanjan Rout
 
NO1 Top Black Magic Specialist In Lahore Black magic In Pakistan Kala Ilam Ex...
NO1 Top Black Magic Specialist In Lahore Black magic In Pakistan Kala Ilam Ex...NO1 Top Black Magic Specialist In Lahore Black magic In Pakistan Kala Ilam Ex...
NO1 Top Black Magic Specialist In Lahore Black magic In Pakistan Kala Ilam Ex...Amil baba
 
QUATER-1-PE-HEALTH-LC2- this is just a sample of unpacked lesson
QUATER-1-PE-HEALTH-LC2- this is just a sample of unpacked lessonQUATER-1-PE-HEALTH-LC2- this is just a sample of unpacked lesson
QUATER-1-PE-HEALTH-LC2- this is just a sample of unpacked lessonhttgc7rh9c
 
REMIFENTANIL: An Ultra short acting opioid.pptx
REMIFENTANIL: An Ultra short acting opioid.pptxREMIFENTANIL: An Ultra short acting opioid.pptx
REMIFENTANIL: An Ultra short acting opioid.pptxDr. Ravikiran H M Gowda
 
FICTIONAL SALESMAN/SALESMAN SNSW 2024.pdf
FICTIONAL SALESMAN/SALESMAN SNSW 2024.pdfFICTIONAL SALESMAN/SALESMAN SNSW 2024.pdf
FICTIONAL SALESMAN/SALESMAN SNSW 2024.pdfPondicherry University
 
Simple, Complex, and Compound Sentences Exercises.pdf
Simple, Complex, and Compound Sentences Exercises.pdfSimple, Complex, and Compound Sentences Exercises.pdf
Simple, Complex, and Compound Sentences Exercises.pdfstareducators107
 
Tatlong Kwento ni Lola basyang-1.pdf arts
Tatlong Kwento ni Lola basyang-1.pdf artsTatlong Kwento ni Lola basyang-1.pdf arts
Tatlong Kwento ni Lola basyang-1.pdf artsNbelano25
 
How to Create and Manage Wizard in Odoo 17
How to Create and Manage Wizard in Odoo 17How to Create and Manage Wizard in Odoo 17
How to Create and Manage Wizard in Odoo 17Celine George
 
UGC NET Paper 1 Unit 7 DATA INTERPRETATION.pdf
UGC NET Paper 1 Unit 7 DATA INTERPRETATION.pdfUGC NET Paper 1 Unit 7 DATA INTERPRETATION.pdf
UGC NET Paper 1 Unit 7 DATA INTERPRETATION.pdfNirmal Dwivedi
 
Transparency, Recognition and the role of eSealing - Ildiko Mazar and Koen No...
Transparency, Recognition and the role of eSealing - Ildiko Mazar and Koen No...Transparency, Recognition and the role of eSealing - Ildiko Mazar and Koen No...
Transparency, Recognition and the role of eSealing - Ildiko Mazar and Koen No...EADTU
 
TỔNG ÔN TẬP THI VÀO LỚP 10 MÔN TIẾNG ANH NĂM HỌC 2023 - 2024 CÓ ĐÁP ÁN (NGỮ Â...
TỔNG ÔN TẬP THI VÀO LỚP 10 MÔN TIẾNG ANH NĂM HỌC 2023 - 2024 CÓ ĐÁP ÁN (NGỮ Â...TỔNG ÔN TẬP THI VÀO LỚP 10 MÔN TIẾNG ANH NĂM HỌC 2023 - 2024 CÓ ĐÁP ÁN (NGỮ Â...
TỔNG ÔN TẬP THI VÀO LỚP 10 MÔN TIẾNG ANH NĂM HỌC 2023 - 2024 CÓ ĐÁP ÁN (NGỮ Â...Nguyen Thanh Tu Collection
 
OSCM Unit 2_Operations Processes & Systems
OSCM Unit 2_Operations Processes & SystemsOSCM Unit 2_Operations Processes & Systems
OSCM Unit 2_Operations Processes & SystemsSandeep D Chaudhary
 
How to Add a Tool Tip to a Field in Odoo 17
How to Add a Tool Tip to a Field in Odoo 17How to Add a Tool Tip to a Field in Odoo 17
How to Add a Tool Tip to a Field in Odoo 17Celine George
 
Graduate Outcomes Presentation Slides - English
Graduate Outcomes Presentation Slides - EnglishGraduate Outcomes Presentation Slides - English
Graduate Outcomes Presentation Slides - Englishneillewis46
 
The basics of sentences session 3pptx.pptx
The basics of sentences session 3pptx.pptxThe basics of sentences session 3pptx.pptx
The basics of sentences session 3pptx.pptxheathfieldcps1
 
Beyond_Borders_Understanding_Anime_and_Manga_Fandom_A_Comprehensive_Audience_...
Beyond_Borders_Understanding_Anime_and_Manga_Fandom_A_Comprehensive_Audience_...Beyond_Borders_Understanding_Anime_and_Manga_Fandom_A_Comprehensive_Audience_...
Beyond_Borders_Understanding_Anime_and_Manga_Fandom_A_Comprehensive_Audience_...Pooja Bhuva
 
Wellbeing inclusion and digital dystopias.pptx
Wellbeing inclusion and digital dystopias.pptxWellbeing inclusion and digital dystopias.pptx
Wellbeing inclusion and digital dystopias.pptxJisc
 
21st_Century_Skills_Framework_Final_Presentation_2.pptx
21st_Century_Skills_Framework_Final_Presentation_2.pptx21st_Century_Skills_Framework_Final_Presentation_2.pptx
21st_Century_Skills_Framework_Final_Presentation_2.pptxJoelynRubio1
 
FSB Advising Checklist - Orientation 2024
FSB Advising Checklist - Orientation 2024FSB Advising Checklist - Orientation 2024
FSB Advising Checklist - Orientation 2024Elizabeth Walsh
 
Economic Importance Of Fungi In Food Additives
Economic Importance Of Fungi In Food AdditivesEconomic Importance Of Fungi In Food Additives
Economic Importance Of Fungi In Food AdditivesSHIVANANDaRV
 

Recently uploaded (20)

AIM of Education-Teachers Training-2024.ppt
AIM of Education-Teachers Training-2024.pptAIM of Education-Teachers Training-2024.ppt
AIM of Education-Teachers Training-2024.ppt
 
NO1 Top Black Magic Specialist In Lahore Black magic In Pakistan Kala Ilam Ex...
NO1 Top Black Magic Specialist In Lahore Black magic In Pakistan Kala Ilam Ex...NO1 Top Black Magic Specialist In Lahore Black magic In Pakistan Kala Ilam Ex...
NO1 Top Black Magic Specialist In Lahore Black magic In Pakistan Kala Ilam Ex...
 
QUATER-1-PE-HEALTH-LC2- this is just a sample of unpacked lesson
QUATER-1-PE-HEALTH-LC2- this is just a sample of unpacked lessonQUATER-1-PE-HEALTH-LC2- this is just a sample of unpacked lesson
QUATER-1-PE-HEALTH-LC2- this is just a sample of unpacked lesson
 
REMIFENTANIL: An Ultra short acting opioid.pptx
REMIFENTANIL: An Ultra short acting opioid.pptxREMIFENTANIL: An Ultra short acting opioid.pptx
REMIFENTANIL: An Ultra short acting opioid.pptx
 
FICTIONAL SALESMAN/SALESMAN SNSW 2024.pdf
FICTIONAL SALESMAN/SALESMAN SNSW 2024.pdfFICTIONAL SALESMAN/SALESMAN SNSW 2024.pdf
FICTIONAL SALESMAN/SALESMAN SNSW 2024.pdf
 
Simple, Complex, and Compound Sentences Exercises.pdf
Simple, Complex, and Compound Sentences Exercises.pdfSimple, Complex, and Compound Sentences Exercises.pdf
Simple, Complex, and Compound Sentences Exercises.pdf
 
Tatlong Kwento ni Lola basyang-1.pdf arts
Tatlong Kwento ni Lola basyang-1.pdf artsTatlong Kwento ni Lola basyang-1.pdf arts
Tatlong Kwento ni Lola basyang-1.pdf arts
 
How to Create and Manage Wizard in Odoo 17
How to Create and Manage Wizard in Odoo 17How to Create and Manage Wizard in Odoo 17
How to Create and Manage Wizard in Odoo 17
 
UGC NET Paper 1 Unit 7 DATA INTERPRETATION.pdf
UGC NET Paper 1 Unit 7 DATA INTERPRETATION.pdfUGC NET Paper 1 Unit 7 DATA INTERPRETATION.pdf
UGC NET Paper 1 Unit 7 DATA INTERPRETATION.pdf
 
Transparency, Recognition and the role of eSealing - Ildiko Mazar and Koen No...
Transparency, Recognition and the role of eSealing - Ildiko Mazar and Koen No...Transparency, Recognition and the role of eSealing - Ildiko Mazar and Koen No...
Transparency, Recognition and the role of eSealing - Ildiko Mazar and Koen No...
 
TỔNG ÔN TẬP THI VÀO LỚP 10 MÔN TIẾNG ANH NĂM HỌC 2023 - 2024 CÓ ĐÁP ÁN (NGỮ Â...
TỔNG ÔN TẬP THI VÀO LỚP 10 MÔN TIẾNG ANH NĂM HỌC 2023 - 2024 CÓ ĐÁP ÁN (NGỮ Â...TỔNG ÔN TẬP THI VÀO LỚP 10 MÔN TIẾNG ANH NĂM HỌC 2023 - 2024 CÓ ĐÁP ÁN (NGỮ Â...
TỔNG ÔN TẬP THI VÀO LỚP 10 MÔN TIẾNG ANH NĂM HỌC 2023 - 2024 CÓ ĐÁP ÁN (NGỮ Â...
 
OSCM Unit 2_Operations Processes & Systems
OSCM Unit 2_Operations Processes & SystemsOSCM Unit 2_Operations Processes & Systems
OSCM Unit 2_Operations Processes & Systems
 
How to Add a Tool Tip to a Field in Odoo 17
How to Add a Tool Tip to a Field in Odoo 17How to Add a Tool Tip to a Field in Odoo 17
How to Add a Tool Tip to a Field in Odoo 17
 
Graduate Outcomes Presentation Slides - English
Graduate Outcomes Presentation Slides - EnglishGraduate Outcomes Presentation Slides - English
Graduate Outcomes Presentation Slides - English
 
The basics of sentences session 3pptx.pptx
The basics of sentences session 3pptx.pptxThe basics of sentences session 3pptx.pptx
The basics of sentences session 3pptx.pptx
 
Beyond_Borders_Understanding_Anime_and_Manga_Fandom_A_Comprehensive_Audience_...
Beyond_Borders_Understanding_Anime_and_Manga_Fandom_A_Comprehensive_Audience_...Beyond_Borders_Understanding_Anime_and_Manga_Fandom_A_Comprehensive_Audience_...
Beyond_Borders_Understanding_Anime_and_Manga_Fandom_A_Comprehensive_Audience_...
 
Wellbeing inclusion and digital dystopias.pptx
Wellbeing inclusion and digital dystopias.pptxWellbeing inclusion and digital dystopias.pptx
Wellbeing inclusion and digital dystopias.pptx
 
21st_Century_Skills_Framework_Final_Presentation_2.pptx
21st_Century_Skills_Framework_Final_Presentation_2.pptx21st_Century_Skills_Framework_Final_Presentation_2.pptx
21st_Century_Skills_Framework_Final_Presentation_2.pptx
 
FSB Advising Checklist - Orientation 2024
FSB Advising Checklist - Orientation 2024FSB Advising Checklist - Orientation 2024
FSB Advising Checklist - Orientation 2024
 
Economic Importance Of Fungi In Food Additives
Economic Importance Of Fungi In Food AdditivesEconomic Importance Of Fungi In Food Additives
Economic Importance Of Fungi In Food Additives
 

5.2 Production Reflection.pptx

  • 2. Process Day-1 Today I have gone out with the equipment that I borrowed from school (a camera), as well as my camera stand, iPhone and iPhone gimble (in the case of the camera not working I brought this with me as a backup). We took a train to get to Harrogate from Knaresborough, with my actors helping me carry the equipment. When we first arrived at the location that I had in mind, I discovered that it was actually an area that I could not access, so I had to go to another location as a backup. I filmed two of my friends having a semi choreographed fight scene when we arrived. It was a quite difficult, as we had to stop once or twice to let a car pass (the location was quite secluded, so not many would come by), or so that I could explain how they needed to do a certain scene, like faking a punch by being in line with the camera and crossing the plane. In the end we wrapped it up nicely. We went to wither spoons to get refreshments, and took a train back to Knaresborough. I uploaded the footage on to my PC and backed it up on my OneDrive. I am feeling optimistic about my project so far, and am looking forward to the editing (which I am aware is a bit weird, but I like editing).
  • 3. Process Day-2 I have put my footage into premier in order to see if the sequence envisioned works as I intended, and it pretty much fulfils that roll. I have also had a go at overlaying some flash effects to see how they look on it. To do this I followed the same steps that I had in my 3rd light experiment. I used light leak videos from online, dragged it into my timeline and changed the blending mode to screen. I found that it looks good with these effects in, and with the appropriate music I think it would work really nicely.
  • 4. Process Day-3 Last night I picked up a camera from my grandparents, as I retuned the camera I had been borrowing to college. The camera that I used was the same as college, however it was the previous model camera. Today I have filmed the part where the main character is having a therapy session. I set up the camera on my camera stand and filmed most of the scenes, however since the camera ran out of storage on the SD card half way through, I had to film the rest of it on my iPhone. I think this is fine, as I can make the footage look similar in post production.
  • 5. Process Day-4 Today I have downloaded the rest of my footage for the trailer, and gone through it all, editing most of it down into smaller clips, and arranging them into the sequentially right order.
  • 6. Process Day-4 I have gotten started on my first poster: which is a poster of a coffee table which has a notebook which explains bit of the plot and has doodles in it (notebook of the therapist). To do this I have copped some cartoons off the internet, created a copy of their borders in black, and filled them in with black and blank space. I have also added in some black text with the chalkboard font to look like handwriting and messed around with the proportions and angles until it looked like they where on the lines. For all of these I changed the opacity to make it look like it had been drawn on. I also selected parts of the mug that needed to go above it, by utilizing the quick selection and lasso tools to create a copy of the areas that needed to go above.
  • 7. Process Day-4 I have also used a photo of my main character petting the dog from the puppy therapy scene and put it into the cup. I added an image in the cup, by taking another one of my photos, and shrinking it down to size, while using the select elliptical marque tool to make the image circularly cut out. I also changed the opacity and tried to match it properly with the corners. I also messed around with the colour and layer styles on this, trying to make it look watery like. I did select the lime beneath it using the polygonal lasso tool, so to overlay it above and make it look nicer. I used a layer mask so to soften the corners and make the blend seem more natural duplicated them all and combined and adjusted layer with brightness, contrast, exposure, vibrance…
  • 8. Process Day-4 I also duplicated and combined it all (the duplicated stuff was combined). I messed around with the shadows, highlights, brightness, contrast, exposure, vibrance and saturation until I got the look I wanted. Before: After: I am happy with my progress, and like the look of my poster so far.
  • 9. Process – Day 5 I started off by removing the background from the image, leaving behind the table with the notepad and cup on it. I added text with a shadow of relevant colour using type writer font. Added a red and blue background, to which I added a vector mask with the black brush tool (in order to make it look more faded), and also added some white highlights in the corner of the layer, to make it look more like a light flash. I am happy with this poster, and am going to move onto the next one.
  • 10. Process – Day 5 Create a second poster – on second poster I took one image and removed the background, only keeping the person and sofa, adding in a new office background. I had, however, accidentally removed the corner of the sofa. To fix this I copped over another segment of the sofa, used the vector mask to blend it in more, then upped the brightness and vibrance to make it look more natural.
  • 11. Process – Day 5 Then I created a copy of them all merged together and made another copy, which I messed around with the black and whites of to make it look good in black and white. I then changed some of the objects to be red, copying a style from Schindler's list. I made the hearts red by using the magic wand select and quick select tools and changing the colour to red. I also then added a red overlay layer and added some smudges of red to make it look like blood. I also added some blood splatter effects. One on the clock, which I faded on the area above the glass to add contrast to it. Hand print.
  • 12. Process – Day 6 I am continuing with my second poster. I added demon eyes to my character, using a red brush overlay with the lighten effect, which has a brighter dot in the centre to show where the pupil is.
  • 13. Process – Day 6 I added a title on the poster with a red colour, using the chalkboard font. Using the gradient blending option I added variety to the colour, making it dark in some areas, I also added a darker blood shadow to make it pop more, using the multiply effect on materialised copy of the text to blend it in. I also added a copy of some objects above the text by selecting the areas I want and duplicating them, dragging them above the text so to make it look more blended and as if it Is there.
  • 14. Process – Day 6 I am happy with how my poster looks for now. I might go back and remove some of the blood off of the character, as I think I used too much on the clothes.
  • 15. Process – Day 6 I have now started a flyer for the movie and am planning to make it look blended with a colour thyme of red. I have made an image black and white and am overlaying it with a Hard Mix blend on a lighter red/pink background, which is surrounded by a brighter red boarder. I then proceeded to add a red brush to create a bit of variety in the red, I then went on the pen tool and added white dots of a variety of sizes, and copied the title from my 2nd poster. I added the release date and that it was across Europe in a new font, and made the image more white.
  • 16. Process – Day 6 I am happy with how my poster looks for now. I do not plan to change anything about this, as I believe it is good as it is, and any messing around will only make it look worse. I have also done a bit more editing, while waiting for a large file to download.
  • 17. Process – Day 7 Today I have continued with my editing, cutting down the footage I already have, while also adding some music. I have used key frames on opacity, scale and position to create a few effects. For example, a zoom out fade in effect to start, another effect I have done is create a subsequence over two clips so that I can have. More constant zoom over both, that seems a lot smoother. I also added in my previous edit of the fight scene into the sequence I am happy with my progress today, as I’ve been feeling quite sick today and spent a lot of the time in bed, but have still done a bit of work.
  • 18. Process – Day 8 I added a cooler temperature on some footage that was too warm. I duplicated the level of cool onto the cut up bits of the same footage, and made another one of the bits of footage and its clips have a different level of cool so that it looks similar to the much warmer one with its level of cold correction. I have made use of the opacity, scale and location keyframes to rotated a clip and make it fade from a drawing of a dog, to an actual dog. I have also recorded some audio for the fight scene with my friends today, as I wanted some grunting sound effects. Some problems I have encountered include audio being too loud at certain points, to solve this I used keyframes on audio levels so that it got quitter or faded out when needed.
  • 19. Process – Day 9 To start off toady I have downloaded all of my files from my flash drive to my home computer, which lead to me having to relocate all the files, which did not take too long. I then proceeded to get rid of the static background noise in the background of all my audio (as I did not have enough people to use the audio equipment from college the audio was recorded through the camera). I did this by using the denoise audio effect, which can remove most of the background noise while keeping the prominent noise, speaking in this case, still prominent. I upped the percentage to 50 percent, as the static was quite bad. I am happy with how my project looks for now. I’ll be it, my trailer is not the best piece of work I have ever done.
  • 20. Process – Day 10 I started off today by first adding in my footage for the interview and cutting down parts of it at the start into a tangible segment. Then I created a legacy title with the Georgia font, white text, a black outline and a black shadow. I then aligned this with the centre of the page using the centre tools on the left-hand side of the screen.
  • 21. Process – Day 10 After finishing with the customisation of the legacy title, I then added the linear wipe effect to the text, messing around with the key frames till it looked more natural. I then added a black video into my footage, which I dragged into my timeline and then customised the size by undoing the uniform scale and changing the scale width to 0.8 and height to 18, to make it look like a typing cursor (I believe that is the name). I then proceeded to add a keyframes at the beginning and end of the wipe effects duration, onto the cursor. These two frames where to make the cursor seem like its ahead of the text. I then added a few more keyframes in-between, as it was not perfect, and I wanted it to look normal.
  • 22. Process – Day 10 After his I proceeded to add keyframes on the opacity fx, with it alternating from 100 percent to 0 percent, with 4 frames in-between each change. After this, I then repeated the same process on some text with my character’s name, which I positioned beneath the other text. I also changed a few other bits, like stroke size and the height + width of the cursor for the typing effect.
  • 23. Process – Day 10 After this I added an adjustment layer with a gaussian blur effect on it, which I faded out into normal video footage after the text had disappeared. I also added a blur out effect on the text, to make it fade out and smooth. I then added some background music to this segment, which I cut down quite a bit, messed with the audio levels, and then faded it out by using keyframes on the levels segment that would lower the volume. An effect that I used was the reverse speed on a certain clip that I ended up removing, I reversed it as I thought it may look correct if done so. It did not.
  • 24. Process – Day 10 The was a visual problem with the cursor effects, as every time I would play the video, the smaller cursor would look like the bigger one. I thought that it may be fixed if I added a new black layer into the sequences and did the same things on that. It did not work. I then tried exporting the segment just to check if it was only popping up on Premier Pro, which turned out to be the case. After this I just ignored how it looked on premier. After this I proceeded to edit the bits I wanted from my footage and remove the rest. I then added in some more background music and lowered the volume of it, while also raising the volume of the actual audio, which I would proceed to do multiple more times during the day.
  • 25. Process – Day 10 After this I added in some text using the same Georgia font as the Legacy titles. I then resized it using key frames, so that it was above a blank gap where the was no footage, stayed in the centre of the screen for a bit, then changed locations to the top left of the screen and stayed there, before fading out. I copied the original text with the effects for every new question, changing the text and approximate location, as some of them had more text than others, and I wanted them to all be in approximately the same spot, so I had to do it a bit more visually, rather than being able to conveniently copy it every time; however, it was useful for me not to have to completely recreate it from scratch. 100%
  • 26. Process – Day 10 After this I proceeded to add in clips from my other premier file in order to use in some speaking bits and as clips to provide visual context to the verbal context. I made the fight sequence into a subsequence, so that it would not take up too much room on my time line, and that I would only have to cut one layer, making it much more simpler for me. I also had to change the size and temperature for another clip, as I had to remove some effects due to how I had edited on the other document.
  • 27. Process – Day 10 I then once again changed the volume levels of music and audio, with some of the new clips having audio that needed to be adjusted, and the original scenes needing to be louder. After some contemplation, I decided to add in the flyer I Had worked on recently, as well as some text above it to indicate that people would get a 10 percent discount when using a certain code. I made this not quite fully opaque, with the image sitting at 80 percent and the text 50 percent, while both fading in and out with the opacity key frames.
  • 28. Process – Day 10 I added an adjustment layer to my timeline and add my effects onto this. The first effect I added was noise grain, which turned up to 100 percent. Then I used the grid effect on the adjustment layer, which I customized by using the two controls on the screen, which I changed to have very frequent lines horizontally. I changed the feather to be 3 on the height and set the blending mode to color dodge.
  • 29. Process – Day 10 I added the turbulent displace effect, changed the displacement to horizontal and changed the complexity to 7. I then added a gaussian-blur onto the effect itself. I then added the transform effect, turning the skew up and then turning off uniform scale and scaling up the height till it filled the fame.
  • 30. Process – Day 10 I then changed the contrast on the lumetric colours tab to 100 percent. I added a push transition to the edit point and made sure it was going from south to north and centered add cut, with a duration of 6fps. I added a 50 pixels border between the images and moved my adjustment layer so that it started and finished at the correct points. I duplicated this effect a couple of times over points that started and finished clips.
  • 31. Process – Day 10 I am happy with the work I have produced today, as I have gotten a lot done today. I have finally finished my FMP production, and feel both relieved and better for it. My editing skills have definitely improved, and this whole process has taught me quite a lot.

Editor's Notes

  1. Discuss the tools and processes used in your production. Log your thoughts and feelings about your work. Pay special attention to problems and how you solved them
  2. Discuss the tools and processes used in your production. Log your thoughts and feelings about your work. Pay special attention to problems and how you solved them
  3. Discuss the tools and processes used in your production. Log your thoughts and feelings about your work. Pay special attention to problems and how you solved them
  4. Discuss the tools and processes used in your production. Log your thoughts and feelings about your work. Pay special attention to problems and how you solved them
  5. Discuss the tools and processes used in your production. Log your thoughts and feelings about your work. Pay special attention to problems and how you solved them
  6. Discuss the tools and processes used in your production. Log your thoughts and feelings about your work. Pay special attention to problems and how you solved them
  7. Discuss the tools and processes used in your production. Log your thoughts and feelings about your work. Pay special attention to problems and how you solved them
  8. Discuss the tools and processes used in your production. Log your thoughts and feelings about your work. Pay special attention to problems and how you solved them
  9. Discuss the tools and processes used in your production. Log your thoughts and feelings about your work. Pay special attention to problems and how you solved them
  10. Discuss the tools and processes used in your production. Log your thoughts and feelings about your work. Pay special attention to problems and how you solved them
  11. Discuss the tools and processes used in your production. Log your thoughts and feelings about your work. Pay special attention to problems and how you solved them
  12. Discuss the tools and processes used in your production. Log your thoughts and feelings about your work. Pay special attention to problems and how you solved them
  13. Discuss the tools and processes used in your production. Log your thoughts and feelings about your work. Pay special attention to problems and how you solved them
  14. Discuss the tools and processes used in your production. Log your thoughts and feelings about your work. Pay special attention to problems and how you solved them
  15. Discuss the tools and processes used in your production. Log your thoughts and feelings about your work. Pay special attention to problems and how you solved them
  16. Discuss the tools and processes used in your production. Log your thoughts and feelings about your work. Pay special attention to problems and how you solved them
  17. Discuss the tools and processes used in your production. Log your thoughts and feelings about your work. Pay special attention to problems and how you solved them
  18. Discuss the tools and processes used in your production. Log your thoughts and feelings about your work. Pay special attention to problems and how you solved them
  19. Discuss the tools and processes used in your production. Log your thoughts and feelings about your work. Pay special attention to problems and how you solved them
  20. Discuss the tools and processes used in your production. Log your thoughts and feelings about your work. Pay special attention to problems and how you solved them
  21. Discuss the tools and processes used in your production. Log your thoughts and feelings about your work. Pay special attention to problems and how you solved them
  22. Discuss the tools and processes used in your production. Log your thoughts and feelings about your work. Pay special attention to problems and how you solved them
  23. Discuss the tools and processes used in your production. Log your thoughts and feelings about your work. Pay special attention to problems and how you solved them
  24. Discuss the tools and processes used in your production. Log your thoughts and feelings about your work. Pay special attention to problems and how you solved them
  25. Discuss the tools and processes used in your production. Log your thoughts and feelings about your work. Pay special attention to problems and how you solved them
  26. Discuss the tools and processes used in your production. Log your thoughts and feelings about your work. Pay special attention to problems and how you solved them
  27. Discuss the tools and processes used in your production. Log your thoughts and feelings about your work. Pay special attention to problems and how you solved them
  28. Discuss the tools and processes used in your production. Log your thoughts and feelings about your work. Pay special attention to problems and how you solved them
  29. Discuss the tools and processes used in your production. Log your thoughts and feelings about your work. Pay special attention to problems and how you solved them
  30. Discuss the tools and processes used in your production. Log your thoughts and feelings about your work. Pay special attention to problems and how you solved them