Downloaded 375 times
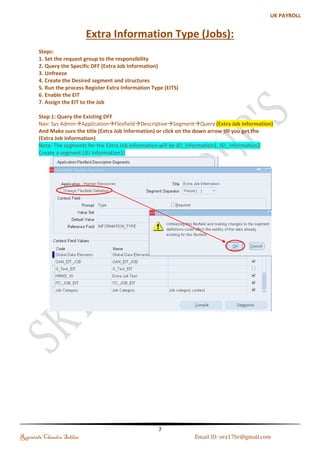
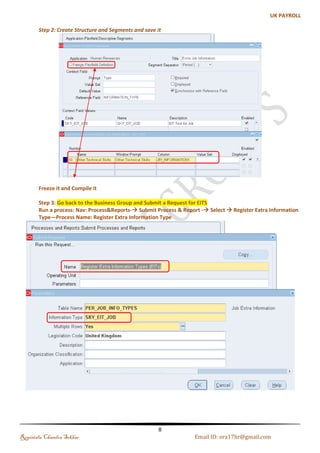
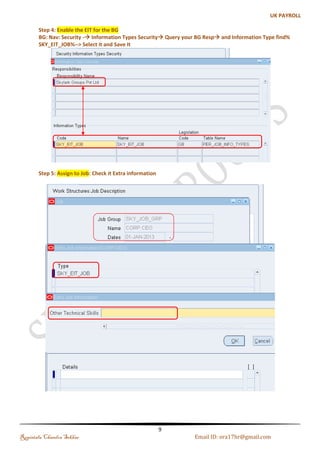
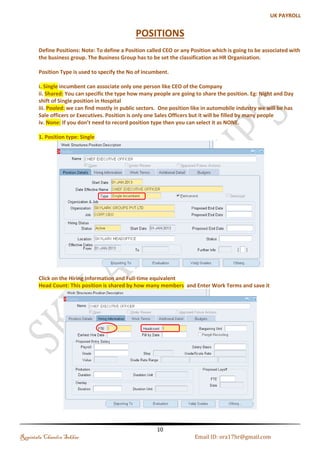


This document serves as a training resource for setting up jobs and positions in Oracle HRMS, detailing processes for creating job groups, jobs, special information types (SITs), and extra information types (EITs). It outlines the steps for configuring various position types and their hierarchies, emphasizing how to capture additional information for employees and roles. Specific navigation paths and examples are provided to aid users in effectively utilizing the Oracle HRMS functionalities.