call girls in Kamla Market (DELHI) 🔝 >༒9953330565🔝 genuine Escort Service 🔝✔️✔️
Step by step guide
1. Step By Step Guide_______________
Before using the drama studio you must makesure that everything is present
for sound, projection and lighting:
Lighting:
In the rig there should be 10X CCT Fresnels w/gel frames. In order to make
surethat these are situated correctly and are rigged correctly, you MUST make
surethat all the following are present and done correctly;
Step One:
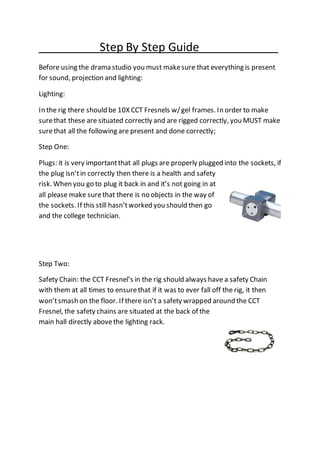
Plugs: it is very importantthat all plugs are properly plugged into the sockets, if
the plug isn’tin correctly then there is a health and safety
risk. When you go to plug it back in and it’s not going in at
all please make surethat there is no objects in the way of
the sockets. If this still hasn’tworked you should then go
and the college technician.
Step Two:
Safety Chain: the CCT Fresnel’s in the rig should always have a safety Chain
with them at all times to ensurethat if it was to ever fall off the rig, it then
won’tsmash on the floor. If there isn’t a safety wrapped around the CCT
Fresnel, the safety chains are situated at the back of the
main hall directly abovethe lighting rack.
2. Step Three:
G-Clamp: All lights should have a G-clamp on at all times; the G-Clamp should
be sitting on top of the adjustablearm. If there isn’t a G-Clamp in sight then
you should go to the back of the main hall and you will see
that they areall situated on the lighting rack.
Step Four:
Gel Frame: Itis important that all CCT Fresnel’s have gel frames attached to the
frontof the light. If there aren’t any gel frames attached to the light you should
go to the back of main hall wherethey are all situated on the wall abovethe
lighting rack.
Step Five:
Barn doors: Itis important that all CCT Fresnel’s haveBarn door attached to
the frontof the light. Dueto if there are any performancebeing held you are
then able to focus the lights easier. If there aren’t any Barn doors attached you
should go to the back of the main hall where the barn
doors are situated on the wall above the lighting rack.
Step Six:
Gels: All the CCT Fresnel’s should havegels in them, it doesn’treally matter
which colour are in the lights. If there aren’t any gels in the light you should go
to the back of the main hall and next to the lighting rack you will see a tall filing
cabinet. In there are all the Coloured gels and they are in order
of colour. You can cut out the gels to the right size.
Yes/No
If this is all complete please circle;
3. Lighting & Dimmers
Step Seven:
Lighting desk/dimmers: Before turning on any lights you haveto make sure
that the dimmer control box has the 32 Amp cable going in to its socket.
Step Eight:
You then make surethe switches on the dimmers are switched to the left,
if not it’s because the lights a tripped it.
Step Nine:
After this make surethat the DMX cable is in inserted in the input socket to
give all the lights power.
Step Ten:
Ensurethat the lighting desk is switched on at the back of the lighting desk in
order to the desk full power.
Step Eleven:
Make surethe grand master is up and A & B, then you can begin to play with
the lights.
Step Twelve:
Light not active: If the CCT Fresnelis working firstto do is to check if the plug is
plugged in properly. If this still isn’tworking, go and grab the ladder which is
located in the back of the hall. Switch the sockets around, for example if it’s in
4. socketnumber 12 put it into socket number 10 and see if it’s working. If itstill
doesn’twork take the light down fromthe rig.
Step Thirteen:
Make sureyou have a screw driver and a small brush, open the tray which is at
the bottom of the light. From there check that the bulb hasn’tpopped, for you
to know if it has popped the bulb would havegone black at the top. If the bulb
is fine give the lens and the inside a quick brush to get rid of the dust that is in
there. After this shutthe tray and tighten it back up.
The image here is my self-opening up the light to get inside and check that all
elements are present.
.
The image is my self-brushing outthe dustfrom inside
the light due to over time, if this isn’tcomplete then through shows there
could be a high risk of it burning.
5. Step Fourteen:
Last you will check the plug; you open the plug and check if there are any loose
wires. If all the wires are connected, from there you should take the light to
the technician’s office which is located at the back of the main hall.
If this is all complete please circle;
Yes/No
Completed by: Date: Next Inspection Date:________