SEE DESCRIPTION FOR NEW LINK
•Download as PPTX, PDF•
0 likes•604 views

This document provides a step-by-step guide to using the ERMobile conference app. It outlines the key features of the app including logging in, viewing attendee profiles, adding connections, accessing the conference schedule and sessions, creating a personalized itinerary, asking questions during sessions, completing surveys, and engaging on social media. The guide is intended to help users navigate and make the most of the various functions within the mobile app during a conference event.

Recommended
Recommended
More Related Content
Similar to SEE DESCRIPTION FOR NEW LINK
Similar to SEE DESCRIPTION FOR NEW LINK (20)
Recently uploaded
Recently uploaded (20)
SEE DESCRIPTION FOR NEW LINK
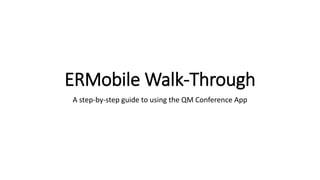
- 1. ERMobile Walk-Through A step-by-step guide to using the QM Conference App
- 2. Search Your App Store • Search for EventsRebels ERMobile • Download and Install
- 3. Log In • Use the email you used to register along with your registrant ID. Your registrant ID is on the confirmation email you received when you registered and in the most recent conference information email you received. • If you used the app last year, go to settings, log out, then log back in with this year’s information.
- 4. My Profile • Click on My Profile in the menu to add your photo and other information. • You can control what information you are sharing by clicking ADJUST WHAT OTHER USERS CAN SEE
- 5. Attendees • Choose the first letter of the last name of the person you are looking for and scroll to their name.
- 6. Add a Connection • Scan their QR Code. • The person will then appear in your Connections. • *Change from last year due to GDPR compliance.
- 7. Connections • When you have added someone as a connection – using their QR Code - they will be in your Connections. • This is an easy way to find a contact – easier than looking in the Attendees list!
- 8. Schedule • View the schedule for each day. • Select the day by tapping the blue bar at the top and selecting the day at the bottom. • Scroll to see session times and titles as well as other events. • Click on a session for more information.
- 9. Session Information • Time, location, concentration, description, and presenter information. • Click the flag button ̶ top right ̶ to add sessions to your itinerary. • Scroll down to ask a question, see answered questions, and complete the session survey.
- 10. Presenter • Click on a presenter’s name to see any other times they are part of another session.
- 11. Session Survey • Your feedback is very important to the presenters. Please take a moment to complete the session survey. You can find it at the bottom of each session’s information.
- 12. Q&A • You can ask a question in the session. Tap Ask New Question and enter your inquiry. You can vote up or down unanswered questions. • Answers will display in the Answered Questions section. • Presenters – Be sure to check your session for unanswered questions and respond to them (You have the power!)
- 13. My Itinerary • See the schedule you have created for yourself here. Select the day you want to look at from the blue bar at the top. • You can add an itinerary item that is not in the schedule. Click the plus button on the top right.
- 14. Add Your Own Item to Your Itinerary • Items cannot be edited once entered, but you can remove a Calendar Event by pressing and holding it until the delete option appears.
- 15. Itinerary • Here is an example of how your itinerary will look. Items you add from the schedule will be light blue. Any of your own items that you add will be white. • Thank you to QM’s Brenda Boyd for sharing a screenshot of her itinerary!
- 16. Connect Quickly • Open My QR Code so a new contact can scan it and add you to their contacts quickly. • A presenter can also scan your QR Code for post conference follow up.
- 17. Conference Evaluation Survey • We want to continue to improve your conference experience. Please take a few minutes before you head home to complete the overall conference evaluation survey.
- 18. Twitter • Use #QMConnect when you tweet. Plus, see the feed here.
- 19. Floor Plan • Find your way! The image can be enlarged. Pinch the picture and spread your fingers apart to enlarge the floor plan.
- 20. Push Notifications • We will send occasional notifications. Find them in your inbox.