
Recommended
More Related Content
What's hot
What's hot (20)
Viewers also liked
Viewers also liked (20)
Similar to Building Structure Project 1 Report
Similar to Building Structure Project 1 Report (20)
More from kimberleyee95
More from kimberleyee95 (20)
Recently uploaded
Recently uploaded (20)
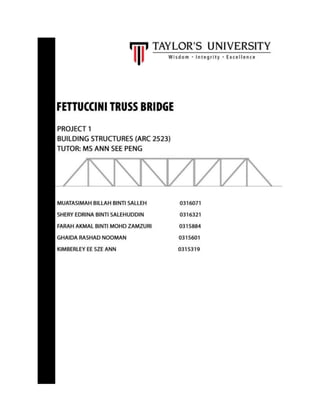
Building Structure Project 1 Report
- 2. Content CHAPTER 1: INTRODUCTION 1 CHAPTER 2: METHODOLOGY 2 CHAPTER 3: PRECEDENT STUDY 3 CHAPTER 4: MATERIALS AND EQUIPMENT 7 CHAPTER 5: BRIDGE TESTING AND ANALYSIS 13 CHAPTER 6: FINAL BRIDGE TESTING 26 CHAPTER 7: CONCLUSION 30 CHAPTER 8: APPENDIX 31 REFERENCES 34 Calculation 35
- 3. CHAPTER 1: INTRODUCTION 1.0 Introduction 1.1 Project Intention and Requirement In a group of 6 members, we were required to design and construct a fettuccini truss bridge with a clear span of 350mm and maximum weight of 70g. In order for the bridge to be Efficient it is important to minimise the weight and maximise the load thus using the least material to sustain the greatest possible load. 1.2 Aim of the Project The aim of this project is to design a fettuccini truss bridge that utilises a perfect truss design with high efficiency and minimal use of construction materials. Furthermore, this project will develop an understanding of material tension and compressive strength as well as develop an understanding of force distribution in a truss. 1.3 Report Overview This report is a compilation of our understanding and analysis based on the precedent studies conducted, construction method and the design of our truss bridge. The report started off with the precedent studies of Pratt Truss and analysis of our designed truss and tests. Sets of testing results and development of our designated bridge through several trial, error experiments and failure analysis were recorded and included to the report. The analysis of the strength of the bridge during the tests was also recorded to improve the efficiency of the bridge. The end of the report will be the calculations of the individual case studies. 1.4 Learning Outcomes By the end of this project, students will be able to: Evaluate, explore and improve attributes of construction materials. Explore and apply understanding of load distribution in a truss.
- 4. Evaluate and identify tension and compression members in a truss structure. Explore different arrangement of members in a truss structure. CHAPTER 2: METHODOLOGY 2.1 Precedent Study For the first step of the project, we decided to do a precedent study on our chosen truss which is the Pratt truss. From the precedent study, we analysed how the structure works in real life and try to imply the same principle on our fettuccine bridge. From the precedent we also learn where are the compression and tension being applied on the bridge when the load is being put on. 2.2 Materials and Equipment Testing For the second step, we decided to do a test on the compressive and tension strength of the fettuccine pasta. We bought several different brands of fettuccine pasta and conduct an analysis. The brands tested were San Remo, Kimball, Giant, and Prego. From the analysis we concluded that San Remo was the best brand for us to use as it has a thicker and stronger layer compared to the other brands. The same method was being use for testing which adhesive suits the San Remo fettuccine to connect the joints and layers. 2.3 Model Making After decided on the type of fettuccine and adhesive to use, we proceed with the model making of the fettuccine bridge. For the first few test we tried doing several designs and arrangement of the trusses and improve our design from the test. After every test, we will analyse what is wrong with the particular bridge and try to improve the structure to make it stronger in order to support a lot of weight. 2.4 Bridge Efficiency Testing
- 5. The efficiency of the bridge tested is calculated using the formula: Efficiency, E = Maximum Load -------------------------- Weight of the bridge CHAPTER 3: PRECEDENT STUDY DEARBORN RIVER HIGH BRIDGE 3.1 History Name of bridge : Dearborn River High Bridge Year : 1897 Location : Lake Bean Road, Montana, United States The bridge is a Pratt half deck truss which means the deck is attached midway on the structure instead on the top or bottom chord like how the usual Pratt truss would look like. This truss structures is famously used in the late 19th and early 20th centuries .The
- 6. bridge is one of the few bridges left in United States with the half deck design with pin connected Pratt. With this design, the bridge managed to carry light loads across the high and deep crossings. Originally the bridge has four spans and had wooden plank deck. The river was named by Lewis and Clark, after the United States Secretary of War, Henry Dearborn in 1805. The Kind Bridge Company of Cleveland, Ohio specifically made the rare designed bridge for the Dearborn River Canyon. The bridge acts as the railroad for the farmers and ranchers who lived in that area. It is located above a river ford that was used for generations by the Blackfeet and other tribes to travel to the Great Plains to hunt buffalo. In 2003, the bridge was improved by the Montana Department of Transportation with Sletten Construction of Great Falls, Montana. It lasts as an excellent example of a rare bridge type and serves as a reminder of the early days of transportation in Montana. 3.2 Structure Pratt truss Material Steel, Concrete, Stone Total Length 251 feet (77m) Width 16.1 feet (4.9m) Height 100 feet (30m) Longest Span 160.1 feet (48.8m) Pratt truss was invented in 1844 by Thomas and Caleb Pratt. The truss can be used with spans up to 76 meters and was a commonly used design for railroad bridges as truss bridges moved from wood to metal. The Pratt truss includes two members which are vertical and diagonals that slants down towards the centre. The vertical members are under compression whereas the diagonals members are under tension under balanced loading. Crossing elements will need to be use near the centre for it to accept concentrated live loads as it cross across the span, if pure tension elements are used in the diagonals. The Pratt truss provided a low maintenance, durable and easily prefabricated bridge that could accommodate the expanding railroad and highway systems.
- 7. The bridge has four spans including the 160 foot half deck truss. The plank is supported by timber stringers and steel I beam where as the main span rests on the concrete piers protected by steel. 1) Side view of the bridge 2) ‘Barrel Shot’ of the bridge
- 8. 3) Bottom part of the bridge 3.3 Joints 1) Pin Joint
- 9. The truss uses pin-connections instead of rivets. This method helps to simplify the construction process and allowed easy prefabrication of the bridge components. Pin connections were commonly used for truss bridges until 1909. A pinned support can resist both vertical and horizontal forces. They will allow the structural member to rotate but not to translate in any direction 2) Cross bracing
- 10. In this construction, the cross bracing is used as a system to reinforce the building structures where the diagonal supports intersect. Using this method, it can help to make the bridge more rigid to withstand the loads. 3) Zoom in on the pin connection
- 11. CHAPTER 4: MATERIALS AND EQUIPMENT 4.1 Materials 4.1.1 Fettuccine 4.1.1.1 Comparison of Different Fettuccini Brands In order to select the most suitable brand of fettuccine to use for the construction of our truss bridge, we purchased 4 different brands of fettuccine and carried out test to determine their tensile and compressive strength. The 4 brands we selected were Kimball, Giant, Prego and San Remo. San Remo Prego Fettuccine Kimball Fettuccine 4.1.1.1 Compressive Strength Test for Different Fettuccini Brands Compressive strength test is conducted by tying 10 sticks of 5cm length fettuccine in a bundle. The bundle is placed on a weighing scale and force is exerted onto the bundle until the fettuccine breaks. The maximum load sustained is recorded as shown in the figure below. Brand Maximum load(kg) Kimball 22 Giant 24 Prego 22.3 Bundle of 10 sticks of 5cm fettuccine Force is exerted on the bundle The testing is ended when the bundle breaks The table above shows the results obtained for the compressive strength of different brands of fettuccine
- 12. 4.1.1.2 Tensile Strength Test for Different Fettuccini Brands Tensile strength test is conducted by tying a single stick of 5cm length fettuccine to a luggage scale. The fettuccine is pulled until it breaks and the maximum load sustained is recorded. 4.1.1.3 Conclusion of Compressive and Tensile Strength Test The results obtained from both test show that San Remo brand fettuccine has higher compressive and tensile strength in comparison to the other brands tested. Furthermore, the test also proves that fettuccine is a material that has better tensile strength than compression strength. San Remo 33.7 Brand Maximum load (kg) Kimball 300 Giant 350 Prego 310 San Remo 400 The table above shows the results obtained for the tensile strength of different brands of fettuccine A single stick of 5cm length fettuccine is tied to a luggage scale The fettuccine ispulled until it breaks
- 13. 4.1.1.4 Compressive and Tensile Strength Test for Different Arrangements of Fettuccine Arrangemen t Weight (g) Compressive Strength/ Maximum load (kg) Tensile Strength/ Maximum load (kg) One layer 25 20 400 Two layer 25 20 500 Three layer 25 20 600 Four layer 25 20 1200 25 20 1000
- 14. Using the same method as shown in section 4.1.1.1 and 4.1.1.2 of this report, compressive and tensile strength test were carried out on different arrangements of fettuccine. 4.1.1.5 Conclusion of Compressive and Tensile Strength Test The results obtained from both test show that the four layer arrangement of fettuccine has the highest compressive and tensile strength. However, the weight of the four layer arrangement when compared to the I-beam arrangement is lighter while achieving almost the same strength. Thus, we can conclude that the I-beam arrangement is the best arrangement to use to minimise weight and achieve high strength. 4.1.2 Adhesive 4.1.2.1 Comparison of Different Adhesives Type of adhesive Analysis V-Tech Super Glue Fastest bonding time (about 3 seconds) High bonding strength Clean connection of joints Disadvantage: most likely to cause fettuccine to become brittle over a period of time Elephant Super Glue Fast bonding time (about 10 seconds) High bonding strength Disadvantage: Troublesome to use as joints must be held in place while waiting for the glue to dry UHU-Glue Slow bonding time (about 35 seconds) Easy to apply Disadvantage: Takes long to dry and does not give a firm connection of joints I-beam
- 15. Hot Glue Gun High bonding strength Joint connections are very firm Disadvantage: Bulky finish and adds a considerable amount of weight 4.1.2.2 Conclusion of Adhesive Comparison After testing the different types of glues we decided to use only the V-Tech Super Glue for the entire design. The reason we chose the V-Tech Super Glue is because it dries quickly and allows for a clean connection of joints. However, when using this glue we must be careful to not leave the bridge to dry for an extended period of time as it causes the fettuccine to become brittle thus weakening the strength of the bridge. 4.2 Equipment Type of adhesive Analysis Craft knife For cutting fettuccine Suitable for making clean cuts Elephant Super Glue Use to sand the fettuccine Sanding the fettuccine will allow for better contact and bonding Pail Used to contain water to test the load on the bridge S-hook Used to attach the pail to the bridge
- 16. Electronic balance Used to weigh the bridge and ensure that it does not exceed the 70g requirement Can read up to 2kg of weight Weighing scale Used in the compressivestrength test of fettuccine to measure the maximum load sustained Luggage scale Used in the tensile strength test of fettuccine to measure the maximum load sustained
- 17. CHAPTER 5 BRIDGE TESTING AND ANALYSIS SUNDAY, APRIL 10th - Test the brands of fettuccine to be used, which layers are stronger, adhesive strength to hold the fettuccine, I- beam and C- beam - Test the strength of compressive and tensile on each brand of fettuccine SUNDAY, APRIL 16th - Discussion on which type of truss should be use - Testing the strength of type of joints to be use - Do a mock up bridge to understand on how to maintain the workmanship and how it works WEDNESDAY, APRIL 20th - Discussion on how to design the first bridge - Construct the first bridge - Load testing of the first bridge - Analyze the cause of failure of the first bridge FRIDAY, APRIL 29th - Discussion on how to improve the design for the second bridge - Proceed in constructing the second bridge - Load testing for the second bridge - Analyze the problem with the second bridge SATURDAY, APRIL 30th - Discussion on how to improve the design for the third bridge - Proceed in constructing the third bridge - Load testing for the third bridge - Analyze the problem with the third bridge MONDAY, MAY 2nd - Discussion on how to improve the design for the fourth bridge - Proceed in constructing the fourth bridge - Load testing for the fourth bridge - Analyze the problem with the fourth bridge
- 18. SUNDAY, MAY 8th - Discussion on how to improve the design for the final bridge - Proceed in constructing the final bridge MONDAY, MAY 9th - Final submission for the fettuccine truss bridge 5.1 Bridge Testing and Analysis 1 5.1.1 Designing Pratt Truss with Different Height and Number of Truss The first step of our analysis was to design bridges with different heights and number of truss. Height (cm) Number of Truss 7.0 4 Height (cm) Number of Truss 9.0 4 Height (cm) Number of Truss 9.0 6
- 19. 5.1.2 Testing with Load The bridges were constructed based on the designs and tested with load. The results were recorded for further analysis. Test Results: 1) 9cm height, 6 truss Load (g) Observation Carrying Weight (g) 540 g Stable 540 g 797 g Breaks 1337 g DETAILS OF THE BRIDGE Height (cm) Number of Truss 7.0 6 Constructed bridges Weak points: Bottom members break off
- 20. Height: 9cm Number of trusses: 6 truss Clear Span: 350mm Overall Span: 490mm Weight: 70g Max Load: 1337g Efficiency = 1337g ÷ 70 g = 19.1 Weak Points The whole bottom member of the bridge breaks (uses 1 layer I-beam and 1 layer of fettuccine) ANALYSIS OF PROBLEMS 1) Height and trusses Based on the precedent studies that we did, we realized that the bridges have different design in terms of the height and trusses that they used. Due to that, we try to analyse how the outcome will be if we change the height and number of trusses in order to achieve a stable bridge that can withstand a lot of load. For the first design, we tried using the 9cm as the height and used 6 trusses. Based on our analysis the bridge should be able to distribute the load evenly and withstand a lot of weight. The distance between trusses was 5.8cm. 2) Poor Workmanship Since this is our first time doing a scaled model of the fettuccine, it took us sometime to understand how does connection works, to angle them perfectly into its position and so on. Due to that reason, the outcome of the first bridge is poorly constructed and caused failure. 3) Weak Joints For the first bridge, we had problems in connecting the diagonal members into the specific angled. Due to not knowing how to properly do it, we just stick the diagonal members with the vertical members without considering the surface should be
- 21. connect with each other. The hole in between the joints caused the bridge to have weak joints. 2) 7cm height, 4 truss DETAILS OF THE BRIDGE Height: 7cm Number of trusses: 4 truss Clear Span: 350mm Overall Span: 490mm Weight: 70 g Max Load: 2127g Efficiency = 2127g ÷ 70 g = 30.4 Weak Points The middle I beam breaks (uses 1 layer I- beam) The top chord bends (1 layer of fettuccine) Load (g) Observation Carrying weight (g) 540 g Stable 540 g 797 g Broke from top chord 1337 g 420 g Bending at one side 1757 g 370 g Breaks at the center 2127 g Weak points: Middle I-beam breaks off
- 22. ANALYSIS OF PROBLEMS 1) Height and trusses In this design we decrease the height from 9cm to 7 cm but remained with the same number of trusses which is 4. By decreasing the height, we were able to achieve more load and efficiency in the second bridge. 3) Weak Joints As for this design, the vertical and diagonal members were not glued together properly, spaces can be seen in between the connection, thus cause the bridge to bend and breaks at the top chord even before reaching the maximum amount of load that it can withstand. The top chord layers which is the compression was only supported with 1 layer of fettuccine which also caused why it bend and broke the bridge. 4) 9cm height, 4 truss Load (g) Observation Carrying Weight (g) 460 g Stable 460 g 797 g Stable 1257 g 410 g Bending 1667 g 314 g Bending + Shaking 1981 g 311 g Bending + Shaking + Swaying 2292 g 290 g Breaks 2582 g DETAILS OF THE BRIDGE Height: 9cm Weak points: Side support and bottom members break off
- 23. Number of trusses: 4 truss Clear Span: 350mm Overall Span: 490mm Weight: 68g Max Load: 2582g Efficiency =2582g ÷ 68g = 37.9 Weak Points The bottom chord of the bridge broke (uses 2 layers and 1 layer) The bottom members broke (uses 1 layer I beam, 2 layers and 1 layer) ANALYSIS OF PROBLEMS 1) Height and trusses In this design we decided to increase the height again but used less trusses. We also take into account the proportion of the bridge. Compared to the second bridge design, this bridge managed to withstand more load and achieve higher efficiency. 2) Problem with material Due to not carefully going through the fettuccine pasta to find straight fettuccine piece, we ended up using a slightly slanted fettuccine piece as part of our bottom chord I-beam, this also contributes to why does the bottom chord of fettuccine breaks. Due to using less layers for the top chord, it caused the bridge to bend and sway. 4) 7cm height, 6 truss Load (g) Observation Carrying Weight (g) Weak points: Top chords bend and middle I-beam breaks off
- 24. 540 g Stable 540 g 797 g Sway 1337 g 420 g Stable 1757 g 370 g Stable 2127 g 314 g Bending at one side 2441 g 359 g Breaks 2800 g DETAILS OF THE BRIDGE Height: 7cm Number of trusses: 6 truss Clear Span: 350mm Overall Span: 490mm Weight: 70g Max Load: 2800g Efficiency = 2800g ÷ 70g = 40 Weak Points The top chord of the bridge breaks due to cannot withstand the compressive strength (only using 1 layer of fettuccine) The I- beam at the middle part also breaks. ANALYSIS OF PROBLEMS 1) Height and trusses Based on the first 3 bridges that we did, we decidedto use shorter height and more trusses for this design. It may weigh more than the third bridge but it can withstand more load and higher efficiency. 2) Weak Joints The joints of the members were also not connected properly. Some of the members were not glued and in contact with each other which leads to why the load did not managed to distribute evenly and breaks before reaching the highest
- 25. load. For the top chord (compression) we still maintained using 1 layer of fettuccine causing it to bend and breaks as it can’t withstand lot of loads. 3) Poor Workmanship Our workmanship is still not good enough and caused a problem as to why do the bridge breaks easily. 5) 5cm height, 8 truss DETAILS OF THE BRIDGE Height: 5cm Number of trusses: 8 truss Clear Span: 350mm Overall Span: 490mm Weight: 73 g Max Load: 7500 g Efficiency = 7500 g ÷ 73 g = 102.7 Weak Points The middle I beam breaks (2layer I-beam used) Bottom beam breaks at the side After the failure of the four previous bridges, this bridge was designed of more trusses and lower height for more stability and efficient distribution of load. The three inside vertical members where made of 3 layers of fettuccini because force is applied in the centre compression force would be higher. The other 2 vertical members on both ends of the bridge where made of 2 layers of fettuccini as these two members will face less force and to reduce the overall weight of the bridge. However all the diagonal members were made of 2 layers except the two at both ends are made of 1 layer this is because the
- 26. fettuccini is naturally stronger in tension strength rather than compression so layers were reduced to maintain a minimum weight. This bridge stood up to 7.5 kg however the weight exceeded the requirement.
- 27. CHAPTER 6: FINAL BRIDGE TESTING 6.0Final Model 16.1. Amendments After testing all the bridges, we have decided to use the Pratt truss with 6 triangles design as our final model because it has the highest efficiency among all the other truss bridge. Based on the result, in depth analysis was conducted for further development in order to reach to achieve a higher efficiency and better performance. 6.2. Joint Analysis Joining method in the bridge is most important factor as it will affect the bridge performance and its efficiency whether it’s a success or a failure bridge. We did a study and tested every joint to get the optimum joining of every single member with different joint and connection. Therefore, the respective joint are designed accordingly. Joint A Joint B Joint C Joint D Joint E
- 28. 6.2.1 Joint A On the initial joint A, we realized that when the force is applied on the slanted member, it broke off easily at the edge of the member and the bridge could not withstand much load. Through observation and analysis, we figured out that it’s better if we trim it and stick closely to each other. We figured out that the joint doesn’t have much surface contact with the other member and the loads can’t transfer completely, therefore causing an efficiency of the bridge low in whole. 6.2.1 Joint B This joint is used at the upper part and the lower part in the bridge making. Based on the observation and analysis we decided to use this joint because it has more surface contact with the other member and it can’t break easily. 6.2.1 Joint C
- 29. Initially, we insert the vertical member in between the horizontal member and joint it vertically. However, when the load is applied on the bridge, the bottom chord breaks off. In order to improve the efficiency of the bridge, we decided to placed the I-beam on top of both horizontal member. Thus, improved the overall performance of the bridge. 6.2.1 Joint D Initially, we didn’t pay much attention to the detail of the vertical member because we didn’t know that it’ll affect the overall performance of the bridge. After through observation, we found out that a ‘slightly’ different height does affect the overall design performance. So we decided to stick the upper chord to each of the end of the vertical member and trim the rest of the middle vertical member with sandpaper. By doing so the member’s surface stick closely to the other member’s surface, thus, improve the overall load distribution of the bridge.
- 30. 6.2.1 Joint E From our previous design of the bridge we cut the extra upper chord for aesthetic value but based on the previous observation and analysis, the excess allows for better connectio between members. 6.3. Final Bridge Testing and Load Analysis Final Bridge Design Efficiency of the bridge: Bridge weight : 67g Load : 6600g Efficiency : 67g = 98.5E 6600g
- 34. CHAPTER 7: CONCLUSION By the end of the project, we had constructed a total of 14 Fettuccine Bridge to achieve the highest efficiency in withstanding loads. In general, we managed to keep the bridge under the 70g weight limit with a load of more than 3 kg. Our bridge managed to hold 6.6 kg of load with just 68g weight of the bridge. We realized that is it significant to study and identify the truss form and joints before constructing a bridge. Furthermore, workmanship is also important to ensure the members and joints are strong and connected perfectly to avoid cracking in between them. Not only that, this project has made us understand more about load distribution in a structure. We learned to calculate the efficiency and type of force applied in each structural member realizing the importance to identify the force (tension/ compression/ zero/ critical) in structural members in order to achieve a high efficient bridge. We also discover that it is important to have a proper way in determine the shape, force in the members in order to produce an efficient bridge not only in terms of quality and material but also time usage on producing the bridge. Forces and load plays an important role in designing a bridge. Hence, there is a lot consideration that we must take in before constructing a bridge that can sustain certain load on the bridge. Therefore, it is crucial to clearly understand the load distribution before a bridge is designed. From this project, we were able to understand the theories behind the forces distribution of compression and tension forces within a truss system. In conclusion, it has been a great experience working on this project. This project teaches us the proper way to construct a truss structure. Using household goods to construct a bridge and gaining so much knowledge after that have amazed us how strong a structure can be if it is properly designed and constructed. Moreover, good workmanship and good team work are also the keys to success in this project. CHAPTER 8:
- 35. APPENDIX
- 37. CHAPTER 9:
- 38. REFERENCES 1) Dearborn Bridge. (n.d.). Retrieved April 9, 2016, from http://www.metnet.mt.gov/Special/Quarries From The Gulch/HTM/Dearborn.shtml 2) Dearborn River High Bridge. (n.d.). Retrieved April 1, 2016, from http://missoulian.com/dearborn-river-high-bridge/article_94178482-cb01-11e3- b118-0019bb2963f4.html 3) Modeling a Pratt Truss Bridge | COMSOL Blog. (2012). Retrieved April 29, 2016, from https://www.comsol.com/blogs/modeling-a-pratt-truss-bridge/ 4) Bridge Height. (n.d.). Retrieved April 29, 2016, from http://www.garrettsbridges.com/design/bridge-height/
- 39. CASE 1 By Kimberley Ee Sze Ann
- 45. CASE 2 By Muatasimah Billah Saleh
- 51. CASE 3 By Shery Edrina Salehuddin
- 58. CASE 4 By Farah Akmal bt Mohd Zamzuri
- 64. CASE 5 By Ghaida Rashad