SlideShare a Scribd company logo
1 of 3
How to disassemble &rebuildadesktopPC
Whetheryou’re takingapartyourcomputerto scrap it, install new components,cleanit,orjusttosee
howit works,ourguide showsyouhowto take it all apart, thenputit back together.
Computerdisassembly
Our guide coversthe mostcommonwayscomputersare put together,butcomputersand
manufacturerscanvary. If you can’t accessa particularcomponentwhenit’slistedinthe guide,skipto
the instructionstoremove the otherpartsuntil youcan reach the original component.
Generally,the processistounplugall the cordsand cablesconnectingacomponenttoother
components,thenremove the partfromthe case or frame.Componentscanbe attachedto the case
withspecial clips,screws,orbyinsertionintoaholder.Ineachcase,no more thana small amountof
force is neededtoremove the part.If it’snotmoving,checkformore attachmentsthatare holdingthe
componentinplace.
You will need a small Phillips-head screwdriver and depending on the manufacturer of your components,
possiblyaflatheadscrewdriver.The metal insidethe computercase canbe sharp, so youmightwant
gloves,aswell.
If you are rebuildingthe computer,be sure todocumentwhatareayouremovedcomponentsfrom,the
orderyou removedthem,andwhatcablesattachto each part.You can take picturesbefore each
removal orwrite itdown.Keepcareful trackof the screws,as well.Keepthe screwswiththeirrelevant
componentbyscrewingthembackinthe holeseitheronthe component oron the frame or by taping
themto the correct location.
Step1 – Unplug yourcomputerand peripheral items
Turn off the computer,unplugthe powercordand unpluganyperipheral itemsattachedtothe
computer,suchas the keyboard,mouse,monitor,headphones,andanyexternal drives.
Wear a groundingstrapor touch an unpaintedmetal partof the computerto discharge anystatic
electricity.If youwalkacrossa carpetat anypoint,touchan unpaintedmetal partof the computeragain
to discharge the builtupstaticelectricity.
Person'sfingertouchinganunpaintedmetalsurface withinacomputertodischarge staticelectricity
Step2 – Remove side covers
Remove atleastone of the side covers,usuallythe rightside asyouface the frontof the computer.You
mightfinditeasiertoaccess all the parts if you remove bothside covers;there are sometimesthumb
screwson the coversto make access easier.
Desktopcomputer'scase has beenremovedtoexposeinternal hardware components
Step3 – Disconnectconnectors
Disconnectall the connectors,thenremove anycardreadersandinternal DVDplayers.These are usually
screwedintoplace.
Step4 – Remove standalone fans
Remove anystandalone fans.Thisisagood time toremove anydust,lint,andpethair from the fansif
you’re planningonreusingthem.
Small brushremovesdustandlintfromthe exposedfanof a desktopcomputer
Step5 – Remove the storage drive
Disconnectthe cablesandremove the storage drive.Generally,storage drivesare heldinplace by
multiple screws.If youhave a harddrive,be gentle whenmovingthe drive ashardbumpscan damage
the internal parts.
Persondisconnectingcablesfromthe storage drive of adesktopcomputer
Step6 – Remove memory(RAM) modules
Remove the memory(RAM) modulesbypushingthe clipsonbothendsof the module down.Thiswill
cause the module topopup foreasyremoval.Donot touch the goldconnectorsonthe chipsif you’re
reusingthe modules.If you're notreusingthe RAM,findouthow itcan be usedinotherapplications.
PersonremovingRAMmemorymodulesfromadesktopcomputer
Step7 – Remove powersupplyunit
Remove the powersupplyunitbyunpluggingthe remainingconnectors,thenunscrewingthe unitfrom
the frame.
Step8 – Remove motherboardadapterorexpansioncards
Remove anyadapteror expansioncardsfromthe motherboard.Althoughthese cardsusuallyslideinto
preconfiguredslots,there canbe screws.Donot touchthe goldconnectorsonthe cards if you’re
reinstallingthe cards.
Step9 – Remove the motherboard
Disconnectall the cablesfromthe motherboard,thenunscrew itfromthe frame bylooseningeach
screwa little bitbeforegoingaroundagaintolooseneachscrew properly.Thispreventsanypotential
warpingof the motherboardbygraduallyreleasingthe tensiononit.
All the componentsshouldnowbe outof the computercase.If you’re reusingthe case,thisisa good
time to getrid of all the dust and lintthatmighthave collected.
Computerreassembly
If you are rebuildingthe computer,insertthe componentsinthe opposite orderyouremovedthem,
startingwiththe motherboard.Pluginall the cablesasyou insertthe component;mostitemswill plug
intothe motherboardandthe powersupplyunit.
Congratulations,you’ve disassembled,andpossiblyreassembledyourcomputer!

More Related Content

Similar to How to disassem-WPS Office.docx

Css grade 11 week 3
Css grade 11 week 3Css grade 11 week 3
Css grade 11 week 3Danilo Anos
 
Assemble a desktop pc
Assemble a desktop pcAssemble a desktop pc
Assemble a desktop pcRajat Gupta
 
pcassemblyanddisassembly-230302040324-f22ec706 (3).pdf
pcassemblyanddisassembly-230302040324-f22ec706 (3).pdfpcassemblyanddisassembly-230302040324-f22ec706 (3).pdf
pcassemblyanddisassembly-230302040324-f22ec706 (3).pdfDeveshSharma588046
 
PC Assembly and Disassembly.pptx
PC Assembly and Disassembly.pptxPC Assembly and Disassembly.pptx
PC Assembly and Disassembly.pptxErwinIruma
 
lesson 3; inspect and test the configured cs and network handouts
lesson 3; inspect and test the configured cs and network handoutslesson 3; inspect and test the configured cs and network handouts
lesson 3; inspect and test the configured cs and network handoutslorbz
 
Parts of computer system (how to assemble and disassemble the computer)
Parts of computer system (how to assemble and disassemble the computer)Parts of computer system (how to assemble and disassemble the computer)
Parts of computer system (how to assemble and disassemble the computer)MuhammadUmarAslam3
 
Steps to install motherboard
Steps to install motherboardSteps to install motherboard
Steps to install motherboarddipaknandankar
 
Css grade 11 week 4
Css grade 11 week 4Css grade 11 week 4
Css grade 11 week 4Danilo Anos
 
Computer Assembly and Disassembly Procedures_student.pptx
Computer Assembly and Disassembly Procedures_student.pptxComputer Assembly and Disassembly Procedures_student.pptx
Computer Assembly and Disassembly Procedures_student.pptxssusercb53d4
 
Computer Systems Servicing Assembling of Laptop.pptx
Computer Systems Servicing Assembling of Laptop.pptxComputer Systems Servicing Assembling of Laptop.pptx
Computer Systems Servicing Assembling of Laptop.pptxMaLynda Sajol
 
Computer 10 Other Parts of the Internal System Unit
Computer 10 Other Parts of the Internal System UnitComputer 10 Other Parts of the Internal System Unit
Computer 10 Other Parts of the Internal System UnitJessaBejer1
 
How to install computer hardware 10 steps (with pictures)
How to install computer hardware  10 steps (with pictures)How to install computer hardware  10 steps (with pictures)
How to install computer hardware 10 steps (with pictures)Perla Pelicano Corpez
 
Assembling and disassembling pc. pdf
Assembling and disassembling pc. pdfAssembling and disassembling pc. pdf
Assembling and disassembling pc. pdfJohnRebenRequinto1
 

Similar to How to disassem-WPS Office.docx (20)

Css grade 11 week 3
Css grade 11 week 3Css grade 11 week 3
Css grade 11 week 3
 
System unit
System unitSystem unit
System unit
 
Assemble a desktop pc
Assemble a desktop pcAssemble a desktop pc
Assemble a desktop pc
 
Desktop assembly
Desktop assemblyDesktop assembly
Desktop assembly
 
pcassemblyanddisassembly-230302040324-f22ec706 (3).pdf
pcassemblyanddisassembly-230302040324-f22ec706 (3).pdfpcassemblyanddisassembly-230302040324-f22ec706 (3).pdf
pcassemblyanddisassembly-230302040324-f22ec706 (3).pdf
 
PC Assembly and Disassembly.pptx
PC Assembly and Disassembly.pptxPC Assembly and Disassembly.pptx
PC Assembly and Disassembly.pptx
 
lesson 3; inspect and test the configured cs and network handouts
lesson 3; inspect and test the configured cs and network handoutslesson 3; inspect and test the configured cs and network handouts
lesson 3; inspect and test the configured cs and network handouts
 
Parts of computer system (how to assemble and disassemble the computer)
Parts of computer system (how to assemble and disassemble the computer)Parts of computer system (how to assemble and disassemble the computer)
Parts of computer system (how to assemble and disassemble the computer)
 
Steps to install motherboard
Steps to install motherboardSteps to install motherboard
Steps to install motherboard
 
Css grade 11 week 4
Css grade 11 week 4Css grade 11 week 4
Css grade 11 week 4
 
Computer assembly
Computer assemblyComputer assembly
Computer assembly
 
Computer Assembly and Disassembly Procedures_student.pptx
Computer Assembly and Disassembly Procedures_student.pptxComputer Assembly and Disassembly Procedures_student.pptx
Computer Assembly and Disassembly Procedures_student.pptx
 
Build laptop
Build laptopBuild laptop
Build laptop
 
Upgrading the Computer Component
Upgrading the Computer ComponentUpgrading the Computer Component
Upgrading the Computer Component
 
Disassembling a PC
Disassembling a PCDisassembling a PC
Disassembling a PC
 
Computer Systems Servicing Assembling of Laptop.pptx
Computer Systems Servicing Assembling of Laptop.pptxComputer Systems Servicing Assembling of Laptop.pptx
Computer Systems Servicing Assembling of Laptop.pptx
 
Computer 10 Other Parts of the Internal System Unit
Computer 10 Other Parts of the Internal System UnitComputer 10 Other Parts of the Internal System Unit
Computer 10 Other Parts of the Internal System Unit
 
How to install computer hardware 10 steps (with pictures)
How to install computer hardware  10 steps (with pictures)How to install computer hardware  10 steps (with pictures)
How to install computer hardware 10 steps (with pictures)
 
Assembling and disassembling pc. pdf
Assembling and disassembling pc. pdfAssembling and disassembling pc. pdf
Assembling and disassembling pc. pdf
 
pc-assembly (1).pptx
pc-assembly (1).pptxpc-assembly (1).pptx
pc-assembly (1).pptx
 

Recently uploaded

Employee wellbeing at the workplace.pptx
Employee wellbeing at the workplace.pptxEmployee wellbeing at the workplace.pptx
Employee wellbeing at the workplace.pptxNirmalaLoungPoorunde1
 
Science 7 - LAND and SEA BREEZE and its Characteristics
Science 7 - LAND and SEA BREEZE and its CharacteristicsScience 7 - LAND and SEA BREEZE and its Characteristics
Science 7 - LAND and SEA BREEZE and its CharacteristicsKarinaGenton
 
Separation of Lanthanides/ Lanthanides and Actinides
Separation of Lanthanides/ Lanthanides and ActinidesSeparation of Lanthanides/ Lanthanides and Actinides
Separation of Lanthanides/ Lanthanides and ActinidesFatimaKhan178732
 
Call Girls in Dwarka Mor Delhi Contact Us 9654467111
Call Girls in Dwarka Mor Delhi Contact Us 9654467111Call Girls in Dwarka Mor Delhi Contact Us 9654467111
Call Girls in Dwarka Mor Delhi Contact Us 9654467111Sapana Sha
 
Micromeritics - Fundamental and Derived Properties of Powders
Micromeritics - Fundamental and Derived Properties of PowdersMicromeritics - Fundamental and Derived Properties of Powders
Micromeritics - Fundamental and Derived Properties of PowdersChitralekhaTherkar
 
BASLIQ CURRENT LOOKBOOK LOOKBOOK(1) (1).pdf
BASLIQ CURRENT LOOKBOOK  LOOKBOOK(1) (1).pdfBASLIQ CURRENT LOOKBOOK  LOOKBOOK(1) (1).pdf
BASLIQ CURRENT LOOKBOOK LOOKBOOK(1) (1).pdfSoniaTolstoy
 
Hybridoma Technology ( Production , Purification , and Application )
Hybridoma Technology  ( Production , Purification , and Application  ) Hybridoma Technology  ( Production , Purification , and Application  )
Hybridoma Technology ( Production , Purification , and Application ) Sakshi Ghasle
 
Industrial Policy - 1948, 1956, 1973, 1977, 1980, 1991
Industrial Policy - 1948, 1956, 1973, 1977, 1980, 1991Industrial Policy - 1948, 1956, 1973, 1977, 1980, 1991
Industrial Policy - 1948, 1956, 1973, 1977, 1980, 1991RKavithamani
 
Arihant handbook biology for class 11 .pdf
Arihant handbook biology for class 11 .pdfArihant handbook biology for class 11 .pdf
Arihant handbook biology for class 11 .pdfchloefrazer622
 
Sanyam Choudhary Chemistry practical.pdf
Sanyam Choudhary Chemistry practical.pdfSanyam Choudhary Chemistry practical.pdf
Sanyam Choudhary Chemistry practical.pdfsanyamsingh5019
 
PSYCHIATRIC History collection FORMAT.pptx
PSYCHIATRIC   History collection FORMAT.pptxPSYCHIATRIC   History collection FORMAT.pptx
PSYCHIATRIC History collection FORMAT.pptxPoojaSen20
 
“Oh GOSH! Reflecting on Hackteria's Collaborative Practices in a Global Do-It...
“Oh GOSH! Reflecting on Hackteria's Collaborative Practices in a Global Do-It...“Oh GOSH! Reflecting on Hackteria's Collaborative Practices in a Global Do-It...
“Oh GOSH! Reflecting on Hackteria's Collaborative Practices in a Global Do-It...Marc Dusseiller Dusjagr
 
18-04-UA_REPORT_MEDIALITERAСY_INDEX-DM_23-1-final-eng.pdf
18-04-UA_REPORT_MEDIALITERAСY_INDEX-DM_23-1-final-eng.pdf18-04-UA_REPORT_MEDIALITERAСY_INDEX-DM_23-1-final-eng.pdf
18-04-UA_REPORT_MEDIALITERAСY_INDEX-DM_23-1-final-eng.pdfssuser54595a
 
Introduction to ArtificiaI Intelligence in Higher Education
Introduction to ArtificiaI Intelligence in Higher EducationIntroduction to ArtificiaI Intelligence in Higher Education
Introduction to ArtificiaI Intelligence in Higher Educationpboyjonauth
 
Concept of Vouching. B.Com(Hons) /B.Compdf
Concept of Vouching. B.Com(Hons) /B.CompdfConcept of Vouching. B.Com(Hons) /B.Compdf
Concept of Vouching. B.Com(Hons) /B.CompdfUmakantAnnand
 
MENTAL STATUS EXAMINATION format.docx
MENTAL     STATUS EXAMINATION format.docxMENTAL     STATUS EXAMINATION format.docx
MENTAL STATUS EXAMINATION format.docxPoojaSen20
 
Measures of Central Tendency: Mean, Median and Mode
Measures of Central Tendency: Mean, Median and ModeMeasures of Central Tendency: Mean, Median and Mode
Measures of Central Tendency: Mean, Median and ModeThiyagu K
 
_Math 4-Q4 Week 5.pptx Steps in Collecting Data
_Math 4-Q4 Week 5.pptx Steps in Collecting Data_Math 4-Q4 Week 5.pptx Steps in Collecting Data
_Math 4-Q4 Week 5.pptx Steps in Collecting DataJhengPantaleon
 

Recently uploaded (20)

Employee wellbeing at the workplace.pptx
Employee wellbeing at the workplace.pptxEmployee wellbeing at the workplace.pptx
Employee wellbeing at the workplace.pptx
 
Science 7 - LAND and SEA BREEZE and its Characteristics
Science 7 - LAND and SEA BREEZE and its CharacteristicsScience 7 - LAND and SEA BREEZE and its Characteristics
Science 7 - LAND and SEA BREEZE and its Characteristics
 
Separation of Lanthanides/ Lanthanides and Actinides
Separation of Lanthanides/ Lanthanides and ActinidesSeparation of Lanthanides/ Lanthanides and Actinides
Separation of Lanthanides/ Lanthanides and Actinides
 
Model Call Girl in Bikash Puri Delhi reach out to us at 🔝9953056974🔝
Model Call Girl in Bikash Puri  Delhi reach out to us at 🔝9953056974🔝Model Call Girl in Bikash Puri  Delhi reach out to us at 🔝9953056974🔝
Model Call Girl in Bikash Puri Delhi reach out to us at 🔝9953056974🔝
 
Código Creativo y Arte de Software | Unidad 1
Código Creativo y Arte de Software | Unidad 1Código Creativo y Arte de Software | Unidad 1
Código Creativo y Arte de Software | Unidad 1
 
Call Girls in Dwarka Mor Delhi Contact Us 9654467111
Call Girls in Dwarka Mor Delhi Contact Us 9654467111Call Girls in Dwarka Mor Delhi Contact Us 9654467111
Call Girls in Dwarka Mor Delhi Contact Us 9654467111
 
Micromeritics - Fundamental and Derived Properties of Powders
Micromeritics - Fundamental and Derived Properties of PowdersMicromeritics - Fundamental and Derived Properties of Powders
Micromeritics - Fundamental and Derived Properties of Powders
 
BASLIQ CURRENT LOOKBOOK LOOKBOOK(1) (1).pdf
BASLIQ CURRENT LOOKBOOK  LOOKBOOK(1) (1).pdfBASLIQ CURRENT LOOKBOOK  LOOKBOOK(1) (1).pdf
BASLIQ CURRENT LOOKBOOK LOOKBOOK(1) (1).pdf
 
Hybridoma Technology ( Production , Purification , and Application )
Hybridoma Technology  ( Production , Purification , and Application  ) Hybridoma Technology  ( Production , Purification , and Application  )
Hybridoma Technology ( Production , Purification , and Application )
 
Industrial Policy - 1948, 1956, 1973, 1977, 1980, 1991
Industrial Policy - 1948, 1956, 1973, 1977, 1980, 1991Industrial Policy - 1948, 1956, 1973, 1977, 1980, 1991
Industrial Policy - 1948, 1956, 1973, 1977, 1980, 1991
 
Arihant handbook biology for class 11 .pdf
Arihant handbook biology for class 11 .pdfArihant handbook biology for class 11 .pdf
Arihant handbook biology for class 11 .pdf
 
Sanyam Choudhary Chemistry practical.pdf
Sanyam Choudhary Chemistry practical.pdfSanyam Choudhary Chemistry practical.pdf
Sanyam Choudhary Chemistry practical.pdf
 
PSYCHIATRIC History collection FORMAT.pptx
PSYCHIATRIC   History collection FORMAT.pptxPSYCHIATRIC   History collection FORMAT.pptx
PSYCHIATRIC History collection FORMAT.pptx
 
“Oh GOSH! Reflecting on Hackteria's Collaborative Practices in a Global Do-It...
“Oh GOSH! Reflecting on Hackteria's Collaborative Practices in a Global Do-It...“Oh GOSH! Reflecting on Hackteria's Collaborative Practices in a Global Do-It...
“Oh GOSH! Reflecting on Hackteria's Collaborative Practices in a Global Do-It...
 
18-04-UA_REPORT_MEDIALITERAСY_INDEX-DM_23-1-final-eng.pdf
18-04-UA_REPORT_MEDIALITERAСY_INDEX-DM_23-1-final-eng.pdf18-04-UA_REPORT_MEDIALITERAСY_INDEX-DM_23-1-final-eng.pdf
18-04-UA_REPORT_MEDIALITERAСY_INDEX-DM_23-1-final-eng.pdf
 
Introduction to ArtificiaI Intelligence in Higher Education
Introduction to ArtificiaI Intelligence in Higher EducationIntroduction to ArtificiaI Intelligence in Higher Education
Introduction to ArtificiaI Intelligence in Higher Education
 
Concept of Vouching. B.Com(Hons) /B.Compdf
Concept of Vouching. B.Com(Hons) /B.CompdfConcept of Vouching. B.Com(Hons) /B.Compdf
Concept of Vouching. B.Com(Hons) /B.Compdf
 
MENTAL STATUS EXAMINATION format.docx
MENTAL     STATUS EXAMINATION format.docxMENTAL     STATUS EXAMINATION format.docx
MENTAL STATUS EXAMINATION format.docx
 
Measures of Central Tendency: Mean, Median and Mode
Measures of Central Tendency: Mean, Median and ModeMeasures of Central Tendency: Mean, Median and Mode
Measures of Central Tendency: Mean, Median and Mode
 
_Math 4-Q4 Week 5.pptx Steps in Collecting Data
_Math 4-Q4 Week 5.pptx Steps in Collecting Data_Math 4-Q4 Week 5.pptx Steps in Collecting Data
_Math 4-Q4 Week 5.pptx Steps in Collecting Data
 

How to disassem-WPS Office.docx

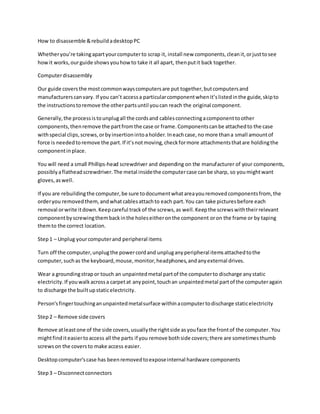
  • 1. How to disassemble &rebuildadesktopPC Whetheryou’re takingapartyourcomputerto scrap it, install new components,cleanit,orjusttosee howit works,ourguide showsyouhowto take it all apart, thenputit back together. Computerdisassembly Our guide coversthe mostcommonwayscomputersare put together,butcomputersand manufacturerscanvary. If you can’t accessa particularcomponentwhenit’slistedinthe guide,skipto the instructionstoremove the otherpartsuntil youcan reach the original component. Generally,the processistounplugall the cordsand cablesconnectingacomponenttoother components,thenremove the partfromthe case or frame.Componentscanbe attachedto the case withspecial clips,screws,orbyinsertionintoaholder.Ineachcase,no more thana small amountof force is neededtoremove the part.If it’snotmoving,checkformore attachmentsthatare holdingthe componentinplace. You will need a small Phillips-head screwdriver and depending on the manufacturer of your components, possiblyaflatheadscrewdriver.The metal insidethe computercase canbe sharp, so youmightwant gloves,aswell. If you are rebuildingthe computer,be sure todocumentwhatareayouremovedcomponentsfrom,the orderyou removedthem,andwhatcablesattachto each part.You can take picturesbefore each removal orwrite itdown.Keepcareful trackof the screws,as well.Keepthe screwswiththeirrelevant componentbyscrewingthembackinthe holeseitheronthe component oron the frame or by taping themto the correct location. Step1 – Unplug yourcomputerand peripheral items Turn off the computer,unplugthe powercordand unpluganyperipheral itemsattachedtothe computer,suchas the keyboard,mouse,monitor,headphones,andanyexternal drives. Wear a groundingstrapor touch an unpaintedmetal partof the computerto discharge anystatic electricity.If youwalkacrossa carpetat anypoint,touchan unpaintedmetal partof the computeragain to discharge the builtupstaticelectricity. Person'sfingertouchinganunpaintedmetalsurface withinacomputertodischarge staticelectricity Step2 – Remove side covers Remove atleastone of the side covers,usuallythe rightside asyouface the frontof the computer.You mightfinditeasiertoaccess all the parts if you remove bothside covers;there are sometimesthumb screwson the coversto make access easier. Desktopcomputer'scase has beenremovedtoexposeinternal hardware components Step3 – Disconnectconnectors
  • 2. Disconnectall the connectors,thenremove anycardreadersandinternal DVDplayers.These are usually screwedintoplace. Step4 – Remove standalone fans Remove anystandalone fans.Thisisagood time toremove anydust,lint,andpethair from the fansif you’re planningonreusingthem. Small brushremovesdustandlintfromthe exposedfanof a desktopcomputer Step5 – Remove the storage drive Disconnectthe cablesandremove the storage drive.Generally,storage drivesare heldinplace by multiple screws.If youhave a harddrive,be gentle whenmovingthe drive ashardbumpscan damage the internal parts. Persondisconnectingcablesfromthe storage drive of adesktopcomputer Step6 – Remove memory(RAM) modules Remove the memory(RAM) modulesbypushingthe clipsonbothendsof the module down.Thiswill cause the module topopup foreasyremoval.Donot touch the goldconnectorsonthe chipsif you’re reusingthe modules.If you're notreusingthe RAM,findouthow itcan be usedinotherapplications. PersonremovingRAMmemorymodulesfromadesktopcomputer Step7 – Remove powersupplyunit Remove the powersupplyunitbyunpluggingthe remainingconnectors,thenunscrewingthe unitfrom the frame. Step8 – Remove motherboardadapterorexpansioncards Remove anyadapteror expansioncardsfromthe motherboard.Althoughthese cardsusuallyslideinto preconfiguredslots,there canbe screws.Donot touchthe goldconnectorsonthe cards if you’re reinstallingthe cards. Step9 – Remove the motherboard Disconnectall the cablesfromthe motherboard,thenunscrew itfromthe frame bylooseningeach screwa little bitbeforegoingaroundagaintolooseneachscrew properly.Thispreventsanypotential warpingof the motherboardbygraduallyreleasingthe tensiononit. All the componentsshouldnowbe outof the computercase.If you’re reusingthe case,thisisa good time to getrid of all the dust and lintthatmighthave collected. Computerreassembly
  • 3. If you are rebuildingthe computer,insertthe componentsinthe opposite orderyouremovedthem, startingwiththe motherboard.Pluginall the cablesasyou insertthe component;mostitemswill plug intothe motherboardandthe powersupplyunit. Congratulations,you’ve disassembled,andpossiblyreassembledyourcomputer!