SlideShare a Scribd company logo
1 of 40
Download to read offline
Computer graphics laboratory
AutoCAD
1st
YEAR PRACTICAL
Name
Roll no.
Branch / sem
computer graphics lab
2
Preface
Hi I’m Ashish Kumar yadav and I’m a Mechanical Design
Engineer by Profession and having 5 years of CAD designing
and training experience. It is very important for every engineer
to be well equipped with the modern engineering design tools
to fight with the way ahead with modern world. we never
imagine any project without proper engineering design. The
AutoCAD software helps you to create Engineering drafting
more quickly and Precisely.
This laboratory booklet will help you to create 2D drawings
using AutoCAD drafting software to make effective
engineering graphic drawings. This booklet covers the whole
Practical which is referred by various universities as a
syllabus named computer graphics for the 1st
year
Engineering students.
I hope you will find information which helps you to complete
the computer graphics practical task using CAD tool like
AutoCAD.
Er.Ashish Kumar Yadav
computer graphics lab
3
TABLE OF CONTENT
1, Overview of Computer Graphics - Page no. – 05 – 09
listing the computer technologies that impact on graphical communication, Demonstrating knowledge
of the theory of CAD software [such as: The Menu System, Toolbars (Standard, Object Properties, Draw,
Modify and Dimension), Drawing Area (Background, Crosshairs, Coordinate System), Dialog boxes
and windows, Shortcut menus (Button Bars), The Command Line (where applicable), The Status Bar,
Different methods of zoom as used in CAD, Select and erase objects.; Isometric Views of lines, Planes,
Simple and compound Solids];
2, Customization & CAD Drawing - Page no. – 10 – 23
consisting of set up of the drawing page and the printer, including scale settings, setting up of units and
drawing limits; ISO and ANSI standards for coordinate dimensioning and tolerance; Orthographic
constraints, Snap to objects manually and automatically; Producing drawings by using various
coordinate input entry methods to draw straight lines, Applying various ways of drawing circles;
3. Annotations, Layering & other Functions- Page no. – 24 – 38
applying dimensions to objects, applying annotations to drawings; Setting up and use of Layers, layers
to create drawings, Create, edit and use customized layers; Changing line lengths through modifying
existing lines (extend/lengthen); Printing documents to paper using the print command; orthographic
projection techniques; Drawing sectional views of composite right regular geometric solids and project
the true shape of the sectioned surface; Drawing annotation, Computer-aided design (CAD) software
modeling of parts and assemblies. Parametric and non-parametric solid, surface, and wireframe models.
Part editing and two-dimensional documentation of models. Planar projection theory, including
sketching of perspective, isometric, multi-view, auxiliary, and section views. Spatial visualization
exercises. Dimensioning guidelines, tolerance techniques; dimensioning and scale multi views of
dwelling;
computer graphics lab
4
4. Demonstration of a Simple Team Design Project.
Geometry and topology of engineered components: creation of engineering models and their
presentation in standard 2D blueprint form and as 3D wire-frame and shaded solids; meshed topologies
for engineering analysis and tool-path generation for component manufacture; geometric dimensioning
and tolerance; Use of solid-modeling software for creating associative models at the component and
assembly levels; floor plans that include: windows, doors, and fixtures such as WC, bath, sink, shower,
etc. Applying color coding according to building drawing practice; Drawing sectional elevation showing
foundation to ceiling; Introduction to Building Information Modelling (BIM).
-------------
computer graphics lab
5
MODULE NO. 1
OVERVIEW OF THE COMPUTER GRAPHICS
computer graphics lab
6
INTRODUCTION
CAD, or computer-aided design and drafting (CADD), is the use of computer technology for design and
design documentation. CAD software replaces manual drafting with an automated process.
If you work in the architecture, MEP or structural engineering fields, you have probably used 2D or 3D
CAD program. These programmers can help you to explore design ideas, visualize concepts through
photorealistic renderings and simulate how a design will perform in the real world. AutoCAD software
was the first CAD programme and it is still the most widely used CAD application.
CAD is an example of the pervasive effect computers were beginning to have on industry. Current
computer-aided design software packages range from 2D vector-based drafting systems to
3D solid and surface modelers. Modern CAD packages can also frequently allow rotations in three
dimensions, allowing viewing of a designed object from any desired angle, even from the inside looking
out. Some CAD software is capable of dynamic mathematical modeling.
Advantages of the CAD software
1. Accurate Design - It has ability to producing very accurate designs. And drawing can be created in
2D or 3D .
2. Easy to modify- modifying the CAD geometry is easy; you will always have “copy” “cut” paste and
delete and move or some similar editing option available with each of the package.
3. Easy to Reproduce- Draftsmen used to take days to complete a drawing by manual drafting, and
reproducing the drawing means recreating the drawing from the beginning. But, in case of the CAD, you
can reproduce the drawing in no time and makes as many copies as you can.
4. Computer aided manufacturing- The 3D CAD geometry is used as input for the CAM packages for
generates NC codes. The manual drawings cannot be used for CAM packages.
5. Environmental Friendly – Manual drawings are necessarily created on the paper, but the CAD
drawings can be stored and used electronically without using paper.
6. Access Control – some of the drawings and design documents are very crucial for a company
business, and such drawings should not be accessible to all. Providing are easy for the CAD drawings.
Strict access control and maintaining confidentiality is difficult in manual drawing.
computer graphics lab
7
Choose Start ➢ All Programs ➢ Autodesk ➢ AutoCAD 2018 ➢ AutoCAD 2018.
You can also double-click the AutoCAD 2018 icon
on your Windows Desktop.
The AutoCAD Start tab appears, offering options
to open existing drawings or to create a new
drawing. You may also see the Design Feed panel,
which allows you to use a cloud-based
collaboration feature. Click the Start Drawing
thumbnail in the left side of the view under “Get
Started”.
AutoCAD 2018 Main Window
AutoCAD Program windows generally divided into several parts: -
Application Menu
Quick Access toolbar
Info Center
Ribbon
Drawing Tabs
Drawing Area
UCS icon (User Coordinate
System)
View Cube
Navigation Bar
Command Windows
Status Bar
computer graphics lab
8
Application Menu – Application Menu helps you to
manage your AutoCAD Design files. It is File Pull-
Down menu which appears by pressing the big A button
top left corner of the software.
This application menu gives you a way to find recently
used files or go to the file which already have open. Save
the drawing using save button or import-export other
design formats to CAD format or vice versa.
Quick Access Toolbar- Quick access toolbar is at the top of the drawing area and next to the Application
menu which is used to includes the basic file-handling function, which you find mostly in all windows
programs.
Info Center - The InfoCenter is the AutoCAD online help facility. There you’ll find a comprehensive
set of help topics and tools, including video tutorials and the standard help documentation. As with any
other programs, you can obtain context-sensitive help by pressing the F1 function key.
Ribbon - The Ribbon uses icons to provide nearly all of the commands that you’ll need; you’ll learn
more about it in the section “
Drawing Tabs- Just above the drawing area are the Drawing tabs that let you create new drawings or
switch between open drawings in a way similar to popular web browsers.
Drawing Area- The drawing area occupies most of the screen. Everything
you draw appears in this area. As you move your mouse around, crosshairs
appear to move within the drawing area. This is the drawing cursor that lets
you point to locations in the drawing area.
computer graphics lab
9
UCS icon (User Coordinate System) – The UCS icon appears in the lower-left corner. Which looks
like arrow of X axis and Y axis which is known as USC icon.
View Cube – The ViewCube is primarily for 3D modeling. Which Indicates the current
viewing direction. Dragging or clicking the ViewCube rotates the scene.
Navigation Bar -Navigation bar along the right edge of the AutoCAD window. This bar
offers tools that you can use to get around in your drawing. Basic tools like Zoom and Pan
can be found here as well as some advanced tools for viewing 3D models.
Command Windows -The Command window, it located just below the drawing area
which gives you feedback about the AutoCAD commands as you use them.
Status Bar -status bar located just below the command windows, Black strip of Status bar
provides icons to switch drafting setting tools on or off and more.
computer graphics lab
10
MODULE NO. 2
CUSTOMIZATION & CAD DRAWING
computer graphics lab
11
INTRODUCTION
In this practical we learn how to set the working area of the AutoCAD software. To do this, we must
determine the Measurement system, the drawing sheet or screen size and scale you want to use.
Measurement system – Setting the Units
In AutoCAD every object is measured in units. You determine the value of units before you start the
drawing in software. For Example, a unit is equal to one millimeter of the real-world object, in another
drawing a unit might be equal to Inch. To specify the unit system which we want to use we need to set
the units in this software.
Command – Units - un
Measurement system Display of measurement
in AutoCAD
Scientific 1.55E+01 (inches or metric)
Decimal 15.5000 (inches or metric)
Engineering 1′-3.5″(input as 1′3.5″)
Architectural 1′-31/2″(input as 1′3–1/2″)
Fractional 151/2″(input as 15–1/2″)
In units settings go to “Type” choose the desired unit standard e.g. 0.000 for the decimal, 1E3
(1000) for the Engineering etc.
In “Precision” choose the desired preciseness you need in the drawing e.g. 1.001 for (0.000)
and for 0.1 choose 0.0 and for 1 choose “0”
Choose the insertion scale of your set perimeter or dimension e.g. millimeters, centimeters,
inches, feet etc.
Choose the angle type same as your desired units choose before e.g. decimal degrees,
engineering, architectural etc.
Click on “OK” to set the units and hit the Esc key to get out of the command.
Setting up the Drawing Limits :
AutoCAD allows you to draw at full scale. You can set up arbitrary boundaries using the limit feature
at what size you like to draw. Generally we draw our limit screen size bit larger than the actual
drawing size for example if your drawing take 100mm to complete then you must draw 200mm of
screen size using limits command in AutoCAD software.
computer graphics lab
12
1. Type LIMITS
2. At the Specify the lower-left corner or [ON/OFF] = <0,0>
3. At the Specify the upper-right corner or [ON/OFF] = <500,500>
4. z a - zoom enter – all enter
5. Although it appears that nothing has changed, but you should also draw a rectangle using
rectangle tool with same process to visualize the limit area of the screen.
QUICK SEETING GUIDE
1. Click the Start tab.
2. Open the Templates drop-down list just below the Star Drawings icon and select acad.dwt
(metric users select acadiso.dwt).
3. Open the Application menu, and select Drawing Utilities ➢ Units. You can also type UNITS↵.
4. In the Length group of the Drawing Units dialog box, select Architectural from the Type
drop-down list and then click OK. Metric users should leave this setting as Decimal but should
select Centimeters from the Insert Scale drop-down list.
5. Enter LIMITS↵, and then press ↵ to accept the default lower-left corner coordinates.
6. For the upper-right corner of the limits, enter 48,26↵. Metric users should enter 122,92↵.
7. Type Z↵A↵ to display the overall area of the drawing set by the limits.
8. Choose Save As from the Application menu and save the file under the name Sink.
STUDY THE COORDINATE SYSTEM
In AutoCAD various type of Co-ordinates
are used which we can discuss here.
1. Absolute Co-ordinate system
2. Relative Rectangular Co-ordinate
system.
3. Polar Co-ordinate System.
1. Absolute Co-ordinate system-
Absolute coordinates refers to a
Cartesian System that uses X, Y, and
sometimes a Z-axis to establish a
point some distance from a common
origin. For example, the picture
shows an origin point of '0,0' and
the absolute coordinate from that
point is '8,7' making it 8 along the X-
axis and 7 along the Y-axis.
computer graphics lab
13
2. Relative Rectangular Co-ordinate system –
Relative coordinates are based on the last point entered. Use relative coordinates when you know the
location of a point in relation to the previous point.
To specify relative coordinates, precede the coordinate values with an @ sign. For example,
entering @3,4 specifies a point 3 units along the X axis and 4 units along the Y axis from the last point
specified.
The following example draws the sides of a rectangle. The first side is a line starting at the absolute
coordinates 0,0 and ending at a point 0 units in the X direction and 0 units in the Y direction. The
second side is a line starting at the endpoint of the first line and ending at a point 20 units in
the X direction and 0 units in the Y direction. The final line segment uses relative coordinates to return
to the starting point.
Command: line
From point: 0,0
To point: @20,0
To point: @0,20
To point: @-20,0
C
3. Polar Co-ordinate system-
Polar Coordinate (Distance and angle) are use to locate the point while creating
the objects. To use polar coordinates to specify a point, enter a distance and an
angle separated by an angle bracket (<). By default angles increase in the
counterclockwise direction and decrease in the clockwise direction. To specify
a clockwise direction, enter a negative value for the angle. For example,
entering 1<315 locates the same point as entering 1<-45. You can change the
angle conventions for the current drawing with the UNITS command.
Absolute polar coordinates are measured from the UCS origin (0,0) for example.
Command: line
From point: 0,0
To point: 20<0
To point: 20<90
To point: 20<180
To point: 20<270 or C
computer graphics lab
14
DRAFTING SETTING
Drafting settings this dialogue box contains so many tabs like Snap
and Grid, Polar tracking, Object snap, Dynamic Input etc. let
discuss each tab one by one Right click on the status bar and choose
properties the drafting setting box will appears to you in the
AutoCAD screen.
Command – DSETTINGS
1. Object snap (F3) - it’s used to turns the running snap on and off
when the object snap is on it will shows the main snap points of the
object which is relative to the other object e.g. end point, midpoint,
center point, tangent point, perpendicular etc.
2. Object Snap tracking (F11)- object snap tracking gives the tracking point of the object near to the
relative point of another object which is more helpful and no need to draw any extra helping line to
follow the object corner, center, quadrant tracking.
3. Dynamic input (F12) - The dynamic input enables the graphics cursor with the power of the command
line. Thus, you enter dimensional and command option information as you work, you get immediate
feedback when your dynamic input is ON.
4. Snap (F7) and Grid (F9)- Snap and Grid mode is used for the showing the graphical representation
and when we move the mouse cursor it will not move freely it will move point to point as we set the
graph snap point.
e.g. if we set snap 0.5 to 0.5 the mouse cursor moves to the distance .5 on the computer screen.
5. ORTHO MODE (F8) – Ortho mode is used to draw
a straight line if we need to draw a perfect straight line
you need to on the ortho mode by pressing F8 button on
your keyboard.
6. POLAR TRACKING (F10)- Polar tracking is used when we work on the specified angel it will
automatically tracks the angel we choose and indicate us with green hidden line indication. You can also
choose your custom angle by click on the additional angle>New and put the specified angle you need.
computer graphics lab
15
0,0 BASE
BASE
AutoCAD DRAWING TOOLS
Drawing tools in AutoCAD helps to create drawing objects like
LINE, CIRCLE, RECTAGLE etc. following tools which is
mainly used in AutoCAD to create drawing in Computer
Graphics Lab.
1. Line – L
Click Home tab Draw panel Line. Find
Specify the start point and end point of the line segment.
click on the screen and draw a line accordingly.
F8 – Ortho mode (to create Straight line in horizontal and vertical
direction).
2. Polyline –Pl
Polyline Creates a 2D polyline, a single object that is composed of line and arc segments. We should
also specify the with of a line by using width option in command bar by pressing W or click on it.
3. Rectangle –REC
Rectangle command is used to create a rectangular box with the selection of the direction of the X axis
and Y axis or say you have to choose first Base and then Height of the object by pressing comma to
switch the axis (,) e.g. “10,20” where 10 is Base and 20 is height.
Object – 1
Object – 2
Single object
line polyline
HIGHT
computer graphics lab
16
inscribed about the circle
4. Cicle –C
In circle you create circle in several ways either by click on the command or pressing command through
keyboard. And there are so many options to draw the circle.
1. Do one of the following:
Click Home tab Draw panel Circle drop-down Center, Radius. Find
Click Home tab Draw panel Circle drop-down Center, Diameter. Find
2. Specify the center point.
3. Specify the radius or diameter.
We have more options to create circles by using AutoCAD LT.
2p = two points
3p = three points
Ttr = tangent tangent radius
TTT = tangent tangent tangent
5. Polygon –POL
Polygon command create a regular polygon of no. of faces we can draw
the minimum no. of sides = 3 polygon and maximum no. of sides =
1024 sides of the polygon inside the AutoCAD software.
6. ARC –A
Arc is created with the help of Arc tool we can create 3-point arc by clicking 3
points at the screen at anticlockwise direction (preferably).
AutoCAD also provides various types of arc options as per designer
requirement we can choose the specified arc by clicking the flyout panel on
drawing ribbon bar.
Circumscribed about the circle
computer graphics lab
17
diameter
height
7. ELLIPS –EL
The first two points of the ellipse determine the location and length of the first axis. The third point
determines the distance between the center of the ellipse and the end point of the second axis.
8. HATCH –H
Hatch is used to fill the enclosed area of the object with
predefined given patterns. Hatch is also providing color or
color gradient combined in a single command.
Choose from several methods to specify the
boundaries of a hatch.
Specify a point in an area that is enclosed by
objects.
Select objects that enclose an area.
9. DIVIDE –DIV
Divide tool is used to divide the object in number of segments where
segments are divided by the visible identification of points styles using
after the command – ddptype to choose the exact point style in
AutoCAD.
computer graphics lab
18
10. MEASURE –ME
Measure tool is also used to divide the object but not in number of
segments but by means of distance measurement we fill. where
segments are divided by the value you fill and visible identification
of points styles using after the command – ddptype to choose the
exact point style in AutoCAD.
AutoCAD MODIFY TOOLS
11. Copy – CO
Copy creates copies objects a specified distance in a specified direction.
Select object you want to copy
Specify the Base point (click where you want to pick the object)
Copy it by using base point as a reference.
12. Move – M
Move command is used to move copies objects a specified distance in a specified direction.
Select object you want to move
Specify the Base point (click where you want to pick the object)
Move it by using base point as a reference.
computer graphics lab
19
13. Rotate –RO
we can rotate selected objects around a base point to an absolute angle.
Select object you want to Rotate
Specify the Base point (click where you want to fix the object)
Rotate it by using base point as a reference (clockwise or anti clockwise or by pressing the angle)
14. Mirror –MI
Mirror command Creates a mirrored copy of
selected objects.
You can create objects that represent half of a
drawing, select them, and mirror them across a
specified line to create the other half.
Select the object you want to mirror
Specify the reference line where you want to create mirror copy.
press N enter if you don’t want to remove the original source object.
15. Scale –SC
To scale an object, specify a base point and a scale factor. The base point acts as the center of the scaling
operation and remains stationary. A scale factor greater than 1 enlarges the object. A scale factor between
0 and 1 shrinks the object.
computer graphics lab
20
16. Trim –TR
Trim is used to delete the unneeded object without deleting the whole object.
Use trim command.
Select the whole object.
Click at the object you want to trim.
17. Extend –EX
extend is used to extend the missing object up to the first interference.
Use extend command.
Select the whole object.
Click at the object you want to extend.
18. Fillet –F
Fillet is used to create the round corner by specifying the radius at fillet command.
Use fillet command.
Type R (r = radius).
Fill the radius value.
Click two point where you put the fillet
on.
19. Chamfer –CHA
Chamfer is used to create the flattened the corner (bevels) by specifying the distance or angle by using
chamfer command.
Use chamfer command.
Type D (d = distance).
Fill the distance value.
Click two point where you put the
chamfer on.
computer graphics lab
21
20. Array –AR
Array command Distributes object copies into any combination of rows, columns, and levels. There
are three types of array we are generally used.
1. Rectangular array
2. Polar array
3. Path array
Polar Array – polar array is used to create copies of the object in a
circular manner.
Path array – Path array Evenly distributes object copies along a path or a
portion of a path. The path can be a line, polyline, 3D polyline, spline,
helix, arc, circle, or ellipse.
21. Break–BR
Breaks the selected object between two points. You can create a gap
between two specified points on an object, breaking it into two objects.
If the points are off of an object, they are automatically projected on to
the object. BREAK is often used to create space for a block or text.
22. Offset–O
You can offset an object at a specified distance or through a point.
After you offset objects, you can trim and extend them as an efficient
method to create drawings containing many parallel lines and curves.
Type offset or click on the offset icon under modify tool
Type the offset value.
Select the object you want to offset in both direction either in forward direction or backward
direction.
computer graphics lab
22
PRACTICAL WORKOUT
Diagram-1 Duration – 15 mins Diagram-2 Duration – 30 mins
Diagram-3 Duration – 30 mins Diagram-4 Duration – 30 mins
computer graphics lab
23
MODULE NO. 3
Annotations, Layering & other Functions
computer graphics lab
24
DIMENSION
Add Dimension to an Object
Dimension is used to measure the object by means of specified selected units.
There are various types of dimensions we are using during measurement in
AutoCAD.
1. Linear Dimension- Find the linear Dimensions of an Object
2. Aligned Dimension- Find the Dimensions of an Aligned Object.
3. Angular Dimension – Find the Angle between two objects.
4. Circular Dimension – Find the Radius or Diametric Dimension of an
Object.
5. Ordinate Dimension – Find the Ordinate points.
1. Linear Dimension – Dimlin
Click on Linear Dimension icon or type shortcut command.
Select the two point where you want to measure the distance of an object.
Enter
2. Circular Dimension – Dimrad
Click on Circular Radius or Diameter Dimension icon or type shortcut command.
Select the circle where you want to measure the distance of an object.
Enter
computer graphics lab
25
3. Aligned Dimension – Dimali
Click on Circular Radius or Diameter Dimension icon or type shortcut command.
Select the circle where you want to measure the distance of an object.
Enter
4. Angular Dimension – Dimang
Click on angular dimension icon or type shortcut command.
Select the two lines where you want to measure the angel of an object.
Enter.
Dimension Style – D
A dimension style is a named collection of dimension
settings that controls the appearance of dimensions,
such as arrowhead style, text location, and lateral
tolerances.
You create dimension styles to specify the
format of dimensions quickly, and to ensure
that dimensions conform to industry or project
standards.
When you create a dimension, it uses the
settings of the current dimension style.
If you change a setting in a dimension style, all
dimensions in the drawing that use the style
update automatically.
You can create dimension substyles that use
specified settings for different types of
dimensions.
You can override a dimension style with
dimension settings that deviate from the
current dimension style.
All dimension styles in your drawing are listed
in the Dimension Style drop-down.
computer graphics lab
26
ANNOANNOTATIONS
TEXT – TE
You can use single-line text to create one or more lines of text, where each text
line is an independent object that you can move, format, or otherwise modify.
Right-click in the text box to select options on the shortcut menu. While you are
in the TEXT command:
Click elsewhere in a drawing to start a new set of rows of single-line text
Press Tab or Shift+Tab to move forward and back between the sets of single-
line text
Press Alt and click a text object to edit a set of text lines
LAYER - LA
Use layers to control the visibility of objects and to
assign properties such as color and linetype. Objects on
a layer normally assume the properties of that layer.
However, you can override any layer property of an
object. For example, if an object’s color property is set
to BYLAYER, the object displays the color of that layer.
If the object’s color is set to Red, the object displays as
red, regardless of the color assigned to that layer.
type layer command and click
on the new icon to make new
layer.
Assign the color, linetype or line
weight to the selected layer
Select object and move onto the
particular layer you created.
computer graphics lab
27
BLOCK - B
Blocks are the collection of geometries that act as a
single object and they can be used in a drawing
repetitively.
Names the block. The name can have up to 255
characters and can include letters, numbers, blank
spaces, and any special character not used by the
operating system or the program for other purposes.
The block name and definition are saved in the
current drawing.
Preview
If an existing block is selected under Name, displays a
preview of the block.
Base Point
Specifies an insertion base point for the block. The
default value is 0,0,0.
Specify On-Screen
Prompts you to specify the base point when the dialog
box is closed.
Pick Insertion Base Point
Temporarily closes the dialog box so that you can
specify an insertion base point in the current drawing.
We could also find the pre-installed Blocks using
Designcentre on AutoCAD Software.
1. Type – DC
2. Find the desired blocks on design center tab right
side of the computer screen.
3. Simply Drag and drop the required block.
computer graphics lab
28
Tolerence
A feature control frame consists of two or more
components. The first feature control frame contains
a symbol that represents the geometric characteristic
to which a tolerance is being applied, for example,
location, profile, form, orientation, or runout. Form
tolerances control straightness, flatness, circularity
and cylindricity; profiles control line and surface. In
the illustration, the characteristic is position.
You can use most editing commands and grips to
change feature control frames, and you can snap to
them using object snaps.
You can also create tolerances that use annotative scaling. For more information about creating and
working with an annotative tolerance, see About Creating Annotative Dimensions and Tolerances,
and About Scaling Annotations
COMPUTER AIDED DESIGNING
Computer aided designing A new part model accurately captures a design from a concept through solid
feature-based modeling. A part model enables you to graphically view the product before it is
manufactured. A part model can be used to:
Capture mass property information.
Vary design parameters to determine the best options.
Graphically visualize a model before it is manufactured.
computer graphics lab
29
PARAMETRIC DESIGN CONCEPT
Parametric models are value-driven, using dimensions and parameters to define the size and location of
the 3D part model. If you edit the value of a feature dimension, that features updates accordingly. The
change then automatically propagates through the related features in the model and eventually updates
the entire part.
BIDIRECTIONAL ASSOCIATIVITY
Bi-directional associativity means that all changes made to an object in any mode of 3D design Software,
Whether it’s on Single part model, Assembly part model or Drawing 3D Part Modeling Design Software
are automatically reflected in every related mode. For example if you made a change in drawing is
directly reflect in part being Designed and also
reflected in every assembly using the part model.
According to Design associativity Assembly
design is not a large file containing copies of every
part in the assembly, but rather it containing files
associative links to every model used in assembly.
In another words, all files are linked or
associate with each other if you change the one
another one will update automatically
accordingly.
SOLIDWORKS – 3D Design Software
Solidworks is a 3d modeling software produced by Dassault system corp. ltd. Solid works is a CAD Tool
and its Parametric Feature based system it’s allows you to create 3d parts, assemblies and 2d drawings.
Parametric modeling everything is control by either Parameter, relations and dimensions. The basic
requirement for creating a solid model in every 3d CAD tool is a sketch. The sketch for the features is
drawn in the sketch ribbon inside the solid works. Let’s discuss each and every drawing and 3d tools
with some practical examples.
part
assembly
drawing
computer graphics lab
30
Before stating solidworks let’s familiar with the user interface of the software. When software starts
choose “new” for the creating new drawing part file.
You have 3 option available to you on
your solidworks screen 1. Part, 2.
Assembly and 3. Drawing
Choose part (either double click on in or
just click once and press “OK”.
Choose sketch ribbon in the solid works screen and select first plane,
front, top and right and click on the sketch icon.
Sketch environment is highlighted and we can draw the various 2d
drawing using 2d drawing sketching in solid works.
For setting the initial units setting in solidworks go to
“tools>options>click documents and properties > click on “UNITS”
and choose your default units what you need to choose e.g. mmgs
(millimeters, grams, second)
IPS (inch, pound, second).
computer graphics lab
31
PRACTICAL -1
3D DESIGN USING SOLIDWORKS 2015
Open sketch environment in solidworks choose one of default plane (say front) and click on the circle
icon on the sketch toolbar ribbon.
Draw a circle inside the drawing area first then choose smart dimension icon on the sketch ribbon or
right click and drag the mouse courser to UP
you’ve automatically chosen smart
dimension tool. Select the circle and give
the proper dimension as per given drawing.
Draw the same circle of diameter of 60 mm
from the same center point. Then draw the
line as per given drawing and give
dimensions with smart dimension tool.
computer graphics lab
32
when we done by 2D sketching
we must use the trim tool icon
shown in sketch ribbon at
solidworks ribbon panel and
click on the power trim option
available on the right side of
the properties toolbar and
select the line you need to erase
and it will automatically delete
or disappear from the screen.
The final object is ready as per
shown in the 2D sketch
Diagram.
(You can also put the relationships in the object just
click the first object and second object holding down
the “ctrl” key the relation between the both object you
have selected will automatically appear on the right
side on the properties toolbar and you can choose the
appropriate desired relation you want to put on to
define the object.
Now Choose or click on the “feature” ribbon and choose ‘Extruded
Boss/Base’ and your object will automatically get stretched at
backward direction you can simply put the dimension of extrusion
say 40mm. click on OK .
computer graphics lab
33
final object is ready as per the dimension given in the 2D diagram. We have generally four universal 3D
tools which is mostly used in every 3D Design software.
1. Extrude – Extrude is generally
used to extrude or stretched the
object.
2. Revolve- it’s rotates the 2D object
with the help of one reference line.
3. Loft – Loft is generally used to
join the 2 or more 2d objects into a
single solid body.
4. Sweep – The Sweep tool is used to
create solid/surface feature
by sweeping closed loop sketch
along the selected trajectory.
DIMENSIONING AND TOLERANCING
Geometric dimensioning and tolerancing (GD&T) is a system for defining and communicating
engineering tolerances. It uses a symbolic language on engineering drawings and computer-generated
three-dimensional solid models that explicitly describe nominal geometry and its allowable variation.
If we used Solidworks to make Geometric Dimensioning only one tool is fair enough to specify the
whole dimension here is the following list you could use to mark dimensions using solidworks
AutoCAD® SOLIDWORKS®
Tool Tooltip Command Tool Tooltip Toolbar
Linear
Dimension
DIMLINEAR Smart Dimension Dimensions/Relations.
See Dimensions/Relations Toolbar
and Menus in the main
SOLIDWORKS help.
Aligned
Dimension
DIMALIGNED Smart Dimension Dimensions/Relations
Ordinate
Dimension
DIMORDINATE Ordinate Dimension Dimensions/Relations
Also tools for horizontal and vertical
ordinate dimensions
Radius
Dimension
DIMRADIUS Smart Dimension Dimensions/Relations
Diameter
Dimension
DIMDIAMETER Smart Dimension Dimensions/Relations
Angular
Dimension
DIMANGULAR Smart Dimension Dimensions/Relations
computer graphics lab
34
AutoCAD®
SOLIDWORKS®
Tool Tooltip Command Tool Tooltip Toolbar
Quick
Dimension
QDIM Smart
DimensionAutodimension tab
Dimensions/Relations
Dimension a complete sketch or
drawing
Baseline
Dimension
DIMBASELINE Baseline Dimension Dimensions/Relations
Also tools for horizontal and vertical
baseline dimensions
Continue
Dimension
DIMCONTINUE Smart Dimension Dimensions/Relations
Tolerance TOLERANCE Geometric Tolerance Annotations. See Annotations
Toolbar in the main SOLIDWORKS
help.
Center
Mark
DIMCENTER Center Mark Annotations
Dimension
Edit
DIMEDIT - - -
Double-click dimension and edit
in Modify dialog box
Dimension
Text Edit
DIMTEDIT - - -
Select dimension and edit text
in Dimension
ValuePropertyManager
Dimension
Update
DIMSTYLE
APPLY
- - -
Dim Style
Control
Dimension Style
Default
- - -
Dimension
Style
DIMSTYLE - - -
Define, edit, and apply Dimension Styles in Dimension
Leaders PropertyManager for DIMSTYLE APPLY, Style Default, and
DIMSTYLE
computer graphics lab
35
TOLERANCING
Geometric dimensioning and tolerancing (GD&T) is a system for defining and communicating
engineering tolerances. It uses a symbolic language on engineering drawings and computer-generated
three-dimensional solid models that explicitly describe nominal geometry and its allowable variation.
SYMBOL
Select a symbol.
Straightness Flatness Circularity Cylindricity Profile of Line
Profile of Surface Parallel Perpendicular Angularity Circular Runout
Total Runout Position Concentricity Symmetry None
MATERIAL CONDITIONS
Select a material condition. The pointer must be in a Tolerance or Primary, Secondary, or Tertiary box
to insert a material condition.
Only the material conditions that are appropriate for the selected symbol are available.
computer graphics lab
36
Diameter Spherical Diameter Maximum Material Condition
Least Material Condition Regardless of Feature Size Tangent Plane
Free State Statistical Projected Tolerance
Square Unequally Disposed Profile Translation
HEIGHT
If you click Projected Tolerance , enter a projected tolerance zone (PTZ) in Height.
Tolerances
Type tolerance values for Tolerance 1 and Tolerance 2.
computer graphics lab
37
Unit Basis Tolerance
You can apply flatness and straightness tolerances on a unit basis. You apply a unit basis tolerance by
following the tolerance value with a forward slash (/) and entering the per-unit area or per-unit length
criteria.
Primary, Secondary, and Tertiary
Enter datum names and material condition symbols for the Primary, Secondary, and Tertiary datums.
Frames
Create additional frames. You can set as many frames as needed. Use the Frames box to move among
frames. You can see only two frames in the dialog box at a time.
Composite Frame
Combines the symbols of two frames.
Below Frame
Add text below the feature control frame.
Between Two Points
Type the labels of the points if the tolerance value applies between two points or entities.
computer graphics lab
2
MODULE NO. 4
Simple team design project
computer graphics lab
3
GEOMETRY AND TOPOLOGY OF ENGINEERING COMPONENT
The method of representing the shapes of a boundary using the limits is know as Boundary
representation. The boundary representation of a model are composed of two parts, 1. Geometry 2.
Topology the main topological items are edges, vertices and face. A face is a bounded portion of
a surface; an edge is a bounded piece of a curve and a vertex lies at a point.
1. To create surface first we must create a messed boundary on a surface of the model
2. Specify the points where we want to stretch the surface boundary
3. Click and drag until you get the desired topological shape of a boundary surface.
BIM – Building Information Modeling
BIM (Building Information Modeling) is an intelligent 3D model-based process that gives architecture
engineering and construction (AEC) professionals the insight and tools to more efficiently plan, design,
construct, and manage buildings and infrastructure.

More Related Content

What's hot

Rayat institute of engineering and information technology(final)
Rayat institute of engineering and information technology(final)Rayat institute of engineering and information technology(final)
Rayat institute of engineering and information technology(final)Yogesh Thakur
 
Lesson 1 - Introduction to CAD/CAM
Lesson 1 - Introduction to CAD/CAMLesson 1 - Introduction to CAD/CAM
Lesson 1 - Introduction to CAD/CAMNeilOw87
 
computer aided design
computer aided design computer aided design
computer aided design Naveen Teja
 
Kapilppt auto cad_show
Kapilppt auto cad_showKapilppt auto cad_show
Kapilppt auto cad_showKapil Kumar
 
COMPUTER AIDED DESIGN - CAD
COMPUTER AIDED DESIGN - CADCOMPUTER AIDED DESIGN - CAD
COMPUTER AIDED DESIGN - CADNina Donard
 
computer aided design
computer aided design computer aided design
computer aided design Amita Gautam
 
ppt on summer training on solidworks
ppt on summer training on solidworksppt on summer training on solidworks
ppt on summer training on solidworksShubham Agarwal
 
Benefits of Computer Aided Design
Benefits of Computer Aided DesignBenefits of Computer Aided Design
Benefits of Computer Aided DesignJohn Paul
 
Software training report on AutoCAD and Staad Pro. Civil Engineering
Software training report on AutoCAD and Staad Pro. Civil EngineeringSoftware training report on AutoCAD and Staad Pro. Civil Engineering
Software training report on AutoCAD and Staad Pro. Civil EngineeringJAPJEETSINGH13
 
Software important to learn in mechanical engineering
Software important to learn in mechanical engineeringSoftware important to learn in mechanical engineering
Software important to learn in mechanical engineeringramakrishnanpravin
 
Catia training - Ikya Global Edu
Catia training - Ikya Global EduCatia training - Ikya Global Edu
Catia training - Ikya Global Eduikya global
 
Intro to CAD CAM Tools
Intro to CAD CAM ToolsIntro to CAD CAM Tools
Intro to CAD CAM ToolsAbhay Gore
 
Solidworks training report
Solidworks training reportSolidworks training report
Solidworks training reportPawan Kumar
 
Computer applications in architecture
Computer applications in architectureComputer applications in architecture
Computer applications in architectureDipitaGupta
 
Technical Drafting Learning Module v.2.0
Technical Drafting Learning Module v.2.0Technical Drafting Learning Module v.2.0
Technical Drafting Learning Module v.2.0Bogs De Castro
 
Cad computer-aided design, cad engineering and design
Cad computer-aided design, cad engineering and designCad computer-aided design, cad engineering and design
Cad computer-aided design, cad engineering and designmeheng1001
 

What's hot (20)

Rayat institute of engineering and information technology(final)
Rayat institute of engineering and information technology(final)Rayat institute of engineering and information technology(final)
Rayat institute of engineering and information technology(final)
 
Lesson 1 - Introduction to CAD/CAM
Lesson 1 - Introduction to CAD/CAMLesson 1 - Introduction to CAD/CAM
Lesson 1 - Introduction to CAD/CAM
 
computer aided design
computer aided design computer aided design
computer aided design
 
Kapilppt auto cad_show
Kapilppt auto cad_showKapilppt auto cad_show
Kapilppt auto cad_show
 
COMPUTER AIDED DESIGN - CAD
COMPUTER AIDED DESIGN - CADCOMPUTER AIDED DESIGN - CAD
COMPUTER AIDED DESIGN - CAD
 
computer aided design
computer aided design computer aided design
computer aided design
 
ppt on summer training on solidworks
ppt on summer training on solidworksppt on summer training on solidworks
ppt on summer training on solidworks
 
CAD/CAM/CIM (Lecture 1 CAD)
CAD/CAM/CIM  (Lecture 1 CAD)CAD/CAM/CIM  (Lecture 1 CAD)
CAD/CAM/CIM (Lecture 1 CAD)
 
Cad
CadCad
Cad
 
Benefits of Computer Aided Design
Benefits of Computer Aided DesignBenefits of Computer Aided Design
Benefits of Computer Aided Design
 
What is CAD?
What is CAD?What is CAD?
What is CAD?
 
Software training report on AutoCAD and Staad Pro. Civil Engineering
Software training report on AutoCAD and Staad Pro. Civil EngineeringSoftware training report on AutoCAD and Staad Pro. Civil Engineering
Software training report on AutoCAD and Staad Pro. Civil Engineering
 
Software important to learn in mechanical engineering
Software important to learn in mechanical engineeringSoftware important to learn in mechanical engineering
Software important to learn in mechanical engineering
 
Catia training - Ikya Global Edu
Catia training - Ikya Global EduCatia training - Ikya Global Edu
Catia training - Ikya Global Edu
 
Intro to CAD CAM Tools
Intro to CAD CAM ToolsIntro to CAD CAM Tools
Intro to CAD CAM Tools
 
Solidworks training report
Solidworks training reportSolidworks training report
Solidworks training report
 
1. cad fundamental
1. cad fundamental1. cad fundamental
1. cad fundamental
 
Computer applications in architecture
Computer applications in architectureComputer applications in architecture
Computer applications in architecture
 
Technical Drafting Learning Module v.2.0
Technical Drafting Learning Module v.2.0Technical Drafting Learning Module v.2.0
Technical Drafting Learning Module v.2.0
 
Cad computer-aided design, cad engineering and design
Cad computer-aided design, cad engineering and designCad computer-aided design, cad engineering and design
Cad computer-aided design, cad engineering and design
 

Similar to Computer graphics

K to 12_entrep-based_technical_drafting_learning_module
K to 12_entrep-based_technical_drafting_learning_moduleK to 12_entrep-based_technical_drafting_learning_module
K to 12_entrep-based_technical_drafting_learning_moduleGilbert Bautista
 
Introduction to Computer Graphics
Introduction to Computer GraphicsIntroduction to Computer Graphics
Introduction to Computer GraphicsYatin Singh
 
AutoCAD 2D training report
AutoCAD 2D training reportAutoCAD 2D training report
AutoCAD 2D training reportSTAY CURIOUS
 
technical drafting.pptx
technical drafting.pptxtechnical drafting.pptx
technical drafting.pptxdexdexjoyjoy
 
AutoCAD is a 2D and 3D computer desi.pptx
AutoCAD is a 2D and 3D computer desi.pptxAutoCAD is a 2D and 3D computer desi.pptx
AutoCAD is a 2D and 3D computer desi.pptxinnocentvk155
 
Introductiuon to cad
Introductiuon to cadIntroductiuon to cad
Introductiuon to cadnayakq
 
Part 1-Introduction to CAD-CAM-CAE.pptx
Part 1-Introduction to CAD-CAM-CAE.pptxPart 1-Introduction to CAD-CAM-CAE.pptx
Part 1-Introduction to CAD-CAM-CAE.pptxKhalil Alhatab
 
Autocad civil project file
Autocad civil project fileAutocad civil project file
Autocad civil project filenaveen899
 
Cad cam report-final (mechanical workshop)
Cad cam report-final (mechanical workshop)Cad cam report-final (mechanical workshop)
Cad cam report-final (mechanical workshop)Parthibanraj Selvaraj
 
Classification Engineering graphics & design
Classification Engineering graphics & designClassification Engineering graphics & design
Classification Engineering graphics & designManish Gupta
 
Power point Presentation on AutoCAD And NX software
Power point Presentation on AutoCAD And NX softwarePower point Presentation on AutoCAD And NX software
Power point Presentation on AutoCAD And NX softwareVimalJasoliya1
 
AutoCad 2D shortcut Keys
AutoCad 2D shortcut KeysAutoCad 2D shortcut Keys
AutoCad 2D shortcut KeysNzar Braim
 

Similar to Computer graphics (20)

AutoCAD Tutorial AB.pptx
AutoCAD Tutorial AB.pptxAutoCAD Tutorial AB.pptx
AutoCAD Tutorial AB.pptx
 
K to 12_entrep-based_technical_drafting_learning_module
K to 12_entrep-based_technical_drafting_learning_moduleK to 12_entrep-based_technical_drafting_learning_module
K to 12_entrep-based_technical_drafting_learning_module
 
Technical drafting
Technical draftingTechnical drafting
Technical drafting
 
Introduction to Computer Graphics
Introduction to Computer GraphicsIntroduction to Computer Graphics
Introduction to Computer Graphics
 
AutoCAD 2D training report
AutoCAD 2D training reportAutoCAD 2D training report
AutoCAD 2D training report
 
technical drafting.pptx
technical drafting.pptxtechnical drafting.pptx
technical drafting.pptx
 
CAD.ppt
CAD.pptCAD.ppt
CAD.ppt
 
AUTOCAD-REVIEW-2.pdf
AUTOCAD-REVIEW-2.pdfAUTOCAD-REVIEW-2.pdf
AUTOCAD-REVIEW-2.pdf
 
autocad.pptx
autocad.pptxautocad.pptx
autocad.pptx
 
Aragaw Gebremedhin auto cad lecture notes
Aragaw Gebremedhin auto cad lecture notesAragaw Gebremedhin auto cad lecture notes
Aragaw Gebremedhin auto cad lecture notes
 
CAD/CAE
CAD/CAECAD/CAE
CAD/CAE
 
AutoCAD is a 2D and 3D computer desi.pptx
AutoCAD is a 2D and 3D computer desi.pptxAutoCAD is a 2D and 3D computer desi.pptx
AutoCAD is a 2D and 3D computer desi.pptx
 
Introductiuon to cad
Introductiuon to cadIntroductiuon to cad
Introductiuon to cad
 
Part 1-Introduction to CAD-CAM-CAE.pptx
Part 1-Introduction to CAD-CAM-CAE.pptxPart 1-Introduction to CAD-CAM-CAE.pptx
Part 1-Introduction to CAD-CAM-CAE.pptx
 
Autocad civil project file
Autocad civil project fileAutocad civil project file
Autocad civil project file
 
Cad cam report-final (mechanical workshop)
Cad cam report-final (mechanical workshop)Cad cam report-final (mechanical workshop)
Cad cam report-final (mechanical workshop)
 
Classification Engineering graphics & design
Classification Engineering graphics & designClassification Engineering graphics & design
Classification Engineering graphics & design
 
Power point Presentation on AutoCAD And NX software
Power point Presentation on AutoCAD And NX softwarePower point Presentation on AutoCAD And NX software
Power point Presentation on AutoCAD And NX software
 
AutoCad 2D shortcut Keys
AutoCad 2D shortcut KeysAutoCad 2D shortcut Keys
AutoCad 2D shortcut Keys
 
CAD vs CAE
CAD vs CAECAD vs CAE
CAD vs CAE
 

Recently uploaded

Effects of rheological properties on mixing
Effects of rheological properties on mixingEffects of rheological properties on mixing
Effects of rheological properties on mixingviprabot1
 
Call Us ≽ 8377877756 ≼ Call Girls In Shastri Nagar (Delhi)
Call Us ≽ 8377877756 ≼ Call Girls In Shastri Nagar (Delhi)Call Us ≽ 8377877756 ≼ Call Girls In Shastri Nagar (Delhi)
Call Us ≽ 8377877756 ≼ Call Girls In Shastri Nagar (Delhi)dollysharma2066
 
Electronically Controlled suspensions system .pdf
Electronically Controlled suspensions system .pdfElectronically Controlled suspensions system .pdf
Electronically Controlled suspensions system .pdfme23b1001
 
Call Girls Narol 7397865700 Independent Call Girls
Call Girls Narol 7397865700 Independent Call GirlsCall Girls Narol 7397865700 Independent Call Girls
Call Girls Narol 7397865700 Independent Call Girlsssuser7cb4ff
 
Gurgaon ✡️9711147426✨Call In girls Gurgaon Sector 51 escort service
Gurgaon ✡️9711147426✨Call In girls Gurgaon Sector 51 escort serviceGurgaon ✡️9711147426✨Call In girls Gurgaon Sector 51 escort service
Gurgaon ✡️9711147426✨Call In girls Gurgaon Sector 51 escort servicejennyeacort
 
Sachpazis Costas: Geotechnical Engineering: A student's Perspective Introduction
Sachpazis Costas: Geotechnical Engineering: A student's Perspective IntroductionSachpazis Costas: Geotechnical Engineering: A student's Perspective Introduction
Sachpazis Costas: Geotechnical Engineering: A student's Perspective IntroductionDr.Costas Sachpazis
 
Call Girls Delhi {Jodhpur} 9711199012 high profile service
Call Girls Delhi {Jodhpur} 9711199012 high profile serviceCall Girls Delhi {Jodhpur} 9711199012 high profile service
Call Girls Delhi {Jodhpur} 9711199012 high profile servicerehmti665
 
Architect Hassan Khalil Portfolio for 2024
Architect Hassan Khalil Portfolio for 2024Architect Hassan Khalil Portfolio for 2024
Architect Hassan Khalil Portfolio for 2024hassan khalil
 
IVE Industry Focused Event - Defence Sector 2024
IVE Industry Focused Event - Defence Sector 2024IVE Industry Focused Event - Defence Sector 2024
IVE Industry Focused Event - Defence Sector 2024Mark Billinghurst
 
Arduino_CSE ece ppt for working and principal of arduino.ppt
Arduino_CSE ece ppt for working and principal of arduino.pptArduino_CSE ece ppt for working and principal of arduino.ppt
Arduino_CSE ece ppt for working and principal of arduino.pptSAURABHKUMAR892774
 
Heart Disease Prediction using machine learning.pptx
Heart Disease Prediction using machine learning.pptxHeart Disease Prediction using machine learning.pptx
Heart Disease Prediction using machine learning.pptxPoojaBan
 
Artificial-Intelligence-in-Electronics (K).pptx
Artificial-Intelligence-in-Electronics (K).pptxArtificial-Intelligence-in-Electronics (K).pptx
Artificial-Intelligence-in-Electronics (K).pptxbritheesh05
 
GDSC ASEB Gen AI study jams presentation
GDSC ASEB Gen AI study jams presentationGDSC ASEB Gen AI study jams presentation
GDSC ASEB Gen AI study jams presentationGDSCAESB
 
An experimental study in using natural admixture as an alternative for chemic...
An experimental study in using natural admixture as an alternative for chemic...An experimental study in using natural admixture as an alternative for chemic...
An experimental study in using natural admixture as an alternative for chemic...Chandu841456
 
Application of Residue Theorem to evaluate real integrations.pptx
Application of Residue Theorem to evaluate real integrations.pptxApplication of Residue Theorem to evaluate real integrations.pptx
Application of Residue Theorem to evaluate real integrations.pptx959SahilShah
 
Work Experience-Dalton Park.pptxfvvvvvvv
Work Experience-Dalton Park.pptxfvvvvvvvWork Experience-Dalton Park.pptxfvvvvvvv
Work Experience-Dalton Park.pptxfvvvvvvvLewisJB
 
Gfe Mayur Vihar Call Girls Service WhatsApp -> 9999965857 Available 24x7 ^ De...
Gfe Mayur Vihar Call Girls Service WhatsApp -> 9999965857 Available 24x7 ^ De...Gfe Mayur Vihar Call Girls Service WhatsApp -> 9999965857 Available 24x7 ^ De...
Gfe Mayur Vihar Call Girls Service WhatsApp -> 9999965857 Available 24x7 ^ De...srsj9000
 

Recently uploaded (20)

Effects of rheological properties on mixing
Effects of rheological properties on mixingEffects of rheological properties on mixing
Effects of rheological properties on mixing
 
Call Us ≽ 8377877756 ≼ Call Girls In Shastri Nagar (Delhi)
Call Us ≽ 8377877756 ≼ Call Girls In Shastri Nagar (Delhi)Call Us ≽ 8377877756 ≼ Call Girls In Shastri Nagar (Delhi)
Call Us ≽ 8377877756 ≼ Call Girls In Shastri Nagar (Delhi)
 
Electronically Controlled suspensions system .pdf
Electronically Controlled suspensions system .pdfElectronically Controlled suspensions system .pdf
Electronically Controlled suspensions system .pdf
 
Call Girls Narol 7397865700 Independent Call Girls
Call Girls Narol 7397865700 Independent Call GirlsCall Girls Narol 7397865700 Independent Call Girls
Call Girls Narol 7397865700 Independent Call Girls
 
Gurgaon ✡️9711147426✨Call In girls Gurgaon Sector 51 escort service
Gurgaon ✡️9711147426✨Call In girls Gurgaon Sector 51 escort serviceGurgaon ✡️9711147426✨Call In girls Gurgaon Sector 51 escort service
Gurgaon ✡️9711147426✨Call In girls Gurgaon Sector 51 escort service
 
Sachpazis Costas: Geotechnical Engineering: A student's Perspective Introduction
Sachpazis Costas: Geotechnical Engineering: A student's Perspective IntroductionSachpazis Costas: Geotechnical Engineering: A student's Perspective Introduction
Sachpazis Costas: Geotechnical Engineering: A student's Perspective Introduction
 
Call Girls Delhi {Jodhpur} 9711199012 high profile service
Call Girls Delhi {Jodhpur} 9711199012 high profile serviceCall Girls Delhi {Jodhpur} 9711199012 high profile service
Call Girls Delhi {Jodhpur} 9711199012 high profile service
 
Architect Hassan Khalil Portfolio for 2024
Architect Hassan Khalil Portfolio for 2024Architect Hassan Khalil Portfolio for 2024
Architect Hassan Khalil Portfolio for 2024
 
IVE Industry Focused Event - Defence Sector 2024
IVE Industry Focused Event - Defence Sector 2024IVE Industry Focused Event - Defence Sector 2024
IVE Industry Focused Event - Defence Sector 2024
 
Arduino_CSE ece ppt for working and principal of arduino.ppt
Arduino_CSE ece ppt for working and principal of arduino.pptArduino_CSE ece ppt for working and principal of arduino.ppt
Arduino_CSE ece ppt for working and principal of arduino.ppt
 
Heart Disease Prediction using machine learning.pptx
Heart Disease Prediction using machine learning.pptxHeart Disease Prediction using machine learning.pptx
Heart Disease Prediction using machine learning.pptx
 
Artificial-Intelligence-in-Electronics (K).pptx
Artificial-Intelligence-in-Electronics (K).pptxArtificial-Intelligence-in-Electronics (K).pptx
Artificial-Intelligence-in-Electronics (K).pptx
 
GDSC ASEB Gen AI study jams presentation
GDSC ASEB Gen AI study jams presentationGDSC ASEB Gen AI study jams presentation
GDSC ASEB Gen AI study jams presentation
 
An experimental study in using natural admixture as an alternative for chemic...
An experimental study in using natural admixture as an alternative for chemic...An experimental study in using natural admixture as an alternative for chemic...
An experimental study in using natural admixture as an alternative for chemic...
 
Design and analysis of solar grass cutter.pdf
Design and analysis of solar grass cutter.pdfDesign and analysis of solar grass cutter.pdf
Design and analysis of solar grass cutter.pdf
 
Application of Residue Theorem to evaluate real integrations.pptx
Application of Residue Theorem to evaluate real integrations.pptxApplication of Residue Theorem to evaluate real integrations.pptx
Application of Residue Theorem to evaluate real integrations.pptx
 
9953056974 Call Girls In South Ex, Escorts (Delhi) NCR.pdf
9953056974 Call Girls In South Ex, Escorts (Delhi) NCR.pdf9953056974 Call Girls In South Ex, Escorts (Delhi) NCR.pdf
9953056974 Call Girls In South Ex, Escorts (Delhi) NCR.pdf
 
Work Experience-Dalton Park.pptxfvvvvvvv
Work Experience-Dalton Park.pptxfvvvvvvvWork Experience-Dalton Park.pptxfvvvvvvv
Work Experience-Dalton Park.pptxfvvvvvvv
 
POWER SYSTEMS-1 Complete notes examples
POWER SYSTEMS-1 Complete notes  examplesPOWER SYSTEMS-1 Complete notes  examples
POWER SYSTEMS-1 Complete notes examples
 
Gfe Mayur Vihar Call Girls Service WhatsApp -> 9999965857 Available 24x7 ^ De...
Gfe Mayur Vihar Call Girls Service WhatsApp -> 9999965857 Available 24x7 ^ De...Gfe Mayur Vihar Call Girls Service WhatsApp -> 9999965857 Available 24x7 ^ De...
Gfe Mayur Vihar Call Girls Service WhatsApp -> 9999965857 Available 24x7 ^ De...
 

Computer graphics

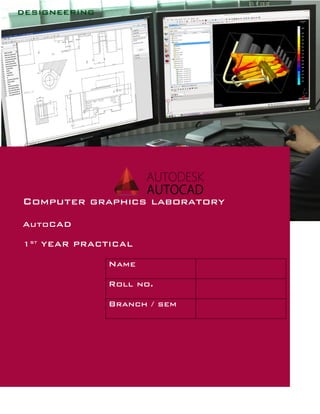
  • 1. Computer graphics laboratory AutoCAD 1st YEAR PRACTICAL Name Roll no. Branch / sem
  • 2. computer graphics lab 2 Preface Hi I’m Ashish Kumar yadav and I’m a Mechanical Design Engineer by Profession and having 5 years of CAD designing and training experience. It is very important for every engineer to be well equipped with the modern engineering design tools to fight with the way ahead with modern world. we never imagine any project without proper engineering design. The AutoCAD software helps you to create Engineering drafting more quickly and Precisely. This laboratory booklet will help you to create 2D drawings using AutoCAD drafting software to make effective engineering graphic drawings. This booklet covers the whole Practical which is referred by various universities as a syllabus named computer graphics for the 1st year Engineering students. I hope you will find information which helps you to complete the computer graphics practical task using CAD tool like AutoCAD. Er.Ashish Kumar Yadav
  • 3. computer graphics lab 3 TABLE OF CONTENT 1, Overview of Computer Graphics - Page no. – 05 – 09 listing the computer technologies that impact on graphical communication, Demonstrating knowledge of the theory of CAD software [such as: The Menu System, Toolbars (Standard, Object Properties, Draw, Modify and Dimension), Drawing Area (Background, Crosshairs, Coordinate System), Dialog boxes and windows, Shortcut menus (Button Bars), The Command Line (where applicable), The Status Bar, Different methods of zoom as used in CAD, Select and erase objects.; Isometric Views of lines, Planes, Simple and compound Solids]; 2, Customization & CAD Drawing - Page no. – 10 – 23 consisting of set up of the drawing page and the printer, including scale settings, setting up of units and drawing limits; ISO and ANSI standards for coordinate dimensioning and tolerance; Orthographic constraints, Snap to objects manually and automatically; Producing drawings by using various coordinate input entry methods to draw straight lines, Applying various ways of drawing circles; 3. Annotations, Layering & other Functions- Page no. – 24 – 38 applying dimensions to objects, applying annotations to drawings; Setting up and use of Layers, layers to create drawings, Create, edit and use customized layers; Changing line lengths through modifying existing lines (extend/lengthen); Printing documents to paper using the print command; orthographic projection techniques; Drawing sectional views of composite right regular geometric solids and project the true shape of the sectioned surface; Drawing annotation, Computer-aided design (CAD) software modeling of parts and assemblies. Parametric and non-parametric solid, surface, and wireframe models. Part editing and two-dimensional documentation of models. Planar projection theory, including sketching of perspective, isometric, multi-view, auxiliary, and section views. Spatial visualization exercises. Dimensioning guidelines, tolerance techniques; dimensioning and scale multi views of dwelling;
  • 4. computer graphics lab 4 4. Demonstration of a Simple Team Design Project. Geometry and topology of engineered components: creation of engineering models and their presentation in standard 2D blueprint form and as 3D wire-frame and shaded solids; meshed topologies for engineering analysis and tool-path generation for component manufacture; geometric dimensioning and tolerance; Use of solid-modeling software for creating associative models at the component and assembly levels; floor plans that include: windows, doors, and fixtures such as WC, bath, sink, shower, etc. Applying color coding according to building drawing practice; Drawing sectional elevation showing foundation to ceiling; Introduction to Building Information Modelling (BIM). -------------
  • 5. computer graphics lab 5 MODULE NO. 1 OVERVIEW OF THE COMPUTER GRAPHICS
  • 6. computer graphics lab 6 INTRODUCTION CAD, or computer-aided design and drafting (CADD), is the use of computer technology for design and design documentation. CAD software replaces manual drafting with an automated process. If you work in the architecture, MEP or structural engineering fields, you have probably used 2D or 3D CAD program. These programmers can help you to explore design ideas, visualize concepts through photorealistic renderings and simulate how a design will perform in the real world. AutoCAD software was the first CAD programme and it is still the most widely used CAD application. CAD is an example of the pervasive effect computers were beginning to have on industry. Current computer-aided design software packages range from 2D vector-based drafting systems to 3D solid and surface modelers. Modern CAD packages can also frequently allow rotations in three dimensions, allowing viewing of a designed object from any desired angle, even from the inside looking out. Some CAD software is capable of dynamic mathematical modeling. Advantages of the CAD software 1. Accurate Design - It has ability to producing very accurate designs. And drawing can be created in 2D or 3D . 2. Easy to modify- modifying the CAD geometry is easy; you will always have “copy” “cut” paste and delete and move or some similar editing option available with each of the package. 3. Easy to Reproduce- Draftsmen used to take days to complete a drawing by manual drafting, and reproducing the drawing means recreating the drawing from the beginning. But, in case of the CAD, you can reproduce the drawing in no time and makes as many copies as you can. 4. Computer aided manufacturing- The 3D CAD geometry is used as input for the CAM packages for generates NC codes. The manual drawings cannot be used for CAM packages. 5. Environmental Friendly – Manual drawings are necessarily created on the paper, but the CAD drawings can be stored and used electronically without using paper. 6. Access Control – some of the drawings and design documents are very crucial for a company business, and such drawings should not be accessible to all. Providing are easy for the CAD drawings. Strict access control and maintaining confidentiality is difficult in manual drawing.
  • 7. computer graphics lab 7 Choose Start ➢ All Programs ➢ Autodesk ➢ AutoCAD 2018 ➢ AutoCAD 2018. You can also double-click the AutoCAD 2018 icon on your Windows Desktop. The AutoCAD Start tab appears, offering options to open existing drawings or to create a new drawing. You may also see the Design Feed panel, which allows you to use a cloud-based collaboration feature. Click the Start Drawing thumbnail in the left side of the view under “Get Started”. AutoCAD 2018 Main Window AutoCAD Program windows generally divided into several parts: - Application Menu Quick Access toolbar Info Center Ribbon Drawing Tabs Drawing Area UCS icon (User Coordinate System) View Cube Navigation Bar Command Windows Status Bar
  • 8. computer graphics lab 8 Application Menu – Application Menu helps you to manage your AutoCAD Design files. It is File Pull- Down menu which appears by pressing the big A button top left corner of the software. This application menu gives you a way to find recently used files or go to the file which already have open. Save the drawing using save button or import-export other design formats to CAD format or vice versa. Quick Access Toolbar- Quick access toolbar is at the top of the drawing area and next to the Application menu which is used to includes the basic file-handling function, which you find mostly in all windows programs. Info Center - The InfoCenter is the AutoCAD online help facility. There you’ll find a comprehensive set of help topics and tools, including video tutorials and the standard help documentation. As with any other programs, you can obtain context-sensitive help by pressing the F1 function key. Ribbon - The Ribbon uses icons to provide nearly all of the commands that you’ll need; you’ll learn more about it in the section “ Drawing Tabs- Just above the drawing area are the Drawing tabs that let you create new drawings or switch between open drawings in a way similar to popular web browsers. Drawing Area- The drawing area occupies most of the screen. Everything you draw appears in this area. As you move your mouse around, crosshairs appear to move within the drawing area. This is the drawing cursor that lets you point to locations in the drawing area.
  • 9. computer graphics lab 9 UCS icon (User Coordinate System) – The UCS icon appears in the lower-left corner. Which looks like arrow of X axis and Y axis which is known as USC icon. View Cube – The ViewCube is primarily for 3D modeling. Which Indicates the current viewing direction. Dragging or clicking the ViewCube rotates the scene. Navigation Bar -Navigation bar along the right edge of the AutoCAD window. This bar offers tools that you can use to get around in your drawing. Basic tools like Zoom and Pan can be found here as well as some advanced tools for viewing 3D models. Command Windows -The Command window, it located just below the drawing area which gives you feedback about the AutoCAD commands as you use them. Status Bar -status bar located just below the command windows, Black strip of Status bar provides icons to switch drafting setting tools on or off and more.
  • 10. computer graphics lab 10 MODULE NO. 2 CUSTOMIZATION & CAD DRAWING
  • 11. computer graphics lab 11 INTRODUCTION In this practical we learn how to set the working area of the AutoCAD software. To do this, we must determine the Measurement system, the drawing sheet or screen size and scale you want to use. Measurement system – Setting the Units In AutoCAD every object is measured in units. You determine the value of units before you start the drawing in software. For Example, a unit is equal to one millimeter of the real-world object, in another drawing a unit might be equal to Inch. To specify the unit system which we want to use we need to set the units in this software. Command – Units - un Measurement system Display of measurement in AutoCAD Scientific 1.55E+01 (inches or metric) Decimal 15.5000 (inches or metric) Engineering 1′-3.5″(input as 1′3.5″) Architectural 1′-31/2″(input as 1′3–1/2″) Fractional 151/2″(input as 15–1/2″) In units settings go to “Type” choose the desired unit standard e.g. 0.000 for the decimal, 1E3 (1000) for the Engineering etc. In “Precision” choose the desired preciseness you need in the drawing e.g. 1.001 for (0.000) and for 0.1 choose 0.0 and for 1 choose “0” Choose the insertion scale of your set perimeter or dimension e.g. millimeters, centimeters, inches, feet etc. Choose the angle type same as your desired units choose before e.g. decimal degrees, engineering, architectural etc. Click on “OK” to set the units and hit the Esc key to get out of the command. Setting up the Drawing Limits : AutoCAD allows you to draw at full scale. You can set up arbitrary boundaries using the limit feature at what size you like to draw. Generally we draw our limit screen size bit larger than the actual drawing size for example if your drawing take 100mm to complete then you must draw 200mm of screen size using limits command in AutoCAD software.
  • 12. computer graphics lab 12 1. Type LIMITS 2. At the Specify the lower-left corner or [ON/OFF] = <0,0> 3. At the Specify the upper-right corner or [ON/OFF] = <500,500> 4. z a - zoom enter – all enter 5. Although it appears that nothing has changed, but you should also draw a rectangle using rectangle tool with same process to visualize the limit area of the screen. QUICK SEETING GUIDE 1. Click the Start tab. 2. Open the Templates drop-down list just below the Star Drawings icon and select acad.dwt (metric users select acadiso.dwt). 3. Open the Application menu, and select Drawing Utilities ➢ Units. You can also type UNITS↵. 4. In the Length group of the Drawing Units dialog box, select Architectural from the Type drop-down list and then click OK. Metric users should leave this setting as Decimal but should select Centimeters from the Insert Scale drop-down list. 5. Enter LIMITS↵, and then press ↵ to accept the default lower-left corner coordinates. 6. For the upper-right corner of the limits, enter 48,26↵. Metric users should enter 122,92↵. 7. Type Z↵A↵ to display the overall area of the drawing set by the limits. 8. Choose Save As from the Application menu and save the file under the name Sink. STUDY THE COORDINATE SYSTEM In AutoCAD various type of Co-ordinates are used which we can discuss here. 1. Absolute Co-ordinate system 2. Relative Rectangular Co-ordinate system. 3. Polar Co-ordinate System. 1. Absolute Co-ordinate system- Absolute coordinates refers to a Cartesian System that uses X, Y, and sometimes a Z-axis to establish a point some distance from a common origin. For example, the picture shows an origin point of '0,0' and the absolute coordinate from that point is '8,7' making it 8 along the X- axis and 7 along the Y-axis.
  • 13. computer graphics lab 13 2. Relative Rectangular Co-ordinate system – Relative coordinates are based on the last point entered. Use relative coordinates when you know the location of a point in relation to the previous point. To specify relative coordinates, precede the coordinate values with an @ sign. For example, entering @3,4 specifies a point 3 units along the X axis and 4 units along the Y axis from the last point specified. The following example draws the sides of a rectangle. The first side is a line starting at the absolute coordinates 0,0 and ending at a point 0 units in the X direction and 0 units in the Y direction. The second side is a line starting at the endpoint of the first line and ending at a point 20 units in the X direction and 0 units in the Y direction. The final line segment uses relative coordinates to return to the starting point. Command: line From point: 0,0 To point: @20,0 To point: @0,20 To point: @-20,0 C 3. Polar Co-ordinate system- Polar Coordinate (Distance and angle) are use to locate the point while creating the objects. To use polar coordinates to specify a point, enter a distance and an angle separated by an angle bracket (<). By default angles increase in the counterclockwise direction and decrease in the clockwise direction. To specify a clockwise direction, enter a negative value for the angle. For example, entering 1<315 locates the same point as entering 1<-45. You can change the angle conventions for the current drawing with the UNITS command. Absolute polar coordinates are measured from the UCS origin (0,0) for example. Command: line From point: 0,0 To point: 20<0 To point: 20<90 To point: 20<180 To point: 20<270 or C
  • 14. computer graphics lab 14 DRAFTING SETTING Drafting settings this dialogue box contains so many tabs like Snap and Grid, Polar tracking, Object snap, Dynamic Input etc. let discuss each tab one by one Right click on the status bar and choose properties the drafting setting box will appears to you in the AutoCAD screen. Command – DSETTINGS 1. Object snap (F3) - it’s used to turns the running snap on and off when the object snap is on it will shows the main snap points of the object which is relative to the other object e.g. end point, midpoint, center point, tangent point, perpendicular etc. 2. Object Snap tracking (F11)- object snap tracking gives the tracking point of the object near to the relative point of another object which is more helpful and no need to draw any extra helping line to follow the object corner, center, quadrant tracking. 3. Dynamic input (F12) - The dynamic input enables the graphics cursor with the power of the command line. Thus, you enter dimensional and command option information as you work, you get immediate feedback when your dynamic input is ON. 4. Snap (F7) and Grid (F9)- Snap and Grid mode is used for the showing the graphical representation and when we move the mouse cursor it will not move freely it will move point to point as we set the graph snap point. e.g. if we set snap 0.5 to 0.5 the mouse cursor moves to the distance .5 on the computer screen. 5. ORTHO MODE (F8) – Ortho mode is used to draw a straight line if we need to draw a perfect straight line you need to on the ortho mode by pressing F8 button on your keyboard. 6. POLAR TRACKING (F10)- Polar tracking is used when we work on the specified angel it will automatically tracks the angel we choose and indicate us with green hidden line indication. You can also choose your custom angle by click on the additional angle>New and put the specified angle you need.
  • 15. computer graphics lab 15 0,0 BASE BASE AutoCAD DRAWING TOOLS Drawing tools in AutoCAD helps to create drawing objects like LINE, CIRCLE, RECTAGLE etc. following tools which is mainly used in AutoCAD to create drawing in Computer Graphics Lab. 1. Line – L Click Home tab Draw panel Line. Find Specify the start point and end point of the line segment. click on the screen and draw a line accordingly. F8 – Ortho mode (to create Straight line in horizontal and vertical direction). 2. Polyline –Pl Polyline Creates a 2D polyline, a single object that is composed of line and arc segments. We should also specify the with of a line by using width option in command bar by pressing W or click on it. 3. Rectangle –REC Rectangle command is used to create a rectangular box with the selection of the direction of the X axis and Y axis or say you have to choose first Base and then Height of the object by pressing comma to switch the axis (,) e.g. “10,20” where 10 is Base and 20 is height. Object – 1 Object – 2 Single object line polyline HIGHT
  • 16. computer graphics lab 16 inscribed about the circle 4. Cicle –C In circle you create circle in several ways either by click on the command or pressing command through keyboard. And there are so many options to draw the circle. 1. Do one of the following: Click Home tab Draw panel Circle drop-down Center, Radius. Find Click Home tab Draw panel Circle drop-down Center, Diameter. Find 2. Specify the center point. 3. Specify the radius or diameter. We have more options to create circles by using AutoCAD LT. 2p = two points 3p = three points Ttr = tangent tangent radius TTT = tangent tangent tangent 5. Polygon –POL Polygon command create a regular polygon of no. of faces we can draw the minimum no. of sides = 3 polygon and maximum no. of sides = 1024 sides of the polygon inside the AutoCAD software. 6. ARC –A Arc is created with the help of Arc tool we can create 3-point arc by clicking 3 points at the screen at anticlockwise direction (preferably). AutoCAD also provides various types of arc options as per designer requirement we can choose the specified arc by clicking the flyout panel on drawing ribbon bar. Circumscribed about the circle
  • 17. computer graphics lab 17 diameter height 7. ELLIPS –EL The first two points of the ellipse determine the location and length of the first axis. The third point determines the distance between the center of the ellipse and the end point of the second axis. 8. HATCH –H Hatch is used to fill the enclosed area of the object with predefined given patterns. Hatch is also providing color or color gradient combined in a single command. Choose from several methods to specify the boundaries of a hatch. Specify a point in an area that is enclosed by objects. Select objects that enclose an area. 9. DIVIDE –DIV Divide tool is used to divide the object in number of segments where segments are divided by the visible identification of points styles using after the command – ddptype to choose the exact point style in AutoCAD.
  • 18. computer graphics lab 18 10. MEASURE –ME Measure tool is also used to divide the object but not in number of segments but by means of distance measurement we fill. where segments are divided by the value you fill and visible identification of points styles using after the command – ddptype to choose the exact point style in AutoCAD. AutoCAD MODIFY TOOLS 11. Copy – CO Copy creates copies objects a specified distance in a specified direction. Select object you want to copy Specify the Base point (click where you want to pick the object) Copy it by using base point as a reference. 12. Move – M Move command is used to move copies objects a specified distance in a specified direction. Select object you want to move Specify the Base point (click where you want to pick the object) Move it by using base point as a reference.
  • 19. computer graphics lab 19 13. Rotate –RO we can rotate selected objects around a base point to an absolute angle. Select object you want to Rotate Specify the Base point (click where you want to fix the object) Rotate it by using base point as a reference (clockwise or anti clockwise or by pressing the angle) 14. Mirror –MI Mirror command Creates a mirrored copy of selected objects. You can create objects that represent half of a drawing, select them, and mirror them across a specified line to create the other half. Select the object you want to mirror Specify the reference line where you want to create mirror copy. press N enter if you don’t want to remove the original source object. 15. Scale –SC To scale an object, specify a base point and a scale factor. The base point acts as the center of the scaling operation and remains stationary. A scale factor greater than 1 enlarges the object. A scale factor between 0 and 1 shrinks the object.
  • 20. computer graphics lab 20 16. Trim –TR Trim is used to delete the unneeded object without deleting the whole object. Use trim command. Select the whole object. Click at the object you want to trim. 17. Extend –EX extend is used to extend the missing object up to the first interference. Use extend command. Select the whole object. Click at the object you want to extend. 18. Fillet –F Fillet is used to create the round corner by specifying the radius at fillet command. Use fillet command. Type R (r = radius). Fill the radius value. Click two point where you put the fillet on. 19. Chamfer –CHA Chamfer is used to create the flattened the corner (bevels) by specifying the distance or angle by using chamfer command. Use chamfer command. Type D (d = distance). Fill the distance value. Click two point where you put the chamfer on.
  • 21. computer graphics lab 21 20. Array –AR Array command Distributes object copies into any combination of rows, columns, and levels. There are three types of array we are generally used. 1. Rectangular array 2. Polar array 3. Path array Polar Array – polar array is used to create copies of the object in a circular manner. Path array – Path array Evenly distributes object copies along a path or a portion of a path. The path can be a line, polyline, 3D polyline, spline, helix, arc, circle, or ellipse. 21. Break–BR Breaks the selected object between two points. You can create a gap between two specified points on an object, breaking it into two objects. If the points are off of an object, they are automatically projected on to the object. BREAK is often used to create space for a block or text. 22. Offset–O You can offset an object at a specified distance or through a point. After you offset objects, you can trim and extend them as an efficient method to create drawings containing many parallel lines and curves. Type offset or click on the offset icon under modify tool Type the offset value. Select the object you want to offset in both direction either in forward direction or backward direction.
  • 22. computer graphics lab 22 PRACTICAL WORKOUT Diagram-1 Duration – 15 mins Diagram-2 Duration – 30 mins Diagram-3 Duration – 30 mins Diagram-4 Duration – 30 mins
  • 23. computer graphics lab 23 MODULE NO. 3 Annotations, Layering & other Functions
  • 24. computer graphics lab 24 DIMENSION Add Dimension to an Object Dimension is used to measure the object by means of specified selected units. There are various types of dimensions we are using during measurement in AutoCAD. 1. Linear Dimension- Find the linear Dimensions of an Object 2. Aligned Dimension- Find the Dimensions of an Aligned Object. 3. Angular Dimension – Find the Angle between two objects. 4. Circular Dimension – Find the Radius or Diametric Dimension of an Object. 5. Ordinate Dimension – Find the Ordinate points. 1. Linear Dimension – Dimlin Click on Linear Dimension icon or type shortcut command. Select the two point where you want to measure the distance of an object. Enter 2. Circular Dimension – Dimrad Click on Circular Radius or Diameter Dimension icon or type shortcut command. Select the circle where you want to measure the distance of an object. Enter
  • 25. computer graphics lab 25 3. Aligned Dimension – Dimali Click on Circular Radius or Diameter Dimension icon or type shortcut command. Select the circle where you want to measure the distance of an object. Enter 4. Angular Dimension – Dimang Click on angular dimension icon or type shortcut command. Select the two lines where you want to measure the angel of an object. Enter. Dimension Style – D A dimension style is a named collection of dimension settings that controls the appearance of dimensions, such as arrowhead style, text location, and lateral tolerances. You create dimension styles to specify the format of dimensions quickly, and to ensure that dimensions conform to industry or project standards. When you create a dimension, it uses the settings of the current dimension style. If you change a setting in a dimension style, all dimensions in the drawing that use the style update automatically. You can create dimension substyles that use specified settings for different types of dimensions. You can override a dimension style with dimension settings that deviate from the current dimension style. All dimension styles in your drawing are listed in the Dimension Style drop-down.
  • 26. computer graphics lab 26 ANNOANNOTATIONS TEXT – TE You can use single-line text to create one or more lines of text, where each text line is an independent object that you can move, format, or otherwise modify. Right-click in the text box to select options on the shortcut menu. While you are in the TEXT command: Click elsewhere in a drawing to start a new set of rows of single-line text Press Tab or Shift+Tab to move forward and back between the sets of single- line text Press Alt and click a text object to edit a set of text lines LAYER - LA Use layers to control the visibility of objects and to assign properties such as color and linetype. Objects on a layer normally assume the properties of that layer. However, you can override any layer property of an object. For example, if an object’s color property is set to BYLAYER, the object displays the color of that layer. If the object’s color is set to Red, the object displays as red, regardless of the color assigned to that layer. type layer command and click on the new icon to make new layer. Assign the color, linetype or line weight to the selected layer Select object and move onto the particular layer you created.
  • 27. computer graphics lab 27 BLOCK - B Blocks are the collection of geometries that act as a single object and they can be used in a drawing repetitively. Names the block. The name can have up to 255 characters and can include letters, numbers, blank spaces, and any special character not used by the operating system or the program for other purposes. The block name and definition are saved in the current drawing. Preview If an existing block is selected under Name, displays a preview of the block. Base Point Specifies an insertion base point for the block. The default value is 0,0,0. Specify On-Screen Prompts you to specify the base point when the dialog box is closed. Pick Insertion Base Point Temporarily closes the dialog box so that you can specify an insertion base point in the current drawing. We could also find the pre-installed Blocks using Designcentre on AutoCAD Software. 1. Type – DC 2. Find the desired blocks on design center tab right side of the computer screen. 3. Simply Drag and drop the required block.
  • 28. computer graphics lab 28 Tolerence A feature control frame consists of two or more components. The first feature control frame contains a symbol that represents the geometric characteristic to which a tolerance is being applied, for example, location, profile, form, orientation, or runout. Form tolerances control straightness, flatness, circularity and cylindricity; profiles control line and surface. In the illustration, the characteristic is position. You can use most editing commands and grips to change feature control frames, and you can snap to them using object snaps. You can also create tolerances that use annotative scaling. For more information about creating and working with an annotative tolerance, see About Creating Annotative Dimensions and Tolerances, and About Scaling Annotations COMPUTER AIDED DESIGNING Computer aided designing A new part model accurately captures a design from a concept through solid feature-based modeling. A part model enables you to graphically view the product before it is manufactured. A part model can be used to: Capture mass property information. Vary design parameters to determine the best options. Graphically visualize a model before it is manufactured.
  • 29. computer graphics lab 29 PARAMETRIC DESIGN CONCEPT Parametric models are value-driven, using dimensions and parameters to define the size and location of the 3D part model. If you edit the value of a feature dimension, that features updates accordingly. The change then automatically propagates through the related features in the model and eventually updates the entire part. BIDIRECTIONAL ASSOCIATIVITY Bi-directional associativity means that all changes made to an object in any mode of 3D design Software, Whether it’s on Single part model, Assembly part model or Drawing 3D Part Modeling Design Software are automatically reflected in every related mode. For example if you made a change in drawing is directly reflect in part being Designed and also reflected in every assembly using the part model. According to Design associativity Assembly design is not a large file containing copies of every part in the assembly, but rather it containing files associative links to every model used in assembly. In another words, all files are linked or associate with each other if you change the one another one will update automatically accordingly. SOLIDWORKS – 3D Design Software Solidworks is a 3d modeling software produced by Dassault system corp. ltd. Solid works is a CAD Tool and its Parametric Feature based system it’s allows you to create 3d parts, assemblies and 2d drawings. Parametric modeling everything is control by either Parameter, relations and dimensions. The basic requirement for creating a solid model in every 3d CAD tool is a sketch. The sketch for the features is drawn in the sketch ribbon inside the solid works. Let’s discuss each and every drawing and 3d tools with some practical examples. part assembly drawing
  • 30. computer graphics lab 30 Before stating solidworks let’s familiar with the user interface of the software. When software starts choose “new” for the creating new drawing part file. You have 3 option available to you on your solidworks screen 1. Part, 2. Assembly and 3. Drawing Choose part (either double click on in or just click once and press “OK”. Choose sketch ribbon in the solid works screen and select first plane, front, top and right and click on the sketch icon. Sketch environment is highlighted and we can draw the various 2d drawing using 2d drawing sketching in solid works. For setting the initial units setting in solidworks go to “tools>options>click documents and properties > click on “UNITS” and choose your default units what you need to choose e.g. mmgs (millimeters, grams, second) IPS (inch, pound, second).
  • 31. computer graphics lab 31 PRACTICAL -1 3D DESIGN USING SOLIDWORKS 2015 Open sketch environment in solidworks choose one of default plane (say front) and click on the circle icon on the sketch toolbar ribbon. Draw a circle inside the drawing area first then choose smart dimension icon on the sketch ribbon or right click and drag the mouse courser to UP you’ve automatically chosen smart dimension tool. Select the circle and give the proper dimension as per given drawing. Draw the same circle of diameter of 60 mm from the same center point. Then draw the line as per given drawing and give dimensions with smart dimension tool.
  • 32. computer graphics lab 32 when we done by 2D sketching we must use the trim tool icon shown in sketch ribbon at solidworks ribbon panel and click on the power trim option available on the right side of the properties toolbar and select the line you need to erase and it will automatically delete or disappear from the screen. The final object is ready as per shown in the 2D sketch Diagram. (You can also put the relationships in the object just click the first object and second object holding down the “ctrl” key the relation between the both object you have selected will automatically appear on the right side on the properties toolbar and you can choose the appropriate desired relation you want to put on to define the object. Now Choose or click on the “feature” ribbon and choose ‘Extruded Boss/Base’ and your object will automatically get stretched at backward direction you can simply put the dimension of extrusion say 40mm. click on OK .
  • 33. computer graphics lab 33 final object is ready as per the dimension given in the 2D diagram. We have generally four universal 3D tools which is mostly used in every 3D Design software. 1. Extrude – Extrude is generally used to extrude or stretched the object. 2. Revolve- it’s rotates the 2D object with the help of one reference line. 3. Loft – Loft is generally used to join the 2 or more 2d objects into a single solid body. 4. Sweep – The Sweep tool is used to create solid/surface feature by sweeping closed loop sketch along the selected trajectory. DIMENSIONING AND TOLERANCING Geometric dimensioning and tolerancing (GD&T) is a system for defining and communicating engineering tolerances. It uses a symbolic language on engineering drawings and computer-generated three-dimensional solid models that explicitly describe nominal geometry and its allowable variation. If we used Solidworks to make Geometric Dimensioning only one tool is fair enough to specify the whole dimension here is the following list you could use to mark dimensions using solidworks AutoCAD® SOLIDWORKS® Tool Tooltip Command Tool Tooltip Toolbar Linear Dimension DIMLINEAR Smart Dimension Dimensions/Relations. See Dimensions/Relations Toolbar and Menus in the main SOLIDWORKS help. Aligned Dimension DIMALIGNED Smart Dimension Dimensions/Relations Ordinate Dimension DIMORDINATE Ordinate Dimension Dimensions/Relations Also tools for horizontal and vertical ordinate dimensions Radius Dimension DIMRADIUS Smart Dimension Dimensions/Relations Diameter Dimension DIMDIAMETER Smart Dimension Dimensions/Relations Angular Dimension DIMANGULAR Smart Dimension Dimensions/Relations
  • 34. computer graphics lab 34 AutoCAD® SOLIDWORKS® Tool Tooltip Command Tool Tooltip Toolbar Quick Dimension QDIM Smart DimensionAutodimension tab Dimensions/Relations Dimension a complete sketch or drawing Baseline Dimension DIMBASELINE Baseline Dimension Dimensions/Relations Also tools for horizontal and vertical baseline dimensions Continue Dimension DIMCONTINUE Smart Dimension Dimensions/Relations Tolerance TOLERANCE Geometric Tolerance Annotations. See Annotations Toolbar in the main SOLIDWORKS help. Center Mark DIMCENTER Center Mark Annotations Dimension Edit DIMEDIT - - - Double-click dimension and edit in Modify dialog box Dimension Text Edit DIMTEDIT - - - Select dimension and edit text in Dimension ValuePropertyManager Dimension Update DIMSTYLE APPLY - - - Dim Style Control Dimension Style Default - - - Dimension Style DIMSTYLE - - - Define, edit, and apply Dimension Styles in Dimension Leaders PropertyManager for DIMSTYLE APPLY, Style Default, and DIMSTYLE
  • 35. computer graphics lab 35 TOLERANCING Geometric dimensioning and tolerancing (GD&T) is a system for defining and communicating engineering tolerances. It uses a symbolic language on engineering drawings and computer-generated three-dimensional solid models that explicitly describe nominal geometry and its allowable variation. SYMBOL Select a symbol. Straightness Flatness Circularity Cylindricity Profile of Line Profile of Surface Parallel Perpendicular Angularity Circular Runout Total Runout Position Concentricity Symmetry None MATERIAL CONDITIONS Select a material condition. The pointer must be in a Tolerance or Primary, Secondary, or Tertiary box to insert a material condition. Only the material conditions that are appropriate for the selected symbol are available.
  • 36. computer graphics lab 36 Diameter Spherical Diameter Maximum Material Condition Least Material Condition Regardless of Feature Size Tangent Plane Free State Statistical Projected Tolerance Square Unequally Disposed Profile Translation HEIGHT If you click Projected Tolerance , enter a projected tolerance zone (PTZ) in Height. Tolerances Type tolerance values for Tolerance 1 and Tolerance 2.
  • 37. computer graphics lab 37 Unit Basis Tolerance You can apply flatness and straightness tolerances on a unit basis. You apply a unit basis tolerance by following the tolerance value with a forward slash (/) and entering the per-unit area or per-unit length criteria. Primary, Secondary, and Tertiary Enter datum names and material condition symbols for the Primary, Secondary, and Tertiary datums. Frames Create additional frames. You can set as many frames as needed. Use the Frames box to move among frames. You can see only two frames in the dialog box at a time.
  • 38. Composite Frame Combines the symbols of two frames. Below Frame Add text below the feature control frame. Between Two Points Type the labels of the points if the tolerance value applies between two points or entities.
  • 39. computer graphics lab 2 MODULE NO. 4 Simple team design project
  • 40. computer graphics lab 3 GEOMETRY AND TOPOLOGY OF ENGINEERING COMPONENT The method of representing the shapes of a boundary using the limits is know as Boundary representation. The boundary representation of a model are composed of two parts, 1. Geometry 2. Topology the main topological items are edges, vertices and face. A face is a bounded portion of a surface; an edge is a bounded piece of a curve and a vertex lies at a point. 1. To create surface first we must create a messed boundary on a surface of the model 2. Specify the points where we want to stretch the surface boundary 3. Click and drag until you get the desired topological shape of a boundary surface. BIM – Building Information Modeling BIM (Building Information Modeling) is an intelligent 3D model-based process that gives architecture engineering and construction (AEC) professionals the insight and tools to more efficiently plan, design, construct, and manage buildings and infrastructure.