Retail Store Scavanger Hunt - Foundation College Park
Laser eyes
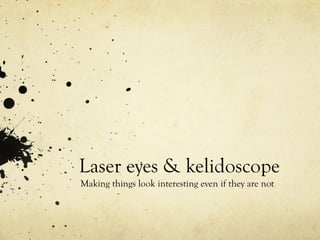
1. Laser eyes & kelidoscope
Making things look interesting even if they are not
2. Chaton is French for cat
This image was made one
morning as I was planning
to teach the polygonal lasso
tool!
On a layer above the image of
the cat, I made a selection area
with the polygonal lasso and
then filled it with bright green.
I made the layer transparent.
It is a simple ting but fun to
look at.
3. Having colors come from the eye like
lasers can add some visual interest
On this day I had planned to do the
Animal project with my class.
All of the students in the class were
absent that day so I made this during
that free hour.
Laser eyes!!
The background layer was created
using what I call the “kaleidoscope”
technique.
5. Kaleidoscope
I tend to create these to fit on the printer
paper.
Hey, What size is printer paper?
If I have a .5” margin,
what size should my image be?
6. Laser eyes
I did not get a LARGE image as
you can see. This is ok because my
plan is to duplicate it many times.
The page will be filled with tiny
Wiz Khalifas with laser eyes.
7. Resize it
My new document size
reflects that I intend to
print this masterpiece
once finished.
The resolution has been
changed to 300 ppi.
I shrank the width to 3”.
Because “constrain
proportions” is checked
the height changed
on it’s own.
9. Drag & Drop
< drag & drop the correctly sized image into
your new file. Your new file is your project file.
This is the correctly sized masterpiece you will
turn in once completed.
^ delete the locked background layer
10. Make a new (transparent) layer
This ^ is the new layer button.
It is located on the bottom
of the layers panel. Click it.
< new layer
On your new layer use the polygonal lasso tool to draw shapes near the eyes.
Use the paint bucket & color picker to fill the shapes with a laserish color.
Add fx to the laser layer and a blending mode.
Merge the laser and eye layers once you are satisfied with your effects.
11. This is called a “blending mode” >
It dictates how the pixels on the
top layer will interact with
pixels on the layer below it.
For this composition
I chose “screen”
12. That works
The selection area is marked
by the marching ants.
I filled the selection area with hot pink.
The 2 fx I thought would be best to convey
light are inner glow with a drop shadow.
13. Select both layers and rt click for the
flyout menu.
Select “Merge Visable.”
Photoshop will merge the two layers into
one making sure to only show what is
currently visible.
^ merged layer
14. duplicate & transform the layer
Select the copied layer and hit Command T to transform. Flip the image by using
the left node and pulling it to the right.
You can also flip top to bottom by pulling the opposite node the opposite direction.
Merge the layers.
15. Repeat
Once you have filled the page
use the crop tool to cut off any
pixel data that is outside of your
canvass.
16.
17. Congrats you have completed the lesson!
Describe your process
In creating this artwork you went through many steps.
What was easy?
What was challenging?
I really like this animator’s process record. I am asking you for something like this. Talk about
your feelings as they occurred during the creation of your project. When did you feel unsuccessful,
how did you fix it, what was it like to feel successful again, did you work with others / collaborate?