
Recommended
Recommended
More Related Content
Similar to Steps to be done in arduino ide for monitoring
Similar to Steps to be done in arduino ide for monitoring (20)
More from Citharthan Durairaj
More from Citharthan Durairaj (16)
Recently uploaded
Recently uploaded (20)
Steps to be done in arduino ide for monitoring
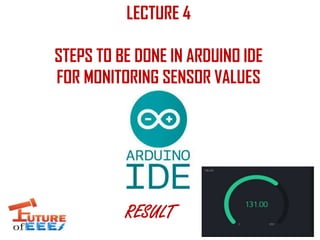
- 1. LECTURE 4 STEPS TO BE DONE IN ARDUINO IDE FOR MONITORING SENSOR VALUES RESULT
- 2. To use node- MCU board in Arduino IDE, It is necessary to do the following 4 steps. Then in step 5 & 6 setup is configured for node MCU and Blynk App
- 3. STEP 1 Download Arduino IDE based on your Operating system from the link https://www.arduino.cc/en/main/software and install it as the normal software
- 4. Check Open the Arduino IDE. connect the node MCU board to the laptop . Go to tools port & check some port is selected as shown . It should be automatically selected.
- 5. STEP 2 Open the Arduino IDE and go to File Preferences. In Additional Board Manager URL field add the following address. http://arduino.esp8266.com/stable/package_esp8266com_index.json
- 6. STEP 3 Go to Tools Boards Board manager and select “esp8266 by ESP8266 Community” and click the Install button. (It will take some time to download. Please wait). You will be seeing the word installed next to it. Once Completed you can see INSTALLED as shown
- 7. Choose the Board Go to Tools Board and select NodeMCU 0.9/1.0.
- 8. STEP 4 Go to Tools upload speed and select 115200.
- 9. STEP 5 Once completing the above 4 steps, copy the “Program” and paste in IDE The “program ” uses the Blynk library So, i) Download Blynk library from the following URL https://github.com/blynkkk/blynk-library/releases/tag/v0.5.2 ii) Then, in arduino IDE go to Sketch Include Library Add Zip Library and select the downloaded zip file. iii) Finally, In “PROGRAM 1” change the “authorized token”, “WiFi user name” and “WiFi password” to yours char auth[] = "4042a240e2ea48bea5ffeeadb13eb715"; // Your token number sent to your email char ssid[] = "Moto C Plus 2634"; // your Wi- Fi User name char pass[] = "password"; //your Wi-Fi Password
- 10. FINAL STEP Once done upload it to the node MCU by clicking upload button
- 11. CONGRATULATIONS! YOU HAVE DONE THE STEPS TO BE DONE IN ARDUINO IDE
- 12. IT’S TIME FOR ACTION!
- 13. Check: Ensure that Wi- Fi and internet connection in your PC/ smartphone are working properly.
- 14. Once uploaded the program in node MCU, click play button in Blynk App
- 15. RESULT Now, You can see the real time sensor value in GAUGE voltage = sensor value * (3.3/1024) milli-volt = sensor value * (3.3/1024)*1000 Example milli-voltage = 131* (3.3 /1024)*1000 = 422 mV = 42.2 deg C
- 16. If you see the above result then GOAL 1 is achieved!!!
- 17. Lets interpret the program#define BLYNK_PRINTSerial #include <ESP8266WiFi.h> #include <BlynkSimpleEsp8266.h> char auth[] = “type authorized token sent to your mail id "; char ssid[] = “type Wifi User Name here"; char pass[]= “Type Wifie password here"; BlynkTimer timer; void myTimerEvent() {. float sensor=analogRead(A0); Blynk.virtualWrite(V5,sensor); } void setup() { Serial.begin(9600); Blynk.begin(auth, ssid, pass); timer.setInterval(1000L, myTimerEvent); } void loop() { Blynk.run(); timer.run(); }