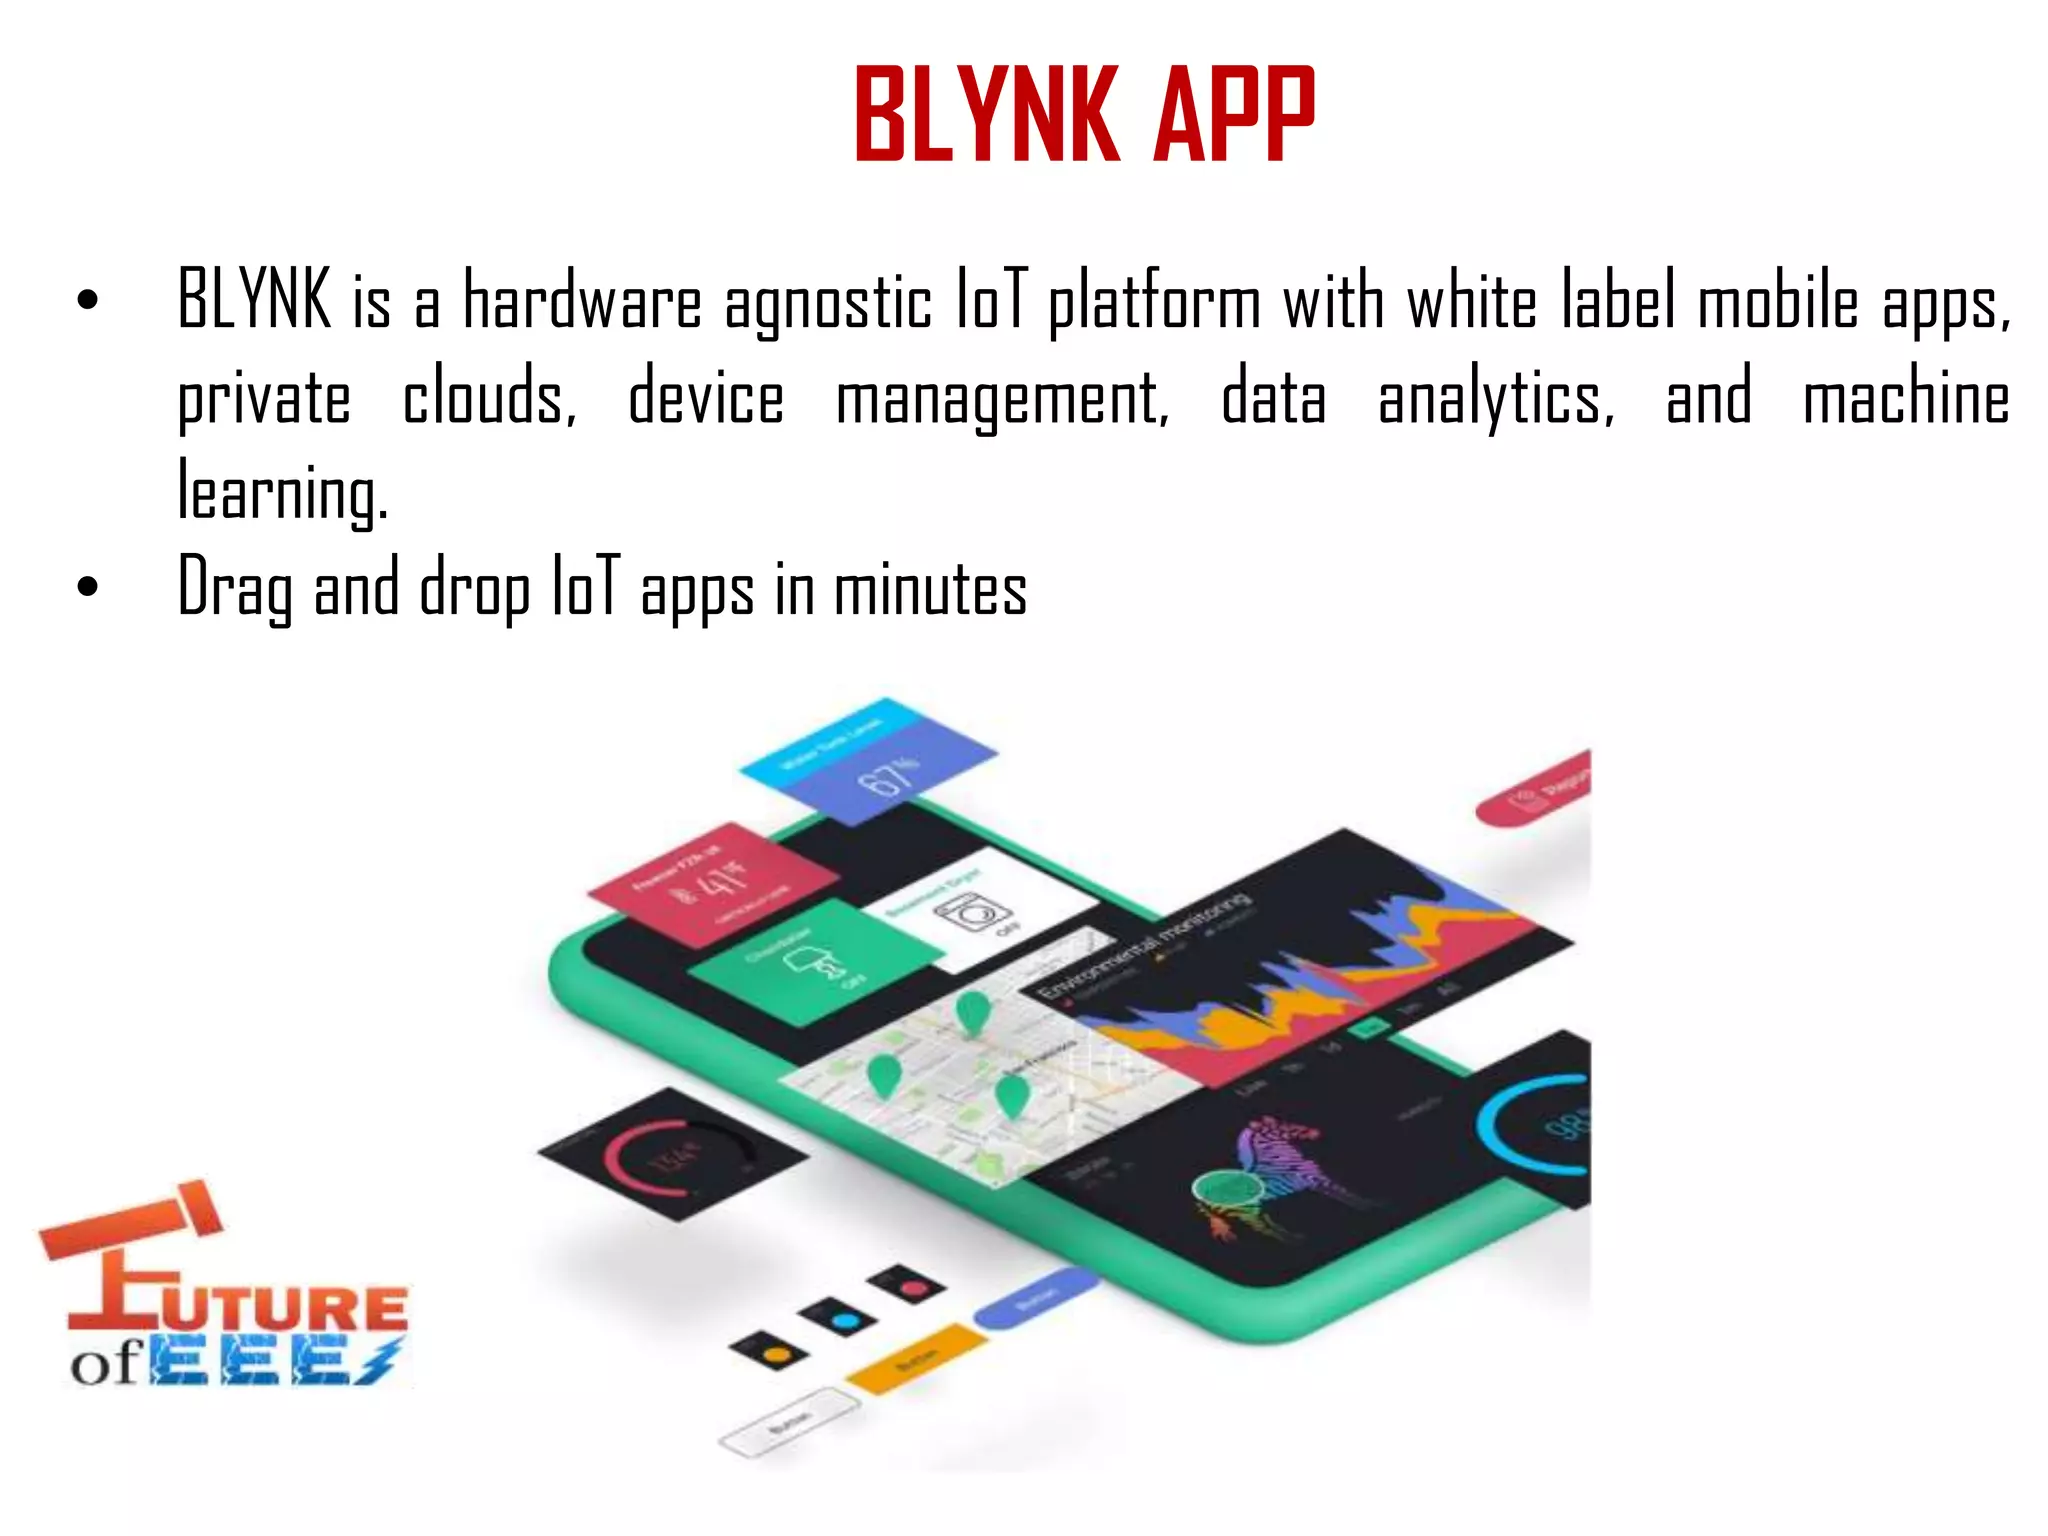
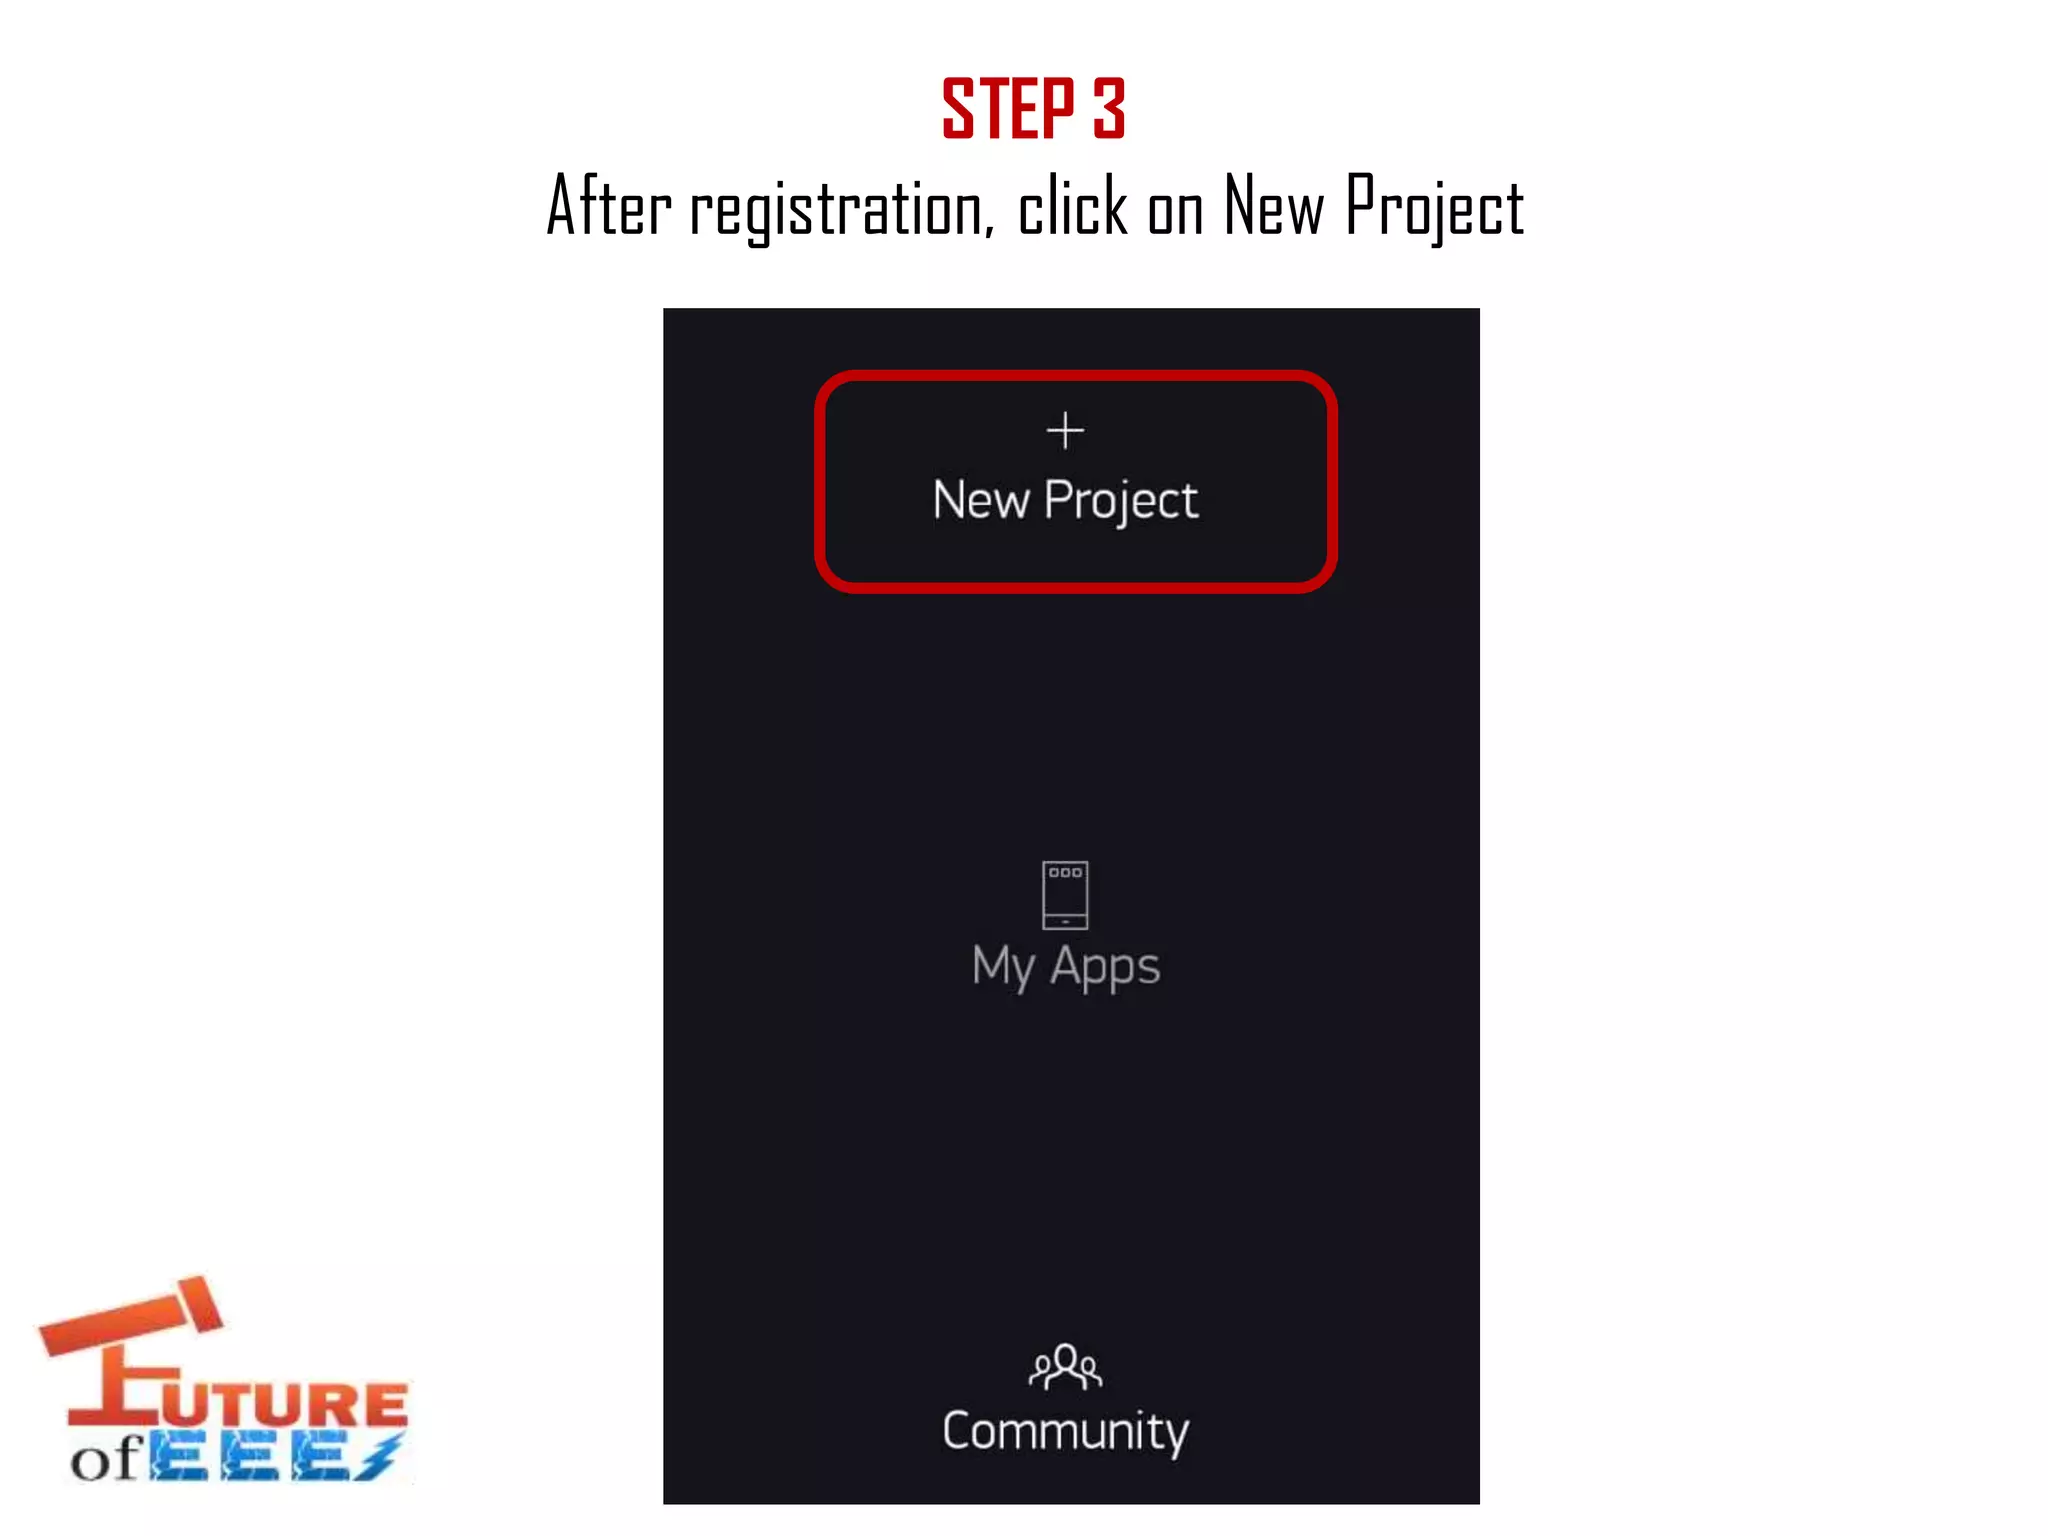
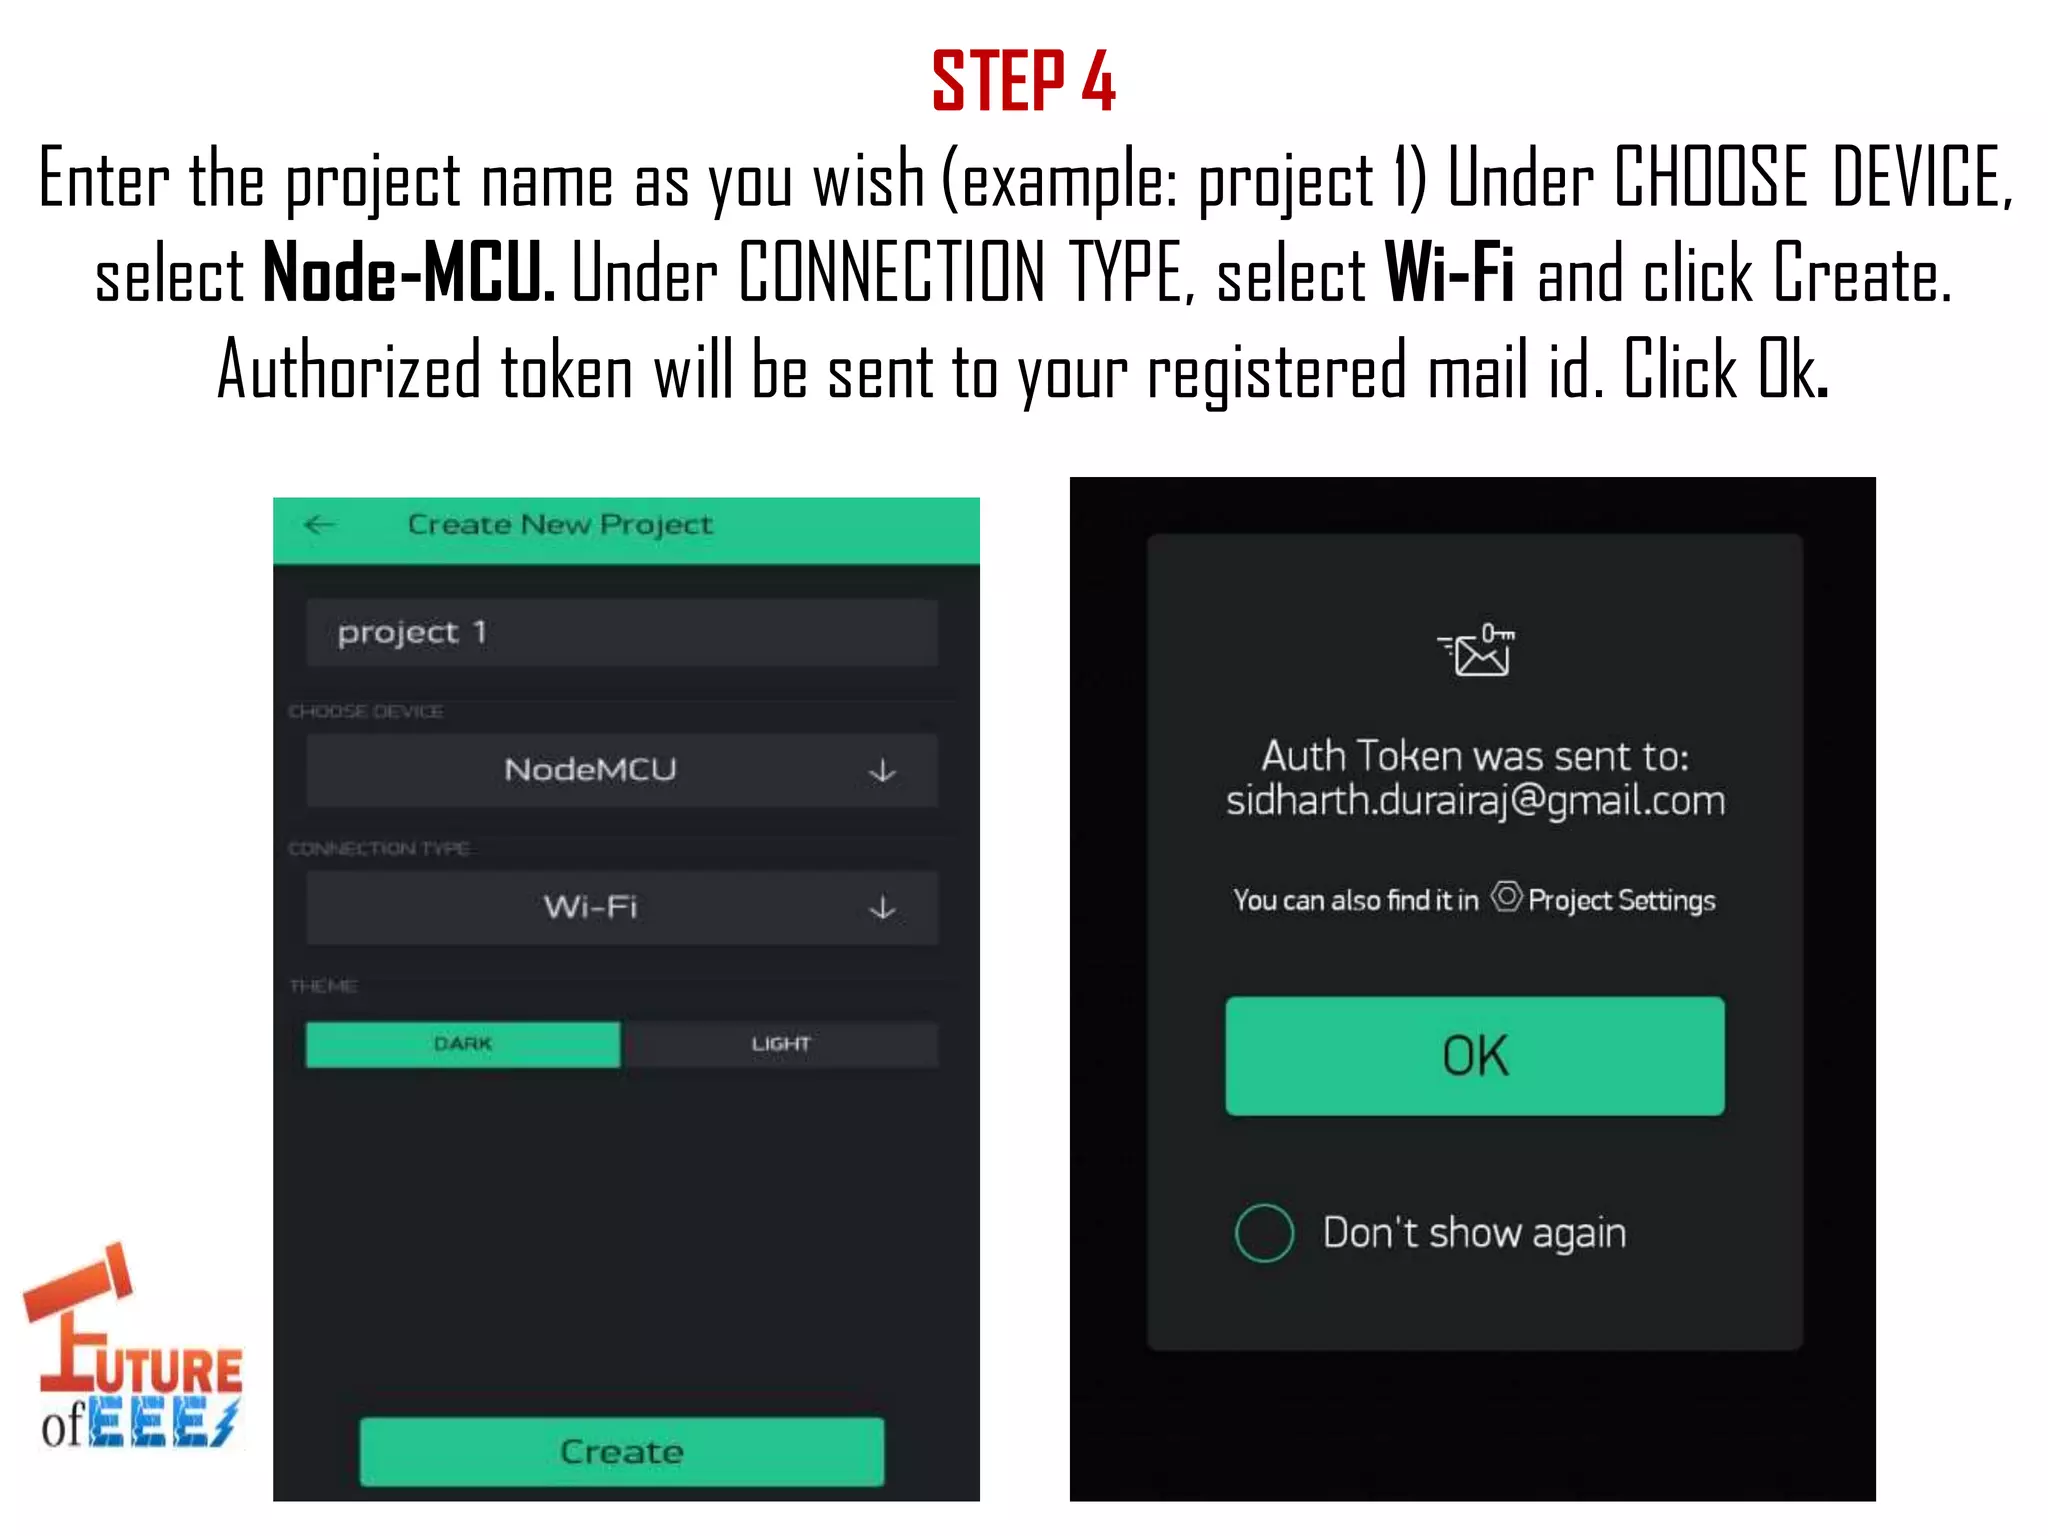
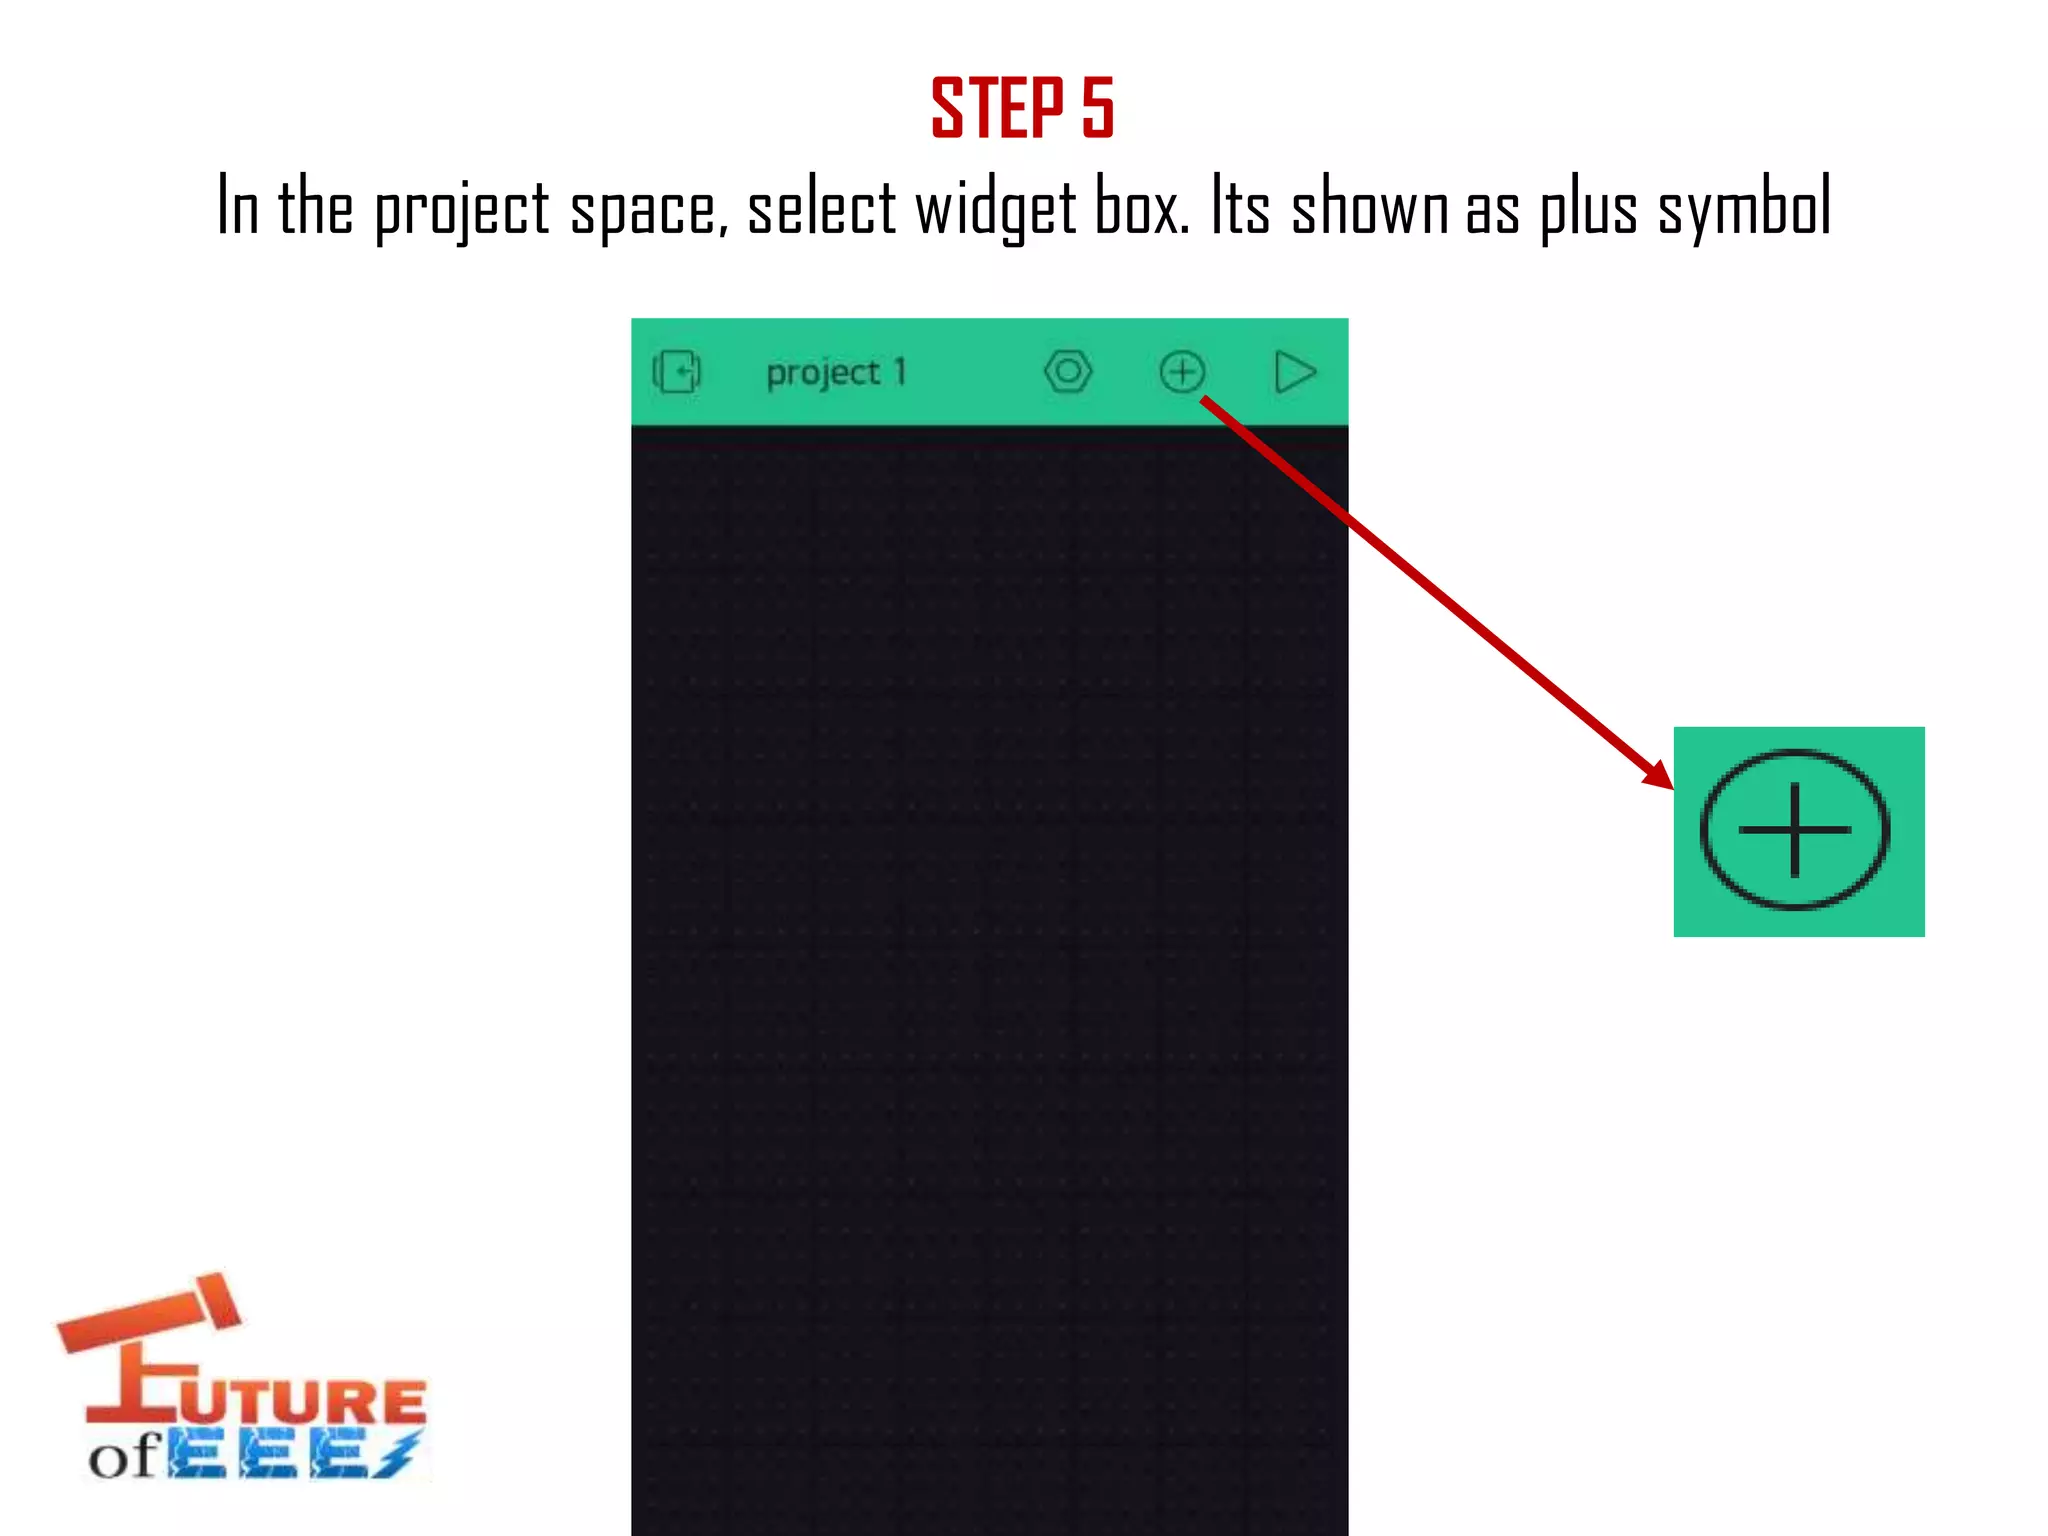
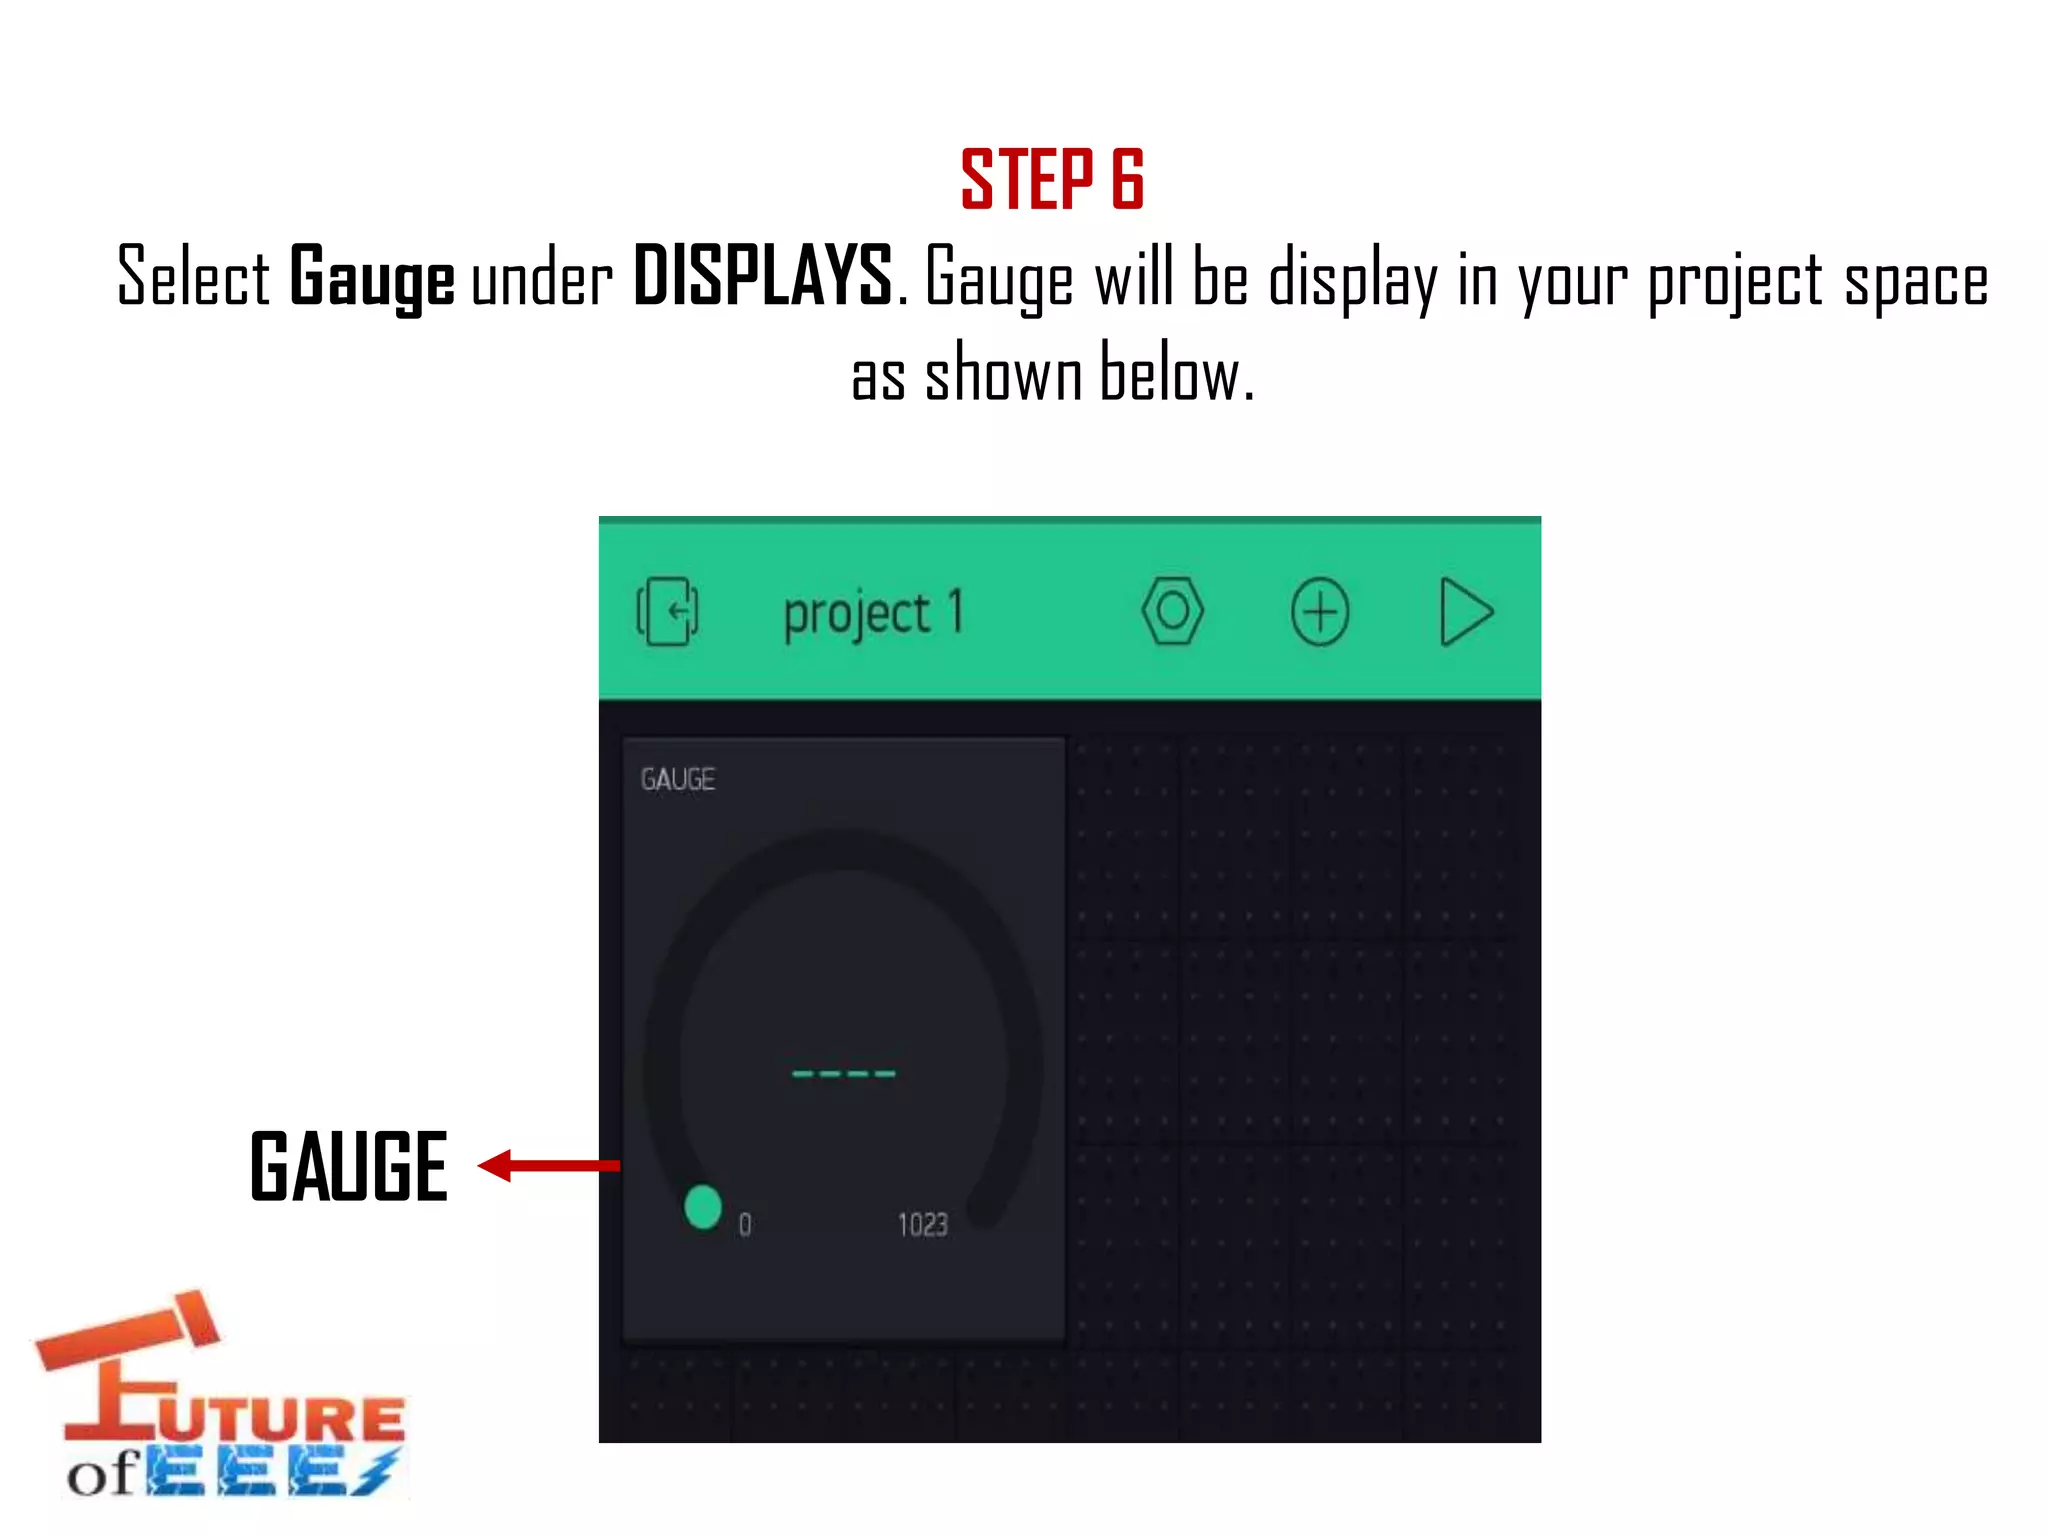
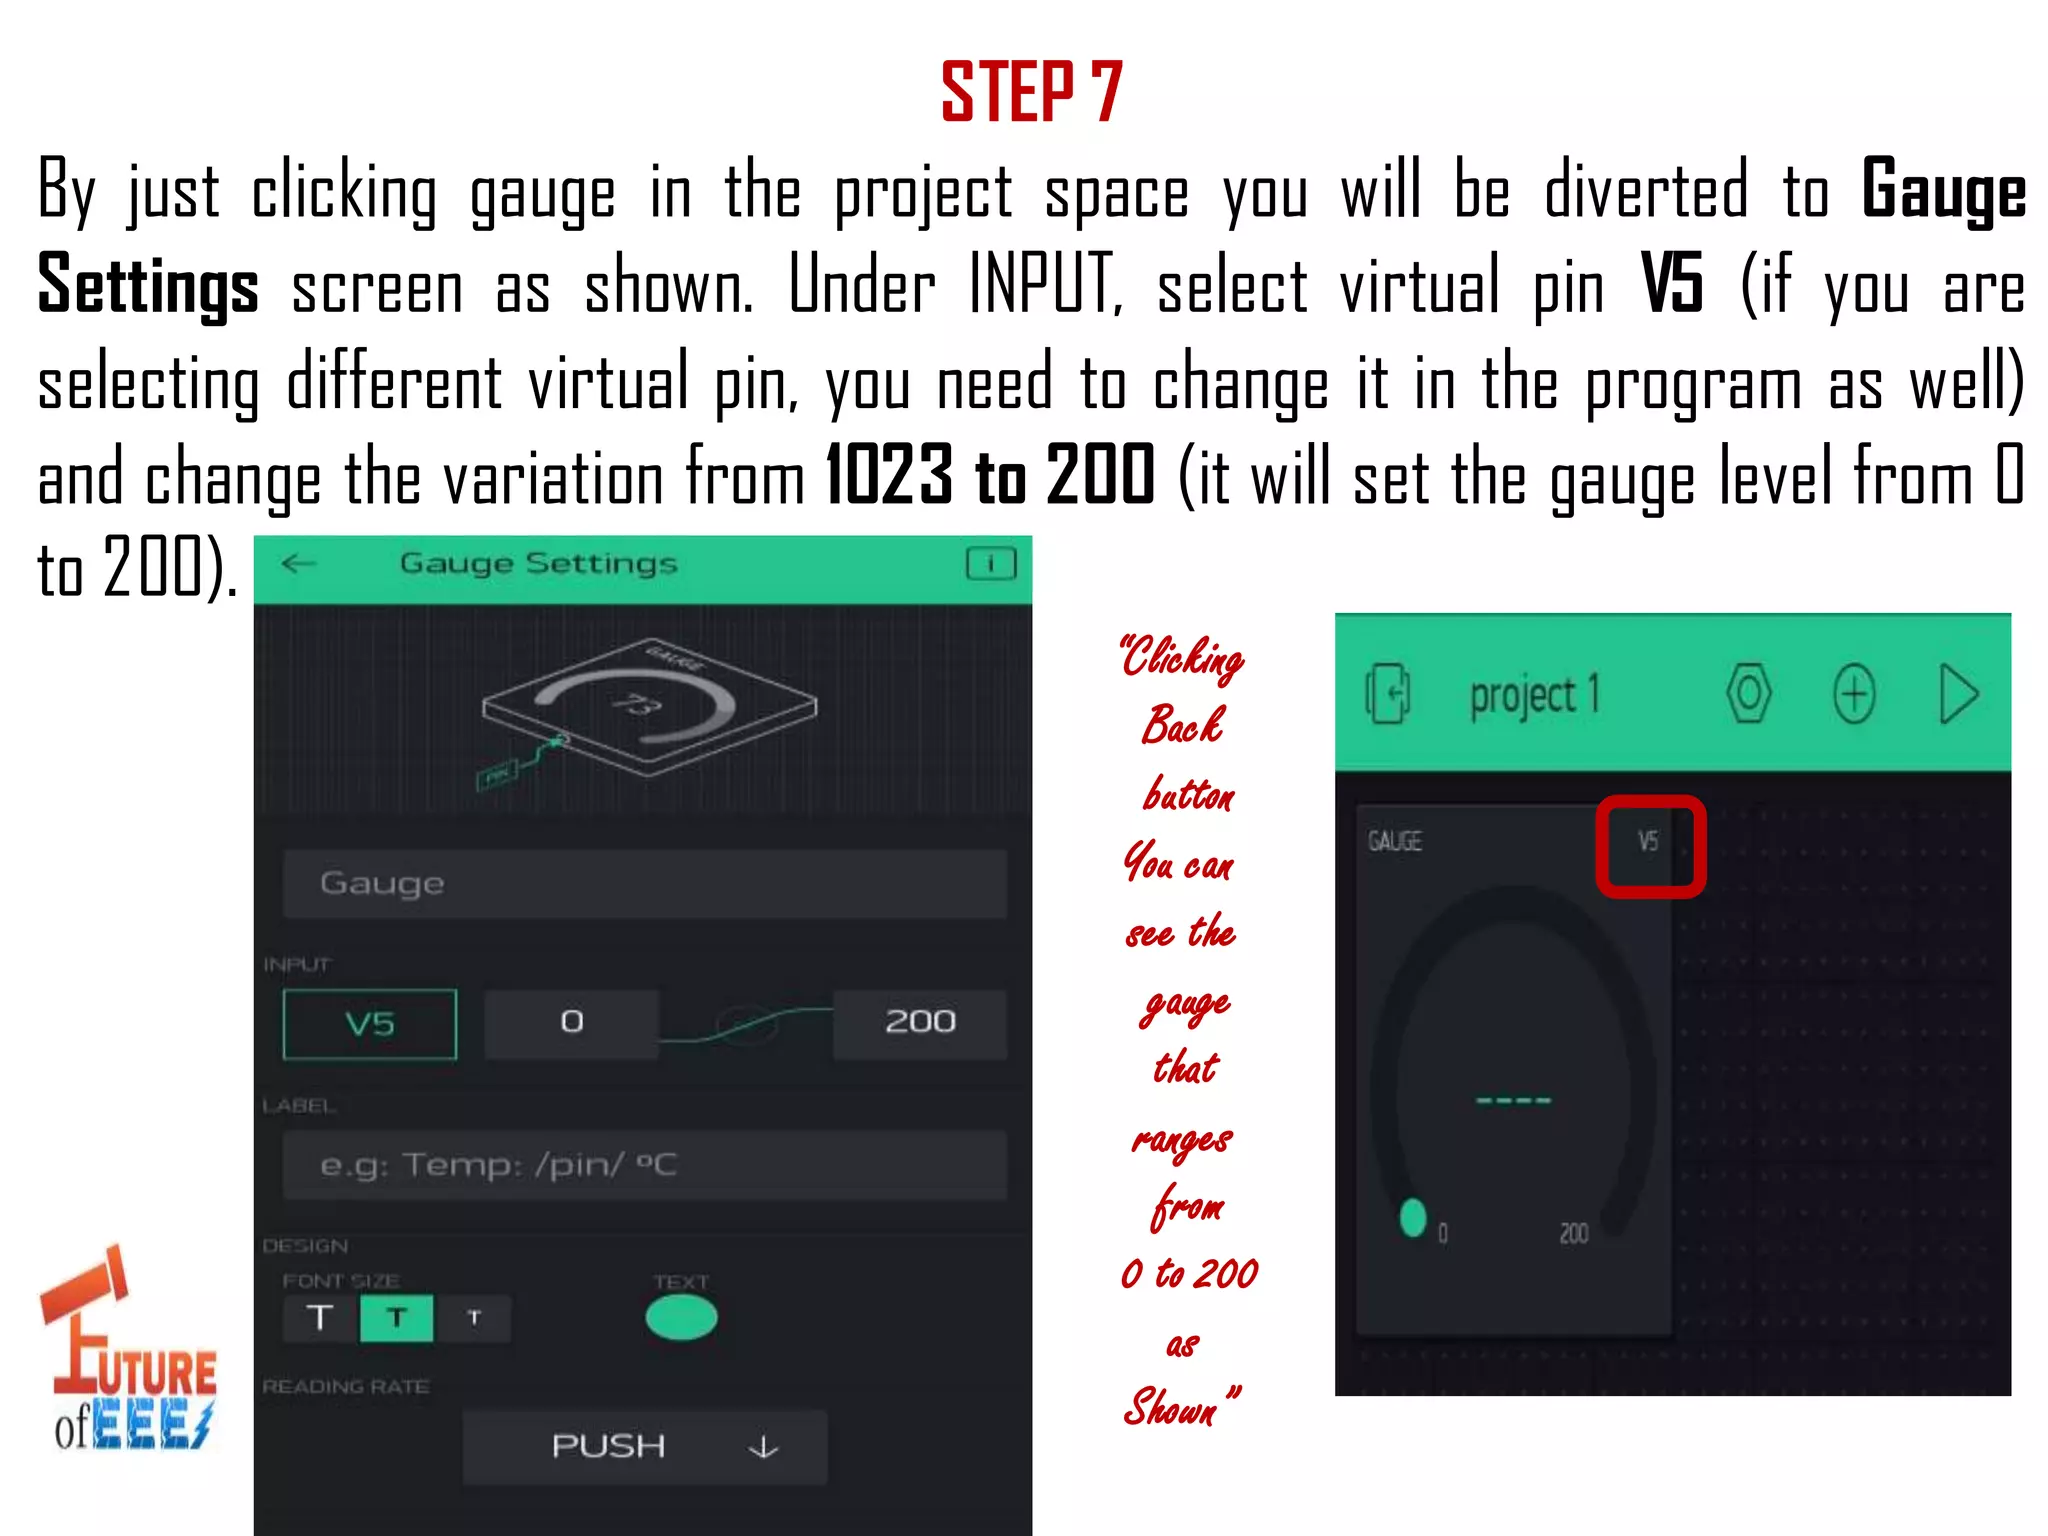
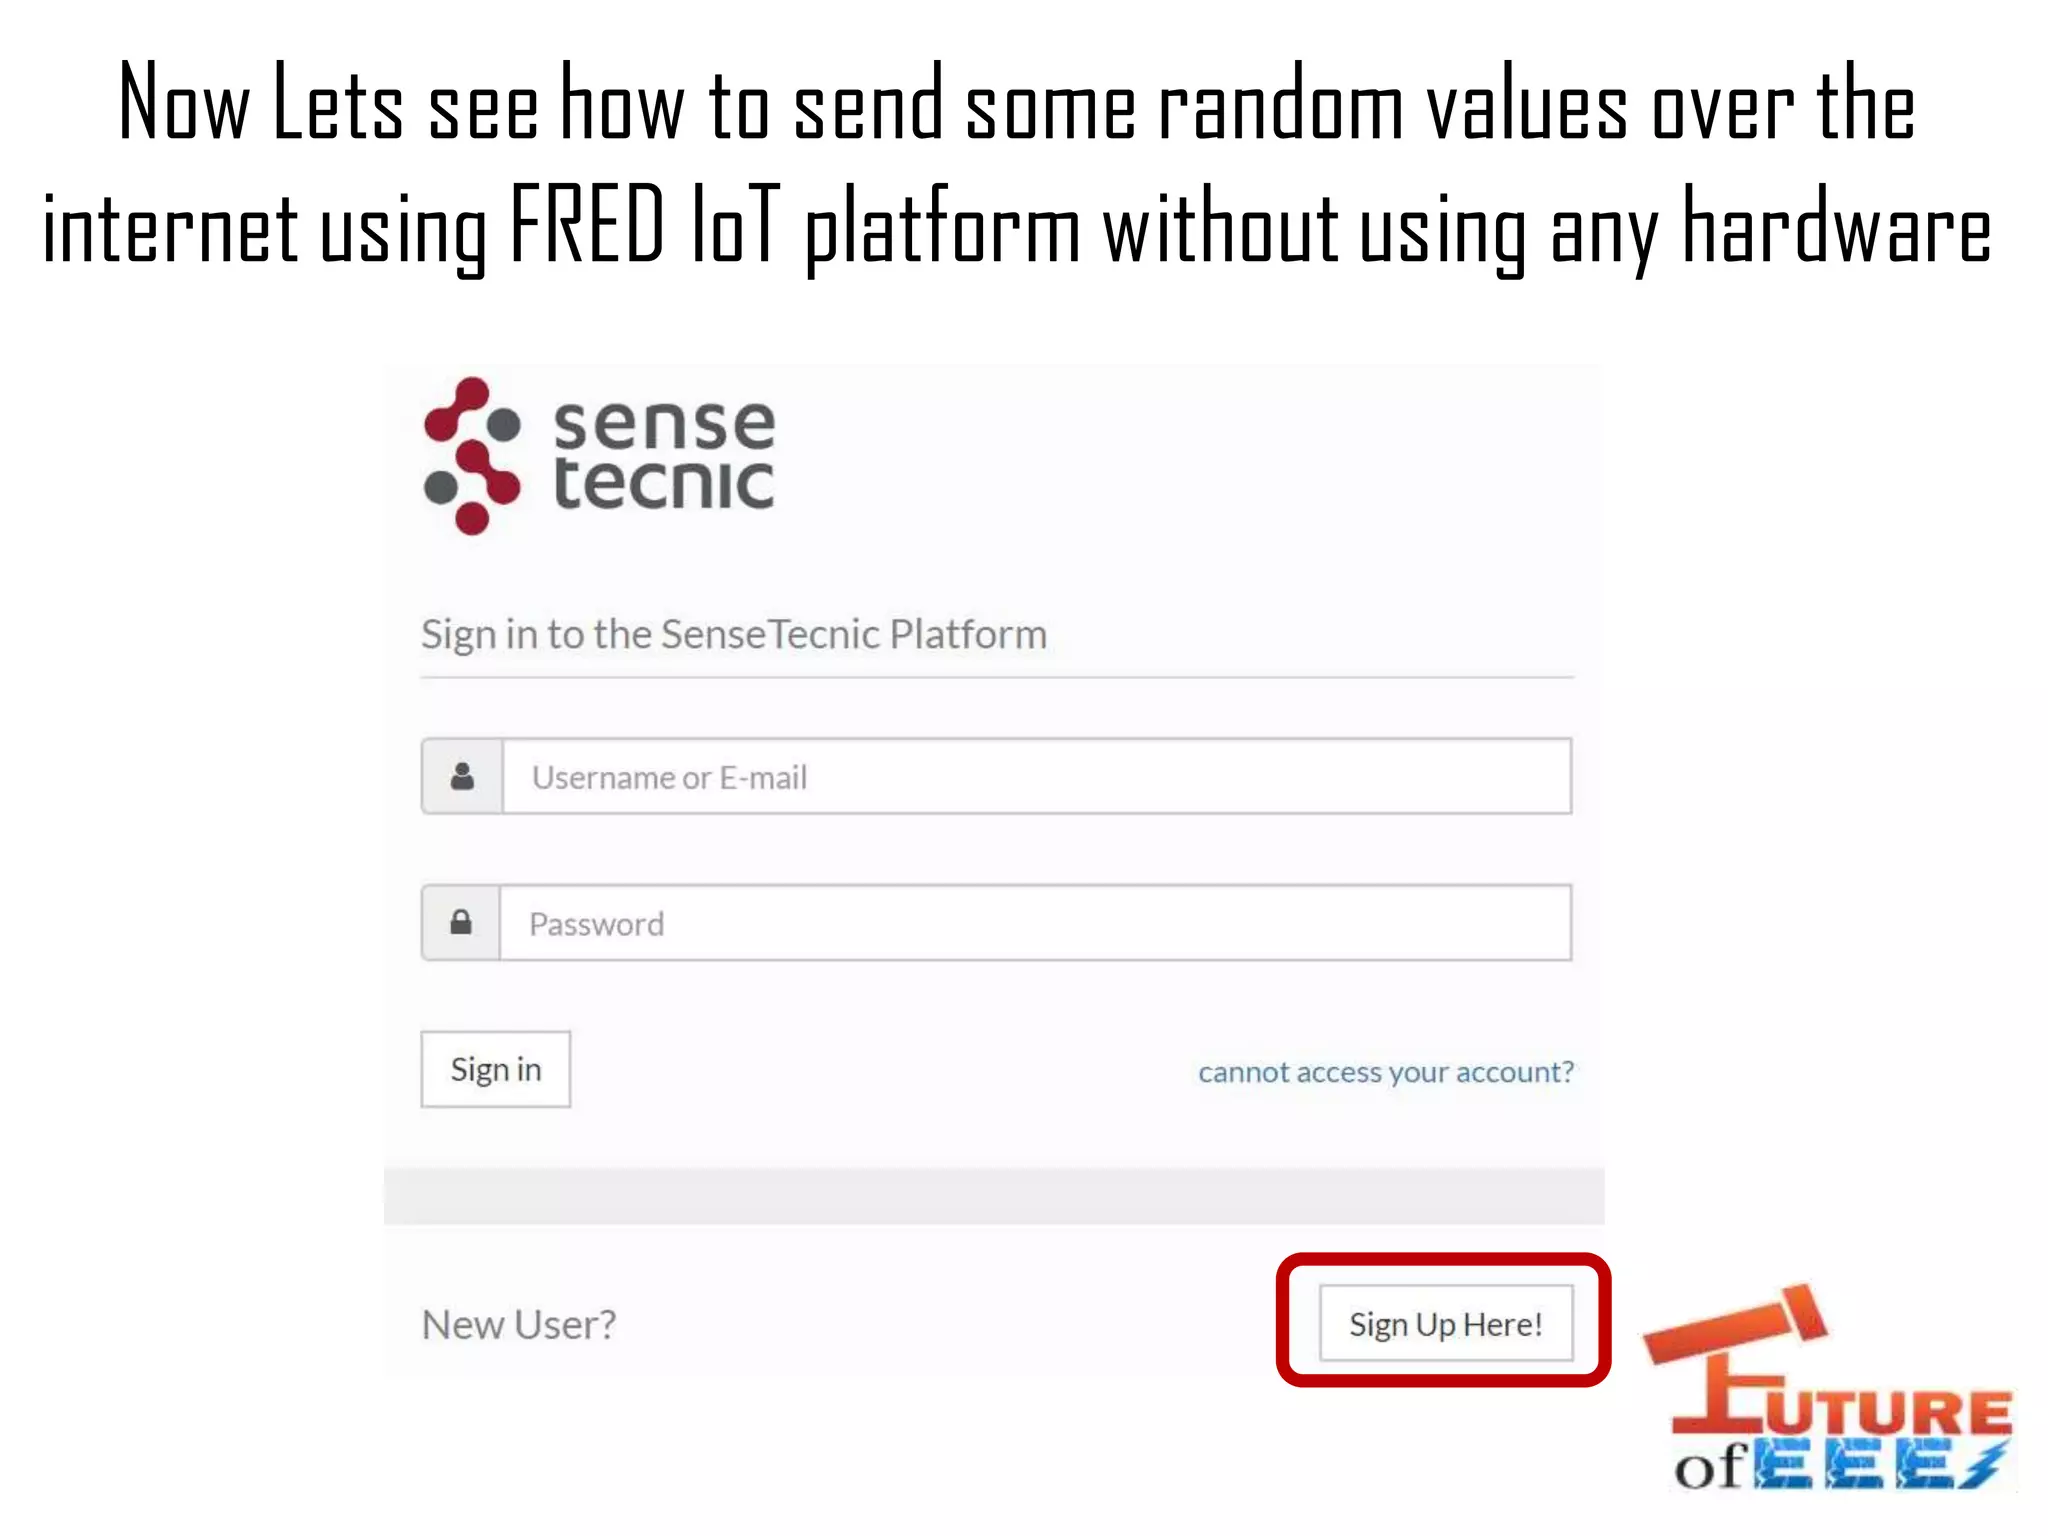
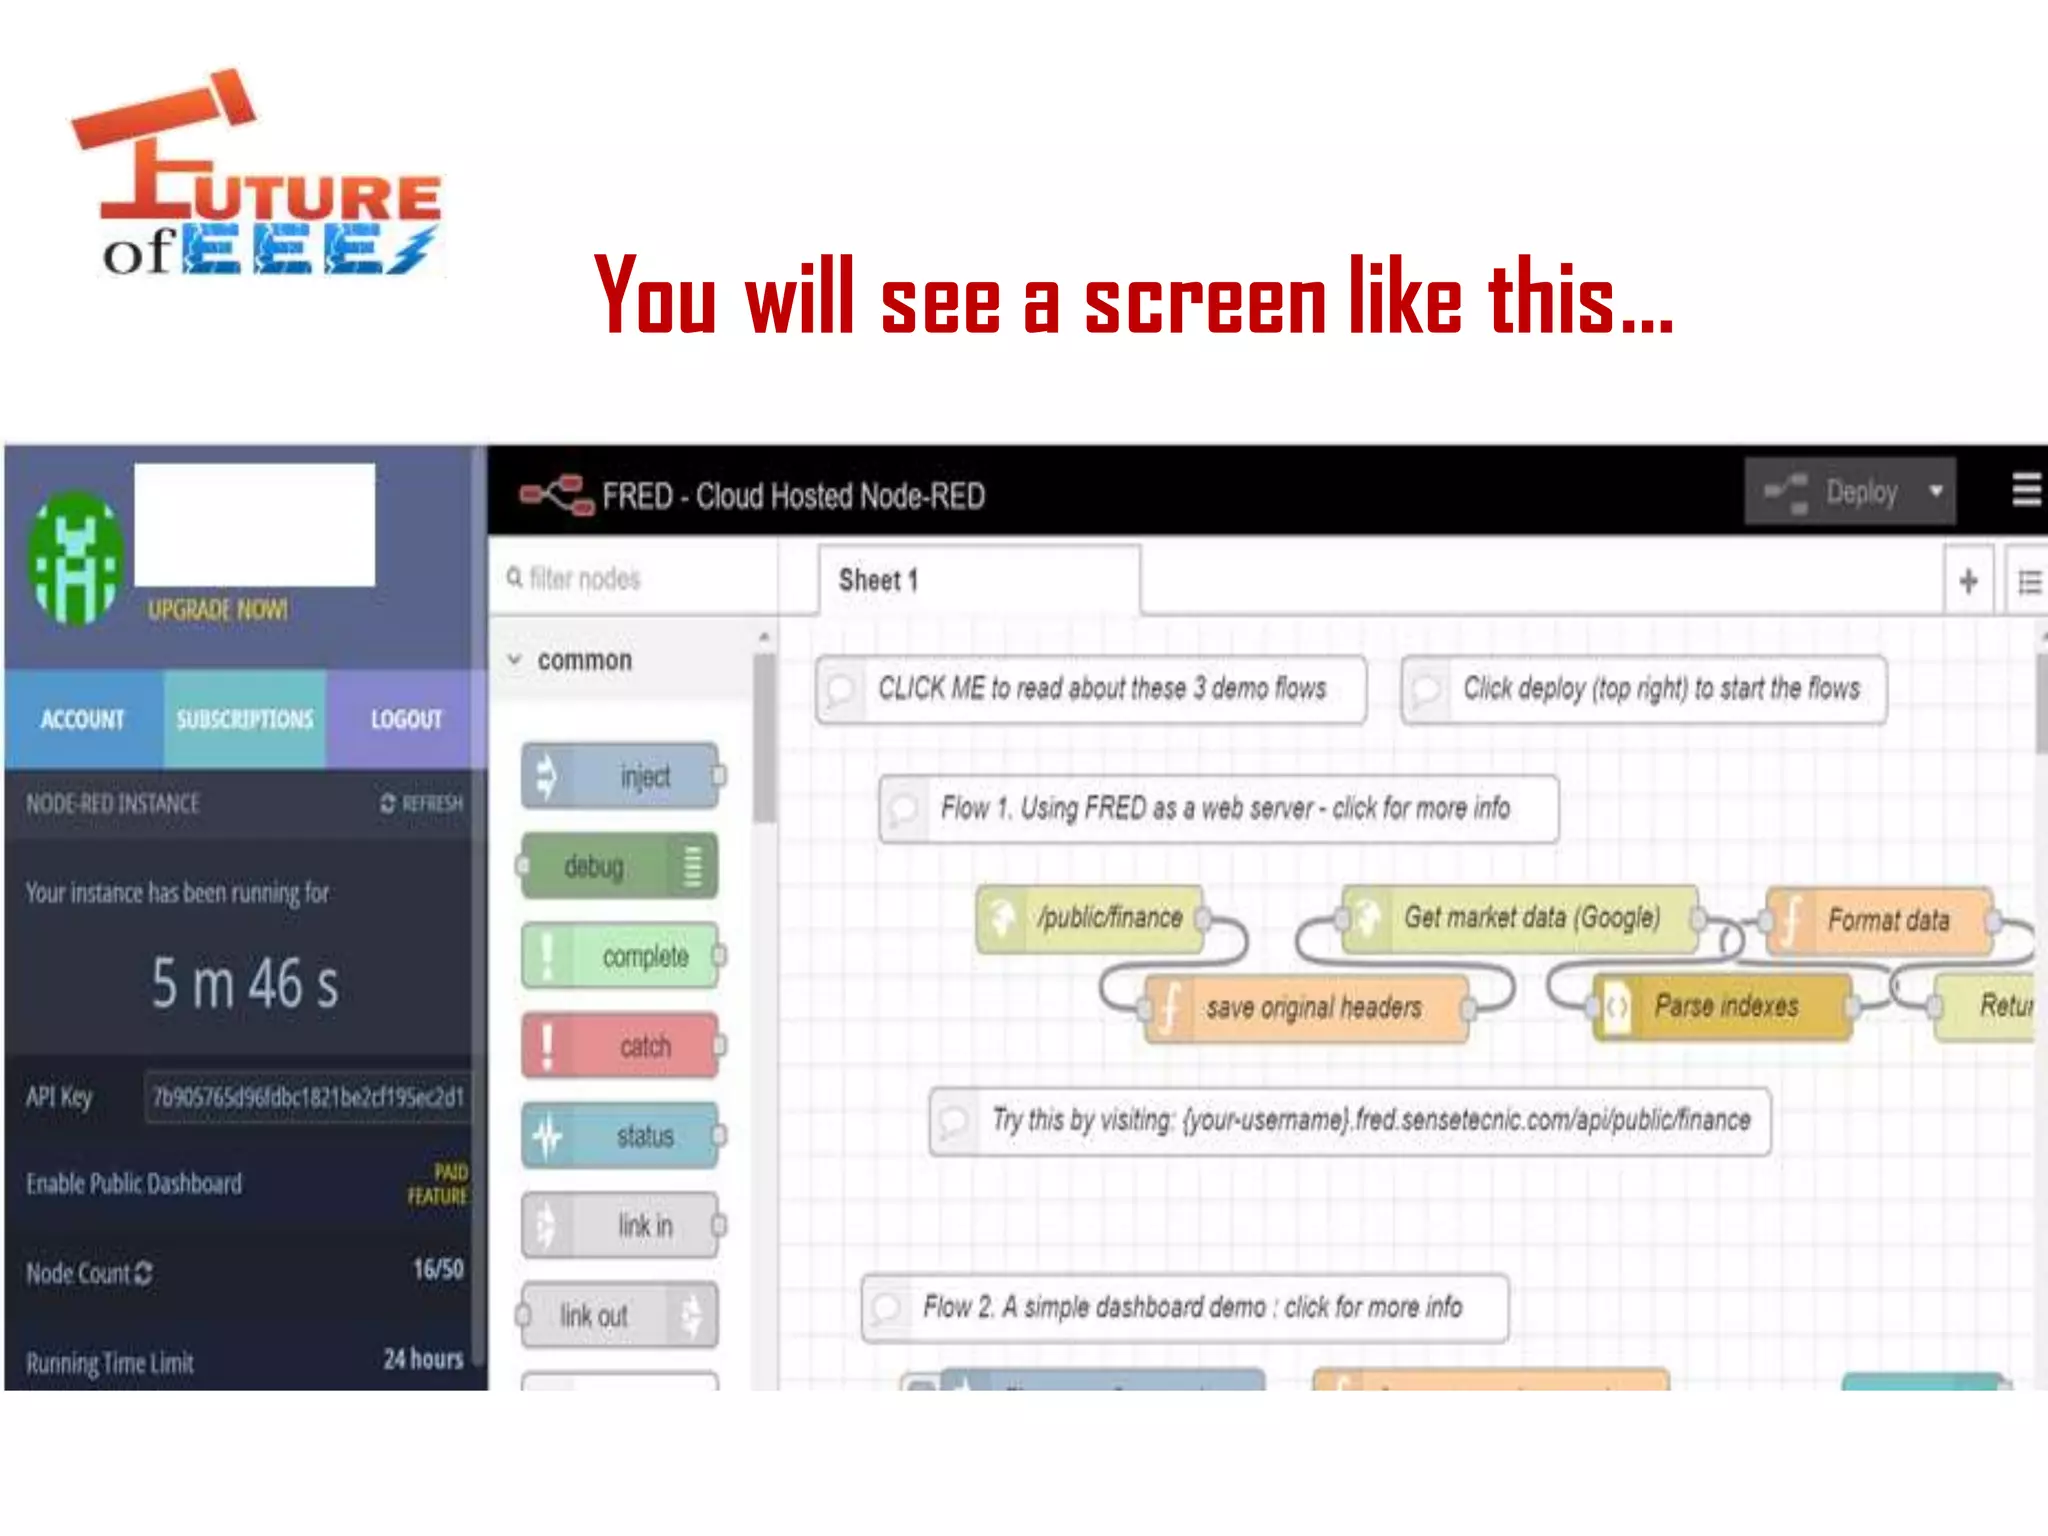
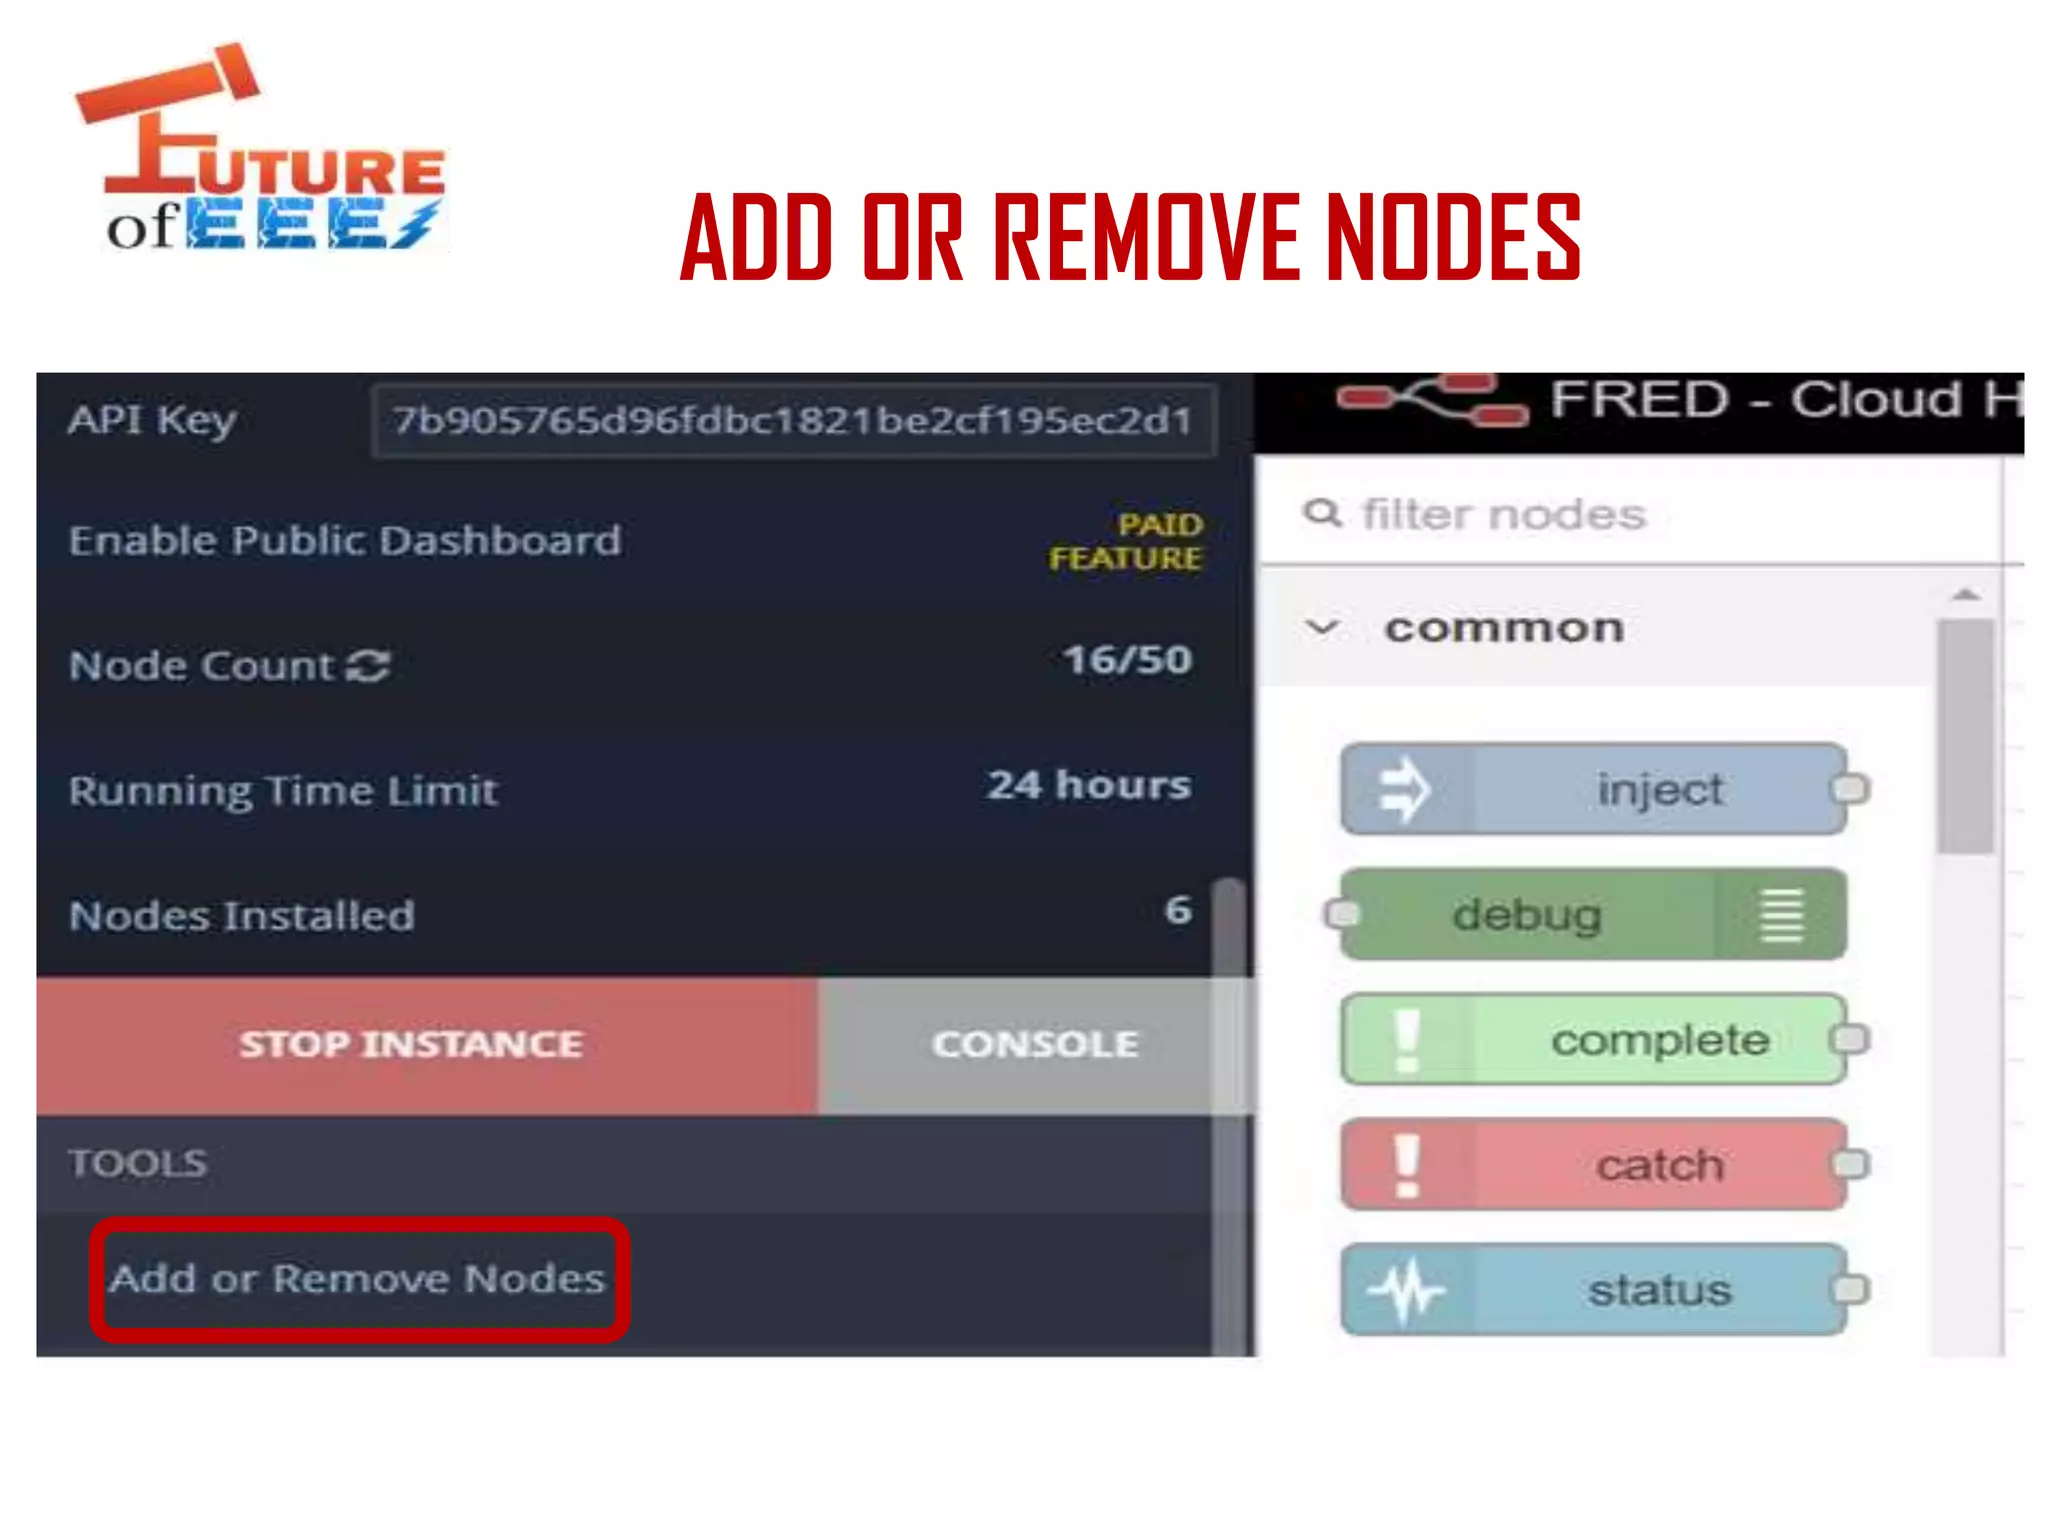
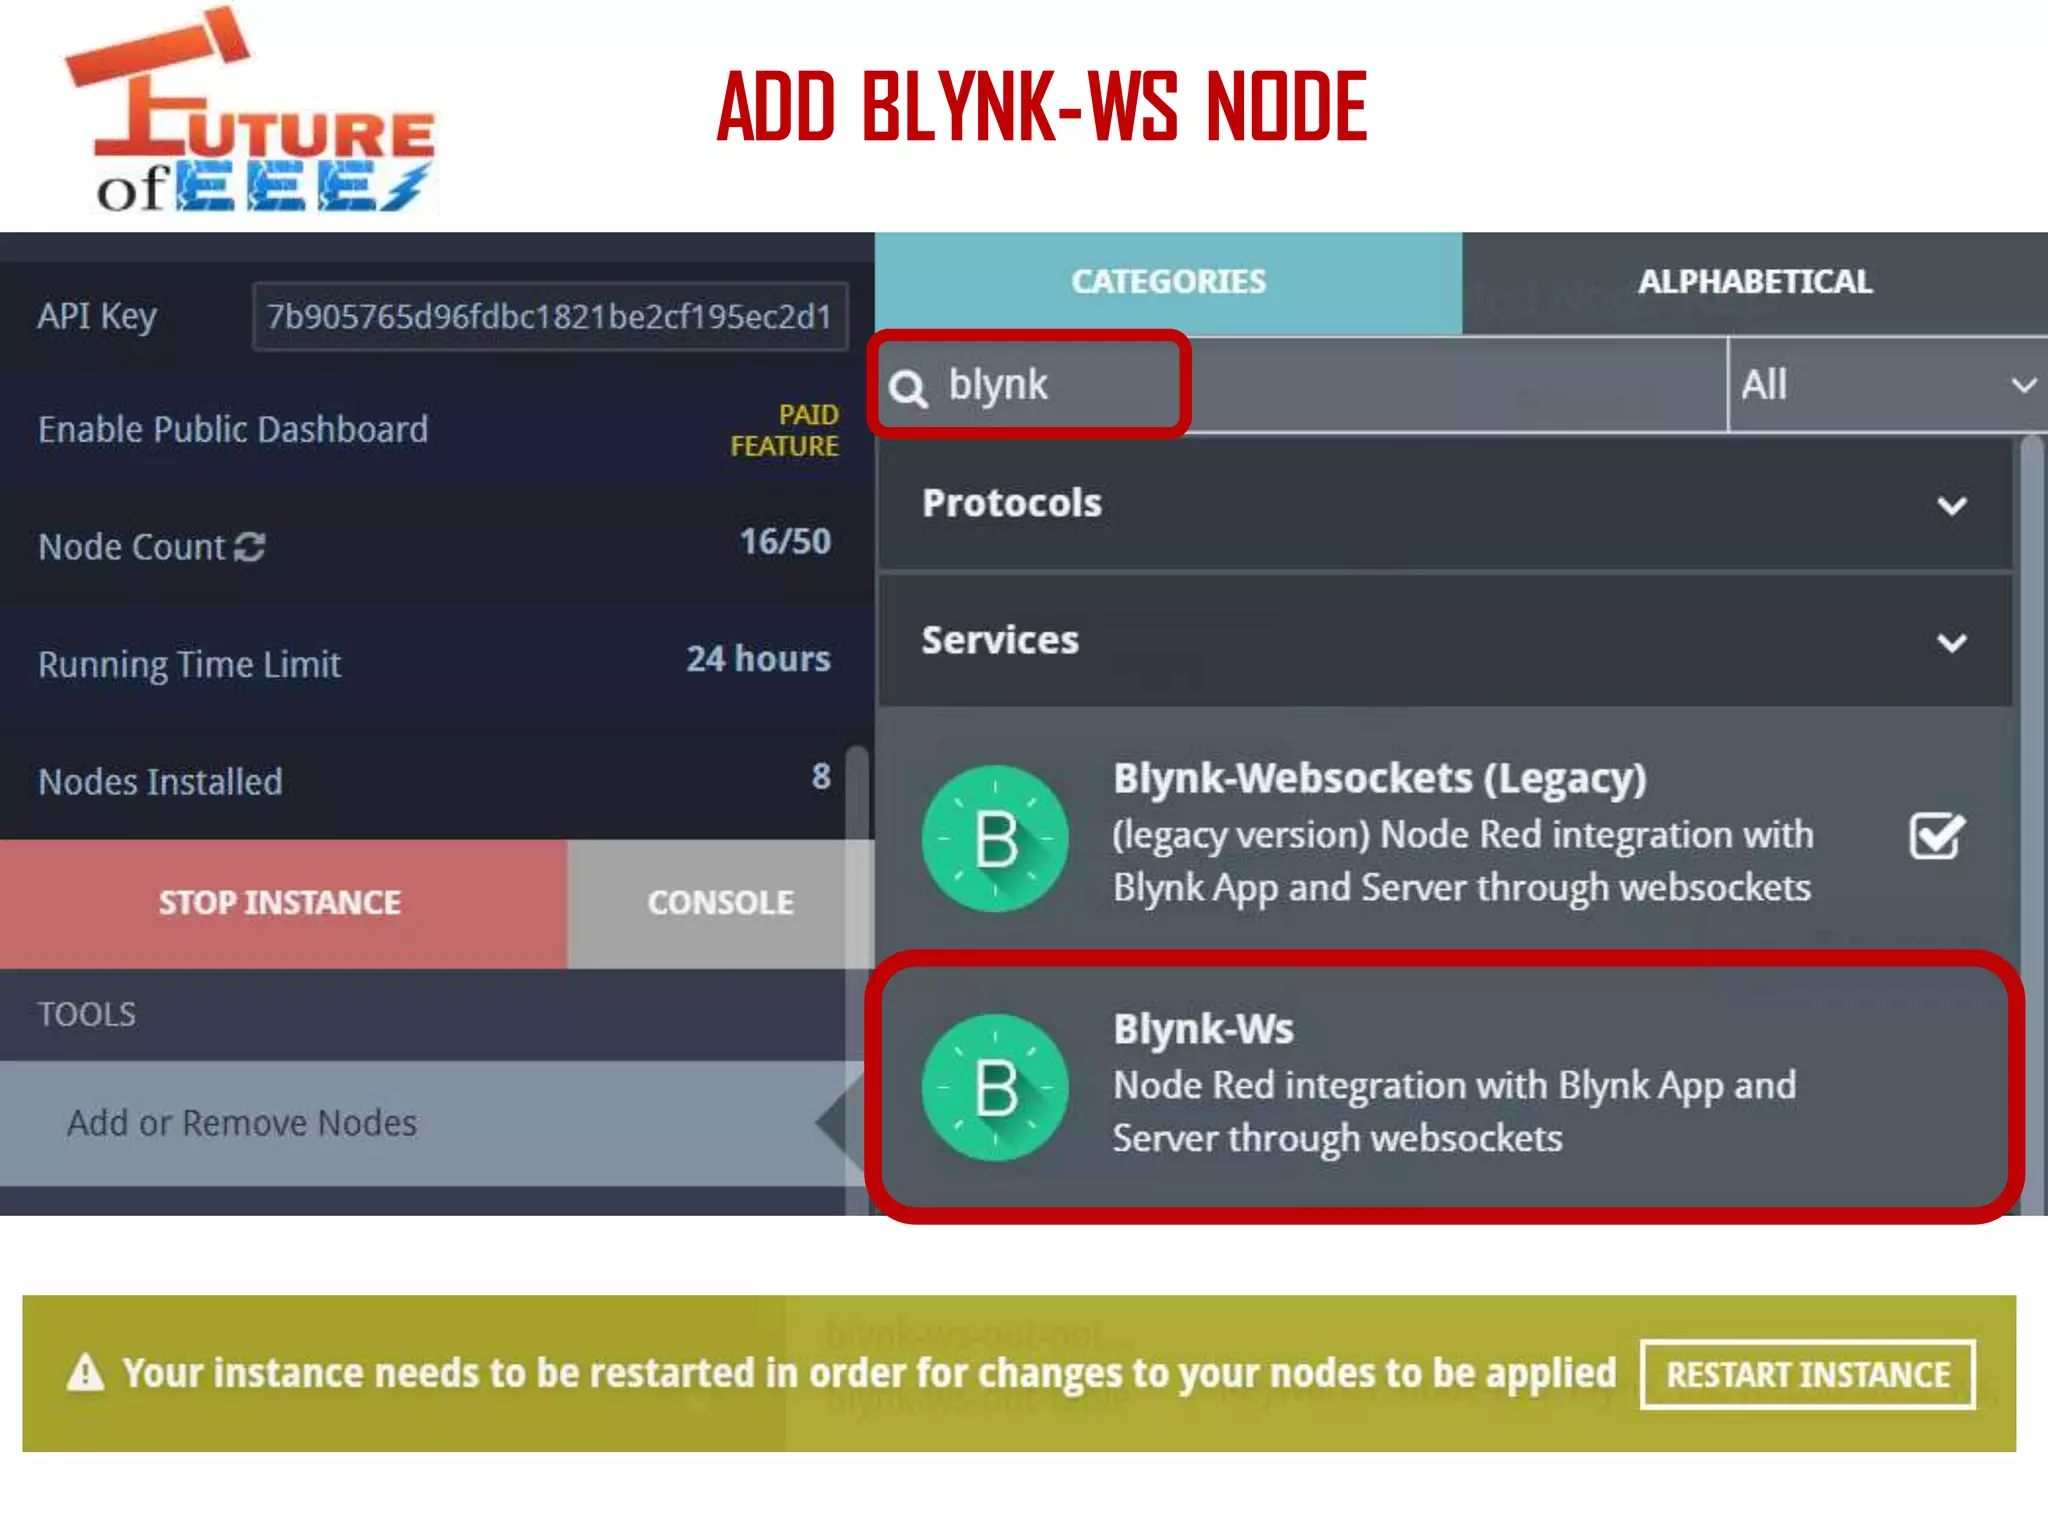
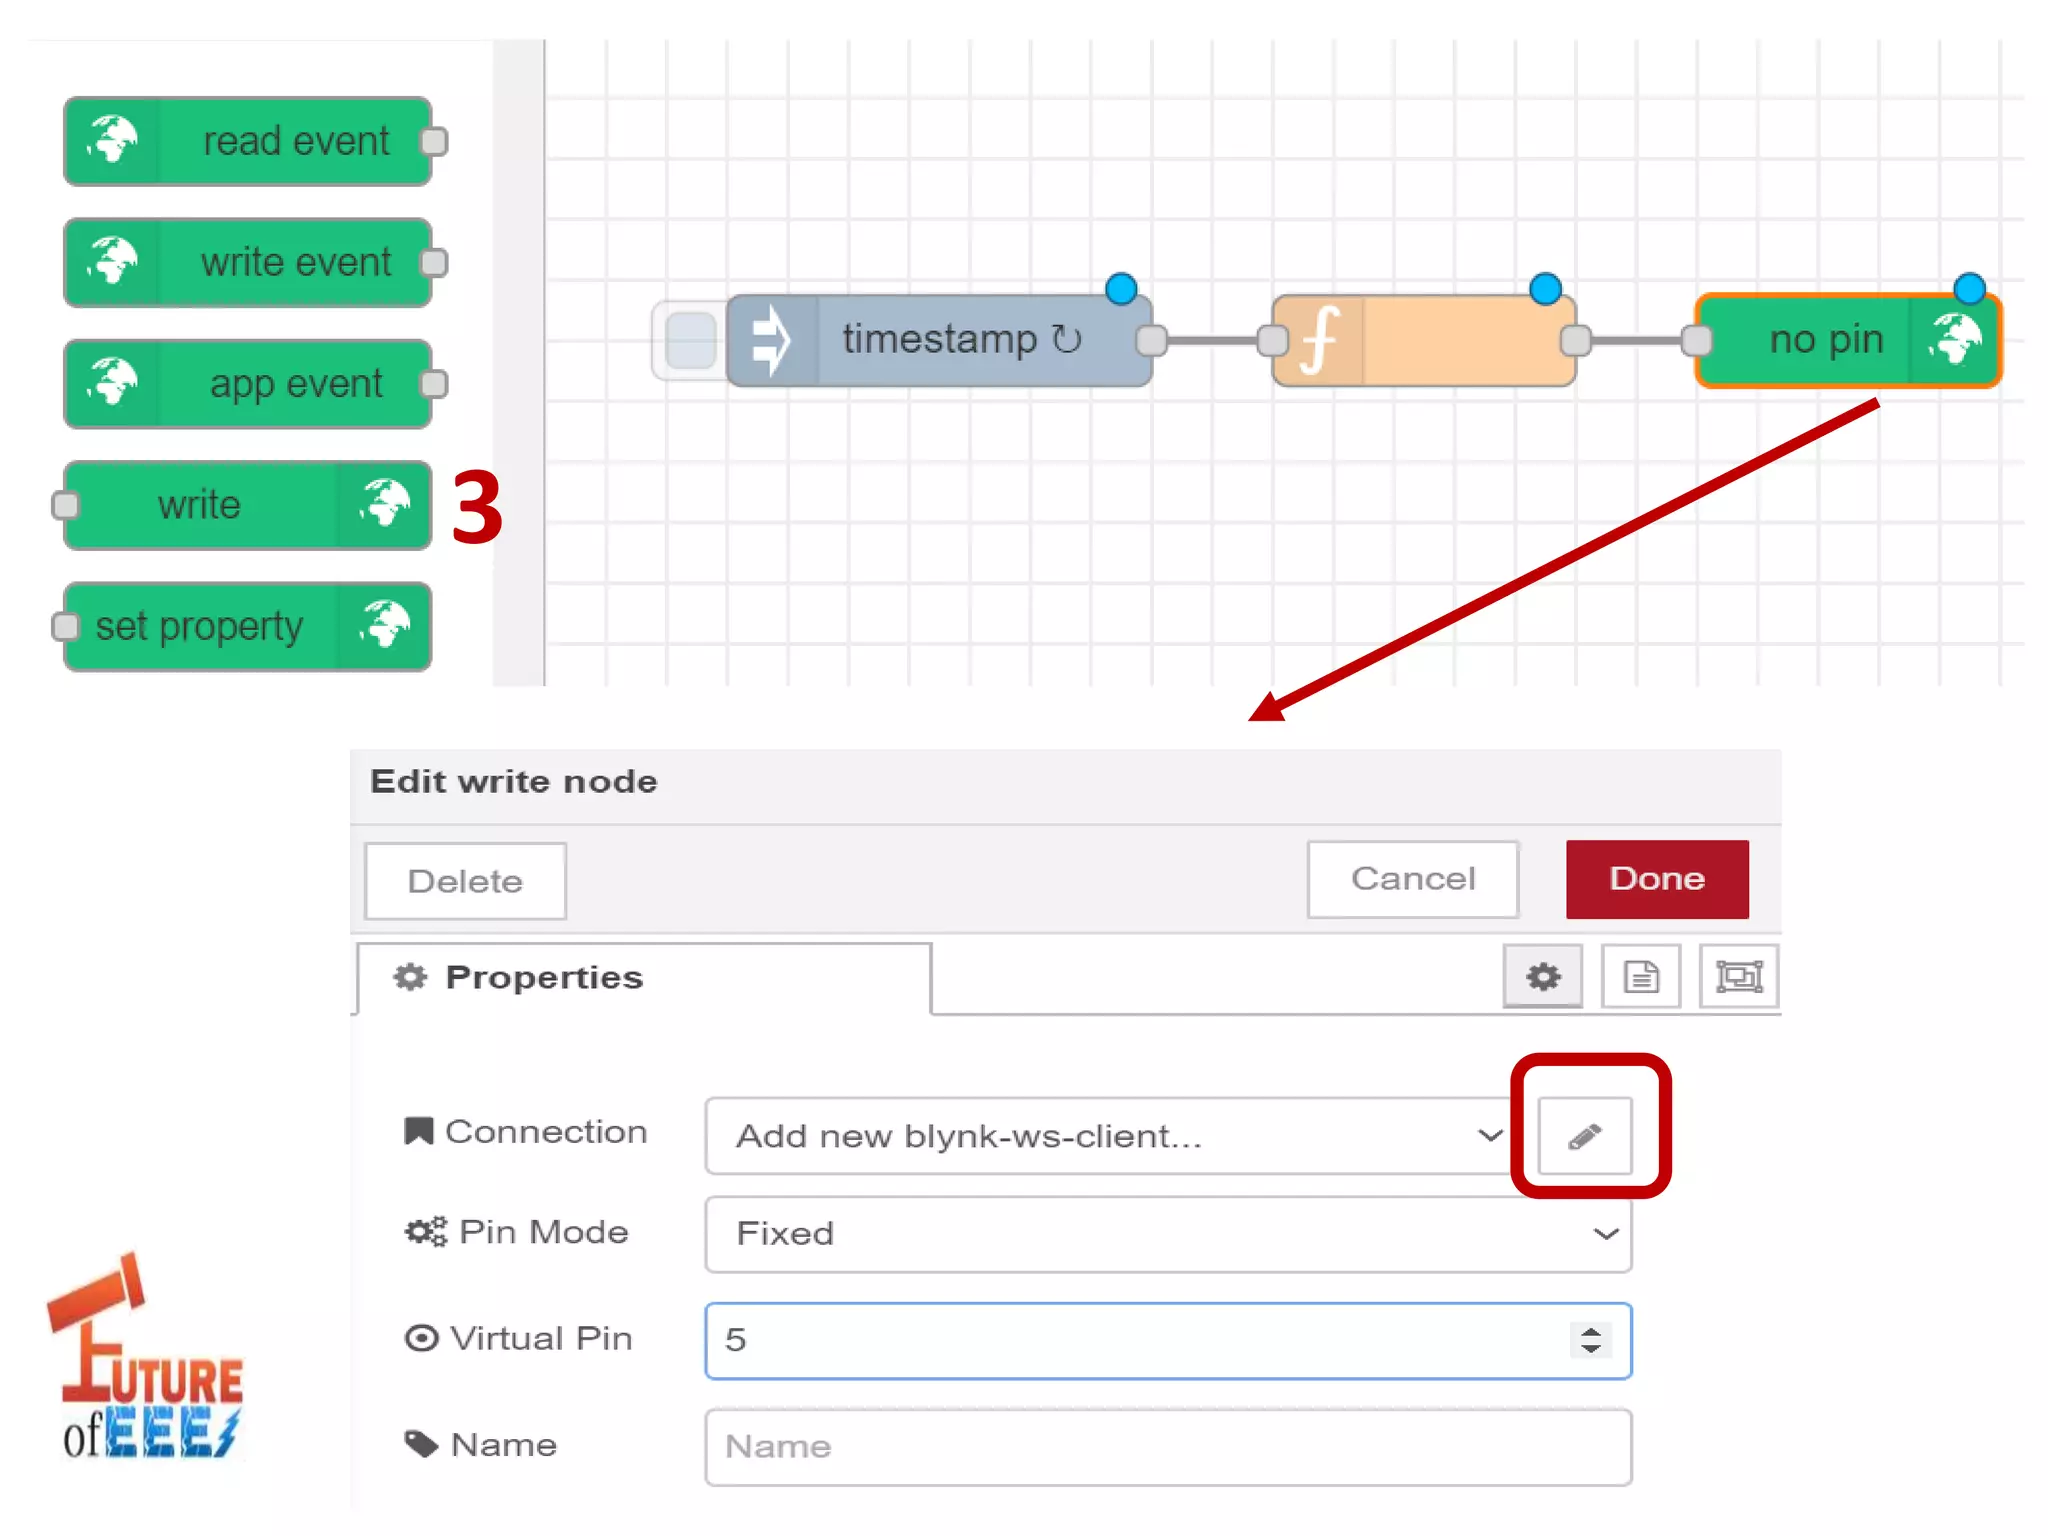
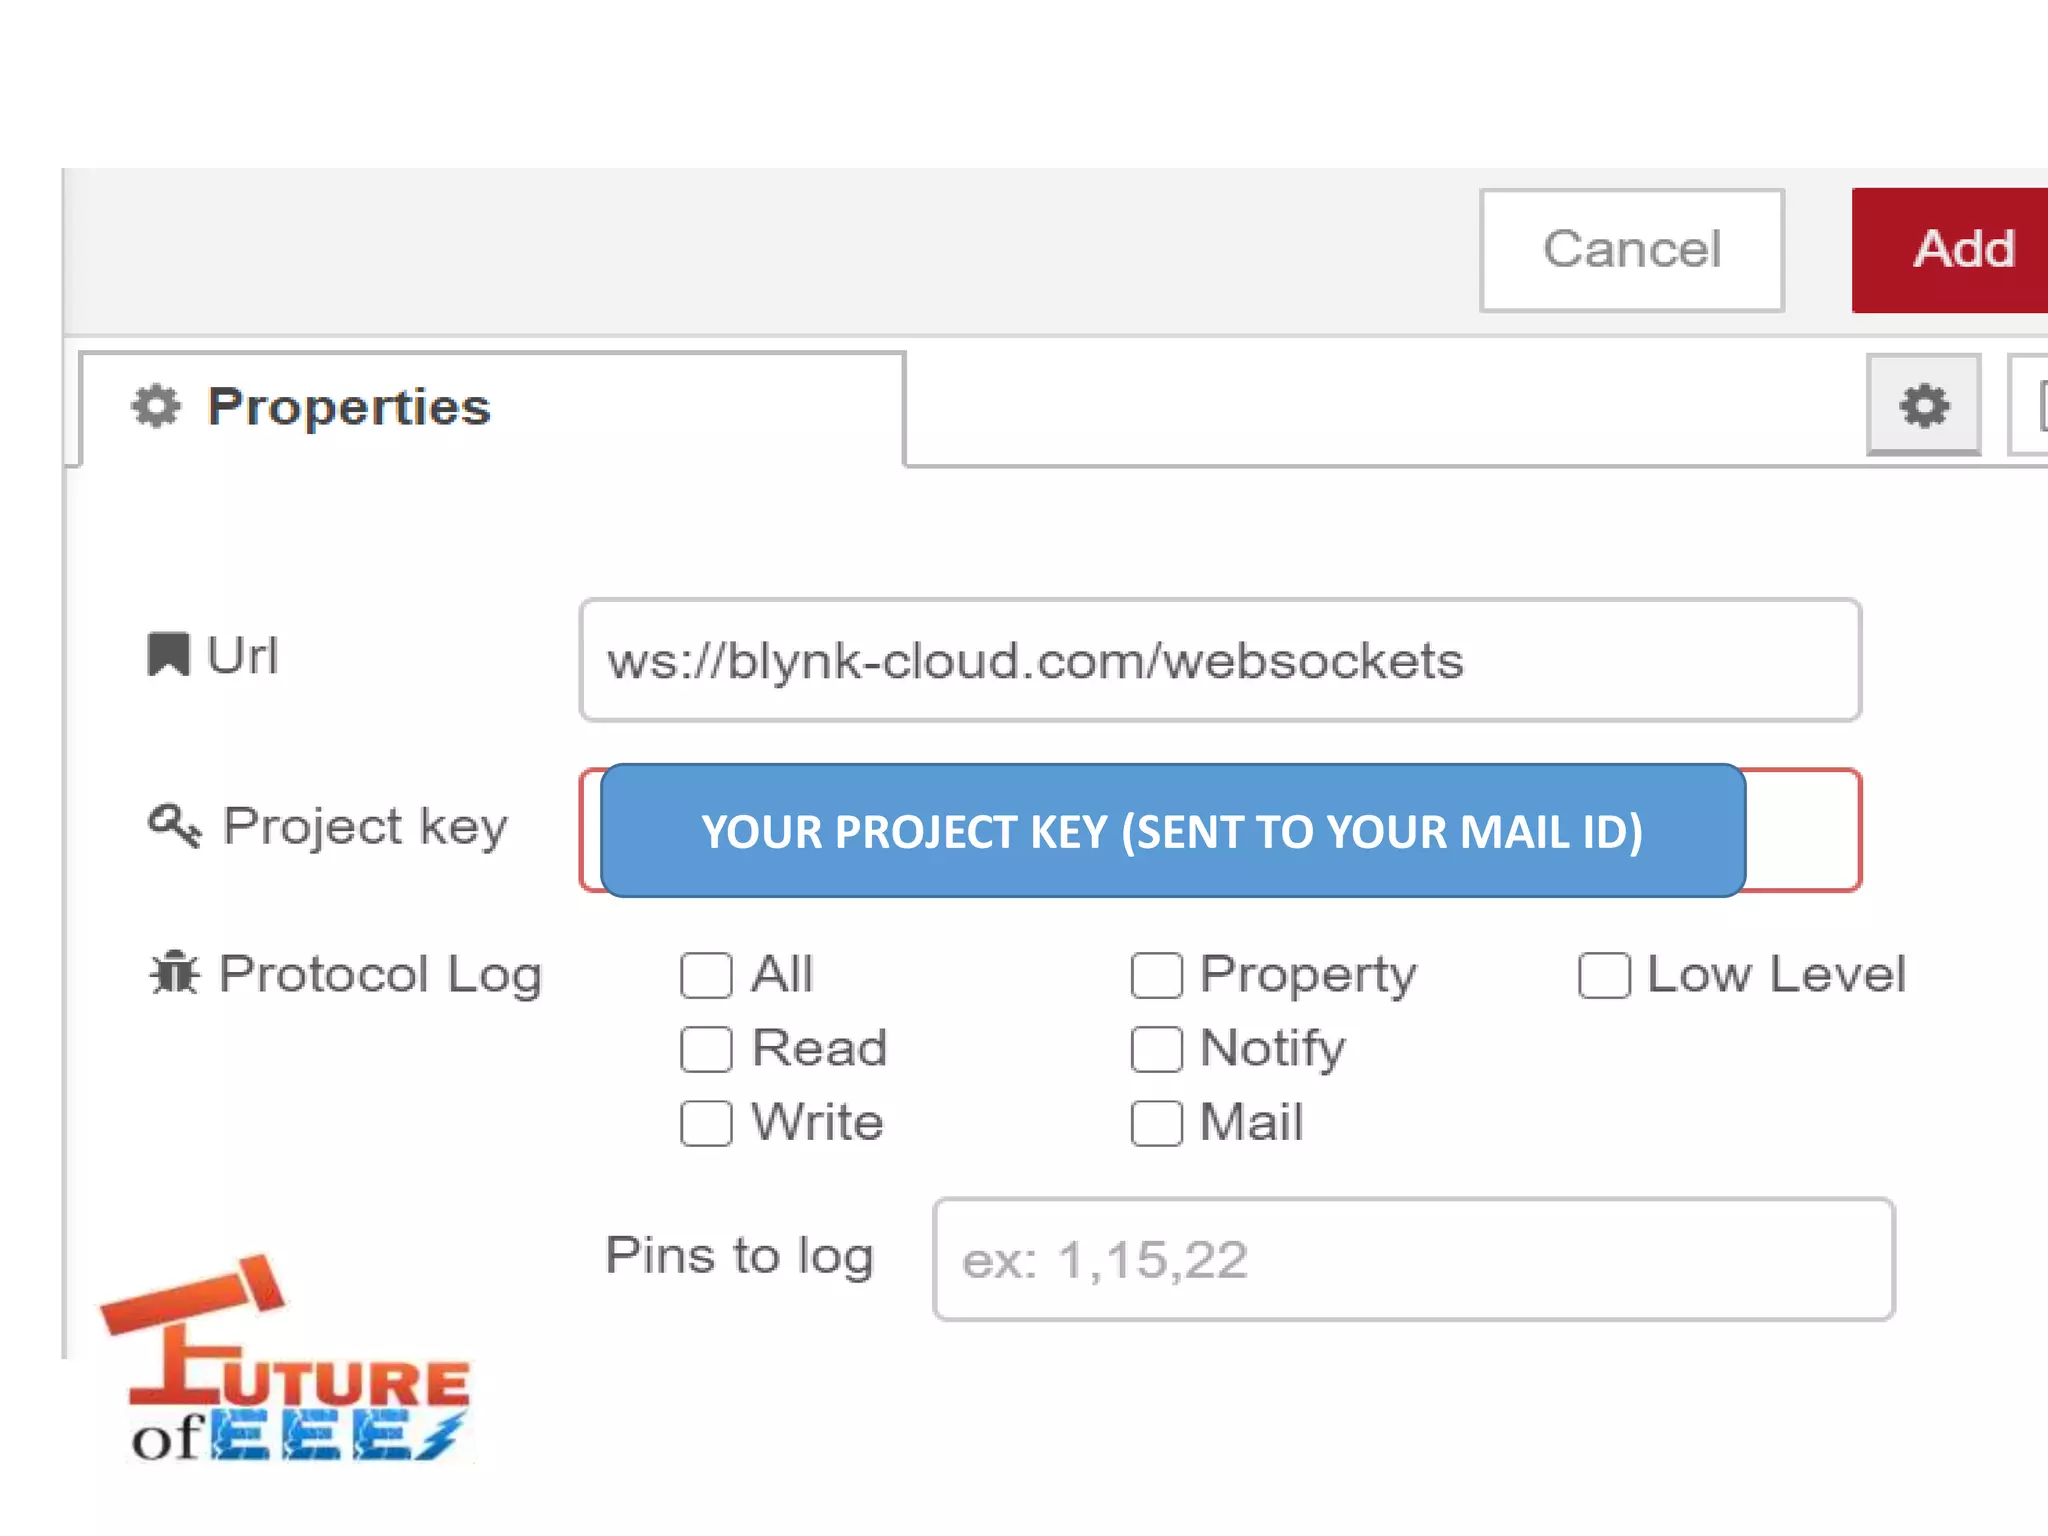
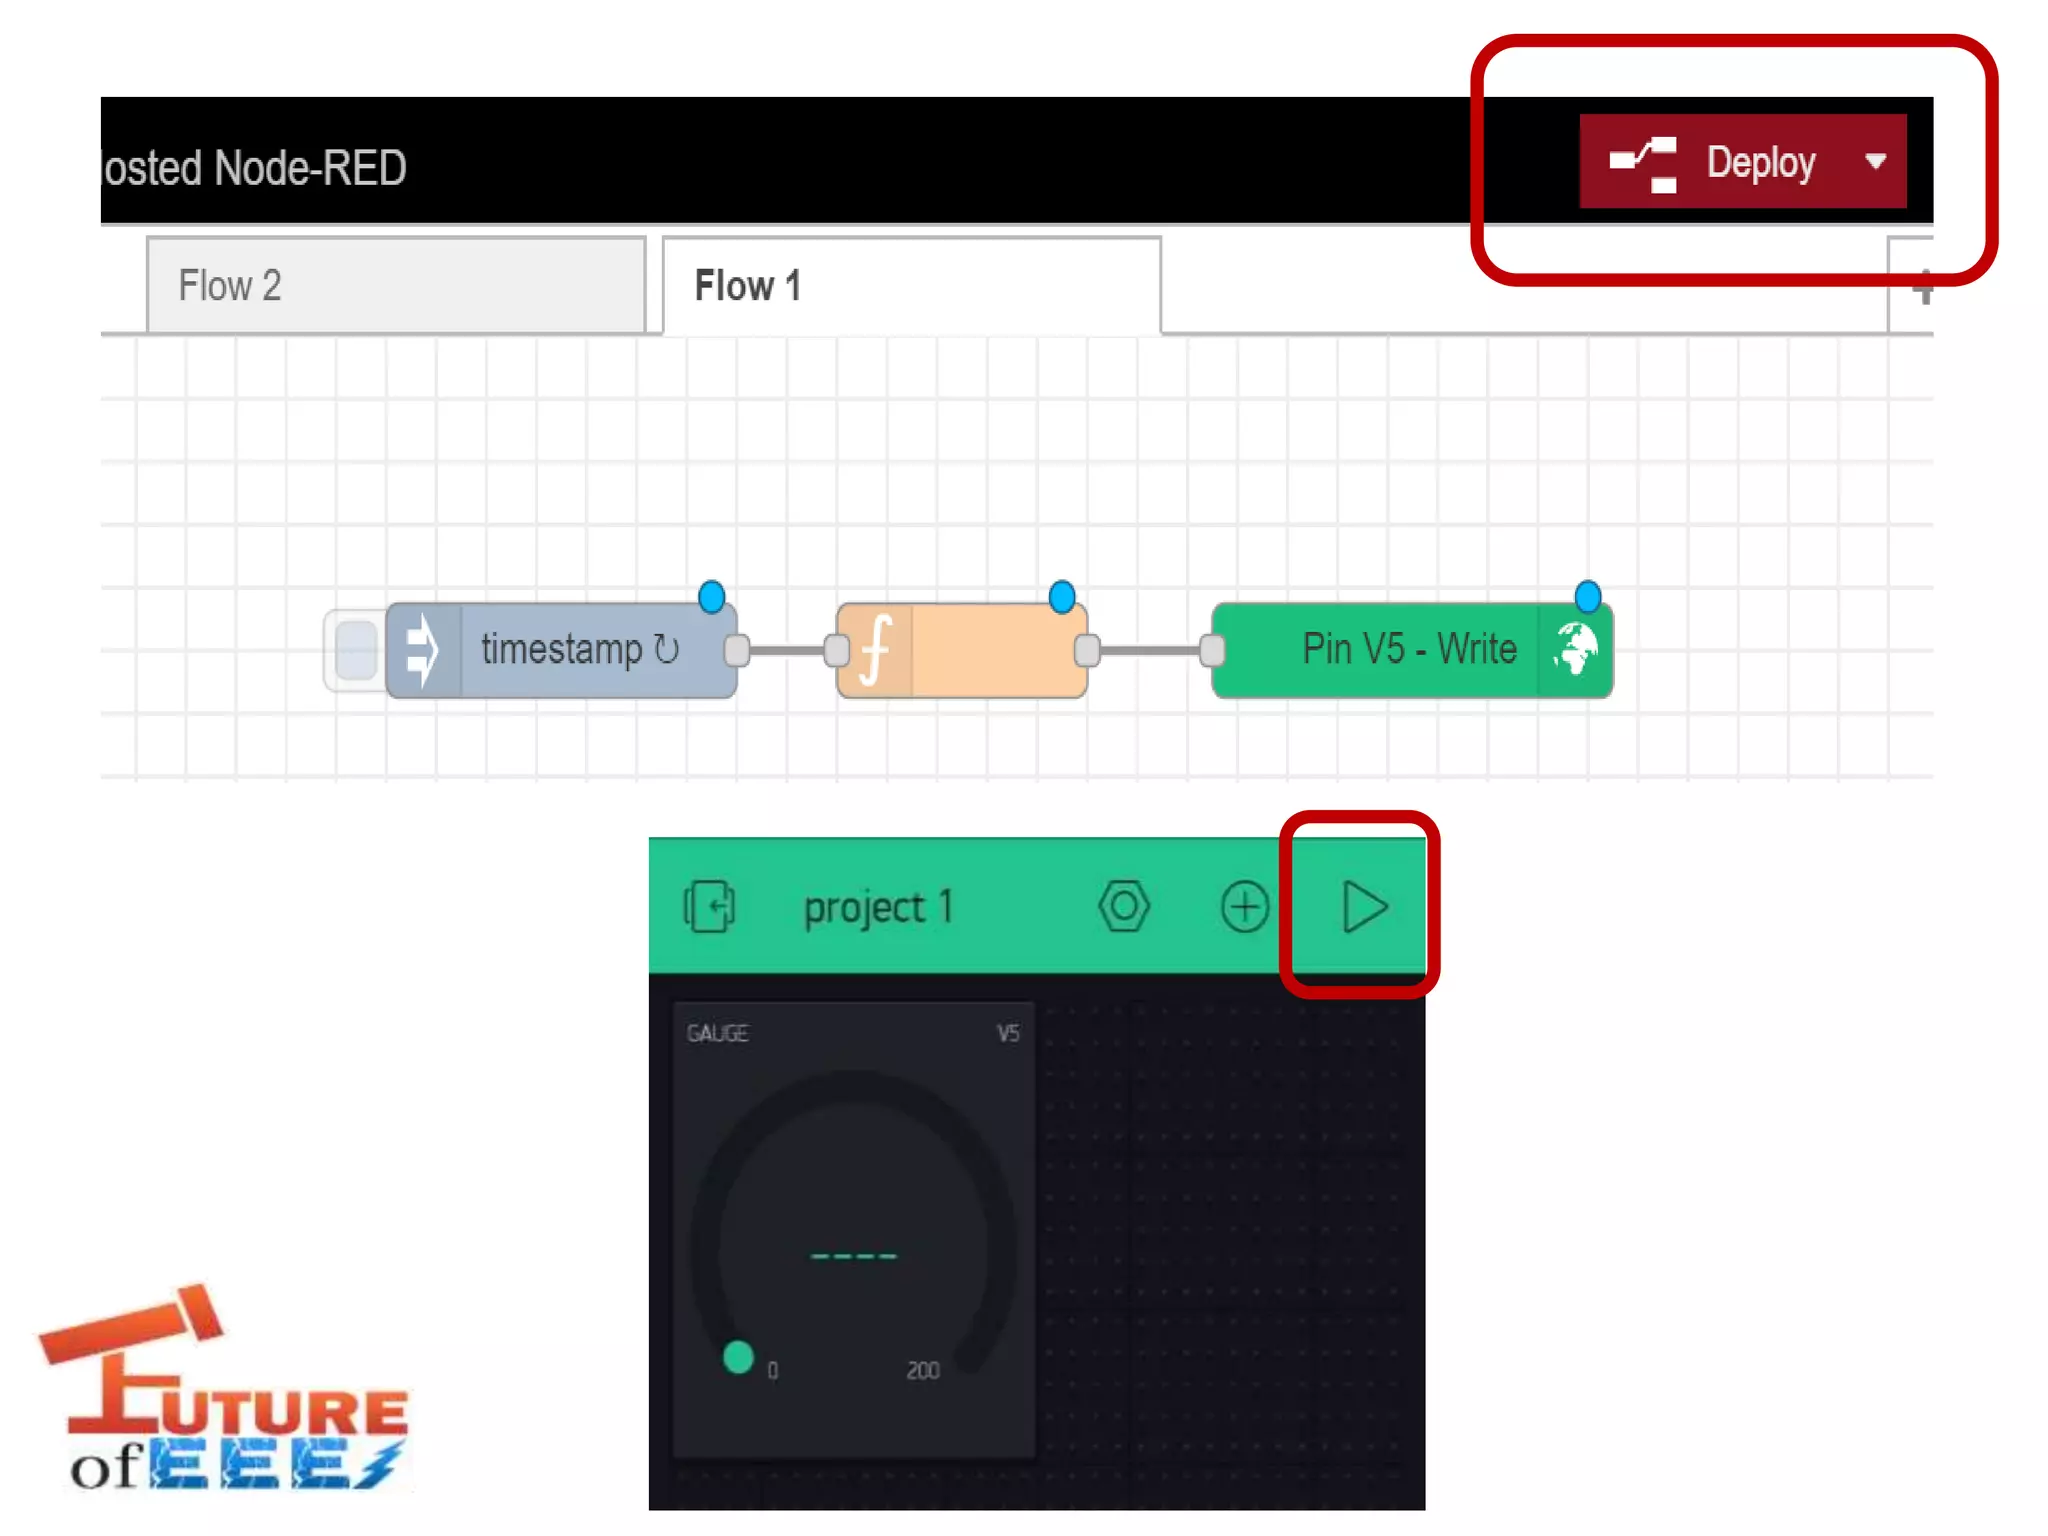
LECTURE 2
STEPS TO BE DONE IN BLYNK MOBILE APP
+FRED FOR MONITORING RANDOM VALUES
BLYNK APP
• BLYNK is a hardware agnostic IoT platform with white label mobile apps,
private clouds, device management, data analytics, and machine
learning.
• Drag and drop IoT apps in minutes
STEP 1
Install the Blynk-IoT Mobile App from the Google play store.
STEP 2
Registration is required to use it. So, create an account.
(or)
If you have Facebook account you can directly log in with that account.
STEP 3
After registration, click on New Project
STEP 4
Enter the project name as you wish (example: project 1) Under CHOOSE DEVICE,
select Node-MCU. Under CONNECTION TYPE, select Wi-Fi and click Create.
Authorized token will be sent to your registered mail id. Click Ok.
STEP 5
In the project space, select widget box. Its shown as plus symbol
STEP 6
Select Gauge under DISPLAYS. Gauge will be display in your project space
as shown below.
GAUGE
STEP 7
By just clicking gauge in the project space you will be diverted to Gauge
Settings screen as shown. Under INPUT, select virtual pin V5 (if you are
selecting different virtual pin, you need to change it in the program as well)
and change the variation from 1023 to 200 (it will set the gauge level from 0
to 200).
“Clicking
Back
button
You can
see the
gauge
that
ranges
from
0 to 200
as
Shown”
CONGRATULATIONS!
YOU HAVE DONE
THE STEPS TO BE DONE IN BLYNK APP
Now Lets see how to send some random values over the
internet using FRED IoT platform without using any hardware
Then enter the details, In the available plan you can select FRED short which is
FREE. Once completing your email verification, you can log in with your
credentials as shown here
You will see a screen like this…
ADD OR REMOVE NODES
ADD BLYNK-WS NODE
1
2
3
YOUR PROJECT KEY (SENT TO YOUR MAIL ID)
RESULT

Steps to be done in blynk app for monitoring

  • 1.
    LECTURE 2 STEPS TOBE DONE IN BLYNK MOBILE APP +FRED FOR MONITORING RANDOM VALUES
  • 2.
    BLYNK APP • BLYNKis a hardware agnostic IoT platform with white label mobile apps, private clouds, device management, data analytics, and machine learning. • Drag and drop IoT apps in minutes
  • 3.
    STEP 1 Install theBlynk-IoT Mobile App from the Google play store.
  • 4.
    STEP 2 Registration isrequired to use it. So, create an account. (or) If you have Facebook account you can directly log in with that account.
  • 5.
    STEP 3 After registration,click on New Project
  • 6.
    STEP 4 Enter theproject name as you wish (example: project 1) Under CHOOSE DEVICE, select Node-MCU. Under CONNECTION TYPE, select Wi-Fi and click Create. Authorized token will be sent to your registered mail id. Click Ok.
  • 7.
    STEP 5 In theproject space, select widget box. Its shown as plus symbol
  • 8.
    STEP 6 Select Gaugeunder DISPLAYS. Gauge will be display in your project space as shown below. GAUGE
  • 9.
    STEP 7 By justclicking gauge in the project space you will be diverted to Gauge Settings screen as shown. Under INPUT, select virtual pin V5 (if you are selecting different virtual pin, you need to change it in the program as well) and change the variation from 1023 to 200 (it will set the gauge level from 0 to 200). “Clicking Back button You can see the gauge that ranges from 0 to 200 as Shown”
  • 10.
    CONGRATULATIONS! YOU HAVE DONE THESTEPS TO BE DONE IN BLYNK APP
  • 11.
    Now Lets seehow to send some random values over the internet using FRED IoT platform without using any hardware
  • 12.
    Then enter thedetails, In the available plan you can select FRED short which is FREE. Once completing your email verification, you can log in with your credentials as shown here
  • 13.
    You will seea screen like this…
  • 14.
  • 15.
  • 16.
  • 17.
  • 18.
  • 19.
    YOUR PROJECT KEY(SENT TO YOUR MAIL ID)
  • 21.