Download as PDF, PPTX
![www.vishalbiyani.comLearning Puppet
Variables &
Expressions
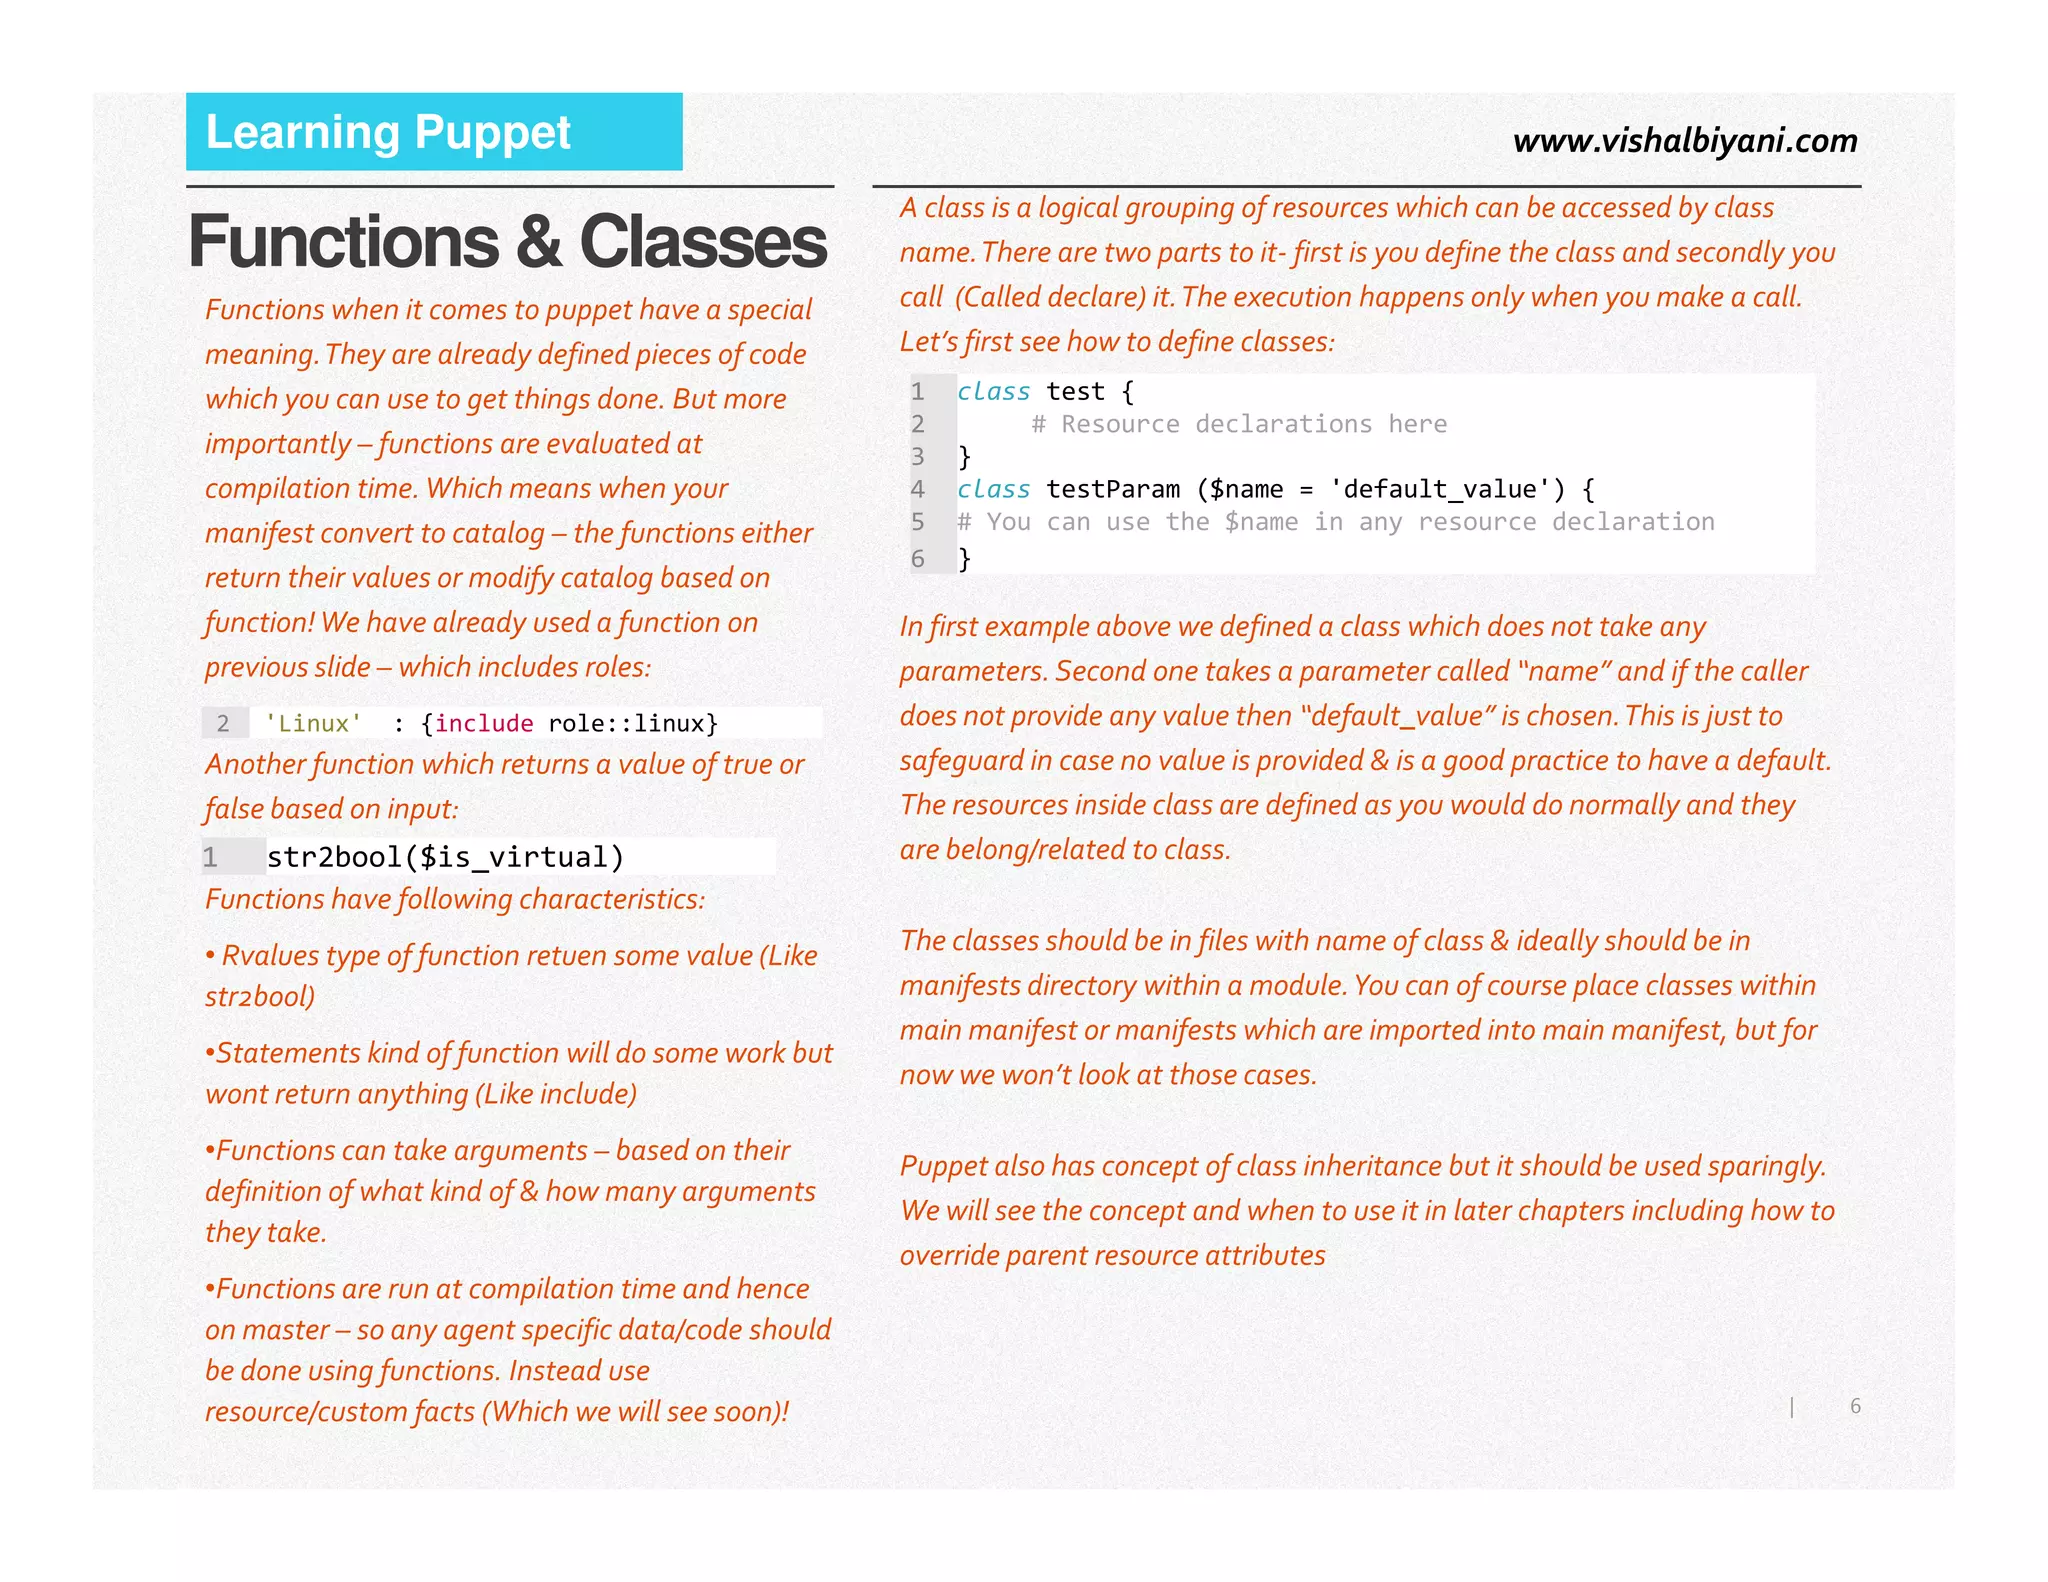
Lot of times we also need to resolve variables within a string for ex:
Variables can be declared with names starting
with $ and value can be a literal value or a
function/expression which resolves to a value.
1 $name = "vishal"
2 $number = 10+2
As long as the value that a variable resolves to is
compatible with data type of intended target, it
can be used as part of expression, function or
attribute!You will also see variables in following
6 $f_name = "${conf_dir}/.conf"
3 $users = ['us1','us2']
4 $users += ['us3']
Here we are resolving variable named conf_dir within a string – called
interpolation. Similarly addition of variables of same type is easy:
Now coming to one of most important features of variables – you can
assign a variable only once in a given scope. In a new scope you can assign a
new value to same variable, for example below the $name is reassigned but
in a new scaope – scope of the class testClass:
1 $name = "Default Name"
2 class testClass {
3 $name = "Test Class Name"
4 }
4|
attribute!You will also see variables in following
form:
4 $tomcat::config::tc_port
What does this mean? It means a variable called
“tc_port” from class tomcat::config. We will see
the classes & modules shortly.You can access
variables from parent scopes but not from child
scope (And we will scope in detail soon). For
example you can access a top level variable from
class level scope but not other way around. Also
there is a special notation for variables at top
scope – the scope is blank. In following example
we are getting “osfamily” from top scope
4 $::osfamily
4 }
Lastly – a variable can not be resolved unless it is defined.Which means
unlike rest of Puppet – order matters while defining variables.
Expressions
Most expressions in puppet are usual suspects of any programming
language like == (Equality), != (Non Equality), ,< , > , <= , >= , and, or, ! , +, -,
/, *, % etc. Couple of them that need some attention are not found in some
languages are:
=~ Left hand is a string & right hand is a regex – if match is found
then returns true
!~ Left hand is a string and right is a regex – if match is found
returns false
in Left hand operand should be string and right hand could be
string, array, hash. It checks if string on left side is “in” the right
side variable. Returns true if found](https://image.slidesharecdn.com/learningpuppetchapter2-150519194824-lva1-app6892/75/Learning-puppet-chapter-2-4-2048.jpg)
![www.vishalbiyani.comLearning Puppet
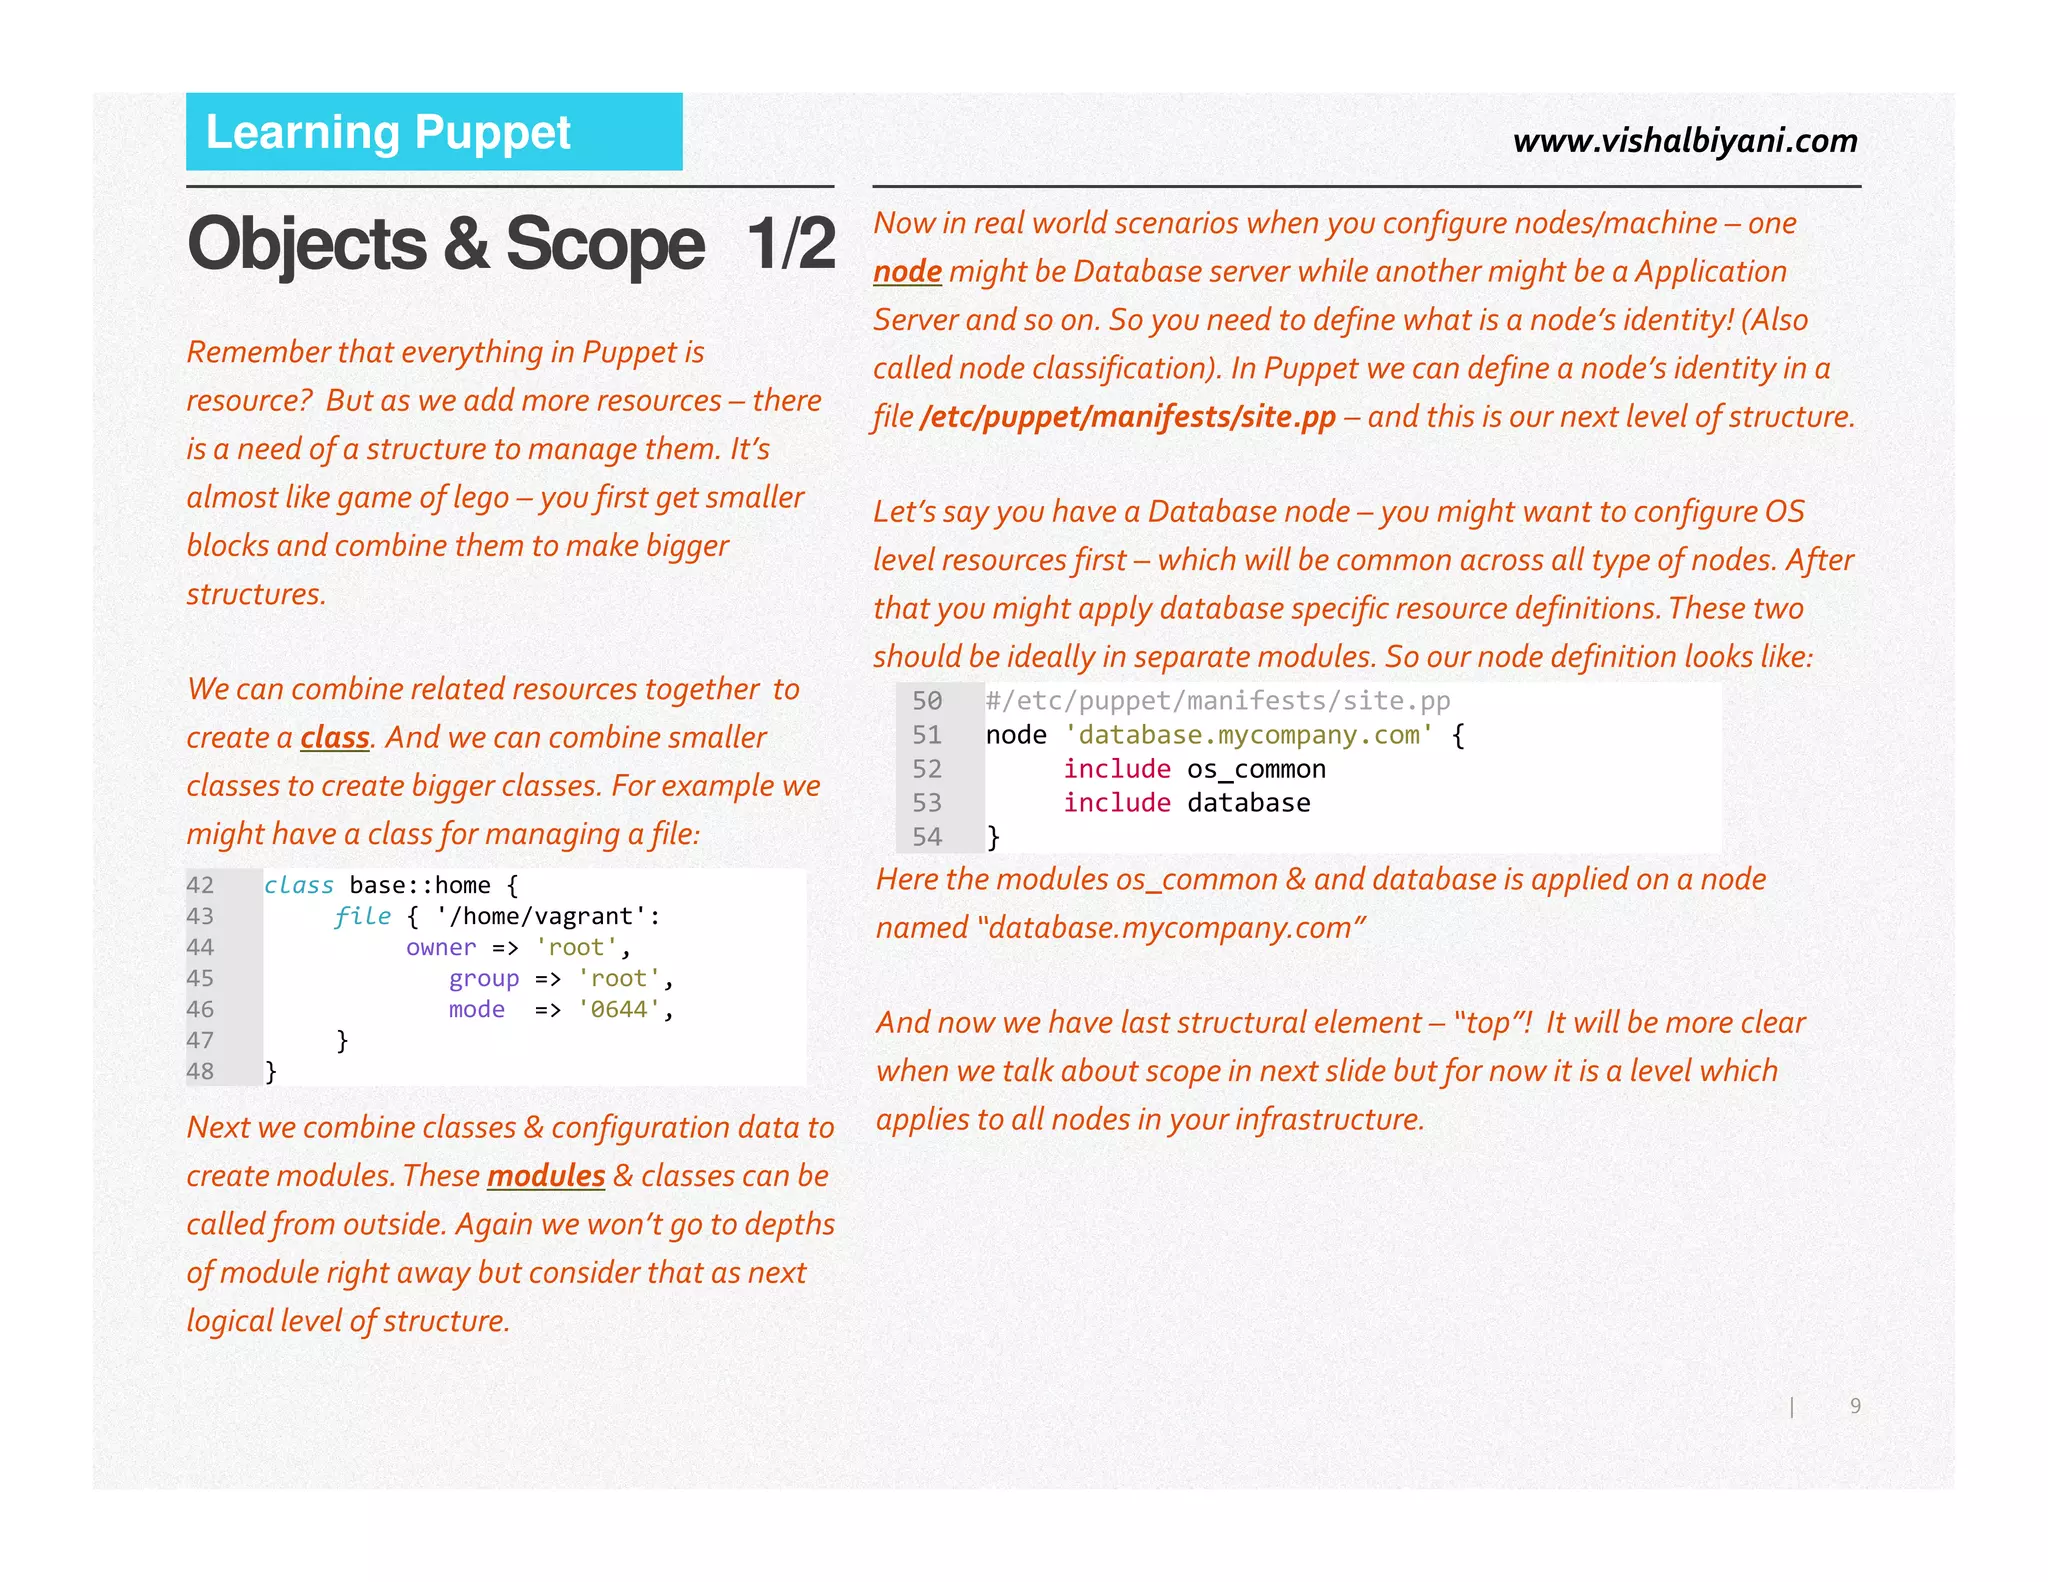
Declaring Classes
Before we deep dive into declaring/calling classes
let’s understand a fundamental difference due
the way this evolved with Puppet:
•Include-like way:This was introduced in 3.x &
later versions.You can declare a class any number
of times but it will be called only once. It uses a
combination of external data & defaults to set
values of parameters. (Good practice of
externalizing configuration data from code). It is
suggested to use this way.
•Resource-like way:This is old way – in which
Let’s say you want to include a class into another one, this can be done
using “require” funcion which BTW is different than require used for
ordering.The require’s behavior is include like and you can pass list
separated by comma, array etc.
There is third include like way of declaring classes which uses hiera but we
will see that when we talk about hiera!
Now let’s look at resource like way of declaring classes which is not
suggested after version puppet 3. It is as good as declaring any other
resource:
6 define nix::tomcat(){
7 require java
8 }
10 class {‘nix::tomcat’}
7|
•Resource-like way:This is old way – in which
you declare a class the way you declare a
resource.You MUST DECLARE ONLY ONCE!You
can override parameters else they will be taken
from external data or lastly form defaults!
Now let’s see in how many different ways we can
declare classes.
Include: this is of course include like way to
declare classes and can take many forms
There is another way to assign classes to some nodes is via something called
ENC - External Node Classifier!Why would you do that?
External node classification is process of defining which node belong to
which classes. Doing it separate from automation tool provides loose
coupling & separation of concerns. ENC can be an external script or a
system which when called gives data of which nodes need to be applied
which classes and the automation tool accordingly applies the same. For
example many organizations store the node data in LDAP and in such case
you will fetch data from LDAP and then run puppet based on which nodes
needs which class.This is a topic which needs more detailed treatment and
we will not go into much details on this one at the moment.
1 include nix::tomcat
2 include nix::tomcat, nginx
3 clas_list = ['nix::tomcat','nginx']
4 include clas_list
10 class {‘nix::tomcat’}](https://image.slidesharecdn.com/learningpuppetchapter2-150519194824-lva1-app6892/75/Learning-puppet-chapter-2-7-2048.jpg)
![www.vishalbiyani.comLearning Puppet
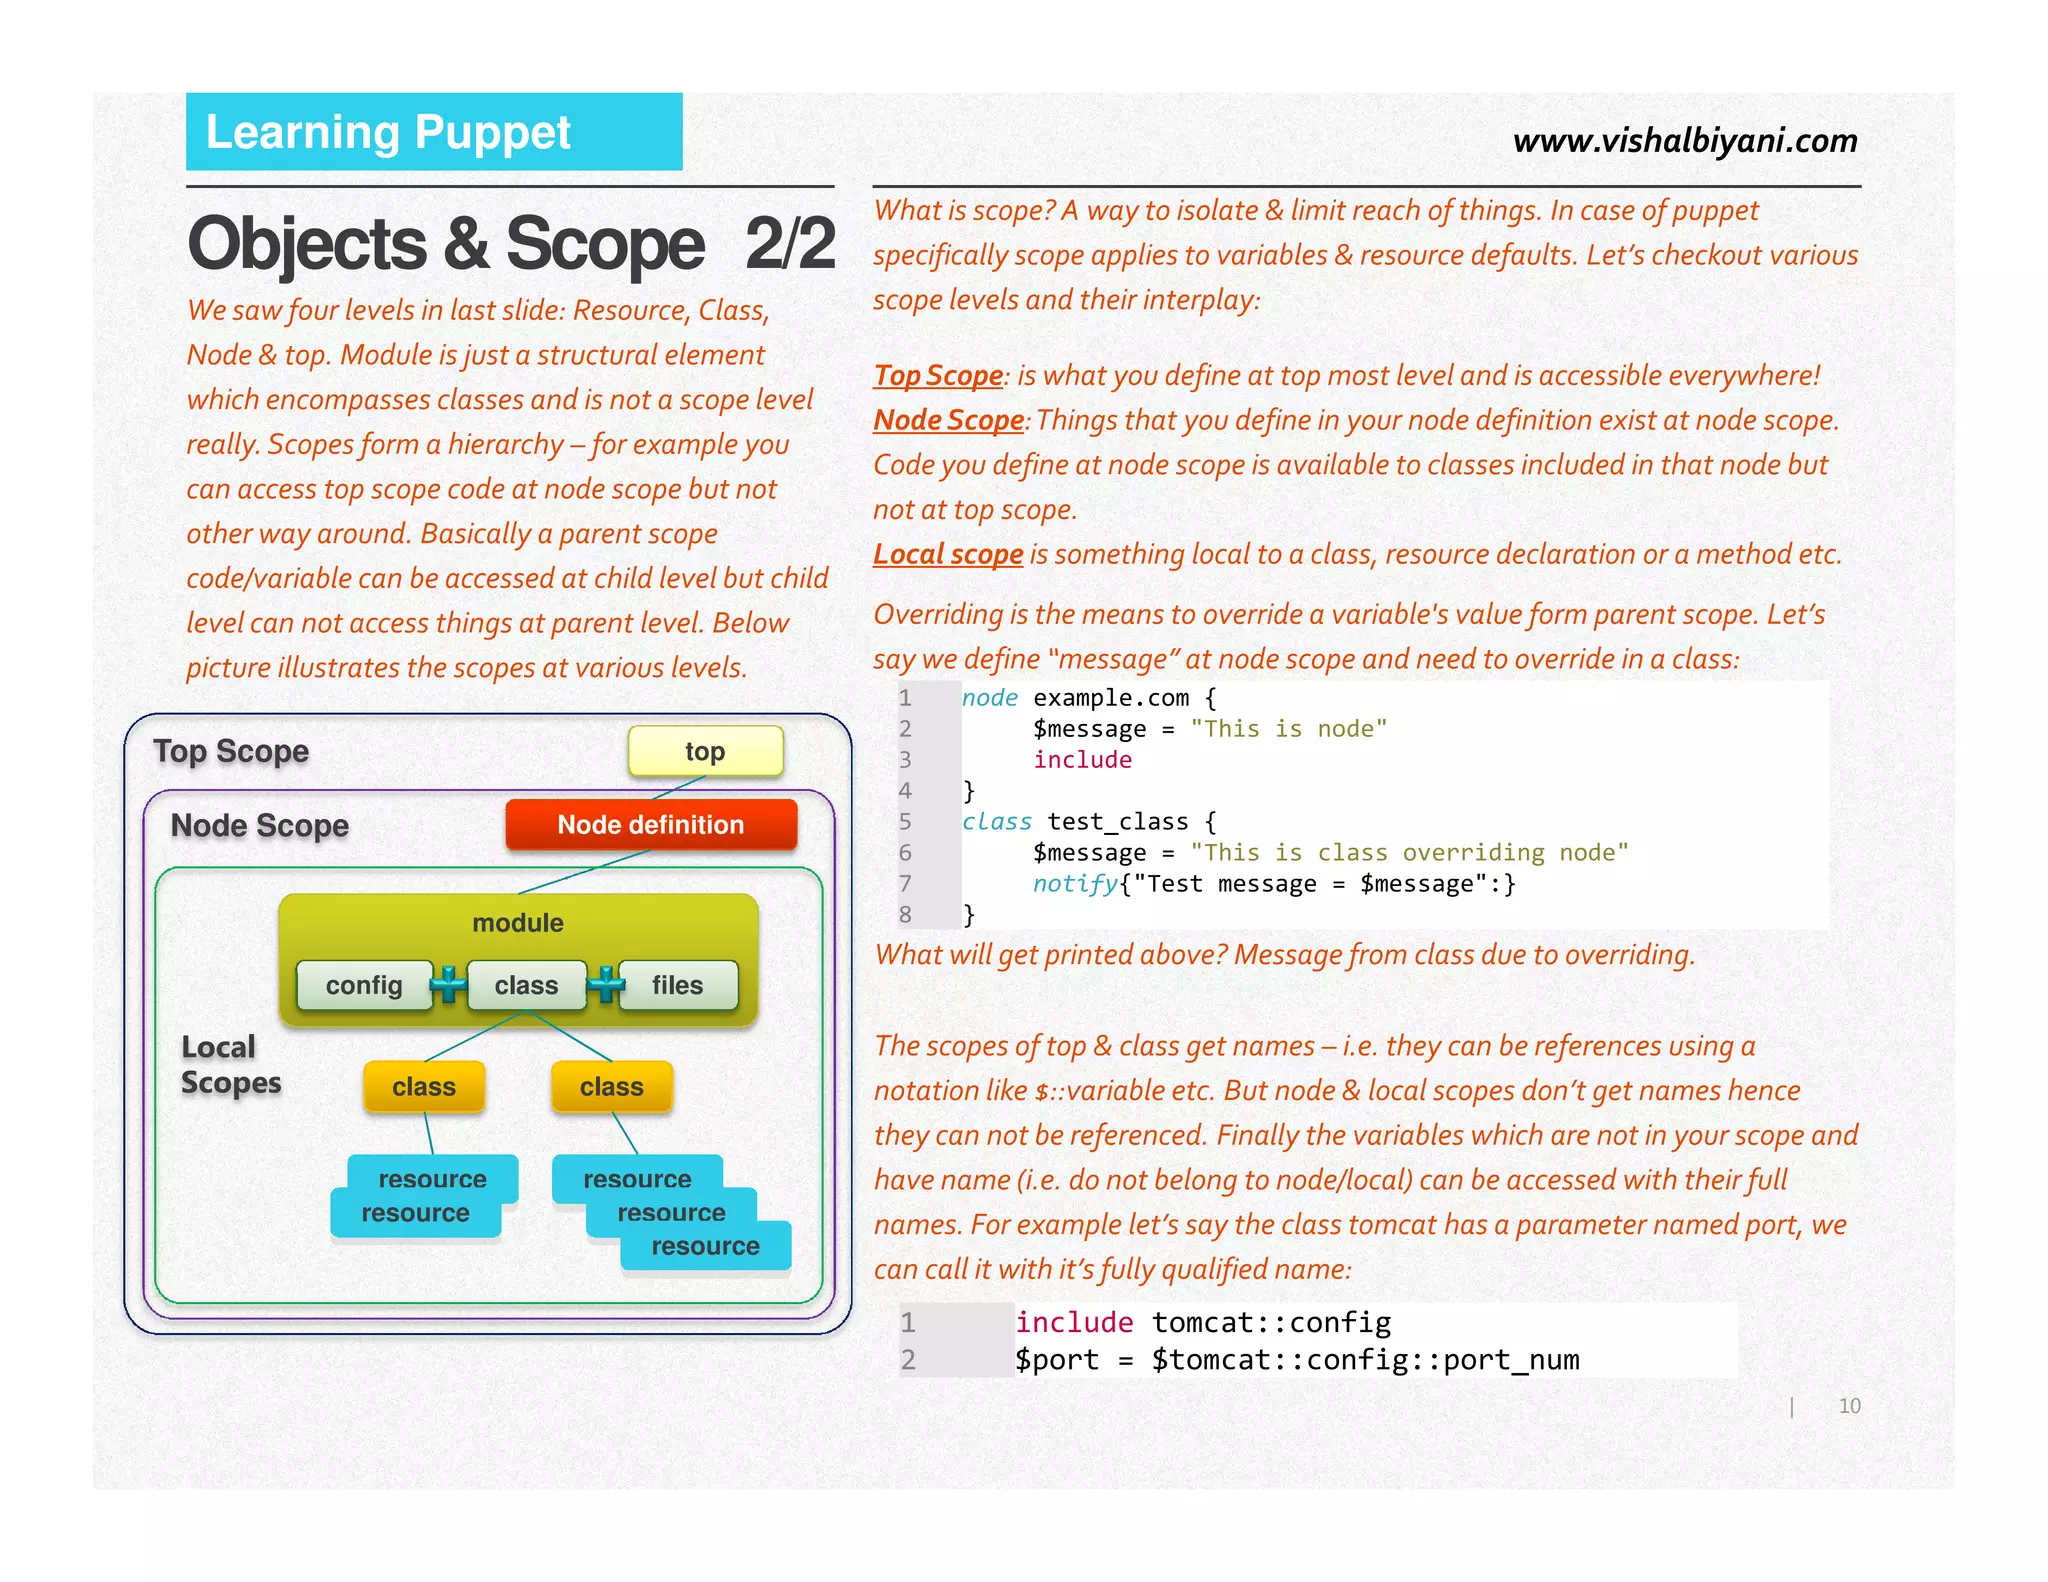
Resource & types
Some more ground rules for resources:
•You can not declare the same resource twice! Imagine if in one place you
said file should be present and other place absent. Since puppet is declarative
language – it has to have a clear state defined. Although you can add
attributes to already defined resource for example:
1 file { "/home/vagrant/testFile"
2 ensure => present,
3 owner => 'root',
4 group => 'root',
5 mode => '0400',
6 }
Lifecycle of a resource:
When a resource declaration is executed, following things happen:
• The resource’s current state is read.
• If there is a different in current state vs. desired state then the change the
resource to desired state.
• The change in state is logged as event. This event will appear in log files
& reports.
The title of type in this case is
Every resource has a type – in our example below
it is file. It can be a service you want to manage or
a package that needs installed etc.
8|
attributes to already defined resource for example:
1 file { '/home/vagrant/testFile'
2 ensure => present,
3 }
4 File['/home/vagrant/testFile']{
5 owner => 'root',
6 group => 'root',
7 mode => '0400',
8 }
The title of type in this case is
‘/home/vagrant/testFile’ & rest of the details are
”attributes” with values (Equivalent to
parameters in context of resources). Now the
“ensure” attribute will ensure that the file is
“present” – meaning it exists.The value of ensure
might vary from type to type – for example for a
service you might say “running” . So we are
defining the desired state of the a resource. How
to achieve it is what puppet does it for us on
multiple platforms. So in short a resource has
primarily three things – type, title & one or more
attributes. Attributes also might vary form type
to type.
•The order in which you declare resources in file does not matter. Meaning
during execution the order might change for execution optimization. So if you
want to introduce sequence in resource execution – you will have to use
relationships, which we will see shortly.](https://image.slidesharecdn.com/learningpuppetchapter2-150519194824-lva1-app6892/75/Learning-puppet-chapter-2-8-2048.jpg)
![www.vishalbiyani.comLearning Puppet
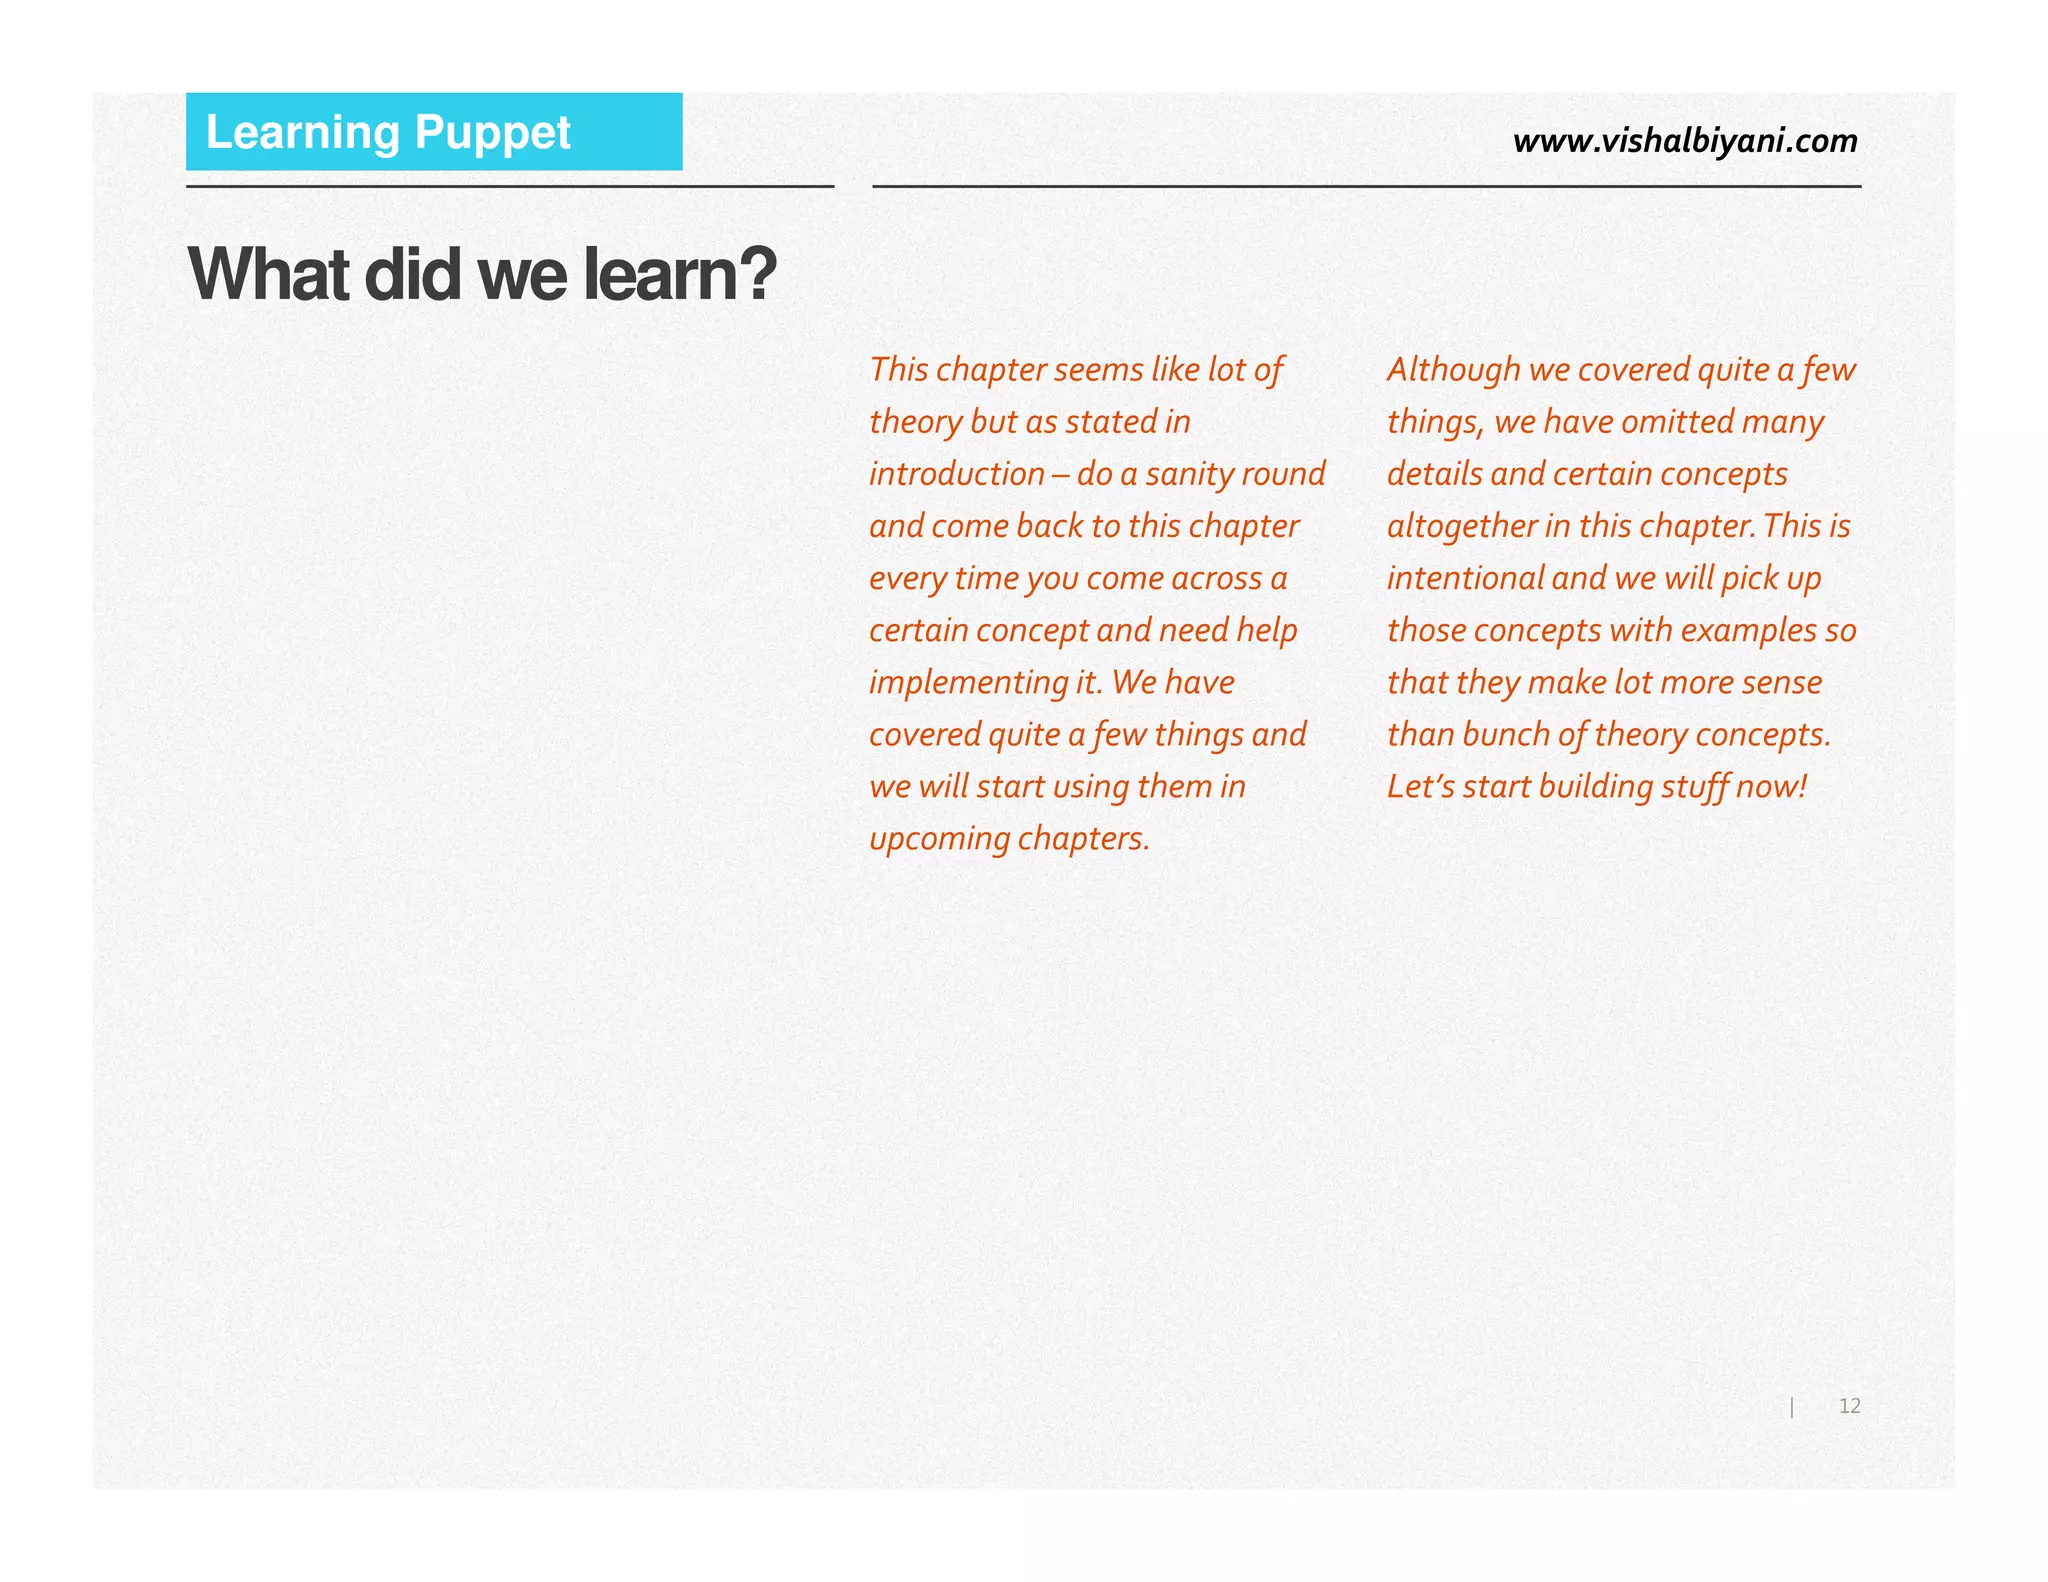
Relations & Ordering
We saw that the sequence of execution of resources
can be different than what we see in manifest. But
there are times when you need to enforce order –
and that’s where ordering attributes help us.There
are four attributes – or metaparameters which
enable ordering:
Attribute Effect
before Execute current resource before and
Let’s say we want to ensure package “ssh” is installed first and then the file
“/etc/ssh/ssh_config” is configured. So there are two ways to do it (With only
relevant attributes:
10 file {'/etc/ssh/ssh_config'
11 ensure => present,
12 require => Package[ssh]
13 }
14 package {'ssh'
15 ensure => installed,
16 }
18 file {'/etc/ssh/ssh_config'
19 ensure => present,
20 }
21 package {'ssh'
22 ensure => installed,
23 before => File['/etc/ssh/ssh_config']
24 }
Similarly let’s say we want the service SSH to be running only after the file
“/etc/ssh/ssh_config” is configured. In addition the service SSH should be
11|
The notation -> (ordering) and ~> (Ordering + Refresh) are equivalent to the four attributes above based on direction you use
them. You can use them or be more explicit and use the attribute names. These arrows are lovingly called “chaining arrows”
before Execute current resource before and
target resource later
require Execute current resource later and
target resource before
notify Execute current resource before,
target resource later & refresh target
resource of current one changes
subscribe Execute target resource before, then
execute current resource, and refresh
current if target has changed
As you have noticed – before and require are same
things but depends on where you declare it. Ditto
with notify & subscribe but with a refresh included.
Quite confusing? – let’s look at some example.
“/etc/ssh/ssh_config” is configured. In addition the service SSH should be
restarted every time the file changes. Again two ways we can configure it:
26 file {'/etc/ssh/ssh_config'
27 ensure => present,
28 notify => Service['ssh'],
29 }
30 service {'ssh'
31 ensure => running,
32 }
34 file {'/etc/ssh/ssh_config'
35 ensure => present,
36 }
37 service {'ssh'
38 ensure => running,
39 subscribe => File['/etc/ssh/ssh_config']
40 }
• You can refer an array of resources in value for attributes. For example you can
restart SSH and some other service as file changes.
• There are more complex scenarios where you might want to use “resource
collectors” – but more on that later ☺](https://image.slidesharecdn.com/learningpuppetchapter2-150519194824-lva1-app6892/75/Learning-puppet-chapter-2-11-2048.jpg)

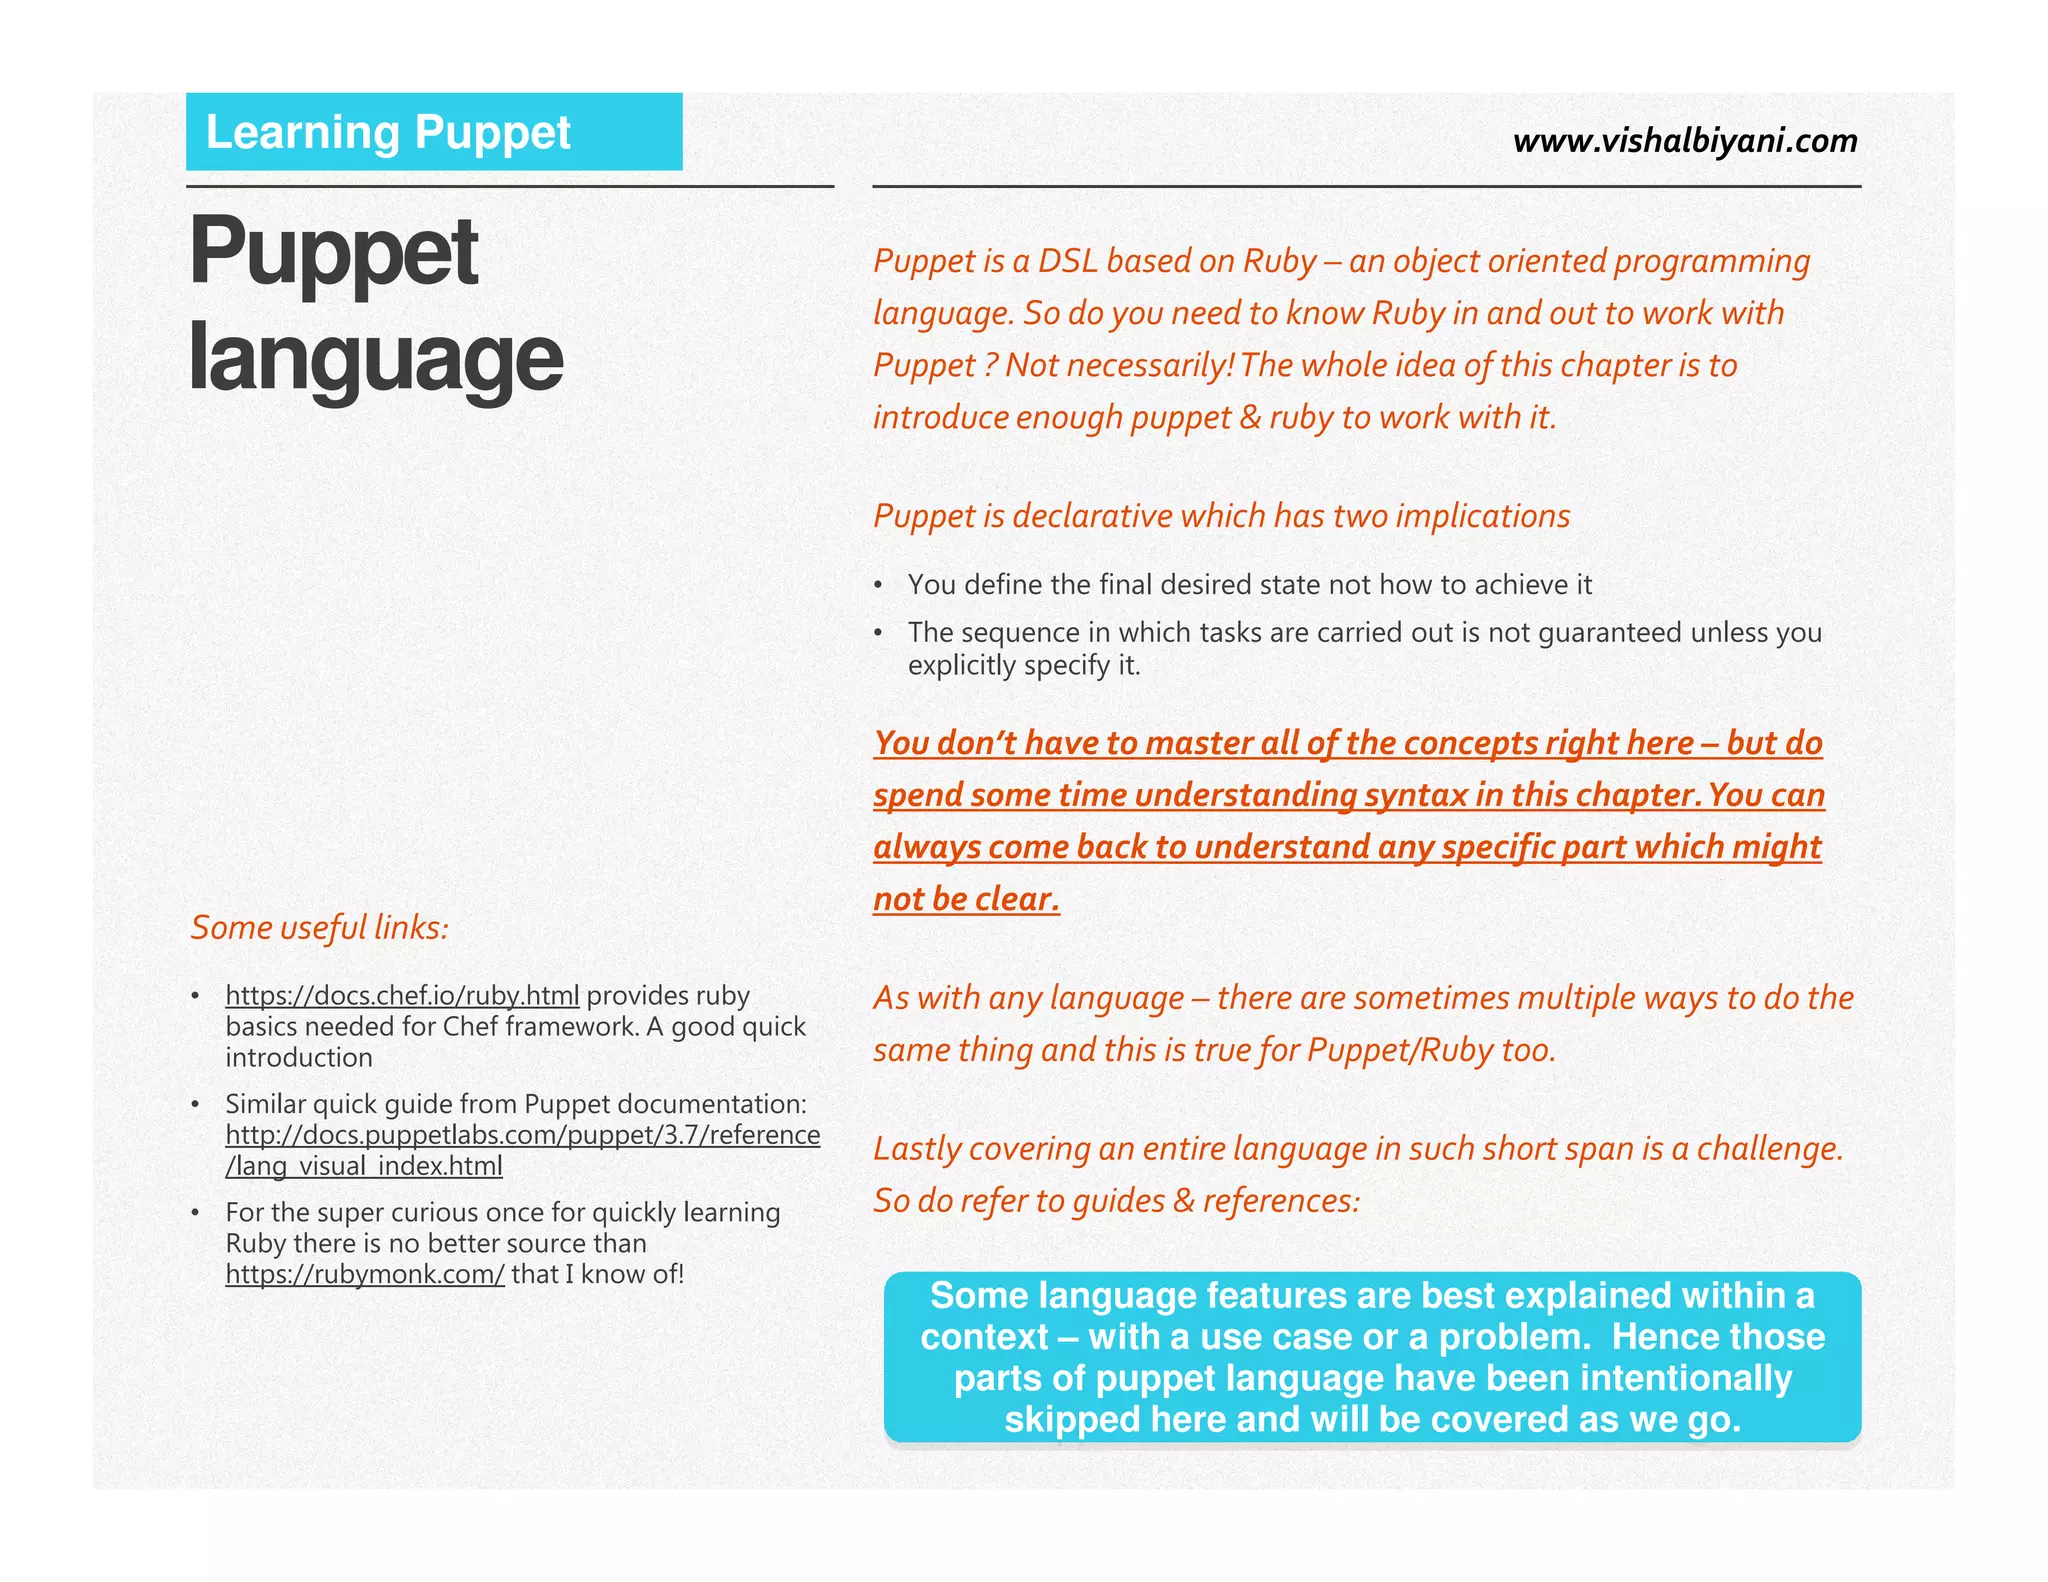
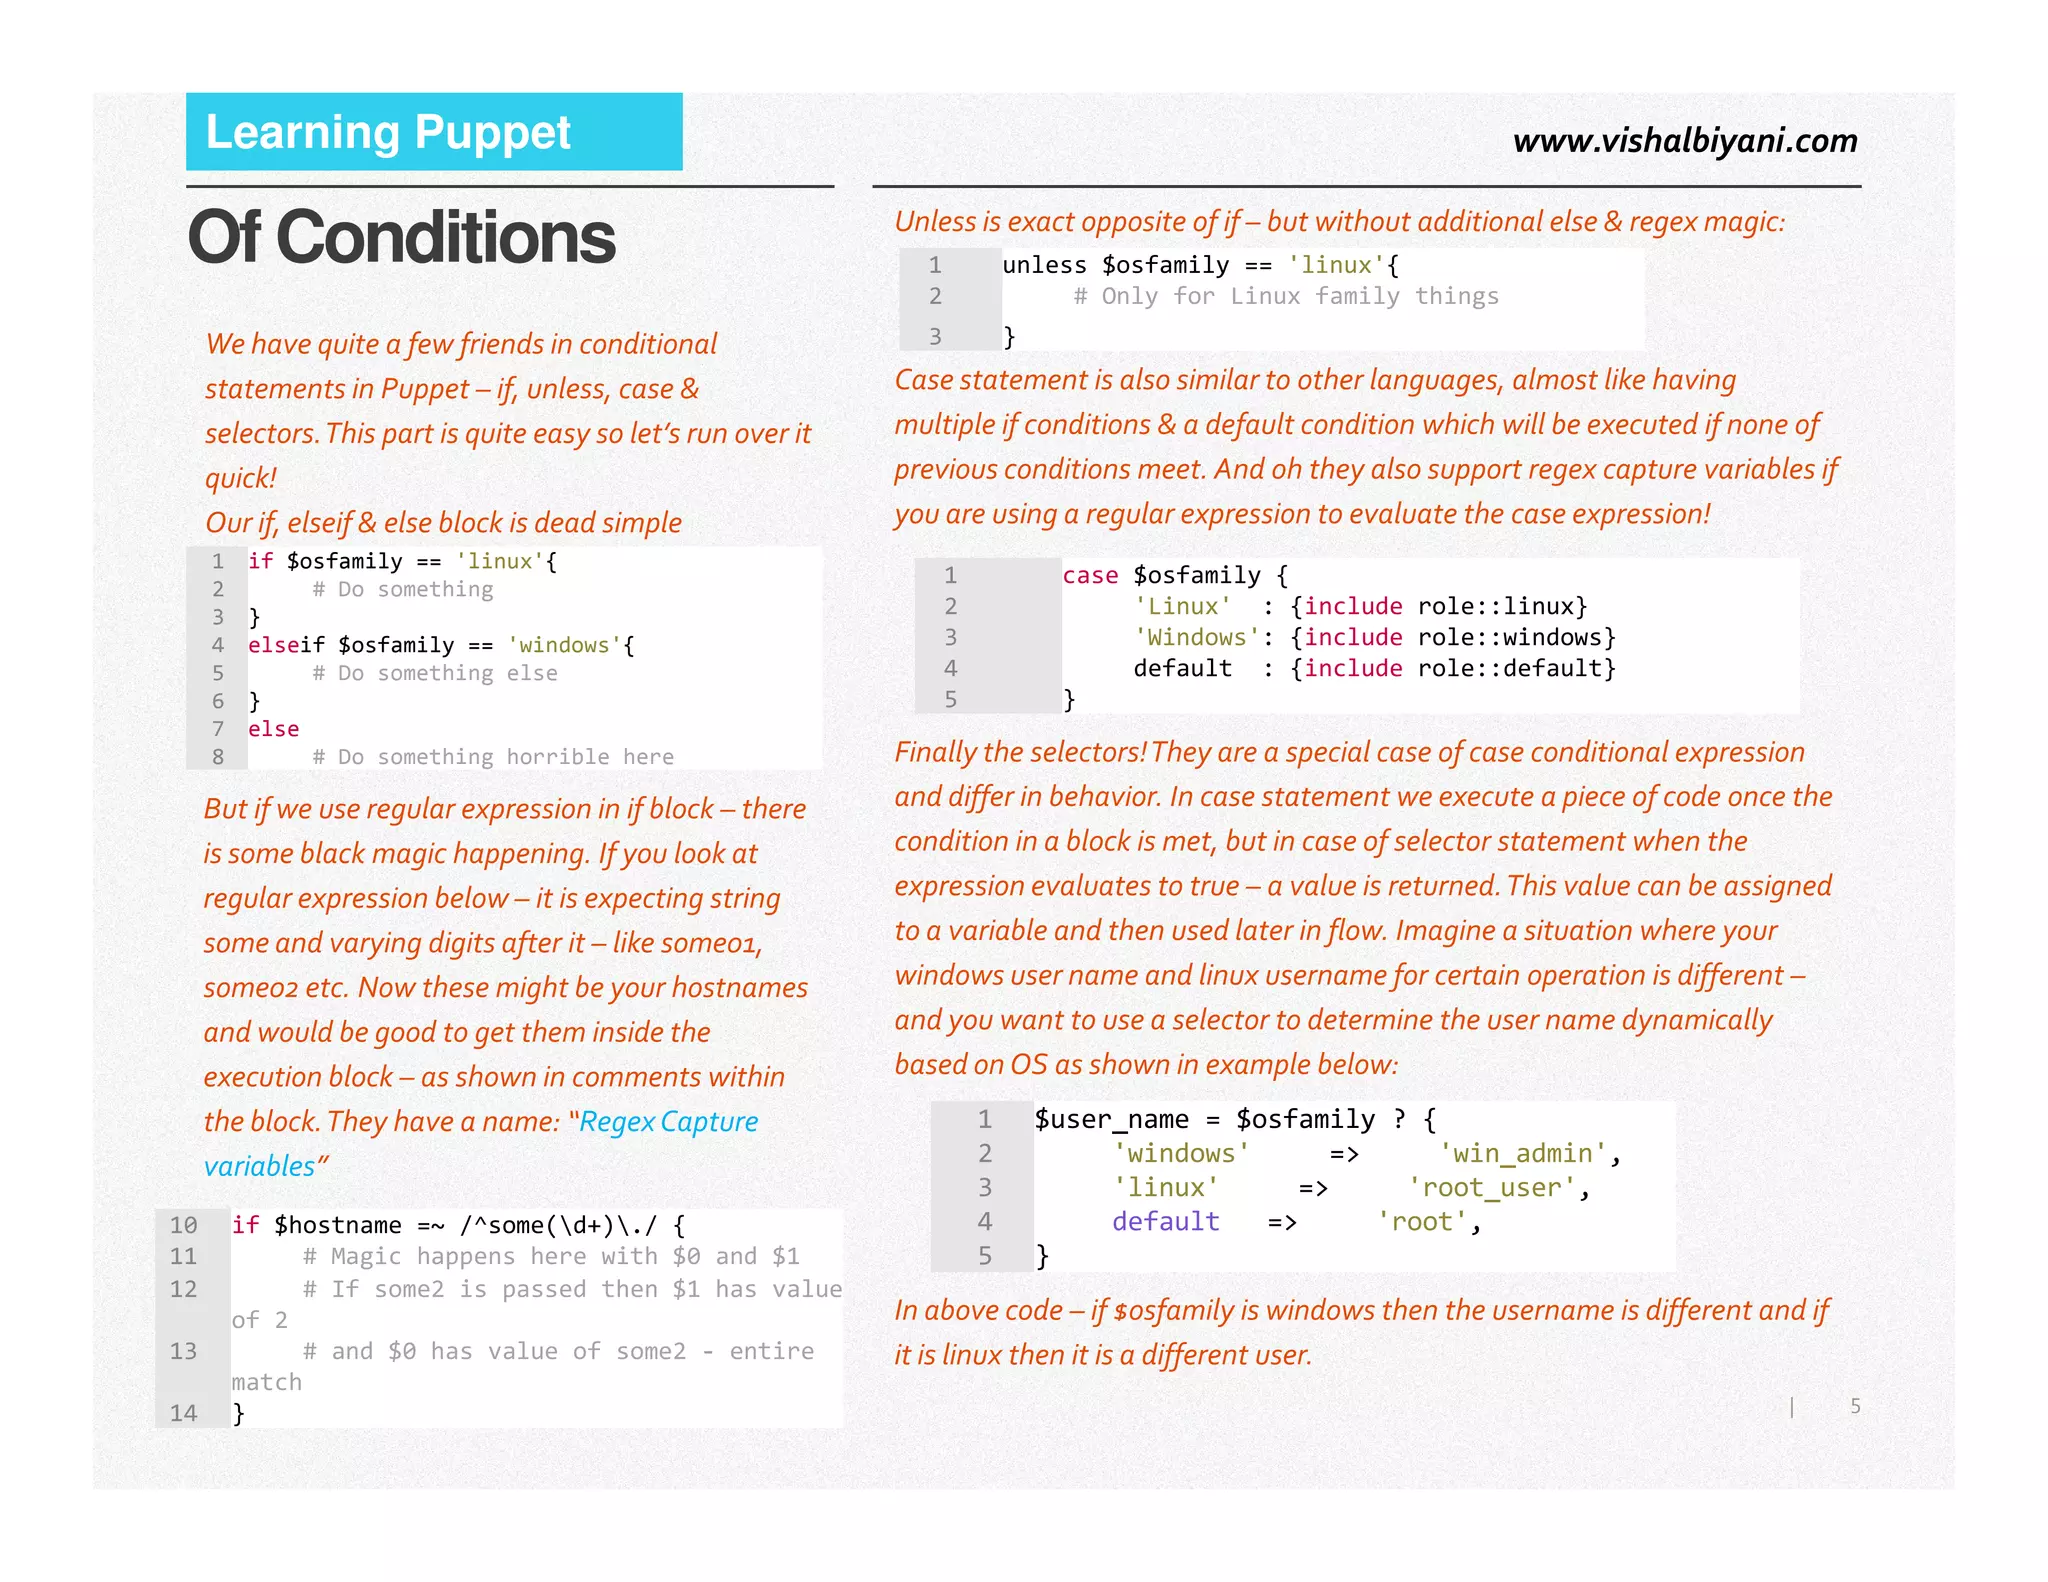
This document provides an overview of learning Puppet, emphasizing its declarative nature and syntax, as well as key features such as variables, expressions, conditions, functions, classes, and scopes. It explains concepts like variable assignment, conditional statements, and the structure of Puppet modules and classes, including the importance of scope and node classification. Additionally, it encourages users to refer to additional resources for deeper understanding and practical application of Puppet's capabilities.