
Recommended
More Related Content
What's hot
What's hot (20)
Viewers also liked
Similar to Lecture 1-aerial photogrammetry
Similar to Lecture 1-aerial photogrammetry (20)
More from Vidhi Khokhani
More from Vidhi Khokhani (20)
Recently uploaded
Recently uploaded (20)
Lecture 1-aerial photogrammetry
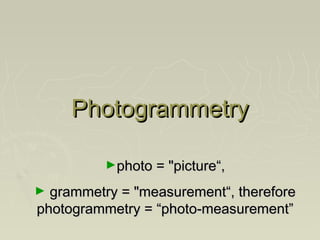
- 1. Photogrammetry ►photo = "picture“, grammetry = "measurement“, therefore photogrammetry = “photo-measurement” ►
- 3. Lecture outline ► Definition ► Principle of photogrammetry. ► Uses. ► Aerial camera ► Aerial photograph. ► Scale of vertical and tilted photograph ► Ground coordinates ► Procedure of aerial survey. ► Photomaps and mosaics ►
- 4. Introduction ► Definition of Photogrammetry: the art, science, and technology of obtaining information about physical objects and the environment by photographic and electromagnetic images.
- 5. Basic Information ► Mapping from aerial photos is the best mapping procedure yet developed for most large projects. Used successfully for maps varying in scale from 1:1,000,000 1:120 with contour intervals as small as 1 foot. Topographic mapping is the most common form. – U.S.G.S updated and done this way. Used to reconstruct a scaled 3-dimensional optical model of the lands surface using a stereoplotter.
- 6. Basic Information ► Uses: Aerial photos Aid: geological investigations, soil surveys, land surveys, tax mapping, reconnaissance and military intelligence, urban and regional development, transportation system investigations, quantity estimates, shore erosion, etc. Mathematical methods have been developed to make precise 3-dimensional measurements from photos. ►Phototriangulation: survey stations. 3-dimensional positioning of
- 7. Basic Information Continued Photo has been used to take geometric measurements of human bodies, artificial human hearts, large radio telescopes, ships, dams, buildings and very accurate reproductions. ► In general it is not economical for small projects – the cost break even point is somewhere between 30 – 100 acres depending on the situation.
- 8. Basic Information ► Photogrammetry can not be used successfully over the following types of terrain. Desert or plains areas, sandy beaches, and snow – the photograph as uniform shades with little texture. Deep canyons or high buildings that conceal ground surface. Areas covered by dense forest.
- 9. 2 Basic Categories ► Photogrammetry - Known survey ► Classification of photogrammety as Aerial
- 10. Photogrammetry for Engineering ► Defined: Photogrammetry is the process of measuring images on a photograph. ► Modern photogrammetry also uses radar imaging, radiant electromagnetic energy detection and x-ray imaging – called remote sensing.
- 11. Aerial camera
- 12. Types of Aerial Photographs
- 13. Principle of Aerial survey
- 16. Definitions (GTU:Nov/Dec-2011) Exposure station (o) : The point in the atmosphere occupied by center of camera lenses at instance of photography. ► Flying height : Vertical distance between exposure station and mean sea level. ► Flight line: Line traced by exposure station in atmosphere ( track of aircraft) ► Photo principal plane (k) It is point on photograph obtained by projecting camera axis to intersect at a point on photograph known as photo principal point(k) ► Camera axis extended up to ground, the point obtained on ground is called Ground Principal point (K) ►
- 17. Definitions Photo nadir point (n) : It is a point on photograph obtained by dropping vertical line from camera center. That plumb line extendd up to ground gives Ground Nadir Point (N) ► Horizon point (h) : It is point of intersection of horizontal line through center of lenses and principal line (np) on photograph. ► Principal plane:- Plane defined by exposure station (O), Ground nadir point (N) and ground principal point (P) ( i.e. plane NOK) ► Principal line : Line of intersection of principal plane with photograph plane -nk ►
- 18. Definitions Azimuth : (A) : Clockwise horizontal angle measured about ground nadir point from true north to the principal plane of photograph.(Ф ) ► Swing (S) :-Angle measured in plane of photograph from +y axis clockwise to photo nadir point. ► Isocenter (i) :-Point on photo where bisection of tilt falls on photo. ( dotted line ------- in sketch). ► Axis of tilt:- It is line in plane of photograph perpendicular to principal line at the isocenter. ►
- 20. SCALE OF PHOTOGRAPH ► To perform computations, one must know: H = height above datum from which photos taken. f = focal length of camera lens – in cm or mm
- 21. Scale of a Vertical Photographs f f or H H’ h ► f = focal length 6” or 152.4 mm is common ► H’ = height of plane above ground ► h = height (elevation) of ground ► H = height of place above datum ►S =
- 22. Scale of a Vertical Photo
- 23. Scale varies from point to point ► Scale of photograph at point P on ground having elevation hp ► Scale for any point = s ► Representative fraction (R.F.) =
- 24. Scale of a Vertical Photo ► Datum Scale = All the points of photograph are asumed to be projected on M.S.L. (R.L.± 0.00) SD = f H ► Average Scale = All the points of photograph are asumed to be having average elevation above m.s.l. f SAV. = H-hav.
- 25. Other methods of finding scale of vertical photograph ► By measuring Ground distance ► By determining the distance from existing map = Photo distance = distance on existing map ► ►
- 26. Relief Displacement ► ► Relief Displacement exists because photos are a perspective projection. Use this to determine the height of object: h= d (H’) r h = height of object d = radial distance to top of object-radial distance to bottom of object. r = radial distance to top of object.
- 27. Relief displacement ► The scale of an aerial photograph is partly a function of flying height. ► Thus, variations in elevation cause variations in scale on aerial photographs. Specifically, the higher the elevation of an object, the farther the object will be displaced from its actual position away from the principal point of the photograph (the point on the ground surface that is directly below the camera lens).
- 28. Relief displacement ► The scale of an aerial photograph is partly a function of flying height. ► The lower the elevation of an object, the more it will be displaced toward the principal point . This effect, called relief displacement , is illustrated in the diagram below. Note that the effect increases with distance from the principal point.
- 31. Equation for relief displacement (d)
- 32. Displacement and errors ► In photography survey we try to represent 3- D surface of earth as 2D image. ► Object appears in photographs are geometrically distorted. / ( known as relief displacement) ► Reasons for Distortions Perspective view Movement of camera Instability of aircraft Variation in altitude , tilt and speed Curvature of earth
- 34. Ground control survey ► Purpose: Determine exact position of aerial camera at the instant of exposure and identify the objects on ground. ► Steps ► Targets (signals) are placed on ground. ► Targets are surveyed by Triangulation ► Ground control ( Triangulation, B.M. Azimuth,)and photo control ( position of signal and elevation) ► Horizontal control ( Triangulation)and Vertical control ( leveling)
- 35. Procedure for Aerial survey ( Flight planning) ► Parameters Altitude of flight (H) Focal length of camera (f) Size of photograph Size of area or land to be photographed Alignment of flight line and parallel flight line Lateral overlap No of photo in each flight line and overlap Scale of flight map. Ground speed of aeroplane Time interval of successive photographs
- 36. Overlaps
- 37. Overlaps
- 38. Overlaps ► Longitudinal Overlap ► Overlap between two photo 50% to 70% ► Overlap between two alternate photo 10% to 20% ► Lateral Overlap ► Overlap between adjacent flight lines ► Side overlap should be 20% to 30%.
- 39. Reasons for Overlaps ► Arrangement of mosaic ► Remove errors due to distortion, displacement, and tilt. ► For view in stereoscope- 3D view. ► Avoid repetition of aerial survey
- 40. D
- 42. Numbers of photographs required to cover the area A
- 43. Number of photographs necessary to cover a Given area ► A = Total area to be photographed ► l = length of photo in direction of flight ► w = width of photo normal to direction ► s = Scale Of Photograph f/H ► L= net ground distance corresponding to l ► W= Net ground width corresponding to w ► a = net ground area covered by each photo ► Pl = % Overlap in direction of flight(length) ► Pw = % overlap in side (width)
- 44. Numbers of photographs required to cover the area A
- 45. ► If Numbers of photographs required to cover the area A actual geometry L and B known no of photographs calculated as under ► ► L= Ground length of each photo ( 1-Pl)s.l. in Km S= speed of aeroplane in Km/hour.
- 46. Crab ► Opposite line of photographs are not parallel to flight line is known as crab of photograph.
- 48. Drift ► When aircraft is swayed away from its preplanned flight line then it is known as drift.
- 52. Photomaps and Mosaics ► Used as alternate of maps ► Photomap is single photograph ► Two or more photograph combined is known as mosaic. ► In mosaics objects are easily recognized. ► In maps symbols of objects are used ► In mosaics true picture of objects helps ► Cost and time saves in mosaics preparing ► Mosaics can be used by non technical person
- 53. Procedure to prepare Photo mosaics ► Manual Zerox procedure ► Digital Photo editing software
- 54. STEREOSCOPES
- 55. Principle of stereoscope ► Two separate photo viewed in stereoscope the image of left photograph viewed by left eye and the image of right photograph viewed by right eye is fused together in brain to provide 3- dimensional view. This is called stereoscopic fusion
- 56. Parallax in Aerial Stereoscopic View ► In normal binocular vision the apprent movement of a point viewed first with one eye and then with the other is known as Parallax. ► Parallax is displacement of two images in successive photographs.
- 57. Later……
- 58. Planning and Executing Photo Project ► Basic Overall Process: 1. 2. 3. 4. 5. Photography – obtain suitable photos. Control – obtain sufficient control through field surveys and/or extension by photographic methods. Map Compilation – plotting of planimetric and/or topographic features. Map Completion – map editing and special field surveys. Final Map Drafting
- 59. Elements of Planning 1. Conversion of requirements to project specs. Factors: 1. Purpose of photogrammetry a) Majority of projects for engineering involves making topographic map in a stereoscopic plotting unit. Wide angle photography (152mm focal length) is required for topographic mapping because it provides better vertical accuracy. If area is heavily wooded, use f=210mm (standard angle) to allow more visibility through trees. Generally 60% overlap with 15-30% sidelap. Orientation of flightlines is dictated more by economy than geometric considerations.
- 60. Elements of Planning b) Photos for mosaics should be flown as high as possible. c) Reduces relief displacement. Orthophotos – similar to topo maps, however, should be taken normal to ground topo. 2. Photo Scale: somewhat dependent on type of plotter. Essentially can be dependent on type of plotter you need to see and dividing it by the resolving power of the photo equipment. Also affected by map accuracy and area configuration.
- 61. Elements of Planning 3. Allowed scale variation. Variation caused by difference in ground elevation and flying height. Longer focal length reduces scale variation. If flying height remains constant and ground elevation increases the area covered by photo becomes less. Overlap becomes less Viewfinder needed to control overlap and flightline spacing, thus eliminating possible gaps. 4. Relief displacement Affects mosaics most. Large amount of relief displacement will make it difficult to form continuous picture desired in mosaics.
- 62. Elements of Planning Relief displacement decreases as flying height increases, the focal length must also be increased. Relief displacement has no adverse affect on map making with stereo. With greater relief displacement, elevations can be measured and plotted more accurately. 5. Tilt Amount in direction of flight (y tilt). Amount normal direction of flight (x tilt). Will cause overlap to be greater on one end than other. Will increase sidelap on one side and decrease on other. Y tilt corrected by viewfinder. X tilt corrected by increasing planned sidelap.
- 63. Elements of Planning 6. Crab and Drift Crab – angle formed between flightline and edges of photo in direction of flight and caused by not having focal plane square with direction of flight at time of exposure. Corrected by rotation of camera on vertical axis through viewfinder. Reduces coverage, but sidelap compensates. Drift – plane not staying on flightline. Most common cause of re-flights and gaps.
- 64. Elements of Planning 7. Flying height: determined after sidelap and overlap determined. Factors affecting: 1. Desired scale, relief displacement, and tilt. 2. Precision of equipment used. Greater precision, greater possible flying height. By doubling flying height, ground coverage increased 4 times, thus less ground control and fewer photos. Vertical accuracy most important in topographic mapping. 1. Flying height is related to contour interval desired. Relationship called C-factor (precision factor) Flying height = desired contour interval x C-factor C-factor is the value used to compute flying height which will produce photos satisfactory to obtain the desired vertical accuracy of the maps.
- 65. Elements of Planning 8. Direction or orientation of terrain 2. Arrange to fly along ridges, not across. Gathering material and people. 1. Existing photos, maps, survey data, instruments and personnel. Determine specifications and conditions for operation. 3. Preparing final plans. 2. 1. Scheduling 2. Surveying instructions 2. Cost estimating and replanning.
- 66. Flight Design A. Considerations 1. 2. 3. 4. 5. 6. B. Project boundaries Existing and planned control Time schedule Final product needed Optimum flying season Found cover conditions Objectives 1. Determine optimum conditions for spacing of photos along flightlines. 2. Number and spacing of fligtlines to cover area. 3. Plan must account for allowable deviations. 4. Distance between flightlines on fllightway.
- 67. Flight Design C. Flight Patterns 1. Totally dependent on overlap and sidelap. Under ideal conditions with 9”x 9” photo with 6” focal length, and overlap of 57%, and sidelap of 13% will provide maximum stereo coverage with no gaps. If additional safety factor desired, overlap can be increased to 70-75% and sidelap can be increased to 50%.
- 68. Computation of Flight Plan ► Data required to compute flight map lines, time interval between exposures, and amount of film needed. 1. Focal length of camera. 2. Flying height above datum or photo scale for certain elevation. 3. Size of photo. 4. Size of area to be photographed. 5. Positions of outer flight lines with respect to boundary. 6. Overlap. 7. Sidelap. 8. Scale of flight map. 9. Ground speed of aircraft.
- 69. Example Area – 15 miles N-S & 8.5 miles E-W Photos – 9” x 9” Save tobe 1:12000 @ 700’ above elevation Overlap – 60% Sidelap – 35% Ground speed of plane – 150 mph Flight lines to be laid out N-S on a map @ a scale of 1:62500 Outer flight lines coincide with E & W boundary
- 70. 1. 2. Flying Height: 1 1 = ∴ H = 12000’ above 700’ or 12700’ above sea level H 12000 Ground Distance Between Flight lines – since sidelap is 35%, photo distance between lines is 65% of 9”=5.85” 5.85'×12000 ∴ GroundSpacing = = 5850' 12" / 1' 3. Number of flight lines Total width = 8.5 miles x 5280 = 44880’ 44880 ∴ = 8 + 1 = 9 flight lines (Round up) 5850 4. Adjust ground distance between flight lines 5. Spacing of flight lines on flight map 5610 12" 5610’ on map @ 1:62500 scale × = 1.08" 62500 44880 = 5610' 9 −1 1'
- 71. 6. Ground Distance Between Exposures with 60% overlap gain on each photo is 40% ∴ 40% of 9” = 3.60” ∴ ground distance is: 3.60 × 12000 = 3600' 12" / 1'