Downloaded 84 times

![1-4 Copyright © Oracle Corporation, 2001. All rights reserved.
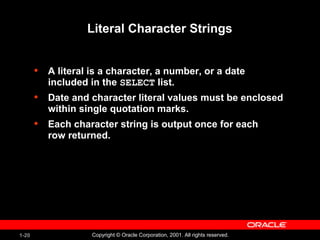
Basic SELECT Statement
SELECT *|{[DISTINCT] column|expression [alias],...}
FROM table;
SELECT *|{[DISTINCT] column|expression [alias],...}
FROM table;
• SELECT identifies what columns
• FROM identifies which table](https://image.slidesharecdn.com/les01-160101190615/85/Writing-Basic-SQL-SELECT-Statements-4-320.jpg)
![1-29 Copyright © Oracle Corporation, 2001. All rights reserved.
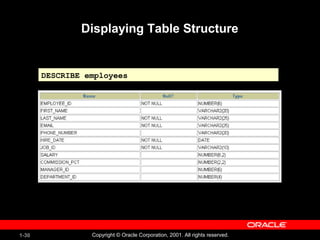
Displaying Table Structure
Use the iSQL*Plus DESCRIBE command to display
the structure of a table.
DESC[RIBE] tablenameDESC[RIBE] tablename](https://image.slidesharecdn.com/les01-160101190615/85/Writing-Basic-SQL-SELECT-Statements-29-320.jpg)

![1-34 Copyright © Oracle Corporation, 2001. All rights reserved.
Summary
SELECT *|{[DISTINCT] column|expression [alias],...}
FROM table;
SELECT *|{[DISTINCT] column|expression [alias],...}
FROM table;
In this lesson, you should have learned how to:
• Write a SELECT statement that:
– Returns all rows and columns from a table
– Returns specified columns from a table
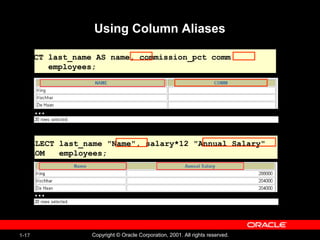
– Uses column aliases to give descriptive column
headings
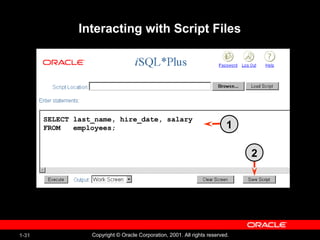
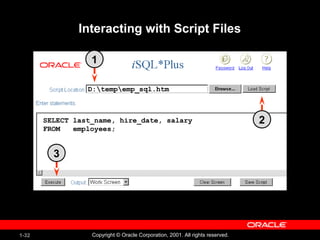
• Use the iSQL*Plus environment to write, save, and
execute SQL statements and iSQL*Plus commands.](https://image.slidesharecdn.com/les01-160101190615/85/Writing-Basic-SQL-SELECT-Statements-34-320.jpg)


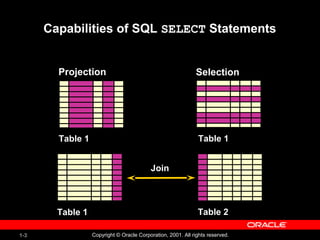
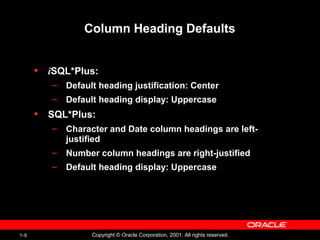
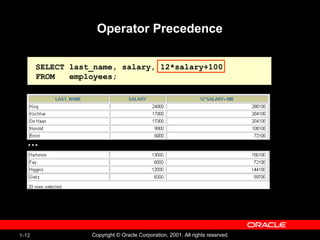
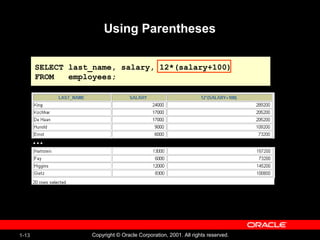
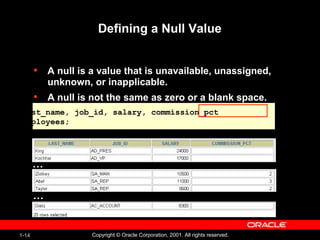
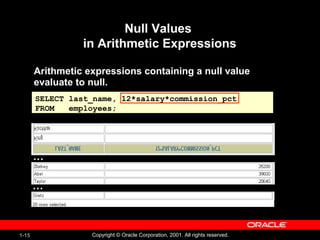
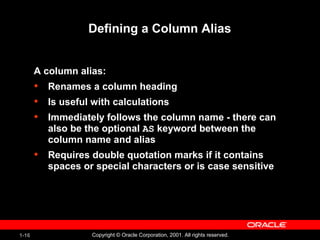
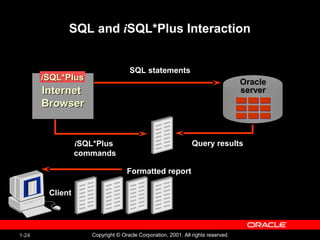
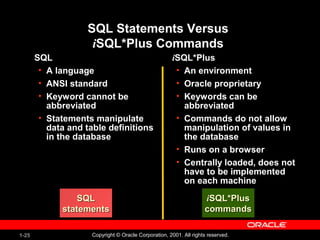
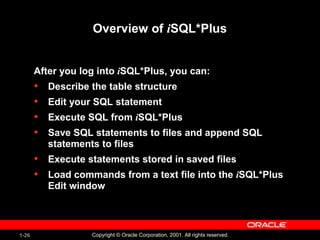
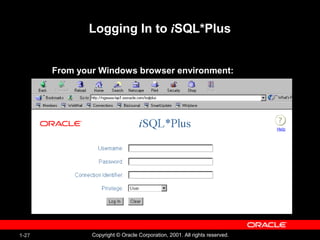
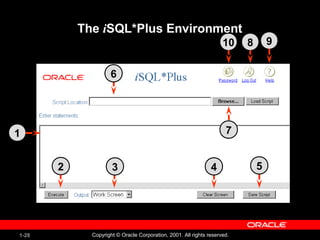
This document outlines the fundamentals of writing basic SQL select statements, focusing on capabilities, syntax, and usage within the isql*plus environment. It covers key topics such as selecting columns, using arithmetic operators, defining null values, and employing column aliases. Additionally, it differentiates between SQL statements and isql*plus commands, highlighting their respective functionalities and environments.


![Les01[1]Writing Basic SQL Statements](https://cdn.slidesharecdn.com/ss_thumbnails/les011-220214133635-thumbnail.jpg?width=640&height=640&fit=bounds)