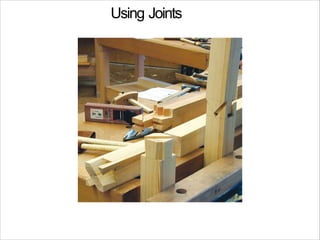
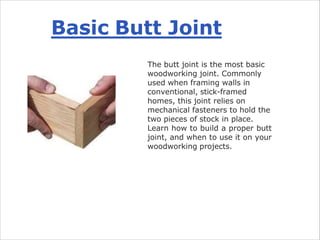
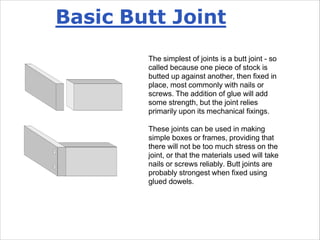
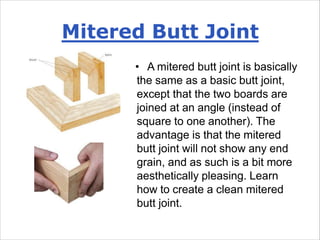
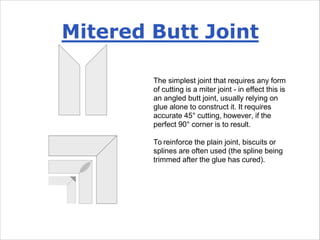
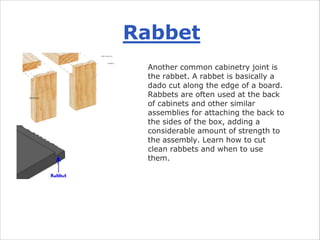
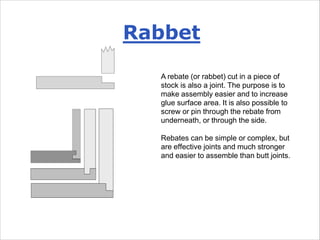
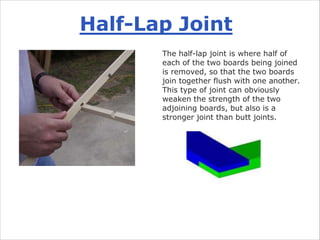
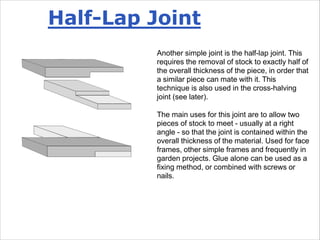
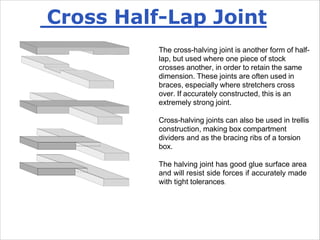
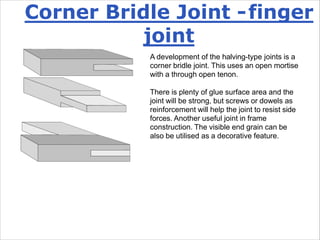
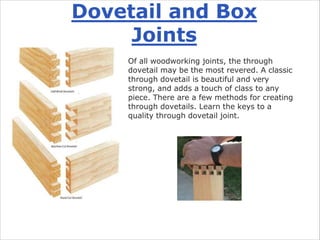
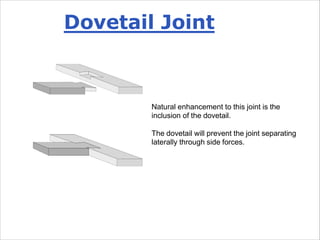
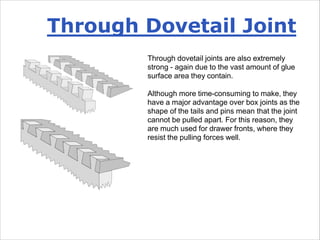
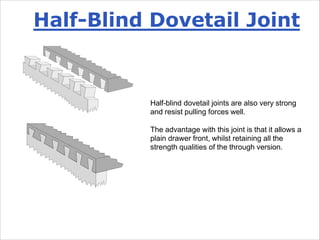
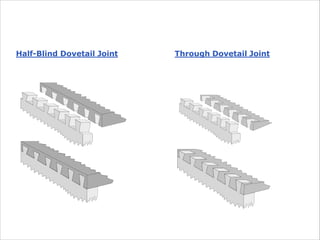
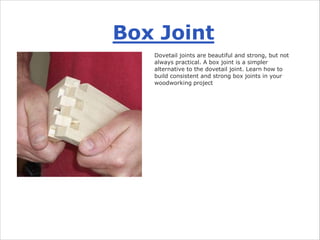
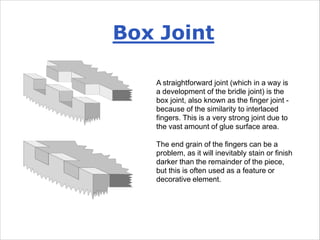
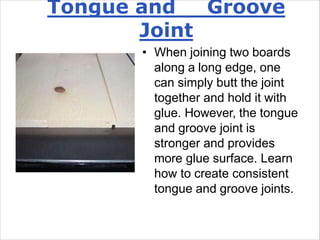
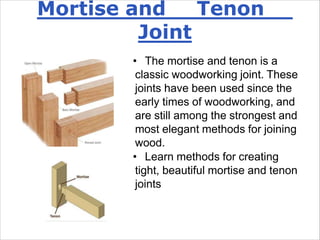
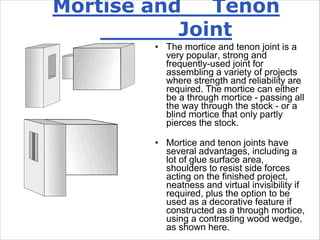
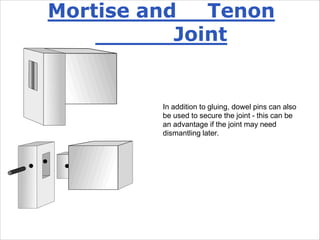
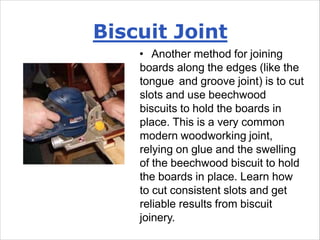
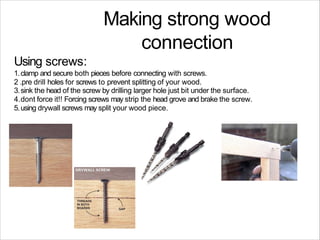
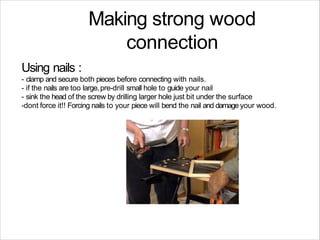
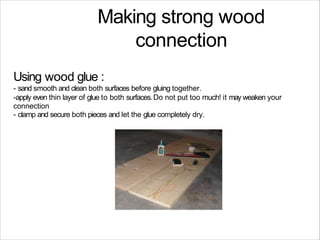
3. Basic Butt Joint
The butt joint is the most basic
woodworking joint. Commonly
used when framing walls in
conventional, stick-framed
homes, this joint relies on
mechanical fasteners to hold the
two pieces of stock in place.
Learn how to build a proper butt
joint, and when to use it on your
woodworking projects.
4. Basic Butt Joint
The simplest of joints is a butt joint - so
called because one piece of stock is
butted up against another, then fixed in
place, most commonly with nails or
screws. The addition of glue will add
some strength, but the joint relies
primarily upon its mechanical fixings.
These joints can be used in making
simple boxes or frames, providing that
there will not be too much stress on the
joint, or that the materials used will take
nails or screws reliably. Butt joints are
probably strongest when fixed using
glued dowels.
5. Mitered Butt Joint
• A mitered butt joint is basically
the same as a basic butt joint,
except that the two boards are
joined at an angle (instead of
square to one another). The
advantage is that the mitered
butt joint will not show any end
grain, and as such is a bit more
aesthetically pleasing. Learn
how to create a clean mitered
butt joint.
6. Mitered Butt Joint
The simplest joint that requires any form
of cutting is a miter joint - in effect this is
an angled butt joint, usually relying on
glue alone to construct it. It requires
accurate 45° cutting, however, if the
perfect 90° corner is to result.
To reinforce the plain joint, biscuits or
splines are often used (the spline being
trimmed after the glue has cured).
7. Rabbet
Another common cabinetry joint is
the rabbet. A rabbet is basically a
dado cut along the edge of a board.
Rabbets are often used at the back
of cabinets and other similar
assemblies for attaching the back to
the sides of the box, adding a
considerable amount of strength to
the assembly. Learn how to cut
clean rabbets and when to use
them.
8. Rabbet
A rebate (or rabbet) cut in a piece of
stock is also a joint. The purpose is to
make assembly easier and to increase
glue surface area. It is also possible to
screw or pin through the rebate from
underneath, or through the side.
Rebates can be simple or complex, but
are effective joints and much stronger
and easier to assemble than butt joints.
9. Half-Lap Joint
The half-lap joint is where half of
each of the two boards being joined
is removed, so that the two boards
join together flush with one another.
This type of joint can obviously
weaken the strength of the two
adjoining boards, but also is a
stronger joint than butt joints.
10. Half-Lap Joint
Another simple joint is the half-lap joint. This
requires the removal of stock to exactly half of
the overall thickness of the piece, in order that
a similar piece can mate with it. This
technique is also used in the cross-halving
joint (see later).
The main uses for this joint are to allow two
pieces of stock to meet - usually at a right
angle - so that the joint is contained within the
overall thickness of the material. Used for face
frames, other simple frames and frequently in
garden projects. Glue alone can be used as a
fixing method, or combined with screws or
nails.
11. Cross Half-Lap Joint
The cross-halving joint is another form of half-
lap, but used where one piece of stock
crosses another, in order to retain the same
dimension. These joints are often used in
braces, especially where stretchers cross
over. If accurately constructed, this is an
extremely strong joint.
Cross-halving joints can also be used in trellis
construction, making box compartment
dividers and as the bracing ribs of a torsion
box.
The halving joint has good glue surface area
and will resist side forces if accurately made
with tight tolerances.
12. Corner Bridle Joint -finger
joint
A development of the halving-type joints is a
corner bridle joint. This uses an open mortise
with a through open tenon.
There is plenty of glue surface area and the
joint will be strong, but screws or dowels as
reinforcement will help the joint to resist side
forces. Another useful joint in frame
construction. The visible end grain can be
also be utilised as a decorative feature.
13. Dovetail and Box
Joints
Of all woodworking joints, the through
dovetail may be the most revered. A classic
through dovetail is beautiful and very
strong, and adds a touch of class to any
piece. There are a few methods for creating
through dovetails. Learn the keys to a
quality through dovetail joint.
14. Natural enhancement to this joint is the
inclusion of the dovetail.
The dovetail will prevent the joint separating
laterally through side forces.
Dovetail Joint
15. Through dovetail joints are also extremely
strong - again due to the vast amount of glue
surface area they contain.
Although more time-consuming to make, they
have a major advantage over box joints as the
shape of the tails and pins mean that the joint
cannot be pulled apart. For this reason, they
are much used for drawer fronts, where they
resist the pulling forces well.
Through Dovetail Joint
16. Half-blind dovetail joints are also very strong
and resist pulling forces well.
The advantage with this joint is that it allows a
plain drawer front, whilst retaining all the
strength qualities of the through version.
Half-Blind Dovetail Joint
18. Box Joint
Dovetail joints are beautiful and strong, but not
always practical. A box joint is a simpler
alternative to the dovetail joint. Learn how to
build consistent and strong box joints in your
woodworking project
19. Box Joint
A straightforward joint (which in a way is
a development of the bridle joint) is the
box joint, also known as the finger joint -
because of the similarity to interlaced
fingers. This is a very strong joint due to
the vast amount of glue surface area.
The end grain of the fingers can be a
problem, as it will inevitably stain or finish
darker than the remainder of the piece,
but this is often used as a feature or
decorative element.
20. Tongue and Groove
Joint
• When joining two boards
along a long edge, one
can simply butt the joint
together and hold it with
glue. However, the tongue
and groove joint is
stronger and provides
more glue surface. Learn
how to create consistent
tongue and groove joints.
21. Tongue and Groove
Joint
The natural development of a rebate is a
groove, as shown here in a spline joint, which
uses a separate strip of wood (the loose spline)
to join two pieces of stock via a groove in each.
The advantage of this method over simply
butting and gluing, or using flat plate dowel
technology (biscuits) is that the glue surface
area is at least doubled and the spline helps to
prevent bowing or cupping.
A more common development is in the tongue
and groove joint, which uses a milled tongue in
place of a seaparate loose spline to achieve
the same result.
Quite a strong joint, the glue surface area is
good and ease of assembly is a main feature.
22. Mortise and Tenon
Joint
• The mortise and tenon is a
classic woodworking joint. These
joints have been used since the
early times of woodworking, and
are still among the strongest and
most elegant methods for joining
wood.
• Learn methods for creating
tight, beautiful mortise and tenon
joints
23. Mortise and Tenon
Joint
• The mortice and tenon joint is a
very popular, strong and
frequently-used joint for
assembling a variety of projects
where strength and reliability are
required. The mortice can either
be a through mortice - passing all
the way through the stock - or a
blind mortice that only partly
pierces the stock.
• Mortice and tenon joints have
several advantages, including a
lot of glue surface area,
shoulders to resist side forces
acting on the finished project,
neatness and virtual invisibility if
required, plus the option to be
used as a decorative feature if
constructed as a through mortice,
using a contrasting wood wedge,
as shown here.
24. Mortise and Tenon
Joint
In addition to gluing, dowel pins can also
be used to secure the joint - this can be
an advantage if the joint may need
dismantling later.
25. Dowel Joint
Dowel joints are basically substitutes for
mortise and tenon joints. A dowel joint is
made by fitting a butt joint and then
drilling corresponding holes in the two
pieces of wood to be joined and inserting
the dowel pin or pins before joining the
pieces. Glue is used in this type of joint,
and the dowel pins serve as round
tenons, holding the two pieces together.
26. Biscuit Joint
• Another method for joining
boards along the edges (like the
tongue and groove joint) is to cut
slots and use beechwood
biscuits to hold the boards in
place. This is a very common
modern woodworking joint,
relying on glue and the swelling
of the beechwood biscuit to hold
the boards in place. Learn how
to cut consistent slots and get
reliable results from biscuit
joinery.
28. Making strong wood
connection
Using screws:
1.clamp and secure both pieces before connecting with screws.
2 .pre drill holes for screws to prevent splitting of your wood.
3.sink the head of the screw by drilling larger hole just bit under the surface.
4.dont force it!! Forcing screws may strip the head grove and brake the screw.
5.using drywall screws may split your wood piece.
29. Making strong wood
connection
Using nails :
- clamp and secure both pieces before connecting with nails.
- if the nails are too large,pre-drill small hole to guide your nail
- sink the head of the screw by drilling larger hole just bit under the surface
-dont force it!! Forcing nails to your piece will bend the nail and damage your wood.
30. Making strong wood
connection
Using wood glue :
- sand smooth and clean both surfaces before gluing together.
-apply even thin layer of glue to both surfaces.Do not put too much! it may weaken your
connection
- clamp and secure both pieces and let the glue completely dry.
32. Resources
Overview of wood working tools
http://www.technologystudent.com/equip1/equipex1.htm
Overview of wood working joints
http://www.technologystudent.com/joints/joindex.htm