Downloaded 45 times

![Amilton Diesel Aquiris Game Studio [email_address] Briefing](https://image.slidesharecdn.com/unitybootcamppostmortem-120222174741-phpapp02/85/Unity-bootcamp-post-mortem-2-320.jpg)
![Meeting Unity 3 Amilton Diesel Aquiris Game Studio [email_address] Demonstrate features Lightmapping OCC System Tree Editor Audio Filters Deffered Rendering Post-Processing FX Core Optimizations Streaming Content Many more…](https://image.slidesharecdn.com/unitybootcamppostmortem-120222174741-phpapp02/85/Unity-bootcamp-post-mortem-3-320.jpg)
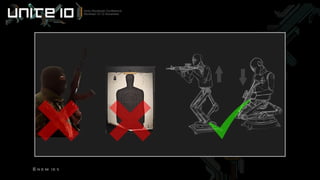
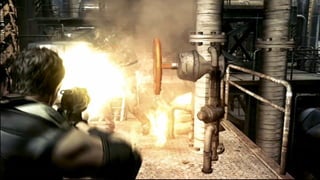
![Main Concept Amilton Diesel Aquiris Game Studio [email_address] Military Trainning Dynamic loadings Stunning Graphics Cutscenes](https://image.slidesharecdn.com/unitybootcamppostmortem-120222174741-phpapp02/85/Unity-bootcamp-post-mortem-4-320.jpg)

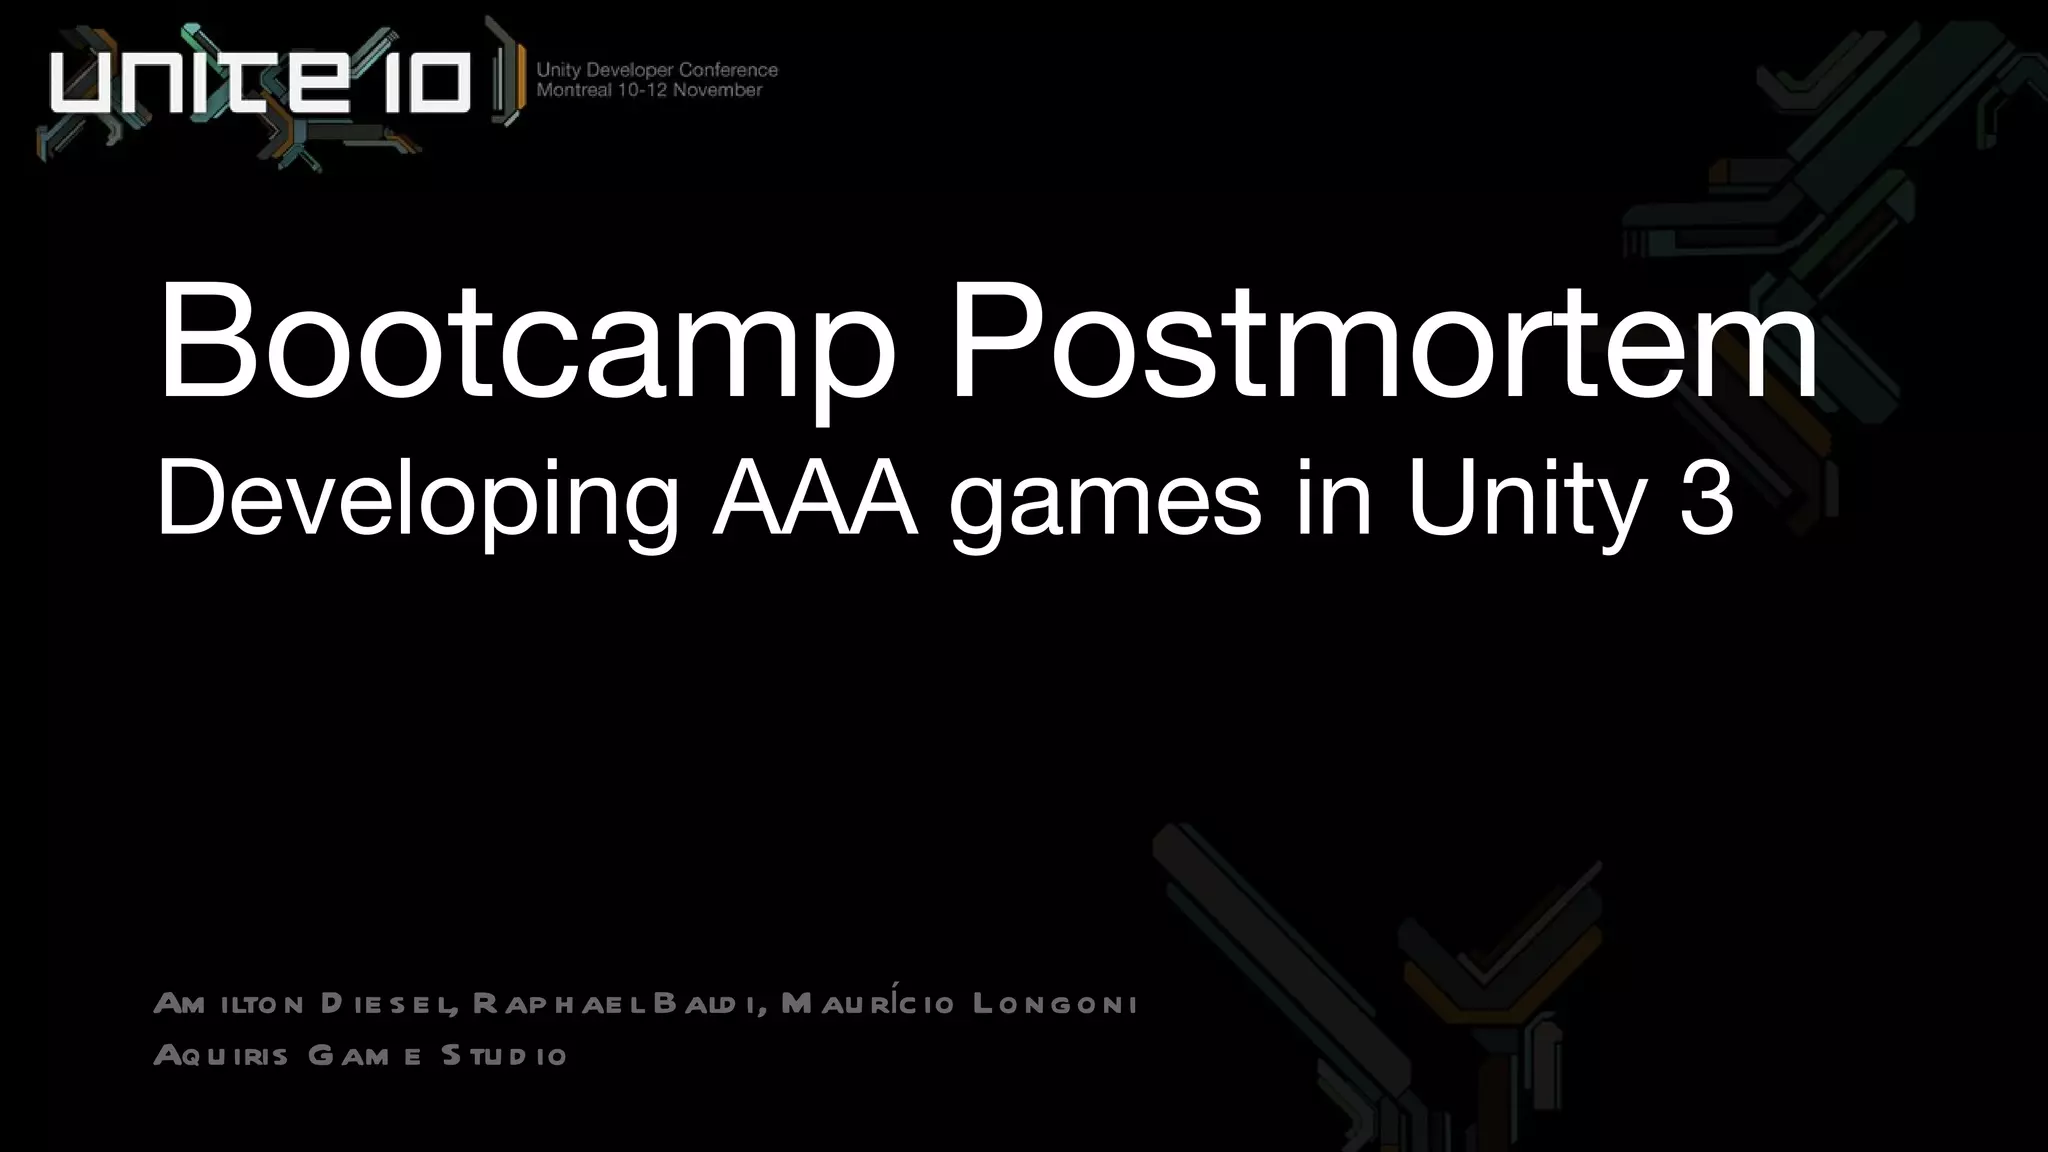
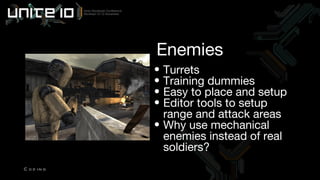
![Enemies Amilton Diesel Aquiris Game Studio [email_address] Not really smart Not boring either Original design](https://image.slidesharecdn.com/unitybootcamppostmortem-120222174741-phpapp02/85/Unity-bootcamp-post-mortem-6-320.jpg)
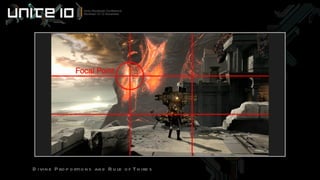
![Amilton Diesel Aquiris Game Studio [email_address] Planning the Graphics](https://image.slidesharecdn.com/unitybootcamppostmortem-120222174741-phpapp02/85/Unity-bootcamp-post-mortem-8-320.jpg)
![Storyboard Amilton Diesel Aquiris Game Studio [email_address] Detailed Cutscenes First color guide](https://image.slidesharecdn.com/unitybootcamppostmortem-120222174741-phpapp02/85/Unity-bootcamp-post-mortem-9-320.jpg)
![Color Palette Amilton Diesel Aquiris Game Studio [email_address] Timeline oriented Detailed mood board](https://image.slidesharecdn.com/unitybootcamppostmortem-120222174741-phpapp02/85/Unity-bootcamp-post-mortem-11-320.jpg)
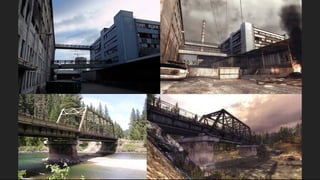
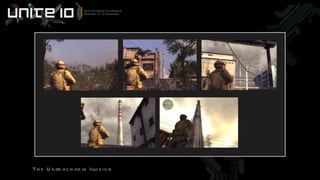
![Collecting References Amilton Diesel Aquiris Game Studio [email_address] Search for real places Filter pictures](https://image.slidesharecdn.com/unitybootcamppostmortem-120222174741-phpapp02/85/Unity-bootcamp-post-mortem-13-320.jpg)
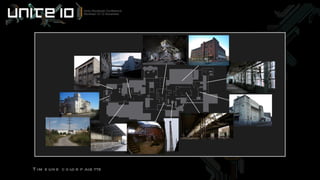
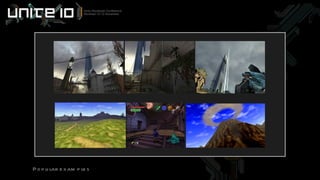
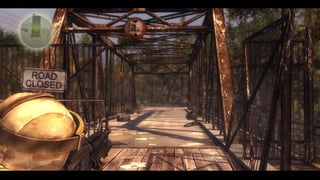
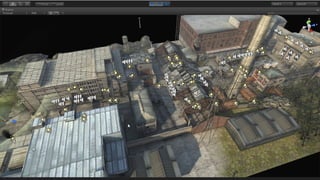
![Planning Spaces Amilton Diesel Aquiris Game Studio [email_address] Composing a level by pictures Connecting buildings](https://image.slidesharecdn.com/unitybootcamppostmortem-120222174741-phpapp02/85/Unity-bootcamp-post-mortem-16-320.jpg)
![Composition Rules Amilton Diesel Aquiris Game Studio [email_address] One place to remember Same drawing and photography rules](https://image.slidesharecdn.com/unitybootcamppostmortem-120222174741-phpapp02/85/Unity-bootcamp-post-mortem-18-320.jpg)
![Unreachable Illusion Amilton Diesel Aquiris Game Studio [email_address] Large scale feeling More interesting to explore](https://image.slidesharecdn.com/unitybootcamppostmortem-120222174741-phpapp02/85/Unity-bootcamp-post-mortem-21-320.jpg)
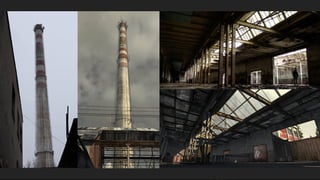
![Amilton Diesel Aquiris Game Studio [email_address] Environment Art](https://image.slidesharecdn.com/unitybootcamppostmortem-120222174741-phpapp02/85/Unity-bootcamp-post-mortem-24-320.jpg)
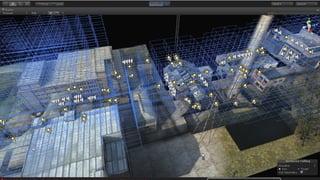
![Modeling Amilton Diesel Aquiris Game Studio [email_address] Individual Prefabs Unity as a level design tool](https://image.slidesharecdn.com/unitybootcamppostmortem-120222174741-phpapp02/85/Unity-bootcamp-post-mortem-25-320.jpg)
![Texture Scale Amilton Diesel Aquiris Game Studio [email_address] Real world scale 1cm² = 1px²](https://image.slidesharecdn.com/unitybootcamppostmortem-120222174741-phpapp02/85/Unity-bootcamp-post-mortem-26-320.jpg)
![Texture Division Amilton Diesel Aquiris Game Studio [email_address] Tileable vs unique textures Advantages and disadvantages](https://image.slidesharecdn.com/unitybootcamppostmortem-120222174741-phpapp02/85/Unity-bootcamp-post-mortem-27-320.jpg)
![The Half Life 2 like Amilton Diesel Aquiris Game Studio [email_address] Tileable textures Flexible prototyping Fast production Less VRAM required Save triangles No mesh combining Less realistic](https://image.slidesharecdn.com/unitybootcamppostmortem-120222174741-phpapp02/85/Unity-bootcamp-post-mortem-28-320.jpg)
![The Unreal 3 like Amilton Diesel Aquiris Game Studio [email_address] Unique textures Flexible prototyping Slow production Huge VRAM required Increase triangles Good for batching More realistic](https://image.slidesharecdn.com/unitybootcamppostmortem-120222174741-phpapp02/85/Unity-bootcamp-post-mortem-29-320.jpg)
![The Bootcamp like Amilton Diesel Aquiris Game Studio [email_address] Middle ground solution Advantages from both sides](https://image.slidesharecdn.com/unitybootcamppostmortem-120222174741-phpapp02/85/Unity-bootcamp-post-mortem-30-320.jpg)
![Shading Amilton Diesel Aquiris Game Studio [email_address] Reflective/Bumped/Specular Ambient Cubemap](https://image.slidesharecdn.com/unitybootcamppostmortem-120222174741-phpapp02/85/Unity-bootcamp-post-mortem-31-320.jpg)
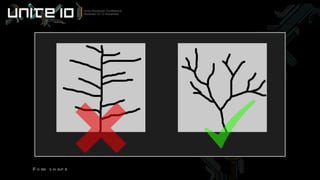
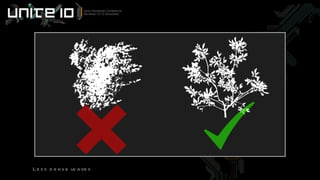
![Realistic Vegetation Amilton Diesel Aquiris Game Studio [email_address] Using the Tree Editor Observing nature](https://image.slidesharecdn.com/unitybootcamppostmortem-120222174741-phpapp02/85/Unity-bootcamp-post-mortem-32-320.jpg)
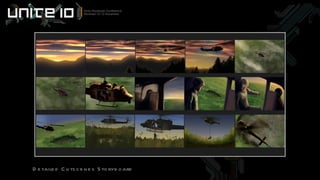
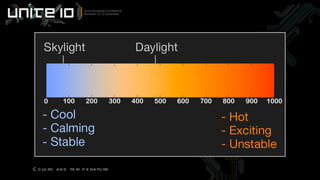
![Lighting Amilton Diesel Aquiris Game Studio [email_address] Sunlight and Skylight It’s all about colors!](https://image.slidesharecdn.com/unitybootcamppostmortem-120222174741-phpapp02/85/Unity-bootcamp-post-mortem-35-320.jpg)
![Lighting Contrast Amilton Diesel Aquiris Game Studio [email_address] Dark vs Bright Cold vs Warm Shadow vs Light](https://image.slidesharecdn.com/unitybootcamppostmortem-120222174741-phpapp02/85/Unity-bootcamp-post-mortem-37-320.jpg)
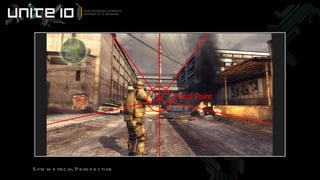
![Raphael Lopes Baldi Aquiris Game Studio [email_address] Coding](https://image.slidesharecdn.com/unitybootcamppostmortem-120222174741-phpapp02/85/Unity-bootcamp-post-mortem-38-320.jpg)
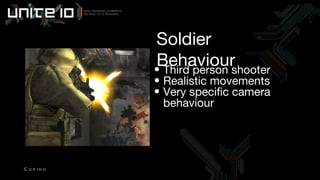
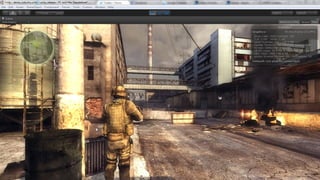
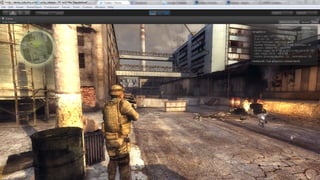
![Coding Raphael Lopes Baldi Aquiris Game Studio [email_address] Programming language Soldier Enemies Smart objects Streaming and scene loading Decal System](https://image.slidesharecdn.com/unitybootcamppostmortem-120222174741-phpapp02/85/Unity-bootcamp-post-mortem-39-320.jpg)
![Programming language JavaScript Widespread in the community Easier to learn Raphael Lopes Baldi Aquiris Game Studio [email_address]](https://image.slidesharecdn.com/unitybootcamppostmortem-120222174741-phpapp02/85/Unity-bootcamp-post-mortem-40-320.jpg)
![Camera behaviour Non centered character Collide with walls Over the shoulder effect Highlight weapon when aiming Raphael Lopes Baldi Aquiris Game Studio [email_address]](https://image.slidesharecdn.com/unitybootcamppostmortem-120222174741-phpapp02/85/Unity-bootcamp-post-mortem-44-320.jpg)
![Smart objects Objects that “know” what must be done under certain conditions Barrels Trash bags Collectable items Raphael Lopes Baldi Aquiris Game Studio [email_address]](https://image.slidesharecdn.com/unitybootcamppostmortem-120222174741-phpapp02/85/Unity-bootcamp-post-mortem-47-320.jpg)
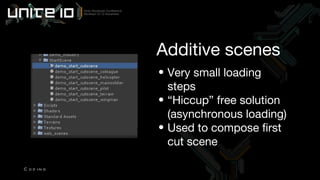
![Streaming Web deployment Large scenes User must feel that the game is continuous Loading free Raphael Lopes Baldi Aquiris Game Studio [email_address]](https://image.slidesharecdn.com/unitybootcamppostmortem-120222174741-phpapp02/85/Unity-bootcamp-post-mortem-48-320.jpg)
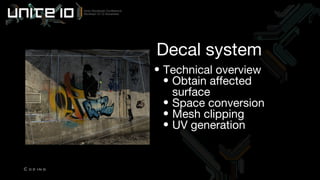
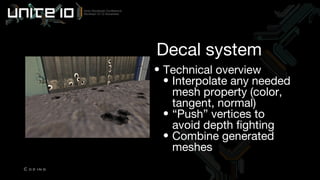
![Decal system Main use: bullet holes Secondary use: environment enrichment AAA titles makes extensive use of decals Unity does not have a built in decal system Raphael Lopes Baldi Aquiris Game Studio [email_address]](https://image.slidesharecdn.com/unitybootcamppostmortem-120222174741-phpapp02/85/Unity-bootcamp-post-mortem-50-320.jpg)

![How it actually helps? Objects occluded by others are not rendered Less Draw Calls Less CPU overhead Bigger frame rate Maurício Longoni Aquiris Game Studio [email_address]](https://image.slidesharecdn.com/unitybootcamppostmortem-120222174741-phpapp02/85/Unity-bootcamp-post-mortem-56-320.jpg)
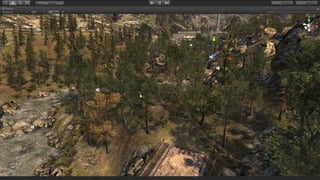
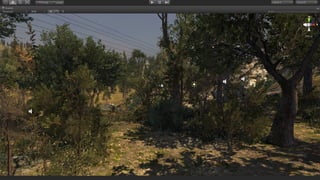
![The Forest Challenge Open environment Thin objects Not too much things to hide after Maurício Longoni Aquiris Game Studio [email_address]](https://image.slidesharecdn.com/unitybootcamppostmortem-120222174741-phpapp02/85/Unity-bootcamp-post-mortem-61-320.jpg)
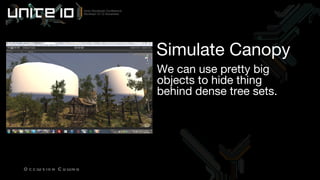
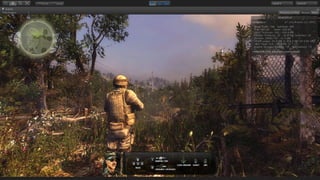
![How can we go over that? Fake! If it looks right, it is right tm Take advantage of so many trees Maurício Longoni Aquiris Game Studio [email_address]](https://image.slidesharecdn.com/unitybootcamppostmortem-120222174741-phpapp02/85/Unity-bootcamp-post-mortem-64-320.jpg)


The document discusses various techniques for developing AAA games in Unity 3, including: 1. Demonstrating Unity 3 features such as lightmapping, occlusion culling, tree editing, and post-processing effects. 2. Planning graphics such as storyboards, cutscenes, color palettes, and collecting environment references. 3. Techniques for environment art, modeling, texturing, lighting, and vegetation. 4. Programming aspects such as coding languages, soldier behaviors, enemy systems, streaming, and implementing decal systems. 5. Addressing challenges with occlusion culling in forest environments and techniques to fake occlusion using dense tree canopies.


![Getting Started with Apache Spark: Big Data Made Simple [Free Meetup]](https://cdn.slidesharecdn.com/ss_thumbnails/apachesparkgettingstarted-260203175547-8361bcc3-thumbnail.jpg?width=640&height=640&fit=bounds)


