Tutorial j boss
•
0 likes•791 views

The document provides instructions for setting up a development environment for JBoss, including installing Java JDK, EasyEclipse IDE, JBoss Application Server, and configuring directories. It also demonstrates how to create a basic J2EE web application with a Servlet, with code examples and build instructions. Key directories and files like the application.xml, web.xml, and packaging-build.xml are configured to deploy the Servlet war file to the JBoss Application Server.

Recommended
More Related Content
What's hot
What's hot (18)
Viewers also liked
Viewers also liked (20)
Similar to Tutorial j boss
Similar to Tutorial j boss (20)
Recently uploaded
Recently uploaded (20)
Tutorial j boss
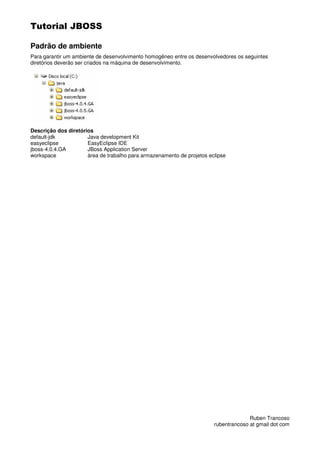
- 1. Tutorial JBOSS Padrão de ambiente Para garantir um ambiente de desenvolvimento homogêneo entre os desenvolvedores os seguintes diretórios deverão ser criados na máquina de desenvolvimento. Descrição dos diretórios default-jdk Java development Kit easyeclipse EasyEclipse IDE jboss-4.0.4.GA JBoss Application Server workspace área de trabalho para armazenamento de projetos eclipse Ruben Trancoso rubentrancoso at gmail dot com
- 2. Tutorial JBOSS Java JDK Nome atualizado: Java(TM) SE Development Kit 6 Update 1 Categoria: Windows Platform - Java(TM) SE Development Kit 6 Update 1 Tipo: Windows Offline Installation, Multi-language Arquivo de instalação: jdk-6u1-windows-i586-p.exe Descrição: The Java SE Development Kit (JDK) includes the Java Runtime Environment (JRE) and command-line development tools that are useful for developing applets and applications. URL para download: http://java.sun.com/javase/downloads/ Diretório de instalação: C:javadefault-jdk Data do registro: 20 de junho de 2007 Instruções: 1. É aconselhavel você remova todas as instalações de JRE ou JDK existentes no seu sistema antes de instalar uma nova. 2. Localize e faça do download do arquivo de instalação da última versão disponível. 3. Execute o instalador. 4. Na tela Custom setup selecione o item Development Tools e altere o caminho de instalação para que aponte para C:javadefault-jdk. 5. Em Public JRE opte por não instalar uma JRE pública. 6. Prosiga com a instalação até que o termino. Ruben Trancoso rubentrancoso at gmail dot com
- 3. Tutorial JBOSS EasyEclipse Nome atualizado: EasyEclipse Server Java Categoria: Windows Distribution Arquivo de instalação: easyeclipse-server-java-1.2.1.exe Descrição: EasyEclipse Server Edition contains lots of plugins to manage different application servers (Tomcat, JBoss, WebLogic), develop on some server-side frameworks (Struts, Java Server Faces), and manipulate common file types on servers (HTML, XML, JSPs). URL para download: http://www.easyeclipse.org/site/distributions/index.html Release: 1.2.1 Diretório de instalação: C:javaeasyeclipse Data do registro: 20 de junho de 2007 Instruções: 1. Localize e faça o download do arquivo de instalação. 2. Na tela Chose Install Location altere o caminho de instalação para que aponte para C:javaeasyeclipse (Verifique que após selecionar o diretório, o instalador ira adicionar um novo subdiretório EasyEclipse Server Java 1.2.1 que deverá ser removido). 3. Execute o instalador. 4. Execute o eclipse. 5. Na primeira execução aparecerá uma janela solicitando o diretório para o espaço de trabalho. Aponte para o diretório C:javaworkspace anteriormente criado. Apontando o eclipse para a JDK: 1. Localize e faça o download do arquivo de instalação. 2. Abra o menu Window > Preferences e na opção Java > Installed JREs adicione a JDK instalada em C:javadefault-jdk. 3. Selecione default-jdk para ser a instalação que será usada como build-path do eclipse. 4. Remova a entrada easyeclipse da lista. 5. Termine a configuração pressionando OK. 6. Encerre o eclipse. 7. Remova o diretório C:javaeasyeclipse jre da instalação. Configurando o easyeclipse: 1. Efetue a instalação do JBoss (conforme este tutorial na seção Instalação do JBoss ). 2. Em window > preferences > server > installed runtimes clique em no botão adicionar ( add... ). 3. Na janela New Server Runtime selecione JBoss Inc > JBoss 4.0 Server Adapter Runtime. 4. Prossiga para a próxima janela e localize o Home Directory do seu JBoss AS que deverá ser C:javajboss-4.0.4.GA. 5. Para Name (unique identifier) utilize o diretório do JBoss como identificador: jboss-4.0.4.GA. 6. Finalize pressionando OK. 7. Selecione a perspectiva JBoss AS. 8. Caso não seja apresentada a janela JBoss Server View abra a opção window > show view > other... > Server > JBoss Server View. 9. Posicione a janela no ambiente de trabalho de acordo com sua preferência. 10. Dentro da área da janela JBoss Server View clique com o botão direito do mouse e selecione new > server para criar um nova configuração de servidor JBoss. 11. Em server host name mantenha localhost. 12. Em server type selecione JBoss Inc > JBoss AS 4.0. 13. O Campo Server runtime deverá apontar para o servidor configurado no passo 2 até o 5: jboss- 4.0.4.GA. Prossiga para a próxima janela. 14. Para Name (unique identifier) utilize o mesmo identificador jboss-4.0.4.GA. 15. Pressione Finish. Iniciando o AS sob o easyeclipse: 1. Pressione o botão play da janela JBoss Server View. Todas as informações de startup e de execução que são normalmente apresentadas em console serão redirecionadas para o console do eclipse. Ruben Trancoso rubentrancoso at gmail dot com
- 4. Tutorial JBOSS Resultado apresentado no console: 15:43:46,015 INFO[Server] Starting JBoss (MX MicroKernel)... 15:43:46,015 INFO[Server] Release ID: JBoss [Zion] 4.0.4.GA (build: CVSTag=JBoss_4_0 (...) 15:43:46,031 INFO[Server] Home Dir: C:javajboss-4.0.4.GA 15:43:46,031 INFO[Server] Home URL: file:/C:/java/jboss-4.0.4.GA/ 15:43:46,031 INFO[Server] Patch URL: null 15:43:46,031 INFO[Server] Server Name: default 15:43:46,031 INFO[Server] Server Home Dir: C:javajboss-4.0.4.GAserverdefault 15:43:46,031 INFO[Server] Server Home URL: file:/C:/java/jboss-4.0.4.GA/server/default/ 15:43:46,031 INFO[Server] Server Log Dir: C:javajboss-4.0.4.GAserverdefaultlog 15:43:46,031 INFO[Server] Server Temp Dir: C:javajboss-4.0.4.GAserverdefaulttmp 15:43:46,031 INFO[Server] Root Deployment Filename: jboss-service.xml 15:43:48,640 INFO[ServerInfo] Java version: 1.6.0_01,Sun Microsystems Inc. 15:43:48,640 INFO[ServerInfo] Java VM: Java HotSpot(TM) Client VM 1.6.0_01-b06,Sun (...) . (prossegue) . 15:44:30,750 INFO [ConnectionFactoryBindingService] Bound ConnectionManager (...) 15:44:31,640 INFO [A] Bound to JNDI name: queue/A 15:44:31,656 INFO [B] Bound to JNDI name: queue/B 15:44:31,656 INFO [C] Bound to JNDI name: queue/C 15:44:31,671 INFO [D] Bound to JNDI name: queue/D 15:44:31,671 INFO [ex] Bound to JNDI name: queue/ex 15:44:31,843 INFO [testTopic] Bound to JNDI name: topic/testTopic 15:44:31,843 INFO [securedTopic] Bound to JNDI name: topic/securedTopic 15:44:31,843 INFO [testDurableTopic] Bound to JNDI name: topic/testDurableTopic 15:44:31,906 INFO [testQueue] Bound to JNDI name: queue/testQueue 15:44:32,078 INFO [UILServerILService] JBossMQ UIL service available at : (...) 15:44:32,265 INFO [DLQ] Bound to JNDI name: queue/DLQ 15:44:32,625 INFO [ConnectionFactoryBindingService] Bound ConnectionManager (...) 15:44:32,828 INFO [TomcatDeployer] deploy, ctxPath=/jmx-console, (...) 15:44:34,687 INFO [ChannelSocket] JK: ajp13 listening on localhost/127.0.0.1:8009 15:44:35,078 INFO [JkMain] Jk running ID=0 time=0/688 config=null 15:44:35,093 INFO [Server] JBoss (MX MicroKernel) [4.0.4.GA (build: CVSTag=JBoss_4_0_4_GA date=200605151000)] Started in 49s:47ms Ruben Trancoso rubentrancoso at gmail dot com
- 5. Tutorial JBOSS Instalação do JBOSS Nome atualizado: JEMS Installer 1.2.0.BETA2 (AS 4.0.4.GA, EJB3 1.0.0.CR8, Portal 2.4.GA) Arquivo de instalação: jems-installer-1.2.0.BETA2.jar Descrição: The JEMS Installer allows to install various JBoss products. It's an easy way for customers to get started using AS. Installer is going to support other products pretty soon. URL para download: http://labs.jboss.com/jemsinstaller/ (veja a seção JEMS Installer Downloads). Selecione 1.2.0.BETA2. Diretório de instalação: C:javajboss-4.0.4.GA Data do registro: 20 de junho de 2007 Instruções: 1. Localize e faça o download do arquivo de instalação. 2. Executo o instalador com o comando java -jar jems-installer-1.2.0.BETA2.jar. 3. Selecione o caminho para instalação: C:javajboss-4.0.4.GA. 4. Selecione a instalação ejb3. Prossiga duas telas. 5. Em configuration name mantenha o nome default. 6. Em datasource mantenha defaut. 7. Selecione o checkbox Enable deployment isolation. 8. Em jmx security deselecione todas as opções selecionadas e defina uma senha para o usuario admin. Recomenda-se utilizar admin como senha. 9. Prossiga com a instalação até o termino. Ruben Trancoso rubentrancoso at gmail dot com
- 6. Tutorial JBOSS Ant-Contrib Tasks Pacote: ant-contrib-1.0b3-bin.zip Descrição: The Ant-Contrib project is a collection of tasks (and at one point maybe types and other tools) for Apache-Ant. URL para download: http://ant-contrib.sourceforge.net/ Ant-Contrib Tasks: http://ant-contrib.sourceforge.net/tasks/tasks/index.html Data do registro: 21 de junho de 2007 Instruções: 1. Localize e faça o download do arquivo de instalação. 2. Descompacte o pacote em um diretório temporário. 3. Copie o arquivo ant-contrib-1.0b3.jar para o diretório C:javaeasyeclipsepluginsorg.apache.ant_1.6.5lib. 4. Em window > preferences > ant > runtime adicione o jar ao grupo Ant Home Entries. 5. Para utilizar as taks do ant-contrib basta adicionar a tag <taskdef resorce="net/sf/antcontrib/antlib.xml"/> ao arquivo packaging-build.xml do seu projeto. Ruben Trancoso rubentrancoso at gmail dot com
- 7. Tutorial JBOSS Criar um novo projeto J2EE 1.4 1. Abrir o menu file > new > project. 2. No Select Wizard que abrirá selecione a pasta JBoss Eclipse IDE e a sub-pasta J2EE Projects. 3. Selecione J2EE 1.4 Project. 4. Clique em Next. 5. Mantenha selecionado Use default location e crie um nome para o projeto. 6. Clique em Next. 7. Na janela J2EE 1.4 Project clique em add folder. 8. De o nome da pasta de src. 9. Clique em Finish. 10. Selecione a opção Allow output folders for source folders. 11. Certifique-se que em Default output folder esteja sendo apresentado <nome do projeto>bin. 12. Na aba Libraries remova a biblioteca Web Services 1.0 Libraries (JBoss-IDE). 13. Clique em Add Library... 14. Selecione JBoss EJB3 Libraries e clique Next. 15. Selecione a instancia do jboss. 16. Clique em Finish e Finish novamente. Ruben Trancoso rubentrancoso at gmail dot com
- 8. Tutorial JBOSS Servlet Servlet.java package web.servlet; import java.io.IOException; import javax.servlet.http.HttpServlet; import javax.servlet.ServletException; import javax.servlet.http.HttpServletRequest; import javax.servlet.http.HttpServletResponse; public class Servlet extends HttpServlet { @Override protected void doGet( HttpServletRequest req, HttpServletResponse resp ) throws ServletException, IOException { System.out.println("Hello"); resp.getWriter().print("<HTML>"); resp.getWriter().print("<BODY>"); resp.getWriter().print("<H1>Hello</H1>"); resp.getWriter().print("</BODY>"); resp.getWriter().print("</HTML>"); } } application.xml <?xml version="1.0" encoding="UTF-8"?> <application version="1.4" xmlns="http://java.sun.com/xml/ns/j2ee" xmlns:xsi="http://www.w3.org/2001/XMLSchema-instance" xsi:schemaLocation="http://java.sun.com/xml/ns/j2ee http://java.sun.com/xml/ns/j2ee/application_1_4.xsd"> <description>Servlet mínima ea</description> <display-name>Servlet mínima ea</display-name> <module> <web> <web-uri>solution-001.war</web-uri> <context-root>solution-001</context-root> Ruben Trancoso rubentrancoso at gmail dot com
- 9. Tutorial JBOSS </web> </module> </application> web.xml <?xml version="1.0" encoding="UTF-8"?> <web-app version="2.4" xmlns="http://java.sun.com/xml/ns/j2ee" xmlns:xsi="http://www.w3.org/2001/XMLSchema-instance" xsi:schemaLocation="http://java.sun.com/xml/ns/j2ee http://java.sun.com/xml/ns/j2ee/web-app_2_4.xsd"> <display-name>Hello World Servlet</display-name> <servlet> <servlet-name>Servlet</servlet-name> <servlet-class>web.servlet.Servlet</servlet-class> </servlet> <servlet-mapping> <servlet-name>Servlet</servlet-name> <url-pattern>/Servlet</url-pattern> </servlet-mapping> </web-app> packaging-build.xml <?xml version="1.0" encoding="UTF-8"?> <project name="Packaging Generator" default="main"> <property file="properties"/> <target name="main" depends="war,ear,deploy"/> <target name="war" description="${project.name}.war"> <delete file="deploy/${project.name}.war"/> <jar destfile="deploy/${project.name}.war"> <zipfileset dir="bin/web" prefix="WEB-INF/classes/web" includes="**"/> <zipfileset dir="bin/WEB-INF" prefix="WEB-INF" includes="*.xml"/> </jar> </target> <target name="ear" description="${project.name}.ear"> <delete file="deploy/${project.name}.ear"/> <jar destfile="deploy/${project.name}.ear"> <zipfileset dir="deploy" includes="${project.name}.war"/> <zipfileset dir="bin/META-INF" prefix="META-INF" includes="*.xml"/> </jar> <delete file="deploy/${project.name}.war" /> </target> <target name="deploy" description="deploy"> <delete file="${deploy.dir}/${project.name}.ear" /> <copy file="deploy/${project.name}.ear" todir="${deploy.dir}" /> </target> </project > Ruben Trancoso rubentrancoso at gmail dot com
- 10. Tutorial JBOSS properties.xml jboss.server=jboss-4.0.4.GA deploy.dir=C:java${jboss.server}serverdefaultdeploy conf.dir=C:java${jboss.server}serverdefaultconf lib.dir=C:java${jboss.server}serverdefaultlib project.name=solution-001 Ruben Trancoso rubentrancoso at gmail dot com
- 11. Tutorial JBOSS Deploy Habilitar o Build automático: 1. Clique na pasta do projeto com o botão direito e selecione Properties ou tecle Alt+Enter. 2. Em Packaging Configurations selecione Enable Packaging e Clique em OK. Execução do Build: 1. Clique na pasta do projeto com o botão direito e selecione Run Packaging. Resultado apresentado no console: Buildfile: C:javaworkspacesolution-001packaging-build.xml war: [jar] Building jar: C:javaworkspacesolution-001deploysolution-001.war ear: [delete] Deleting: C:javaworkspacesolution-001deploysolution-001.ear [jar] Building jar: C:javaworkspacesolution-001deploysolution-001.ear [delete] Deleting: C:javaworkspacesolution-001deploysolution-001.war deploy: [delete] Deleting: C:javajboss-4.0.4.GAserverdefaultdeploysolution-001.ear [copy] Copying 1 file to C:javajboss-4.0.4.GAserverdefaultdeploy main: BUILD SUCCESSFUL Total time: 1 second 16:00:32,359 INFO [EARDeployer] Init J2EE application: file:/C:/java/jboss- 4.0.4.GA/server/default/deploy/solution-001.ear 16:00:32,562 INFO [TomcatDeployer] deploy, ctxPath=/solution-001, warUrl=.../tmp/deploy/tmp62851solution-001.ear-contents/solution-001-exp.war/ 16:00:32,859 INFO [EARDeployer] Started J2EE application: file:/C:/java/jboss- 4.0.4.GA/server/default/deploy/solution-001.ear Undeploy 1. Basta remover o pacote .ear/.war/.ejb3 do diretório ${deploy.dir} definido no arquivo properties. Resultado apresentado no console: 16:01:48,093 INFO [TomcatDeployer] undeploy, ctxPath=/solution-001, warUrl=.../tmp/deploy/tmp62851solution-001.ear-contents/solution-001-exp.war/ 16:01:48,171 INFO [EARDeployer] Undeploying J2EE application, destroy step: file:/C:/java/jboss- 4.0.4.GA/server/default/deploy/solution-001.ear 16:01:48,171 INFO [EARDeployer] Undeployed J2EE application: file:/C:/java/jboss- 4.0.4.GA/server/default/deploy/solution-001.ear Ruben Trancoso rubentrancoso at gmail dot com
- 12. Tutorial JBOSS Acessar a aplicação Web Acessar Servlet: nome do projeto: definido em context-root no arquivo application.xml url-pattern: definida no arquivo web.xml servlet-name: definida no arquivo web.xml 1. Abra o browser em http://localhost:8080/<nome do projeto>/<url-pattern da servlet>/<servlet-name> Ex.: http://localhost:8080/solution-001/Servlet Acessar Páginas JSP: 1. ? Ruben Trancoso rubentrancoso at gmail dot com
- 13. Tutorial JBOSS Bean IOperation.java package ejb3.interfaces; import javax.ejb.Remote; @Remote public interface IOperation { public int sum(int a, int b); public int subtract(int a, int b); } Operation.java package ejb3.stateless; import javax.ejb.Stateless; import ejb3.interfaces.IOperation; public @Stateless class Operation implements IOperation { public int sum(int a, int b) { return a+b; } public int subtract(int a, int b) { return a-b; } } application.xml <?xml version="1.0" encoding="UTF-8"?> <application version="1.4" xmlns="http://java.sun.com/xml/ns/j2ee" xmlns:xsi="http://www.w3.org/2001/XMLSchema-instance" xsi:schemaLocation="http://java.sun.com/xml/ns/j2ee http://java.sun.com/xml/ns/j2ee/application_1_4.xsd"> <description>Bean ea</description> <display-name>Bean ea</display-name> <module> Ruben Trancoso rubentrancoso at gmail dot com
- 14. Tutorial JBOSS <ejb>solution-002.ejb3</ejb> </module> </application> packaging-build.xml <?xml version="1.0" encoding="UTF-8"?> <project name="Packaging Generator" default="main"> <property file="properties" /> <target name="main" depends="ejb3,ear,deploy"/> <target name="ejb3" description="${project.name}.ejb3"> <delete file="deploy/${project.name}.ejb3"/> <jar destfile="deploy/${project.name}.ejb3"> <zipfileset dir="bin/ejb3" prefix="ejb3" includes="**"/> </jar> </target> <target name="ear" description="${project.name}.ear"> <delete file="deploy/${project.name}.ear"/> <jar destfile="deploy/${project.name}.ear"> <zipfileset dir="deploy" includes="${project.name}.ejb3"/> <zipfileset dir="bin/META-INF" prefix="META-INF" includes="*.xml"/> </jar> <delete file="deploy/${project.name}.ejb3" /> </target> <target name="deploy" description="deploy"> <delete file="${deploy.dir}/${project.name}.ear" /> <copy file="deploy/${project.name}.ear" todir="${deploy.dir}" /> </target> </project> properties.xml jboss.server=jboss-4.0.4.GA deploy.dir=C:java${jboss.server}serverdefaultdeploy conf.dir=C:java${jboss.server}serverdefaultconf lib.dir=C:java${jboss.server}serverdefaultlib project.name=solution-002 Ruben Trancoso rubentrancoso at gmail dot com
- 15. Tutorial JBOSS Servlet com Bean Local e Remoto É a junção do projeto para Servlet com o projeto para Bean. Os dois projetos serão sobrepostos e os arquivos application.xml e packaging-build.xml deverão refletir a junção da aplicação WEB e EJB3. A propriedade project.name do arquivo properties recebera o nome do novo projeto, assim como as referências aos módulos no arquivo application.xml. Ruben Trancoso rubentrancoso at gmail dot com
- 16. Tutorial JBOSS Instruções: 1. Crie um novo projeto de nome solution-003 como já descrito neste documento. 2. Abra a pasta C:javaworkspace e copie o conteúdo do projetos solution-001 e solution-002 diretamente para a pasta do novo projeto, sobrepondo os arquivos que já existirem. 3. De volta ao eclipse, clique com o botão direito na pasta do novo projeto e acione a opção refresh para que a disposição dos novos arquivos seja apresentada no eclipse. 4. Altere os arquivos Operation.java conforme segue. ( O Bean do projeto solution-003 terá apenas interface local ) Operation.java package ejb3.stateless; import javax.ejb.Stateless; import ejb3.interfaces.IOperationLocal; public @Stateless class Operation implements IOperationLocal { public int multiply(int a, int b) { return a*b; } } 5. Crie uma cópia da interface IOperation com o nome IoperationLocal e altere como indicado. IOperationLocal.java package ejb3.interfaces; import javax.ejb.Local; @Local public interface IOperationLocal { public int multiply(int a, int b); } 6. Altere o arquivo properties com o novo nome. properties.xml jboss.server=jboss-4.0.4.GA deploy.dir=C:java${jboss.server}serverdefaultdeploy conf.dir=C:java${jboss.server}serverdefaultconf lib.dir=C:java${jboss.server}serverdefaultlib project.name=solution-003 Ruben Trancoso rubentrancoso at gmail dot com
- 17. Tutorial JBOSS 7. Copie o target war do projeto solution-001 para o novo packaging-build.xml incluindo também a dependencia ao target main. 8. Faça a junção do target ear do projeto solution-001 com o target ear do novo projeto. packaging-build.xml <?xml version="1.0" encoding="UTF-8"?> <project name="Packaging Generator" default="main"> <property file="properties" /> <target name="main" depends="war,ejb3,ear,deploy"/> <target name="ejb3" description="${project.name}.ejb3"> <delete file="deploy/${project.name}.ejb3"/> <jar destfile="deploy/${project.name}.ejb3"> <zipfileset dir="bin/ejb3" prefix="ejb3" includes="**"/> </jar> </target> <target name="war" description="${project.name}.war"> <delete file="deploy/${project.name}.war"/> 7 <jar destfile="deploy/${project.name}.war"> <zipfileset dir="bin/web" prefix="WEB-INF/classes/web" includes="**"/> <zipfileset dir="bin/WEB-INF" prefix="WEB-INF" includes="*.xml"/> </jar> </target> <target name="ear" description="${project.name}.ear"> <delete file="deploy/${project.name}.ear"/> <jar destfile="deploy/${project.name}.ear"> <zipfileset dir="deploy" includes="${project.name}.war"/> 8 <zipfileset dir="deploy" includes="${project.name}.ejb3"/> <zipfileset dir="bin/META-INF" prefix="META-INF" includes="*.xml"/> </jar> <delete file="deploy/${project.name}.ejb3" /> </target> <target name="deploy" description="deploy"> <delete file="${deploy.dir}/${project.name}.ear" /> <copy file="deploy/${project.name}.ear" todir="${deploy.dir}" /> </target> </project> Ruben Trancoso rubentrancoso at gmail dot com
- 18. Tutorial JBOSS 9. Adicione a referência do modulo web do projeto solution-001 ao application.xml do novo projeto. 10. Corrija as referências ao nome dos módulos ejb3 e war, assim como o description e o display-name para que reflitam as propriedades do novo projeto. application.xml <?xml version="1.0" encoding="UTF-8"?> <application version="1.4" xmlns="http://java.sun.com/xml/ns/j2ee" xmlns:xsi="http://www.w3.org/2001/XMLSchema-instance" xsi:schemaLocation="http://java.sun.com/xml/ns/j2ee http://java.sun.com/xml/ns/j2ee/application_1_4.xsd"> <description>Servlet com Bean local e remoto</description> <display-name>Servlet com Bean local e remoto</display-name> <module> <web> <web-uri>solution-003.war</web-uri> 9 <context-root>solution-003</context-root> </web> </module> 10 <module> <ejb>solution-003.ejb3</ejb> </module> </application> Ruben Trancoso rubentrancoso at gmail dot com
- 19. Tutorial JBOSS 11. Insira as chamadas aos Beans no Servlet. Servlet.java package web.servlet; import javax.naming.Context; import javax.naming.InitialContext; import javax.servlet.http.HttpServlet; import javax.servlet.ServletException; import javax.servlet.http.HttpServletRequest; import javax.servlet.http.HttpServletResponse; import ejb3.interfaces.IOperation; import ejb3.interfaces.IOperationLocal; public class Servlet extends HttpServlet { @Override protected void doGet( HttpServletRequest req, HttpServletResponse resp ) throws ServletException, IOException { Context ctx = null; try { ctx = new InitialContext(); IOperationLocal opm = (IOperationLocal)ctx.lookup( "solution-003/Operation/local"); resp.getWriter().print( "<br>multiply local : " + opm.multiply(2, 3)); } catch (Exception e) { e.printStackTrace(); } try { Properties properties = new Properties(); properties.put( "java.naming.factory.initial", "org.jnp.interfaces.NamingContextFactory"); properties.put( "java.naming.factory.url.pkgs", "=org.jboss.naming:org.jnp.interfaces"); properties.put( "java.naming.provider.url", "localhost:1099"); ctx = new InitialContext(properties); IOperation ops = (IOperation)ctx.lookup( "solution-002/Operation/remote"); resp.getWriter().print( "<br>sum remote : " + ops.sum(2, 3)); } catch (Exception e) { e.printStackTrace(); } } } Ruben Trancoso rubentrancoso at gmail dot com
- 20. Tutorial JBOSS Criar um novo projeto J2SE 1. Abra o menu file > new > project... > java > java project. 2. Clique Next. 3. Nomeie o novo projeto solution-004. 4. Clique Next. 5. Na janela Java Settings clique em Create new source folder. 6. Preencha o campo Folder name com src. 7. Clique em Finish. 8. Selecione a opção Allow output folders for source folders. 9. Certifique-se que o campo Default output folder esteja exibindo solution-004/bin. 10. Selecione a aba Libraries. 11. Clique em Add External JARs.... 12. A partir do diretório C:javajboss-4.0.4.GAclient selecione as seguintes bibliotecas: "jbossall-client.jar" "jboss-aop-jdk50-client.jar" "jboss-aspect-jdk50-client.jar" "jboss-ejb3- client.jar". 13. Clique em Abrir e depois Finish. 14. Habilitar build automático no projeto como em demonstrado na sessão Deploy. Ruben Trancoso rubentrancoso at gmail dot com
- 21. Tutorial JBOSS Stand-Alone client acessa Bean App.java package client; import java.rmi.RMISecurityManager; import java.util.Properties; import javax.naming.Context; import javax.naming.InitialContext; import javax.naming.NamingException; import javax.swing.JFrame; import ejb3.interfaces.IOperation; public class App extends JFrame { App() { this.setSize(200,200); this.setVisible(true); this.setDefaultCloseOperation(JFrame.EXIT_ON_CLOSE); Context ctx; System.setProperty("java.security.policy","java.policy"); if (System.getSecurityManager() == null) { System.setSecurityManager(new RMISecurityManager()); } try { Properties properties = new Properties(); properties.put( Context.INITIAL_CONTEXT_FACTORY, "org.jnp.interfaces.NamingContextFactory"); properties.put( Context.URL_PKG_PREFIXES, "org.jboss.naming:org.jnp.interfaces.jnp"); properties.put( Context.PROVIDER_URL, "jnp://localhost:1099"); ctx = new InitialContext(properties); IOperation op = (IOperation)ctx.lookup( "solution-002/Operation/remote"); Ruben Trancoso rubentrancoso at gmail dot com
- 22. Tutorial JBOSS int res = op.sum(2,2); System.out.println("a soma é: " + res ); res = op.subtract(5, 2); System.out.println("a subtração é: " + res ); } catch (NamingException e) { e.printStackTrace(); } } public static void main(String[] args) { new App(); } } IOperation.java package ejb3.interfaces; import javax.ejb.Remote; @Remote public interface IOperation { public int sum(int a, int b); public int subtract(int a, int b); } java.policy grant { permission java.security.AllPermission; }; packaging-build.xml <?xml version="1.0" encoding="UTF-8"?> <project name="Packaging Generator" default="main"> <property file="properties" /> <target name="main" depends="jar"/> <target name="jar" description="${project.name}.jar"> <delete file="deploy/${project.name}.jar"/> <copy file="${client.libs.dir}/jbossall-client.jar" todir="deploy/lib" /> <copy file="${client.libs.dir}/jnp-client.jar" todir="deploy/lib" /> <copy file="${client.libs.dir}/jboss-aop-jdk50-client.jar" todir="deploy/lib" /> <copy file="${client.libs.dir}/ jboss-aspect-jdk50-client.jar" todir="deploy/lib" /> <copy file="${client.libs.dir}/jboss-ejb3-client.jar" todir="deploy/lib" /> <copy file="java.policy" todir="deploy" /> <jar destfile="deploy/${project.name}.jar"> <manifest> <attribute name="Built-By" value="${user.name}"/> <attribute name="Package-Title" value="${manifest.package.title}"/> <attribute Ruben Trancoso rubentrancoso at gmail dot com
- 23. Tutorial JBOSS name="Package-Version" value="${manifest.package.version}"/> <attribute name="Package-Vendor" value="${manifest.package.vendor}"/> <attribute name="Main-Class" value="${manifest.main.class}"/> <attribute name="Class-Path" value="${manifest.class.path}"/> </manifest> <zipfileset dir="bin" includes="**"/> </jar> </target> </project> properties project.name=solution-004 manifest.package.title=Stand-alone Client Bean Acess manifest.package.version=build1 manifest.package.vendor=BESC - Banco Estadual de Santa Catarina manifest.main.class=client.App manifest.class.path=lib/jbossall-client.jar lib/jnp-client.jar lib/jboss-aop- jdk50-client.jar lib/jboss-aspect-jdk50-client.jar lib/jboss-ejb3-client.jar run.bat java -cp . -jar solution-004.jar Ruben Trancoso rubentrancoso at gmail dot com
- 24. Tutorial JBOSS Stand-Alone client acessa Bean JNDI externalizado e java.policy embutido Instruções: 1. Crie um novo projeto de nome solution-005 como já descrito neste documento. 2. Abra a pasta C:javaworkspace e copie o conteúdo do projetos solution-004 diretamente para a pasta do novo projeto, sobrepondo os arquivos que já existirem. 3. De volta ao eclipse, clique com o botão direito na pasta do novo projeto e acione a opção refresh para que a disposição dos novos arquivos seja apresentada no eclipse. 4. Adicione o arquivo jndi.properties ao diretório conf e altere os arquivos App.java e packaging- build.xml conforme segue. Objetivo: O uso de um arquivo de propriedades permite que o provedor possa ser alterado sem alterar o código da aplicação. Ainda possibilita a utilização de vários arquivos de propriedades com os provedores correspondentes. O deploy do arquivo java.policy dentro do jar do cliente. jndi.properties java.naming.factory.initial=org.jnp.interfaces.NamingContextFactory java.naming.factory.url.pkgs=org.jboss.naming:org.jnp.interfaces.jnp java.naming.provider.url=jnp://localhost:1099 App.java package client; import java.rmi.RMISecurityManager; import java.util.Properties; import javax.naming.Context; import javax.naming.InitialContext; import javax.naming.NamingException; import javax.swing.JFrame; import ejb3.interfaces.IOperation; public class App extends JFrame { App() { this.setSize(200,200); Ruben Trancoso rubentrancoso at gmail dot com
- 25. Tutorial JBOSS this.setVisible(true); this.setDefaultCloseOperation(JFrame.EXIT_ON_CLOSE); Context ctx; ClassLoader cl = this.getClass().getClassLoader(); URL policyURL = cl.getResource("conf/java.policy"); System.setProperty("java.security.policy", policyURL.toString()); if (System.getSecurityManager() == null) { System.setSecurityManager(new RMISecurityManager()); } try { Properties properties = new Properties(); cl = this.getClass().getClassLoader(); InputStream is = cl.getResourceAsStream( "jndi.properties"); try { properties.load(is); } catch (IOException e) { e.printStackTrace(); } ctx = new InitialContext(properties); IOperation op = (IOperation)ctx.lookup( "solution-002/Operation/remote"); int res = op.sum(2,2); System.out.println("a soma é: " + res ); res = op.subtract(5, 2); System.out.println("a subtração é: " + res ); } catch (NamingException e) { e.printStackTrace(); } } public static void main(String[] args) { new App(); } } packaging-build.xml <?xml version="1.0" encoding="UTF-8"?> <project name="Packaging Generator" default="main"> <property file="properties" /> <target name="main" depends="jar"/> <target name="jar" description="${project.name}.jar"> <delete file="deploy/${project.name}.jar"/> <copy file="${client.libs.dir}/jbossall-client.jar" todir="deploy/lib" /> <copy file="${client.libs.dir}/jnp-client.jar" todir="deploy/lib" /> <copy file="${client.libs.dir}/jboss-aop-jdk50-client.jar" todir="deploy/lib" /> <copy file="${client.libs.dir}/ jboss-aspect-jdk50-client.jar" todir="deploy/lib" /> <copy file="${client.libs.dir}/jboss-ejb3-client.jar" todir="deploy/lib" /> <jar destfile="deploy/${project.name}.jar"> <manifest> <attribute name="Built-By" value="${user.name}"/> Ruben Trancoso rubentrancoso at gmail dot com
- 26. Tutorial JBOSS <attribute name="Package-Title" value="${manifest.package.title}"/> <attribute name="Package-Version" value="${manifest.package.version}"/> <attribute name="Package-Vendor" value="${manifest.package.vendor}"/> <attribute name="Main-Class" value="${manifest.main.class}"/> <attribute name="Class-Path" value="${manifest.class.path}"/> </manifest> <zipfileset dir="bin" includes="**"/> <zipfileset dir="conf" prefix="conf" includes="**"/> </jar> </target> </project> Ruben Trancoso rubentrancoso at gmail dot com
- 27. Tutorial JBOSS Stand-Alone client acessa Bean referenciando libs fora do diretório da aplicação Instruções: 1. Crie um novo projeto de nome solution-006 como já descrito neste documento. 2. Abra a pasta C:javaworkspace e copie o conteúdo do projetos solution-005 diretamente para a pasta do novo projeto, sobrepondo os arquivos que já existirem. 3. De volta ao eclipse, clique com o botão direito na pasta do novo projeto e acione a opção refresh para que a disposição dos novos arquivos seja apresentada no eclipse. 4. Altere o arquivo properties e packaging-build.xml conforme segue. Objetivo: Obter acesso compartilhado a bibliotecas jar. properties project.name=solution-006 manifest.package.title=Stand-alone Client Bean Acess manifest.package.version=build1 manifest.package.vendor=BESC - Banco Estadual de Santa Catarina manifest.main.class=client.App manifest.class.path=${client.libs.url}/jbossall-client.jar ${client.libs.url}/jnp-client.jar ${client.libs.url}/jboss-aop-jdk50-client.jar ${client.libs.url}/jboss-aspect-jdk50-client.jar ${client.libs.url}/jboss-ejb3- client.jar client.libs.url=file:/c:/java/jboss-4.0.4.GA/client packaging-build.xml <?xml version="1.0" encoding="UTF-8"?> <project name="Packaging Generator" default="main"> <property file="properties" /> <target name="main" depends="jar"/> <target name="jar" description="${project.name}.jar"> <delete file="deploy/${project.name}.jar"/> <jar destfile="deploy/${project.name}.jar"> <manifest> <attribute name="Built-By" value="${user.name}"/> <attribute name="Package-Title" value="${manifest.package.title}"/> <attribute name="Package-Version" value="${manifest.package.version}"/> <attribute name="Package-Vendor" value="${manifest.package.vendor}"/> <attribute name="Main-Class" value="${manifest.main.class}"/> <attribute name="Class-Path" value="${manifest.class.path}"/> </manifest> <zipfileset dir="bin" includes="**"/> <zipfileset dir="conf" prefix="conf" includes="**"/> </jar> </target> </project> Ruben Trancoso rubentrancoso at gmail dot com
- 28. Tutorial JBOSS Stand-Alone client acessa Bean JavaWebStart com full deploy (libs jboss incluidas) Instruções: 5. Crie um novo projeto de nome solution-007 como já descrito neste documento. 6. Abra a pasta C:javaworkspace e copie o conteúdo do projetos solution-006 diretamente para a pasta do novo projeto, sobrepondo os arquivos que já existirem. 7. De volta ao eclipse, clique com o botão direito na pasta do novo projeto e acione a opção refresh para que a disposição dos novos arquivos seja apresentada no eclipse. 8. Altere o arquivos, App.java, properties e packaging-build.xml conforme segue. 9. Inclua os descritores .jnlp , os arquivos application.xml e web.xml e os arquivos de entrada de teclado cert-create.in e sign-jar.in. Objetivo: Disponibilizar a aplicação através da web. App.java package client; import java.awt.BorderLayout; import java.io.IOException; import java.io.InputStream; import java.io.PrintWriter; import java.io.StringWriter; import java.net.URL; import java.rmi.RMISecurityManager; import java.util.Properties; import javax.naming.Context; import javax.naming.InitialContext; import javax.naming.NamingException; import javax.swing.JFrame; import javax.swing.JScrollPane; Ruben Trancoso rubentrancoso at gmail dot com
- 29. Tutorial JBOSS import javax.swing.JTextArea; import ejb3.interfaces.IOperation; public class App extends JFrame { JTextArea debug; App() { this.setSize(200,200); this.setDefaultCloseOperation(JFrame.EXIT_ON_CLOSE); debug = new JTextArea(); JScrollPane scrollPane = new JScrollPane(debug); this.getContentPane().add(scrollPane,BorderLayout.CENTER); this.validate(); this.setVisible(true); Context ctx; ClassLoader cl = this.getClass().getClassLoader(); URL policyURL = cl.getResource("conf/java.policy"); System.setProperty("java.security.policy",policyURL.toString()); if (System.getSecurityManager() == null) { System.setSecurityManager(new RMISecurityManager()); } try { Properties properties = new Properties(); cl = this.getClass().getClassLoader(); InputStream is = cl.getResourceAsStream( "conf/jndi.properties"); try { properties.load(is); } catch (IOException e) { e.printStackTrace(); this.debug( this.getStackTrace(e) ); } ctx = new InitialContext(properties); IOperation op = (IOperation)ctx.lookup( "solution-002/Operation/remote"); int res = op.sum(2,2); String text = "a soma é: " + Integer.toString(res); this.debug(text); res = op.subtract(5, 2); text = "a subtração é: " + Integer.toString(res); this.debug(text); } catch (NamingException e) { e.printStackTrace(); this.debug( this.getStackTrace(e) ); } } private String getStackTrace(Throwable t) { StringWriter sw = new StringWriter(); PrintWriter pw = new PrintWriter(sw, true); t.printStackTrace(pw); pw.flush(); sw.flush(); return sw.toString(); } Ruben Trancoso rubentrancoso at gmail dot com
- 30. Tutorial JBOSS private void debug(String text) { debug.insert("# " + text + "n", 0 ); debug.setCaretPosition(0); } public static void main(String[] args) { new App(); } } properties project.name=solution-007 manifest.package.title=Stand-alone Client Bean Acess manifest.package.version=build1 manifest.package.vendor=BESC - Banco Estadual de Santa Catarina manifest.main.class=client.App jboss.server=jboss-4.0.4.GA deploy.dir=C:java${jboss.server}serverdefaultdeploy conf.dir=C:java${jboss.server}serverdefaultconf lib.dir=C:java${jboss.server}serverdefaultlib client.libs.url=lib/ client.libs.dir=C:/java/jboss-4.0.4.GA/client jar-01=jbossall-client.jar jar-02=jnp-client.jar jar-03=jboss-aop-jdk50-client.jar jar-04=jboss-aspect-jdk50-client.jar jar-05=jboss-ejb3-client.jar jar.signed-01=${client.libs.url}${jar-01} jar.signed-02=${client.libs.url}${jar-02} jar.signed-03=${client.libs.url}${jar-03} jar.signed-04=${client.libs.url}${jar-04} jar.signed-05=${client.libs.url}${jar-05} manifest.class.path=${jar.signed-01} ${jar.signed-02} ${jar.signed-03} ${jar.signed-04} ${jar.signed-05} packaging-build.xml <?xml version="1.0" encoding="UTF-8"?> <project name="Packaging Generator" default="main"> <property file="properties" /> <target name="main" depends="jar,jws,war,ear,deploy"/> <target name="jar" description="${project.name}.jar"> <delete file="deploy/${project.name}.jar"/> <copy file="${client.libs.dir}/${jar-01}" todir="deploy/lib" /> <copy file="${client.libs.dir}/${jar-02}" todir="deploy/lib" /> <copy file="${client.libs.dir}/${jar-03}" todir="deploy/lib" /> <copy file="${client.libs.dir}/${jar-04}" todir="deploy/lib" /> <copy file="${client.libs.dir}/${jar-05}" todir="deploy/lib" /> <jar destfile="deploy/${project.name}.jar"> <manifest> <attribute name="Built-By" value="${user.name}"/> <attribute name="Package-Title" value="${manifest.package.title}"/> <attribute name="Package-Version" Ruben Trancoso rubentrancoso at gmail dot com
- 31. Tutorial JBOSS value="${manifest.package.version}"/> <attribute name="Package-Vendor" value="${manifest.package.vendor}"/> <attribute name="Main-Class" value="${manifest.main.class}"/> <attribute name="Class-Path" value="${manifest.class.path}"/> </manifest> <zipfileset dir="bin" includes="**"/> <zipfileset dir="conf" prefix="conf" includes="**"/> </jar> </target> <target name="jws" description="prepare jws certificate"> <delete file="deploy/stand-alone-certificate" /> <exec dir="deploy" executable="keytool" input="jws/cert-create.in"> <arg value="-genkey"/> <arg value="-keystore"/> <arg value="stand-alone-certificate"/> <arg value="-alias"/> <arg value="saclient"/> </exec> <exec dir="deploy" executable="jarsigner" input="jws/sign-jar.in"> <arg value="-verbose"/> <arg value="-keystore"/> <arg value="stand-alone-certificate"/> <arg value="solution-007.jar"/> <arg value="saclient"/> </exec> <exec dir="deploy" executable="jarsigner" input="jws/sign-jar.in"> <arg value="-verbose"/> <arg value="-keystore"/> <arg value="stand-alone-certificate"/> <arg value="${jar.signed-01}"/> <arg value="saclient"/> </exec> <exec dir="deploy" executable="jarsigner" input="jws/sign-jar.in"> <arg value="-verbose"/> <arg value="-keystore"/> <arg value="stand-alone-certificate"/> <arg value="${jar.signed-02}"/> <arg value="saclient"/> </exec> <exec dir="deploy" executable="jarsigner" input="jws/sign-jar.in"> <arg value="-verbose"/> <arg value="-keystore"/> <arg value="stand-alone-certificate"/> <arg value="${jar.signed-03}"/> <arg value="saclient"/> </exec> <exec dir="deploy" executable="jarsigner" input="jws/sign-jar.in"> <arg value="-verbose"/> <arg value="-keystore"/> <arg value="stand-alone-certificate"/> <arg value="${jar.signed-04}"/> <arg value="saclient"/> </exec> <exec dir="deploy" executable="jarsigner" input="jws/sign-jar.in"> <arg value="-verbose"/> <arg value="-keystore"/> <arg value="stand-alone-certificate"/> <arg value="${jar.signed-05}"/> Ruben Trancoso rubentrancoso at gmail dot com
- 32. Tutorial JBOSS <arg value="saclient"/> </exec> </target> <target name="war" description="${project.name}.war"> <delete file="deploy/${project.name}.war"/> <jar destfile="deploy/${project.name}.war"> <zipfileset dir="deploy" prefix="" includes="**" excludes="${project.name}.ear,stand-alone-local.jnlp"/> <zipfileset dir="bin/WEB-INF" prefix="WEB-INF/" includes="**"/> </jar> <delete file="deploy/lib/${jar-01}" /> <delete file="deploy/lib/${jar-02}" /> <delete file="deploy/lib/${jar-03}" /> <delete file="deploy/lib/${jar-04}" /> <delete file="deploy/lib/${jar-05}" /> </target> <target name="ear" description="${project.name}.ear"> <delete file="deploy/${project.name}.ear"/> <jar destfile="deploy/${project.name}.ear"> <zipfileset dir="deploy" includes="${project.name}.war"/> <zipfileset dir="bin/META-INF" prefix="META-INF" includes="*.xml"/> </jar> <delete file="deploy/${project.name}.war" /> </target> <target name="deploy" description="deploy"> <delete file="${deploy.dir}/${project.name}.ear" /> <copy file="deploy/${project.name}.ear" todir="${deploy.dir}" /> </target> </project> stand-alone.jnlp <?xml version="1.0" encoding="UTF-8"?> <jnlp spec="1.0+" codebase="http://localhost:8080/solution-007" href="stand-alone.jnlp" > <information> <title>Stand-Alone EJB3 Client</title> <vendor>BESC - BESC - Banco do Estado de Santa Catarina</vendor> <homepage href="http://www.besc.com.br" /> <description>A simple swing EJB client with JWS.</description> <offline-allowed /> </information> <resources> <j2se version="1.4+"/> <jar href="solution-007.jar" main="true" /> <jar href="lib/jboss-ejb3-client.jar" /> Ruben Trancoso rubentrancoso at gmail dot com
- 33. Tutorial JBOSS <jar href="lib/jbossall-client.jar" /> <jar href="lib/jnp-client.jar" /> <jar href="lib/jboss-aop-jdk50-client.jar" /> <jar href="lib/jboss-aspect-jdk50-client.jar" /> </resources> <application-desc main-class="client.App"/> <security> <all-permissions/> </security> </jnlp> cert-create.in 123456<ENTER> 123456<ENTER> SADSI - Stand Alone Client<ENTER> COMRE<ENTER> BESC Banco do Estado de Santa Catarina<ENTER> Florianópolis<ENTER> Santa Catarina<ENTER> br<ENTER> yes<ENTER> 123456<ENTER> 123456<ENTER> sign-jar.in 123456<ENTER> application.xml <?xml version="1.0" encoding="UTF-8"?> <application version="1.4" xmlns="http://java.sun.com/xml/ns/j2ee" xmlns:xsi="http://www.w3.org/2001/XMLSchema-instance" xsi:schemaLocation="http://java.sun.com/xml/ns/j2ee http://java.sun.com/xml/ns/j2ee/application_1_4.xsd"> <description>Java Web Start sample</description> <display-name>Java Web Start sample</display-name> <module> <web> <web-uri>solution-007.war</web-uri> <context-root>solution-007</context-root> </web> </module> </application> web.xml <?xml version="1.0" encoding="UTF-8"?> <web-app version="2.4" xmlns="http://java.sun.com/xml/ns/j2ee" xmlns:xsi="http://www.w3.org/2001/XMLSchema-instance" xsi:schemaLocation="http://java.sun.com/xml/ns/j2ee http://java.sun.com/xml/ns/j2ee/web-app_2_4.xsd"> </web-app> Ruben Trancoso rubentrancoso at gmail dot com
- 34. Tutorial JBOSS Stand-Alone client acessa Bean JavaWebStart utilizando biblioteca local compartilhada (deploy reduzido) Instruções: 1. Crie um novo projeto de nome solution-008 como já descrito neste documento. 2. Abra a pasta C:javaworkspace e copie o conteúdo do projetos solution-007 diretamente para a pasta do novo projeto, sobrepondo os arquivos que já existirem. 3. De volta ao eclipse, clique com o botão direito na pasta do novo projeto e acione a opção refresh para que a disposição dos novos arquivos seja apresentada no eclipse. 4. Altere o arquivo properties, stand-alone.jnlp e packaging-build.xml conforme segue. Objetivo: Disponibilizar a aplicação através da web. properties project.name=solution-008 manifest.package.title=Stand-alone Client Bean Acess manifest.package.version=build1 manifest.package.vendor=BESC - Banco Estadual de Santa Catarina manifest.main.class=client.App jboss.server=jboss-4.0.4.GA deploy.dir=C:java${jboss.server}serverdefaultdeploy conf.dir=C:java${jboss.server}serverdefaultconf lib.dir=C:java${jboss.server}serverdefaultlib client.libs.url=c:/lib/ client.libs.dir=C:/java/jboss-4.0.4.GA/client jar-01=jbossall-client.jar jar-02=jnp-client.jar jar-03=jboss-aop-jdk50-client.jar jar-04=jboss-aspect-jdk50-client.jar jar-05=jboss-ejb3-client.jar jar.signed-01=${client.libs.url}${jar-01} jar.signed-02=${client.libs.url}${jar-02} jar.signed-03=${client.libs.url}${jar-03} jar.signed-04=${client.libs.url}${jar-04} jar.signed-05=${client.libs.url}${jar-05} manifest.class.path=${jar.signed-01} ${jar.signed-02} ${jar.signed-03} ${jar.signed-04} ${jar.signed-05} stand-alone.jnlp <?xml version="1.0" encoding="UTF-8"?> <jnlp spec="1.0+" codebase="http://localhost:8080/solution-008" href="stand-alone.jnlp" > <information> <title>Stand-Alone EJB3 Client</title> <vendor>BESC - BESC - Banco do Estado de Santa Catarina</vendor> <homepage href="http://www.besc.com.br" /> <description>A simple swing EJB client with java web start.</description> Ruben Trancoso rubentrancoso at gmail dot com
- 35. Tutorial JBOSS <offline-allowed /> </information> <resources> <j2se version="1.4+"/> <jar href="solution-008.jar" main="true" /> <jar href="file:/c:/lib/jboss-ejb3-client.jar" /> <jar href="file:/c:/lib/jbossall-client.jar" /> <jar href="file:/c:/lib/jnp-client.jar" /> <jar href="file:/c:/lib/jboss-aop-jdk50-client.jar" /> <jar href="file:/c:/lib/jboss-aspect-jdk50-client.jar" /> </resources> <application-desc main-class="client.App"/> <security> <all-permissions/> </security> </jnlp> packaging-build.xml <?xml version="1.0" encoding="UTF-8"?> <project name="Packaging Generator" default="main"> <property file="properties" /> <target name="main" depends="jar,jws,war,ear, deploy"/> <target name="jar" description="${project.name}.jar"> <delete file="deploy/${project.name}.jar"/> <delete file="${jar.signed-01}"/> <delete file="${jar.signed-02}"/> <delete file="${jar.signed-03}"/> <delete file="${jar.signed-04}"/> <delete file="${jar.signed-05}"/> <copy file="${client.libs.dir}/${jar-01}" todir="${client.libs.url}" /> <copy file="${client.libs.dir}/${jar-02}" todir="${client.libs.url}" /> <copy file="${client.libs.dir}/${jar-03}" todir="${client.libs.url}" /> <copy file="${client.libs.dir}/${jar-04}" todir="${client.libs.url}" /> <copy file="${client.libs.dir}/${jar-05}" todir="${client.libs.url}" /> <jar destfile="deploy/${project.name}.jar"> <manifest> <attribute name="Built-By" value="${user.name}"/> <attribute name="Package-Title" value="${manifest.package.title}"/> <attribute name="Package-Version" value="${manifest.package.version}"/> <attribute name="Package-Vendor" value="${manifest.package.vendor}"/> <attribute name="Main-Class" value="${manifest.main.class}"/> <attribute name="Class-Path" value="${manifest.class.path}"/> </manifest> <zipfileset dir="bin/client" prefix="client" includes="**"/> <zipfileset dir="bin/ejb3" prefix="ejb3" includes="**"/> <zipfileset dir="conf" prefix="conf" includes="**"/> Ruben Trancoso rubentrancoso at gmail dot com
- 36. Tutorial JBOSS </jar> </target> <target name="jws" description="prepare jws certificate"> <delete file="deploy/stand-alone-certificate" /> <exec dir="deploy" executable="keytool" input="jws/cert-create.in"> <arg value="-genkey"/> <arg value="-keystore"/> <arg value="stand-alone-certificate"/> <arg value="-alias"/> <arg value="saclient"/> </exec> <exec dir="deploy" executable="jarsigner" input="jws/sign-jar.in"> <arg value="-verbose"/> <arg value="-keystore"/> <arg value="stand-alone-certificate"/> <arg value="${project.name}.jar"/> <arg value="saclient"/> </exec> <exec dir="deploy" executable="jarsigner" input="jws/sign-jar.in"> <arg value="-verbose"/> <arg value="-keystore"/> <arg value="stand-alone-certificate"/> <arg value="${jar.signed-01}"/> <arg value="saclient"/> </exec> <exec dir="deploy" executable="jarsigner" input="jws/sign-jar.in"> <arg value="-verbose"/> <arg value="-keystore"/> <arg value="stand-alone-certificate"/> <arg value="${jar.signed-02}"/> <arg value="saclient"/> </exec> <exec dir="deploy" executable="jarsigner" input="jws/sign-jar.in"> <arg value="-verbose"/> <arg value="-keystore"/> <arg value="stand-alone-certificate"/> <arg value="${jar.signed-03}"/> <arg value="saclient"/> </exec> <exec dir="deploy" executable="jarsigner" input="jws/sign-jar.in"> <arg value="-verbose"/> <arg value="-keystore"/> <arg value="stand-alone-certificate"/> <arg value="${jar.signed-04}"/> <arg value="saclient"/> </exec> <exec dir="deploy" executable="jarsigner" input="jws/sign-jar.in"> <arg value="-verbose"/> <arg value="-keystore"/> <arg value="stand-alone-certificate"/> <arg value="${jar.signed-05}"/> <arg value="saclient"/> </exec> </target> <target name="war" description="${project.name}.war"> <delete file="deploy/${project.name}.war"/> <jar destfile="deploy/${project.name}.war"> <zipfileset dir="deploy" prefix="" Ruben Trancoso rubentrancoso at gmail dot com
- 37. Tutorial JBOSS includes="**" excludes="${project.name}.ear,stand-alone-local.jnlp"/> <zipfileset dir="bin/WEB-INF" prefix="WEB-INF/" includes="**"/> </jar> </target> <target name="ear" description="${project.name}.ear"> <delete file="deploy/${project.name}.ear"/> <jar destfile="deploy/${project.name}.ear"> <zipfileset dir="deploy" includes="${project.name}.war"/> <zipfileset dir="bin/META-INF" prefix="META-INF" includes="*.xml"/> </jar> <delete file="deploy/${project.name}.war" /> </target> <target name="deploy" description="deploy"> <delete file="${deploy.dir}/${project.name}.ear" /> <copy file="deploy/${project.name}.ear" todir="${deploy.dir}" /> </target> </project> Ruben Trancoso rubentrancoso at gmail dot com
- 38. Tutorial JBOSS Banco de dados Ruben Trancoso rubentrancoso at gmail dot com
- 39. Tutorial JBOSS MSSQL Stored Procedures/Functions Usuario sp_autentica sp_autoriza sp_cria_usuario /*------------------------------------------------------------------------------ DESCRICAO: Rotina para criação de novo usuário. OBS.: Valores de retorno: 0 - usuário e senha ok! 1 - usuário não cadastrado 2 - senha inválida 3 - usuário inativo 4 - senha alterada 5 - usuário incluido 6 - usuário alterado 7 - usuário desativado 8 - usuário ativado 9 - usuário já cadastrado -------------------------------------------------------------------------------- ALTERACOES: AUTOR DATA OBS.: Royquener 12/2005 Criação Ruben Trancoso 06/2007 Migração da sp para o novo squema +------------------------------------------------------------------------------- */ CREATE procedure [dbo].[sp_cria_usuario] ( @matricula varchar(8) ,@senha varchar(6) ) as set nocount on if exists (select 1 from Usuario where matricula = @matricula ) begin raiserror('Usuário já cadastrado',16,9) return 9 end else begin insert into dbo.Usuario (matricula ,senha) values (@matricula ,@senha) end set nocount off Ruben Trancoso rubentrancoso at gmail dot com
- 40. Tutorial JBOSS GO sp_remove_usuario sp_obtem_usuario sp_altera_usuario sp_reinicializa_senha sp_troca_senha Perfil sp_cria_perfil sp_remove_perfil Aplicativo sp_cria_aplicativo sp_remove_aplicativo sp_obtem_aplicativo sp_altera_aplicativo Servico sp_cria_servico sp_remove_servico sp_obtem_servico sp_altera_servico Associações sp_usuario_associa_perfil sp_aplicativo_associa_perfil sp_servico_associa_aplicativo Ruben Trancoso rubentrancoso at gmail dot com
- 41. Tutorial JBOSS JDBC acessa stored procedure Driver JDBC para MSSQL Nome atualizado: The jTDS Project Biblioteca jar: jtds-1.2.jar Descrição: jTDS is an open source 100% pure Java (type 4) JDBC 3.0 driver for Microsoft SQL Server (6.5, 7, 2000 and 2005) and Sybase (10, 11, 12, 15). jTDS is based on FreeTDS and is currently the fastest production-ready JDBC driver for SQL Server and Sybase. jTDS is 100% JDBC 3.0 compatible, supporting forward-only and scrollable/updateable ResultSets, concurrent (completely independent) Statements and implementing all the DatabaseMetaData and ResultSetMetaData methods. URL para download: http://jtds.sourceforge.net/ Data do registro: 27 de junho de 2007 Instanciamento String driverName = "net.sourceforge.jtds.jdbc.Driver"; String connString = "jdbc:jtds:sqlserver://<server>[:<port>]/ <database>;tds=8.0;user=<user>;password=<password>"; Class.forName(driverName); Connection connection = DriverManager.getConnection(connString); Observações: Port: 1433 Driver JDBC para MySQL Nome atualizado: MySQL JDBC Connector Biblioteca jar: mysql-connector-java-5.0.6-bin.jar Descrição: Standardized database driver for Java platforms and development. URL para download: http://dev.mysql.com/downloads/connector/j/5.0.html Data do registro: 27 de junho de 2007 Instanciamento String driverName = "com.mysql.jdbc.Driver"; String connString = "jdbc:mysql://<server>[:<port>]/ <database>?user=<user>&password=<password>"; Class.forName(driverName); Connection connection = DriverManager.getConnection(connString); Observações: Port: 3306 Ruben Trancoso rubentrancoso at gmail dot com
- 42. Tutorial JBOSS Instruções: 1. Crie um novo projeto J2SE. 2. Adicione uma pasta drivers na raiz do projeto e copie a(s) biblioteca(s) para ela. 3. Adicione a(s) biblioteca(s) ao classpath do projeto como já explicado em Criar um novo projeto J2SE. App.java package client; import java.sql.CallableStatement; import java.sql.Connection; import java.sql.DriverManager; import java.sql.SQLException; import javax.swing.JFrame; public class App extends JFrame { String driverName = "net.sourceforge.jtds.jdbc.Driver"; String connString = "jdbc:jtds:sqlserver://db-vm:1433/security; tds=8.0;user=sa;password=sadesis"; App() { this.cria_usuario("teste","123456"); } public void cria_usuario(String matricula, String senha) { CallableStatement sf; try { Class.forName(driverName); Connection connection = DriverManager.getConnection(connString); sf = connection.prepareCall("{ call sp_cria_usuario(?,?) }"); sf.setString(1, matricula); sf.setString(2, senha); sf.execute(); } catch (ClassNotFoundException e) { e.printStackTrace(); } catch (SQLException e) { e.printStackTrace(); } } public static void main(String[] args) { new App(); } } Ruben Trancoso rubentrancoso at gmail dot com
- 43. Tutorial JBOSS JAAS SSL Interceptor Junit Ruben Trancoso rubentrancoso at gmail dot com