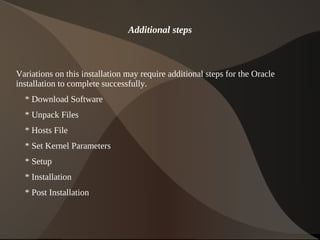
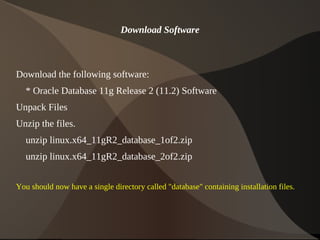
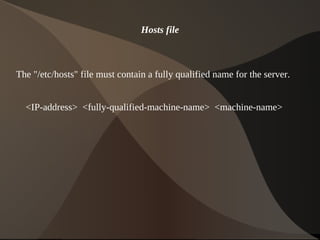
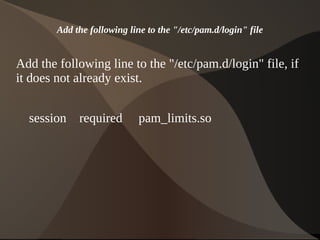
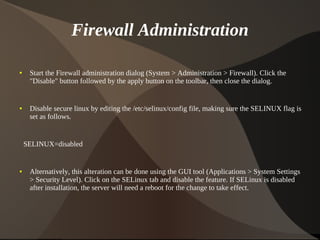
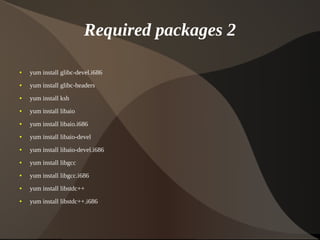
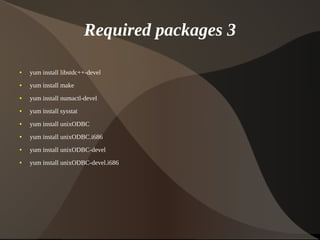
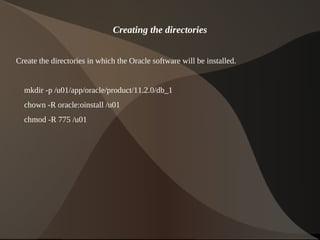
This document provides instructions for installing Oracle 11g Release 2 on Fedora 14. It describes downloading and unpacking the required software, configuring kernel parameters and firewall settings, installing prerequisite packages, creating user groups and directories for the installation, and running the Oracle Universal Installer to complete the database installation. Post-installation steps involve restoring the original "/etc/redhat-release" file and setting the restart flag in "/etc/oratab".
3. Introduction
Oracle Database 11g Release 2 (11.2) Installation On
Fedora 14 (F14). This article describes the installation
of Oracle Database 11g Release 2 (11.2) 64-bit on
Fedora 14 (F14) 64-bit. The article is based on a server
installation with a minimum of 2G swap and secure
Linux disabled.
4. The installation should also include the following package groups
* Gnome Desktop Environment
* Graphical Internet
* Development Libraries
* Development Tools
* Server Configuration Tools
* Administration Tools
* Base
* Fonts
* Hardware Support
* Input Methods
* System Tools
* X Windows System
5. Additional steps
Variations on this installation may require additional steps for the Oracle
installation to complete successfully.
* Download Software
* Unpack Files
* Hosts File
* Set Kernel Parameters
* Setup
* Installation
* Post Installation
6. Download Software
Download the following software:
* Oracle Database 11g Release 2 (11.2) Software
Unpack Files
Unzip the files.
unzip linux.x64_11gR2_database_1of2.zip
unzip linux.x64_11gR2_database_2of2.zip
You should now have a single directory called "database" containing installation files.
7. Hosts file
The "/etc/hosts" file must contain a fully qualified name for the server.
<IP-address> <fully-qualified-machine-name> <machine-name>
8. Set Kernel Parameters
Oracle recommend the following minimum parameter settings.
fs.aio-max-nr = 1048576
fs.file-max = 6815744
kernel.shmall = 2097152
kernel.shmmax = 536870912
kernel.shmmni = 4096
kernel.sem = 250 32000 100 128
net.ipv4.ip_local_port_range = 9000 65500
net.core.rmem_default = 262144
net.core.rmem_max = 4194304
net.core.wmem_default = 262144
net.core.wmem_max = 1048586
The current values can be tested using the following command: /sbin/sysctl -a | grep <param-name>
9. Add or amend the following lines in the "/etc/sysctl.conf" file.
fs.aio-max-nr = 1048576
fs.file-max = 6815744
kernel.shmall = 2097152
kernel.shmmax = 536870912
kernel.shmmni = 4096
# semaphores: semmsl, semmns, semopm, semmni
kernel.sem = 250 32000 100 128
net.ipv4.ip_local_port_range = 9000 65500
net.core.rmem_default=262144
net.core.rmem_max=4194304
net.core.wmem_default=262144
net.core.wmem_max=1048586
10. Add the following lines to the "/etc/security/limits.conf" file.
oracle soft nproc 2047
oracle hard nproc 16384
oracle soft nofile 1024
oracle hard nofile 65536
11. Add the following line to the "/etc/pam.d/login" file
Add the following line to the "/etc/pam.d/login" file, if
it does not already exist.
session required pam_limits.so
12. Firewall Administration
● Start the Firewall administration dialog (System > Administration > Firewall). Click the
"Disable" button followed by the apply button on the toolbar, then close the dialog.
● Disable secure linux by editing the /etc/selinux/config file, making sure the SELINUX flag is
set as follows.
SELINUX=disabled
● Alternatively, this alteration can be done using the GUI tool (Applications > System Settings
> Security Level). Click on the SELinux tab and disable the feature. If SELinux is disabled
after installation, the server will need a reboot for the change to take effect.
13. Setup
If you have installed the suggested package groups
during the installation, the majority of the necessary
packages will already be installed. The following
packages are listed as required, including the 32-bit
version of some of the packages.
17. Creating new groups and users
groupadd oinstall
groupadd dba
groupadd oper
groupadd asmadmin
useradd -g oinstall -G dba,oper,asmadmin oracle
passwd oracle
Note. We are not going to use the "asmadmin" group, since this installation will not use
ASM.
18. Creating the directories
Create the directories in which the Oracle software will be installed.
mkdir -p /u01/app/oracle/product/11.2.0/db_1
chown -R oracle:oinstall /u01
chmod -R 775 /u01
20. Editing .bash_profile file
Login as the oracle user and add the following lines at the end of the .bash_profile file.
# Oracle Settings
TMP=/tmp; export TMP
TMPDIR=$TMP; export TMPDIR
ORACLE_HOSTNAME=fedora14.localdomain; export ORACLE_HOSTNAME
ORACLE_UNQNAME=DB11G; export ORACLE_UNQNAME
ORACLE_BASE=/u01/app/oracle; export ORACLE_BASE
ORACLE_HOME=$ORACLE_BASE/product/11.2.0/db_1; export ORACLE_HOME
ORACLE_SID=DB11G; export ORACLE_SID
ORACLE_TERM=xterm; export ORACLE_TERM
PATH=/usr/sbin:$PATH; export PATH
PATH=$ORACLE_HOME/bin:$PATH; export PATH
21. Cont. Editing .bash_profile file
LD_LIBRARY_PATH=$ORACLE_HOME/lib:/lib:/usr/lib; export LD_LIBRARY_PATH
CLASSPATH=$ORACLE_HOME/JRE:$ORACLE_HOME/jlib:$ORACLE_HOME/rdbms/jlib; export
CLASSPATH
if [ $USER = "oracle" ]; then
if [ $SHELL = "/bin/ksh" ]; then
ulimit -p 16384
ulimit -n 65536
else
ulimit -u 16384 -n 65536
fi
fi
22. Installation
Log into the oracle user. If you are using X emulation then set the DISPLAY
environmental variable.
DISPLAY=<machine-name>:0.0; export DISPLAY
Start the Oracle Universal Installer (OUI) by issuing the following command in the
database directory.
./runInstaller
23. Post Installation
Edit the "/etc/redhat-release" file restoring the original release information.
Fedora release 14 (Laughlin)
Edit the "/etc/oratab" file setting the restart flag for each instance to 'Y'.
DB11G:/u01/app/oracle/product/11.2.0/db_1:Y
The End.