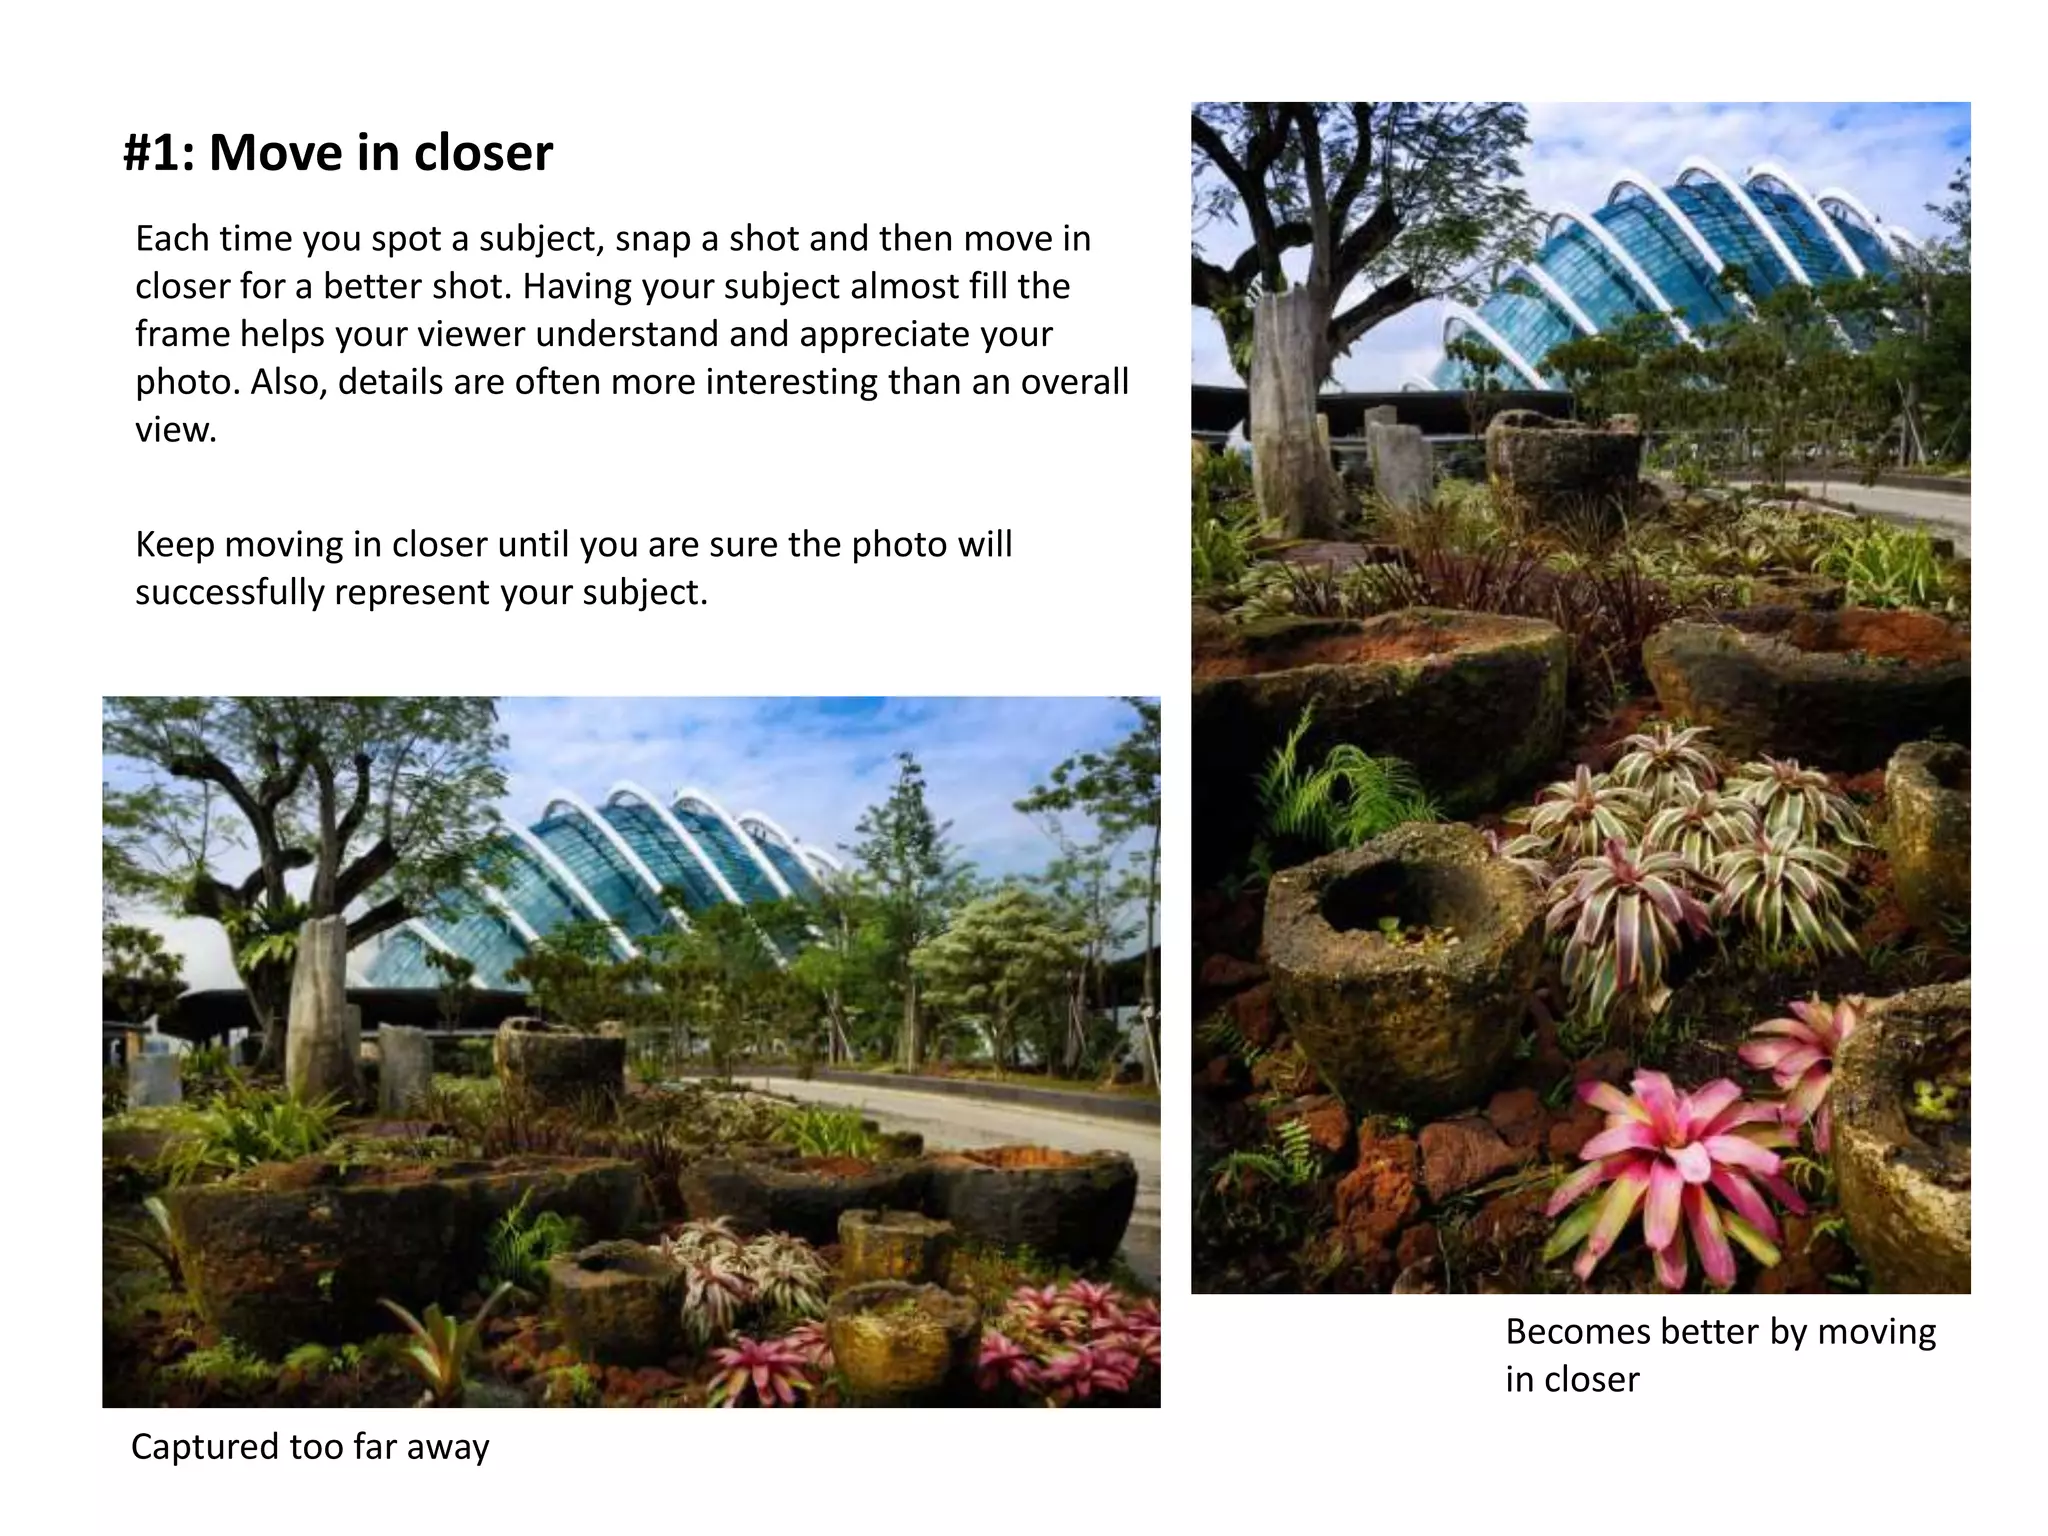
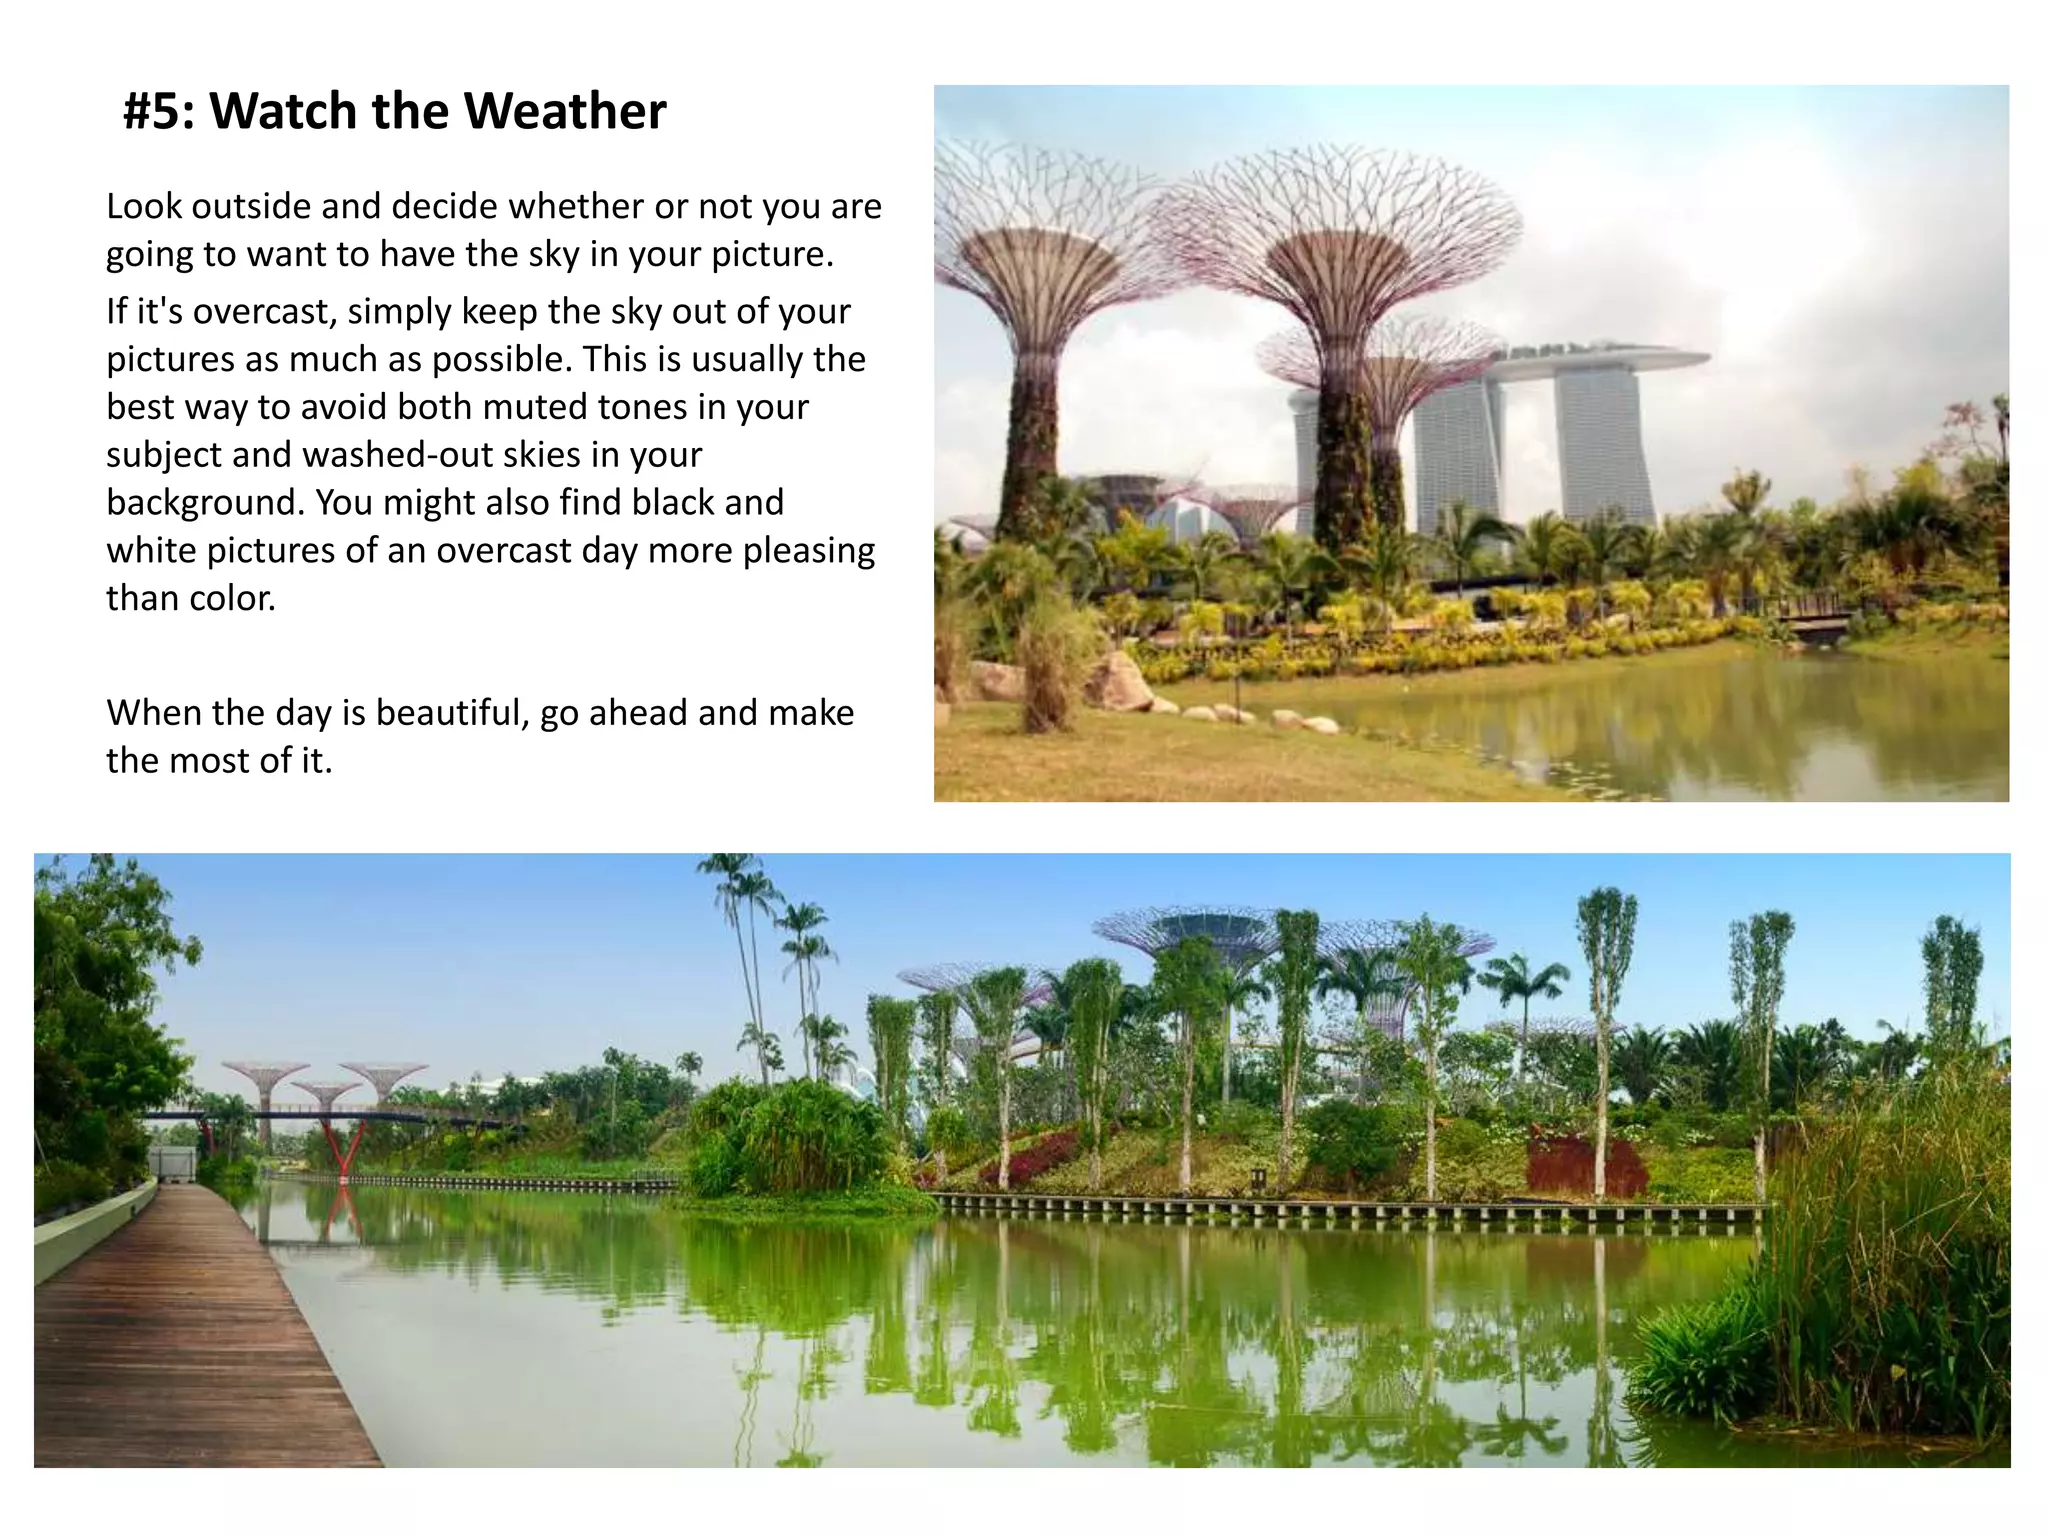
1. Move closer to your subject to fill more of the frame with details. Keep moving closer until the photo successfully represents the subject.
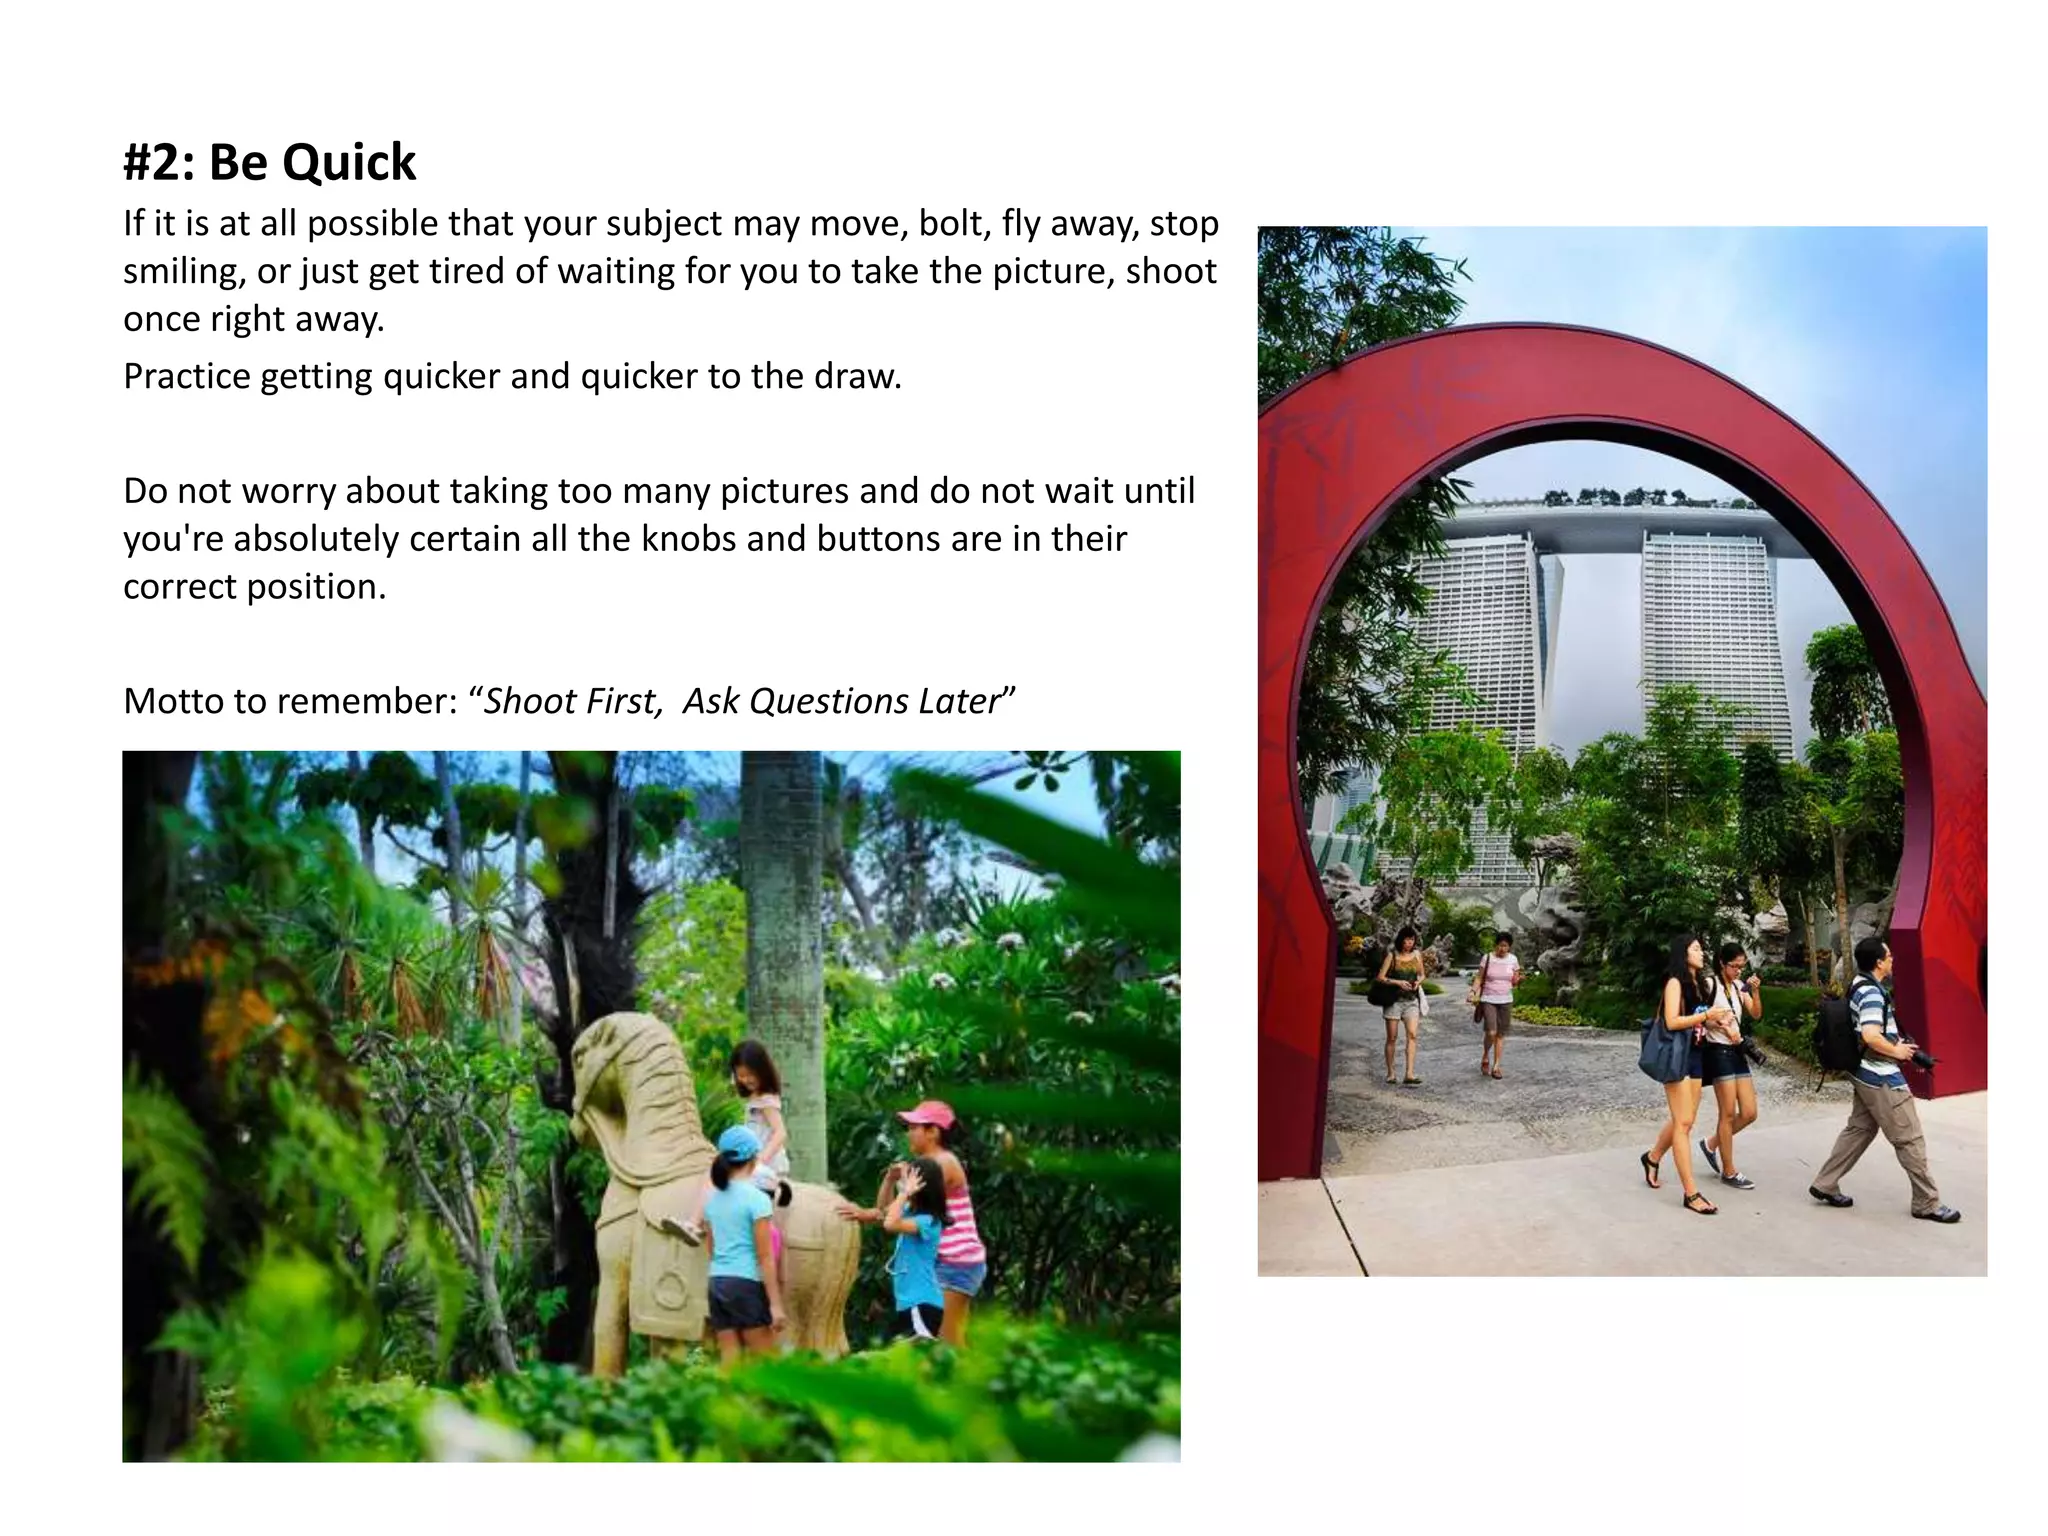
2. Take the photo quickly if the subject may move before you are ready. Practice quick shooting and don't worry about settings, following the motto "shoot first, ask questions later."
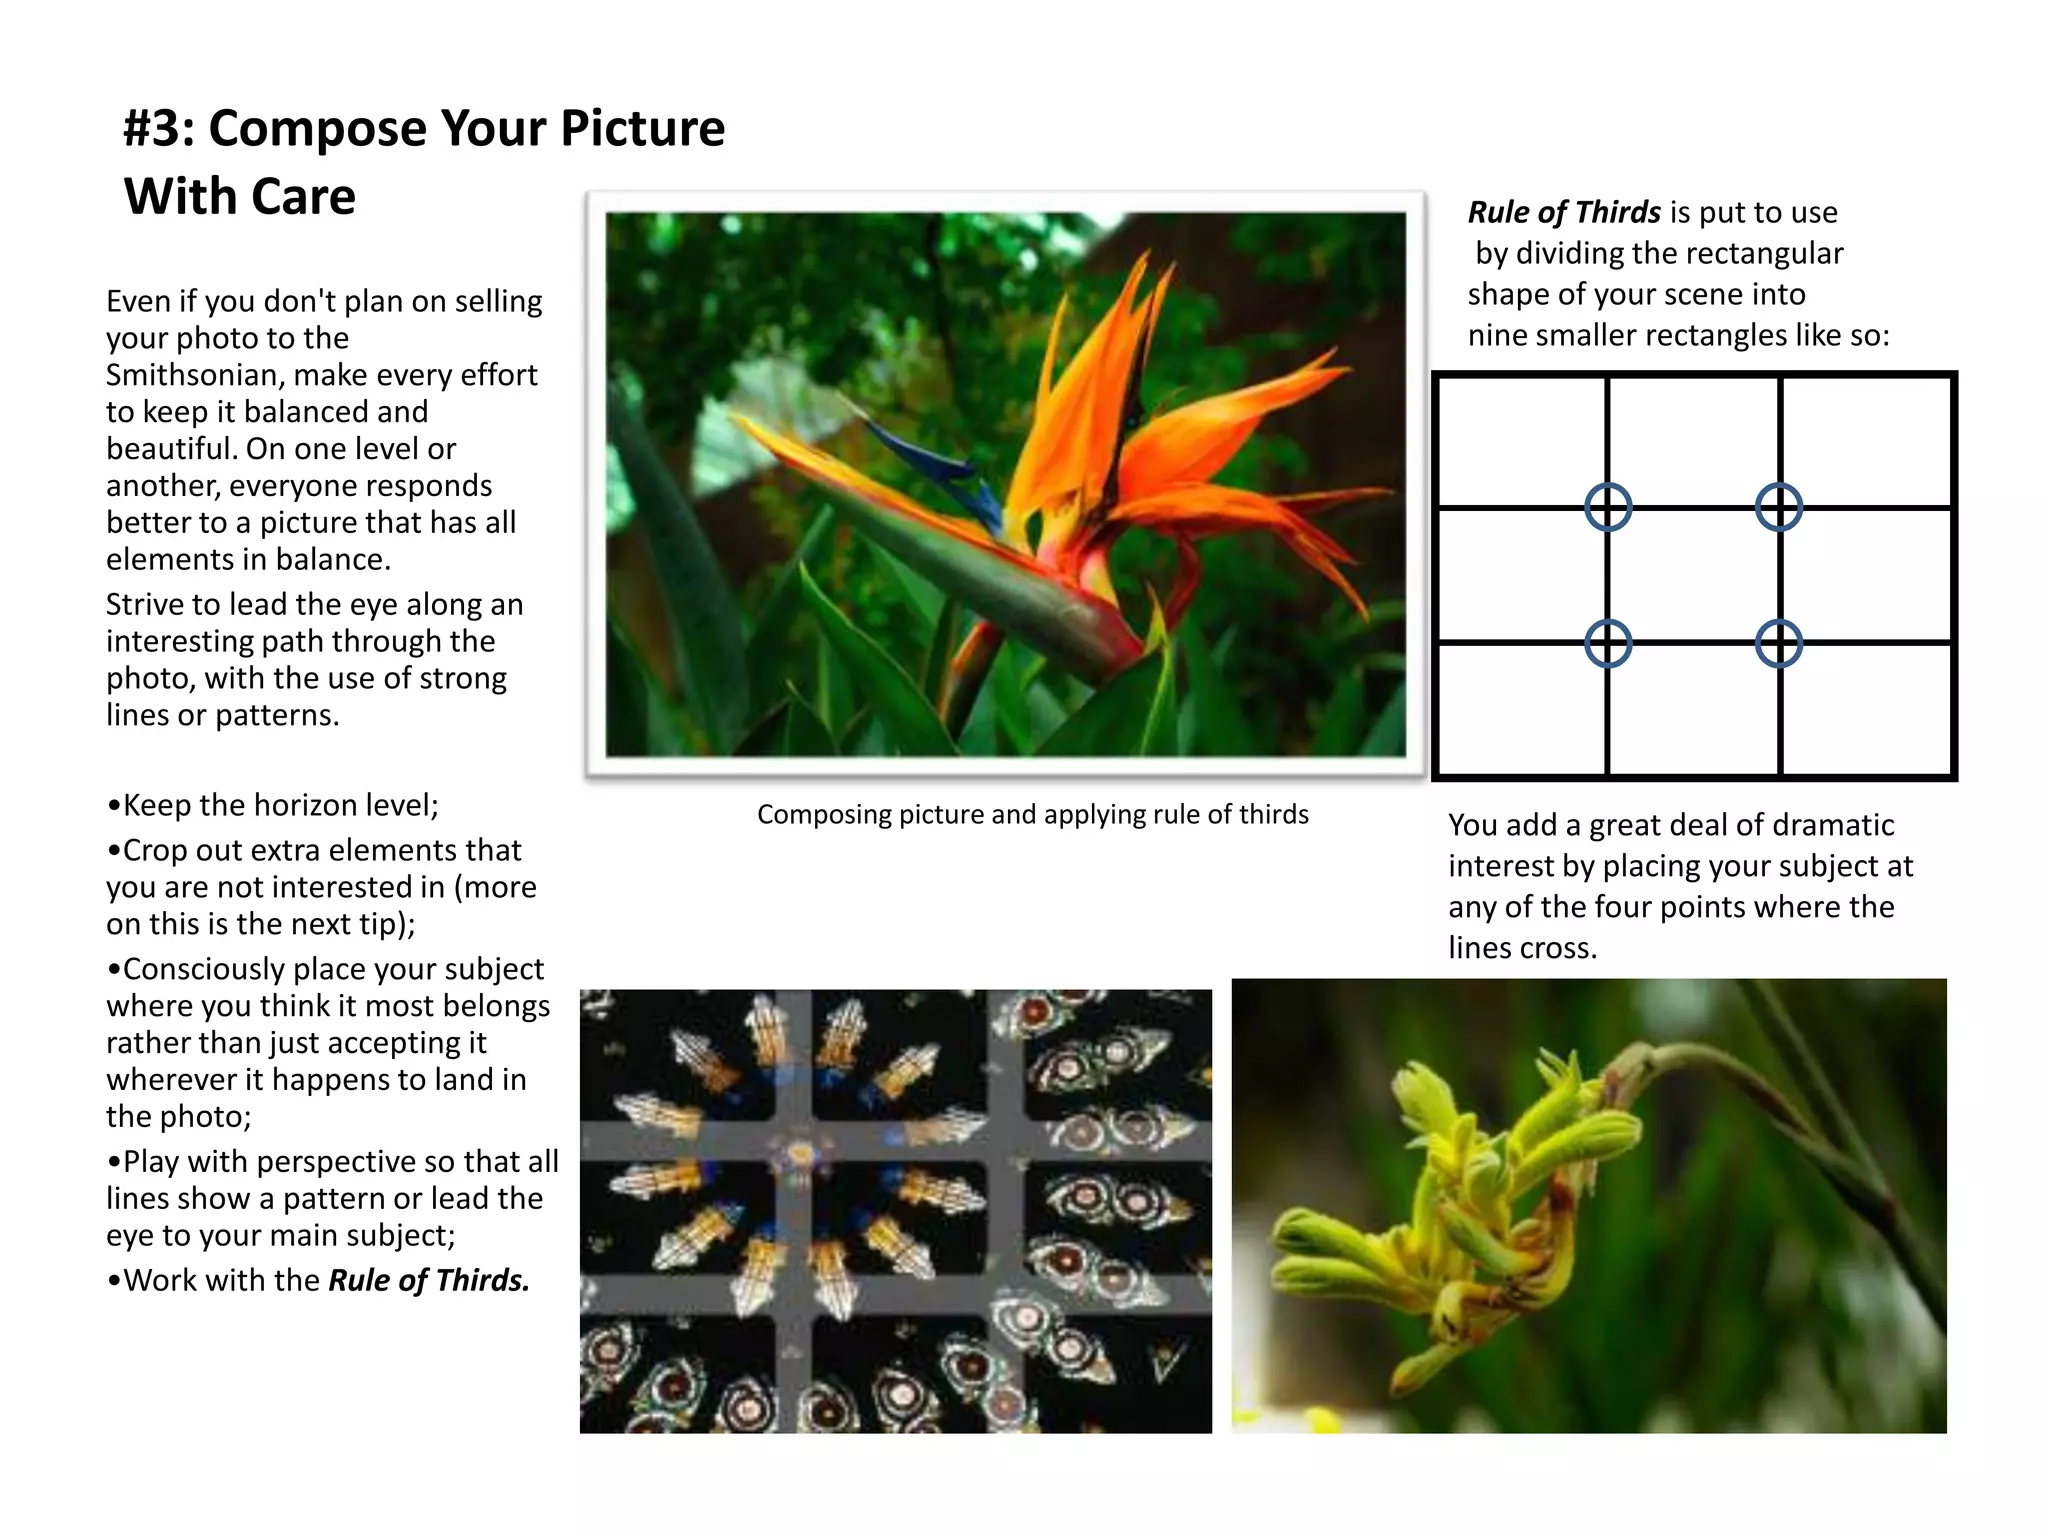
3. Compose photos with care using techniques like level horizons, rule of thirds, leading the eye along lines or patterns, and placing the subject intentionally in the frame.
This is a power point I used to teach a computer production technology grade 10 class. I was teaching a photography unit and used this PowerPoint to demonstrate both good and bad examples of photography. Myself, my brother, or past students took all of these photos.
7 Smartphone Photography Tips & Tricks that We Don’t Use OftenMetrodesk
Did you know your volume button works as mobile camera controller or how does Panorama option work? Chances are - you are not even taking full advantage of your mobile camera tricks.
The world around you is analog. Capturing it in digital form takes smart planning mixed with creative chance. Learn how to use light, framing, depth of field and HDR techniques to make your iPhone photos stand out in the crowd. Discover easy tips and tools for taking and producing creative, eye-popping photographs with your iPhone.
How to do more with iPhone Photography - TBEX 2014Sarabeth Jones
From my content track session at TBEX Europe 2014, here are some handy tips on how to do more with iPhone photography. We start with things to think about before you shoot, tools to use while shooting, and apps for editing after you shoot.
Mobile phones have been in demand nowadays and people love to take photos everywhere with it. In this time and age, digital cameras and DSLRs are no longer necessary to capture an incredible photo. With the advent of technology, mobile phones can capture high-quality photos in just a tap. However, the question is -- how? There are simple ways on how you can achieve stunning photos that are Instagram-worthy or could be posted on social media with pride. Here are relevant tips on how you can master mobile photography and take amazing images.
Sec 3 F&N: Proteins (Part 2: Diet and Health)snteo24
This set of lecture slides is a customised teaching and learning resource for students of Woodlands Ring Secondary School (Singapore) to enhance their current reading materials.
I am sharing this resource online so that Nutrition and Food Science (NFS) teachers in Singapore and other teaching professionals may adapt this for their own use. :)
Sec 3 F&N: Proteins (Part 1: Nutrients and Health)snteo24
This set of lecture slides is a customised teaching and learning resource for students of Woodlands Ring Secondary School (Singapore) to enhance their current reading materials.
I am sharing this resource online so that Nutrition and Food Science (NFS) teachers in Singapore and other teaching professionals may adapt this for their own use. :)
Basic Photo Journalism for Campus Journalism for beginners in campus journalism and school paper advisers.
Art principles' application are also included here.
Telling Your Group's Story with Photos (Bobby Fouther)Kathleen Pequeño
An online presentation for MRG Foundation grantees on taking better photos. Tips include capturing the action, cropping and the importance of storyboarding before your event.
As more and more people use their smartphone to take photos for business purposes, e.g. to show the customer or the event they were with/at today, the quality of the photos plays an increasingly important role.
In a small workshop in Dubai, the team of Flanke 7 showed the team of Unified Inbox what errors are often made and how these can be easily avoided.
2. #1: Move in closer
Each time you spot a subject, snap a shot and then move in
closer for a better shot. Having your subject almost fill the
frame helps your viewer understand and appreciate your
photo. Also, details are often more interesting than an overall
view.
Keep moving in closer until you are sure the photo will
successfully represent your subject.
Becomes better by moving
in closer
Captured too far away
3. #2: Be Quick
If it is at all possible that your subject may move, bolt, fly away, stop
smiling, or just get tired of waiting for you to take the picture, shoot
once right away.
Practice getting quicker and quicker to the draw.
Do not worry about taking too many pictures and do not wait until
you're absolutely certain all the knobs and buttons are in their
correct position.
Motto to remember: “Shoot First, Ask Questions Later”
4. #3: Compose Your Picture
With Care Rule of Thirds is put to use
by dividing the rectangular
Even if you don't plan on selling shape of your scene into
your photo to the nine smaller rectangles like so:
Smithsonian, make every effort
to keep it balanced and
beautiful. On one level or
another, everyone responds
better to a picture that has all
elements in balance.
Strive to lead the eye along an
interesting path through the
photo, with the use of strong
lines or patterns.
•Keep the horizon level; Composing picture and applying rule of thirds You add a great deal of dramatic
•Crop out extra elements that interest by placing your subject at
you are not interested in (more
on this is the next tip); any of the four points where the
lines cross.
•Consciously place your subject
where you think it most belongs
rather than just accepting it
wherever it happens to land in
the photo;
•Play with perspective so that all
lines show a pattern or lead the
eye to your main subject;
•Work with the Rule of Thirds.
5. #4: Select and Focus on
your Subject
Practice shooting with different apertures and monitor
the results afterwards to learn how depth-of-field
affects your photo.
You will find that a smaller depth-of-field (and smaller
f-stop #) focuses all the attention upon your subject.
This is great for taking a picture of your subject as it
stand s out against a blurry background.
You will also want to become familiar with the way your
camera focuses. If it is a simple point and shoot
camera, you will likely
indicate which part of the picture to focus on by
following these steps:
1.Aim so the object you want in sharp focus is in the
center of the viewfinder.
2.Press the shutter button down half-way and hold it.
3.Move your camera until you have the composition
you like best (see tip #3).
4.Press the button down the rest of the way to take the
picture.
6. #5: Watch the Weather
Look outside and decide whether or not you are
going to want to have the sky in your picture.
If it's overcast, simply keep the sky out of your
pictures as much as possible. This is usually the
best way to avoid both muted tones in your
subject and washed-out skies in your
background. You might also find black and
white pictures of an overcast day more pleasing
than color.
When the day is beautiful, go ahead and make
the most of it.