The document introduces the YourKITE toolkit, which was created by four organizations in Norway, Romania and Poland to develop digital media, communication, and entrepreneurship skills for young people. The goal is to reduce youth unemployment by training 58 young people to become trainers and facilitators of workshops on topics like media, entrepreneurship, volunteering and career counseling, who will then train 400 other young people. The toolkit provides resources for trainers to develop and implement workshops on these topics.


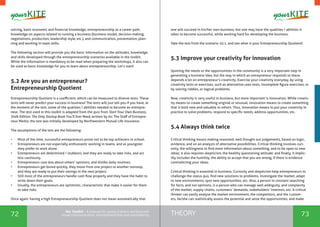


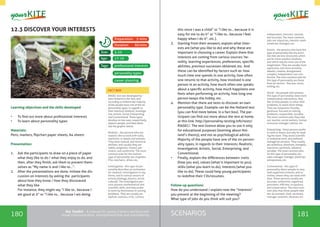
![168 169SCENARIOSthe Toolkit - A manual for young trainers working with
visual communication, entrepreneurship and volunteering
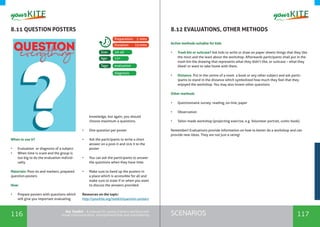
11.1 PICTURE VOLUNTEERING
When to use it?
• Understand what volunteers do.
• Understand how volunteering is regarded.
• Understand that there are various motivations to volunteer.
• Understand that it is possible to benefit from volunteering.
Materials:
Flipchart paper, markers & pens, post-its
Presentation:
1. Provide the participants with three paper post-its and ask them to imagine a volun-
teer, and, individually, to write on each paper one trait that describes that volunteer.
How is the volunteer?
volunteering
8-30
14+
Tags:
Size:
Age:
Preparation: 2 mins
Duration: 45mins
visual
2. After everyone is ready, split the participants in groups of 4-5 persons. In
groups, the participants should read out to each other the traits and based
on that create together a picture of a volunteer. The following instruction is
given:
• Draw the volunteer and create a story of your volunteer that you can later
also present to the others. Give the volunteer also a name.
• Try to answer the following questions:
• How does he/she look like?
• What kind of person is he/she?
• What is he/she doing as volunteer?
• Why is he/she a volunteer?
[Write down the above questions on the flipchart in case you do not want to
repeat the questions several times.]
• Tell the participants that they:
• have 15 min to finish the task.
• need to decide how they want to present their work to the others.
[Provide the groups with colored pens or markers and one flip-chart sheet per
group.]
3. While the groups are working, prepare a flip chart sheet on which you will
summarize the findings from the groups. Divide the paper in 3 questions.
• How is he/she?
• What is he/she doing?
• Why is he/she a volunteer?
4. Ask each group to present. While they are presenting write down key words
answering the above questions from each group.
5. Make sure to hang up each picture of a volunteer so that anyone can see it.
6. Summarize the groups findings of all groups. Ask the participants if they want
to add something. Do all groups see the volunteer that way?
7. Pick some of the pictured volunteers ask the participants what other motiva-
tions their volunteer could have to engage in the described volunteering activ-
ity. Make the participants aware why people volunteer and that it can be a win-
win situation. If you are a volunteer, tell them about your reasons to volunteer.
You can also present them at this stage with written or told stories of volunteers
who state why they are volunteering and what positive effect it had on them.
Resources on the topic:
http://yourkite.org/toolkit/picture-volunteering](https://image.slidesharecdn.com/0747a528-de90-4700-8573-c2c96794eb63-170202213346/85/toolkit_spread_A4-85-320.jpg)
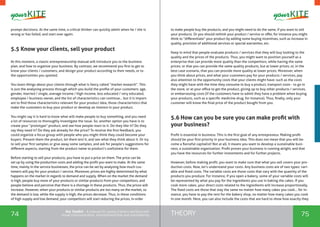
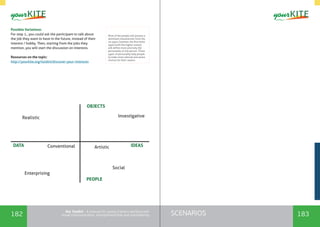
![170 171SCENARIOSthe Toolkit - A manual for young trainers working with
visual communication, entrepreneurship and volunteering
11.2 DEFINING VOLUNTEERING
When to use it?
Define what volunteering means and what
a volunteer does.
Materials:
Flipchart paper, markers & pens, post-its
[ if exercise 1 not done earlier: Printed out
volunteering stories or short videos on
volunteering roles]
Presentation:
1. Base this exercise on exercise 1 or pro-
vide the participants with written or
filmed stories of various volunteers.
2. If you have not done exercise 1 with
the group before: Analyze with the
group the various volunteering roles
based on the questions stated in exer-
cise 1, point 3.
3. Based on the findings ask the partic-
ipants to create individually a defini-
tion on what volunteering is.
4. Ask the participants to read out their
definitions and create together, or
decide on, one common definition.
If the group is large, spit the group in
two subgroups so that two definitions
will be created. Keep the two defini-
tions or try to work out with the whole
group one definition based on the two
presented ones.
Follow up questions:
Ask if everyone agrees with the definition
and hang up the written definition.
Resources on the topic:
http://yourkite.org/toolkit/defining-vol-
unteering
volunteering
8-30
14+
Tags:
Size:
Age:
Preparation: 2 mins
Duration: 25mins
visual](https://image.slidesharecdn.com/0747a528-de90-4700-8573-c2c96794eb63-170202213346/85/toolkit_spread_A4-86-320.jpg)
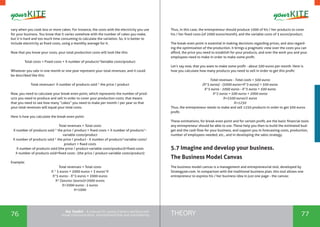
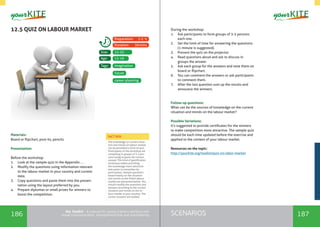
![172 173SCENARIOSthe Toolkit - A manual for young trainers working with
visual communication, entrepreneurship and volunteering
11.3 WHAT’S THERE AND WHAT’S FOR ME?
When to use it?
Define what volunteering means and what a volunteer
does.
Materials:
Printed out pictures of volunteering roles
Printed out volunteering test
Pens
Presentation:
1. Lay out pictures on the floor, showing volunteers
in their various roles. Ask the participants to each
take one picture.
[If the group is large you can also ask the partici-
pants to discuss and present one picture in pairs.
You can find example pictures in the Appendix
section of this toolkit or you can search the inter-
net on your own for pictures showing different
volunteering roles]
2. Ask each participant to present the volunteering
volunteering
8-20
14+
Tags:
Size:
Age:
Preparation: 2 mins
Duration: 25mins
visual
roles on the picture by sitting or standing in a circle. By answering the following
question.
• What is the volunteer doing?
• Who are the beneficiaries?
• Who organized the volunteering activity? Was is organized through an organiza-
tion or individually?
• How long or often will the person volunteer?
[Write down the above questions on the flipchart in case you do not want to repeat
the questions several times.]
3. Add information where needed about each volunteering activity presented. Make
use of the information provided in the theory section on volunteering. See fact box.
4. After all roles have been discussed, ask the participants if they would like to engage
in a volunteering activity. What they would like to do and why. If the group is not too
large, allow each participant to talk.
5. Tell the participant that you have a self-assessment quiz to help them discover what
kinds of volunteer opportunities they might enjoy. You can find the test in the Ap-
pendix section of the toolkit.
Follow Up Question:
Ask the participants if they agree with the test results. Did they find out something sur-
prising and does the result fit with the idea they had earlier?
Resources on the topic:
http://yourkite.org/toolkit/whats-there-for-me](https://image.slidesharecdn.com/0747a528-de90-4700-8573-c2c96794eb63-170202213346/85/toolkit_spread_A4-87-320.jpg)
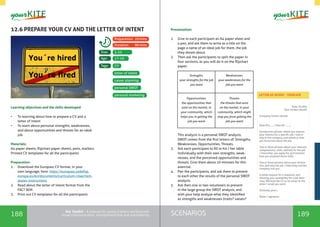
![178 179SCENARIOSthe Toolkit - A manual for young trainers working with
visual communication, entrepreneurship and volunteering
12.2 I LOVE TO - I’M GOOD AT - IT PAYS WELL TO
Learning objectives and the skills developed
• To realize the main factors behind the profes-
sional success and interrelations among them
• Might be a good warm-up at the beginning of the
workshop on career guidance
Materials:
Computer, projector, flipchart, markers, post-its,
pencils
Presentation:
This is the exercise to practiced individually by each
participant. Here are the instructions you should
provide to participants.
1. Complete the sentences:
I love [to do]…
I am good at…
It pays well to…
2. Write down each response on the separate post-it
3. Do not share your responses with the group
4. Put anonymous post-its on the board
You have 3 MINUTES – let’s START!
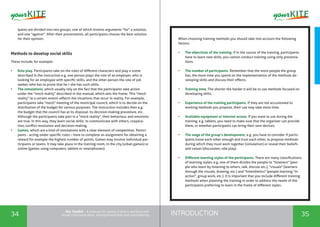
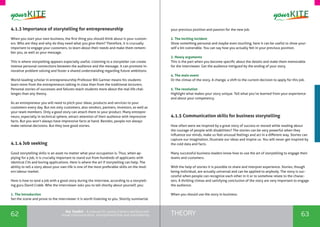
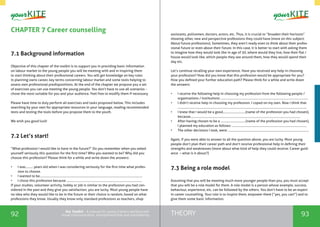
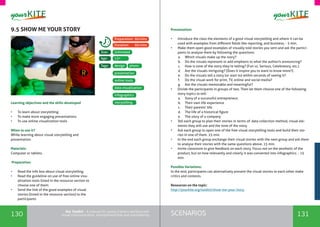
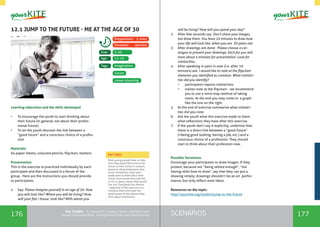
Please present the infographic on the right to partici-
pants. The conclusion of this exercise is: “the success
is when you do what you love, what you’re good at
and what pays well”
Follow-up questions:
Think about people you know. Can you identify the
groups mentioned above?
Possible Variations:
As a warm-up exercise you can also provide a sample
list of future professions and ask participant for an
answer which their personality traits can help them
to be good at one of these professions. You can use
also the exercise “What is the success?” described in
a separate section.
Resources on the topic:
http://yourkite.org/toolkit/love-to-good-at-pays-well
self-assessment
5-30
15-19
Tags:
Size:
Age:
Preparation: 5 mins
Duration: 20mins
future
career planning
If you do what you love and what
you’re good at, but you’re not
well paid, you are happy, but
poor and if you are poor it’s likely
you will become unhappy in the
future, unless you have some-
body like your spouse or parents
who provide a financial support
for your maintenance. If you do
what you’re good at and what
pays well, but you don’t like your
job, you will have money, but
probably you will be unhappy.
The situation when you love your
job and it pays well even you’re
not good at this is not often
and rather temporary. The long
term success and satisfaction in
your professional life you can
achieve when you will be able
to combine all of these factors:
when you do what you love, what
you’re good at and it pays well.
FACT BOX
Source: http://eskimon.wordpress.com](https://image.slidesharecdn.com/0747a528-de90-4700-8573-c2c96794eb63-170202213346/85/toolkit_spread_A4-90-320.jpg)
![184 185SCENARIOSthe Toolkit - A manual for young trainers working with
visual communication, entrepreneurship and volunteering
12.4 WHAT IS THE SUCCESS?
Learning objectives and the skills developed
• To realize the various aspects of the success
• To present dependency between successes,
personality traits and professions in which these
personality traits are important
Materials:
Computer, projector, Internet access, flipchart,
markers, post-its, pencils
Presentation:
Step 1: What can be a success for somebody in your
age?
[Group exercise] Try to name as many examples as
possible, of what can be classified as a success for a
middle school / high school student.
Hint: Remember that even a small success counts; try
to think of different kinds of success.
Step 2: What are your successes you are proud of?
[Individual exercise] Write down at least 3 of your successes – only for
you, without showing it to anyone.
Hint: Remember that these don’t have to be any spectacular successes,
but even something small, that you’re proud of.
Step 3: Your personality traits that are behind these successes
[Individual exercise] Mark your personality traits that are behind these
successes.
Sample personality traits to be considered:
Step 4: Professions in which the above personality traits are important
[Individual exercise] Please look at the list of deficit professions and
future professions and try to select 10 professions in which the person-
ality traits you marked are important. These are professions worth to be
considered by you.
Possible Variations:
If you are a Polish-speaking person you can skip step 3 and 4 and go to
Your Potential (Twój Potencjał) online tool to analyse your successes:
http://praca-enter.pl/potencjal (available only in Polish).
Resources on the topic:
http://yourkite.org/toolkit/what-is-the-success
personality tests
5-30
15-19
Tags:
Size:
Age:
Preparation: 10mins
Duration: 20mins
labour market
career planning
future professions
role models
There is a dependency between
successes, personality traits
and professions optimal for
each person. This exercise is
designed to identify strengths
in more neutral way than usual
people tend to think about them,
because the analysis is based on
evidences, real achievements. On
the other hand, it helps to realize
that some personality traits are
important in various professions,
broadening the perspective in
planning the professional future.
FACT BOX
Honest
Responsible
Adaptable
Compassionate
Patient
Courageous
Loyal
Adventurous
Affable
Conscientious
Cultured
Dependable
Discreet
Fair
Fearless
Observant
Impartial
Independent
Optimistic
Intelligent
Keen
Gregarious
Persistent
Capable
Charming
Precise
Confident
Dutiful
Encouraging
Reliable
Exuberant
Helpful
Humble
Suave
Imaginative
Meticulous
Obedient
Trusting
Valiant](https://image.slidesharecdn.com/0747a528-de90-4700-8573-c2c96794eb63-170202213346/85/toolkit_spread_A4-93-320.jpg)


![[Challenge:Future] "Social entrepreneur - Education segment"](https://cdn.slidesharecdn.com/ss_thumbnails/challengefuture-social-entrepreneur-education-segment1328-130228020820-phpapp02-thumbnail.jpg?width=640&height=640&fit=bounds)


