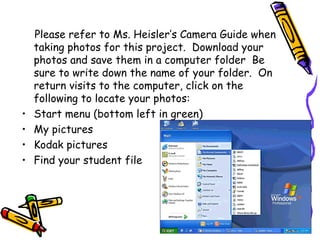
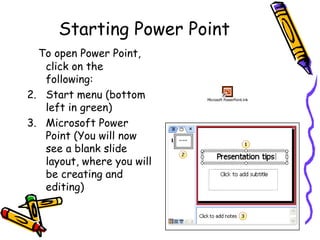
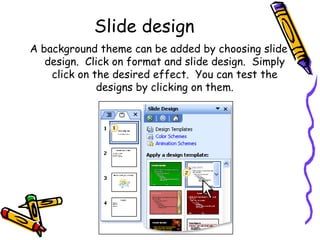
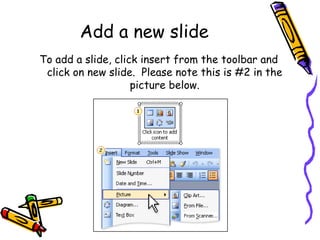
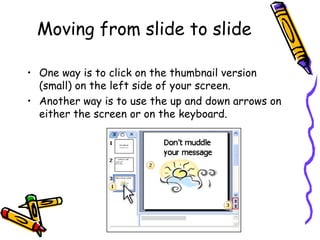
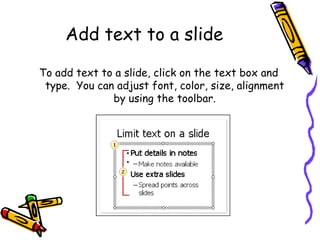
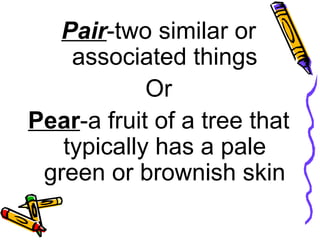
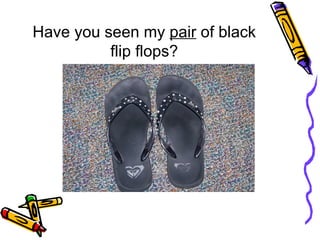
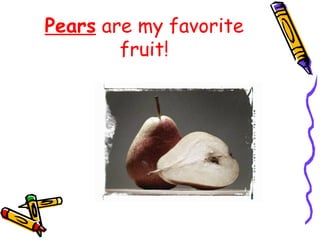
Slideshow Guide for “Heisler’s Grammar Book” Third Grade Using Microsoft Power Point
Please refer to Ms. Heisler’s Camera Guide when taking photos for this project.  Download your photos and save them in a computer folder  Be sure to write down the name of your folder.  On return visits to the computer, click on the following to locate your photos:  Start menu (bottom left in green) My pictures Kodak pictures Find your student file
Starting Power Point To open Power Point, click on the following: Start menu (bottom left in green) Microsoft Power Point (You will now see a blank slide layout, where you will be creating and editing)
Slide layout Click on format and slide layout to choose where you want to place text boxes, lists, photos, etc.  You can test the layouts by clicking on them.
Slide design A background theme can be added by choosing slide design.  Click on format and slide design.  Simply click on the desired effect.  You can test the designs by clicking on them.
Add a new slide To add a slide, click insert from the toolbar and click on new slide.  Please note this is #2 in the picture below.
Moving from slide to slide One way is to click on the thumbnail version (small) on the left side of your screen. Another way is to use the up and down arrows on either the screen or on the keyboard.
Add text to a slide To add text to a slide, click on the text box and type.  You can adjust font, color, size, alignment by using the toolbar.
Delete a slide To delete a slide, click on the thumbnail version of the slide (on the left) and press the delete key.
To view your slideshow To view the show, click on slide show and click view show.  Click the mouse to move through the slides.  You can end the show by right clicking the mouse and choosing the end show option.
Insert your photo In a previous slide, you were instructed as to how to locate your photos.  Once you locate the photo that you are using, click copy and then paste it into the spot where you want it on the slide. You can move the photo by dragging it.  If you wish to re-size the photo, right click on the mouse, click on format picture, choose size and adjust height and width.
Insert clip art Choose insert from the toolbar.  Click on picture and then clip art. A search menu will appear.  Type a keyword and click search. When you find the clip you like, double click on it.  It will appear in your slide, however, you may have to move and/or adjust it.  You may do so by following the same directions as you would for a photo.
Example The following slides are examples of what a third grade student might create for our class grammar book.  The first picture is a photo, and the other two were found using clip art.
Pair -two similar or associated things Or Pear -a fruit of a tree that typically has a pale green or brownish skin
Have you seen my  pair  of black flip flops?
Pears  are my favorite fruit!
Look, it is a  pair  of  pears !
References Adobe Systems, Digital School Collection Teacher Resources (2009).  Visual Dictionary.  Retrieved February 20, 2009, from  http://www.adobe.com/education/instruction/adsc/pdf/visual_dictionary.pdf . Adobe Systems, Digital School Collection Teacher Resources (2009).  Visual Pun Fun.  Retrieved February 20, 2009, from  http://www.adobe.com/education/instruction/adsc/pdf/visual_pun.pdf .  Lengel, Jim (2009).  Teaching with Technology:  How to Make a Slide Show with Power Point.  Retrieved February 20, 2009, from  http://www.powertolearn.com/articles/teaching_with_technology/how_to_make_a_slide_show_with_powerpoint.shtml . Microsoft Office Online, Help and How To (2009).  Training Power Point 2003.  Retrieved February 20, 2009, from  http:// office.microsoft.com/training/Training.aspx?AssetID =RC011298761033&CTT=6&Origin=RC011298761033 .

Tool5

  • 1.
    Slideshow Guide for“Heisler’s Grammar Book” Third Grade Using Microsoft Power Point
  • 2.
    Please refer toMs. Heisler’s Camera Guide when taking photos for this project. Download your photos and save them in a computer folder Be sure to write down the name of your folder. On return visits to the computer, click on the following to locate your photos: Start menu (bottom left in green) My pictures Kodak pictures Find your student file
  • 3.
    Starting Power PointTo open Power Point, click on the following: Start menu (bottom left in green) Microsoft Power Point (You will now see a blank slide layout, where you will be creating and editing)
  • 4.
    Slide layout Clickon format and slide layout to choose where you want to place text boxes, lists, photos, etc. You can test the layouts by clicking on them.
  • 5.
    Slide design Abackground theme can be added by choosing slide design. Click on format and slide design. Simply click on the desired effect. You can test the designs by clicking on them.
  • 6.
    Add a newslide To add a slide, click insert from the toolbar and click on new slide. Please note this is #2 in the picture below.
  • 7.
    Moving from slideto slide One way is to click on the thumbnail version (small) on the left side of your screen. Another way is to use the up and down arrows on either the screen or on the keyboard.
  • 8.
    Add text toa slide To add text to a slide, click on the text box and type. You can adjust font, color, size, alignment by using the toolbar.
  • 9.
    Delete a slideTo delete a slide, click on the thumbnail version of the slide (on the left) and press the delete key.
  • 10.
    To view yourslideshow To view the show, click on slide show and click view show. Click the mouse to move through the slides. You can end the show by right clicking the mouse and choosing the end show option.
  • 11.
    Insert your photoIn a previous slide, you were instructed as to how to locate your photos. Once you locate the photo that you are using, click copy and then paste it into the spot where you want it on the slide. You can move the photo by dragging it. If you wish to re-size the photo, right click on the mouse, click on format picture, choose size and adjust height and width.
  • 12.
    Insert clip artChoose insert from the toolbar. Click on picture and then clip art. A search menu will appear. Type a keyword and click search. When you find the clip you like, double click on it. It will appear in your slide, however, you may have to move and/or adjust it. You may do so by following the same directions as you would for a photo.
  • 13.
    Example The followingslides are examples of what a third grade student might create for our class grammar book. The first picture is a photo, and the other two were found using clip art.
  • 14.
    Pair -two similaror associated things Or Pear -a fruit of a tree that typically has a pale green or brownish skin
  • 15.
    Have you seenmy pair of black flip flops?
  • 16.
    Pears aremy favorite fruit!
  • 17.
    Look, it isa pair of pears !
  • 18.
    References Adobe Systems,Digital School Collection Teacher Resources (2009). Visual Dictionary. Retrieved February 20, 2009, from http://www.adobe.com/education/instruction/adsc/pdf/visual_dictionary.pdf . Adobe Systems, Digital School Collection Teacher Resources (2009). Visual Pun Fun. Retrieved February 20, 2009, from http://www.adobe.com/education/instruction/adsc/pdf/visual_pun.pdf . Lengel, Jim (2009). Teaching with Technology: How to Make a Slide Show with Power Point. Retrieved February 20, 2009, from http://www.powertolearn.com/articles/teaching_with_technology/how_to_make_a_slide_show_with_powerpoint.shtml . Microsoft Office Online, Help and How To (2009). Training Power Point 2003. Retrieved February 20, 2009, from http:// office.microsoft.com/training/Training.aspx?AssetID =RC011298761033&CTT=6&Origin=RC011298761033 .